tow FORD POLICE INTERCEPTOR UTILITY 2014 1.G User Guide
[x] Cancel search | Manufacturer: FORD, Model Year: 2014, Model line: POLICE INTERCEPTOR UTILITY, Model: FORD POLICE INTERCEPTOR UTILITY 2014 1.GPages: 406, PDF Size: 6.86 MB
Page 96 of 406
INTERIOR MIRROR
WARNING:Do not adjust the mirror when your vehicle is
moving.
Note:Do not clean the housing or glass of any mirror with harsh
abrasives, fuel or other petroleum or ammonia based cleaning products.
You can adjust the interior mirror to your preference. Some mirrors also
have a second pivot point. This lets you move the mirror head up or
down and from side to side.
Pull the tab below the mirror toward you to reduce glare at night.
Auto-Dimming Mirror (If Equipped)
Note:Do not block the sensors on the front and back of the mirror.
Mirror performance may be affected. A rear center passenger or raised
rear center head restraint may also block light from reaching the sensor.
The mirror will dim automatically to reduce glare when bright lights are
detected from behind your vehicle. It will automatically return to normal
reflection when you select reverse gear to make sure you have a clear
view when backing up.
SUN VISORS
Slide-On-Rod
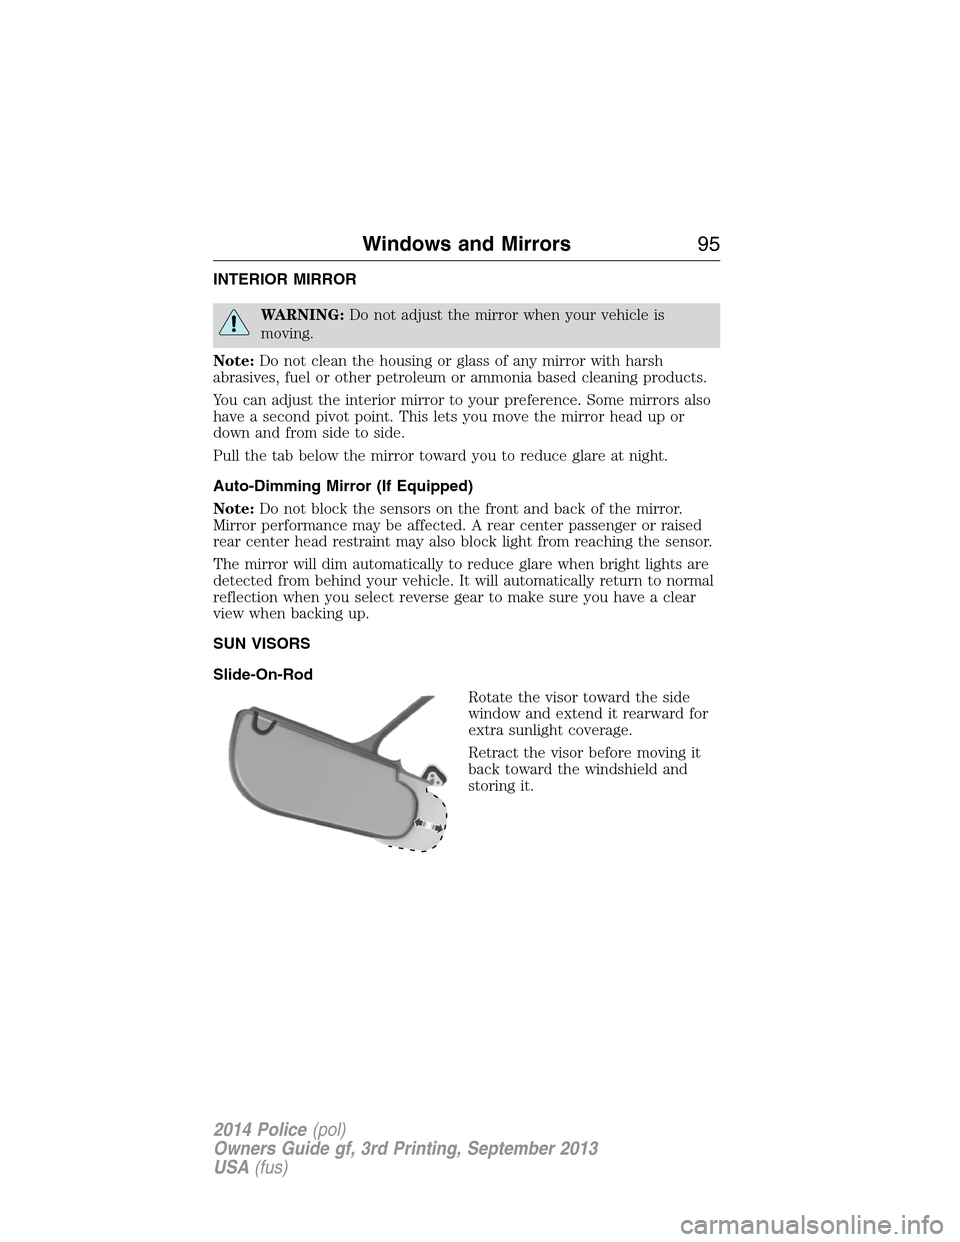
Rotate the visor toward the side
window and extend it rearward for
extra sunlight coverage.
Retract the visor before moving it
back toward the windshield and
storing it.
Windows and Mirrors95
2014 Police(pol)
Owners Guide gf, 3rd Printing, September 2013
USA(fus)
Page 98 of 406
Speedometer
The vehicle is shipped with a certified digital speedometer and analog
gauge. If your local procedures require calibration, utilize the distance
per time on-road test or a radar-based speed test. If a dynamometer
calibration is required, reference the calibration procedure found at
www.Fleet.Ford.com or check OASIS for updated information.
Fuel Gauge
Note:The fuel gauge may vary slightly when your vehicle is moving or
on a gradient.
Switch the ignition on. The fuel gauge will indicate approximately how
much fuel is left in the fuel tank. The arrow adjacent to the fuel pump
symbol indicates on which side of your vehicle the fuel filler door is
located.
The needle should move toward F when you refuel your vehicle. If the
needle points to E after adding fuel, this indicates your vehicle needs
service soon.
After refueling some variability in needle position is normal:
•It may take a short time for the needle to reach F after leaving the gas
station. This is normal and depends upon the slope of pavement at the
gas station.
•The fuel amount dispensed into the tank is a little less or more than
the gauge indicated. This is normal and depends upon the slope of
pavement at the gas station.
•If the gas station nozzle shuts off before the tank is full, try a different
gas pump nozzle.
Low Fuel Reminder
A low fuel reminder triggers when the fuel gauge needle is at 1/16th.
Driving type (fuel
economy conditions)Fuel gauge position Distance-to-empty
Highway driving 1/16th 35 miles to 80 miles
(56 km to 129 km)
Severe duty driving
(trailer towing,
extended idle)1/16th 35 miles (56km)
Instrument Cluster97
2014 Police(pol)
Owners Guide gf, 3rd Printing, September 2013
USA(fus)
Page 106 of 406
Settings
Driver Assist Traction Ctrl
Blind Spot
Cross Traffic
Rear Park Aid
Display Language English, Español or Français
Units Distance Miles & Gal.
km/L
L/100 km
Temperature Fahrenheit (°F)
or Celsius (°C)
Convenience DTE Calculation Normal or Towing
Locks Remote Unlock All Doors or
Driver First
Oil life Reset Set XXX% — Hold OK to Reset
Wipers Courtesy Wipe
Trip Computer
Resetting the Trip Computer
Press and hold OK on the current screen to reset the respective trip,
distance, time and fuel information.
Trip Odometer
Registers the mileage of individual journeys.
Distance to E
Indicates the approximate distance the vehicle will travel on the fuel
remaining in the tank. Changes in driving pattern may cause the value to
vary.
Average fuel
Indicates the average fuel consumption since the function was last reset.
Fuel Used
Shows the amount of fuel used for a given trip.
Total Odometer
Registers the total mileage of the vehicle.
Information Displays105
2014 Police(pol)
Owners Guide gf, 3rd Printing, September 2013
USA(fus)
Page 123 of 406
Fold-flat Seatback (If Equipped)
WARNING:Before returning the seatback to its original position,
make sure that cargo or any objects are not trapped behind the
seatback. After returning the seatback to its original position, pull on
the seatback to make sure that it has fully latched. An unlatched seat
may become dangerous in the event of a sudden stop or crash.
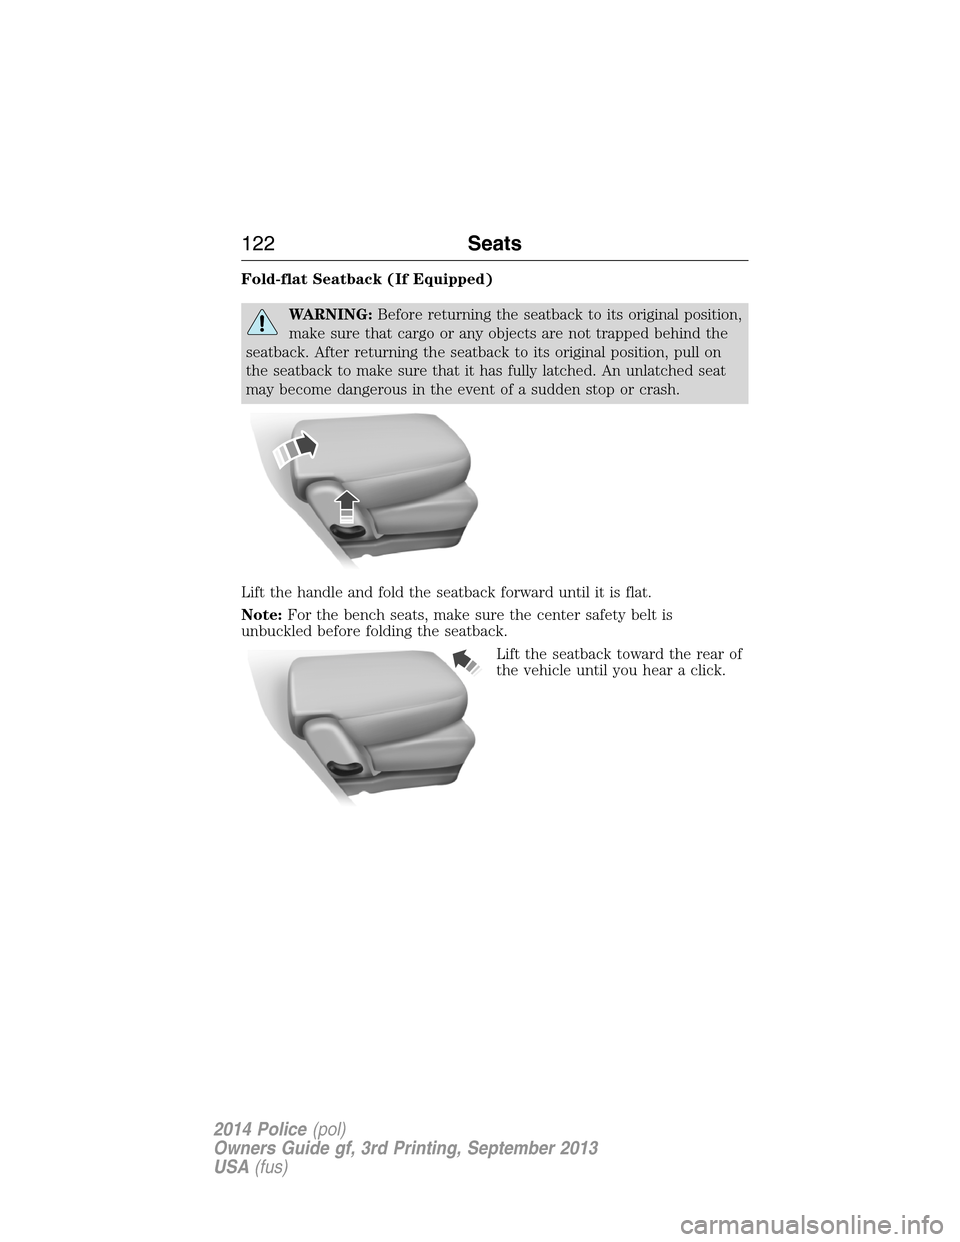
Lift the handle and fold the seatback forward until it is flat.
Note:For the bench seats, make sure the center safety belt is
unbuckled before folding the seatback.
Lift the seatback toward the rear of
the vehicle until you hear a click.
122Seats
2014 Police(pol)
Owners Guide gf, 3rd Printing, September 2013
USA(fus)
Page 125 of 406
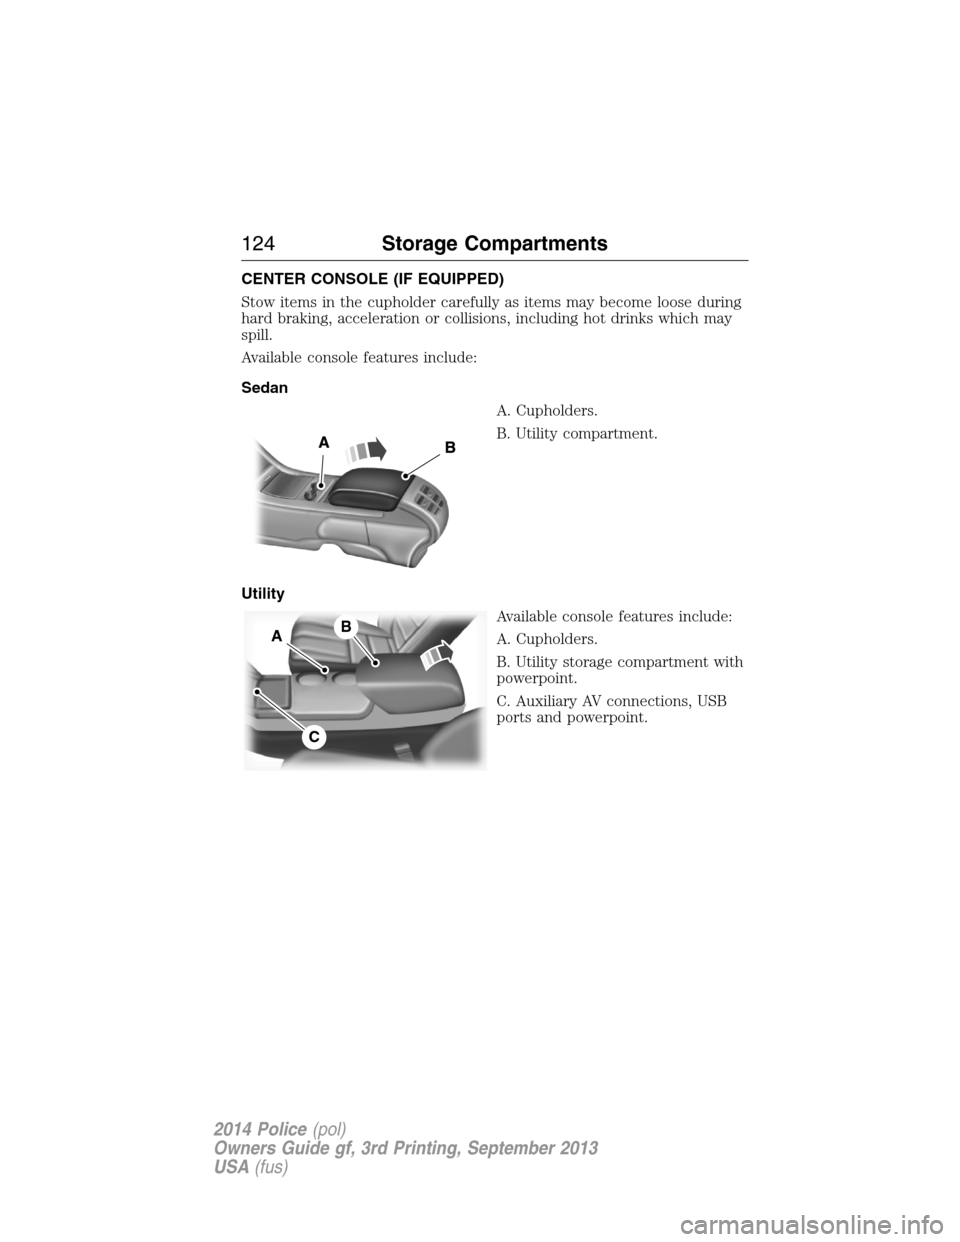
CENTER CONSOLE (IF EQUIPPED)
Stow items in the cupholder carefully as items may become loose during
hard braking, acceleration or collisions, including hot drinks which may
spill.
Available console features include:
Sedan
A. Cupholders.
B. Utility compartment.
Utility
Available console features include:
A. Cupholders.
B. Utility storage compartment with
powerpoint.
C. Auxiliary AV connections, USB
ports and powerpoint.
B
C
A
124Storage Compartments
2014 Police(pol)
Owners Guide gf, 3rd Printing, September 2013
USA(fus)
Page 132 of 406
•Make sure your vehicle is parked in a clean area, clear of
combustibles.
•Make sure the heater, heater cord and extension cord are firmly
connected.
•Check for heat anywhere in the electrical hookup once the system has
been operating for approximately 30 minutes.
•Make sure the system is unplugged and properly stowed before driving
your vehicle. Make sure the protective cover seals the prongs of the
block heater cord plug when not in use.
•Keep plug terminals clean and free of dirt and corrosion.
•Make sure the heater system is checked for proper operation before
winter.
Using the Engine Block Heater
Make sure the receptacle terminals are clean and dry before use.
To clean them, use a dry cloth.
The heater uses 0.4 to 1.0 kilowatt-hours of energy per hour of use.
The system does not have a thermostat. It achieves maximum
temperature after approximately three hours of operation. Using the
heater longer than three hours does not improve system performance
and unnecessarily uses electricity.
Starting and Stopping the Engine131
2014 Police(pol)
Owners Guide gf, 3rd Printing, September 2013
USA(fus)
Page 135 of 406
Octane Recommendations
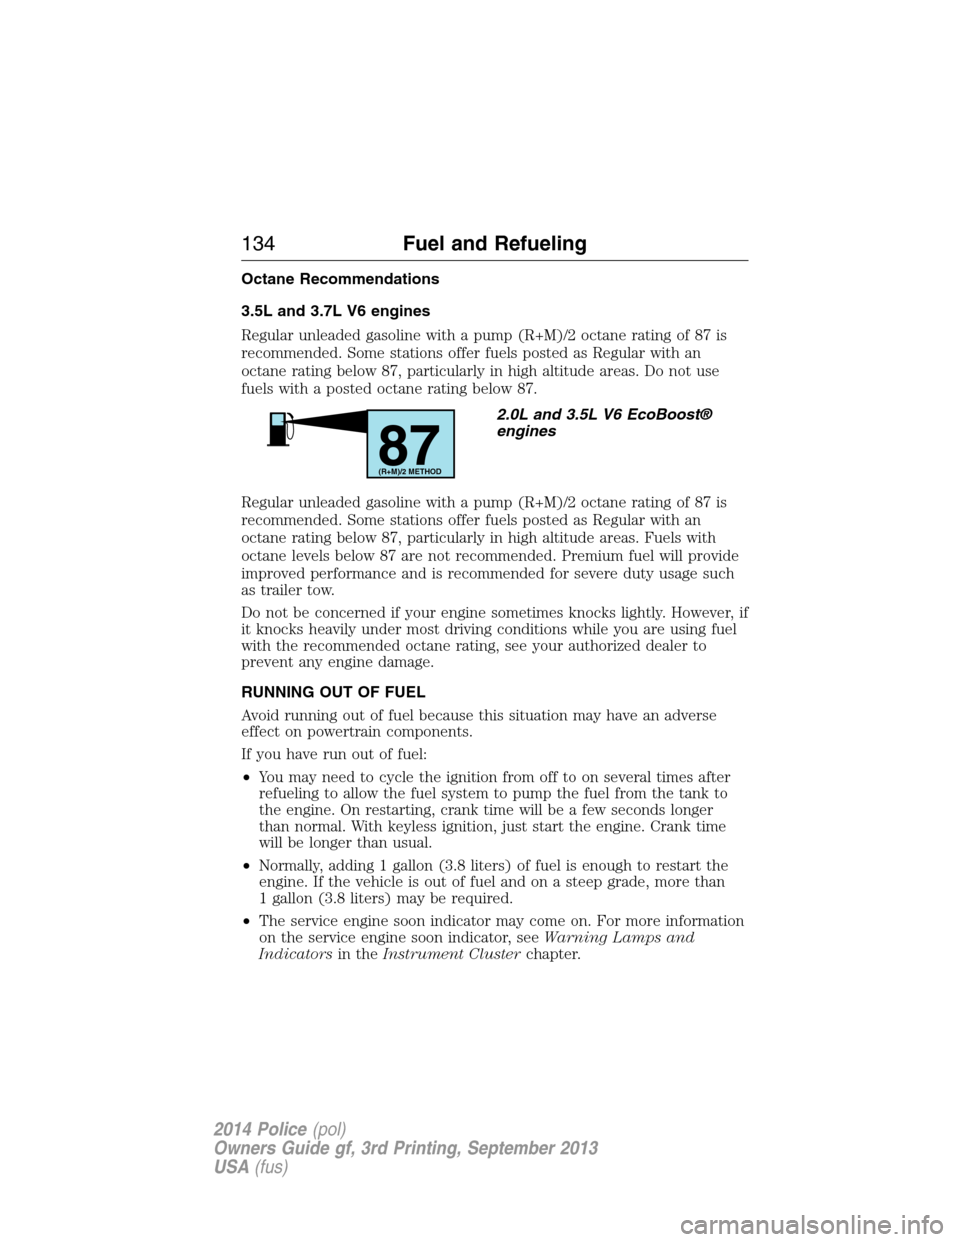
3.5L and 3.7L V6 engines
Regular unleaded gasoline with a pump (R+M)/2 octane rating of 87 is
recommended. Some stations offer fuels posted as Regular with an
octane rating below 87, particularly in high altitude areas. Do not use
fuels with a posted octane rating below 87.
2.0L and 3.5L V6 EcoBoost®
engines
Regular unleaded gasoline with a pump (R+M)/2 octane rating of 87 is
recommended. Some stations offer fuels posted as Regular with an
octane rating below 87, particularly in high altitude areas. Fuels with
octane levels below 87 are not recommended. Premium fuel will provide
improved performance and is recommended for severe duty usage such
as trailer tow.
Do not be concerned if your engine sometimes knocks lightly. However, if
it knocks heavily under most driving conditions while you are using fuel
with the recommended octane rating, see your authorized dealer to
prevent any engine damage.
RUNNING OUT OF FUEL
Avoid running out of fuel because this situation may have an adverse
effect on powertrain components.
If you have run out of fuel:
•You may need to cycle the ignition from off to on several times after
refueling to allow the fuel system to pump the fuel from the tank to
the engine. On restarting, crank time will be a few seconds longer
than normal. With keyless ignition, just start the engine. Crank time
will be longer than usual.
•Normally, adding 1 gallon (3.8 liters) of fuel is enough to restart the
engine. If the vehicle is out of fuel and on a steep grade, more than
1 gallon (3.8 liters) may be required.
•The service engine soon indicator may come on. For more information
on the service engine soon indicator, seeWarning Lamps and
Indicatorsin theInstrument Clusterchapter.
87(R+M)/2 METHOD
134Fuel and Refueling
2014 Police(pol)
Owners Guide gf, 3rd Printing, September 2013
USA(fus)
Page 154 of 406
GENERAL INFORMATION
Note:Occasional brake noise is normal. If a metal-to-metal, continuous
grinding or continuous squeal sound is present, the brake linings may be
worn out. Have them inspected by an authorized dealer. If your vehicle
has continuous vibration or shudder in the steering wheel while braking,
have your vehicle inspected by an authorized dealer.
Note:Brake dust may accumulate on the wheels, even under normal
driving conditions. Some dust is inevitable as the brakes wear and does
not contribute to brake noise. See theVehicle Carechapter for wheel
cleaning instructions.
This vehicle is equipped with heavy-duty front disc brake pads to meet
the varying demands of different police service for fade resistance and
other performance requirements.
Ford recommends brake system inspection and maintenance according
to service manual procedures following high speed pursuits with heavy
brake usage.
See theInstrument Clusterchapter for information on the
brake system warning light.
Wet brakes result in reduced braking efficiency. Gently press the brake
pedal a few times when driving from a car wash or standing water to dry
the brakes.
Brake Over Accelerator
In the event the accelerator pedal becomes stuck or entrapped, apply
steady and firm pressure to the brake pedal to slow your vehicle and
reduce engine power. If you experience this condition, apply the brakes
and bring your vehicle to a safe stop. Turn the engine off, shift to park
(P) and apply the parking brake. Inspect the accelerator pedal and the
area around it for any items or debris that may be obstructing its
movement. If none are found and the condition persists, have your
vehicle towed to the nearest authorized dealer.
Brake Assist
Brake assist detects when you brake heavily by measuring the rate at
which you press the brake pedal. It provides maximum braking efficiency
as long as you press the pedal. Brake assist can reduce stopping
distances in critical situations.
Brakes153
2014 Police(pol)
Owners Guide gf, 3rd Printing, September 2013
USA(fus)
Page 160 of 406
The system can be turned off using the information display control. See
theInformation Displaychapter. If a fault is present in the system, a
warning message appears in the information display and does not allow
the driver to switch the faulted system on.
Using the Rear Sensing System
The rear sensors are only active when the transmission is inR.Asthe
vehicle moves closer to the obstacle, the rate of the audible warning
increases. When the obstacle is fewer than 12 inches (30 centimeters)
away, the warning sounds continuously. If a stationary or receding object
is detected farther than 12 inches (30 centimeters) from the side of the
vehicle, the tone sounds for only three seconds. Once the system detects
an object approaching, the warning sounds again.
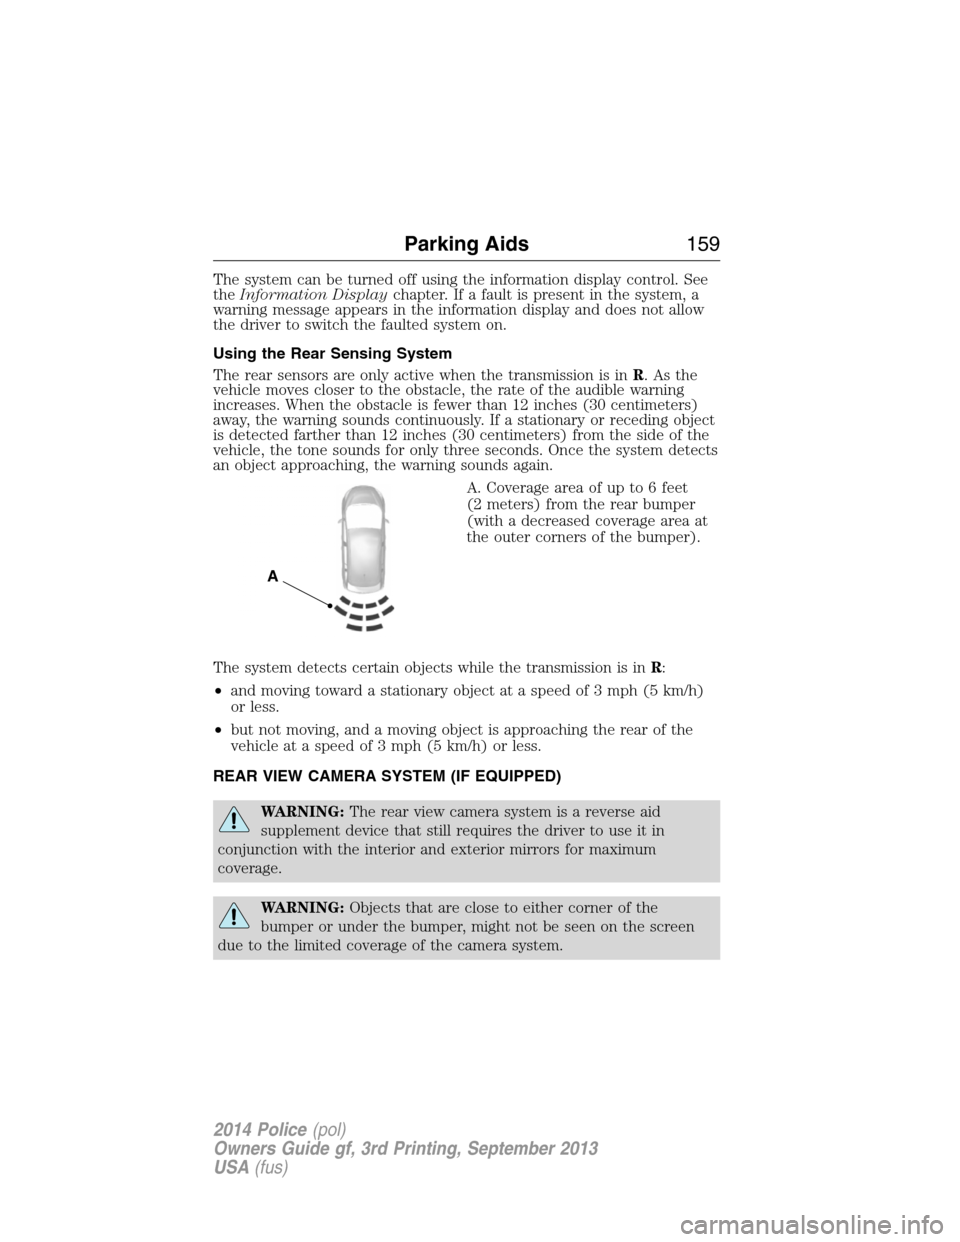
A. Coverage area of up to 6 feet
(2 meters) from the rear bumper
(with a decreased coverage area at
the outer corners of the bumper).
The system detects certain objects while the transmission is inR:
•and moving toward a stationary object at a speed of 3 mph (5 km/h)
or less.
•but not moving, and a moving object is approaching the rear of the
vehicle at a speed of 3 mph (5 km/h) or less.
REAR VIEW CAMERA SYSTEM (IF EQUIPPED)
WARNING:The rear view camera system is a reverse aid
supplement device that still requires the driver to use it in
conjunction with the interior and exterior mirrors for maximum
coverage.
WARNING:Objects that are close to either corner of the
bumper or under the bumper, might not be seen on the screen
due to the limited coverage of the camera system.
A
Parking Aids159
2014 Police(pol)
Owners Guide gf, 3rd Printing, September 2013
USA(fus)
Page 162 of 406
Using the Rear View Camera System
The rear view camera system displays what is behind your vehicle when
you place the transmission inR(Reverse). The system uses fixed
guidelines which show the actual path the vehicle is moving in while
reversing in a straight line. This can be helpful when backing into a parking
space or aligning the vehicle with another object behind the vehicle.
Note:Do not use the camera system if either the trunk (sedan) or the
liftgate (utility) is ajar.
Note:If the image comes on while the transmission is not inR
(Reverse), have the system inspected by your authorized dealer.
Note:When towing, the camera only sees what is being towed behind
the vehicle. This might not provide adequate coverage as it usually
provides in normal operation and some objects might not be seen.
In some vehicles the guidelines (if equipped) may disappear once the
trailer tow connector is engaged.
Note:The camera may not operate correctly under the following
conditions:
•Nighttime or dark areas if one or both reverse lamps are not
operating.
•The camera’s view is obstructed by mud, water or debris. Clean the
lens with a soft, lint-free cloth and non-abrasive cleaner.
•The rear of the vehicle is hit or damaged, causing the camera to
become misaligned.
Parking Aids161
2014 Police(pol)
Owners Guide gf, 3rd Printing, September 2013
USA(fus)