brake FORD THUNDERBIRD 2002 11.G Owners Manual
[x] Cancel search | Manufacturer: FORD, Model Year: 2002, Model line: THUNDERBIRD, Model: FORD THUNDERBIRD 2002 11.GPages: 248, PDF Size: 2.1 MB
Page 2 of 248
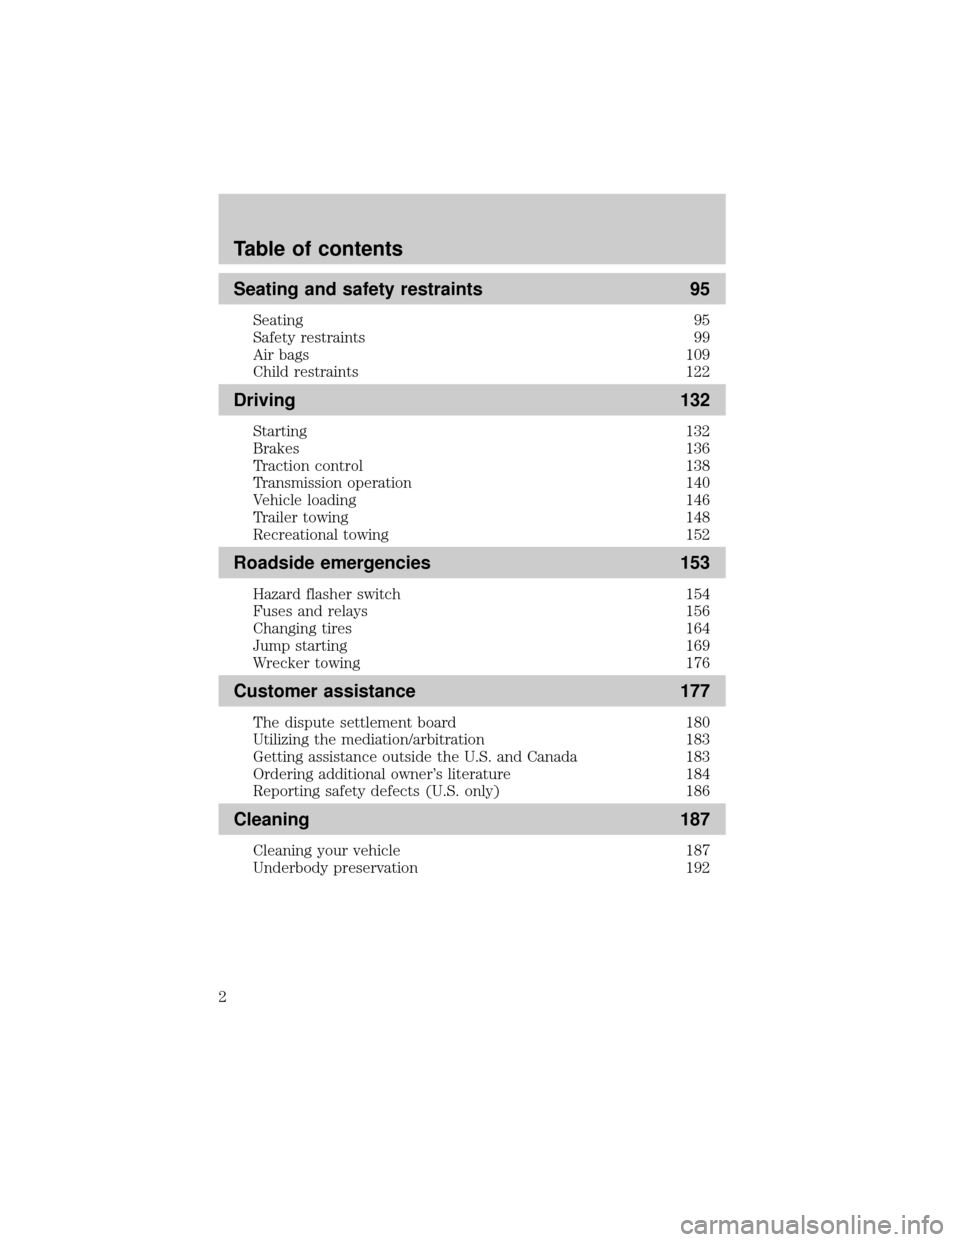
Seating and safety restraints 95
Seating 95
Safety restraints 99
Air bags 109
Child restraints 122
Driving 132
Starting 132
Brakes 136
Traction control 138
Transmission operation 140
Vehicle loading 146
Trailer towing 148
Recreational towing 152
Roadside emergencies 153
Hazard flasher switch 154
Fuses and relays 156
Changing tires 164
Jump starting 169
Wrecker towing 176
Customer assistance 177
The dispute settlement board 180
Utilizing the mediation/arbitration 183
Getting assistance outside the U.S. and Canada 183
Ordering additional owner's literature 184
Reporting safety defects (U.S. only) 186
Cleaning 187
Cleaning your vehicle 187
Underbody preservation 192
Table of contents
2
Page 8 of 248
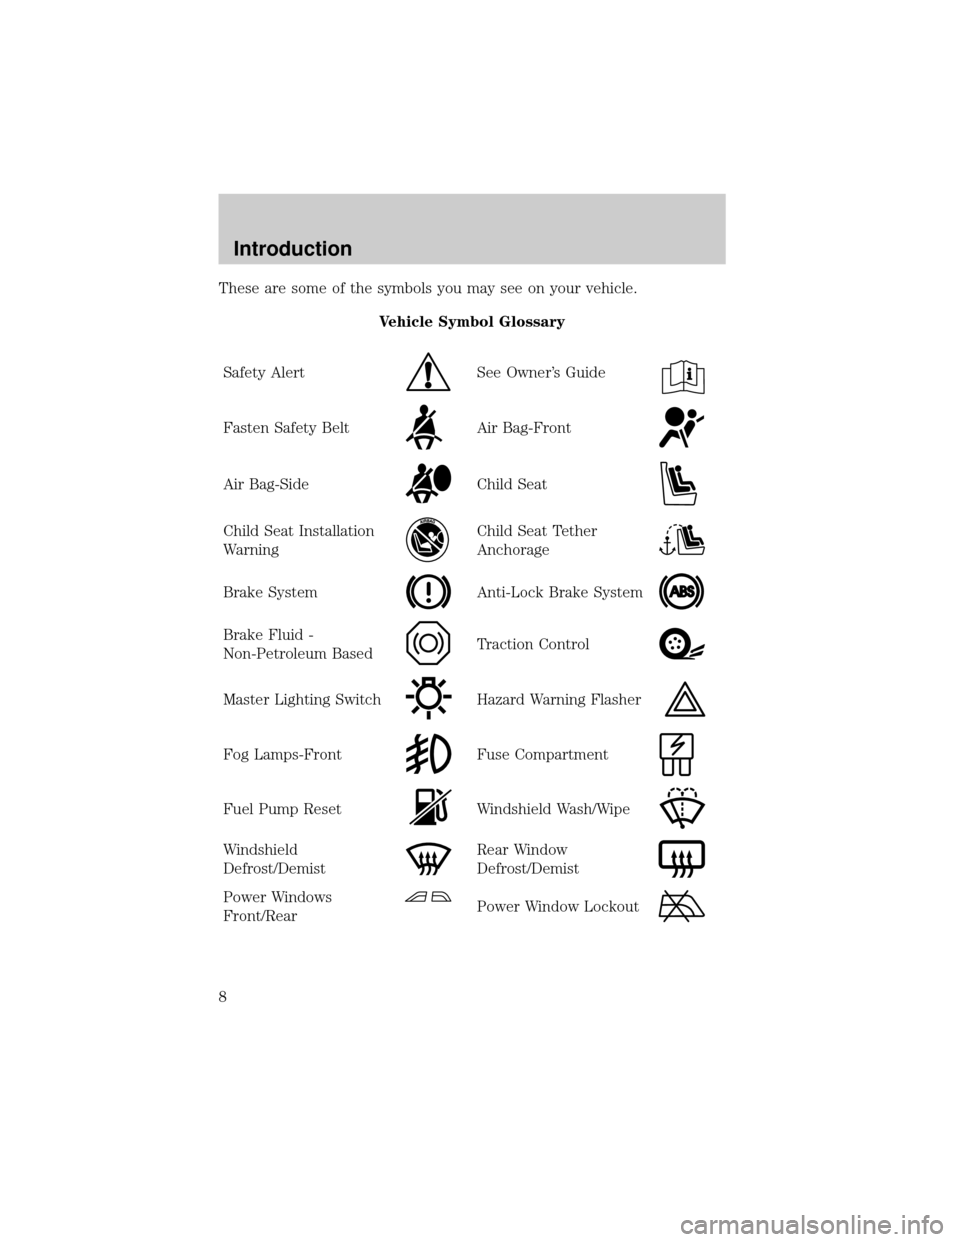
These are some of the symbols you may see on your vehicle.
Vehicle Symbol Glossary
Safety Alert
See Owner's Guide
Fasten Safety BeltAir Bag-Front
Air Bag-SideChild Seat
Child Seat Installation
WarningChild Seat Tether
Anchorage
Brake SystemAnti-Lock Brake System
Brake Fluid -
Non-Petroleum BasedTraction Control
Master Lighting SwitchHazard Warning Flasher
Fog Lamps-FrontFuse Compartment
Fuel Pump ResetWindshield Wash/Wipe
Windshield
Defrost/DemistRear Window
Defrost/Demist
Power Windows
Front/RearPower Window Lockout
Introduction
8
Page 12 of 248
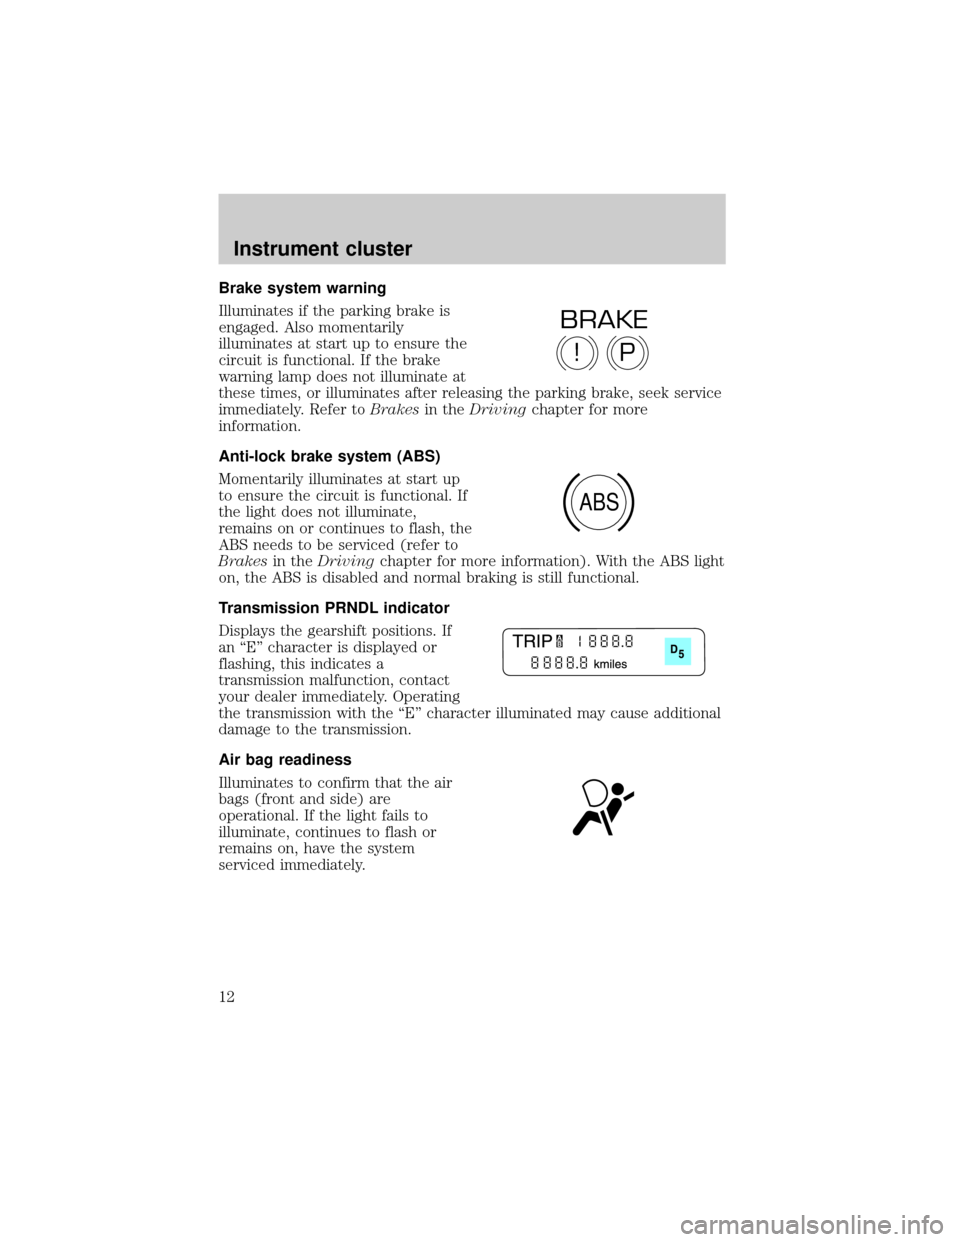
Brake system warning
Illuminates if the parking brake is
engaged. Also momentarily
illuminates at start up to ensure the
circuit is functional. If the brake
warning lamp does not illuminate at
these times, or illuminates after releasing the parking brake, seek service
immediately. Refer toBrakesin theDrivingchapter for more
information.
Anti-lock brake system (ABS)
Momentarily illuminates at start up
to ensure the circuit is functional. If
the light does not illuminate,
remains on or continues to flash, the
ABS needs to be serviced (refer to
Brakesin theDrivingchapter for more information). With the ABS light
on, the ABS is disabled and normal braking is still functional.
Transmission PRNDL indicator
Displays the gearshift positions. If
an ªEº character is displayed or
flashing, this indicates a
transmission malfunction, contact
your dealer immediately. Operating
the transmission with the ªEº character illuminated may cause additional
damage to the transmission.
Air bag readiness
Illuminates to confirm that the air
bags (front and side) are
operational. If the light fails to
illuminate, continues to flash or
remains on, have the system
serviced immediately.
P!
BRAKE
ABS
Instrument cluster
12
Page 53 of 248
BULBS
Replacing exterior bulbs
Check the operation of the following lamps frequently:
²Headlamps
²Tail lamps
²Brakelamps
²High-mount brakelamp
²Turn signals
²Supplemental parking lamps
²Front/rear side marker lamps
²Backup lamps
²License plate lamp
Do not remove lamp bulbs unless they will be replaced immediately. If a
bulb is removed for an extended period of time, contaminants may enter
the lamp housings and affect performance.
Using the right bulbs
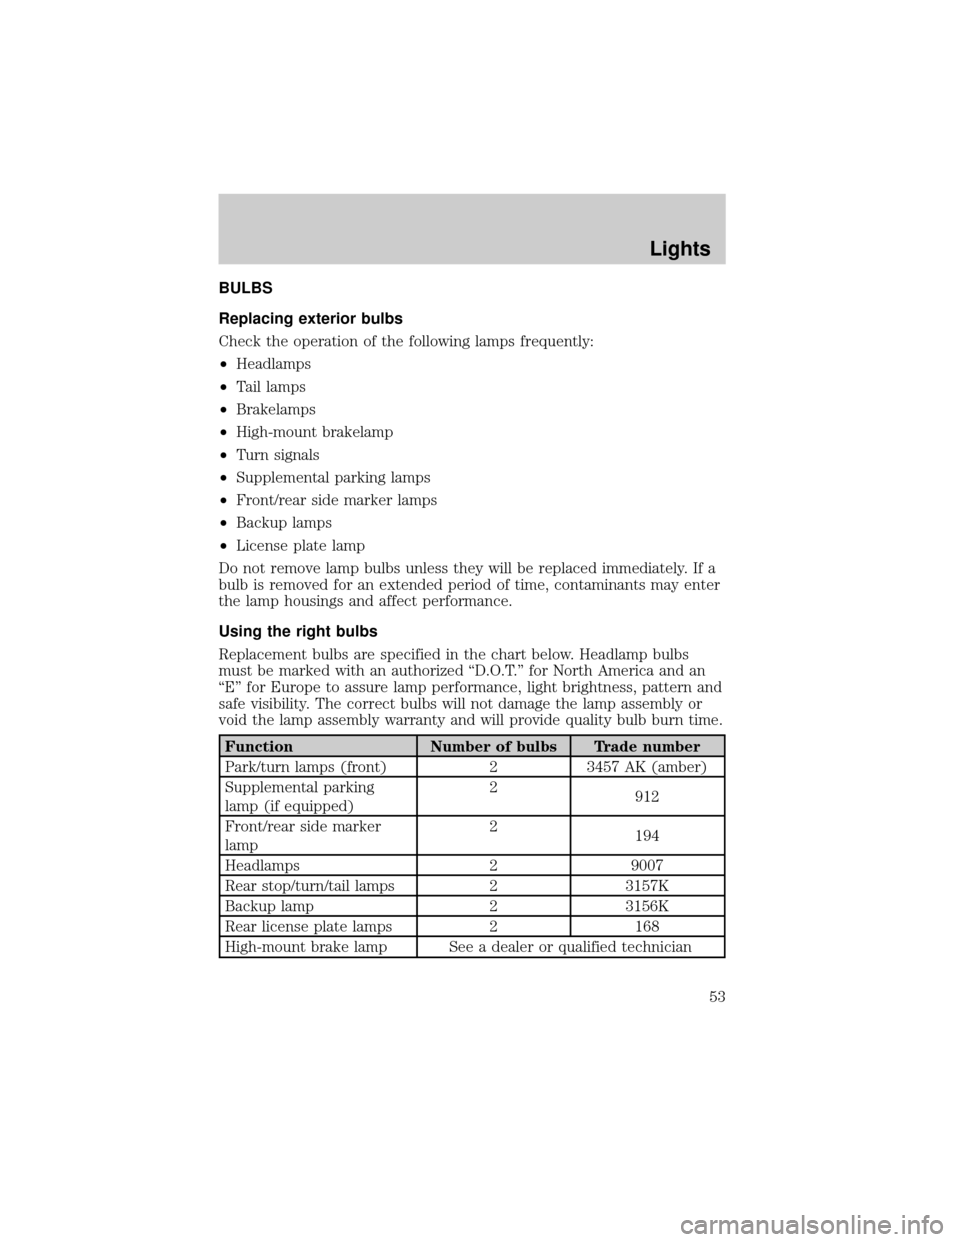
Replacement bulbs are specified in the chart below. Headlamp bulbs
must be marked with an authorized ªD.O.T.º for North America and an
ªEº for Europe to assure lamp performance, light brightness, pattern and
safe visibility. The correct bulbs will not damage the lamp assembly or
void the lamp assembly warranty and will provide quality bulb burn time.
Function Number of bulbs Trade number
Park/turn lamps (front) 2 3457 AK (amber)
Supplemental parking
lamp (if equipped)2
912
Front/rear side marker
lamp2
194
Headlamps 2 9007
Rear stop/turn/tail lamps 2 3157K
Backup lamp 2 3156K
Rear license plate lamps 2 168
High-mount brake lamp See a dealer or qualified technician
Lights
53
Page 58 of 248
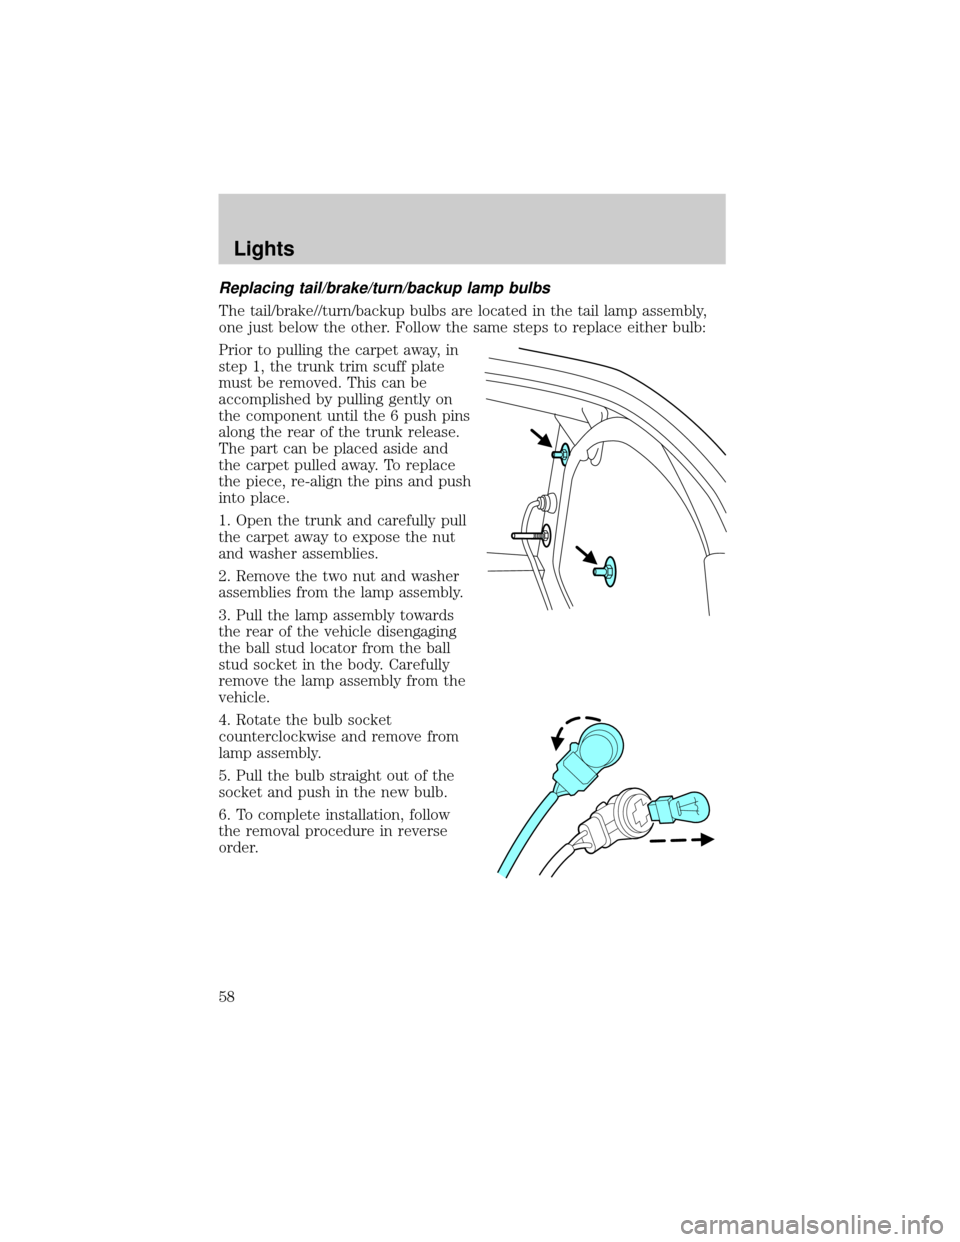
Replacing tail/brake/turn/backup lamp bulbs
The tail/brake//turn/backup bulbs are located in the tail lamp assembly,
one just below the other. Follow the same steps to replace either bulb:
Prior to pulling the carpet away, in
step 1, the trunk trim scuff plate
must be removed. This can be
accomplished by pulling gently on
the component until the 6 push pins
along the rear of the trunk release.
The part can be placed aside and
the carpet pulled away. To replace
the piece, re-align the pins and push
into place.
1. Open the trunk and carefully pull
the carpet away to expose the nut
and washer assemblies.
2. Remove the two nut and washer
assemblies from the lamp assembly.
3. Pull the lamp assembly towards
the rear of the vehicle disengaging
the ball stud locator from the ball
stud socket in the body. Carefully
remove the lamp assembly from the
vehicle.
4. Rotate the bulb socket
counterclockwise and remove from
lamp assembly.
5. Pull the bulb straight out of the
socket and push in the new bulb.
6. To complete installation, follow
the removal procedure in reverse
order.
Lights
58
Page 59 of 248
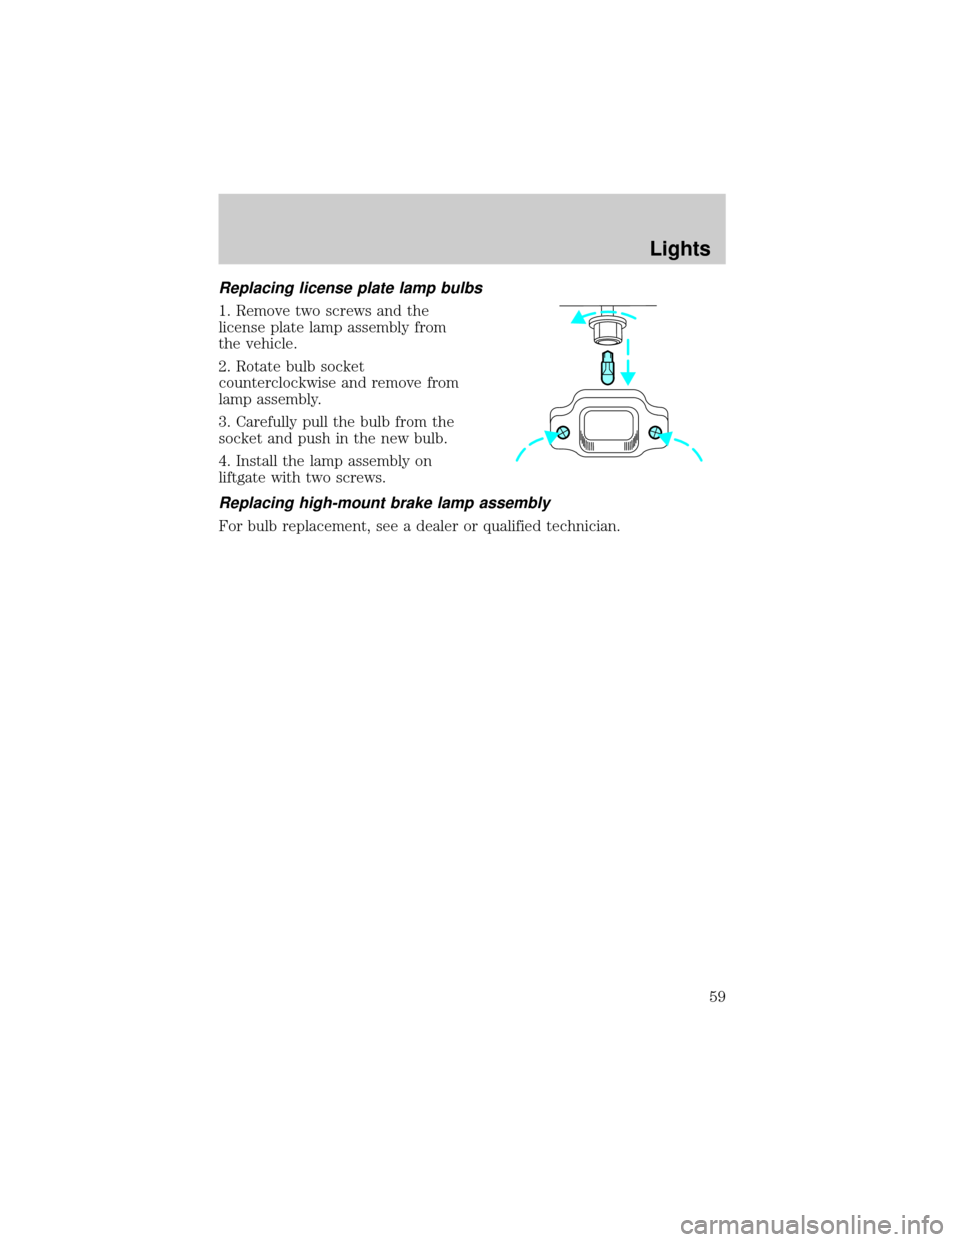
Replacing license plate lamp bulbs
1. Remove two screws and the
license plate lamp assembly from
the vehicle.
2. Rotate bulb socket
counterclockwise and remove from
lamp assembly.
3. Carefully pull the bulb from the
socket and push in the new bulb.
4. Install the lamp assembly on
liftgate with two screws.
Replacing high-mount brake lamp assembly
For bulb replacement, see a dealer or qualified technician.
Lights
59
Page 67 of 248
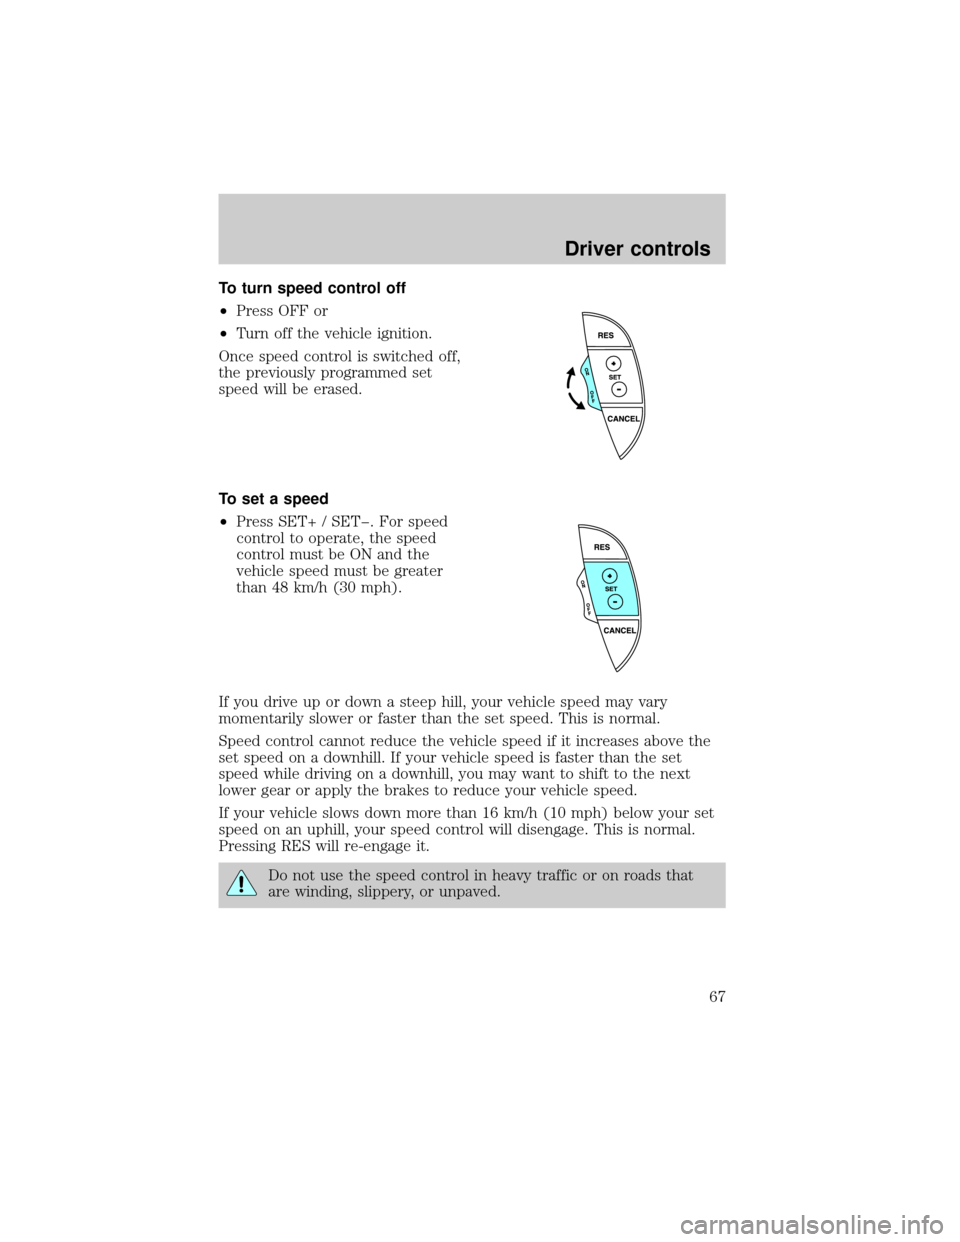
To turn speed control off
²Press OFF or
²Turn off the vehicle ignition.
Once speed control is switched off,
the previously programmed set
speed will be erased.
To set a speed
²Press SET+ / SETþ. For speed
control to operate, the speed
control must be ON and the
vehicle speed must be greater
than 48 km/h (30 mph).
If you drive up or down a steep hill, your vehicle speed may vary
momentarily slower or faster than the set speed. This is normal.
Speed control cannot reduce the vehicle speed if it increases above the
set speed on a downhill. If your vehicle speed is faster than the set
speed while driving on a downhill, you may want to shift to the next
lower gear or apply the brakes to reduce your vehicle speed.
If your vehicle slows down more than 16 km/h (10 mph) below your set
speed on an uphill, your speed control will disengage. This is normal.
Pressing RES will re-engage it.
Do not use the speed control in heavy traffic or on roads that
are winding, slippery, or unpaved.
Driver controls
67
Page 68 of 248
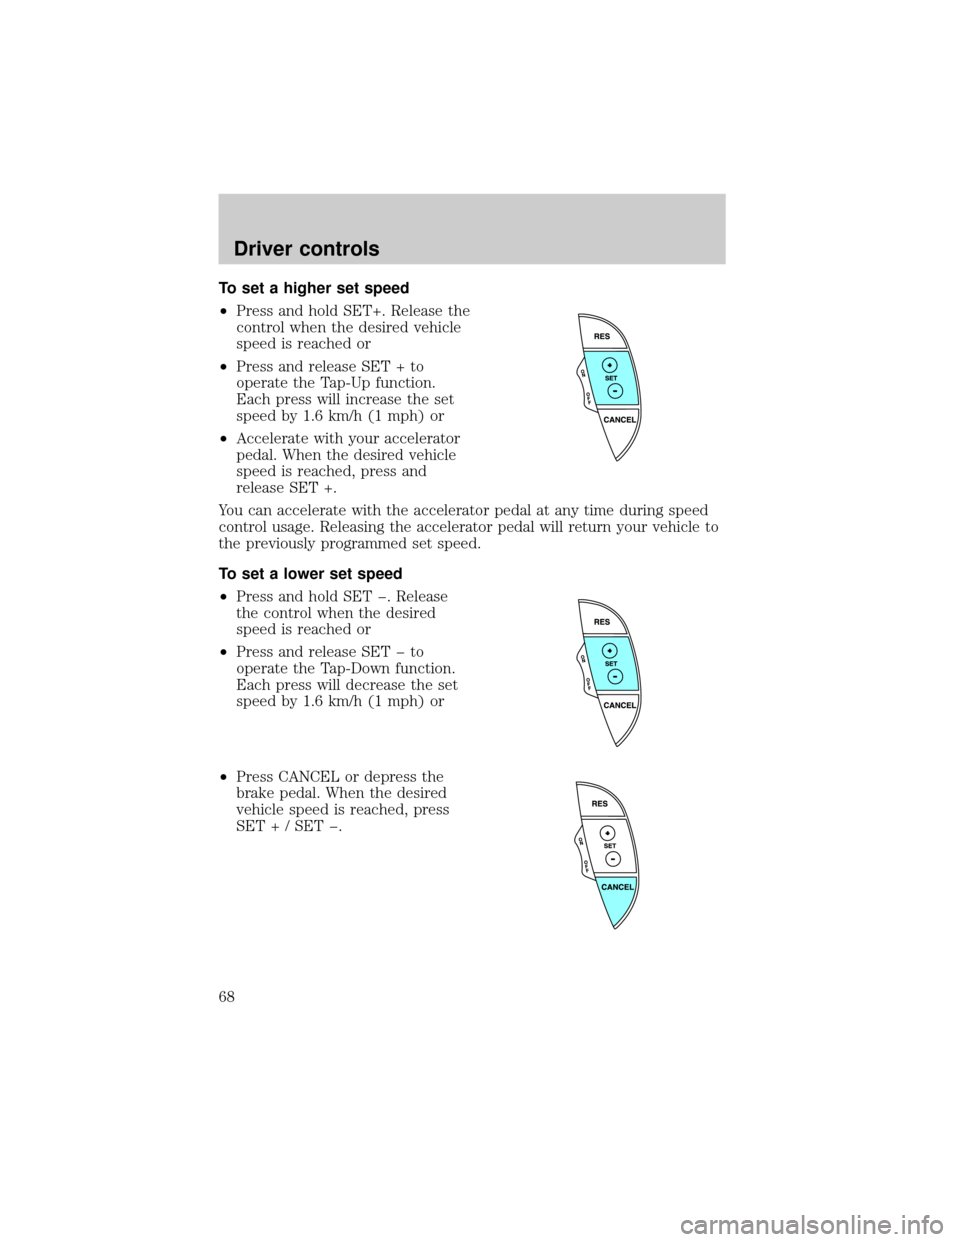
To set a higher set speed
²Press and hold SET+. Release the
control when the desired vehicle
speed is reached or
²Press and release SET + to
operate the Tap-Up function.
Each press will increase the set
speed by 1.6 km/h (1 mph) or
²Accelerate with your accelerator
pedal. When the desired vehicle
speed is reached, press and
release SET +.
You can accelerate with the accelerator pedal at any time during speed
control usage. Releasing the accelerator pedal will return your vehicle to
the previously programmed set speed.
To set a lower set speed
²Press and hold SET þ. Release
the control when the desired
speed is reached or
²Press and release SET þ to
operate the Tap-Down function.
Each press will decrease the set
speed by 1.6 km/h (1 mph) or
²Press CANCEL or depress the
brake pedal. When the desired
vehicle speed is reached, press
SET + / SET þ.
Driver controls
68
Page 69 of 248
To disengage speed control
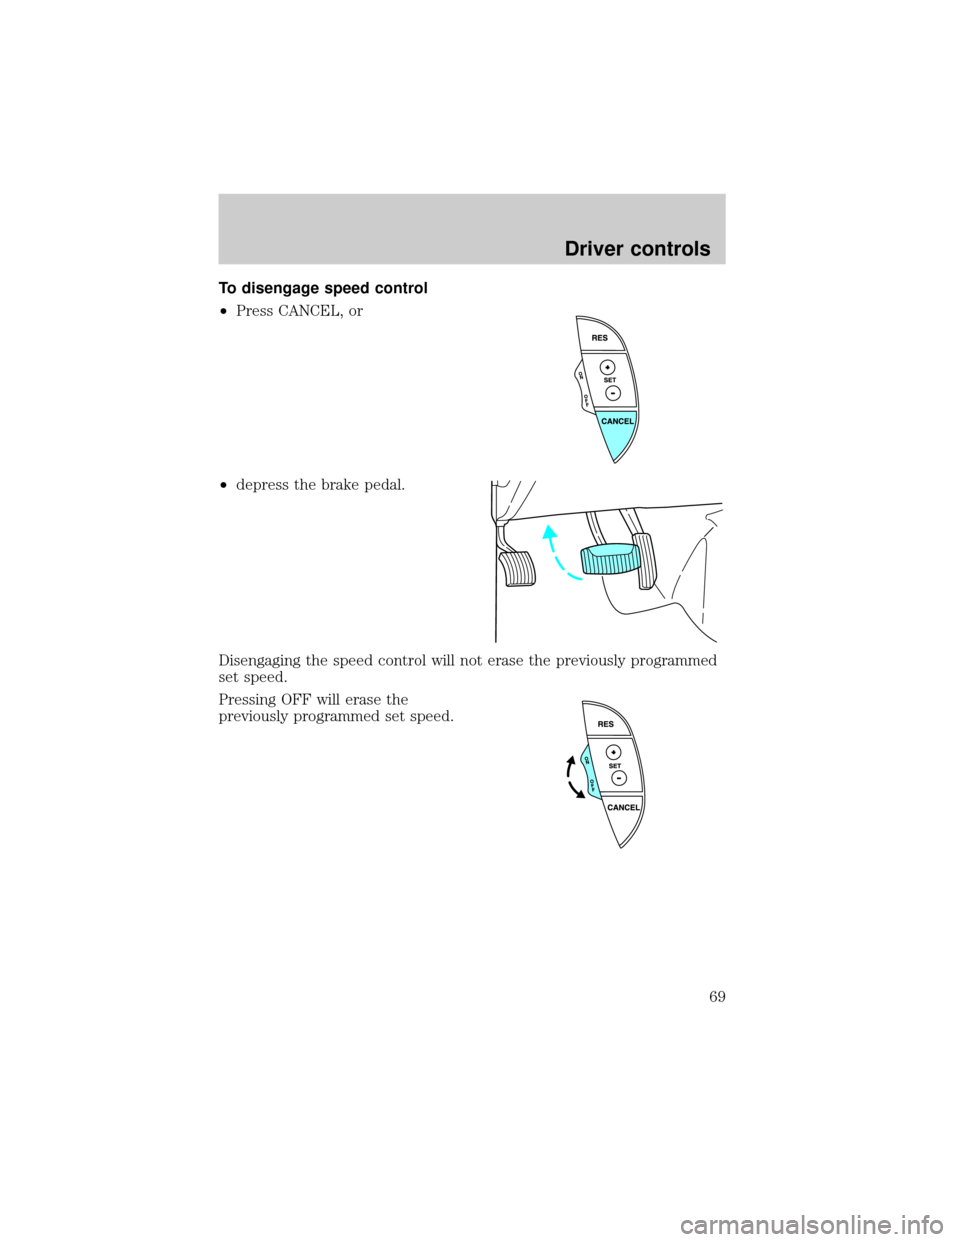
²Press CANCEL, or
²depress the brake pedal.
Disengaging the speed control will not erase the previously programmed
set speed.
Pressing OFF will erase the
previously programmed set speed.
Driver controls
69
Page 83 of 248
CENTER CONSOLE
Your vehicle may be equipped with a variety of console features. These
include:
²Utility compartment
²Cellular phone (if equipped)
²Cupholders
²Ash tray
POSITIVE RETENTION FLOOR MAT
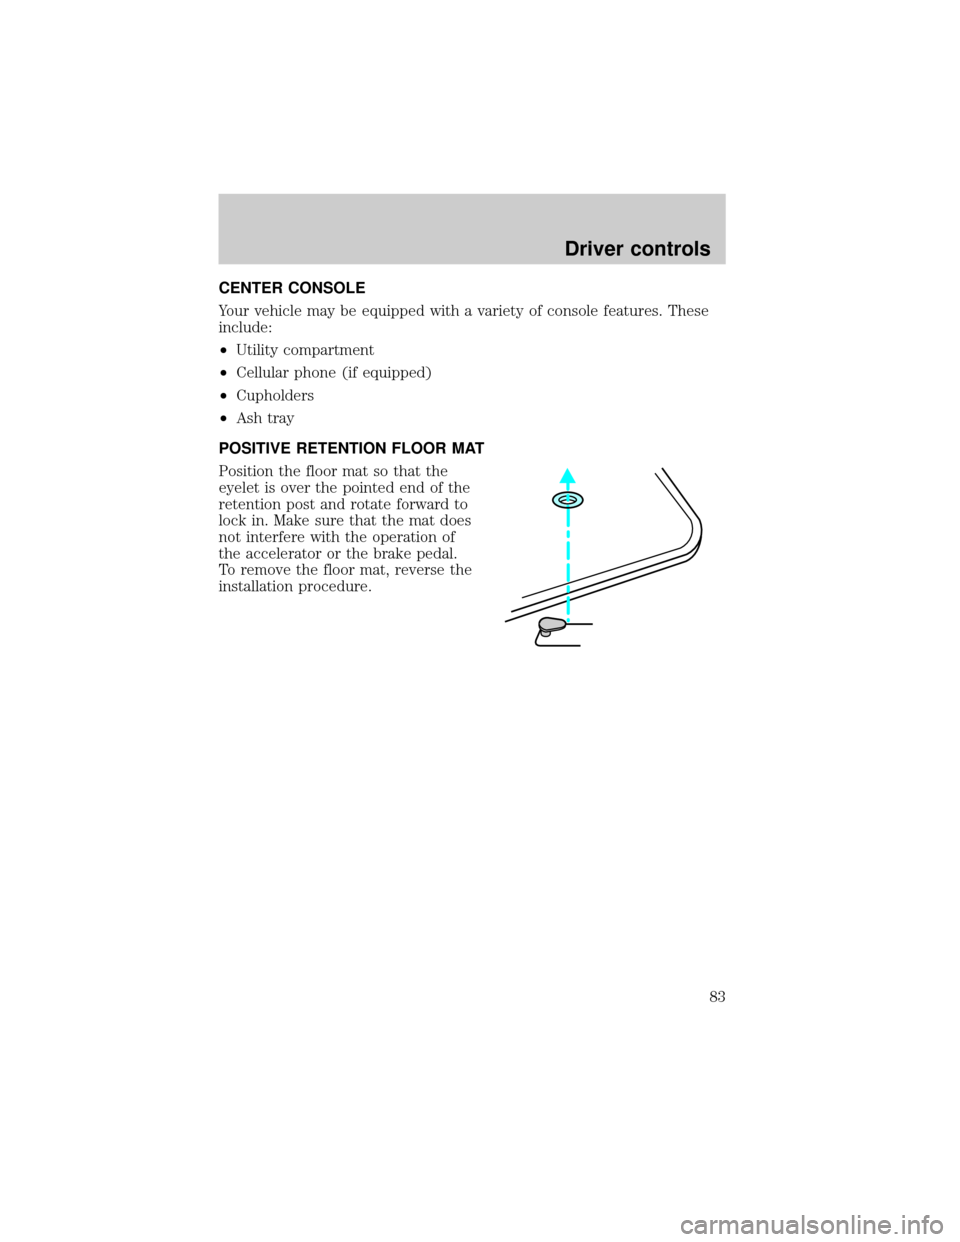
Position the floor mat so that the
eyelet is over the pointed end of the
retention post and rotate forward to
lock in. Make sure that the mat does
not interfere with the operation of
the accelerator or the brake pedal.
To remove the floor mat, reverse the
installation procedure.
Driver controls
83