battery GENESIS G80 2021 User Guide
[x] Cancel search | Manufacturer: GENESIS, Model Year: 2021, Model line: G80, Model: GENESIS G80 2021Pages: 604, PDF Size: 11.47 MB
Page 162 of 604
Convenient Features
5-24
Used Vehicle/Digital Key
Maintenance
Purchasing used vehicle
If any of the digital key devices (smart
phone key, card key) are registered in
the vehicle, the message ‘Digital key(s)
active’ will appear on the instrument
cluster once when the vehicle is turned
on after unlocking the vehicle door.
When purchasing a used car, be sure to
check the message and delete the smart
phone key and card key registered by
the previous user. Please let us know
the purchase of a used vehicle through
Genesis Customer Care. Check whether
the card key that came with the used
vehicle operates properly. If the card key
does not work properly, delete the card
key and register the smart phone key,
and then re-register the card key.
Digital Key Maintenance
If you need to have your Digital Key
System repaired or replaced, the
registered smart key/card key can be
deleted. In this case, you should delete
the digital key on the smart phone and
re-register the key.
Limitations of the System
• Genesis Digital Key App on the smart
phone and card key may not work if
any of the following occurs:
-The Digital Key App in the smart
phone is deleted (reinstall the app)
-Account log information of Genesis
Digital Key App is expired (required
to re-log in)
-When you try to log in from
another smart phone instead of the
registered smart phone with same
user account - Smart phone rooting
or app hacking is detected
-Smart phone battery or the vehicle
battery is discharged
-Smart phone’s screen is off or
locked
-NFC or Bluetooth is turned off in the
smart phone settings
-Smart phone’s mobile network
setting is off or airplane mode is
activated
-A credit card is overlapped in the
back of your smart phone, or metal
or thick smart phone case is used
-Using the card key with other cards,
or using it in a wallet or card holder
-There is electronic interference by
other vehicles, objects, etc.
• The vehicle may not be controlled
by the smart phone if any of the
following occurs:
-Basic and necessary functions of
the smart phone are operating
(general call, urgent call, audio or
NFC payment)
-Using wireless earphone
Page 164 of 604
Convenient Features
5-26
Information
• In cold and wet climates, door lock
and door mechanisms may not work
properly due to freezing conditions.
• If the door is locked/unlocked multiple
times in rapid succession with either
the vehicle key or door lock switch, the
system may stop operating temporarily
in order to protect the circuit and
prevent damage to system components.
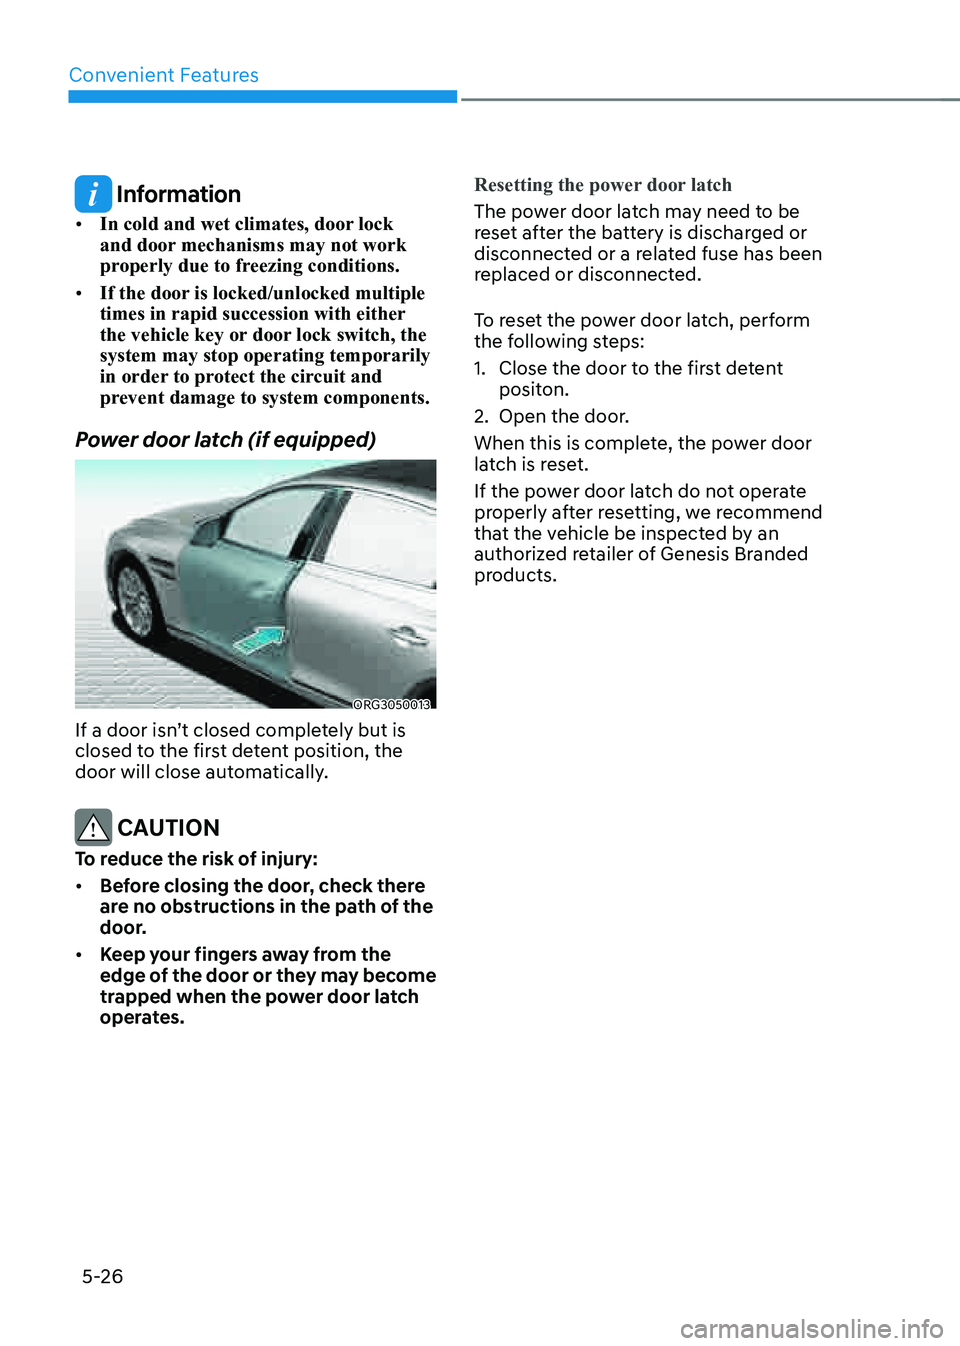
Power door latch (if equipped)
ORG3050013
If a door isn’t closed completely but is
closed to the first detent position, the
door will close automatically.
CAUTION
To reduce the risk of injury:
• Before closing the door, check there
are no obstructions in the path of the
door.
• Keep your fingers away from the
edge of the door or they may become
trapped when the power door latch
operates.Resetting the power door latch
The power door latch may need to be
reset after the battery is discharged or
disconnected or a related fuse has been
replaced or disconnected.
To reset the power door latch, perform
the following steps:
1. Close the door to the first detent
positon.
2. Open the door.
When this is complete, the power door
latch is reset.
If the power door latch do not operate
properly after resetting, we recommend
that the vehicle be inspected by an
authorized retailer of Genesis Branded
products.
Page 166 of 604
Convenient Features
5-28
Information
If all doors are locked with the rear door
lock button, and the electronic child safety
lock button (if equipped) in the driver’s
seat is turned ON (indicator light ON), the
rear doors cannot be opened. If you want
to open the rear doors:
• Unlock the door with the smart key
from outside.
• Unlock the door with Genesis
Connected Service using your smart
phone.
• Press the electronic child safety lock
button on the driver’s door to turn
it off (indicator light OFF), then
unlock the doors with the driver’s or
passenger’s central door lock switch.
(Electronic child lock OFF → Door
unlocked)
• Press the electronic child safety lock
button on the driver’s door to turn it
off (indicator light OFF), then pull the
rear inner door handle twice.
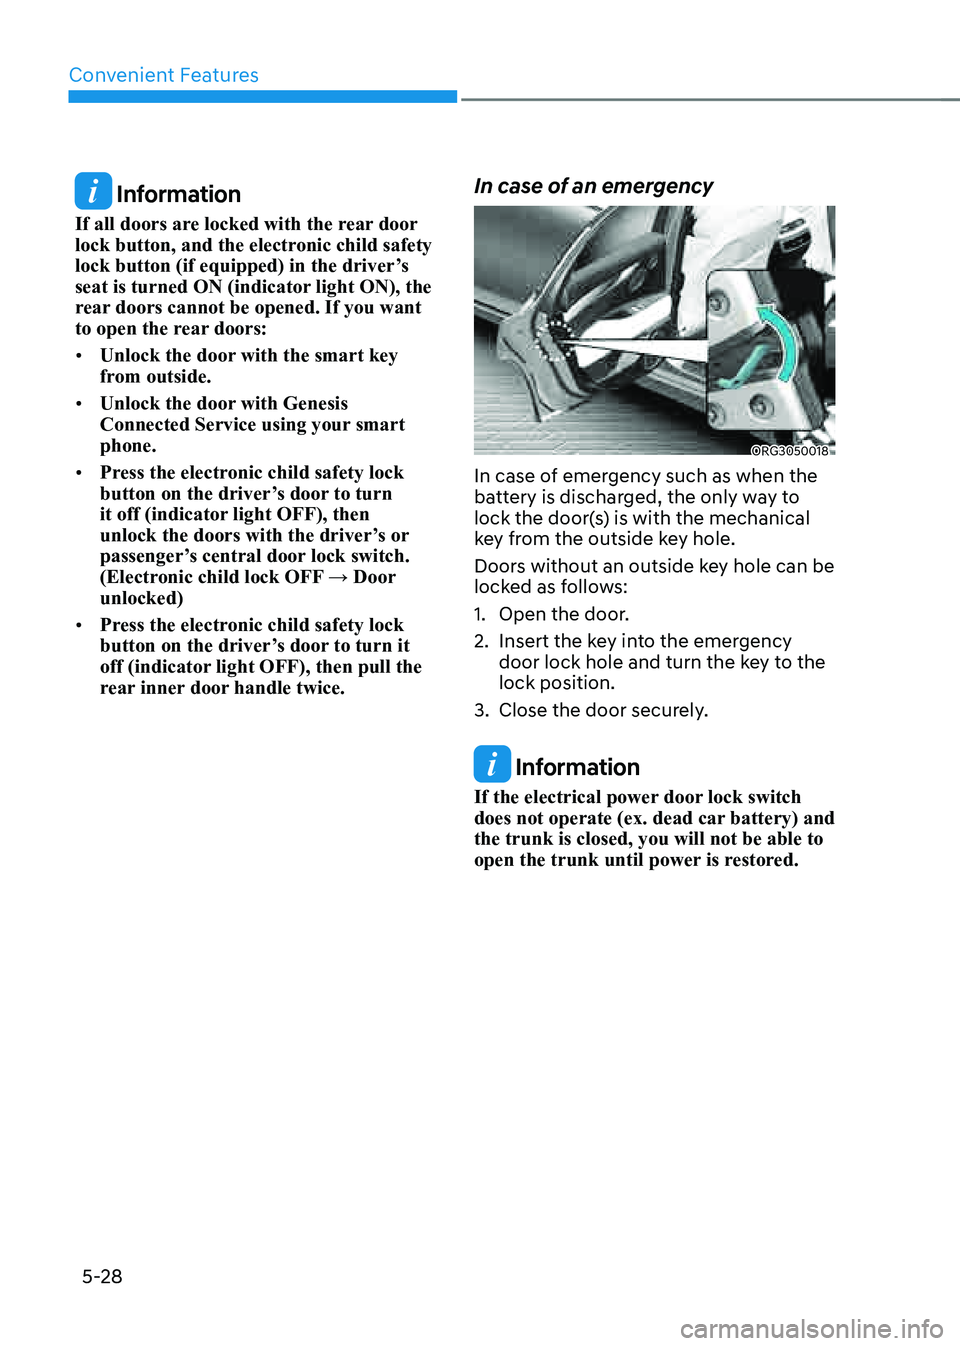
In case of an emergency
ORG3050018
In case of emergency such as when the
battery is discharged, the only way to
lock the door(s) is with the mechanical
key from the outside key hole.
Doors without an outside key hole can be
locked as follows:
1. Open the door.
2. Insert the key into the emergency
door lock hole and turn the key to the
lock position.
3. Close the door securely.
Information
If the electrical power door lock switch
does not operate (ex. dead car battery) and
the trunk is closed, you will not be able to
open the trunk until power is restored.
Page 169 of 604
05
5-31
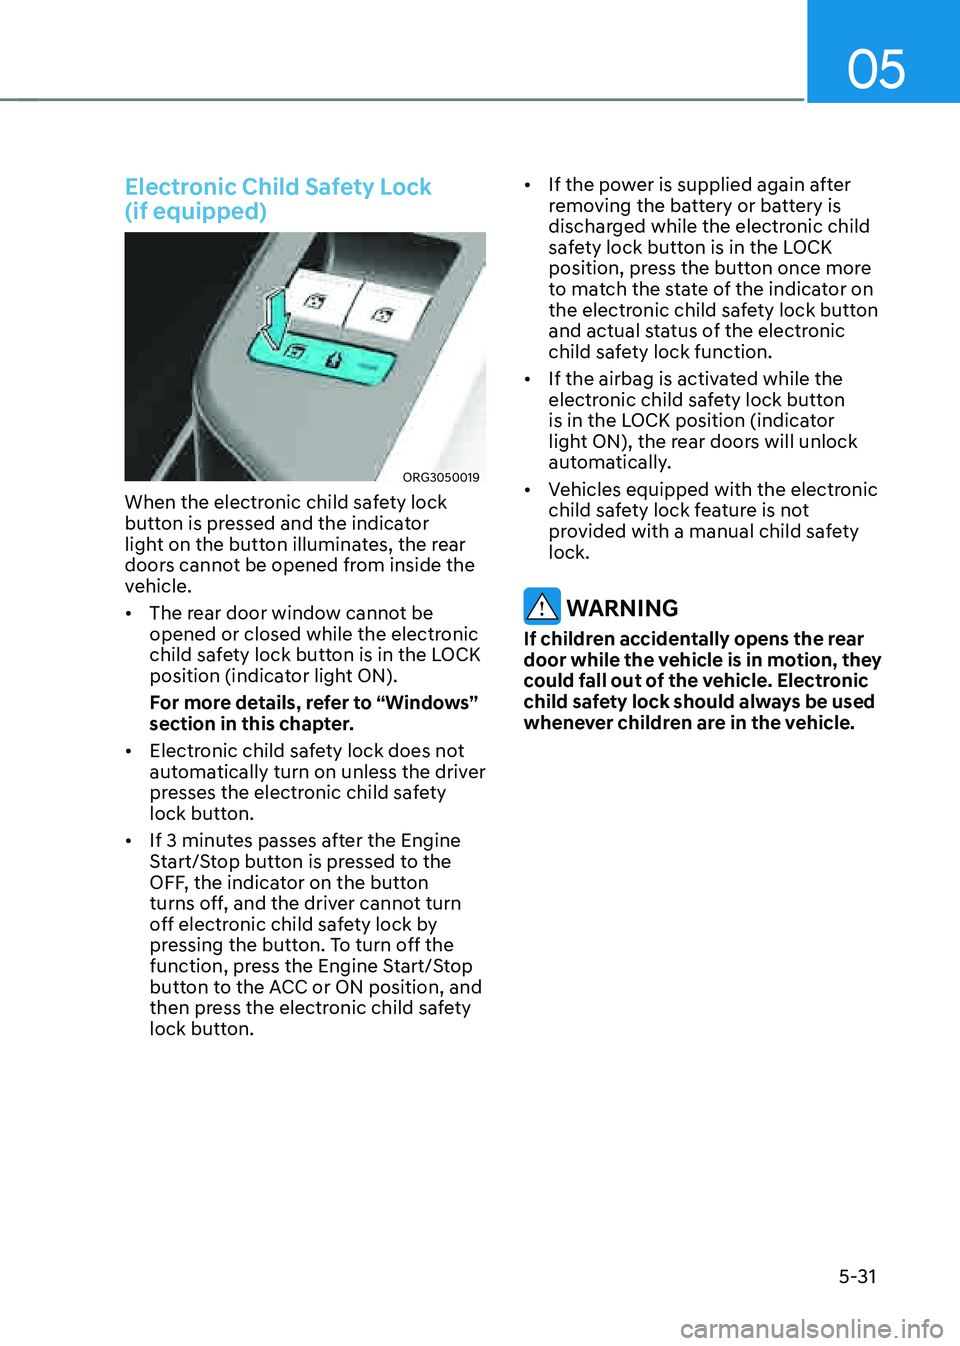
Electronic Child Safety Lock
(if equipped)
ORG3050019
When the electronic child safety lock
button is pressed and the indicator
light on the button illuminates, the rear
doors cannot be opened from inside the
vehicle.
• The rear door window cannot be
opened or closed while the electronic
child safety lock button is in the LOCK
position (indicator light ON).
For more details, refer to “Windows”
section in this chapter.
• Electronic child safety lock does not
automatically turn on unless the driver
presses the electronic child safety
lock button.
• If 3 minutes passes after the Engine
Start/Stop button is pressed to the
OFF, the indicator on the button
turns off, and the driver cannot turn
off electronic child safety lock by
pressing the button. To turn off the
function, press the Engine Start/Stop
button to the ACC or ON position, and
then press the electronic child safety
lock button.
• If the power is supplied again after
removing the battery or battery is
discharged while the electronic child
safety lock button is in the LOCK
position, press the button once more
to match the state of the indicator on
the electronic child safety lock button
and actual status of the electronic
child safety lock function.
• If the airbag is activated while the
electronic child safety lock button
is in the LOCK position (indicator
light ON), the rear doors will unlock
automatically.
• Vehicles equipped with the electronic
child safety lock feature is not
provided with a manual child safety
lock.
WARNING
If children accidentally opens the rear
door while the vehicle is in motion, they
could fall out of the vehicle. Electronic
child safety lock should always be used
whenever children are in the vehicle.
Page 172 of 604
Convenient Features
5-34
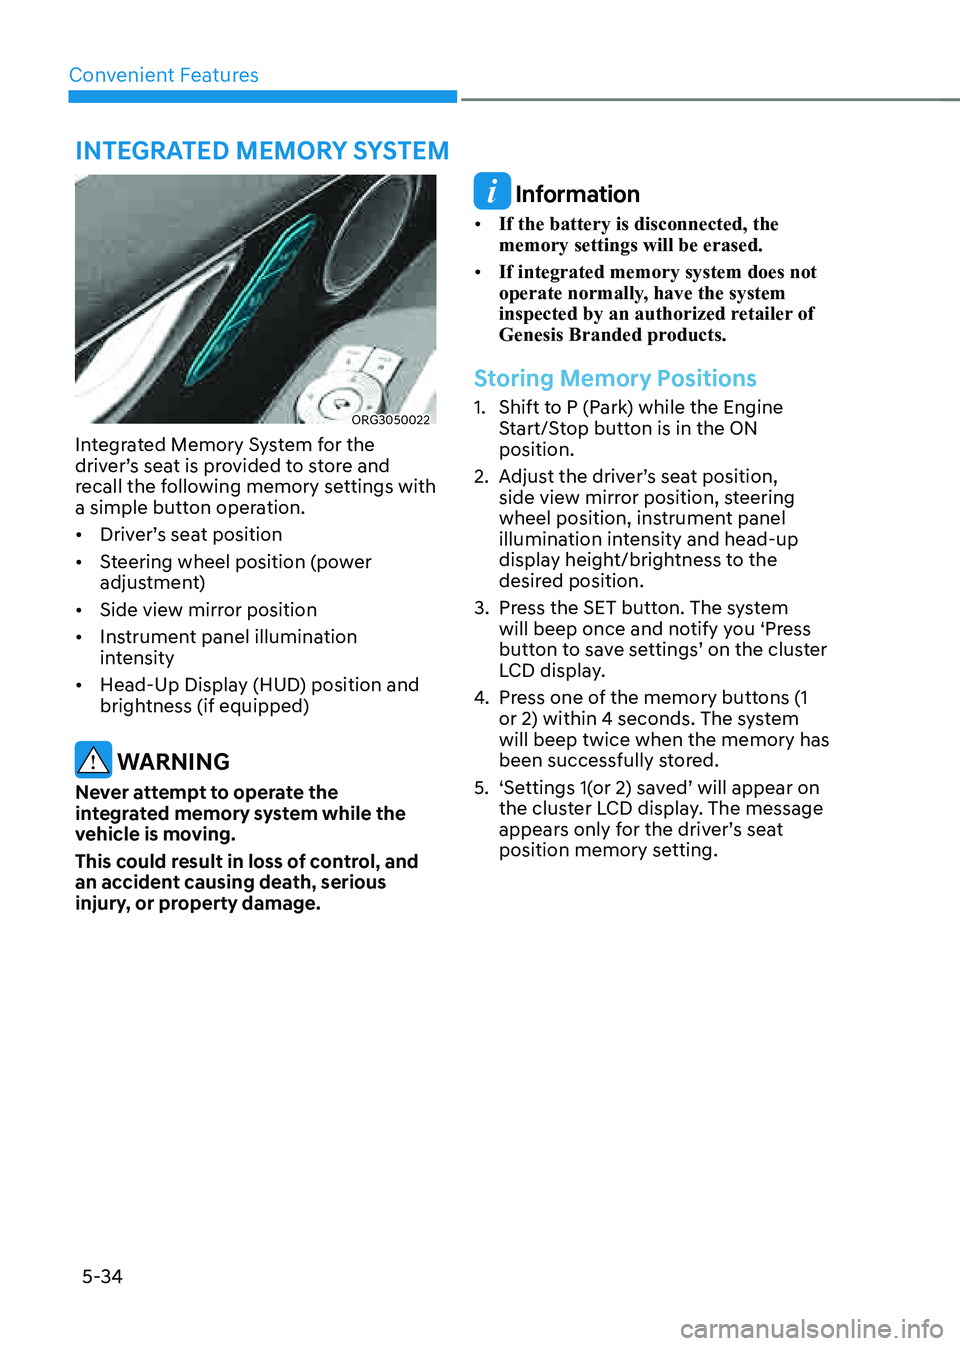
ORG3050022
Integrated Memory System for the
driver’s seat is provided to store and
recall the following memory settings with
a simple button operation.
• Driver’s seat position
• Steering wheel position (power
adjustment)
• Side view mirror position
• Instrument panel illumination
intensity
• Head-Up Display (HUD) position and
brightness (if equipped)
WARNING
Never attempt to operate the
integrated memory system while the
vehicle is moving.
This could result in loss of control, and
an accident causing death, serious
injury, or property damage.
Information
• If the battery is disconnected, the
memory settings will be erased.
• If integrated memory system does not
operate normally, have the system
inspected by an authorized retailer of
Genesis Branded products.
Storing Memory Positions
1. Shift to P (Park) while the Engine
Start/Stop button is in the ON
position.
2. Adjust the driver’s seat position,
side view mirror position, steering
wheel position, instrument panel
illumination intensity and head-up
display height/brightness to the
desired position.
3. Press the SET button. The system
will beep once and notify you ‘Press
button to save settings’ on the cluster
LCD display.
4. Press one of the memory buttons (1
or 2) within 4 seconds. The system
will beep twice when the memory has
been successfully stored.
5. ‘Settings 1(or 2) saved’ will appear on
the cluster LCD display. The message
appears only for the driver’s seat
position memory setting.
INTEGRATED MEMORY SYSTEM
Page 176 of 604

Convenient Features
5-38
Electric Power Steering (EPS)
The system assists you with steering the
vehicle. If the vehicle is turned off or
if the power steering system becomes
inoperative, you may still steer the
vehicle, but it will require increased
steering effort.
Should you notice any change in the
effort required to steer during normal
vehicle operation, we recommend that
you have the system checked by an
authorized retailer of Genesis Branded
products.
CAUTION
If Electric Power Steering does not
operate normally, the warning light and the message ‘Check motor driven
power steering’ will illuminate on the
instrument cluster. You may steer the
vehicle, but it will require increased
steering efforts. We recommend that
you take the vehicle to an authorized
retailer of Genesis Branded products
and have the system checked as soon as
possible.
Information
The following symptoms may occur during
normal vehicle operation:
• The steering effort may be high
immediately after pressing the Engine
Start/Stop button to the ON position.
This happens as the system performs
the EPS system diagnostics. When the
diagnostics are completed, the steering
wheel effort will return to its normal
condition.
• When the battery voltage is low, you
may have to put more steering effort.
However, it is a temporary condition so
that it will return to normal condition
after charging the battery.
• A click noise may be heard from the
EPS relay after the Engine Start/Stop
button is in the ON or OFF position.
• Motor noise may be heard when the
vehicle is at a stop or at a low driving
speed.
• When you operate the steering wheel
in low temperatures, abnormal noise
may occur. If the temperature rises, the
noise will disappear.
This is a normal condition.
• When an error is detected from EPS,
the steering effort assist function will
not be activated in order to prevent
accidents. Instrument cluster warning
lights may be on or the steering effort
may be high. If these symptoms occur,
drive the vehicle to a safe area as soon
as it is safe to do so. Have the system
checked by an authorized retailer of
Genesis Branded products as soon as
possible.
STEERING WHEEL
Page 177 of 604

05
5-39
Tilt/Telescopic Steering
When adjusting the steering wheel to a
comfortable position, adjust the steering
wheel so that it points toward your chest,
not toward your face. Make sure you can
see the instrument cluster warning lights
and gauges. After adjusting, push the
steering wheel both up and down to be
certain it is locked in position.
Always adjust the position of the steering
wheel before driving.
WARNING
NEVER adjust the steering wheel while
driving. This may cause loss of vehicle
control resulting in an accident.
Manual adjustment
ORG3050096L
To adjust the steering wheel angle and
height:
1. Pull down the lock-release lever (1).
2. Adjust the steering wheel to the
desired angle (2) and distance
forward/back (3).
3. Pull up the lock-release lever to lock
the steering wheel in place.
Information
Sometimes the lock release lever may not
engage completely. This may occur when
the gears of the locking mechanism do not
completely mesh. If this occurs, pull down
on the lock-release lever, readjust the
steering wheel again, and then pull back
up on the release lever to lock the steering
wheel in place.
Power adjustment
ORG3050023
To change the steering wheel angle and
height:
• Push the switch (1) up and down to
adjust the angle (2).
• Push the switch forward or rearward
to adjust the height (3).
NOTICE
Do not adjust the steering wheel
longer than necessary when the
engine is turned off. This may result in
unnecessary battery drain.
Page 182 of 604

Convenient Features
5-44
WARNING
Before programming HomeLink® to a
garage door opener or gate operator,
make sure people and objects are out
of the way of the device to prevent
potential harm or damage. Do not
use the HomeLink® with any garage
door opener that lacks the safety
stop and reverse features required
by U.S. federal safety standards (this
includes any garage door opener model
manufactured before April 1, 1982).
A garage door that cannot detect an
object - signaling the door to stop and
reverse - does not meet current U.S.
federal safety standards. Using a garage
door opener without these features
increases the risk of serious injury or
death.
Programming HomeLink
®
Please note the following:
• When programming a garage door
opener, it is advised to park the
vehicle outside of the garage.
• It is recommended that a new battery
be placed in the hand-held transmitter
of the device being programmed to
HomeLink® for quicker training and
accurate transmission of the radio-
frequency signal.
• Some vehicles may require the
Engine Start/Stop button to be in the
ACC (or “Accessories”) position for
programming and/or operation of
HomeLink®.
• In the event that there are still
programming difficulties or questions
after following the programming steps
listed below, contact HomeLink® at:
www.homelink.com, www.youtube.
com/HomeLinkGentex or by calling
1-800-355-3515.Programming
To program most devices, follow these
instructions:
ORG3050209N
1. Press and release (1), (2) or (3) button.
• If the indicator (4) is turned ON in
Orange, go to Step 3) since it is a new
programming.
• If the indicator (4) is continuously
turned ON or flashes in Green rapidly
several times, go to Step 2) since it is a
programmed button.
2. Press and hold the button you wish
to program for approximately 15-
25 seconds until the LED flashes in
Orange for several times.
3. 3.Hold the Garage Door Opener
Original Transmitter near the
HomeLink Mirror.
Page 189 of 604
05
5-51
NOTICE
The electric type side view mirror
operates even though the Engine Start/
Stop button is in the OFF position.
However, to prevent unnecessary
battery discharge, do not adjust the
mirrors longer than necessary while the
engine is not running.
NOTICE
Do not fold the electric type side view
mirror by hand. It could cause motor
failure.
Reverse Parking Aid (if equipped)
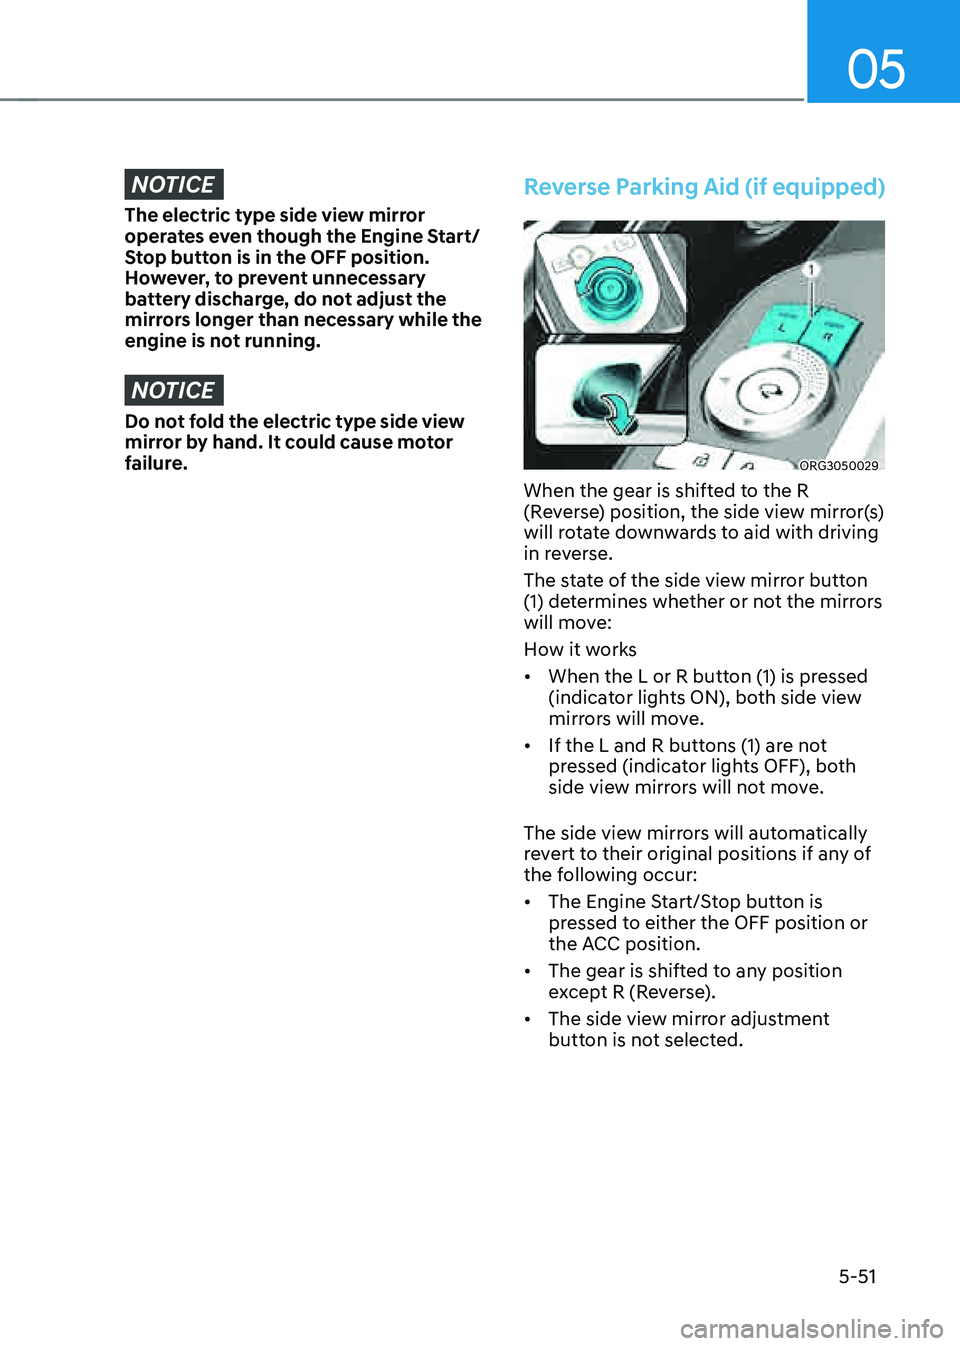
ORG3050029
When the gear is shifted to the R
(Reverse) position, the side view mirror(s)
will rotate downwards to aid with driving
in reverse.
The state of the side view mirror button
(1) determines whether or not the mirrors
will move:
How it works
• When the L or R button (1) is pressed
(indicator lights ON), both side view
mirrors will move.
• If the L and R buttons (1) are not
pressed (indicator lights OFF), both
side view mirrors will not move.
The side view mirrors will automatically
revert to their original positions if any of
the following occur:
• The Engine Start/Stop button is
pressed to either the OFF position or
the ACC position.
• The gear is shifted to any position
except R (Reverse).
• The side view mirror adjustment
button is not selected.
Page 198 of 604
Convenient Features
5-60
Automatic reverse
ODH043039
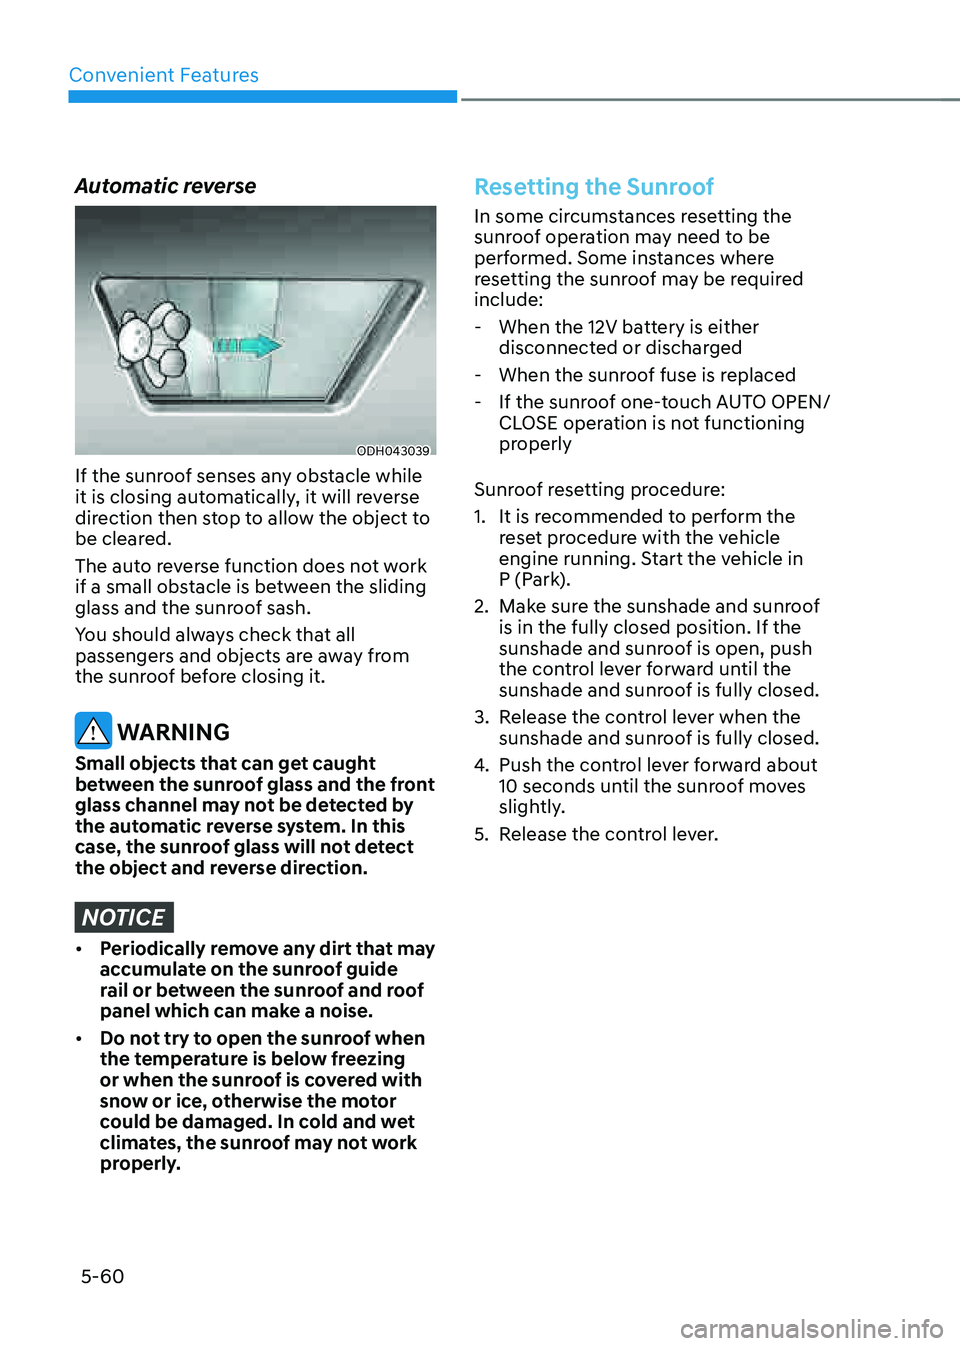
If the sunroof senses any obstacle while
it is closing automatically, it will reverse
direction then stop to allow the object to
be cleared.
The auto reverse function does not work
if a small obstacle is between the sliding
glass and the sunroof sash.
You should always check that all
passengers and objects are away from
the sunroof before closing it.
WARNING
Small objects that can get caught
between the sunroof glass and the front
glass channel may not be detected by
the automatic reverse system. In this
case, the sunroof glass will not detect
the object and reverse direction.
NOTICE
• Periodically remove any dirt that may
accumulate on the sunroof guide
rail or between the sunroof and roof
panel which can make a noise.
• Do not try to open the sunroof when
the temperature is below freezing
or when the sunroof is covered with
snow or ice, otherwise the motor
could be damaged. In cold and wet
climates, the sunroof may not work
properly.
Resetting the Sunroof
In some circumstances resetting the
sunroof operation may need to be
performed. Some instances where
resetting the sunroof may be required
include:
-When the 12V battery is either
disconnected or discharged
-When the sunroof fuse is replaced
-If the sunroof one-touch AUTO OPEN/
CLOSE operation is not functioning
properly
Sunroof resetting procedure:
1. It is recommended to perform the
reset procedure with the vehicle
engine running. Start the vehicle in
P (Park).
2. Make sure the sunshade and sunroof
is in the fully closed position. If the
sunshade and sunroof is open, push
the control lever forward until the
sunshade and sunroof is fully closed.
3. Release the control lever when the
sunshade and sunroof is fully closed.
4. Push the control lever forward about
10 seconds until the sunroof moves
slightly.
5. Release the control lever.