turn signal GENESIS G90 2017 Owner's Manual
[x] Cancel search | Manufacturer: GENESIS, Model Year: 2017, Model line: G90, Model: GENESIS G90 2017Pages: 524, PDF Size: 19.3 MB
Page 19 of 524
1-6
Your vehicle at a glance
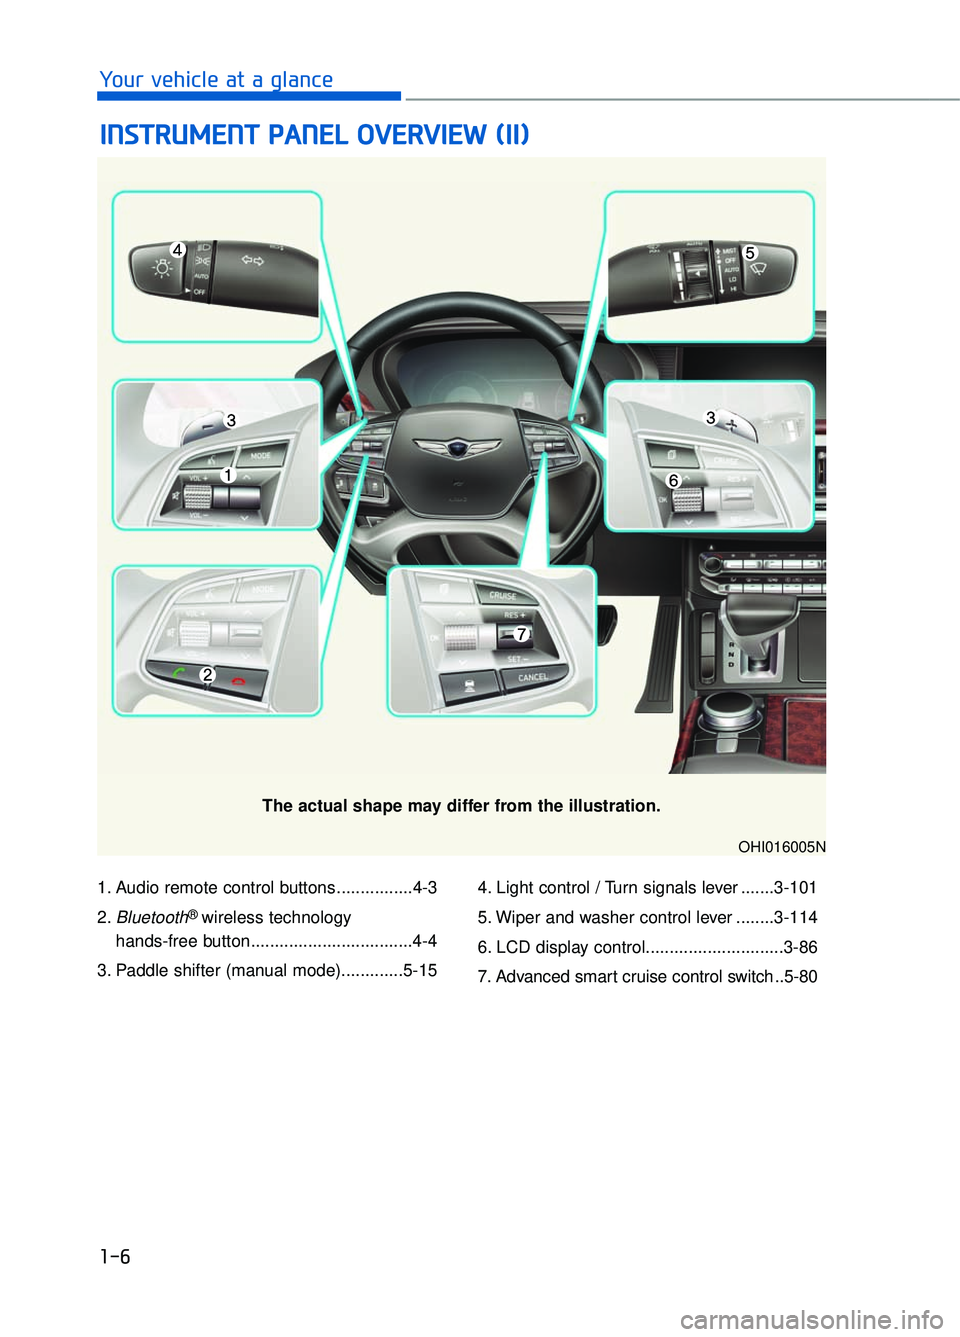
1. Audio remote control buttons ................4-3
2.
Bluetooth® wireless technology
hands-free button..................................4-4
3. Paddle shifter (manual mode).............5-15 4. Light control / Turn signals lever .......3-101
5. Wiper and washer control lever ........3-114
6. LCD display control.............................3-86
7. Advanced smart cruise control switch ..5-80
I I
N
N S
ST
T R
R U
U M
M E
EN
N T
T
P
P A
A N
N E
EL
L
O
O V
VE
ER
R V
V I
IE
E W
W
(
( I
II
I)
)
The actual shape may differ from the illustration.
OHI016005N
Page 89 of 524
2-69
02
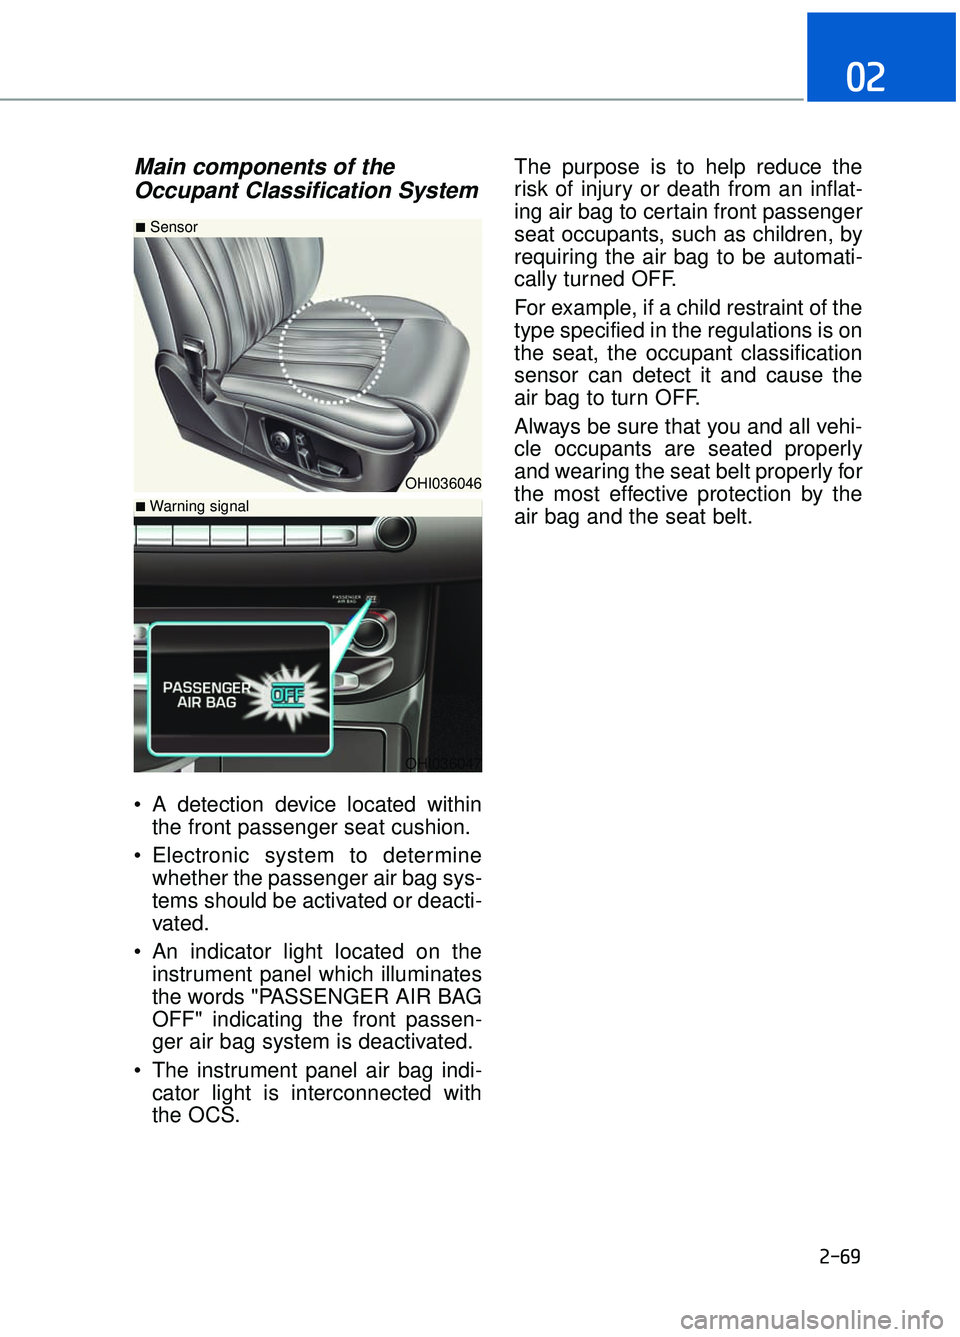
Main components of theOccupant Classification System
A detection device located within
the front passenger seat cushion.
Electronic system to determine whether the passenger air bag sys-
tems should be activated or deacti-
vated.
An indicator light located on the instrument panel which illuminates
the words "PASSENGER AIR BAG
OFF" indicating the front passen-
ger air bag system is deactivated.
The instrument panel air bag indi- cator light is interconnected with
the OCS. The purpose is to help reduce the
risk of injury or death from an inflat-
ing air bag to certain front passenger
seat occupants, such as children, by
requiring the air bag to be automati-
cally turned OFF.
For example, if a child restraint of the
type specified in the regulations is on
the seat, the occupant classification
sensor can detect it and cause the
air bag to turn OFF.
Always be sure that you and all vehi-
cle occupants are seated properly
and wearing the seat belt properly for
the most effective protection by the
air bag and the seat belt.
OHI036046
■Sensor
OHI036047
■Warning signal
Page 126 of 524
3-24
Convenient features of your vehicle
Programming HomeLink®
Please note the following:
When programming a garage dooropener, it is advised to park the
vehicle outside of the garage.
It is recommended that a new bat- tery be placed in the hand-held
transmitter of the device being pro-
grammed to HomeLink
®for quicker
training and accurate transmission
of the radio-frequency signal.
Some vehicles may require the ignition switch to be placed in the
ACC (or "Accessories") position for
programming and/or operation of
HomeLink
®.
In the event that there are still pro- gramming difficulties or questions
after following the programming
steps listed below, contact
HomeLink
®at: www.homelink.com,
www.youtube.com/HomeLinkGentex
or by calling 1-800-355-3515.
Programming
To train most devices, follow these
instructions:
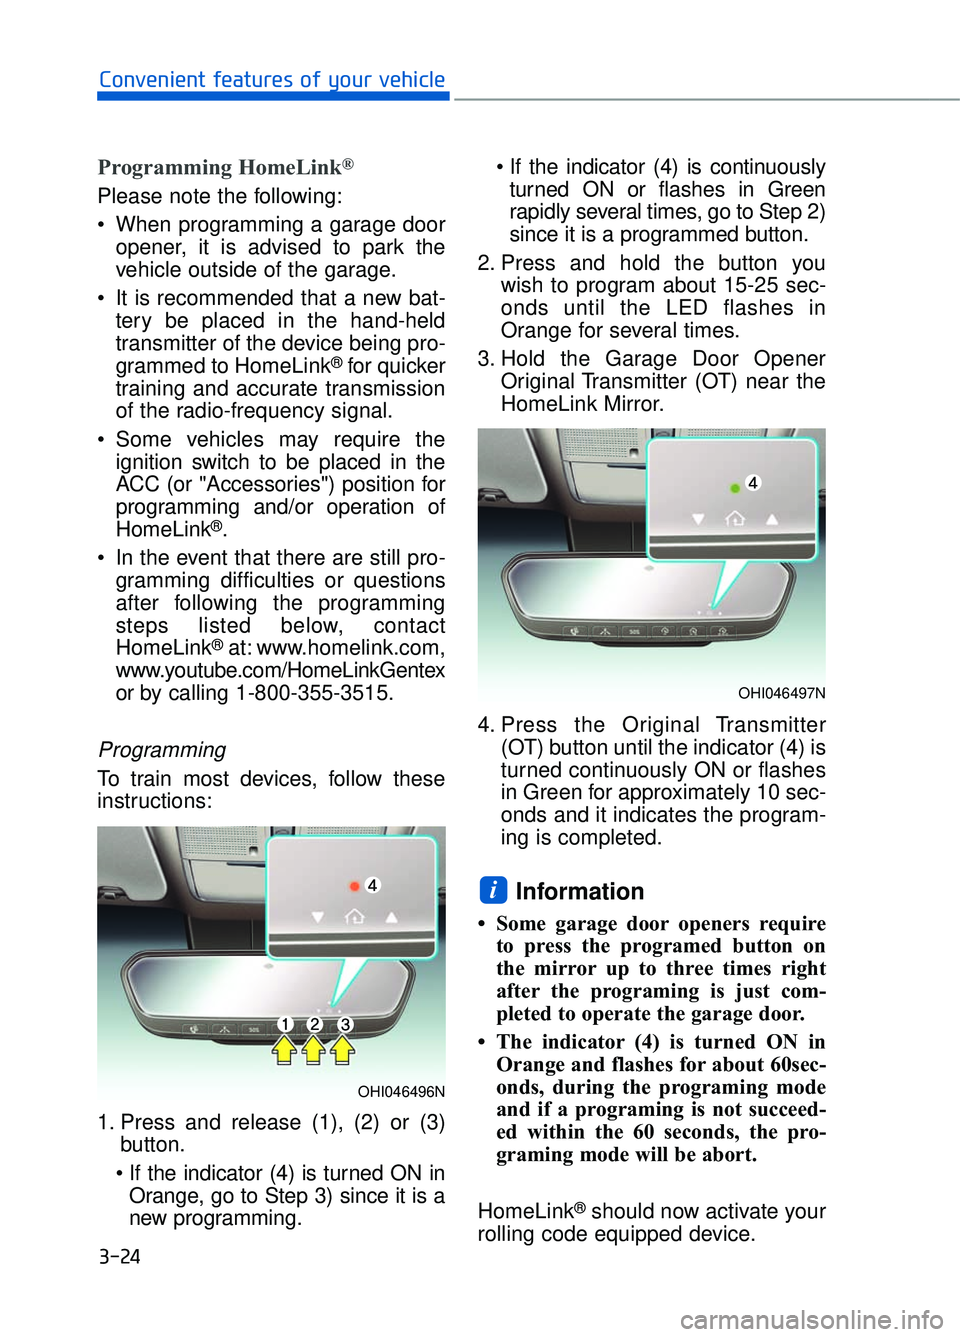
1. Press and release (1), (2) or (3) button.
Orange, go to Step 3) since it is a
new programming.
turned ON or flashes in Green
rapidly several times, go to Step 2)
since it is a programmed button.
2. Press and hold the button you wish to program about 15-25 sec-
onds until the LED flashes in
Orange for several times.
3. Hold the Garage Door Opener Original Transmitter (OT) near the
HomeLink Mirror.
4. Press the Original Transmitter (OT) button until the indicator (4) is
turned continuously ON or flashes
in Green for approximately 10 sec-
onds and it indicates the program-
ing is completed.
Information
• Some garage door openers requireto press the programed button on
the mirror up to three times right
after the programing is just com-
pleted to operate the garage door.
• The indicator (4) is turned ON in Orange and flashes for about 60sec-
onds, during the programing mode
and if a programing is not succeed-
ed within the 60 seconds, the pro-
graming mode will be abort.
HomeLink
®should now activate your
rolling code equipped device.
i
OHI046496N
OHI046497N
Page 127 of 524
3-25
03
Gate operator & Canadian program-ming
During programming, your handheld
transmitter may automatically stop
transmitting. Continue to press the
Integrated HomeLink
®Wireless
Control System button while you
press and re-press ("cycle") your
handheld transmitter every two sec-
onds until the frequency signal has
been learned. The indicator light will
flash slowly and then rapidly after
several seconds upon successful
training.
Operating HomeLink®
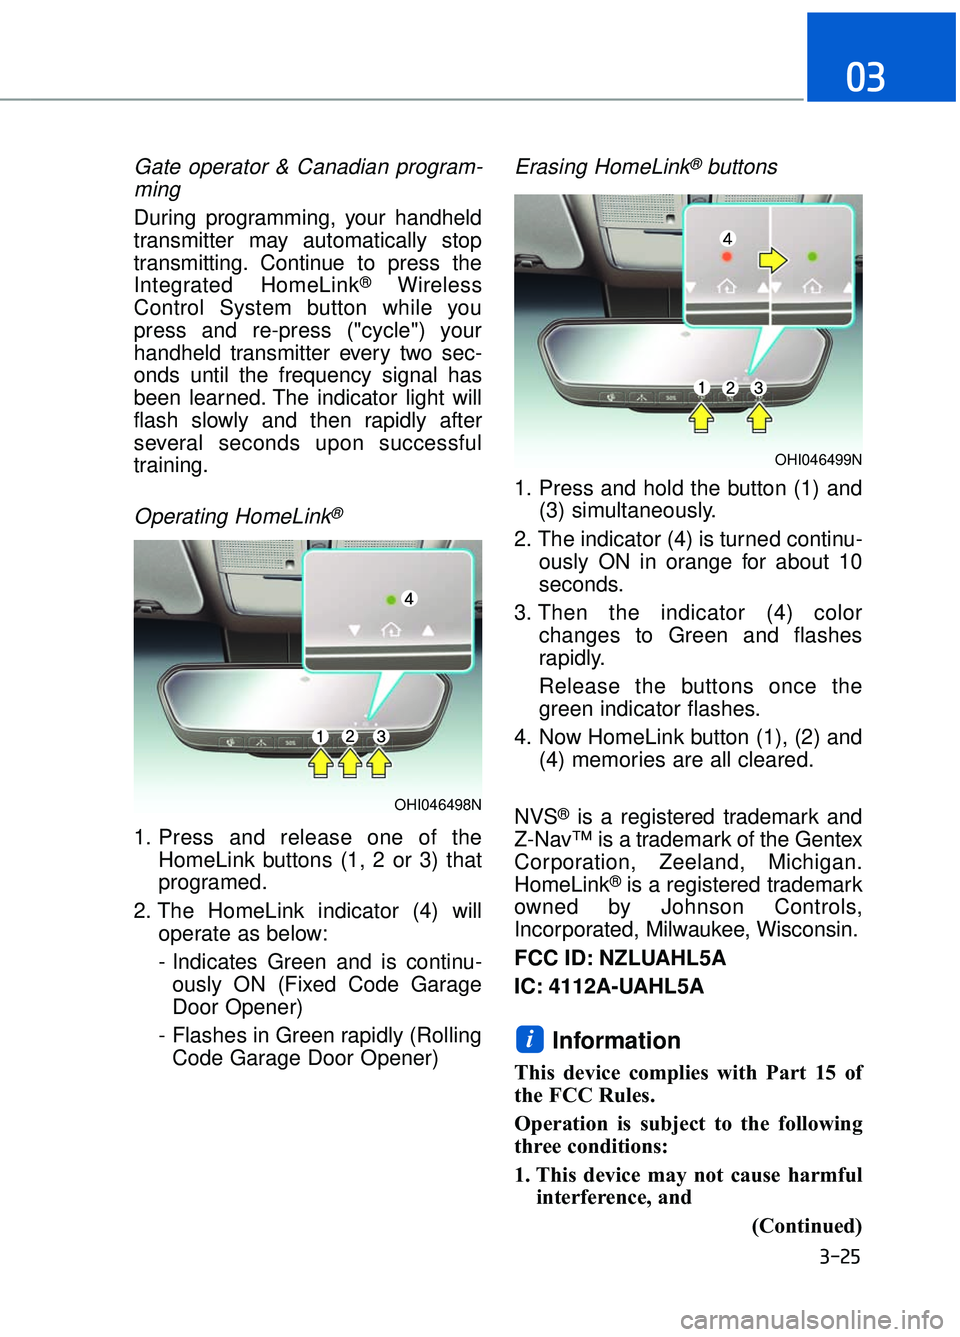
1. Press and release one of the HomeLink buttons (1, 2 or 3) that
programed.
2. The HomeLink indicator (4) will operate as below:
- Indicates Green and is continu- ously ON (Fixed Code Garage
Door Opener)
- Flashes in Green rapidly (Rolling Code Garage Door Opener)
Erasing HomeLink®buttons
1. Press and hold the button (1) and (3) simultaneously.
2. The indicator (4) is turned continu- ously ON in orange for about 10
seconds.
3. Then the indicator (4) color changes to Green and flashes
rapidly.
Release the buttons once the
green indicator flashes.
4. Now HomeLink button (1), (2) and (4) memories are all cleared.
NVS
®is a registered trademark and
Z-Nav™ is a trademark of the Gentex
Corporation, Zeeland, Michigan.
HomeLink
®is a registered trademark
owned by Johnson Controls,
Incorporated, Milwaukee, Wisconsin.
FCC ID: NZLUAHL5A
IC: 4112A-UAHL5A
Information
This device complies with Part 15 of
the FCC Rules.
Operation is subject to the following
three conditions:
1. This device may not cause harmful interference, and
(Continued)
i
OHI046498N
OHI046499N
Page 134 of 524
4. Press the Original Transmitter (OT)button until the indicator (4) is
turned continuously ON or flashes
in Green for approximately 10 sec-
onds and it indicates the program-
ing is completed.
Information
• Some garage door openers requireto press the programed button on
the mirror up to three times right
after the programing is just com-
pleted to operate the garage door.
• The indicator (4) is turned ON in Orange and flashes for about 60sec
during the programing mode and if
a programing is not succeeded with-
in the 60 seconds, the programing
mode will be abort.
Programming HomeLink®
Please note the following:
When programming a garage dooropener, it is advised to park the
vehicle outside of the garage.
It is recommended that a new bat- tery be placed in the hand-held
transmitter of the device being pro-
grammed to HomeLink
®for quicker
training and accurate transmission
of the radio-frequency signal.
Some vehicles may require the ignition switch to be placed in the
ACC (or "Accessories") position for
programming and/or operation of
HomeLink
®.
In the event that there are still pro- gramming difficulties or questions
after following the programming
steps listed below, contact
HomeLink
®at: www.homelink.com,
www.youtube.com/HomeLinkGentex
or by calling 1-800-355-3515.
i
3-32
Convenient features of your vehicle
Before programming HomeLink
®
to a garage door opener or gate
operator, make sure people and
objects are out of the way of the
device to prevent potential harm
or damage. Do not use the
HomeLink
®with any garage door
opener that lacks the safety stop
and reverse features required by
U.S. federal safety standards (this
includes any garage door opener
model manufactured before April
1, 1982). A garage door that can-
not detect an object - signaling
the door to stop and reverse -
does not meet current U.S. feder-
al safety standards. Using a
garage door opener without
these features increases the risk
of serious injury or death.
WARNING
Page 136 of 524
Gate operator & Canadian program-ming
During programming, your handheld
transmitter may automatically stop
transmitting. Continue to press the
Integrated HomeLink
®Wireless
Control System button while you
press and re-press ("cycle") your
handheld transmitter every two sec-
onds until the frequency signal has
been learned. The indicator light
changes from orange to green upon
successful training.
Operating HomeLink®
To operate, simply press and release
the programmed HomeLink®button.
Activation will now occur for the trained
device (i.e. garage door opener, gate
operator, security system, entry door
lock, home/office lighting, etc.).
For convenience, the hand-held trans-
mitter of the device may also be used
at any time.
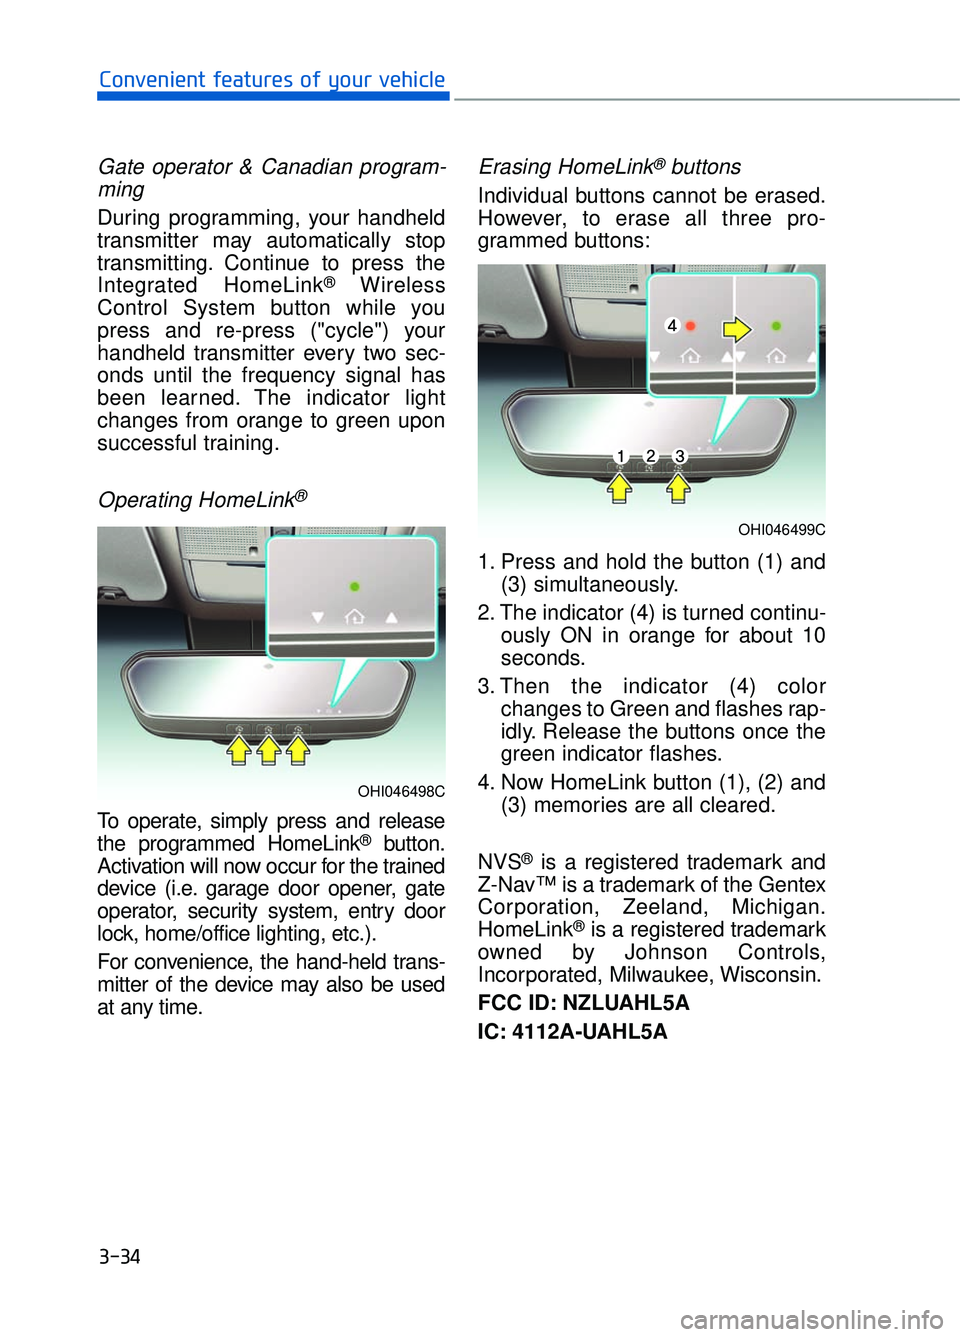
Erasing HomeLink®buttons
Individual buttons cannot be erased.
However, to erase all three pro-
grammed buttons:
1. Press and hold the button (1) and (3) simultaneously.
2. The indicator (4) is turned continu- ously ON in orange for about 10
seconds.
3. Then the indicator (4) color changes to Green and flashes rap-
idly. Release the buttons once the
green indicator flashes.
4. Now HomeLink button (1), (2) and (3) memories are all cleared.
NVS
®is a registered trademark and
Z-Nav™ is a trademark of the Gentex
Corporation, Zeeland, Michigan.
HomeLink
®is a registered trademark
owned by Johnson Controls,
Incorporated, Milwaukee, Wisconsin.
FCC ID: NZLUAHL5A
IC: 4112A-UAHL5A
3-34
Convenient features of your vehicle
OHI046498C
OHI046499C
Page 174 of 524
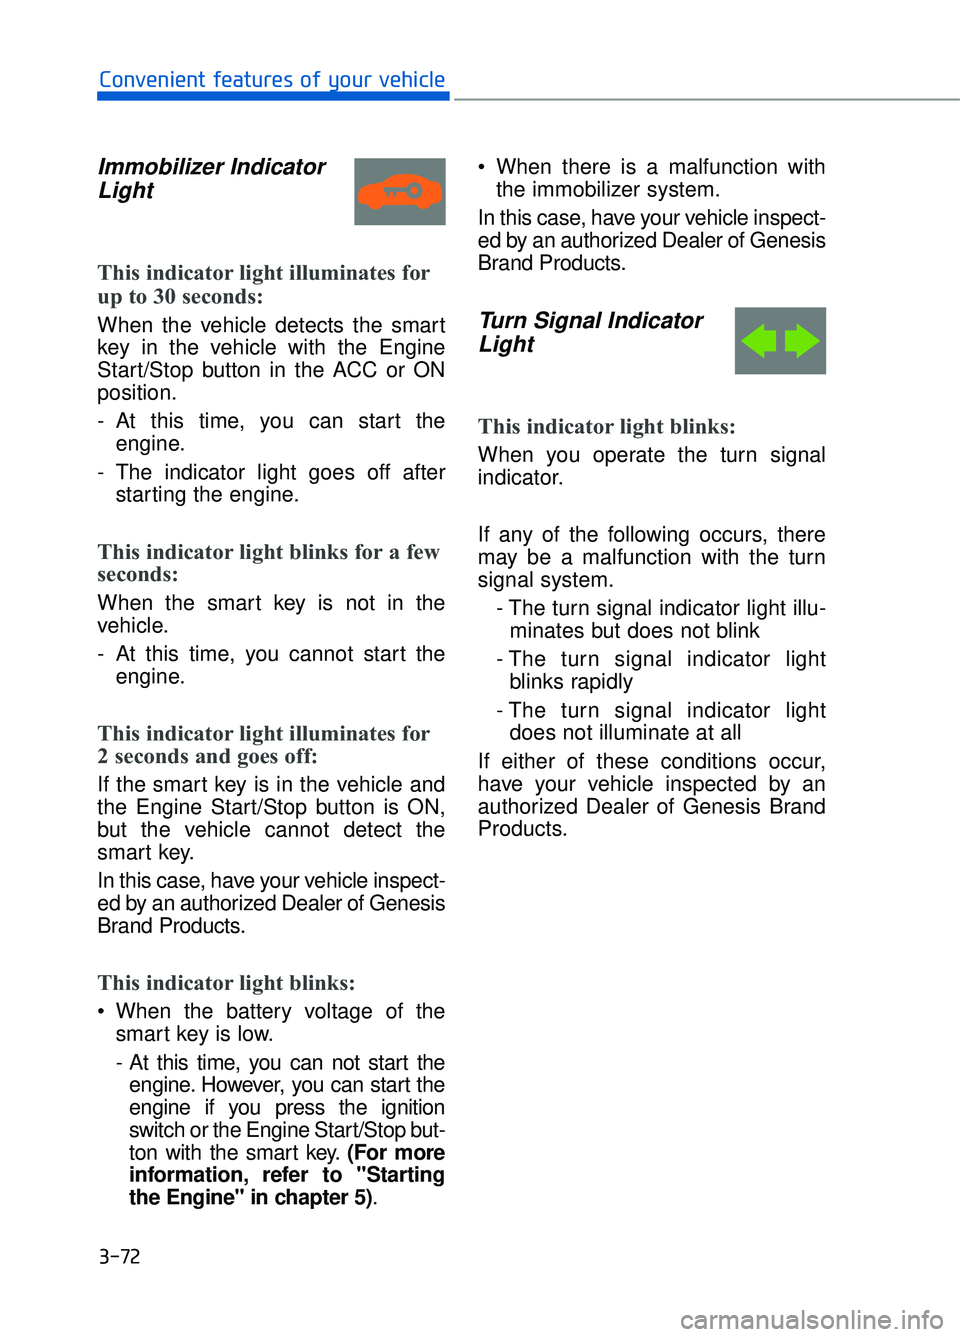
Immobilizer IndicatorLight
This indicator light illuminates for
up to 30 seconds:
When the vehicle detects the smart
key in the vehicle with the Engine
Start/Stop button in the ACC or ON
position.
- At this time, you can start the
engine.
- The indicator light goes off after starting the engine.
This indicator light blinks for a few
seconds:
When the smart key is not in the
vehicle.
- At this time, you cannot start theengine.
This indicator light illuminates for
2 seconds and goes off:
If the smart key is in the vehicle and
the Engine Start/Stop button is ON,
but the vehicle cannot detect the
smart key.
In this case, have your vehicle inspect-
ed by an authorized Dealer of Genesis
Brand Products.
This indicator light blinks:
When the battery voltage of thesmart key is low.
- At this time, you can not start theengine. However, you can start the
engine if you press the ignition
switch or the Engine Start/Stop but-
ton with the smart key. (For more
information, refer to "Starting
the Engine" in chapter 5). When there is a malfunction with
the immobilizer system.
In this case, have your vehicle inspect-
ed by an authorized Dealer of Genesis
Brand Products.
Turn Signal Indicator Light
This indicator light blinks:
When you operate the turn signal
indicator.
If any of the following occurs, there
may be a malfunction with the turn
signal system.
- The turn signal indicator light illu-minates but does not blink
- The turn signal indicator light blinks rapidly
- The turn signal indicator light does not illuminate at all
If either of these conditions occur,
have your vehicle inspected by an
authorized Dealer of Genesis Brand
Products.
3-72
Convenient features of your vehicle
Page 175 of 524
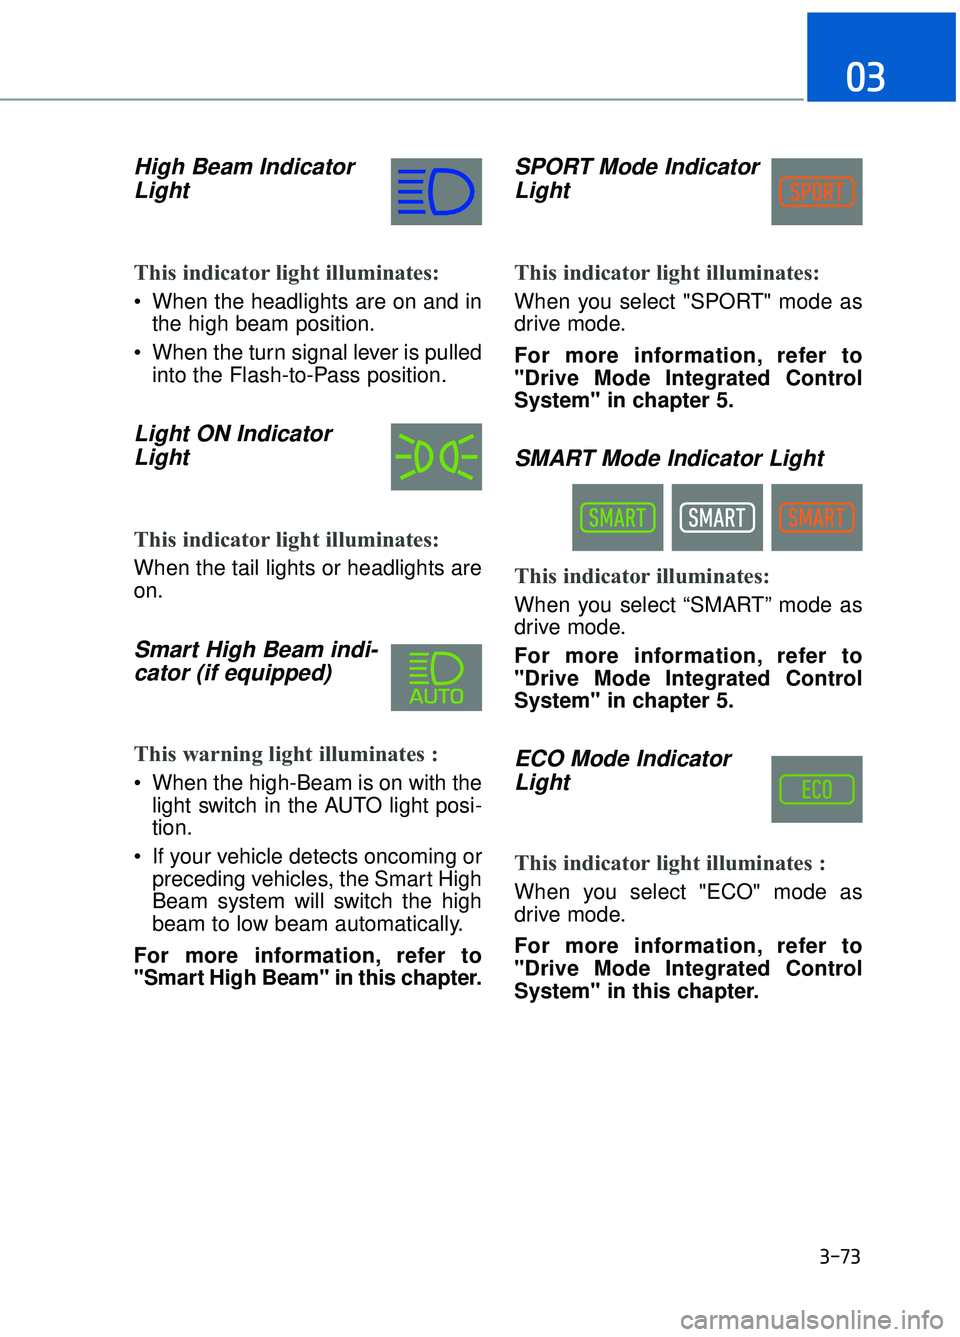
High Beam IndicatorLight
This indicator light illuminates:
When the headlights are on and in
the high beam position.
When the turn signal lever is pulled into the Flash-to-Pass position.
Light ON IndicatorLight
This indicator light illuminates:
When the tail lights or headlights are
on.
Smart High Beam indi-cator (if equipped)
This warning light illuminates :
When the high-Beam is on with the
light switch in the AUTO light posi-
tion.
If your vehicle detects oncoming or preceding vehicles, the Smart High
Beam system will switch the high
beam to low beam automatically.
For more information, refer to
"Smart High Beam" in this chapter.
SPORT Mode Indicator Light
This indicator light illuminates:
When you select "SPORT" mode as
drive mode.
For more information, refer to
"Drive Mode Integrated Control
System" in chapter 5.
SMART Mode Indicator Light
This indicator illuminates:
When you select “SMART” mode as
drive mode.
For more information, refer to
"Drive Mode Integrated Control
System" in chapter 5.
ECO Mode IndicatorLight
This indicator light illuminates :
When you select "ECO" mode as
drive mode.
For more information, refer to
"Drive Mode Integrated Control
System" in this chapter.
3-73
03
Page 182 of 524
3-80
Convenient features of your vehicle
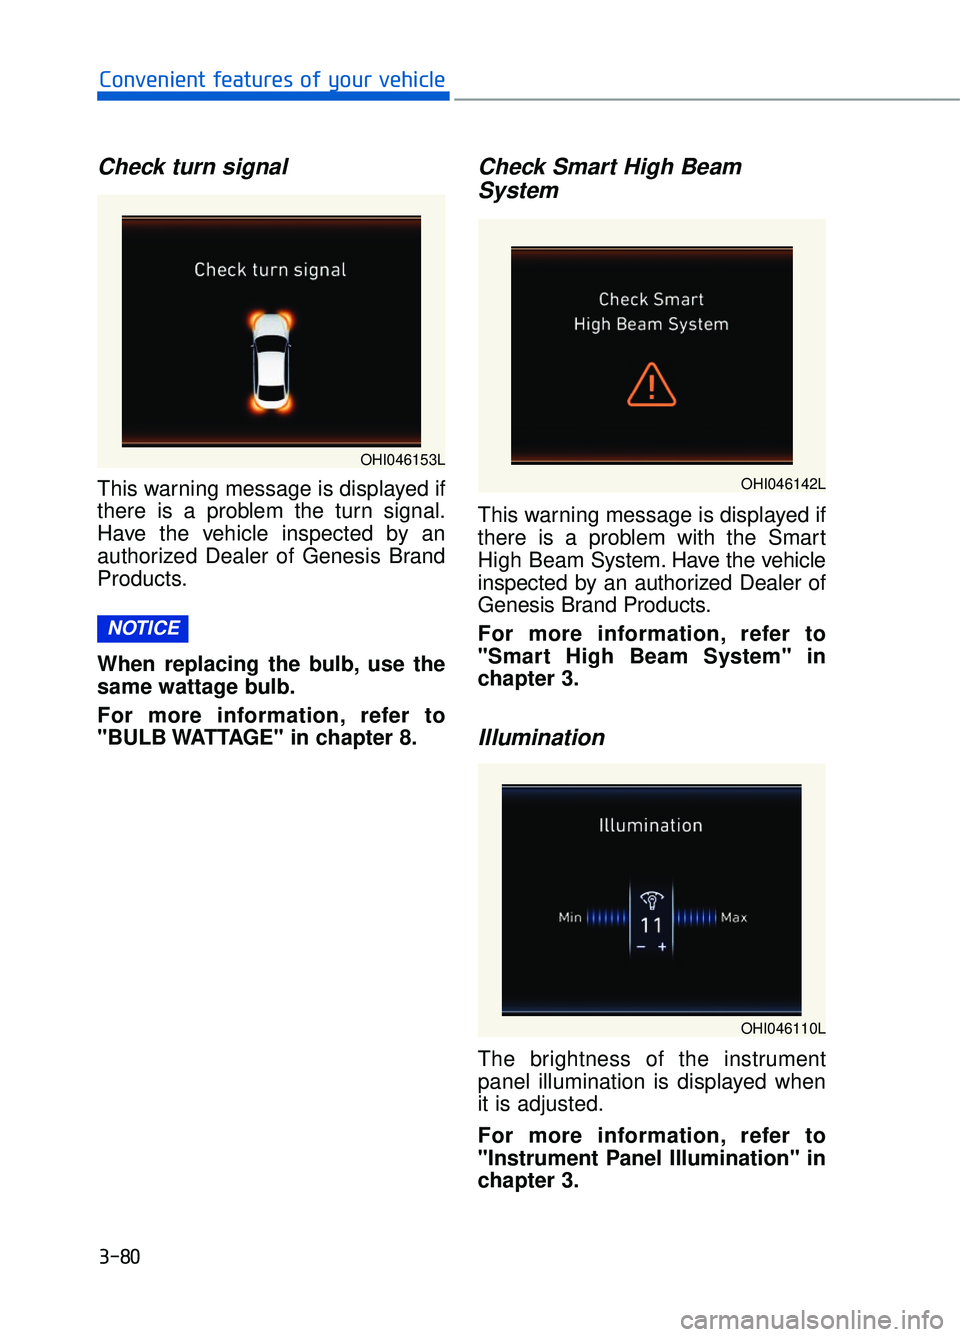
Check turn signal
This warning message is displayed if
there is a problem the turn signal.
Have the vehicle inspected by an
authorized Dealer of Genesis Brand
Products.
When replacing the bulb, use the
same wattage bulb.
For more information, refer to
"BULB WATTAGE" in chapter 8.
Check Smart High BeamSystem
This warning message is displayed if
there is a problem with the Smart
High Beam System. Have the vehicle
inspected by an authorized Dealer of
Genesis Brand Products.
For more information, refer to
"Smart High Beam System" in
chapter 3.
Illumination
The brightness of the instrument
panel illumination is displayed when
it is adjusted.
For more information, refer to
"Instrument Panel Illumination" in
chapter 3.
NOTICE
OHI046153L
OHI046142L
OHI046110L
Page 194 of 524
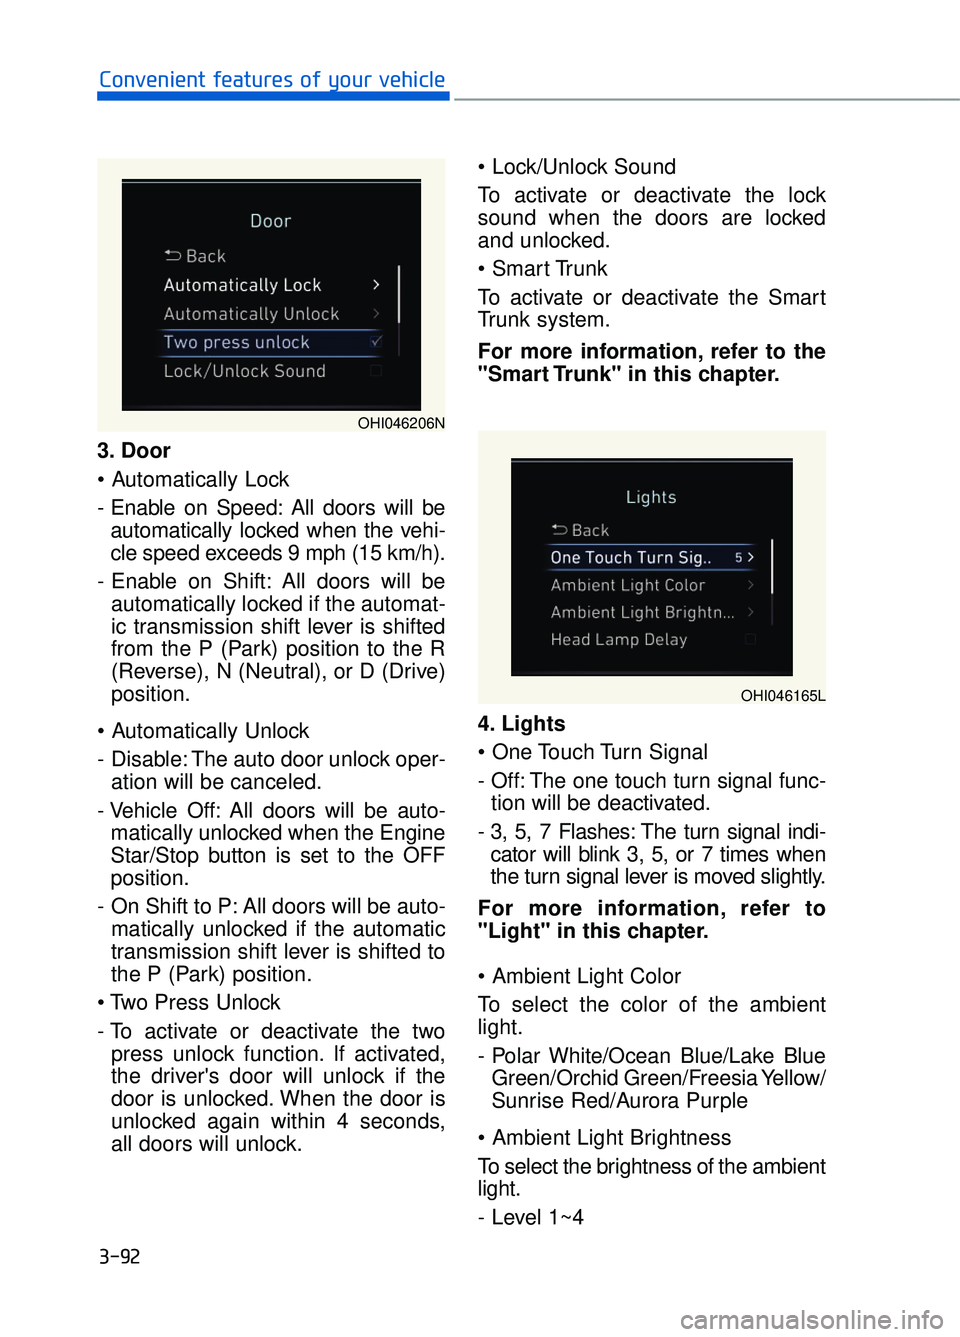
3. Door
- Enable on Speed: All doors will beautomatically locked when the vehi-
cle speed exceeds 9 mph (15 km/h).
- Enable on Shift: All doors will be automatically locked if the automat-
ic transmission shift lever is shifted
from the P (Park) position to the R
(Reverse), N (Neutral), or D (Drive)
position.
- Disable: The auto door unlock oper- ation will be canceled.
- Vehicle Off: All doors will be auto- matically unlocked when the Engine
Star/Stop button is set to the OFF
position.
- On Shift to P: All doors will be auto- matically unlocked if the automatic
transmission shift lever is shifted to
the P (Park) position.
- To activate or deactivate the two press unlock function. If activated,
the driver's door will unlock if the
door is unlocked. When the door is
unlocked again within 4 seconds,
all doors will unlock.
To activate or deactivate the lock
sound when the doors are locked
and unlocked.
To activate or deactivate the Smart
Trunk system.
For more information, refer to the
"Smart Trunk" in this chapter.
4. Lights
- Off: The one touch turn signal func-
tion will be deactivated.
- 3, 5, 7 Flashes: The turn signal indi- cator will blink 3, 5, or 7 times when
the turn signal lever is moved slightly.
For more information, refer to
"Light" in this chapter.
To select the color of the ambient
light.
- Polar White/Ocean Blue/Lake Blue Green/Orchid Green/Freesia Yellow/
Sunrise Red/Aurora Purple
To select the brightness of the ambient
light.
- Level 1~4
3-92
Convenient features of your vehicle
OHI046206N
OHI046165L