service GMC JIMMY 2005 User Guide
[x] Cancel search | Manufacturer: GMC, Model Year: 2005, Model line: JIMMY, Model: GMC JIMMY 2005Pages: 432, PDF Size: 2.65 MB
Page 96 of 432

Shifting from 2HI or 4HI to 4LO
To shift from 2HI or 4HI to 4LO, the vehicle must be
stopped or moving less than 3 mph (4.8 km/h) with the
transmission in NEUTRAL (N) in vehicles equipped
with an automatic transmission or the clutch pedal
engaged in vehicles equipped with a manual
transmission. The preferred method for shifting into 4LO
is to have your vehicle moving 1 to 2 mph (1.6 to
3.2 km/h). Press and release the 4LO button. You must
wait for the 4LO indicator light to stop �ashing and
remain illuminated before shifting your transmission into
gear or releasing the clutch pedal.
If the 4LO button is pressed when your vehicle is in
gear and/or moving, the 4LO indicator light will �ash for
30 seconds and not complete the shift unless your
vehicle is moving slower than 3 mph (4.8 km/h) and the
transmission is in NEUTRAL (N) or the clutch pedal
engaged.
On automatic transmission equipped vehicles, if your
transfer case does not shift into 4LO, your transmission
indicator switch may require adjustment. With your
transmission in NEUTRAL (N), press and release the
4LO button. While the 4LO indicator light is �ashing, shift
your transmission into PARK (P). Wait until the 4LO
indicator light remains illuminated before shifting
your transmission into gear. This will get you into 4LO,
but you should take your vehicle in for service to
restore normal operation.
Shifting from 4LO to 4HI or 2HI
To shift from 4LO to 4HI or 2HI, your vehicle must be
stopped or moving less than 3 mph (4.8 km/h) with
the transmission in NEUTRAL (N) or the clutch pedal
engaged. The preferred method for shifting out of 4LO is
to have your vehicle moving 1 to 2 mph (1.6 to
3.2 km/h). Press and release the 4HI button. You must
wait for the 4HI indicator light to stop �ashing and
remain illuminated before shifting your transmission into
gear or releasing the clutch pedal.
If the 4HI button is pressed when your vehicle is in gear
and/or moving, the 4HI indicator light will �ash for
30 seconds but not complete the shift unless the vehicle
is moving slower than 3 mph (4.8 km/h) and the
transmission is in NEUTRAL (N) or the clutch pedal
engaged.
On automatic transmission equipped vehicles, if your
transfer case does not shift into 4HI, your transmission
indicator switch may require adjustment. With your
transmission in NEUTRAL (N), press and release the
4HI button. While the 4HI indicator light is �ashing, shift
your transmission into PARK (P). Wait until the 4HI
indicator light remains illuminated before shifting your
transmission into gear. This will get you into 4HI, but you
should take your vehicle in for service to restore
normal operation.
2-32
Page 98 of 432

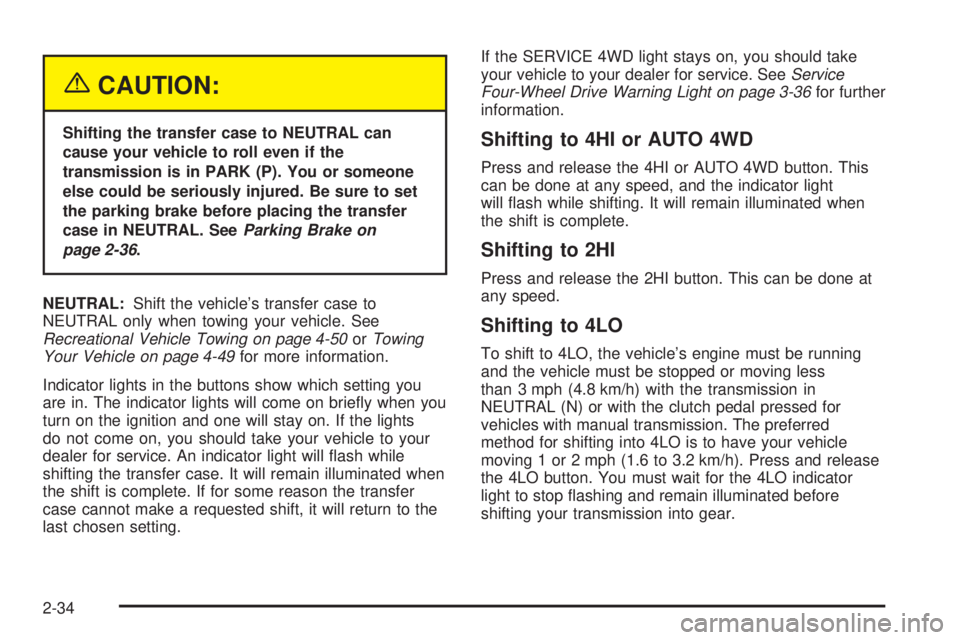
{CAUTION:
Shifting the transfer case to NEUTRAL can
cause your vehicle to roll even if the
transmission is in PARK (P). You or someone
else could be seriously injured. Be sure to set
the parking brake before placing the transfer
case in NEUTRAL. SeeParking Brake on
page 2-36.
NEUTRAL:Shift the vehicle’s transfer case to
NEUTRAL only when towing your vehicle. See
Recreational Vehicle Towing on page 4-50orTowing
Your Vehicle on page 4-49for more information.
Indicator lights in the buttons show which setting you
are in. The indicator lights will come on brie�y when you
turn on the ignition and one will stay on. If the lights
do not come on, you should take your vehicle to your
dealer for service. An indicator light will �ash while
shifting the transfer case. It will remain illuminated when
the shift is complete. If for some reason the transfer
case cannot make a requested shift, it will return to the
last chosen setting.If the SERVICE 4WD light stays on, you should take
your vehicle to your dealer for service. SeeService
Four-Wheel Drive Warning Light on page 3-36for further
information.Shifting to 4HI or AUTO 4WD
Press and release the 4HI or AUTO 4WD button. This
can be done at any speed, and the indicator light
will �ash while shifting. It will remain illuminated when
the shift is complete.
Shifting to 2HI
Press and release the 2HI button. This can be done at
any speed.
Shifting to 4LO
To shift to 4LO, the vehicle’s engine must be running
and the vehicle must be stopped or moving less
than 3 mph (4.8 km/h) with the transmission in
NEUTRAL (N) or with the clutch pedal pressed for
vehicles with manual transmission. The preferred
method for shifting into 4LO is to have your vehicle
moving 1 or 2 mph (1.6 to 3.2 km/h). Press and release
the 4LO button. You must wait for the 4LO indicator
light to stop �ashing and remain illuminated before
shifting your transmission into gear.
2-34
Page 110 of 432

This device complies with RSS-210 of Industry Canada.
Operation is subject to the following two conditions:
(1) this device may not cause interference, and (2) this
device must accept any interference, including
interference that may cause undesired operation of the
device.
Changes and modi�cations to this system by other than
an authorized service facility could void authorization
to use this equipment.
Programming the HomeLink®
Transmitter
Do not use the HomeLink®Transmitter with any garage
door opener that does not have the “stop and reverse”
feature. This includes any garage door opener model
manufactured before April 1, 1982. If you have a newer
garage door opener with rolling codes, please be
sure to follow Steps 6 through 8 to complete the
programming of your HomeLink
®Transmitter.
Read the instructions completely before attempting to
program the HomeLink
®Transmitter. Because of
the steps involved, it may be helpful to have another
person available to assist you in programming the
transmitter.
Keep the original transmitter for use in other vehicles as
well as for future HomeLink
®programming. It is also
recommended that upon the sale of the vehicle,the programmed HomeLink
®buttons should be erased
for security purposes. Refer to “Erasing HomeLink®
Buttons” or, for assistance, contact HomeLink®on the
internet at: www.homelink.com or by calling
1-800-355-3515.
Be sure that people and objects are clear of the garage
door or gate operator you are programming. When
programming a garage door, it is advised to park outside
of the garage.
It is recommended that a new battery be installed in
your hand-held transmitter for quicker and more
accurate transmission of the radio frequency.
Programming HomeLink®
Your vehicle’s engine should be turned off while
programming the transmitter. Follow these steps to
program up to three channels:
1. Press and hold down the two outside buttons,
releasing only when the indicator light begins to
�ash, after 20 seconds. Do not hold down the
buttons for longer than 30 seconds and do not
repeat this step to program a second and/or third
transmitter to the remaining two HomeLink
®buttons.
2. Position the end of your hand-held transmitter about
1 to 3 inches (3 to 8 cm) away from the HomeLink
®
buttons while keeping the indicator light in view.
2-46
Page 125 of 432

Instrument Panel Overview...............................3-4
Hazard Warning Flashers................................3-6
Other Warning Devices...................................3-6
Horn.............................................................3-6
Tilt Wheel.....................................................3-6
Turn Signal/Multifunction Lever.........................3-7
Turn and Lane-Change Signals........................3-8
Headlamp High/Low-Beam Changer..................3-9
Flash-to-Pass.................................................3-9
Windshield Wipers..........................................3-9
Cruise Control..............................................3-11
Exterior Lamps.............................................3-14
Headlamps on Reminder................................3-15
Daytime Running Lamps (DRL).......................3-15
Automatic Headlamp System..........................3-16
Fog Lamps..................................................3-17
Instrument Panel Brightness...........................3-18
Dome Lamps...............................................3-18
Entry Lighting...............................................3-18
Exit Lighting.................................................3-18
Front Reading Lamps....................................3-19
Map Lamps.................................................3-19
Battery Run-Down Protection..........................3-19
Ashtrays and Cigarette Lighter........................3-19Climate Controls............................................3-20
Climate Control System.................................3-20
Outlet Adjustment.........................................3-22
Warning Lights, Gages, and Indicators............3-23
Instrument Panel Cluster................................3-24
Speedometer and Odometer...........................3-26
Trip Odometer..............................................3-26
Tachometer.................................................3-26
Safety Belt Reminder Light.............................3-26
Airbag Readiness Light..................................3-27
Charging System Light..................................3-28
Voltmeter Gage............................................3-28
Up-Shift Light...............................................3-29
Brake System Warning Light..........................3-29
Anti-Lock Brake System Warning Light.............3-30
Engine Coolant Temperature Gage..................3-31
Malfunction Indicator Lamp.............................3-31
Oil Pressure Gage........................................3-34
Security Light...............................................3-35
Highbeam On Light.......................................3-35
Service Four-Wheel Drive Warning Light..........3-36
Tow/Haul Mode Light....................................3-36
Check Gages Warning Light...........................3-37
Gate Ajar Light.............................................3-37
Fuel Gage...................................................3-38
Low Fuel Warning Light.................................3-38
Section 3 Instrument Panel
3-1
Page 151 of 432

Airbag Readiness Light
There is an airbag readiness light on the instrument
panel, which shows the airbag symbol. The system
checks the airbag’s electrical system for malfunctions.
The light tells you if there is an electrical problem.
The system check includes the airbag sensors, the
airbag modules, the wiring and the crash sensing and
diagnostic module. SeeAirbag System on page 1-50for
more information.
This light will come on
when you start your
vehicle, and it will �ash for
a few seconds. Then the
light should go out. This
means the system is ready.
If the airbag readiness light stays on after you start the
vehicle or comes on when you are driving, your
airbag system may not work properly. Have your vehicle
serviced right away.{CAUTION:
If the airbag readiness light stays on after you
start your vehicle, it means the airbag system
may not be working properly. The airbags in
your vehicle may not in�ate in a crash, or they
could even in�ate without a crash. To help avoid
injury to yourself or others, have your vehicle
serviced right away if the airbag readiness light
stays on after you start your vehicle.
The airbag readiness light should �ash for a few
seconds when you turn the ignition key to RUN. If the
light doesn’t come on then, have it �xed so it will
be ready to warn you if there is a problem.
3-27
Page 153 of 432

at engine idle. As engine speeds are increased, this
condition should correct itself as higher engine speeds
allow the charging system to create maximum power.
You can only drive for a short time with the reading
in either warning zone. If you must drive, turn off
all unnecessary accessories. Readings in either warning
zone indicate a possible problem in the electrical
system. Have the vehicle serviced as soon as possible.
Up-Shift Light
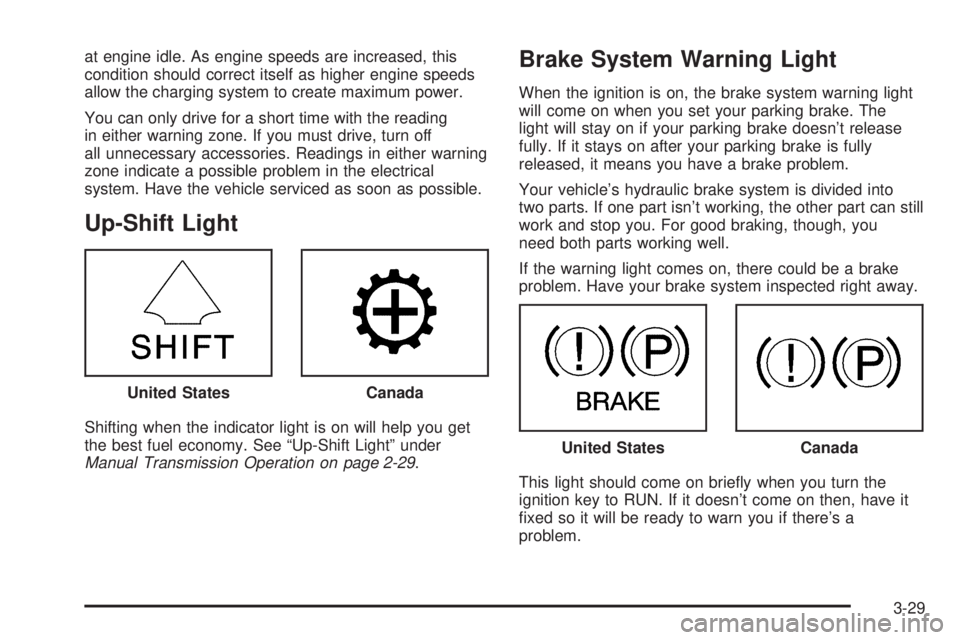
Shifting when the indicator light is on will help you get
the best fuel economy. See “Up-Shift Light” under
Manual Transmission Operation on page 2-29.
Brake System Warning Light
When the ignition is on, the brake system warning light
will come on when you set your parking brake. The
light will stay on if your parking brake doesn’t release
fully. If it stays on after your parking brake is fully
released, it means you have a brake problem.
Your vehicle’s hydraulic brake system is divided into
two parts. If one part isn’t working, the other part can still
work and stop you. For good braking, though, you
need both parts working well.
If the warning light comes on, there could be a brake
problem. Have your brake system inspected right away.
This light should come on brie�y when you turn the
ignition key to RUN. If it doesn’t come on then, have it
�xed so it will be ready to warn you if there’s a
problem. United States
Canada
United StatesCanada
3-29
Page 154 of 432

If the light comes on while you are driving, pull off the
road and stop carefully. You may notice that the pedal is
harder to push. Or, the pedal may go closer to the
�oor. It may take longer to stop. If the light is still on,
have the vehicle towed for service. SeeTowing
Your Vehicle on page 4-49.
{CAUTION:
Your brake system may not be working
properly if the brake system warning light is
on. Driving with the brake system warning light
on can lead to an accident. If the light is still
on after you have pulled off the road and
stopped carefully, have the vehicle towed for
service.
Anti-Lock Brake System
Warning Light
With the anti-lock brake
system, this light will
come on when you start
your engine and may
stay on for several
seconds. That’s normal.
If the light stays on, or comes on when you’re driving,
your vehicle needs service. If the regular brake
system warning light isn’t on, you still have brakes, but
you don’t have anti-lock brakes. If the regular brake
system warning light is also on, you don’t have anti-lock
brakes and there’s a problem with your regular
brakes. SeeBrake System Warning Light on page 3-29.
The anti-lock brake system warning light should come
on brie�y when you turn the ignition key to RUN. If
the light doesn’t come on then, have it �xed so it will be
ready to warn you if there is a problem.
3-30
Page 155 of 432

Engine Coolant Temperature Gage
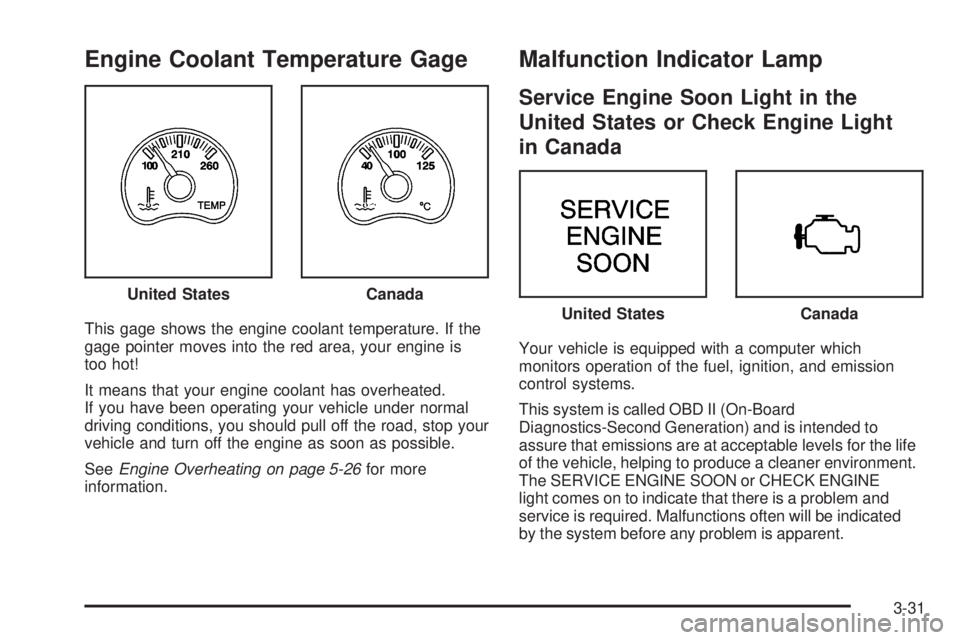
This gage shows the engine coolant temperature. If the
gage pointer moves into the red area, your engine is
too hot!
It means that your engine coolant has overheated.
If you have been operating your vehicle under normal
driving conditions, you should pull off the road, stop your
vehicle and turn off the engine as soon as possible.
SeeEngine Overheating on page 5-26for more
information.
Malfunction Indicator Lamp
Service Engine Soon Light in the
United States or Check Engine Light
in Canada
Your vehicle is equipped with a computer which
monitors operation of the fuel, ignition, and emission
control systems.
This system is called OBD II (On-Board
Diagnostics-Second Generation) and is intended to
assure that emissions are at acceptable levels for the life
of the vehicle, helping to produce a cleaner environment.
The SERVICE ENGINE SOON or CHECK ENGINE
light comes on to indicate that there is a problem and
service is required. Malfunctions often will be indicated
by the system before any problem is apparent. United States
Canada
United StatesCanada
3-31
Page 156 of 432

This may prevent more serious damage to your vehicle.
This system is also designed to assist your service
technician in correctly diagnosing any malfunction.
Notice:If you keep driving your vehicle with this
light on, after awhile, your emission controls
may not work as well, your fuel economy may not
be as good, and your engine may not run as
smoothly. This could lead to costly repairs that may
not be covered by your warranty.
Notice:Modi�cations made to the engine,
transmission, exhaust, intake, or fuel system of
your vehicle or the replacement of the original tires
with other than those of the same Tire Performance
Criteria (TPC) can affect your vehicle’s emission
controls and may cause this light to come on.
Modi�cations to these systems could lead to costly
repairs not covered by your warranty. This may
also result in a failure to pass a required Emission
Inspection/Maintenance test.
This light should come on, as a check to show you it is
working, when the ignition is on and the engine is
not running. If the light does not come on, have it
repaired. This light will also come on during a
malfunction in one of two ways:
Light Flashing— A mis�re condition has been
detected. A mis�re increases vehicle emissions and
may damage the emission control system on your
vehicle. Diagnosis and service may be required.
Light On Steady— An emission control system
malfunction has been detected on your vehicle.
Diagnosis and service may be required.
If the Light Is Flashing
The following may prevent more serious damage to
your vehicle:
Reducing vehicle speed
Avoiding hard accelerations
Avoiding steep uphill grades
If you are towing a trailer, reduce the amount of
cargo being hauled as soon as it is possible
If the light stops �ashing and remains on steady, see “If
the Light Is On Steady” following.
If the light continues to �ash, when it is safe to do so,
stop the vehicle. Find a safe place to park your vehicle.
Turn the key off, wait at least 10 seconds and restart
the engine. If the light remains on steady, see “If
the Light Is On Steady” following. If the light is still
�ashing, follow the previous steps, and see your dealer
for service as soon as possible.
3-32
Page 157 of 432

If the Light Is On Steady
You may be able to correct the emission system
malfunction by considering the following:
Did you recently put fuel into your vehicle?
If so, reinstall the fuel cap, making sure to fully install
the cap. SeeFilling Your Tank on page 5-8. The
diagnostic system can determine if the fuel cap has
been left off or improperly installed. A loose or missing
fuel cap will allow fuel to evaporate into the atmosphere.
A few driving trips with the cap properly installed
should turn the light off.
Did you just drive through a deep puddle of water?
If so, your electrical system may be wet. The condition
will usually be corrected when the electrical system
dries out. A few driving trips should turn the light off.
Have you recently changed brands of fuel?
If so, be sure to fuel your vehicle with quality fuel. See
Gasoline Octane on page 5-5. Poor fuel quality will
cause your engine not to run as efficiently as designed.
You may notice this as stalling after start-up, stalling
when you put the vehicle into gear, mis�ring, hesitation
on acceleration, or stumbling on acceleration. (These
conditions may go away once the engine is warmed up.)
This will be detected by the system and cause the
light to turn on.If you experience one or more of these conditions,
change the fuel brand you use. It will require at least
one full tank of the proper fuel to turn the light off.
If none of the above steps have made the light turn off,
your dealer can check the vehicle. Your dealer has
the proper test equipment and diagnostic tools to �x any
mechanical or electrical problems that may have
developed.
Emissions Inspection and Maintenance
Programs
Some state/provincial and local governments have or
may begin programs to inspect the emission control
equipment on your vehicle. Failure to pass this
inspection could prevent you from getting a vehicle
registration.
Here are some things you need to know to help your
vehicle pass an inspection:
Your vehicle will not pass this inspection if the SERVICE
ENGINE SOON or CHECK ENGINE light is on or not
working properly.
3-33