warning GMC SIERRA 2016 Get To Know Guide
[x] Cancel search | Manufacturer: GMC, Model Year: 2016, Model line: SIERRA, Model: GMC SIERRA 2016Pages: 20, PDF Size: 3.12 MB
Page 3 of 20

3
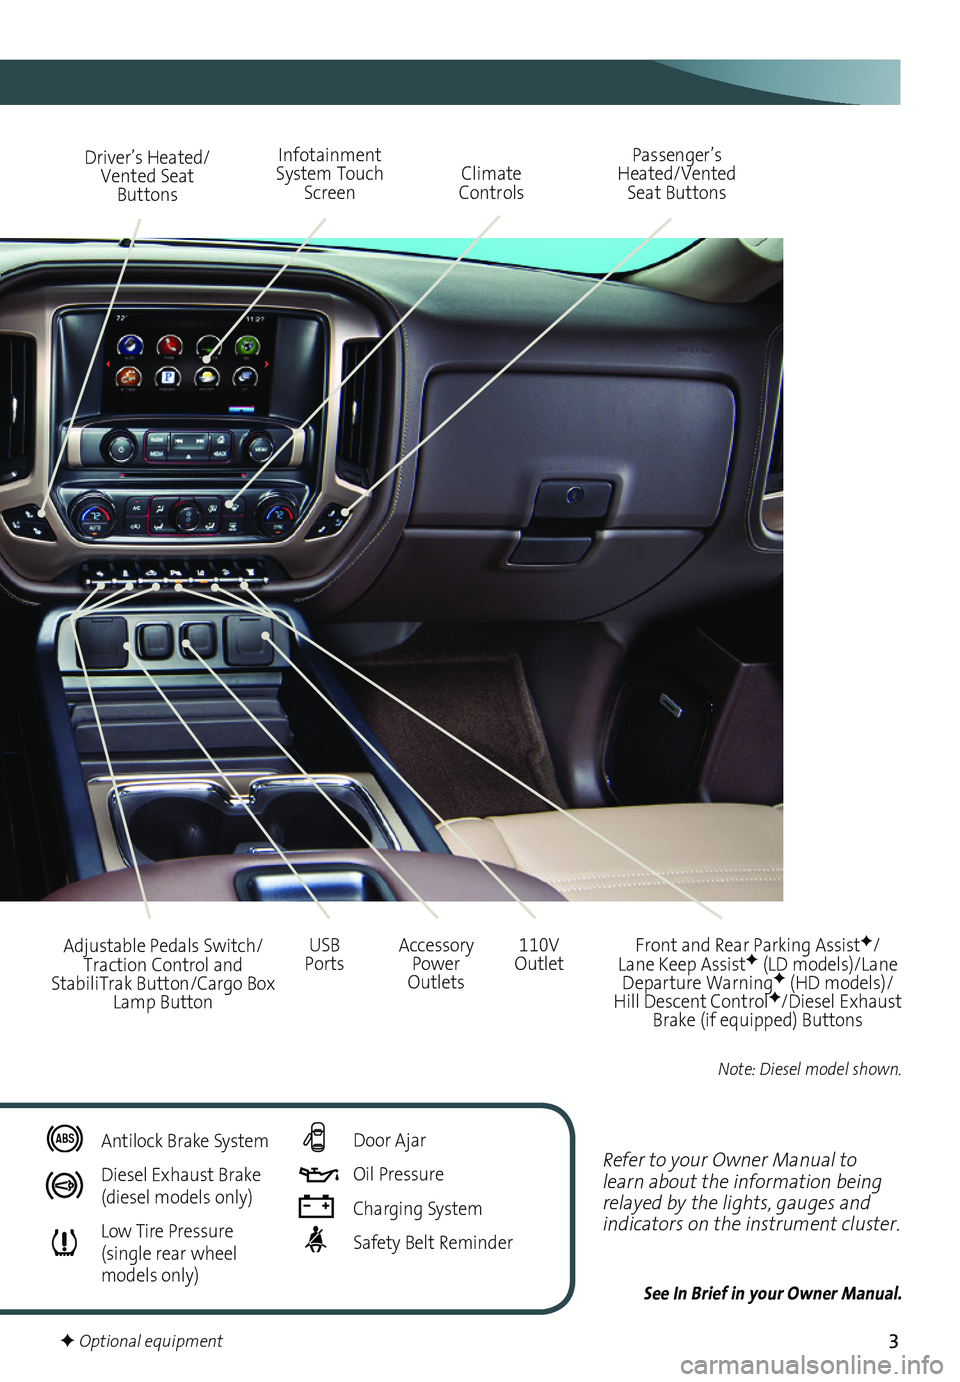
Refer to your Owner Manual to learn about the information being relayed by the lights, gauges and indicators on the instrument cluster.
See In Brief in your Owner Manual.
Driver’s Heated/Vented Seat Buttons
Infotainment System Touch Screen
Passenger’s Heated/Vented Seat ButtonsClimate Controls
Accessory Power Outlets
Adjustable Pedals Switch/Traction Control and StabiliTrak Button/Cargo Box Lamp Button
110V OutletUSB Ports
Antilock Brake System
Diesel Exhaust Brake (diesel models only)
Low Tire Pressure (single rear wheel models only)
Door Ajar
Oil Pressure
Charging System
Safety Belt Reminder
F Optional equipment
Front and Rear Parking AssistF/Lane Keep AssistF (LD models)/Lane Departure WarningF (HD models)/Hill Descent ControlF/Diesel Exhaust Brake (if equipped) Buttons
Note: Diesel model shown.
Page 7 of 20

7
Customizable Driver Display
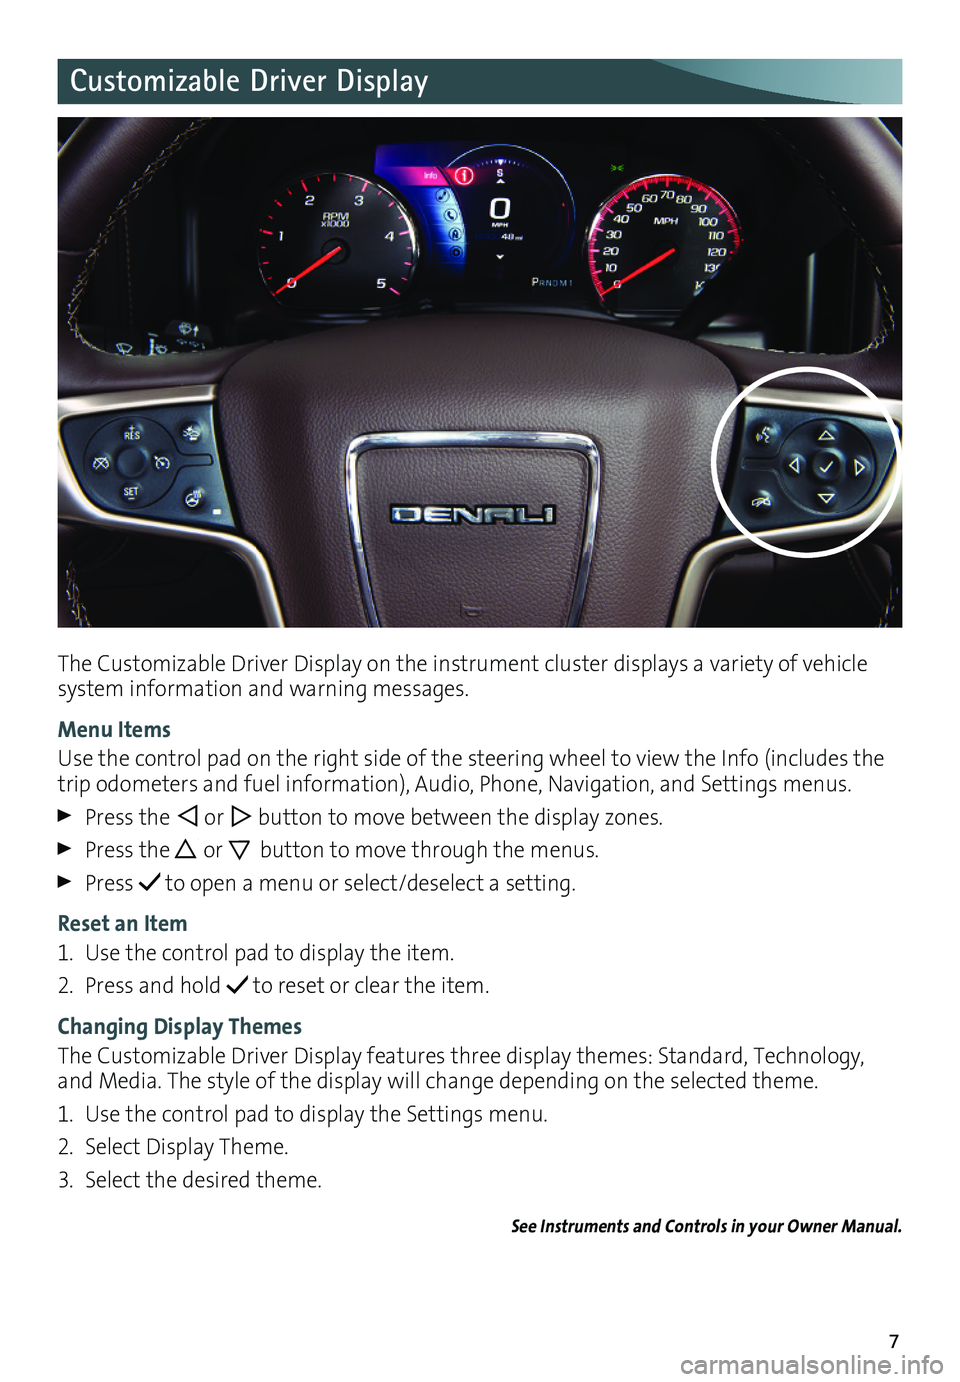
The Customizable Driver Display on the instrument cluster displays a variety of vehicle system information and warning messages.
Menu Items
Use the control pad on the right side of the steering wheel to view the Info (includes the trip odometers and fuel information), Audio, Phone, Navigation, and Settings menus.
Press the or button to move between the display zones.
Press the or button to move through the menus.
Press to open a menu or select/deselect a setting.
Reset an Item
1. Use the control pad to display the item.
2. Press and hold to reset or clear the item.
Changing Display Themes
The Customizable Driver Display features three display themes: Standard, Technology, and Media. The style of the display will change depending on the selected theme.
1. Use the control pad to display the Settings menu.
2. Select Display Theme.
3. Select the desired theme.
See Instruments and Controls in your Owner Manual.
Page 16 of 20

16
Driver Assistance Systems
The driver assistance systems use advanced technologies to help avoid collisions by
providing visual and audible alerts under some imminent collision conditions.
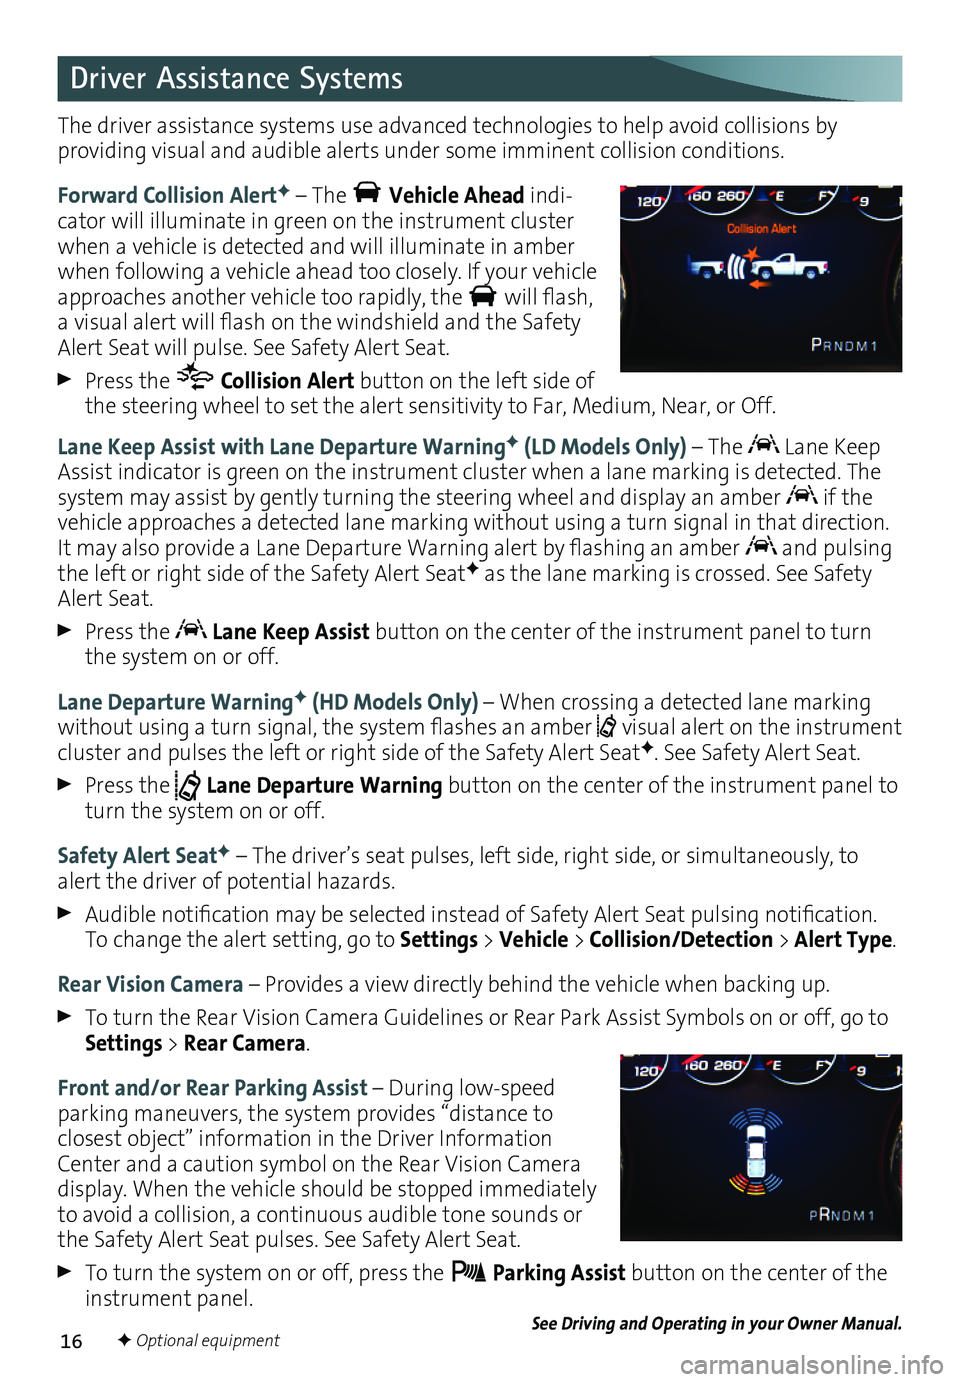
Forward Collision AlertF – The Vehicle Ahead indi-cator will illuminate in green on the instrument cluster when a vehicle is detected and will illuminate in amber when following a vehicle ahead too closely. If your vehicle approaches another vehicle too rapidly, the will flash, a visual alert will flash on the windshield and the Safety Alert Seat will pulse. See Safety Alert Seat.
Press the Collision Alert button on the left side of the steering wheel to set the alert sensitivity to Far, Medium, Near, or Off.
Lane Keep Assist with Lane Departure WarningF (LD Models Only) – The Lane Keep Assist indicator is green on the instrument cluster when a lane marking is detected. The system may assist by gently turning the steering wheel and display an amber if the vehicle approaches a detected lane marking without using a turn signal in that direction. It may also provide a Lane Departure Warning alert by flashing an amber and pulsing the left or right side of the Safety Alert SeatF as the lane marking is crossed. See Safety Alert Seat.
Press the Lane Keep Assist button on the center of the instrument panel to turn the system on or off.
Lane Departure WarningF (HD Models Only) – When crossing a detected lane marking without using a turn signal, the system flashes an amber visual alert on the instrument cluster and pulses the left or right side of the Safety Alert SeatF. See Safety Alert Seat.
Press the Lane Departure Warning button on the center of the instrument panel to turn the system on or off.
Safety Alert SeatF – The driver’s seat pulses, left side, right side, or simultaneously, to alert the driver of potential hazards.
Audible notification may be selected instead of Safety Alert Seat pulsing notification. To change the alert setting, go to Settings > Vehicle > Collision/Detection > Alert Type.
Rear Vision Camera – Provides a view directly behind the vehicle when backing up.
To turn the Rear Vision Camera Guidelines or Rear Park Assist Symbols on or off, go to Settings > Rear Camera.
Front and/or Rear Parking Assist – During low-speed parking maneuvers, the system provides “distance to
closest object” information in the Driver Information Center and a caution symbol on the Rear Vision Camera display. When the vehicle should be stopped immediately to avoid a collision, a continuous audible tone sounds or the Safety Alert Seat pulses. See Safety Alert Seat.
To turn the system on or off, press the Parking Assist button on the center of the instrument panel.See Driving and Operating in your Owner Manual.F Optional equipment
Page 18 of 20

18
Tire Pressure Monitor (Single Rear Wheel Models Only)
Hill Descent Control sets and maintains vehicle speed from 2–14 mph while descending a steep incline in a forward or reverse gear.
1. Press the Hill Descent Control button on the center of the instrument panel. Vehicle speed must be below 31 mph to enable the system. The Hill Descent Control symbol will illuminate on the instrument cluster.
2. Increase or decrease speed by applying the accelerator or brake pedal or use the Cruise Control +/– buttons on the steering wheel. The adjusted speed becomes the new set speed. The symbol flashes when the system is actively applying the brakes to main-tain vehicle speed.
See Driving and Operating in your Owner Manual.
Hill Descent ControlF (Z71)
The traction control system limits wheelspin and the StabiliTrak® stability control system assists with directional control of the vehicle in difficult
driving conditions. Both systems turn on automatically every time the vehicle is started.
Turning Off Traction Control
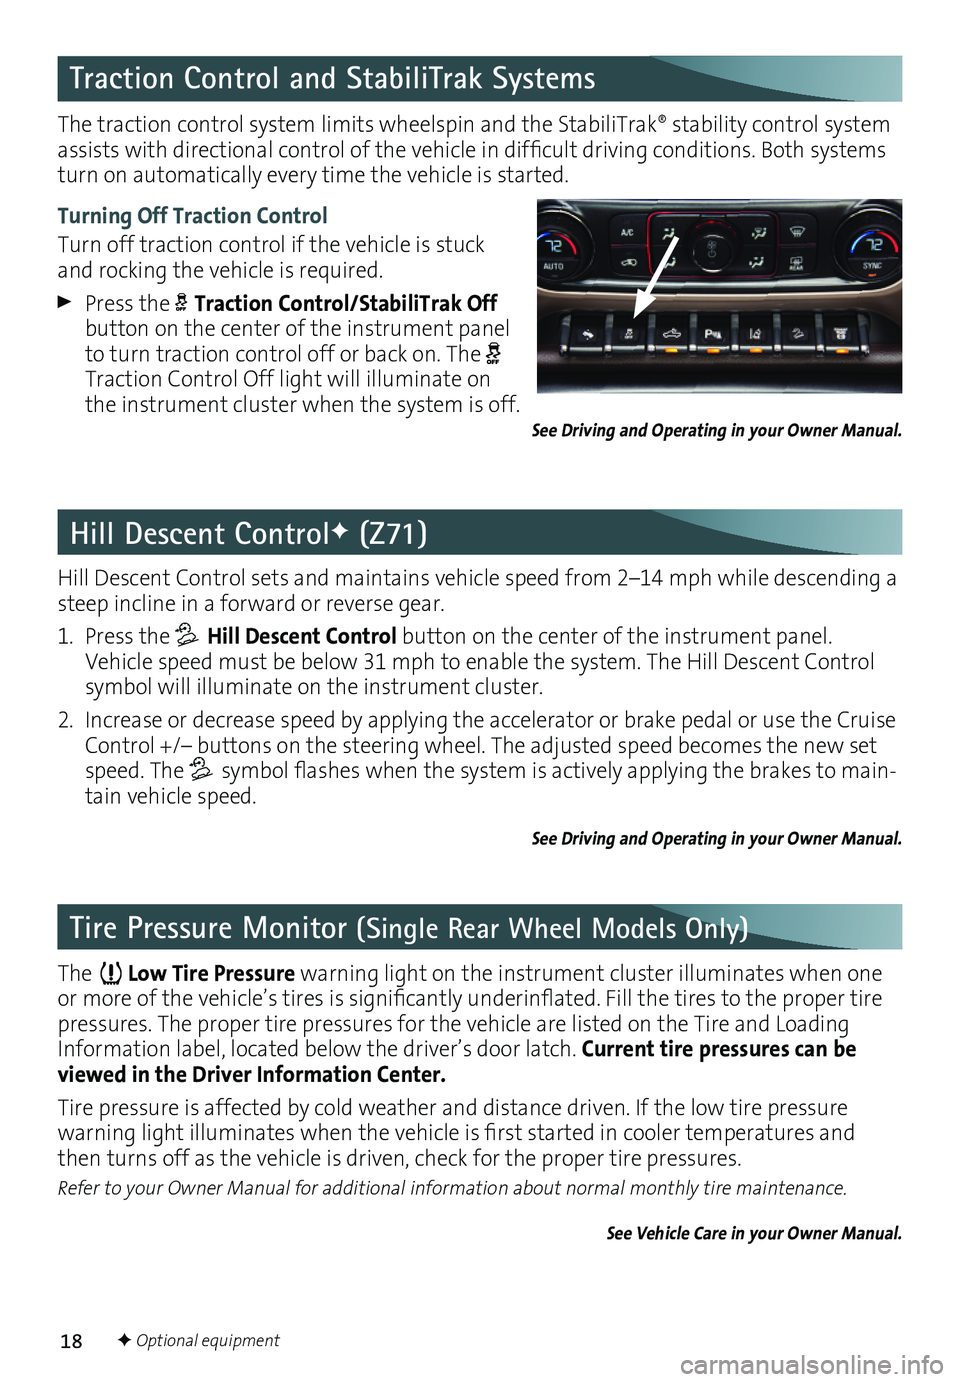
Turn off traction control if the vehicle is stuck and rocking the vehicle is required.
Press the Traction Control/StabiliTrak Off button on the center of the instrument panel to turn traction control off or back on. The Traction Control Off light will illuminate on the instrument cluster when the system is off.
Traction Control and StabiliTrak Systems
The Low Tire Pressure warning light on the instrument cluster illuminates when one or more of the vehicle’s tires is significantly underinflated. Fill the tires to the proper tire pressures. The proper tire pressures for the vehicle are listed on the Tire and Loading Information label, located below the driver’s door latch. Current tire pressures can be viewed in the Driver Information Center.
Tire pressure is affected by cold weather and distance driven. If the low tire pressure
warning light illuminates when the vehicle is first started in cooler temperatures and then turns off as the vehicle is driven, check for the proper tire pressures.
Refer to your Owner Manual for additional information about normal monthly tire maintenance.
See Vehicle Care in your Owner Manual.
See Driving and Operating in your Owner Manual.
F Optional equipment