Dc ac switch GMC SIERRA 2021 User Guide
[x] Cancel search | Manufacturer: GMC, Model Year: 2021, Model line: SIERRA, Model: GMC SIERRA 2021Pages: 461, PDF Size: 11.84 MB
Page 45 of 461
GMC Sierra/Sierra Denali 1500 Owner Manual (GMNA-Localizing-U.S./
Canada/Mexico-14632426) - 2021 - CRC - 11/5/20
44 Keys, Doors, and Windows
sunroof, fully press and releaseK(1).
Press and release
K(1) again to stop the
movement.
Open/Close (Manual Mode) : To open the
sunroof, press and hold
I(1). ReleaseI(1)
to stop the movement. Press and
hold
K(1) to close the sunroof.
Release
K(1) to stop the movement.
Tilt Switch
Vent : From the closed position, press
J(2)
to vent the sunroof. Press
K(2) to close
the vent.
When the sunroof is opened, an air deflector
will automatically raise. The air deflector will
retract when the sunroof is closed.
The sunroof also has a sunshade, which can
be pulled forward to block sun rays. The
sunshade must be opened and closed
manually.
Automatic Reversal System
The sunroof has an automatic reversal
system that is only active when the sunroof
is operated in express-close mode.
If an object is in the path while
express-closing, the reversal system will
detect an object, stop, and open the sunroof
slightly.
If frost or other conditions prevent closing,
override the feature by closing the sunroof
in manual mode. To stop movement, release
K(1).
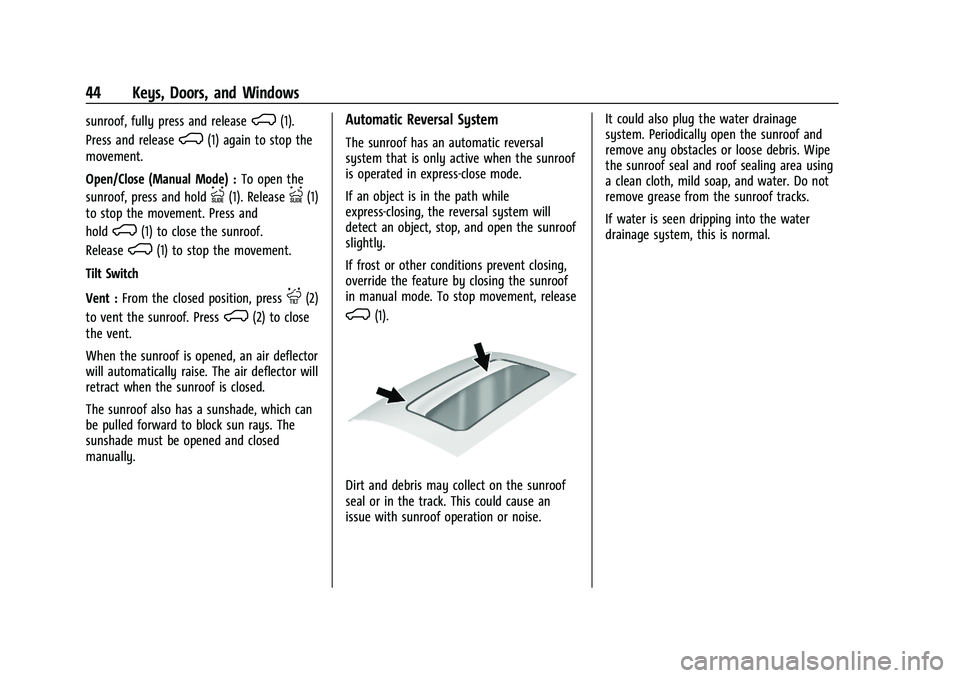
Dirt and debris may collect on the sunroof
seal or in the track. This could cause an
issue with sunroof operation or noise. It could also plug the water drainage
system. Periodically open the sunroof and
remove any obstacles or loose debris. Wipe
the sunroof seal and roof sealing area using
a clean cloth, mild soap, and water. Do not
remove grease from the sunroof tracks.
If water is seen dripping into the water
drainage system, this is normal.
Page 104 of 461
GMC Sierra/Sierra Denali 1500 Owner Manual (GMNA-Localizing-U.S./
Canada/Mexico-14632426) - 2021 - CRC - 11/5/20
Instruments and Controls 103
Caution
Hanging heavy equipment from the
power outlet can cause damage not
covered by the vehicle warranty. The
power outlets are designed for accessory
power plugs only, such as cell phone
charge cords.
Power Outlet 110/120-Volt Alternating
Current
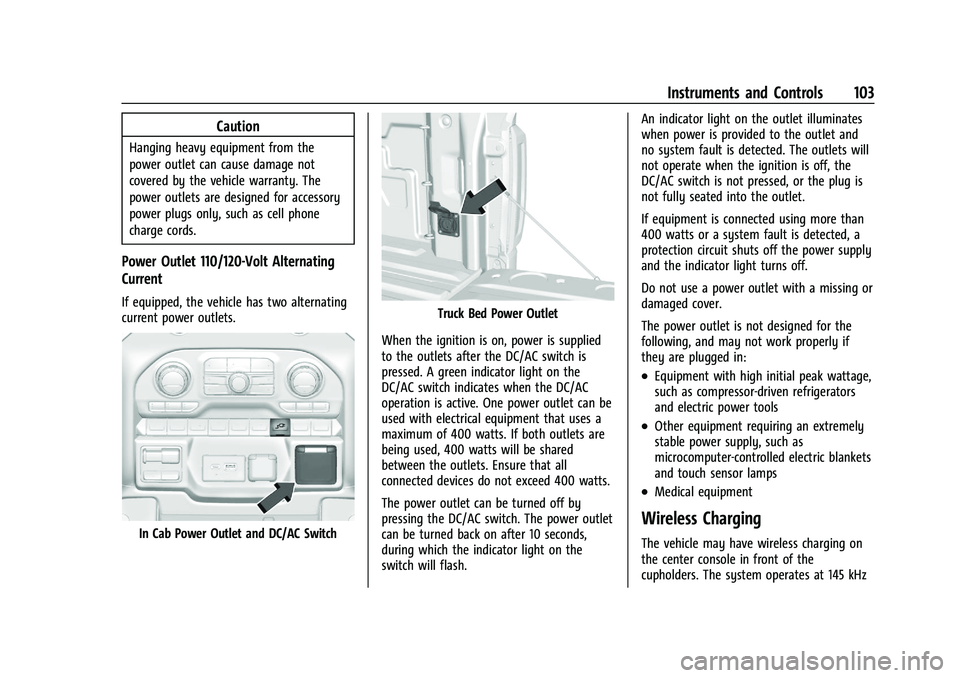
If equipped, the vehicle has two alternating
current power outlets.
In Cab Power Outlet and DC/AC Switch
Truck Bed Power Outlet
When the ignition is on, power is supplied
to the outlets after the DC/AC switch is
pressed. A green indicator light on the
DC/AC switch indicates when the DC/AC
operation is active. One power outlet can be
used with electrical equipment that uses a
maximum of 400 watts. If both outlets are
being used, 400 watts will be shared
between the outlets. Ensure that all
connected devices do not exceed 400 watts.
The power outlet can be turned off by
pressing the DC/AC switch. The power outlet
can be turned back on after 10 seconds,
during which the indicator light on the
switch will flash. An indicator light on the outlet illuminates
when power is provided to the outlet and
no system fault is detected. The outlets will
not operate when the ignition is off, the
DC/AC switch is not pressed, or the plug is
not fully seated into the outlet.
If equipment is connected using more than
400 watts or a system fault is detected, a
protection circuit shuts off the power supply
and the indicator light turns off.
Do not use a power outlet with a missing or
damaged cover.
The power outlet is not designed for the
following, and may not work properly if
they are plugged in:
.Equipment with high initial peak wattage,
such as compressor-driven refrigerators
and electric power tools
.Other equipment requiring an extremely
stable power supply, such as
microcomputer-controlled electric blankets
and touch sensor lamps
.Medical equipment
Wireless Charging
The vehicle may have wireless charging on
the center console in front of the
cupholders. The system operates at 145 kHz
Page 110 of 461
GMC Sierra/Sierra Denali 1500 Owner Manual (GMNA-Localizing-U.S./
Canada/Mexico-14632426) - 2021 - CRC - 11/5/20
Instruments and Controls 109
.Home
.Info App. This is where the selected Driver
Information Center (DIC) displays can be
viewed. See“Driver Information Center
(DIC) (Uplevel)” in the Index.
.Audio
.Navigation
.Phone
.Options
Home
Information displayed here can be
customized from the Options menu.
Speedometer : Displays how fast the vehicle
is moving in either kilometers per hour
(km/h) or miles per hour (mph).
Speed Sign : Shows sign information, which
comes from a roadway database in the
onboard navigation, if equipped.
Time : Displays the current time.
Fuel Range : Displays the approximate
distance the vehicle can be driven without
refueling. The fuel range estimate is based
on an average of the vehicle’s fuel economy
over recent driving history and the amount
of fuel remaining in the fuel tank. Fuel
range cannot be reset. Audio
In the Audio menu, use the thumbwheel to
scroll through options, browse for music,
select from favorites, or change the audio
source. In the main view, scroll to change
the station or go to the next or previous
track.
Navigation
In the Navigation menu, if there is no active
route, a compass will be displayed. If there
is an active route, press the thumbwheel to
cancel or resume route guidance, mute or
unmute voice guidance, or access Recents or
Favorites.
Phone
In the Phone menu, if there is no active
phone call, view recent calls, scroll through
contacts, select from the favorites, or change
the phone source. If there is an active call,
mute the phone or switch to handset
operation.
Options
Use the thumbwheel to scroll through items
in the Options menu.
Head-up Display (HUD) :
If equipped, this
feature allows for adjusting the angle of the
HUD image and changing or turning off the
Speed Limit Sign.
HUD Rotation: Press the thumbwheel while
Adjust Rotation is highlighted to enter
Adjust Mode. Scroll to adjust the angle of
the HUD display. Press the thumbwheel to
confirm and save the setting. This feature
may only be available in P (Park).
Speed Limit Style: Press the thumbwheel
while Speed Limit Style is highlighted to
change the speed sign style or to turn it off.
Units : Press the thumbwheel while Units is
displayed to enter the Units menu. Choose
US or metric units by pressing the
thumbwheel while the desired item is
highlighted. A selected mark will be
displayed next to the selected item.
Info Page Options : Press the thumbwheel
while Info Page Options is displayed to
enter and select the items to be displayed
in the Info app. A selected mark will be
displayed next to the selected item.
Page 134 of 461
GMC Sierra/Sierra Denali 1500 Owner Manual (GMNA-Localizing-U.S./
Canada/Mexico-14632426) - 2021 - CRC - 11/5/20
Instruments and Controls 133
Touch the controls on the infotainment
display to adjust the volume.
Reverse Tilt Mirror
When on, the driver, passenger, or both
driver and passenger outside mirrors will tilt
downward when the vehicle is shifted into
R (Reverse) to improve visibility of the
ground near the rear wheels. They may
move from their tilted position when the
vehicle is shifted out of R (Reverse) or
turned off. SeeReverse Tilt Mirrors 038.
Touch Off, On - Driver and Passenger, On -
Driver, or On - Passenger.
Remote Mirror Folding
When on, the outside mirrors will remotely
fold or unfold when the Remote Keyless
Entry (RKE) transmitter
QorKbutton is
pressed and held. See Folding Mirrors036.
Touch Off or On.
Lighting
Touch and the following may display:
.Vehicle Locator Lights
.Exit Lighting
.Automatic High Beam Assist Vehicle Locator Lights
This setting flashes the vehicle’s headlamps
when
Kis pressed on the Remote Keyless
Entry (RKE) transmitter.
Touch Off or On.
Exit Lighting
This setting specifies how long the
headlamps stay on after the vehicle is
turned off and exited.
Touch Off, 30 Seconds, 60 Seconds,
or 120 Seconds.
Automatic High Beam Assist
This setting specifies how the high beams
adjust based on the vehicle environment.
Touch IntelliBeam or Adaptive Headlight
System.
Power Door Locks
Touch and the following may display:
.Open Door Anti Lock Out
.Auto Door Unlock
.Delayed Door Lock Open Door Anti Lock Out
This setting prevents the driver door from
locking when the door is open. If this
setting is on, the Delayed Door Lock menu
will not be available.
Touch Off or On.
Auto Door Unlock
This setting allows selection of which doors
will automatically unlock when the vehicle is
shifted into P (Park).
Touch Off, All Doors, or Driver Door.
Delayed Door Lock
When on, this feature will delay the locking
of the doors. To override the delay, press
the power door lock switch on the door.
Touch Off or On.
Remote Lock, Unlock, and Start
Touch and the following may display:
.Remote Unlock Light Feedback
.Remote Lock Feedback
.Remote Door Unlock
.Remote Start Auto Cool Seats
.Remote Start Auto Heat Seats
.Remote Window Operation
Page 142 of 461
GMC Sierra/Sierra Denali 1500 Owner Manual (GMNA-Localizing-U.S./
Canada/Mexico-14632426) - 2021 - CRC - 11/6/20
Lighting 141
.The vehicle is loaded such that the front
end points upward, causing the light
sensor to aim high and not detect
headlamps and taillamps.
.Driving on winding or hilly roads.
The automatic high-beam headlamps may
need to be disabled if any of the above
conditions exist.
Exterior Lamps Off Reminder
A reminder chime sounds when the
headlamps or parking lamps are manually
turned on, the ignition is off, and a door is
open. To disable the chime, turn the
lamps off.
Headlamp High/Low-Beam
Changer
Push the turn signal lever toward the
instrument panel to change the headlamps
from low to high beam.
Pull or push the turn signal lever to return
to low-beam headlamps.
When the high-beam headlamps are on, this
indicator light on the instrument cluster will
also be on.
Flash-to-Pass
This feature lets you use the high-beam
headlamps to signal a driver in front of you
that you want to pass. It works even if the
headlamps are in the automatic position.
To use it, pull the turn signal lever toward
you, then release it.
If the headlamps are in the automatic
position or on low beam, the high-beam
headlamps will turn on. Depending on the
type of headlamp, they will either turn off
after a short duration or stay on as long as
you hold the lever toward you. The
high-beam indicator on the instrument
cluster will come on. Release the lever to
return to normal operation.
Daytime Running Lamps (DRL)
DRL can make it easier for others to see the
front of the vehicle during the day. Fully
functional DRL are required on all vehicles
first sold in Canada.
The DRL system comes on when the
following conditions are met:
.The ignition is on.
.The exterior lamp control is in AUTO.
.The transmission is not in P (Park).
.The light sensor determines it is daytime.
When the DRL system is on, only the DRL
are on. The taillamps, sidemarker lamps,
instrument panel lights, and other lamps
will not be on.
When it begins to get dark, the automatic
headlamp system switches from DRL to the
headlamps.
To turn off the DRL, turn the exterior lamp
control to
Oand then release. For vehicles
first sold in Canada, off will only work when
the vehicle is parked.
Page 146 of 461
GMC Sierra/Sierra Denali 1500 Owner Manual (GMNA-Localizing-U.S./
Canada/Mexico-14632426) - 2021 - CRC - 11/6/20
Lighting 145
If the vehicle is in P (Park), R (Reverse),
or N (Neutral) the Cargo Lamp Switch causes
the lights to cycle through the following
states for each button press:
- Initial Press:
- CHMSL/Cargo Bed Lights - On
- Cargo Mirror Lights - On
- Cargo Switch Indicator (if equipped) - On
- Next Press: (if with in 5 seconds of the
previous button press):
- CHMSL/Cargo Bed Lights - On
- Cargo Mirror Lights - Off
- Cargo Switch Indicator (if equipped) - On
- Next Press:
- CHMSL/Cargo Bed Lights - Off
- Cargo Mirror Lights - Off
- Cargo Switch Indicator (if equipped) - Off
Become familiar with and follow all state
and local laws that apply to cargo lamp
operation.Interior Lighting
Instrument Panel Illumination
Control
This feature adjusts the brightness of all
illuminated controls. The instrument panel
illumination control is next to the exterior
lamp control.
D:PressD+ to brighten orD− to
dim the lights.
This feature is functional at night, or when
the headlamps or parking lamps are ON.
Dome Lamps
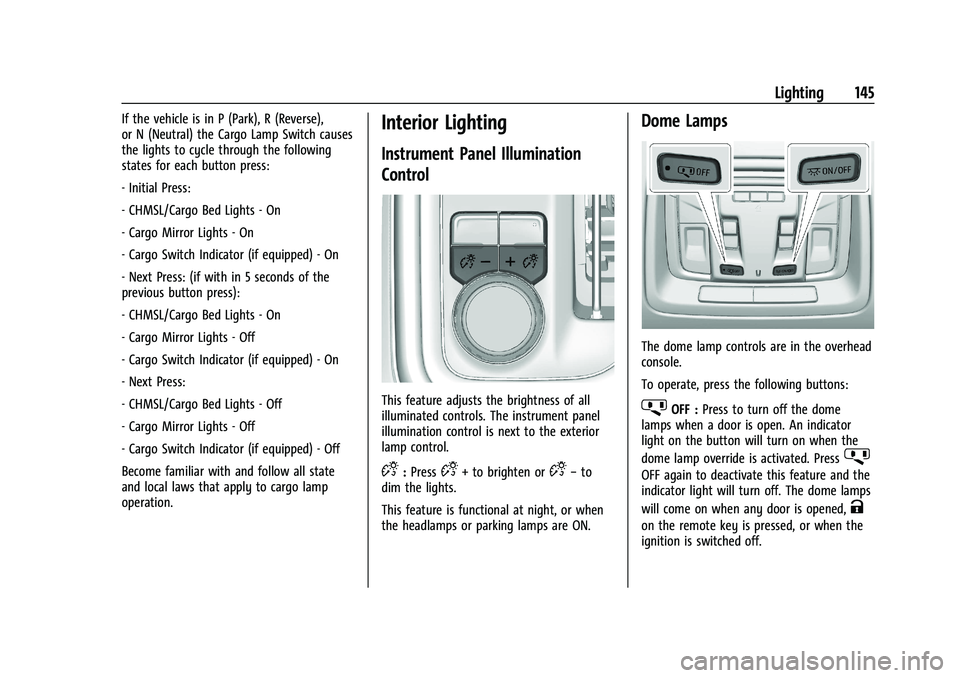
The dome lamp controls are in the overhead
console.
To operate, press the following buttons:
jOFF : Press to turn off the dome
lamps when a door is open. An indicator
light on the button will turn on when the
dome lamp override is activated. Press
j
OFF again to deactivate this feature and the
indicator light will turn off. The dome lamps
will come on when any door is opened,
K
on the remote key is pressed, or when the
ignition is switched off.
Page 153 of 461

GMC Sierra/Sierra Denali 1500 Owner Manual (GMNA-Localizing-U.S./
Canada/Mexico-14632426) - 2021 - CRC - 11/5/20
152 Infotainment System
The favorites and volume switches are on
the back of the steering wheel.1. Favorite: When on a radio source, press to select the next or previous audio
broadcast favorite. When listening to a
media device, press to select the next or
previous track.
2. Volume: Press to increase or decrease the volume.
Using the System
Audio
Touch the Audio icon to display the active
audio source page. Examples of available
sources may include AM, FM, SXM (if
equipped), USB, AUX, and Bluetooth.
Phone
Touch the Phone icon to display the Phone
main page. See Bluetooth (Pairing and Using
a Phone) 0181 or
Bluetooth (Overview) 0180.
Nav
If equipped, touch the Nav icon to display
the navigation map. See Using the
Navigation System 0163.
Users
If equipped, touch the Users icon to sign in
or create a new user profile, and follow the
on-screen instructions.
Only four user profiles can be active at one
time in the vehicle. It may be necessary to
remove a profile from the menu before
creating or signing into an existing profile.
The removed profile can be logged into at a
later time.
Settings
Touch the Settings icon to display the
Settings menu. See Settings0186.
Apple CarPlay
Touch the Apple CarPlay icon to activate
Apple CarPlay (if equipped) after a
supported device is connected. See Apple
CarPlay and Android Auto 0185.
Android Auto
Touch the Android Auto icon to activate
Android Auto (if equipped) after a supported
device is connected. See Apple CarPlay and
Android Auto 0185.
Apps
If equipped, in-vehicle apps are available for
download. Touch the Apps icon on the
Home Page to begin.
Downloading and using in-vehicle apps
requires Internet connectivity which can be
accessed with a data plan through the
vehicle’s built-in 4G LTE Wi-Fi hotspot,
if equipped, or a compatible mobile device
hotspot. On most mobile devices, activation
of the Wi-Fi hotspot is in the device’s
Settings menu under Mobile Network
Sharing, Personal Hotspot, Mobile Hotspot,
or similar.
Page 158 of 461

GMC Sierra/Sierra Denali 1500 Owner Manual (GMNA-Localizing-U.S./
Canada/Mexico-14632426) - 2021 - CRC - 11/5/20
Infotainment System 157
seconds. The radio will also display
icons representing additional channels
(HD2, ...HD8), that may be available.
When the radio successfully tunes to a
HD station, the HD logo will display and
digital audio will play.
2. Touch the display arrows to tune to the previous or next HD Radio station.
There may be a delay before the station
starts playing.
The HD Radio station number is indicated
next to the HD logo.
HD Radio stations can be saved as favorites.
For a list of all stations, see
www.hdradio.com.
HD Radio Troubleshooting
Digital Audio Delay : Wait for the signal to
process. This can take several seconds.
Volume Change, Audio Skip, Echo, Digital
Audio Lost : Station signal strength may be
weak, the station is out of range, or the
station may be out of alignment. Verify
proper reception on another station.
If the HD Radio signal weakens while
listening to HD1, the radio will automatically
switch to the analog version of the radio
station. If the HD Radio signal loses reception while
listening to stations HD2 to HD8, the radio
mutes until the signal can be recovered or
until the station is changed.
HD Radio can be disabled if driving in a
weak signal area. Touch HD Radio On/Off to
toggle HD Radio reception on and off.
Radio Data System (RDS)
If equipped, RDS features are available for
use only on FM stations that broadcast RDS
information. With RDS, the radio can:
.Group stations by Category (i.e., Program
Type) such as Rock, Jazz, Classical, etc.
.Display messages from radio stations.
This system relies on receiving specific
information from these stations and only
works when the information is available.
It is possible that a radio station could
broadcast incorrect information that causes
the radio features to work improperly. If this
happens, contact the radio station.
When information is broadcast from a RDS
station, the station name or call letters
display on the audio screen. Radio text
supporting the currently playing broadcast
may also appear.
Satellite Radio
SiriusXM Radio Service
If equipped, vehicles with a valid SiriusXM
radio subscription can receive SiriusXM
programming.
SiriusXM radio has a wide variety of
programming and commercial-free music,
coast to coast, in digital-quality sound. In
the U.S., see www.siriusxm.com or call
1-888-601-6296. In Canada, see
www.siriusxm.ca or call 1-877-438-9677.
When SiriusXM is active, the channel name,
number, song title, and artist appear on the
display.
SiriusXM with 360L
SiriusXM with 360L interface has enhanced
in-vehicle listening experience for
subscribers. The experience now offers more
categories and system learned
recommendations toward discovering more
personalized content.
To use the full SiriusXM 360L program,
including streaming content and listening
recommendations, OnStar Connected Access
is required. Connected vehicle services vary
Page 166 of 461
GMC Sierra/Sierra Denali 1500 Owner Manual (GMNA-Localizing-U.S./
Canada/Mexico-14632426) - 2021 - CRC - 11/5/20
Infotainment System 165
.About
To exit a list, touch
zin the top right
corner to return to the main map view.
Make sure to set up preferences before
setting a destination and starting active
guidance.
Map Preferences
Touch to choose between basic map feature
configurations:
Map Colors
.Auto –Touch to automatically change
modes based on lighting conditions.
.Day (Light)
.Night (Dark)
3D Landmark (Default is On) : Touch On or
Off. When turned on, the system will
display all 3D Landmarks on the map
depending on the zoom level.
3D Building (Default is Off) : Touch On or
Off. When turned on, the system will
display all of the possible 3D building shapes
on the map depending on the zoom level.
Show Terrain in 3D (Default is Off) :
If equipped, touch On or Off. When turned
on, the system will display terrain
information on the map in 3D view. Auto-Zoom (Default is On) :
Touch On or
Off. When turned on, the system will
automatically adjust the zoom level when
the vehicle is approaching a turn. After the
turn is completed, the system automatically
brings the zoom back to the originally set
level. If the vehicle is approaching a turn
with the next turn occurring shortly after,
the Auto-Zoom will remain on until both
turns are completed.
Route Preferences
Touch to access the Route Preferences. The
choices are:
.Preferred Route –Choose from two
different route options: Fastest or
Eco-Friendly.
‐ Fastest would be the route with the
shortest drive time.
‐ Eco-Friendly would be the most
fuel-efficient route.
.Avoid on Current Route –Choose any of
the road features to avoid while on route:
‐ Highways
‐ Unpaved Roads
‐ Ferries
‐ Carpool Lanes
‐ Toll Roads ‐
Tunnels
‐ Country Borders
Navigation Voice Control
Touch to access the voice control setting
display.
.Navigation Volume –To adjust the
volume level, touch the up and down
arrows. If the voice guidance prompt is
being heard, volume can also be adjusted
using the knob on the center stack or the
volume switch on the steering wheel.
.Navigation Voice Prompt Level during a
Call. Options available are:
‐ Full Prompt (Selected by default)
‐ Tone Only
‐ None
Traffic Events (If Equipped)
This feature provides a list of events that
are on the route or nearby. Touch
Aand
then select Traffic Events. An OnStar
connected Navigation service plan is
required.
Page 170 of 461
GMC Sierra/Sierra Denali 1500 Owner Manual (GMNA-Localizing-U.S./
Canada/Mexico-14632426) - 2021 - CRC - 11/5/20
Infotainment System 169
.Use the index finger and thumb to zoom
out by pinching and then zoom in by
spreading those two fingers on the map.
Map Gestures and Map Scale
Use the following gestures on the
infotainment display to adjust the map scale
and display options.
.Pinch to zoom in or out.
.Pan the map.
.Use two fingers to tilt down and change
from 2D to 3D. Tilt up to change back
to 2D.
.Rotate the map.
See Using the System 0152.
Mute
When in active guidance, the audio prompts
while using navigation can be muted. Touch
the speaker icon on the right side of the
upper bar. A slash will appear on the
speaker to indicate voice guidance is muted.
Active Guidance View
When a destination is chosen and a
navigation session is active, the navigation
system enters into an Active Guidance
View (AGV). Map Orientation
Touch
Aon the map to access map
orientation settings. Map orientation is 3D
Heading Up by default.
Available settings are:
.3D Heading Up (Default): 3D map with
the vehicle pointing up. In this mode, the
current location icon will always head up
and the map will rotate around it.
.2D Heading Up: 2D map with the vehicle
pointing up. In this mode, the current
location icon will always head up and the
map will rotate around it.
.2D North Up: 2D map with North pointing
up. In this mode, the current location icon
will shift as the vehicle turns left and
right.
Touch the icon to change the map type. The
icon and label will also update accordingly.
Depending on the zoom level of the 2D
Heading Up and 3D Heading Up maps, the
system may automatically switch to the 2D
North Up map.
When in AGV, the entire route can be
viewed in 2D North Up by touching the
traffic bar. The map will zoom out and
readjust to display the full route. When in 2D North Up Route View, the Recenter icon
will appear in the middle of the display.
Touch either the Recenter icon or the traffic
bar again to return to the previous view,
either 2D or 3D.
Lane Guidance
The map will display the lane information
for the upcoming maneuver if it is available.
Junction View
When a vehicle is on the highway and
approaching the exit, an image displays the
lane that the vehicle must stay in to
complete the next maneuver.
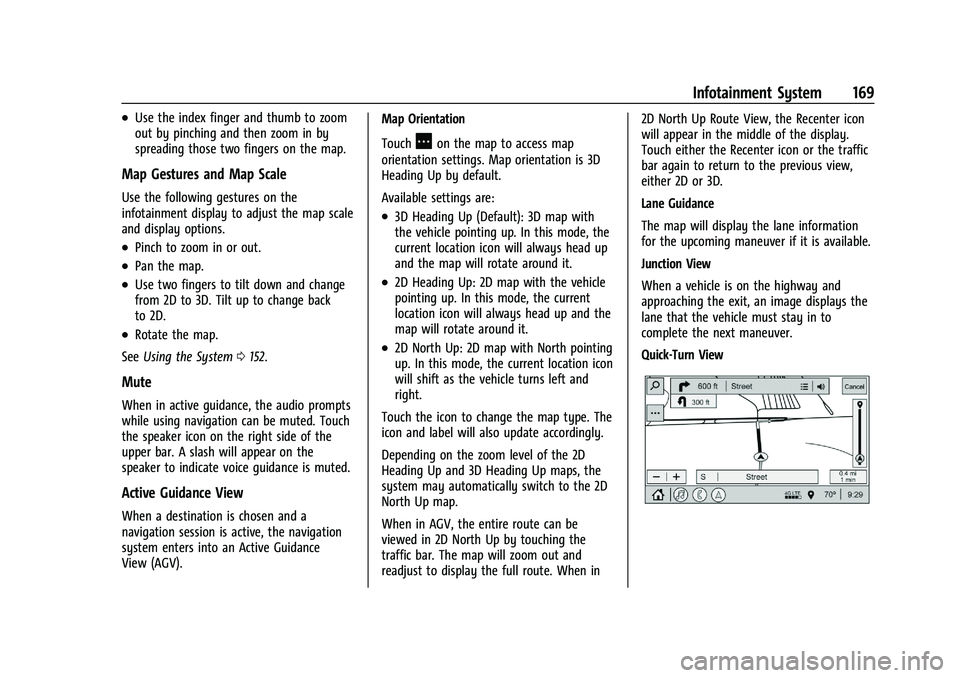
Quick-Turn View