display GMC SIERRA 2021 Workshop Manual
[x] Cancel search | Manufacturer: GMC, Model Year: 2021, Model line: SIERRA, Model: GMC SIERRA 2021Pages: 461, PDF Size: 11.84 MB
Page 161 of 461
GMC Sierra/Sierra Denali 1500 Owner Manual (GMNA-Localizing-U.S./
Canada/Mexico-14632426) - 2021 - CRC - 11/5/20
160 Infotainment System
side. Select A-Z to view a display that will
show all letters of the alphabet and select
the letter to go to.
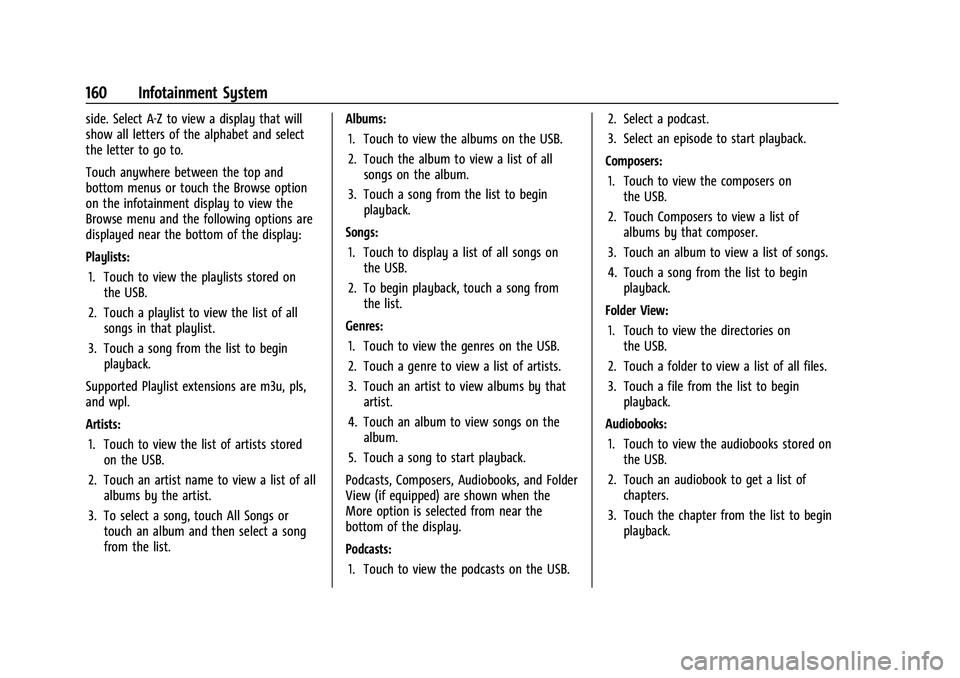
Touch anywhere between the top and
bottom menus or touch the Browse option
on the infotainment display to view the
Browse menu and the following options are
displayed near the bottom of the display:
Playlists:1. Touch to view the playlists stored on the USB.
2. Touch a playlist to view the list of all songs in that playlist.
3. Touch a song from the list to begin playback.
Supported Playlist extensions are m3u, pls,
and wpl.
Artists: 1. Touch to view the list of artists stored on the USB.
2. Touch an artist name to view a list of all albums by the artist.
3. To select a song, touch All Songs or touch an album and then select a song
from the list. Albums:
1. Touch to view the albums on the USB.
2. Touch the album to view a list of all songs on the album.
3. Touch a song from the list to begin playback.
Songs: 1. Touch to display a list of all songs on the USB.
2. To begin playback, touch a song from the list.
Genres: 1. Touch to view the genres on the USB.
2. Touch a genre to view a list of artists.
3. Touch an artist to view albums by that artist.
4. Touch an album to view songs on the album.
5. Touch a song to start playback.
Podcasts, Composers, Audiobooks, and Folder
View (if equipped) are shown when the
More option is selected from near the
bottom of the display.
Podcasts: 1. Touch to view the podcasts on the USB. 2. Select a podcast.
3. Select an episode to start playback.
Composers: 1. Touch to view the composers on the USB.
2. Touch Composers to view a list of albums by that composer.
3. Touch an album to view a list of songs.
4. Touch a song from the list to begin playback.
Folder View: 1. Touch to view the directories on the USB.
2. Touch a folder to view a list of all files.
3. Touch a file from the list to begin playback.
Audiobooks: 1. Touch to view the audiobooks stored on the USB.
2. Touch an audiobook to get a list of chapters.
3. Touch the chapter from the list to begin playback.
Page 162 of 461

GMC Sierra/Sierra Denali 1500 Owner Manual (GMNA-Localizing-U.S./
Canada/Mexico-14632426) - 2021 - CRC - 11/5/20
Infotainment System 161
When a list of songs, albums, artists,
or other types of media display, a vertical
keyboard appears on one side of the list and
a scroll bar on the other side. When using
the vertical keyboard, touch the beginning
character of the desired name to display the
zoom bubble of that character. Release the
finger from the infotainment display and
the zoom bubble disappears.
Touch the scroll bar to move the list up
and down.
File System and Naming
The songs, artists, albums, and genres are
taken from the file’s song information and
are only displayed if present. The radio
displays the file name as the track name if
the song information is not available.Supported Apple Devices
To view supported devices in USA, see
my.gmc.com\learned.
Loss of Audio
If a phone currently paired over Bluetooth is
plugged in with a USB cable, the system will
automatically mute the phone audio.
Playback can be resumed by changing the
audio source from Bluetooth to USB cable.
Source USB from the Media icon on the
infotainment display to resume playback.
Other phones such as Android phones may
have a similar reaction.
Bluetooth Streaming Audio and Voice
Recognition
See
Bluetooth Audio 0162 for information
using voice recognition with Bluetooth
streaming audio.
Make sure all devices have the latest
software downloaded.
Auxiliary Jack
If equipped, this vehicle may have an
auxiliary input jack. This may be located in
the center stack or center console under the
armrest. Possible auxiliary audio sources
include:
.Laptop computer
.Audio music player
This jack is not an audio output. Do not
plug headphones into the auxiliary input
jack. Set up an auxiliary device while the
vehicle is in P (Park).
Connect a 3.5 mm (1/8 in) cable from the
auxiliary device to the auxiliary input jack.
When a device is connected, the system can
play audio from the device over the vehicle
speakers.
If an auxiliary device has already been
connected, but a different source is currently
active, press MEDIA on the center stack or
touch the Media icon on the infotainment
display to scroll through audio source
menus, until the AUX Input source appears.
Playing from the AUX Port
An auxiliary device is played through the
audio system and controlled through the
device itself.
Page 163 of 461
GMC Sierra/Sierra Denali 1500 Owner Manual (GMNA-Localizing-U.S./
Canada/Mexico-14632426) - 2021 - CRC - 11/5/20
162 Infotainment System
AUX Menu
Press MENU on the center stack to display
the AUX Input menu and the following may
display:
Tone Settings :Touch to adjust Bass,
Midrange, Treble, Balance, Fade, and EQ
(Equalizer). See AM-FM Radio0155.
Auto Volume (If Equipped) : This feature
adjusts the volume based on the vehicle
speed. See AM-FM Radio 0155.
Bose AudioPilot Noise Compensation
Technology (If Equipped) : This feature
adjusts the volume based on the noise in
the vehicle and speed. See “Bose AudioPilot”
in AM-FM Radio 0155.
Bluetooth Audio
Music may be played from a paired
Bluetooth device. See Bluetooth (Pairing and
Using a Phone) 0181 or
Bluetooth (Overview) 0180 for help pairing
a device.
Volume and song selection may be
controlled by using the infotainment
controls or the mobile device. If Bluetooth is
selected and no volume is present, check the
volume setting on the infotainment system. Music can be launched by touching
Bluetooth from the recent sources list on
the left of the display or by touching the
More option and then touching the
Bluetooth device.
To play music via Bluetooth:
1. Power on the device, and pair to connect the device.
2. Once paired, touch Audio from the Home Page, then touch Bluetooth from the
recent sources list on the left of the
display.
Bluetooth Sound Menu
See “Infotainment System Sound Menu”
under AM-FM Radio 0155.
Manage Bluetooth Devices
From the Home Page: 1. Touch Audio.
2. Touch More.
3. Touch Bluetooth.
4. Touch Devices to add or delete devices.
When touching Bluetooth, the radio may
not be able to launch the audio player on
the connected device to start playing. When
the vehicle is not moving, use the mobile
device to begin playback. All devices launch audio differently. When
selecting Bluetooth as a source, the radio
may show as paused on the display. Press
play on the device or touch
pon the
display to begin playback.
Browse functionality will be provided where
supported by the Bluetooth device. This
media content will not be part of the
MyMedia source mode.
Some smartphones support sending
Bluetooth music information to display on
the radio. When the radio receives this
information, it will check to see if any is
available and display it. For more
information about supported Bluetooth
features, see my.gmc.com/learn.
OnStar System
4G LTE
If equipped with 4G LTE, up to seven
devices, such as smartphones, tablets, and
laptops, can be connected to high-speed
Internet through the vehicle’s built-in Wi-Fi
hotspot.
Call 1-888-4ONSTAR (1-888-466-7827) to
connect to an OnStar Advisor for assistance.
See www.onstar.com for vehicle availability,
Page 164 of 461
GMC Sierra/Sierra Denali 1500 Owner Manual (GMNA-Localizing-U.S./
Canada/Mexico-14632426) - 2021 - CRC - 11/5/20
Infotainment System 163
details, and system limitations. Service and
connectivity may vary by make, model,
year, carrier, availability, and conditions.
4G LTE service is available in select markets.
4G LTE performance is based on industry
averages and vehicle systems design. Some
services require a data plan.
The OnStar App
If equipped, the infotainment system has
OnStar controls in the embedded OnStar app
on the Home Page. Most OnStar functions
that can be performed with the buttons can
be done using the app. To open the app,
touch the OnStar icon on the Home Page.
App updates require a corresponding service
plan. Features vary by region and model.
Features are subject to change. For more
information, see my.gmc.com/learn or
press
Q.
Services
The Services tab displays the default view
for the app. Use this page to launch the
available OnStar services. Touch a service to
open its display. Touch Wi-Fi to launch the
connections manager. Turn-by-Turn and
Advisor Call are the other tiled options. Account
The Account tab displays a snapshot of the
account linked with the vehicle. If there is
no such account, this tab will show all
values as
——. The advisor call icon will be
active even if there is no active account.
Advisor Call
Selecting Advisor Call is the same as
pressing
Qor calling 1-888-4ONSTAR
(1-888-466-7827). The X option in the upper
right corner of the screen does not end the
call, but returns to the previous screen.
Turn-by-Turn Directions
With a connected plan, an OnStar Advisor
can download a destination to the vehicle or
its embedded navigation system,
if equipped. Select Turn-by-Turn Directions
from the Services tab of the OnStar app to
call an Advisor or select a recent or favorite
destination. Touch the navigation icons to
select home, address or place. A destination
transfer from OnStar will show the detail
view of the destination when it is
transferred from OnStar to the Navigation
application. See www.onstar.com for a
coverage map. Services vary by model. Map
coverage is available in the United States,
Puerto Rico, and Canada. Wi-Fi Hotspot
Touch to display the Settings page, which
shows the configurations for the vehicle
hotspot and allows them to be changed.
For more information, see www.onstar.com.
Navigation
Using the Navigation System
If equipped, launch the Nav application by
touching the Nav icon on the Home Page or
on the shortcut tray near the bottom of the
infotainment display.
When the Nav application is launched for
the first time, a product walkthrough is
available. Use of the feature requires the
Terms and Conditions and the Privacy
statement to be confirmed. If available and
signed into a profile, it is also suggested to
enable and confirm Predictive Navigation.
Predictive Navigation (If Equipped)
If Predictive Navigation is available and
confirmed, this feature learns preferences by
remembering where the vehicle has been.
It uses the locations and navigation history
to personalize routes and results.
Page 165 of 461
GMC Sierra/Sierra Denali 1500 Owner Manual (GMNA-Localizing-U.S./
Canada/Mexico-14632426) - 2021 - CRC - 11/5/20
164 Infotainment System
Predictive Navigation may learn elements
such as:
.Personalized routes based on preferred
streets.
.Search results that provide best matches
at the top of the list.
.Predictive traffic.
.Local map content updating.
Predictive Navigation can also be enabled or
disabled at a later time by touching
A
(Options). While in Options, touch Settings,
then Map and Navigation Settings, and then
Predictive Navigation. See Settings0186.
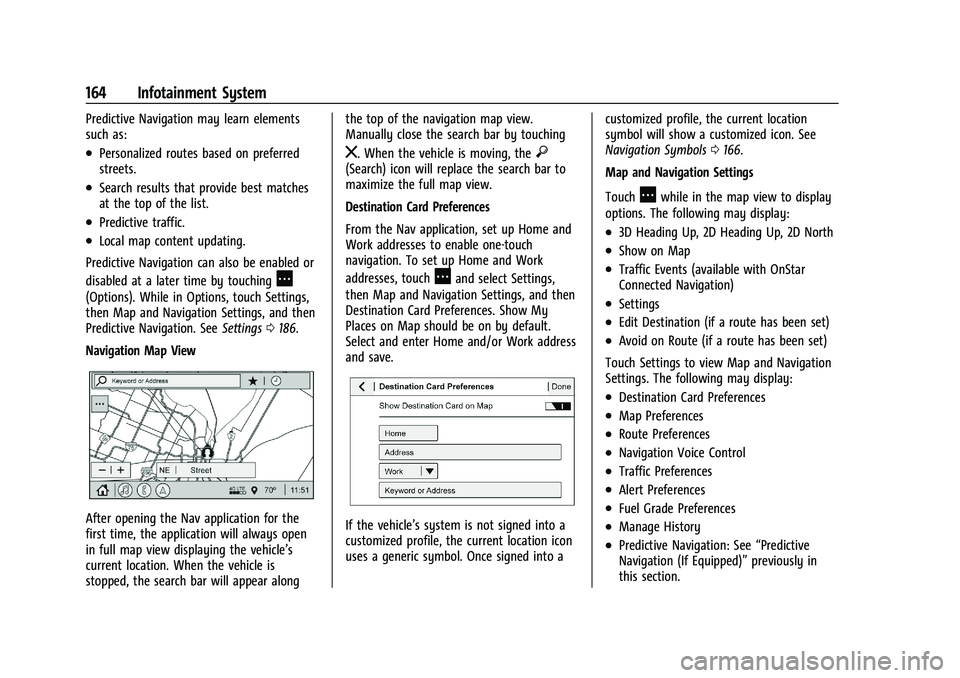
Navigation Map View
After opening the Nav application for the
first time, the application will always open
in full map view displaying the vehicle’s
current location. When the vehicle is
stopped, the search bar will appear along the top of the navigation map view.
Manually close the search bar by touching
z. When the vehicle is moving, the}(Search) icon will replace the search bar to
maximize the full map view.
Destination Card Preferences
From the Nav application, set up Home and
Work addresses to enable one-touch
navigation. To set up Home and Work
addresses, touch
Aand select Settings,
then Map and Navigation Settings, and then
Destination Card Preferences. Show My
Places on Map should be on by default.
Select and enter Home and/or Work address
and save.
If the vehicle’s system is not signed into a
customized profile, the current location icon
uses a generic symbol. Once signed into a customized profile, the current location
symbol will show a customized icon. See
Navigation Symbols
0166.
Map and Navigation Settings
Touch
Awhile in the map view to display
options. The following may display:
.3D Heading Up, 2D Heading Up, 2D North
.Show on Map
.Traffic Events (available with OnStar
Connected Navigation)
.Settings
.Edit Destination (if a route has been set)
.Avoid on Route (if a route has been set)
Touch Settings to view Map and Navigation
Settings. The following may display:
.Destination Card Preferences
.Map Preferences
.Route Preferences
.Navigation Voice Control
.Traffic Preferences
.Alert Preferences
.Fuel Grade Preferences
.Manage History
.Predictive Navigation: See “Predictive
Navigation (If Equipped)” previously in
this section.
Page 166 of 461
GMC Sierra/Sierra Denali 1500 Owner Manual (GMNA-Localizing-U.S./
Canada/Mexico-14632426) - 2021 - CRC - 11/5/20
Infotainment System 165
.About
To exit a list, touch
zin the top right
corner to return to the main map view.
Make sure to set up preferences before
setting a destination and starting active
guidance.
Map Preferences
Touch to choose between basic map feature
configurations:
Map Colors
.Auto –Touch to automatically change
modes based on lighting conditions.
.Day (Light)
.Night (Dark)
3D Landmark (Default is On) : Touch On or
Off. When turned on, the system will
display all 3D Landmarks on the map
depending on the zoom level.
3D Building (Default is Off) : Touch On or
Off. When turned on, the system will
display all of the possible 3D building shapes
on the map depending on the zoom level.
Show Terrain in 3D (Default is Off) :
If equipped, touch On or Off. When turned
on, the system will display terrain
information on the map in 3D view. Auto-Zoom (Default is On) :
Touch On or
Off. When turned on, the system will
automatically adjust the zoom level when
the vehicle is approaching a turn. After the
turn is completed, the system automatically
brings the zoom back to the originally set
level. If the vehicle is approaching a turn
with the next turn occurring shortly after,
the Auto-Zoom will remain on until both
turns are completed.
Route Preferences
Touch to access the Route Preferences. The
choices are:
.Preferred Route –Choose from two
different route options: Fastest or
Eco-Friendly.
‐ Fastest would be the route with the
shortest drive time.
‐ Eco-Friendly would be the most
fuel-efficient route.
.Avoid on Current Route –Choose any of
the road features to avoid while on route:
‐ Highways
‐ Unpaved Roads
‐ Ferries
‐ Carpool Lanes
‐ Toll Roads ‐
Tunnels
‐ Country Borders
Navigation Voice Control
Touch to access the voice control setting
display.
.Navigation Volume –To adjust the
volume level, touch the up and down
arrows. If the voice guidance prompt is
being heard, volume can also be adjusted
using the knob on the center stack or the
volume switch on the steering wheel.
.Navigation Voice Prompt Level during a
Call. Options available are:
‐ Full Prompt (Selected by default)
‐ Tone Only
‐ None
Traffic Events (If Equipped)
This feature provides a list of events that
are on the route or nearby. Touch
Aand
then select Traffic Events. An OnStar
connected Navigation service plan is
required.
Page 167 of 461
GMC Sierra/Sierra Denali 1500 Owner Manual (GMNA-Localizing-U.S./
Canada/Mexico-14632426) - 2021 - CRC - 11/5/20
166 Infotainment System
Traffic Preferences (If Equipped)
While in Map View, touch
A, then Settings
and then Map and Navigation Settings to
access Traffic Preferences. When Show
Traffic on Map is turned on, the feature
provides an overview of the traffic flow
using different coded colors. The following
options are available for rerouting:
.Auto Reroute to Better Route –The
system will automatically reroute if the
system detects there is a traffic issue
ahead.
.Ask Before Rerouting (Default) –If the
system detects there is a traffic issue
ahead, it will display a pop-up with
details about the issue. Choose to reroute
or cancel the alert.
.Never Search for Better Route –The
system will not check for a better route
until one of the above options is selected.
Alert Preferences
Set alerts on or off during both inactive and
active guidance views. The following alerts
may be available:
.Road Safety Alerts –Touch to display
upcoming School Zones.
.Traffic Camera Alerts Manage History
Touch Manage History to access the History
options:
.Clear Recent Destinations
–Touch\to
clear the recent destinations.
.Clear Search History –Touch\to clear
the search history.
About
Touch to display software information,
such as:
.Telenav Terms and Conditions
.Telenav Privacy Statement
.Navigation Version
Maps
The Nav application requires a map database
to run. It is stored on an SD card that is
connected to the infotainment system. If the
map database is not available, a missing SD
card error message will be displayed.
SD Card Error Messages
The SD card only works for one unique
vehicle. The SD card must pass
authentication verification to be used for
that specific vehicle. Potential error scenarios
and messages include:
.The SD card has initialized for the first
time: “Once initialized, this SD card can
only be used for navigation in this
vehicle.”
.The SD card is not working properly: “SD
card is not functioning properly.
(Error Code).”
.The SD card is not paired with the
existing system: “This SD card is not valid
in this vehicle for navigation. See Owner’s
Manual for more detail or visit your
dealer. (Error Code).”
.The SD card has been removed from the
slot: “SD card has been removed.
(Error Code).”
Touch Continue to resume after the
initialization error message. For the other
messages, touch OK to return to the
Home Page.
Navigation Symbols
Following are the most common symbols
that may appear in the Nav application.
Page 169 of 461
GMC Sierra/Sierra Denali 1500 Owner Manual (GMNA-Localizing-U.S./
Canada/Mexico-14632426) - 2021 - CRC - 11/5/20
168 Infotainment System
Waypoints
Add up to five waypoints, which are
additional destinations, along the route. To
add an additional stop or waypoint:1. From active guidance, touch
}.
2. Search for the destination using One-Box, Voice search, or the Quick Category
icons.
3. Choose search results Along Route, Nearby, or Near Destination.
4. Choose the desired waypoint and touch Add to Trip or replace the current
destination by touching New Destination.
Route options are not available for
waypoints.
Arriving at a Waypoint
When approaching a waypoint, the system
will display a Destination Arrival view. To
continue on to the next destination touch
the Drive to message on the infotainment
display.
If the vehicle passes the waypoint or gets
out of the current route, the system will
automatically reroute back to this waypoint.
At the same time, it will show a Drive to
icon along with the next waypoint address so the current waypoint can be skipped and
guidance can resume to the next waypoint
or destination.
Editing a Waypoint
When waypoints are added during active
guidance, the system allows a stop to be
deleted or the order to be changed. To edit
a waypoint:
1. Touch
A.
2. Touch Edit Destinations.
.Modify destination order by touching
and holding the arrow until it is
highlighted. Drag to move the
waypoint up or down the list.
.Delete a waypoint by touchingY.
A pop-up will appear to confirm
waypoint removal. Once the request
is confirmed, the system will remove
the address from the destinations list.
Touch
zon the top right corner so
the system can recalculate the route.
If there is only one address in the
destinations list, the system will
disable the move and delete
functions. The system will not allow
the final destination to be deleted.
Map Information
Road network attributes are contained in the
map database for map information.
Attributes include information such as street
names, street addresses, and turn
restrictions. A detailed area includes all
major highways, service roads, and
residential roads. The detailed areas include
Places of Interest (POIs) such as restaurants,
airports, banks, hospitals, police stations, gas
stations, tourist attractions, and historical
monuments.
If the vehicle does not have an applicable
service plan, the map database may not
include data for newly constructed areas or
map database corrections that are
completed after production. The navigation
system provides full route guidance in the
detailed map areas.
Zoom Control
The zoom control display is shown on the
map view. A few ways to zoom in or
out are:
.Touch + or –to zoom in or out on
the map.
.Double tap with one finger to zoom in or
single tap with two fingers to zoom out
on the map.
Page 170 of 461
GMC Sierra/Sierra Denali 1500 Owner Manual (GMNA-Localizing-U.S./
Canada/Mexico-14632426) - 2021 - CRC - 11/5/20
Infotainment System 169
.Use the index finger and thumb to zoom
out by pinching and then zoom in by
spreading those two fingers on the map.
Map Gestures and Map Scale
Use the following gestures on the
infotainment display to adjust the map scale
and display options.
.Pinch to zoom in or out.
.Pan the map.
.Use two fingers to tilt down and change
from 2D to 3D. Tilt up to change back
to 2D.
.Rotate the map.
See Using the System 0152.
Mute
When in active guidance, the audio prompts
while using navigation can be muted. Touch
the speaker icon on the right side of the
upper bar. A slash will appear on the
speaker to indicate voice guidance is muted.
Active Guidance View
When a destination is chosen and a
navigation session is active, the navigation
system enters into an Active Guidance
View (AGV). Map Orientation
Touch
Aon the map to access map
orientation settings. Map orientation is 3D
Heading Up by default.
Available settings are:
.3D Heading Up (Default): 3D map with
the vehicle pointing up. In this mode, the
current location icon will always head up
and the map will rotate around it.
.2D Heading Up: 2D map with the vehicle
pointing up. In this mode, the current
location icon will always head up and the
map will rotate around it.
.2D North Up: 2D map with North pointing
up. In this mode, the current location icon
will shift as the vehicle turns left and
right.
Touch the icon to change the map type. The
icon and label will also update accordingly.
Depending on the zoom level of the 2D
Heading Up and 3D Heading Up maps, the
system may automatically switch to the 2D
North Up map.
When in AGV, the entire route can be
viewed in 2D North Up by touching the
traffic bar. The map will zoom out and
readjust to display the full route. When in 2D North Up Route View, the Recenter icon
will appear in the middle of the display.
Touch either the Recenter icon or the traffic
bar again to return to the previous view,
either 2D or 3D.
Lane Guidance
The map will display the lane information
for the upcoming maneuver if it is available.
Junction View
When a vehicle is on the highway and
approaching the exit, an image displays the
lane that the vehicle must stay in to
complete the next maneuver.
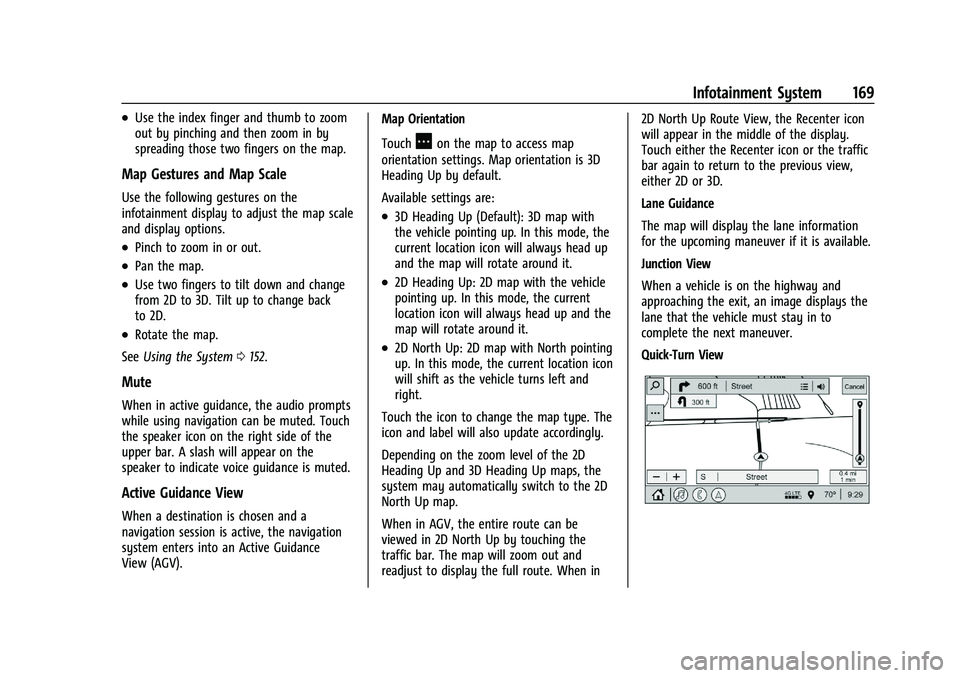
Quick-Turn View
Page 171 of 461
GMC Sierra/Sierra Denali 1500 Owner Manual (GMNA-Localizing-U.S./
Canada/Mexico-14632426) - 2021 - CRC - 11/5/20
170 Infotainment System
When the vehicle is approaching a turn with
the next turn following in quick succession,
a quick-turn list appears below the primary
turn indicator. An audio prompt will
announce the quick turn.
Auto-Zoom
When approaching a maneuver, the map
will automatically zoom in to show both the
vehicle icon and the upcoming maneuver to
give a better view of the maneuver. Once
the maneuver is complete, the system will
zoom back to the previous zoom level.
Touch
Aon the map to access Settings,
then touch Map Preferences to access
Auto-Zoom. This feature can be enabled or
disabled.
Directions
Touch the menu option next to the next
turn street name to display Directions.
Directions displays the turns and directions
from the current location to the final
destination.
Editing Directions
Directions can be edited by choosing
y,
which expands the list to fill the display and
enters the Edit Mode. While in Edit Mode,
an unwanted route segment can be removed from the route by touching
Ynext
to the segment. A pop-up appears to
confirm segment removal.
When the route segment has been removed,
all segments are replaced by an activity
indicator while the new route is
recalculated. When the recalculation is
complete, the activity indicator is replaced
with the new route segments.
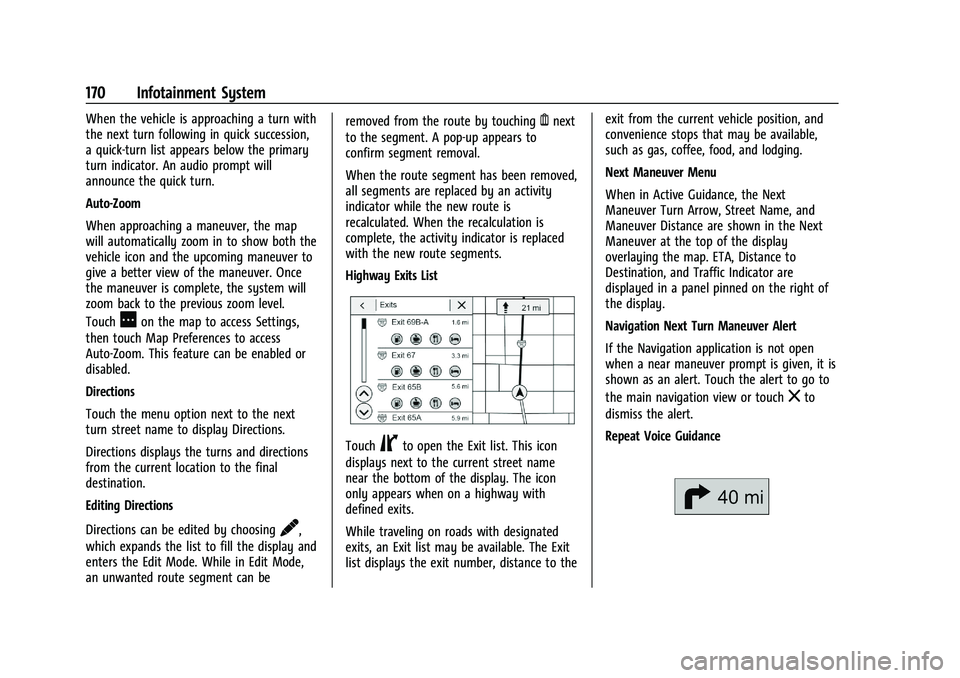
Highway Exits List
TouchCto open the Exit list. This icon
displays next to the current street name
near the bottom of the display. The icon
only appears when on a highway with
defined exits.
While traveling on roads with designated
exits, an Exit list may be available. The Exit
list displays the exit number, distance to the exit from the current vehicle position, and
convenience stops that may be available,
such as gas, coffee, food, and lodging.
Next Maneuver Menu
When in Active Guidance, the Next
Maneuver Turn Arrow, Street Name, and
Maneuver Distance are shown in the Next
Maneuver at the top of the display
overlaying the map. ETA, Distance to
Destination, and Traffic Indicator are
displayed in a panel pinned on the right of
the display.
Navigation Next Turn Maneuver Alert
If the Navigation application is not open
when a near maneuver prompt is given, it is
shown as an alert. Touch the alert to go to
the main navigation view or touch
zto
dismiss the alert.
Repeat Voice Guidance