transmission GMC SIERRA 2022 Service Manual
[x] Cancel search | Manufacturer: GMC, Model Year: 2022, Model line: SIERRA, Model: GMC SIERRA 2022Pages: 474, PDF Size: 15.09 MB
Page 252 of 474
GMC Sierra/Sierra Denali 1500 Owner Manual (GMNA-Localizing-U.S./
Canada/Mexico-15883563) - 2022 - CRC - 11/19/21
Driving and Operating 251
For more information on trailer weight
specifications, seeTrailer Towing0313.
gTerrain Mode : Use for finer control
during low speed, off-road driving. When
using this mode it will mimic the
characteristics of four-wheel-drive low (4
n)
without the torque capabilities.
Use when:
.Traveling on very rough roads at very low
speeds, such as a two-track or heavily
rutted road.
.Traveling slowly in grassy fields.
.Pulling a boat out of the water on a
trailer.
.Using the vehicle for public off-road
recreational driving. See Off-Road Driving
0 208 and Hill and Mountain Roads
0 213. Using terrain mode in extreme conditions
that cause the wheel(s) to slip can lead to
excessive heat in the transfer case causing
four-wheel drive and terrain mode to
automatically turn off, leaving the vehicle in
two-wheel drive. Four-wheel drive will
automatically re-engage once the transfer
case has cooled, then terrain mode can be
turned back on.
When in Terrain Mode, the vehicle will shift
automatically but may hold a lower gear
longer to maximize engine torque. A unique
pedal map, transmission shift pattern, and
rpm control are utilized to give better
control at lower speeds and over rough
terrain. When the vehicle comes to a stop,
Vehicle Hold is engaged. TCS will be
optimized for maximum torque transfer
across axles, and Active Braking During Lift
Throttle will be engaged. Active Braking During Lift Throttle:
.Automatically applies light braking,
similar to heavy engine braking of
four-wheel-drive low.
.Applies light braking in D (Drive) until the
vehicle is at idle speeds. In Manual L1 and
Manual L2, moderate braking may stop
the vehicle.
.Reduces trailer braking.
Page 257 of 474
GMC Sierra/Sierra Denali 1500 Owner Manual (GMNA-Localizing-U.S./
Canada/Mexico-15883563) - 2022 - CRC - 11/19/21
256 Driving and Operating
Increasing Speed While Using Cruise Control
Do one of the following:
.Press and hold +RES up until the desired
speed is reached, then release it.
.To increase vehicle speed in small
increments, press +RES up briefly. For
each press, the vehicle goes about 1 km/h
(1 mph) faster.
The speedometer reading can be displayed
in either English or metric units. See
Instrument Cluster (Base Level) 0109 or
Instrument Cluster (Uplevel) 0110. The
increment value used depends on the units
displayed.
Reducing Speed While Using Cruise Control
Do one of the following:
.Press and hold SET– down until the
desired lower speed is reached, then
release it.
.To slow down in small increments, press
SET– down briefly. For each press, the
vehicle goes about 1 km/h (1 mph) slower.
The speedometer reading can be displayed
in either English or metric units. See
Instrument Cluster (Base Level) 0109 or Instrument Cluster (Uplevel)
0110. The
increment value used depends on the units
displayed.
Passing Another Vehicle While Using Cruise
Control
Use the accelerator pedal to increase the
vehicle speed. When you take your foot off
the pedal, the vehicle will slow down to the
previously set cruise speed. While pressing
the accelerator pedal or shortly following
the release to override cruise control, briefly
pressing SET– will result in cruise control set
to the current vehicle speed.
Using Cruise Control on Hills
How well the cruise control works on hills
depends on the vehicle speed, the load, and
the steepness of the hills. When going up
steep hills, pressing the accelerator pedal
may be necessary to maintain vehicle speed.
While going downhill, cruise braking helps
maintain driver selected speed.
Cruise Grade Braking is enabled when the
vehicle is started and cruise control is active.
It is not enabled in Range Selection Mode.
It assists in maintaining driver selected
speed when driving on downhill grades by
using the engine and transmission to slow
the vehicle. For other forms of descent control, see
Hill
Descent Control (HDC) 0249, Automatic
Transmission (Mechanical Shifter) 0231 or
Automatic Transmission (Electronic Shifter)
0 233, and Tow/Haul Mode 0240.
Ending Cruise Control
There are four ways to end cruise control:
.Step lightly on the brake pedal.
.Press*.
.Shift the transmission to N (Neutral).
.To turn off cruise control, press5.
Erasing Speed Memory
The cruise control set speed is erased from
memory if
5is pressed or the ignition is
turned off.
Adaptive Cruise Control (Camera)
If equipped, Adaptive Cruise Control (ACC)
allows the cruise control set speed and
following gap to be selected. Read this
entire section before using this system. The
following gap is the following time between
your vehicle and a vehicle detected directly
ahead in your path, moving in the same
direction. If no vehicle is detected in your
Page 310 of 474
GMC Sierra/Sierra Denali 1500 Owner Manual (GMNA-Localizing-U.S./
Canada/Mexico-15883563) - 2022 - CRC - 11/19/21
Driving and Operating 309
Trailer Towing
General Towing Information
Only use towing equipment that has been
designed for the vehicle. Contact your dealer
or trailering dealer for assistance with
preparing the vehicle to tow a trailer. Read
the entire section before towing a trailer.
To tow a disabled vehicle, seeTowing the
Vehicle 0409. To tow the vehicle behind
another vehicle such as a motor home, see
Recreational Vehicle Towing 0411.
Driving Characteristics and
Towing Tips
{Warning
You can lose control when towing a
trailer if the correct equipment is not
used or the vehicle is not driven properly.
For example, if the trailer is too heavy or
the trailer brakes are inadequate for the
load, the vehicle may not stop as
expected. You and others could be
seriously injured. The vehicle may also be
damaged, and the repairs would not be
covered by the vehicle warranty. Pull a
(Continued)
Warning (Continued)
trailer only if all the steps in this section
have been followed. Ask your dealer for
advice and information about towing a
trailer with the vehicle.
Driving with a Trailer
Trailering is different than just driving the
vehicle by itself. Trailering means changes in
handling, acceleration, braking, durability,
and fuel economy. Successful, safe trailering
takes correct equipment, and it has to be
used properly.
The following information has many
time-tested, important trailering tips and
safety rules. Many of these are important
for your safety and that of your passengers.
Read this section carefully before pulling a
trailer.
When towing a trailer:
.Become familiar with and follow all state
and local laws that apply to trailer
towing. These requirements vary from
state to state.
.State laws may require the use of
extended side view mirrors. Even if not
required, you should install extended side
view mirrors if your visibility is limited or
restricted while towing.
.Do not tow a trailer during the first
800 km (500 mi) of vehicle use to prevent
damage to the engine, axle, or other
parts.
.It is recommended to perform the first oil
change before heavy towing.
.During the first 800 km (500 mi) of trailer
towing, do not drive over 80 km/h
(50 mph) and do not make starts at full
throttle.
.Vehicles can tow in D (Drive). Tow/Haul
Mode is recommended for heavier trailers.
SeeTow/Haul Mode 0240. If the
transmission downshifts too often, a
lower gear may be selected using Manual
Mode. See Manual Mode (Mechanical
Shifter) 0237 orManual Mode (Electronic
Shifter) 0239.
Page 312 of 474
GMC Sierra/Sierra Denali 1500 Owner Manual (GMNA-Localizing-U.S./
Canada/Mexico-15883563) - 2022 - CRC - 11/19/21
Driving and Operating 311
Following Distance
Stay at least twice as far behind the vehicle
ahead as you would when driving without a
trailer. This can help to avoid heavy braking
and sudden turns.
Passing
More passing distance is needed when
towing a trailer. The combination of the
vehicle and trailer will not accelerate as
quickly and is much longer than the vehicle
alone. It is necessary to go much farther
beyond the passed vehicle before returning
to the lane. Pass on level roadways. Avoid
passing on hills if possible.
Backing Up
Hold the bottom of the steering wheel with
one hand. To move the trailer to the left,
move that hand to the left. To move the
trailer to the right, move that hand to the
right. Always back up slowly and, if possible,
have someone guide you.
Making TurnsCaution
Turn more slowly and make wider arcs
when towing a trailer to prevent damage
to your vehicle. Making very sharp turns
could cause the trailer to contact the
vehicle.
Make wider turns than normal when towing,
so the trailer will not go over soft shoulders,
over curbs, or strike road signs, trees,
or other objects. Always signal turns well in
advance. Do not steer or brake suddenly.
Driving on Grades
Reduce speed and shift to a lower gear
before starting down a long or steep
downhill grade. If the transmission is not
shifted down, the brakes may overheat and
result in reduced braking efficiency.
The vehicle can tow in D (Drive). Shift the
transmission to a lower gear if the
transmission shifts too often under heavy
loads and/or hilly conditions. When towing at higher altitudes, engine
coolant will boil at a lower temperature
than at lower altitudes. If the engine is
turned off immediately after towing at high
altitude on steep uphill grades, the vehicle
could show signs similar to engine
overheating. To avoid this, let the engine
run, preferably on level ground, with the
transmission in P (Park) for a few minutes
before turning the engine off. If the
overheat warning comes on, see
Engine
Overheating 0356.
Viewing Systems
If equipped, the viewing systems on the
vehicle can improve visibility while hitching,
backing, and driving with a trailer. See
Driver Assistance Systems 0282.
Parking on Hills
{Warning
To prevent serious injury or death,
always park your vehicle and trailer on a
level surface when possible.
Page 325 of 474
GMC Sierra/Sierra Denali 1500 Owner Manual (GMNA-Localizing-U.S./
Canada/Mexico-15883563) - 2022 - CRC - 11/19/21
324 Driving and Operating
When towing a trailer, the arrows on the
instrument cluster will illuminate even if the
trailer is not properly connected or the bulbs
are burned out.
Tow/Haul Mode
For instructions on how to enter Tow/Haul
Mode, seeDriver Mode Control 0249.
Tow/Haul assists when pulling a heavy
trailer or a large or heavy load. See Tow/
Haul Mode 0240.
Tow/Haul Mode is designed to be most
effective when the vehicle and trailer
combined weight is at least 75% of the
vehicle's Gross Combined Weight Rating
(GCWR). See “Trailer Weight” underTrailer
Towing 0313.
Tow/Haul Mode is most useful when towing
a heavy trailer or carrying a large or
heavy load:
.Through rolling terrain.
.In stop-and-go traffic.
.In busy parking lots.
Operating the vehicle in Tow/Haul Mode
when lightly loaded or not towing will not
cause damage; however, it is not
recommended and may result in unpleasant engine and transmission driving
characteristics, heavy or light steering
efforts, and reduced fuel economy.
Integrated Trailer Brake Control System
The vehicle may have an Integrated Trailer
Brake Control (ITBC) system for use with
electric trailer brakes or most electric over
hydraulic trailer brake systems. These
instructions apply to both types of electric
trailer brakes.
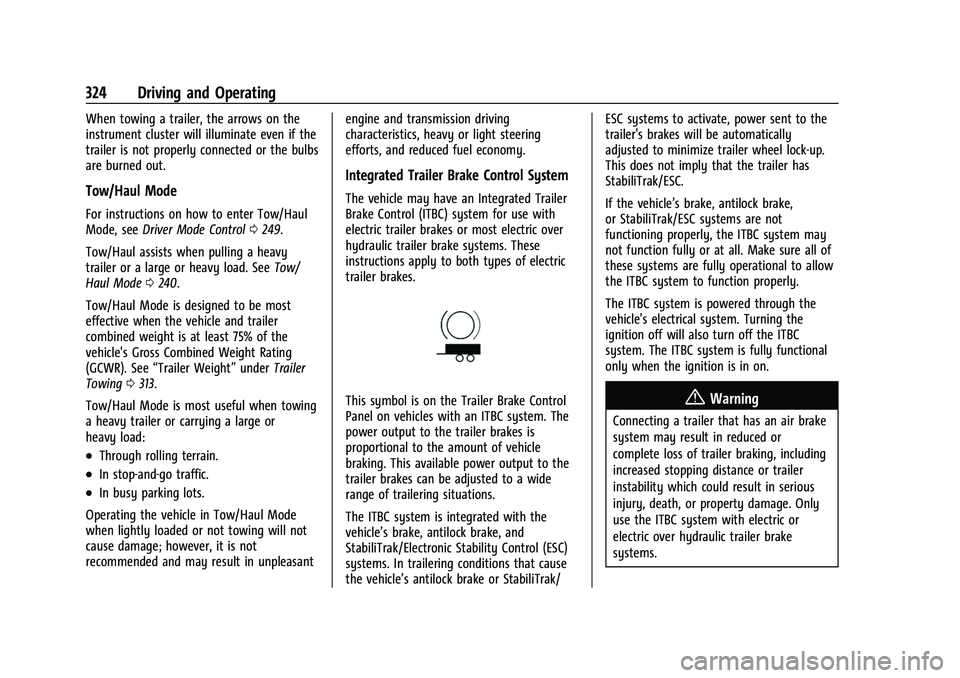
This symbol is on the Trailer Brake Control
Panel on vehicles with an ITBC system. The
power output to the trailer brakes is
proportional to the amount of vehicle
braking. This available power output to the
trailer brakes can be adjusted to a wide
range of trailering situations.
The ITBC system is integrated with the
vehicle’s brake, antilock brake, and
StabiliTrak/Electronic Stability Control (ESC)
systems. In trailering conditions that cause
the vehicle’s antilock brake or StabiliTrak/ESC systems to activate, power sent to the
trailer's brakes will be automatically
adjusted to minimize trailer wheel lock-up.
This does not imply that the trailer has
StabiliTrak/ESC.
If the vehicle’s brake, antilock brake,
or StabiliTrak/ESC systems are not
functioning properly, the ITBC system may
not function fully or at all. Make sure all of
these systems are fully operational to allow
the ITBC system to function properly.
The ITBC system is powered through the
vehicle's electrical system. Turning the
ignition off will also turn off the ITBC
system. The ITBC system is fully functional
only when the ignition is in on.{Warning
Connecting a trailer that has an air brake
system may result in reduced or
complete loss of trailer braking, including
increased stopping distance or trailer
instability which could result in serious
injury, death, or property damage. Only
use the ITBC system with electric or
electric over hydraulic trailer brake
systems.
Page 330 of 474
GMC Sierra/Sierra Denali 1500 Owner Manual (GMNA-Localizing-U.S./
Canada/Mexico-15883563) - 2022 - CRC - 11/19/21
Driving and Operating 329
the trailer tire sidewall. If the speed rating is
not shown, the default trailer tire speed
rating is 105 km/h (65 mph).
Trailering App
Trailer Lights App
If equipped, the Trailer Lights App is on the
infotainment home screen.
Touch Start to cycle the trailer lamps on and
off to determine if they are working. The
test follows this sequence:1. The running lights turn on first and remain on throughout the sequence.
2. The brake lights turn on for about two seconds.
3. The left turn signal light flashes three times.
4. The right turn signal light flashes three times.
5. The reverse lights turn on for about two seconds.
6. Steps 2–5 repeat for approximately one minute and 45 seconds, or until the
test deactivates.
Touch Stop to stop the test. The test
automatically ends after one minute and
45 seconds. The sequence also deactivates when any of
the following occur:
.The vehicle is turned off.
.The transmission is shifted out of P (Park).
.The brake pedal is pressed.
.The turn signal is activated.
.The hazard warning lights are activated.
Trailering App
If equipped, the Trailering App is on the
infotainment home screen.
If equipped this feature allows profiles for
connected trailers to be created to view
status, to store and track trailer usage
information, and to set up towing assist
features.
The Trailering App welcome page appears
when the Trailering App is opened for the
first time from the infotainment home
screen.
When a trailer is electrically connected and
a trailer profile has not been created, there
will be an option to create a profile, use a
guest profile, or select Accessory/No trailer.
When a trailer is electrically connected and
after a Trailer Profile has been created, the
trailer detection pop-up appears with a list
of all of the custom Trailer Profiles made onthe vehicle. To load an existing Trailer
Profile, select one of the Trailer Profiles
listed, or load the Guest Trailer Profile by
selecting GUEST TRAILER. Touching
Accessory/No trailer will select Accessory/No
trailer as the active Trailer Profile and will
dismiss the pop- up. Shifting the vehicle
from P (Park) will select Guest Trailer as the
active Trailer Profile and will dismiss the
pop-up.
Create a Trailer Profile
Touch Add Trailer on the trailer detection
pop-up or touch + Add Trailer in the
Trailering App.
Follow on-screen instructions to set up
profile.
After a profile is created, set up for
additional features may become available,
such as Tow/Haul Mode reminder, Trailer
Tire Pressure Monitoring System (TTPMS),
maintenance reminders, or towing assist.
Import a Trailer Profile
Touch Import on the trailer detection pop-up
or touch Import in the Trailering App.
Follow on-screen instructions to import a
profile.
Page 334 of 474
GMC Sierra/Sierra Denali 1500 Owner Manual (GMNA-Localizing-U.S./
Canada/Mexico-15883563) - 2022 - CRC - 11/19/21
Driving and Operating 333
If a connected trailer becomes disconnected,
a message about the trailer disconnect will
appear on the Driver Information Center
(DIC) immediately (if vehicle is on) or the
next time the vehicle is turned on (if trailer
was disconnected while vehicle is off). Check
your trailer connection if needed.
Connection Problem
If any of the trailer connections are lost, a
message about the connection issue appears
on the DIC. The infotainment screen will also
show the connection issue in the Lights
Status view.
Connection Trailer Lighting Faults Detected
The Trailering App System monitors for
electrical faults on the trailer lights.
A message about the lighting issue appears
on the DIC. The infotainment screen will also
show the lighting issue in the Lights Status
view. Repair your trailer lights if needed.
A trailer lighting issue is not covered by
your GM warranty.
The Running Lights connection may not
detect partial outages. Activate the light test
to check all trailer lamps. See“Light Test”
following. Light Test
Touch Start Light Test to cycle the trailer
lights on and off to determine if they are
working. The test follows this sequence:
1. The running lights turn on first and remain on throughout the sequence.
2. The brake lights turn on for about two seconds.
3. The left turn signal light flashes three times.
4. The right turn signal light flashes three times.
5. The reverse lights turn on for about two seconds.
6. Steps 2-5 repeat for approximately on minute and 45 seconds, or until the test
deactivates.
Touch Stop to stop the test. The test will
automatically end after one minute and
45 seconds.
The sequence also deactivates when any of
the following occur:
.The vehicle is turned off.
.The transmission is shifted out of
P (Park).
.The brake pedal is pressed.
.The turn signal is activated.
.The hazard warning lights are activated.
Tires
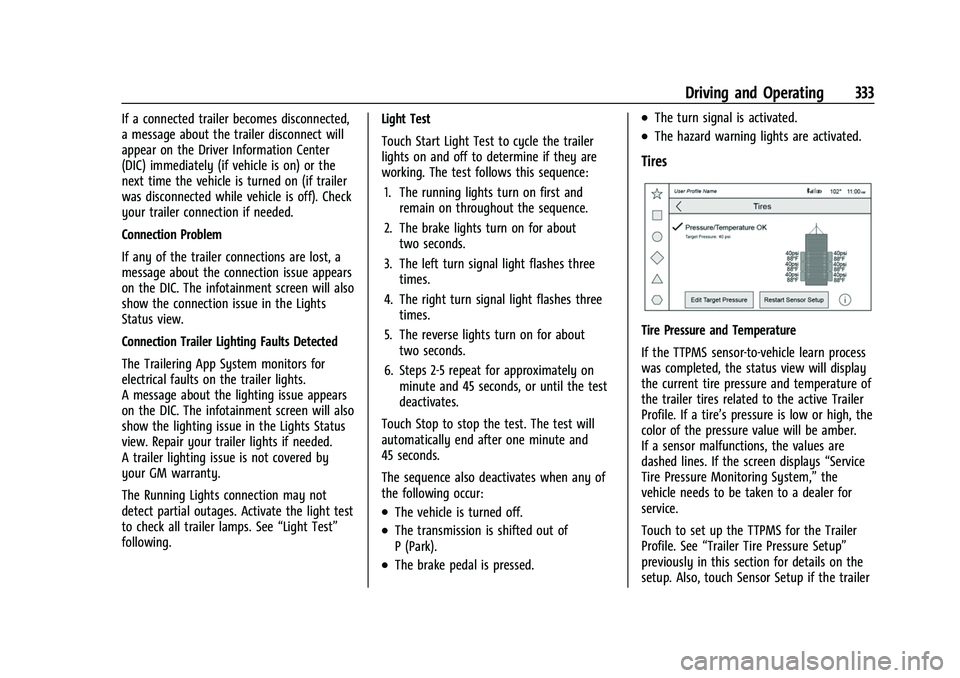
Tire Pressure and Temperature
If the TTPMS sensor-to-vehicle learn process
was completed, the status view will display
the current tire pressure and temperature of
the trailer tires related to the active Trailer
Profile. If a tire’s pressure is low or high, the
color of the pressure value will be amber.
If a sensor malfunctions, the values are
dashed lines. If the screen displays “Service
Tire Pressure Monitoring System,” the
vehicle needs to be taken to a dealer for
service.
Touch to set up the TTPMS for the Trailer
Profile. See “Trailer Tire Pressure Setup”
previously in this section for details on the
setup. Also, touch Sensor Setup if the trailer
Page 342 of 474
GMC Sierra/Sierra Denali 1500 Owner Manual (GMNA-Localizing-U.S./
Canada/Mexico-15883563) - 2022 - CRC - 11/19/21
Vehicle Care 341
Vehicle Care
General Information
General Information . . . . . . . . . . . . . . . . . . . 342
California Perchlorate MaterialsRequirements . . . . . . . . . . . . . . . . . . . . . . . . 342
Accessories and Modifications . . . . . . . . . 342
Vehicle Checks
Doing Your Own Service Work . . . . . . . . 343
Hood . . . . . . . . . . . . . . . . . . . . . . . . . . . . . . . . . . 343
Engine Compartment Overview . . . . . . . . 345
Engine Oil . . . . . . . . . . . . . . . . . . . . . . . . . . . . . 348
Engine Oil Life System . . . . . . . . . . . . . . . . 350
Automatic Transmission Fluid . . . . . . . . . 350
Engine Air Filter Life System . . . . . . . . . . . 351
Engine Air Cleaner/Filter . . . . . . . . . . . . . . . 351
Cooling System . . . . . . . . . . . . . . . . . . . . . . . . 352
Engine Overheating . . . . . . . . . . . . . . . . . . . 356
Overheated Engine Protection Operating Mode . . . . . . . . . . . . . . . . . . . . . 357
Engine Fan . . . . . . . . . . . . . . . . . . . . . . . . . . . . 358
Washer Fluid . . . . . . . . . . . . . . . . . . . . . . . . . . 358
Brakes . . . . . . . . . . . . . . . . . . . . . . . . . . . . . . . . . 358
Brake Pad Life System . . . . . . . . . . . . . . . . . 359
Brake Fluid . . . . . . . . . . . . . . . . . . . . . . . . . . . . 360
Battery - North America . . . . . . . . . . . . . . . 361
Four-Wheel Drive . . . . . . . . . . . . . . . . . . . . . . 363
Front Axle . . . . . . . . . . . . . . . . . . . . . . . . . . . . . 363
Rear Axle . . . . . . . . . . . . . . . . . . . . . . . . . . . . . . 363 Automatic Transmission Shift Lock
Control Function Check (Mechanical
Shifter) . . . . . . . . . . . . . . . . . . . . . . . . . . . . . . 364
Park Brake and P (Park) Mechanism Check . . . . . . . . . . . . . . . . . . . . . . . . . . . . . . . 364
Wiper Blade Replacement . . . . . . . . . . . . . 364
Glass Replacement . . . . . . . . . . . . . . . . . . . . 365
Windshield Replacement . . . . . . . . . . . . . . 365
Gas Strut(s) . . . . . . . . . . . . . . . . . . . . . . . . . . . 365Headlamp Aiming
Front Headlamp Aiming . . . . . . . . . . . . . . . 366
Bulb Replacement
Bulb Replacement . . . . . . . . . . . . . . . . . . . . . 366
Halogen Bulbs . . . . . . . . . . . . . . . . . . . . . . . . 366
LED Lighting . . . . . . . . . . . . . . . . . . . . . . . . . . 366
Taillamps, Turn Signal, Stoplamps, and Back-Up Lamps . . . . . . . . . . . . . . . . . . . . . . 367
Center High-Mounted Stoplamp (CHMSL) and Cargo Lamp . . . . . . . . . . . . 367
License Plate Lamp . . . . . . . . . . . . . . . . . . . . 368
Electrical System
Electrical System Overload . . . . . . . . . . . . 368
Fuses and Circuit Breakers . . . . . . . . . . . . . 370
Engine Compartment Fuse Block . . . . . . 370
Instrument Panel Fuse Block (Left) . . . . . 373
Instrument Panel Fuse Block (Right) . . . 375
Wheels and Tires
Tires . . . . . . . . . . . . . . . . . . . . . . . . . . . . . . . . . . . 377
All-Season Tires . . . . . . . . . . . . . . . . . . . . . . . . 378
Winter Tires . . . . . . . . . . . . . . . . . . . . . . . . . . . 378
All-Terrain Tires . . . . . . . . . . . . . . . . . . . . . . . . 378
Tire Sidewall Labeling . . . . . . . . . . . . . . . . . 379
Tire Designations . . . . . . . . . . . . . . . . . . . . . . 380
Tire Terminology and Definitions . . . . . . 382
Tire Pressure . . . . . . . . . . . . . . . . . . . . . . . . . . 384
Tire Pressure Monitor System . . . . . . . . . 385
Tire Pressure Monitor Operation . . . . . . 385
Tire Inspection . . . . . . . . . . . . . . . . . . . . . . . . 389
Tire Rotation . . . . . . . . . . . . . . . . . . . . . . . . . . 390
When It Is Time for New Tires . . . . . . . . 391
Buying New Tires . . . . . . . . . . . . . . . . . . . . . . 391
Different Size Tires and Wheels . . . . . . . 392
Uniform Tire Quality Grading . . . . . . . . . 393
Wheel Alignment and Tire Balance . . . . 394
Wheel Replacement . . . . . . . . . . . . . . . . . . . 394
Tire Chains . . . . . . . . . . . . . . . . . . . . . . . . . . . . 395
If a Tire Goes Flat . . . . . . . . . . . . . . . . . . . . . 395
Tire Changing . . . . . . . . . . . . . . . . . . . . . . . . . 397
Full-Size Spare Tire . . . . . . . . . . . . . . . . . . . . 406
Jump Starting
Jump Starting - North America . . . . . . . . 407
Towing the Vehicle
Towing the Vehicle . . . . . . . . . . . . . . . . . . . 409
Recreational Vehicle Towing . . . . . . . . . . . 411
Page 351 of 474
GMC Sierra/Sierra Denali 1500 Owner Manual (GMNA-Localizing-U.S./
Canada/Mexico-15883563) - 2022 - CRC - 11/19/21
350 Vehicle Care
Engine Oil Life System
When to Change Engine Oil
This vehicle has a computer system that
indicates when to change the engine oil and
filter. This is based on a combination of
factors which include engine revolutions,
engine temperature, and miles driven. Based
on driving conditions, the mileage at which
an oil change is indicated can vary
considerably. For the oil life system to work
properly, the system must be reset every
time the oil is changed.
On some vehicles, when the system has
calculated that oil life has been diminished,
a CHANGE ENGINE OIL SOON message comes
on to indicate that an oil change is
necessary. Change the oil as soon as
possible within the next 1 000 km (600 mi).
It is possible that, if driving under the best
conditions, the oil life system might indicate
that an oil change is not necessary for up to
a year. The engine oil and filter must be
changed at least once a year and, at this
time, the system must be reset. For vehicles
without the CHANGE ENGINE OIL SOON
message, an oil change is needed when the
REMAINING OIL LIFE percentage is near 0%.
Your dealer has trained service people whowill perform this work and reset the system.
It is also important to check the oil regularly
over the course of an oil drain interval and
keep it at the proper level.
If the system is ever reset accidentally, the
oil must be changed at 5 000 km (3,000 mi)
since the last oil change. Remember to reset
the oil life system whenever the oil is
changed.
How to Reset the Engine Oil Life System
Reset the system whenever the engine oil is
changed so that the system can calculate
the next engine oil change. Always reset the
engine oil life to 100% after every oil
change. It will not reset itself. To reset the
engine oil life system:
1. Display the oil life percentage on the DIC. See Driver Information Center (DIC)
(Base Level) 0128 or
Driver Information Center (DIC) (Uplevel)
0 130.
2. Press the thumbwheel on the steering wheel, or the trip odometer reset stem if
the vehicle does not have DIC controls,
for several seconds. When the
confirmation message displays, select
YES. The oil life will change to 100%. The oil life system can also be reset as
follows:
1. Display the oil life percentage on the DIC. See Driver Information Center (DIC)
(Base Level) 0128 or
Driver Information Center (DIC) (Uplevel)
0 130.
2. Fully press the accelerator pedal slowly three times within five seconds.
3. If the display changes to 100%, the system is reset.
If the vehicle has a CHANGE ENGINE OIL
SOON message and it comes back on when
the vehicle is started and/or the oil
life percentage is near 0%, the engine oil
life system has not been reset. Repeat the
procedure.
Automatic Transmission Fluid
When to Check and Change Automatic
Transmission Fluid
It is usually not necessary to check the
transmission fluid level. The only reason for
fluid loss is a transmission leak or
overheated transmission. This vehicle is not
equipped with a transmission fluid level
dipstick. There is a special procedure for
checking and changing the transmission fluid
Page 352 of 474
GMC Sierra/Sierra Denali 1500 Owner Manual (GMNA-Localizing-U.S./
Canada/Mexico-15883563) - 2022 - CRC - 11/19/21
Vehicle Care 351
in these vehicles. Because this procedure is
difficult, this should be done at the dealer.
Contact the dealer for additional information
or the procedure can be found in the service
manual. SeePublication Ordering
Information 0449.
Caution
Use of the incorrect automatic
transmission fluid may damage the
vehicle, and the damage may not be
covered by the vehicle warranty. Always
use the correct automatic transmission
fluid. See Recommended Fluids and
Lubricants 0434.
Change the fluid and filter at the scheduled
maintenance intervals listed in Maintenance
Schedule 0425. Be sure to use the
transmission fluid listed in Recommended
Fluids and Lubricants 0434.
Engine Air Filter Life System
If equipped, this feature provides the engine
air filter’s remaining life and best timing for
a change. The timing to change an engine
air filter depends on driving and
environmental conditions.
When to Change the Engine Air Filter
When the Driver Information Center (DIC)
displays a message to replace the engine air
filter at the next oil change, follow this
timing.
When the DIC displays a message to replace
the engine air filter soon, replace the engine
air filter at the earliest convenience.
The system must be reset after the engine
air filter is changed.
If the DIC displays a message to check the
engine air filter system, see your dealer.
How to Reset the Engine Air Filter Life
System
To reset:
1. Place the vehicle in P (Park).
2. Display the Air Filter Life on the DIC. See Driver Information Center (DIC) (Base
Level) 0128 or
Driver Information Center (DIC) (Uplevel)
0 130.
3. Press
Ton the steering wheel, or press
the trip odometer reset stem if the
vehicle does not have DIC controls, to
move to the Reset/Disable display area. Select Reset then press the thumbwheel
or press the reset stem for several
seconds.
4. Press the thumbwheel or the reset stem to confirm the reset.
Engine Air Cleaner/Filter
The engine air cleaner/filter is on the driver
side of the engine compartment. See Engine
Compartment Overview 0345.
When to Inspect the Engine Air Cleaner/
Filter
If the vehicle is not equipped with the
engine air filter life system see Maintenance
Schedule 0425 for intervals on inspecting
and replacing the engine air cleaner filter.
How to Inspect/Replace the Engine Air
Cleaner/Filter
Do not start or run the engine with the
engine air cleaner/filter housing open.
Before removing the engine air cleaner/
filter, clear any dirt and debris away from
the engine air cleaner/filter housing and
nearby components. Remove the engine air
cleaner/filter. Lightly tap and shake the
engine air cleaner/filter (away from the
vehicle), to release loose dust and dirt.