change time GMC YUKON DENALI 2010 Owners Manual
[x] Cancel search | Manufacturer: GMC, Model Year: 2010, Model line: YUKON DENALI, Model: GMC YUKON DENALI 2010Pages: 560, PDF Size: 4.32 MB
Page 23 of 560
Setting the Clock
To set the time and date for the radio with CD, DVD,
and USB Port:1. Turn the ignition key to ACC/ACCESSORY or ON/RUN, then press
O, to turn the radio on.
2. Press
Gto display HR, MIN, MM, DD, YYYY
(hour, minute, month, day, and year).
3. Press the softkey located under any one of the labels to be changed.
4. To increase or decrease the time or date, turn
f
clockwise or counter‐clockwise.
For detailed instructions on setting the clock for the
vehicle's specific audio system, see Setting the Clock
on page 4‑76.
Satellite Radio
XM is a satellite radio service that is based in the
48 contiguous United States and 10 Canadian
provinces. XM satellite radio has a wide variety
of programming and commercial-free music,
coast-to-coast, and in digital-quality sound. A fee is required to receive the XM service.
For more information, refer to:
.www.xmradio.com or call 1-800-929-2100 (U.S.)
.www.xmradio.ca or call 1-877-438-9677 (Canada)
See “XM Satellite Radio Service” underRadio(s)
on
page 4‑77.
Portable Audio Devices
This vehicle may have an auxilliary input, located on
the audio faceplate, and a USB port located on the
instrument panel or in the center console. External
devices such as iPod
®, laptop computers, MP3 players,
CD changers, USB storage device, etc. can be
connected to the auxiliary port using a 3.5 mm (1/8 in.)
input jack or the USB port depending on the audio
system.
See “Using the Auxiliary Input Jack” and“Using the
USB Port” underRadio(s) on page 4‑77.
1-17
Page 29 of 560
Note:The Tire Pressure Monitor can alert you about
low tire pressure, but it does not replace normal monthly
tire maintenance. It is the driver ’s responsibility to
maintain correct tire pressures.
See Tire Pressure Monitor System
on page 6‑66and
Tire Pressure Monitor Operation on page 6‑68.
Engine Oil Life System
The engine oil life system calculates engine oil life
based on vehicle use and, on most vehicles, displays a
DIC message when it is necessary to change the
engine oil and filter. The oil life system should be reset
to 100% only following an oil change.
Resetting the Oil Life System
To reset the Engine Oil Life System on most vehicles:
1. Display the OIL LIFE REMAINING on the DIC. If the vehicle does not have DIC buttons, the
vehicle must be in P (Park) to access this display.
2. Press and hold the SET/RESET button on the DIC, or the trip odometer reset stem if the vehicle does
not have DIC buttons, for more than five seconds.
The oil life will change to 100%. On all vehicles, the Engine Oil Life System can be reset
as follows:
1. Turn the ignition to ON/RUN with the engine off
2. Fully press the accelerator pedal slowly three times within five seconds.
3. Display the OIL LIFE REMAINING on the DIC. If the display shows 100%, the system is reset.
See Engine Oil Life System on page 6‑18.
Fuel E85 (85% Ethanol)
This vehicle has a yellow fuel cap and can use either
unleaded gasoline or ethanol fuel containing up to 85%
ethanol (E85). See Gasoline Octane
on page 6‑6and
Fuel E85 (85% Ethanol) on page 6‑7.
1-23
Page 84 of 560
Infants and Young Children
Everyone in a vehicle needs protection! This includes
infants and all other children. Neither the distance
traveled nor the age and size of the traveler changes
the need, for everyone, to use safety restraints. In fact,
the law in every state in the United States and in every
Canadian province says children up to some age must
be restrained while in a vehicle.
{WARNING:
Children can be seriously injured or strangled if a
shoulder belt is wrapped around their neck and
the safety belt continues to tighten. Never leave
children unattended in a vehicle and never allow
children to play with the safety belts.
Airbags plus lap‐shoulder belts offer protection for
adults and older children, but not for young children and
infants. Neither the vehicle's safety belt system nor its
airbag system is designed for them. Every time infants
and young children ride in vehicles, they should have
the protection provided by appropriate child restraints. Children who are not restrained properly can strike
other people, or can be thrown out of the vehicle.
{WARNING:
Never do this.
Never hold an infant or a child while riding in a
vehicle. Due to crash forces, an infant or a child
will become so heavy it is not possible to hold it
during a crash. For example, in a crash at only
40 km/h (25 mph), a 5.5 kg (12 lb) infant will
suddenly become a 110 kg (240 lb) force on a
person's arms. An infant should be secured in
an appropriate restraint.
2-52
Page 143 of 560
Manual Operation of Power Liftgate
To change the liftgate to manual operation, press the
switch on the overhead console to the OFF position.
With the power liftgate disabled and all of the doors
unlocked, the liftgate can be manually opened and
closed.
To open the liftgate, press the touchpad on the handle
on the outside of the liftgate, and lift the gate open.
To close the liftgate, use the pull cup to lower the
liftgate and close. The liftgate latch will power close.
Always close the liftgate before driving.
If the RKE button or the power close button on the
liftgate is pressed while power operation is disabled, the
lights will flash three times, but the liftgate will not move.
It is not recommended that you drive with the liftgate
open, however, if you must drive with the liftgate open,
the liftgate should be set to manual operation by
pressing the OFF switch on the center console.
The liftgate has an electric latch. If the battery is
disconnected or has low voltage, the liftgate will not
open. The liftgate will resume operation when the
battery is reconnected and charged.
If the battery is properly connected with adequate
voltage, the switch is not disabled, and the liftgate still
will not function, your vehicle should be taken to a
dealer/retailer for service.
Power Assist Steps
Your vehicle may have power assist steps.
The power assist steps automatically extend from
beneath the vehicle on the side in which the door has
been opened. Once the door is closed, the assist steps
automatically move back under the vehicle after a brief
delay. The vehicle must not be moving for the assist
steps to extend or retract.
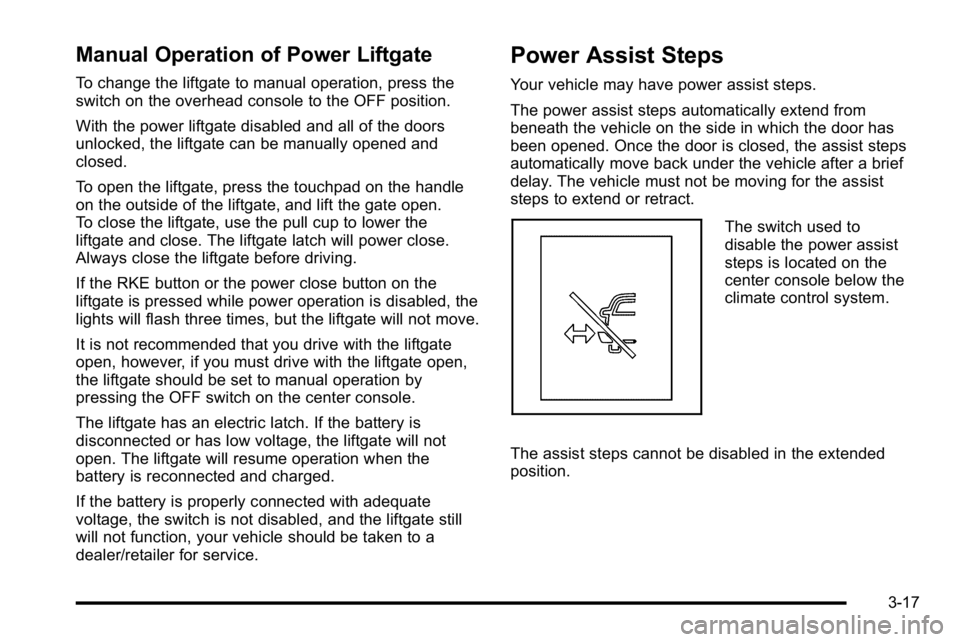
The switch used to
disable the power assist
steps is located on the
center console below the
climate control system.
The assist steps cannot be disabled in the extended
position.
3-17
Page 153 of 560
Starting Procedure
1. With your foot off the accelerator pedal, turn theignition to START. When the engine starts,
let go of the key. The idle speed will slow down
as the engine warms. Do not race the engine
immediately after starting it. Operate the engine
and transmission gently to allow the oil to warm up
and lubricate all moving parts.
The vehicle has a Computer-Controlled Cranking
System. This feature assists in starting the engine
and protects components. If the ignition key is
turned to the START position, and then released
when the engine begins cranking, the engine will
continue cranking for a few seconds or until the
vehicle starts. If the engine does not start and the
key is held in START, cranking will be stopped
after 15 seconds to prevent cranking motor
damage. To prevent gear damage, this system also
prevents cranking if the engine is already running.
Engine cranking can be stopped by turning the
ignition switch to the ACC/ACCESSORY or
LOCK/OFF position.
Notice: Cranking the engine for long periods of
time, by returning the key to the START position
immediately after cranking has ended, can overheat
and damage the cranking motor, and drain the
battery. Wait at least 15 seconds between each try,
to let the cranking motor cool down. 2. If the engine does not start after 5‐10 seconds,
especially in very cold weather (below 0°F or
−18°C), it could be flooded with too much gasoline.
Try pushing the accelerator pedal all the way to the
floor and holding it there as you hold the key in
START for up to a maximum of 15 seconds. Wait at
least 15 seconds between each try, to allow the
cranking motor to cool down. When the engine
starts, let go of the key and accelerator. If the
vehicle starts briefly but then stops again, repeat
these steps. This clears the extra gasoline from the
engine. Do not race the engine immediately after
starting it. Operate the engine and transmission
gently until the oil warms up and lubricates all
moving parts.
Notice: The engine is designed to work with the
electronics in the vehicle. If you add electrical
parts or accessories, you could change the way
the engine operates. Before adding electrical
equipment, check with your dealer/retailer. If you
do not, the engine might not perform properly.
Any resulting damage would not be covered by the
vehicle warranty.
3-27
Page 169 of 560
Outside Power Foldaway Mirrors
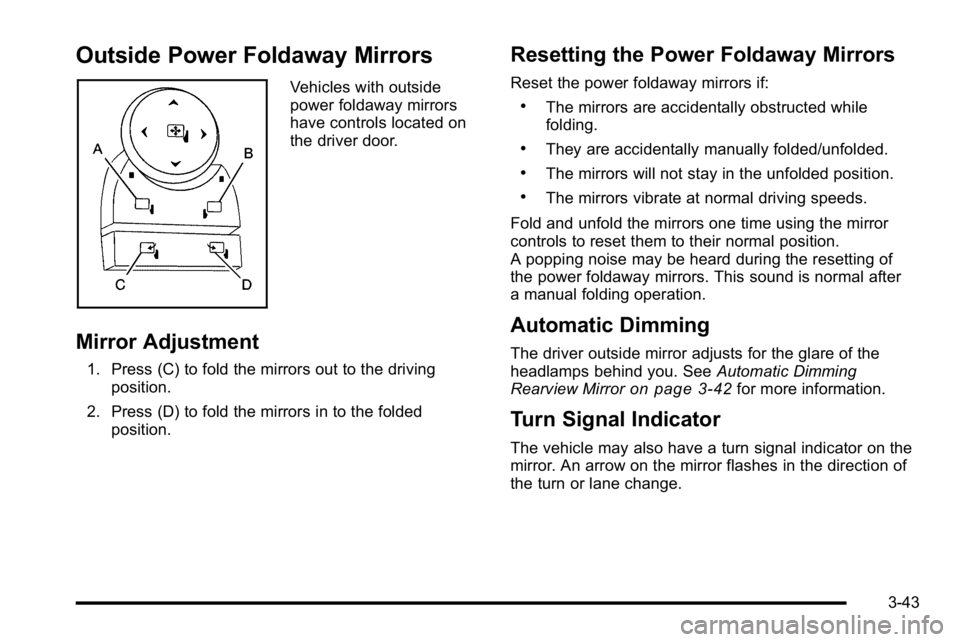
Vehicles with outside
power foldaway mirrors
have controls located on
the driver door.
Mirror Adjustment
1. Press (C) to fold the mirrors out to the drivingposition.
2. Press (D) to fold the mirrors in to the folded position.
Resetting the Power Foldaway Mirrors
Reset the power foldaway mirrors if:
.The mirrors are accidentally obstructed while
folding.
.They are accidentally manually folded/unfolded.
.The mirrors will not stay in the unfolded position.
.The mirrors vibrate at normal driving speeds.
Fold and unfold the mirrors one time using the mirror
controls to reset them to their normal position.
A popping noise may be heard during the resetting of
the power foldaway mirrors. This sound is normal after
a manual folding operation.
Automatic Dimming
The driver outside mirror adjusts for the glare of the
headlamps behind you. See Automatic Dimming
Rearview Mirror
on page 3‑42for more information.
Turn Signal Indicator
The vehicle may also have a turn signal indicator on the
mirror. An arrow on the mirror flashes in the direction of
the turn or lane change.
3-43
Page 180 of 560
When the System Does Not Seem To
Work Properly
The rear vision camera system might not work properly
or display a clear image if:
.The RVC is turned off. See“Turning the Rear
Camera System On or Off” earlier in this section.
.It is dark.
.The sun or the beam of headlights is shining
directly into the camera lens.
.Ice, snow, mud, or anything else builds up on the
camera lens. Clean the lens, rinse it with water,
and wipe it with a soft cloth.
.The back of the vehicle is in an accident, the
position and mounting angle of the camera can
change or the camera can be affected. Be sure to
have the camera and its position and mounting
angle checked at your dealer/retailer. The rear vision camera system display in the rearview
mirror may turn off or not appear as expected due to
one of the following conditions. If this occurs the left
indicator light on the mirror will flash.
.A slow flash may indicate a loss of video signal,
or no video signal present during the reverse cycle.
.A fast flash may indicate that the display has been
on for the maximum allowable time during a
reverse cycle, or the display has reached an Over
Temperature limit.
The fast flash conditions are used to protect the
video device from high temperature conditions.
Once conditions return to normal the device will
reset and the green indicator will stop flashing.
During any of these fault conditions, the display will be
blank and the indicator will continue to flash as long as
the vehicle is in R (Reverse) or until the conditions
return to normal.
Pressing and holding
zwhen the left indicator light is
flashing will turn off the video display along with the left
indicator light.
3-54
Page 195 of 560
Section 4 Instrument Panel
Instrument Panel Overview. . . . . . . . . . . . . . . . . . . . . . . .4-3
Hazard Warning Flashers . . . . . . . . . . . . . . . . . . . . . . . 4-3
Horn . . . . . . . . . . . . . . . . . . . . . . . . . . . . . . . . . . . . . . . . . . . . 4-3
Tilt Wheel . . . . . . . . . . . . . . . . . . . . . . . . . . . . . . . . . . . . . . . 4-3
Heated Steering Wheel . . . . . . . . . . . . . . . . . . . . . . . . . 4-4
Turn Signal/Multifunction Lever . . . . . . . . . . . . . . . . . . 4-4
Turn and Lane-Change Signals . . . . . . . . . . . . . . . . . 4-5
Headlamp High/Low-Beam Changer . . . . . . . . . . . . 4-5
Flash-to-Pass . . . . . . . . . . . . . . . . . . . . . . . . . . . . . . . . . . . 4-6
Windshield Wipers . . . . . . . . . . . . . . . . . . . . . . . . . . . . . . 4-6
Windshield Washer . . . . . . . . . . . . . . . . . . . . . . . . . . . . . 4-7
Rear Window Wiper/Washer . . . . . . . . . . . . . . . . . . . . 4-7
Cruise Control . . . . . . . . . . . . . . . . . . . . . . . . . . . . . . . . . . 4-8
Exterior Lamps . . . . . . . . . . . . . . . . . . . . . . . . . . . . . . . . . 4-11
Headlamps on Reminder . . . . . . . . . . . . . . . . . . . . . . 4-12
Daytime Running Lamps (DRL) . . . . . . . . . . . . . . . . 4-12
Automatic Headlamp System . . . . . . . . . . . . . . . . . . 4-13
Fog Lamps . . . . . . . . . . . . . . . . . . . . . . . . . . . . . . . . . . . . 4-14
Instrument Panel Brightness . . . . . . . . . . . . . . . . . . . 4-14
Dome Lamps . . . . . . . . . . . . . . . . . . . . . . . . . . . . . . . . . . 4-14
Dome Lamp Override . . . . . . . . . . . . . . . . . . . . . . . . . . 4-14
Entry Lighting . . . . . . . . . . . . . . . . . . . . . . . . . . . . . . . . . . 4-15
Exit Lighting . . . . . . . . . . . . . . . . . . . . . . . . . . . . . . . . . . . 4-15
Front Reading Lamps . . . . . . . . . . . . . . . . . . . . . . . . . . 4-15
Electric Power Management . . . . . . . . . . . . . . . . . . . 4-15 Battery Run-Down Protection . . . . . . . . . . . . . . . . . . 4-16
Accessory Power Outlet(s) . . . . . . . . . . . . . . . . . . . . . 4-16
Ashtray(s) and Cigarette Lighter . . . . . . . . . . . . . . . 4-17
Climate Controls . . . . . . . . . . . . . . . . . . . . . . . . . . . . . . . . . . 4-18
Dual Automatic Climate Control System . . . . . . . 4-18
Outlet Adjustment . . . . . . . . . . . . . . . . . . . . . . . . . . . . . . 4-23
Rear Air Conditioning and Heating System
and Electronic Climate Controls . . . . . . . . . . . . . 4-24
Warning Lights, Gages, and Indicators . . . . . . . . . .4-25
Instrument Panel Cluster . . . . . . . . . . . . . . . . . . . . . . . 4-26
Speedometer and Odometer . . . . . . . . . . . . . . . . . . . 4-27
Trip Odometer . . . . . . . . . . . . . . . . . . . . . . . . . . . . . . . . . 4-27
Tachometer . . . . . . . . . . . . . . . . . . . . . . . . . . . . . . . . . . . . 4-27
Safety Belt Reminders . . . . . . . . . . . . . . . . . . . . . . . . . 4-27
Airbag Readiness Light . . . . . . . . . . . . . . . . . . . . . . . . 4-28
Passenger Airbag Status Indicator . . . . . . . . . . . . . 4-29
Charging System Light . . . . . . . . . . . . . . . . . . . . . . . . 4-30
Voltmeter Gage . . . . . . . . . . . . . . . . . . . . . . . . . . . . . . . . 4-31
Brake System Warning Light . . . . . . . . . . . . . . . . . . . 4-32
Antilock Brake System (ABS) Warning Light . . . 4-33
StabiliTrak
®Indicator Light . . . . . . . . . . . . . . . . . . . . . 4-33
Engine Coolant Temperature Gage . . . . . . . . . . . . 4-34
Tire Pressure Light . . . . . . . . . . . . . . . . . . . . . . . . . . . . 4-34
Malfunction Indicator Lamp . . . . . . . . . . . . . . . . . . . . 4-35
Oil Pressure Gage . . . . . . . . . . . . . . . . . . . . . . . . . . . . . 4-38
4-1
Page 199 of 560
Turn and Lane-Change Signals
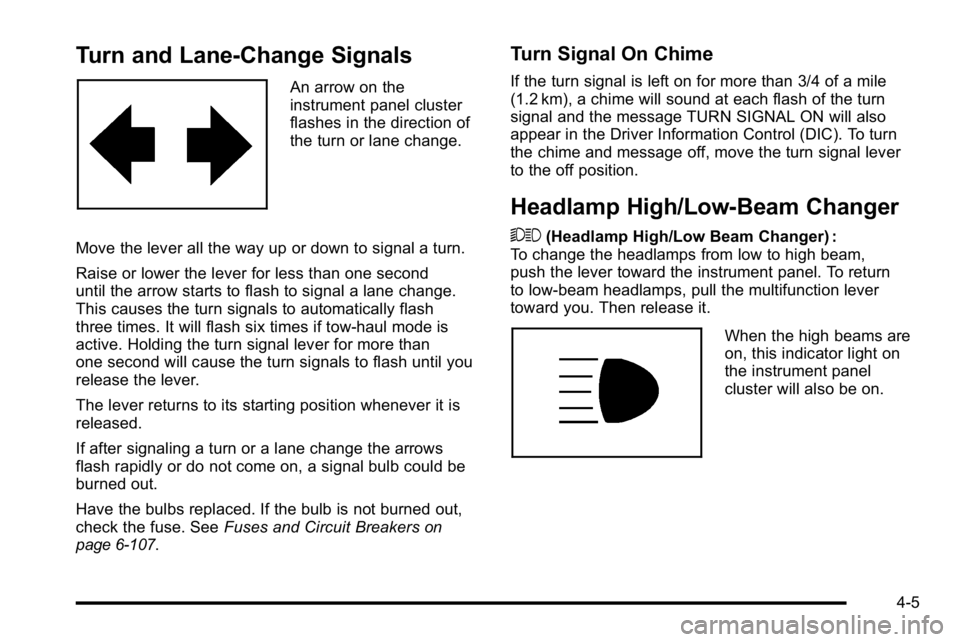
An arrow on the
instrument panel cluster
flashes in the direction of
the turn or lane change.
Move the lever all the way up or down to signal a turn.
Raise or lower the lever for less than one second
until the arrow starts to flash to signal a lane change.
This causes the turn signals to automatically flash
three times. It will flash six times if tow-haul mode is
active. Holding the turn signal lever for more than
one second will cause the turn signals to flash until you
release the lever.
The lever returns to its starting position whenever it is
released.
If after signaling a turn or a lane change the arrows
flash rapidly or do not come on, a signal bulb could be
burned out.
Have the bulbs replaced. If the bulb is not burned out,
check the fuse. See Fuses and Circuit Breakers
on
page 6‑107.
Turn Signal On Chime
If the turn signal is left on for more than 3/4 of a mile
(1.2 km), a chime will sound at each flash of the turn
signal and the message TURN SIGNAL ON will also
appear in the Driver Information Control (DIC). To turn
the chime and message off, move the turn signal lever
to the off position.
Headlamp High/Low-Beam Changer
53 (Headlamp High/Low Beam Changer) :
To change the headlamps from low to high beam,
push the lever toward the instrument panel. To return
to low-beam headlamps, pull the multifunction lever
toward you. Then release it.
When the high beams are
on, this indicator light on
the instrument panel
cluster will also be on.
4-5
Page 207 of 560
To turn off the DRL lamps, turn the exterior lamps
control to the OFF position and then release.
For vehicles first sold in Canada, the transmission
must be in the P (Park) position, before the DRL lamps
can be turned off.
Automatic Headlamp System
When it is dark enough outside, the automatic
headlamp system turns on the headlamps at the normal
brightness, along with the taillamps, sidemarker, parking
lamps, and the instrument panel lights. The radio lights
will also be dim.
To turn off the automatic headlamp system, turn the
exterior lamps switch to the off position and then
release it. For vehicles first sold in Canada, the
transmission must be in the P (Park) position, before
the automatic headlamp system can be turned off.
The vehicle has a light sensor located on the top of the
instrument panel in the defroster grille that regulates
when the automatic headlamps turn on. Do not cover
the sensor or the headlamps will come on whenever the
ignition is on.
The system may also turn on the headlamps when
driving through a parking garage, heavy overcast
weather, or a tunnel. This is normal.There is a delay in the transition between the daytime
and nighttime operation of the Daytime Running Lamps
(DRL) and the automatic headlamp systems so that
driving under bridges or bright overhead street lights
does not affect the system. The DRL and automatic
headlamp system is only affected when the light
sensor detects a change in lighting lasting longer than
the delay.
If the vehicle is started in a dark garage, the automatic
headlamp system will come on immediately. Once the
vehicle leaves the garage, it takes approximately
one minute for the automatic headlamp system to
change to DRL if it is bright enough outside. During that
delay, the instrument panel cluster may not be as bright
as usual. Make sure the instrument panel brightness
control is in the full bright position. See
Instrument
Panel Brightness on page 4‑14.
To idle the vehicle with the automatic headlamp system
off, turn the control to the off position.
The headlamps will also stay on after you exit the
vehicle. This feature can be programmed using the
Driver Information Center (DIC). See DIC Vehicle
Customization (With DIC Buttons) on page 4‑66.
The regular headlamp system can be turned on when
needed.
4-13