ECU HONDA CR-V 2012 RM1, RM3, RM4 / 4.G Owner's Manual
[x] Cancel search | Manufacturer: HONDA, Model Year: 2012, Model line: CR-V, Model: HONDA CR-V 2012 RM1, RM3, RM4 / 4.GPages: 361, PDF Size: 7.25 MB
Page 96 of 361
95
Controls
This chapter explains how to operate the various controls necessary for driving.
Setting the Clock ................................ 96
Locking and Unlocking the Doors
Key Types and Functions ... ................. 97
Locking/Unlocking the Doors from the Outside ............................................ 99
Locking/Unlocking the Doors from the Inside ............................................. 101
Childproof Door Locks ..................... 102
Auto Door Locking/Unlocking .......... 103
Opening and Closing the Tailgate ... 104
Security System ................................ 106
Immobilizer System .......................... 106
Security System Alarm *
.................... 106
Opening and Closing the Windows ..... 108Opening and Closing the Moonroof*...... 110Operating the Switches Around the
Steering WheelIgnition Switch ................................. 111
Turn Signals ..................................... 112
Light Switches.................................. 112Fog Lights *
...................................... 114
Daytime Running Lights ................... 114
Wipers and Washers ........................ 115
Brightness Control ........................... 117 Rear Defogger/Heated Door Mirror *
Button ........................................... 118
ECON Button ................................... 119
Adjusting the Steering Wheel........... 119 Adjusting the Mirrors
....................... 120
Interior Rearview Mirror ................... 120
Power Door Mirrors ......................... 121
Adjusting the Seats .......................... 122
Adjusting the Seat Positions ............. 122
Interior Lights/Interior Convenience Items ................................................ 132
Interior Lights .................................. 132
Interior Convenience Items .............. 133
Heating and Cooling System *
......... 142
Using Vents, Heating and A/C.......... 142
Climate Control System *
.................. 145
Using Automatic Climate Control .... 145
Automatic Climate Control Sensors . 148
* Not available on all models
Page 100 of 361
99
uuLocking and Unlocking the DoorsuLocking/Unlocking the Doors from the Outside
Continued
Controls
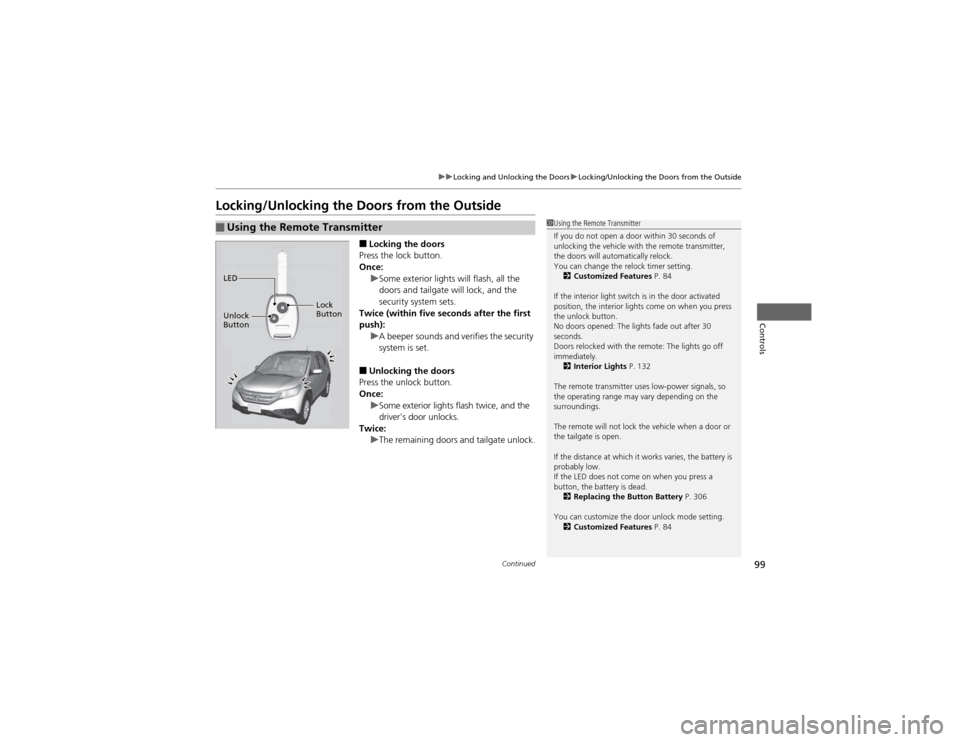
Locking/Unlocking the Doors from the Outside■Locking the doors
Press the lock button.
Once:
uSome exterior lights will flash, all the
doors and tailgate will lock, and the
security system sets.
Twice (within five seconds after the first
push):
uA beeper sounds and verifies the security
system is set.
■ Unlocking the doors
Press the unlock button.
Once:
uSome exterior lights flash twice, and the
driver's door unlocks.
Twice:
uThe remaining doors and tailgate unlock.
■Using the Remote Transmitter1Using the Remote Transmitter
If you do not open a door within 30 seconds of
unlocking the vehicle with the remote transmitter,
the doors will automatically relock.
You can change the relock timer setting. 2 Customized Features P. 84
If the interior light switch is in the door activated
position, the interior lights come on when you press
the unlock button.
No doors opened: The lights fade out after 30
seconds.
Doors relocked with the remote: The lights go off immediately. 2 Interior Lights P. 132
The remote transmitter uses low-power signals, so
the operating range may vary depending on the
surroundings.
The remote will not lock the vehicle when a door or
the tailgate is open.
If the distance at which it works varies, the battery is probably low.
If the LED does not come on when you press a
button, the battery is dead. 2 Replacing the Button Battery P. 306
You can customize the door unlock mode setting. 2 Customized Features P. 84
LED
Unlock
Button Lock
Button
Page 107 of 361
106
Controls
Security System
Immobilizer System
The immobilizer system prevents a key that has not been pre-registered from
starting the engine. Each key contains electronic transmitters that use electronic
signals to verify the key.
Pay attention to the following when inserting the key into the ignition switch: •Do not allow objects that emit strong radio waves near the ignition switch.
• Make sure the key is not covered by or touching a metal object.
• Do not bring a key from another vehicle's immobilizer system near the ignition
switch.
Security System Alarm *
The security system alarm activates when the doors, tailgate, or hood are opened
without the key, or remote transmitter. ■ When the security system alarm activates
The horn sounds intermittently and all of the exterior lights flash.
■ To deactivate the security system alarm
Unlock the vehicle using the key, or remote transmitter. The system, along with the
horn and flashing lights, is deactivated.
1Immobilizer System
NOTICELeaving the ignition key in the vehicle can result in
theft or accidental movement of the vehicle.
Always take the ignition key with you whenever you
leave the vehicle unattended.
Do not alter the system or add other devices to it.
Doing so may damage the system and make your
vehicle inoperable.
1Security System Alarm *
The security alarm continues for a maximum of two
minutes until the security system deactivates.
* Not available on all models
Page 108 of 361
107
uuSecurity SystemuSecurity System Alarm*
Controls
■
Setting the security system alarm
The security system alarm automatically sets when the following conditions have
been met: • The ignition switch is in LOCK
(0 , and the key has been removed from the
ignition switch.
• The hood and tailgate are closed.
• All doors are locked with the key or the remote transmitter.
■ When the security system alarm sets
The security system alarm indicator in the instrument panel blinks. When the
blinking interval changes after about 15 seconds, the security system alarm is set.
■ To cancel the security system alarm
The security system alarm is canceled when the vehicle is unlocked using the key or
remote transmitter, or the ignition switch is turned to ON
(w . The security system
alarm indicator goes off at the same time.
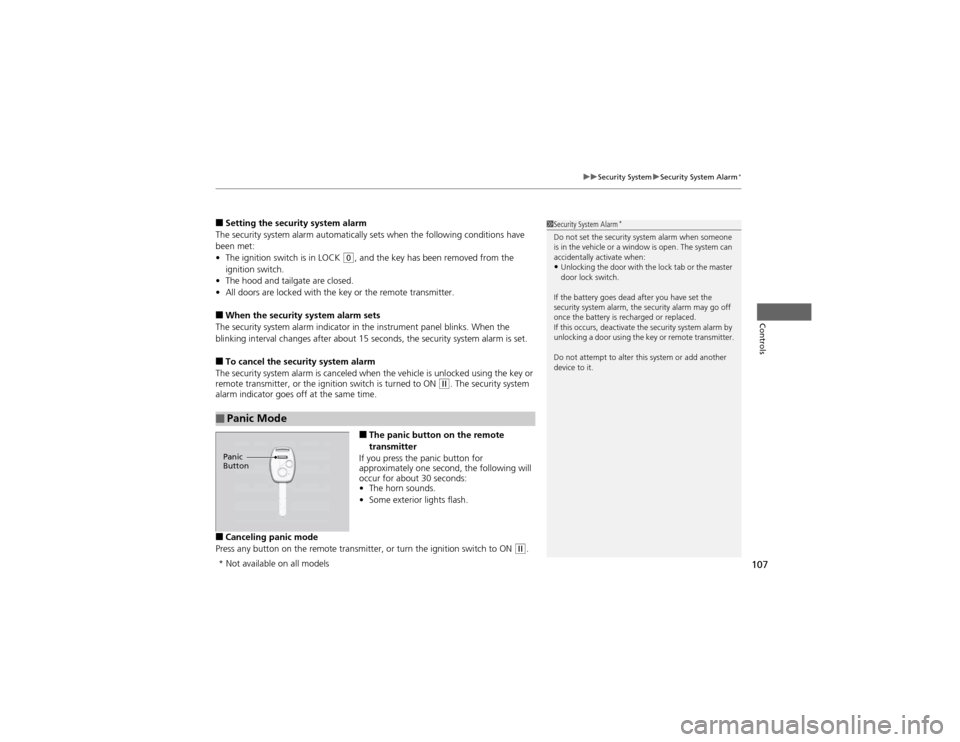
■The panic button on the remote
transmitter
If you press the panic button for
approximately one second, the following will
occur for about 30 seconds: • The horn sounds.
• Some exterior lights flash.
■ Canceling panic mode
Press any button on the remote transmitter, or turn the ignition switch to ON
(w .
■Panic Mode
1Security System Alarm *
Do not set the security system alarm when someone
is in the vehicle or a window is open. The system can
accidentally activate when: • Unlocking the door with the lock tab or the master
door lock switch.
If the battery goes dead after you have set the
security system alarm, the security alarm may go off
once the battery is recharged or replaced.
If this occurs, deactivate the security system alarm by
unlocking a door using the key or remote transmitter.
Do not attempt to alter this system or add another device to it.
Panic
Button
* Not available on all models
Page 120 of 361
119
uuOperating the Switches Around the Steering WheeluECON Button
Controls
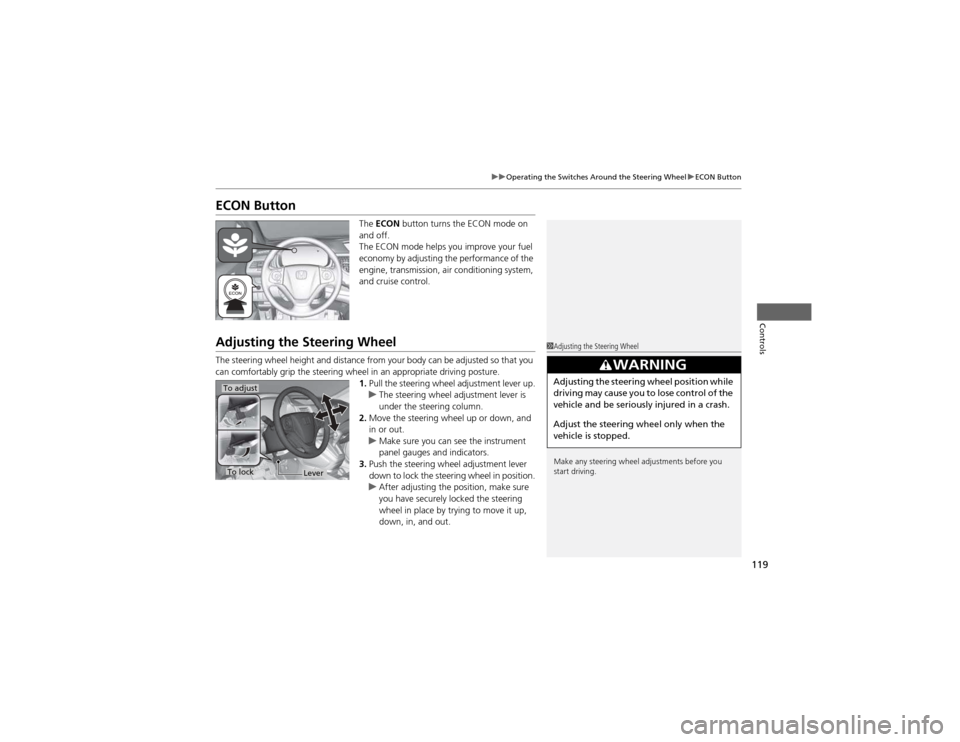
ECON ButtonThe ECON button turns the ECON mode on
and off.
The ECON mode helps you improve your fuel
economy by adjusting the performance of the
engine, transmission, air conditioning system,
and cruise control.
Adjusting the Steering Wheel
The steering wheel height and distance from your body can be adjusted so that you
can comfortably grip the steering wheel in an appropriate driving posture. 1.Pull the steering wheel adjustment lever up.
uThe steering wheel adjustment lever is
under the steering column.
2. Move the steering wheel up or down, and
in or out.
uMake sure you can see the instrument
panel gauges and indicators.
3. Push the steering wheel adjustment lever
down to lock the steering wheel in position.
uAfter adjusting the position, make sure
you have securely locked the steering
wheel in place by trying to move it up,
down, in, and out.
1Adjusting the Steering Wheel
Make any steering wheel adjustments before you
start driving.
3WARNING
Adjusting the steering wheel position while
driving may cause you to lose control of the
vehicle and be seriously injured in a crash.
Adjust the steering wheel only when the
vehicle is stopped.To adjust
To lockLever
Page 130 of 361
129
uuAdjusting the SeatsuRear Seats
Continued
Controls
Rear Seats
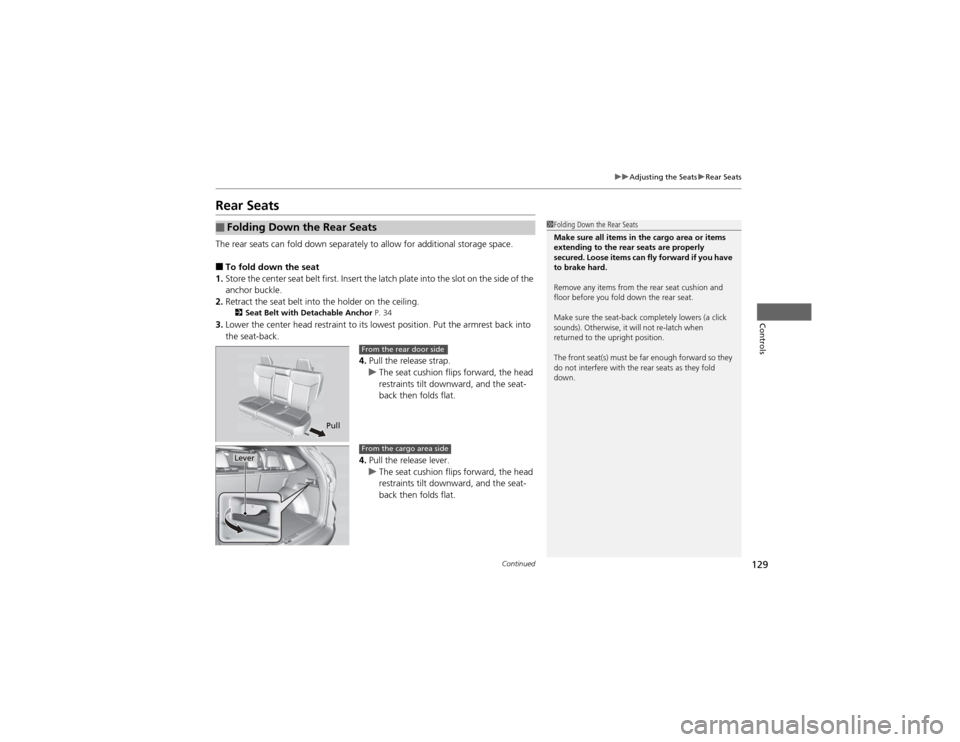
The rear seats can fold down separately to allow for additional storage space. ■To fold down the seat
1. Store the center seat belt first. Insert the latch plate into the slot on the side of the
anchor buckle.
2. Retract the seat belt into the holder on the ceiling.
2 Seat Belt with Detachable Anchor P. 34
3. Lower the center head restraint to its lowest position. Put the armrest back into the seat-back.
4.Pull the release strap.
uThe seat cushion flips forward, the head
restraints tilt downward, and the seat-
back then folds flat.
4. Pull the release lever.
uThe seat cushion flips forward, the head
restraints tilt downward, and the seat-
back then folds flat.
■Folding Down the Rear Seats1Folding Down the Rear Seats
Make sure all items in the cargo area or items
extending to the rear seats are properly
secured. Loose items can fly forward if you have to brake hard.
Remove any items from the rear seat cushion and
floor before you fold down the rear seat.
Make sure the seat-back completely lowers (a click
sounds). Otherwise, it will not re-latch when
returned to the upright position.
The front seat(s) must be far enough forward so they
do not interfere with the rear seats as they fold
down.
Pull
From the rear door side
LeverFrom the cargo area side
Page 131 of 361
uuAdjusting the SeatsuRear Seats
130
Controls
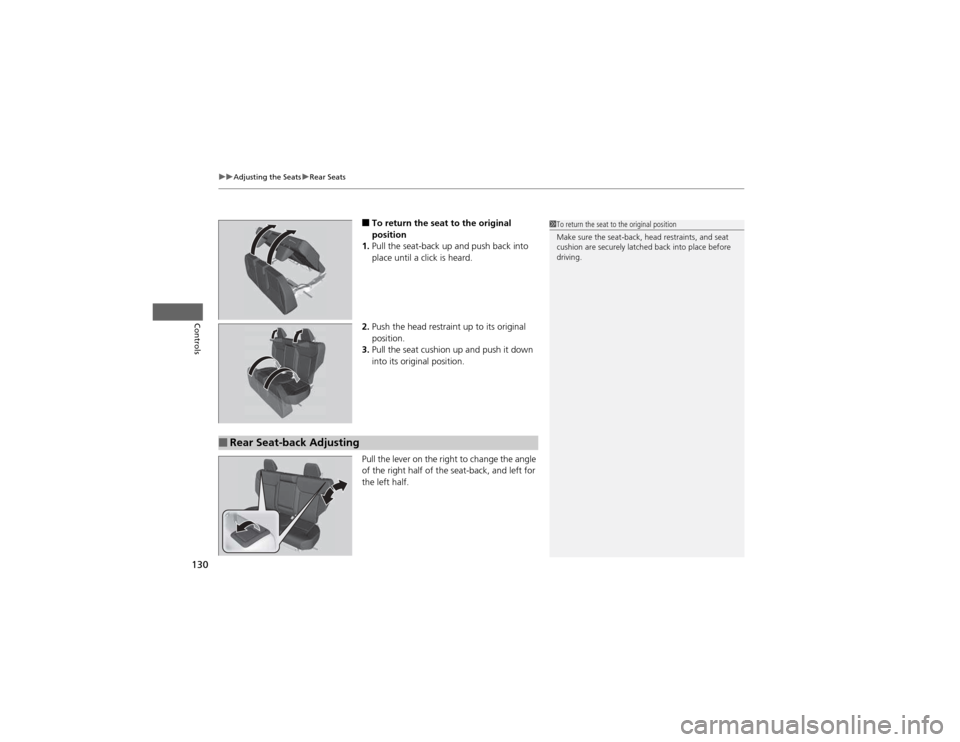
■ To return the seat to the original
position
1. Pull the seat-back up and push back into
place until a click is heard.
2. Push the head restraint up to its original
position.
3. Pull the seat cushion up and push it down
into its original position.
Pull the lever on the right to change the angle
of the right half of the seat-back, and left for
the left half.
■Rear Seat-back Adjusting
1To return the seat to the original position
Make sure the seat-back, head restraints, and seat
cushion are securely latched back into place before
driving.
Page 137 of 361
uuInterior Lights/Interior Convenience ItemsuInterior Convenience Items
136
Controls
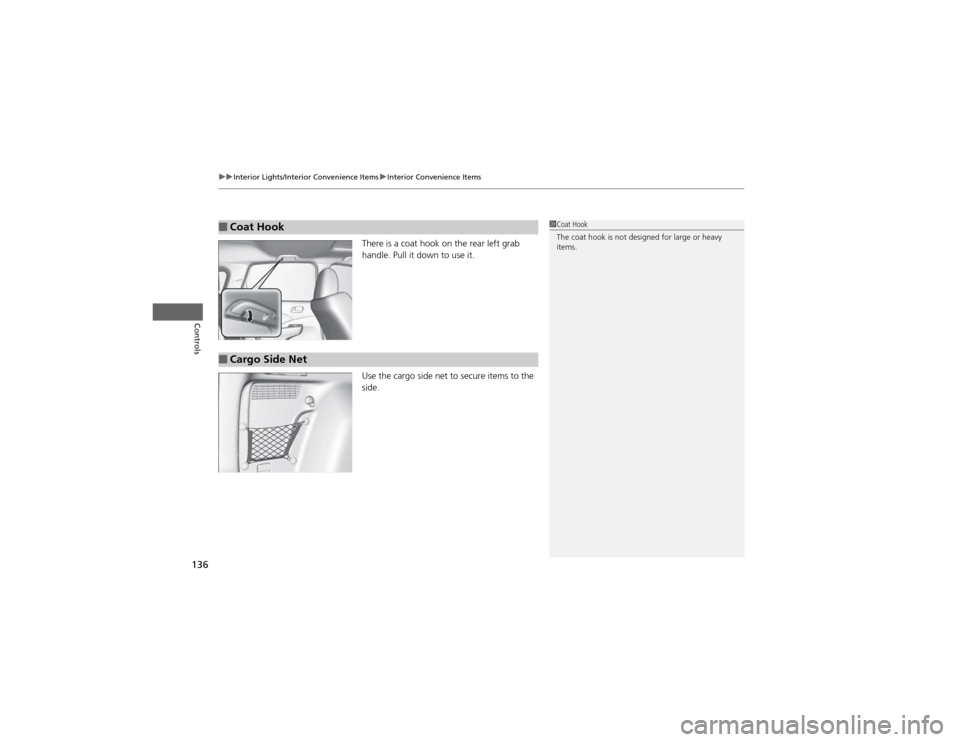
There is a coat hook on the rear left grab
handle. Pull it down to use it.
Use the cargo side net to secure items to the
side.
■Coat Hook1Coat Hook
The coat hook is not designed for large or heavy items.
■Cargo Side Net
Page 138 of 361
Continued137
uuInterior Lights/Interior Convenience ItemsuInterior Convenience Items
Controls
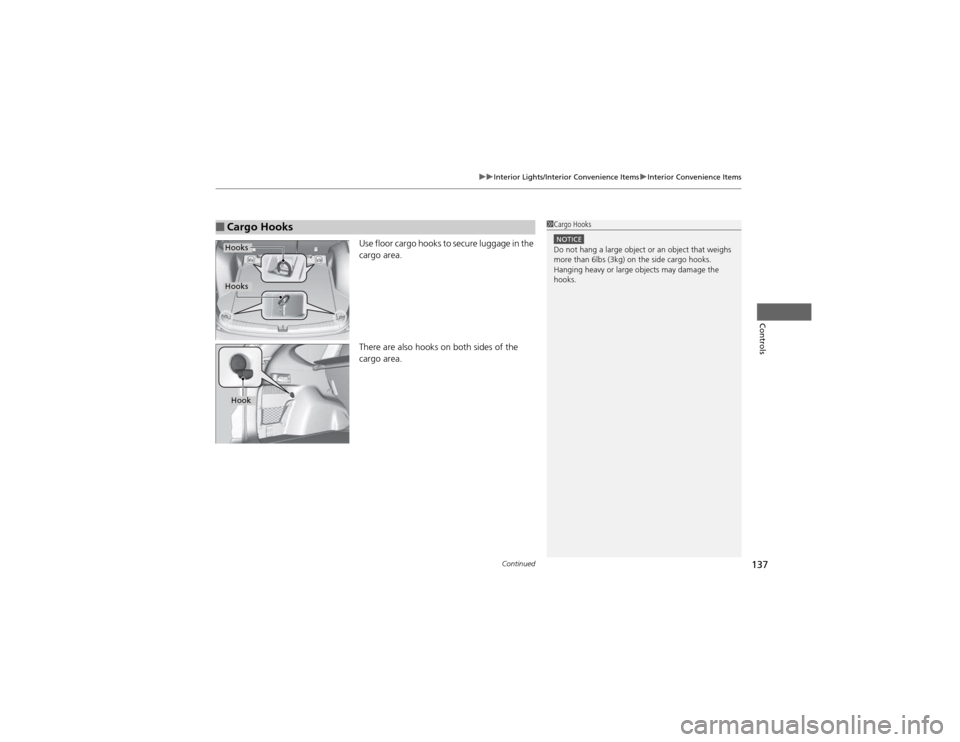
Use floor cargo hooks to secure luggage in the cargo area.
There are also hooks on both sides of the cargo area.
■Cargo Hooks1Cargo Hooks
NOTICEDo not hang a large object or an object that weighs
more than 6lbs (3kg) on the side cargo hooks.
Hanging heavy or large objects may damage the hooks.
Hooks
Hooks
Hook
Page 142 of 361
141
uuInterior Lights/Interior Convenience ItemsuInterior Convenience Items
Controls
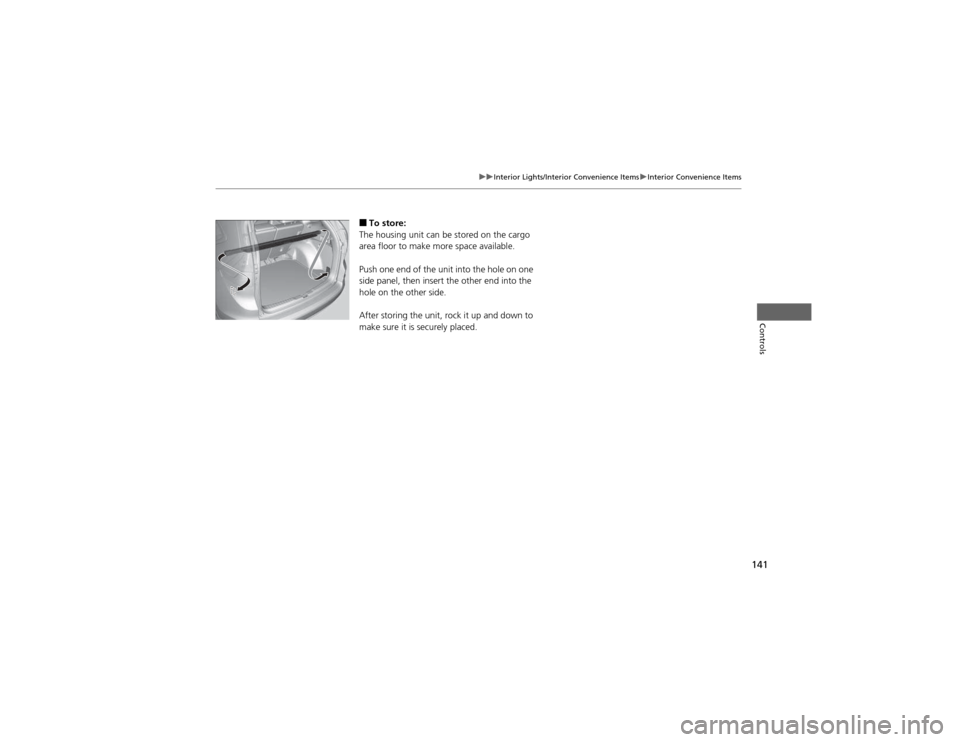
■To store:
The housing unit can be stored on the cargo
area floor to make more space available.
Push one end of the unit into the hole on one
side panel, then insert the other end into the
hole on the other side.
After storing the unit, rock it up and down to
make sure it is securely placed.