display HONDA HR-V 2018 Owner's Manual (in English)
[x] Cancel search | Manufacturer: HONDA, Model Year: 2018, Model line: HR-V, Model: HONDA HR-V 2018Pages: 503, PDF Size: 32.79 MB
Page 352 of 503
350
uuWhen Driving uShifting
Driving
Shifting
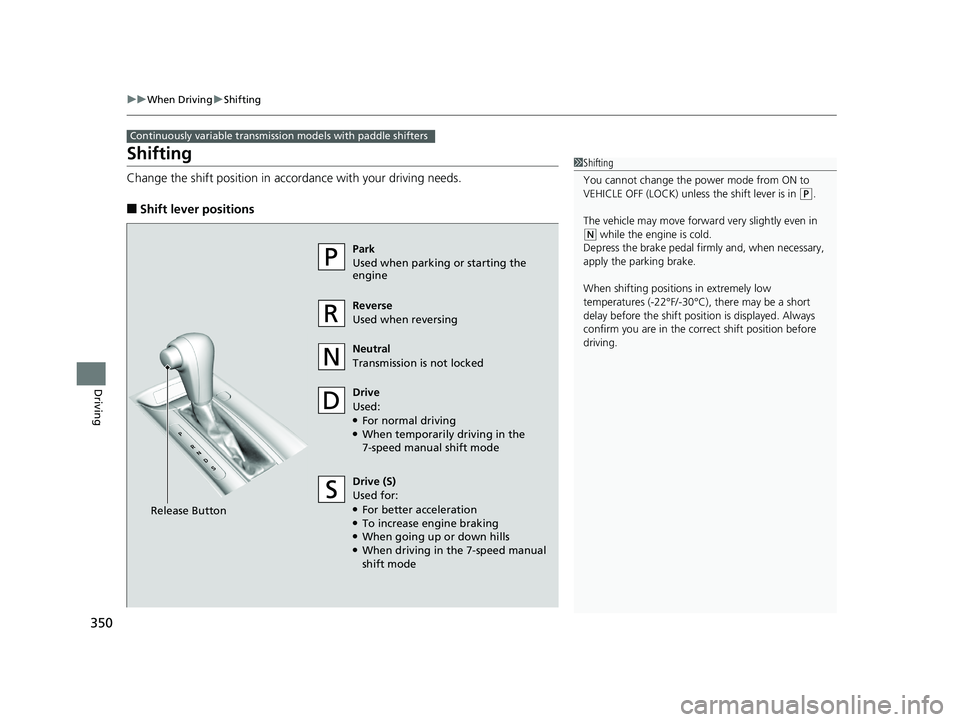
Change the shift positi on in accordance with your driving needs.
■Shift lever positions
Continuously variable transmission models with paddle shifters
1Shifting
You cannot change the power mode from ON to
VEHICLE OFF (LOCK) unless the shift lever is in
(P.
The vehicle may move forwar d very slightly even in
(N while the engine is cold.
Depress the brake pedal firm ly and, when necessary,
apply the parking brake.
When shifting positions in extremely low
temperatures (-22°F/-30°C), there may be a short
delay before the shift posit ion is displayed. Always
confirm you are in the corr ect shift position before
driving.
Park
Used when parking or starting the
engine
Reverse
Used when reversing
Neutral
Transmission is not locked
Drive
Used:
●For normal driving●When temporarily driving in the
7-speed manual shift mode
Release Button Drive (S)
Used for:
●For better acceleration●To increase engine braking●When going up or down hills●When driving in the 7-speed manual
shift mode
18 HR-V-31T7A6200.book 350 ページ 2017年6月30日 金曜日 午後1時23分
Page 354 of 503
uuWhen Driving uShifting
352
Driving
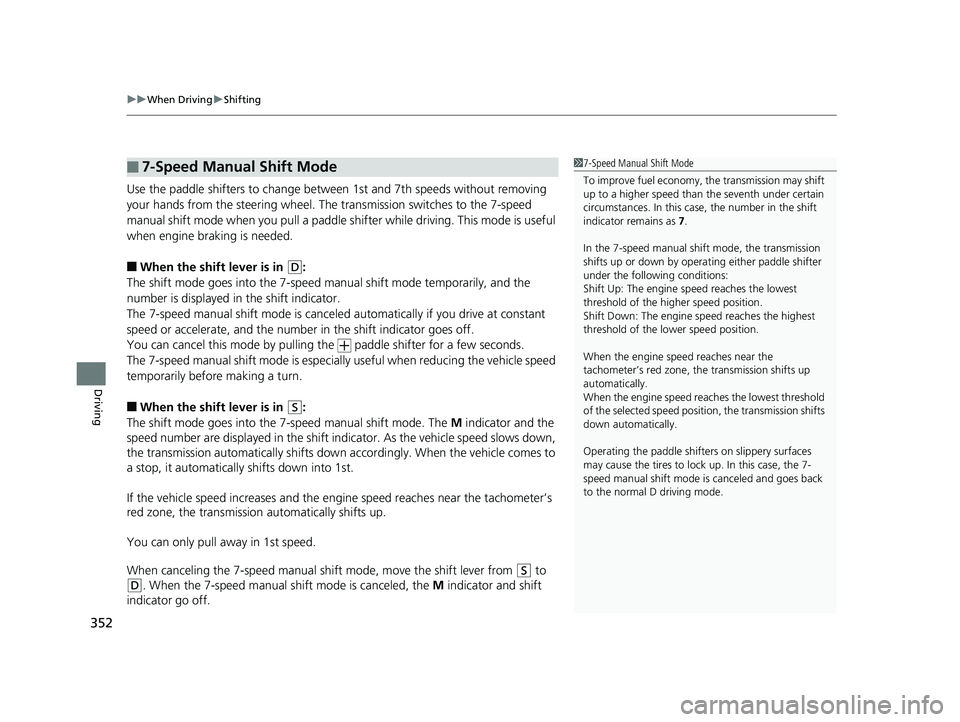
Use the paddle shifters to change betw een 1st and 7th speeds without removing
your hands from the steering wheel. The transmission switches to the 7-speed
manual shift mode when you pull a paddle shi fter while driving. This mode is useful
when engine braking is needed.
■When the shift lever is in (D:
The shift mode goes into the 7-speed ma nual shift mode temporarily, and the
number is displayed in the shift indicator.
The 7-speed manual shift mode is canceled automatically if you drive at constant
speed or accelerate, and the number in the shift indicator goes off.
You can cancel this mode by pulling th e paddle shifter for a few seconds.
The 7-speed manual shift mode is especially useful when reducing the vehicle speed
temporarily before making a turn.
■When the shift lever is in (S:
The shift mode goes into the 7- speed manual shift mode. The M indicator and the
speed number are displayed in the shift indicator. As the vehicle speed slows down,
the transmission automatically shifts down accordingly. When the vehicle comes to
a stop, it automatically shifts down into 1st.
If the vehicle speed increases and the engi ne speed reaches near the tachometer’s
red zone, the transmission automatically shifts up.
You can only pull away in 1st speed.
When canceling the 7-speed manual sh ift mode, move the shift lever from
(S to
(D. When the 7-speed manual shift mode is canceled, the M indicator and shift
indicator go off.
■7-Speed Manual Shift Mode1 7-Speed Manual Shift Mode
To improve fuel economy, the transmission may shift
up to a higher speed than the seventh under certain
circumstances. In this case, the number in the shift
indicator remains as 7.
In the 7-speed manual shif t mode, the transmission
shifts up or down by opera ting either paddle shifter
under the following conditions:
Shift Up: The engine sp eed reaches the lowest
threshold of the higher speed position.
Shift Down: The engine sp eed reaches the highest
threshold of the lower speed position.
When the engine speed reaches near the
tachometer’s red zone, the transmission shifts up
automatically.
When the engine speed reaches the lowest threshold
of the selected speed positi on, the transmission shifts
down automatically.
Operating the paddle shifte rs on slippery surfaces
may cause the tires to lock up. In this case, the 7-
speed manual shift mode is canceled and goes back
to the normal D driving mode.
18 HR-V-31T7A6200.book 352 ページ 2017年6月30日 金曜日 午後1時23分
Page 365 of 503
Continued363
uuWhen Driving uForward Collision Warning (FCW)*
Driving
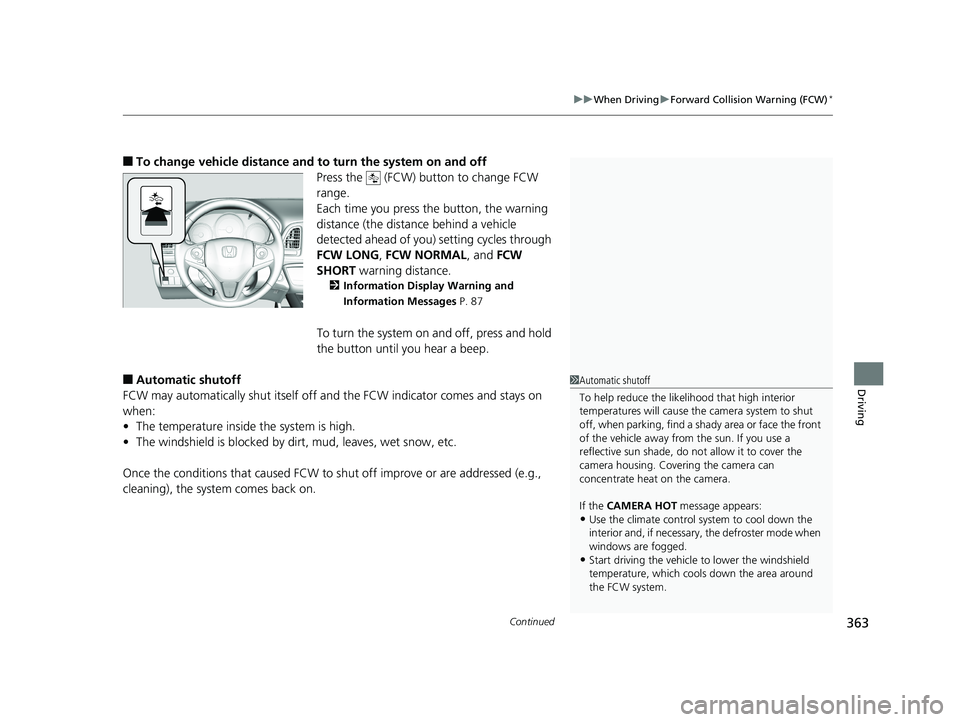
■To change vehicle distance and to turn the system on and off
Press the (FCW) button to change FCW
range.
Each time you press the button, the warning
distance (the distance behind a vehicle
detected ahead of you) setting cycles through
FCW LONG , FCW NORMAL , and FCW
SHORT warning distance.
2Information Display Warning and
Information Messages P. 87
To turn the system on and off, press and hold
the button until you hear a beep.
■Automatic shutoff
FCW may automatically shut itself off and the FCW indicator comes and stays on
when:
• The temperature inside the system is high.
• The windshield is blocked by dirt, mud, leaves, wet snow, etc.
Once the conditions that caused FCW to sh ut off improve or are addressed (e.g.,
cleaning), the system comes back on.1 Automatic shutoff
To help reduce the likel ihood that high interior
temperatures will cause the camera system to shut
off, when parking, find a sh ady area or face the front
of the vehicle away from the sun. If you use a
reflective sun shade, do not allow it to cover the
camera housing. Covering the camera can
concentrate heat on the camera.
If the CAMERA HOT message appears:
•Use the climate control system to cool down the
interior and, if necessary , the defroster mode when
windows are fogged.
•Start driving the vehicle to lower the windshield
temperature, which cool s down the area around
the FCW system.
18 HR-V-31T7A6200.book 363 ページ 2017年6月30日 金曜日 午後1時23分
Page 372 of 503
370
uuWhen Driving uLaneWatchTM*
Driving
LaneWatchTM*
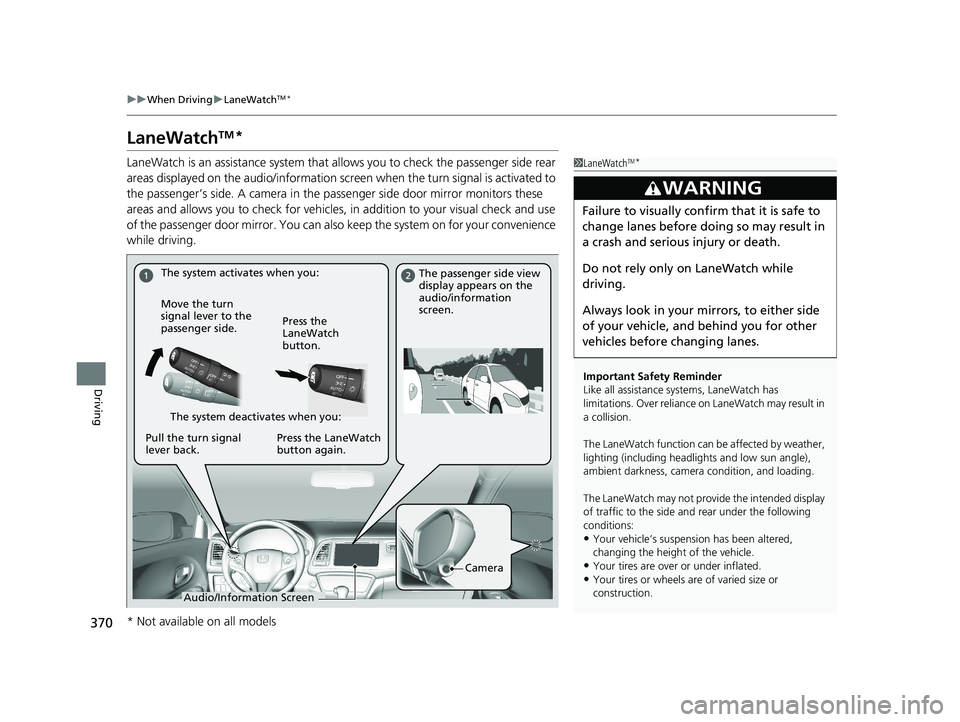
LaneWatch is an assistance system that allows you to check the passenger side rear
areas displayed on the audio/information screen when the turn signal is activated to
the passenger’s side. A camera in the pass enger side door mirror monitors these
areas and allows you to chec k for vehicles, in addition to your visual check and use
of the passenger door mirror. You can also keep the system on for your convenience
while driving.1 LaneWatchTM*
Important Safety Reminder
Like all assistance systems, LaneWatch has
limitations. Over reliance on LaneWatch may result in
a collision.
The LaneWatch function can be affected by weather,
lighting (including headli ghts and low sun angle),
ambient darkness, camera condition, and loading.
The LaneWatch may not prov ide the intended display
of traffic to the side and rear under the following
conditions:
•Your vehicle’s suspensi on has been altered,
changing the height of the vehicle.
•Your tires are over or under inflated.
•Your tires or wheels are of varied size or
construction.
3WARNING
Failure to visually confirm that it is safe to
change lanes before do ing so may result in
a crash and serious injury or death.
Do not rely only on LaneWatch while
driving.
Always look in your mirrors, to either side
of your vehicle, and behind you for other
vehicles before changing lanes.
The system activates when you: The passenger side view
display appears on the
audio/information
screen.
Move the turn
signal lever to the
passenger side. Press the
LaneWatch
button.
The system deactivates when you:
Pull the turn signal
lever back. Press the LaneWatch
button again.
Camera
Audio/Information Screen
* Not available on all models
18 HR-V-31T7A6200.book 370 ページ 2017年6月30日 金曜日 午後1時23分
Page 373 of 503
371
uuWhen Driving uLaneWatchTM*
Driving
■Customizing the La neWatch settings
You can customize the following items using the audio/information screen.
• Show with Tu rn Signal: Selects whether LaneWatch monitor comes on when
you operate the turn signal light lever.
• Display Time after Turn Signal Off: Changes the remaining LaneWatch
display time after you pull the turn signal lever back.
• Reference Line: Selects whether the reference lines appear on the LaneWatch
monitor.
• Next Maneuver Pop up
*: Selects whether a turn direction screen of the
navigation system interr upts the LaneWatch display.
• Display: Adjusts display settings.
2Customized Features P. 252
■Reference Lines
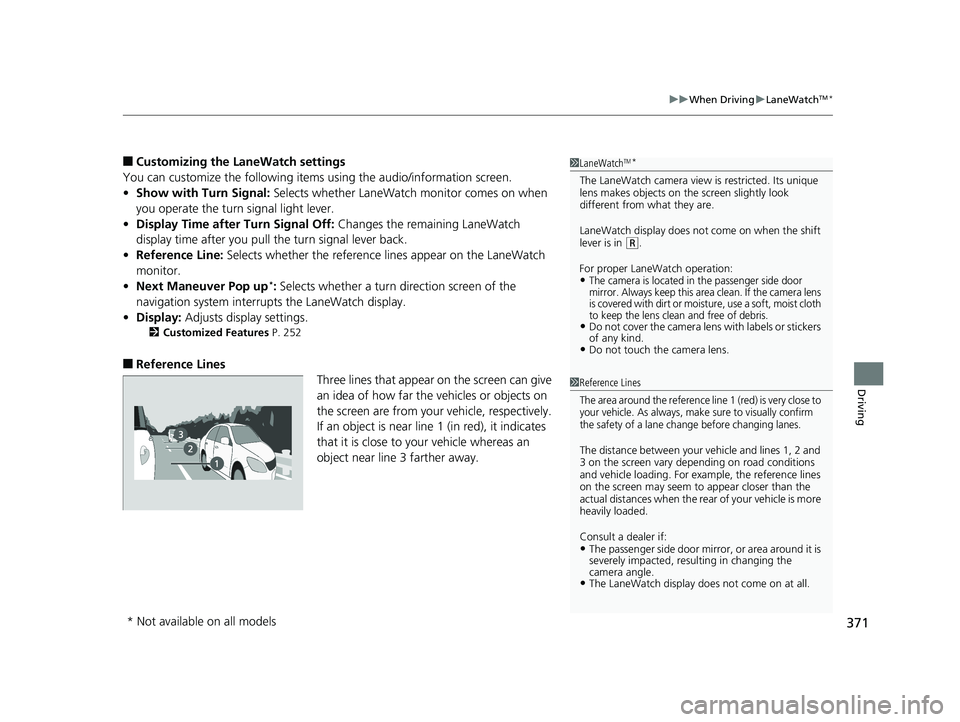
Three lines that appear on the screen can give
an idea of how far the vehicles or objects on
the screen are from your vehicle, respectively.
If an object is near line 1 (in red), it indicates
that it is close to your vehicle whereas an
object near line 3 farther away.
1LaneWatchTM*
The LaneWatch camera view is restricted. Its unique
lens makes objects on the screen slightly look
different from what they are.
LaneWatch display does not come on when the shift
lever is in
( R.
For proper LaneWatch operation:
•The camera is located in the passenger side door
mirror. Always keep this area clean. If the camera lens
is covered with dirt or moisture, use a soft, moist cloth
to keep the lens clean and free of debris.
•Do not cover the camera lens with labels or stickers
of any kind.
•Do not touch the camera lens.
1 Reference Lines
The area around the reference line 1 (red) is very close to
your vehicle. As always, make sure to visually confirm
the safety of a lane change before changing lanes.
The distance betwee n your vehicle and lines 1, 2 and
3 on the screen vary depending on road conditions
and vehicle loading. For ex ample, the reference lines
on the screen may seem to appear closer than the
actual distances when the rear of your vehicle is more
heavily loaded.
Consult a dealer if:
•The passenger side door mirr or, or area around it is
severely impacted, resulting in changing the
camera angle.
•The LaneWatch display doe s not come on at all.
* Not available on all models
18 HR-V-31T7A6200.book 371 ページ 2017年6月30日 金曜日 午後1時23分
Page 388 of 503
386
Driving
Multi-View Rear Camera
About Your Multi-View Rear Camera
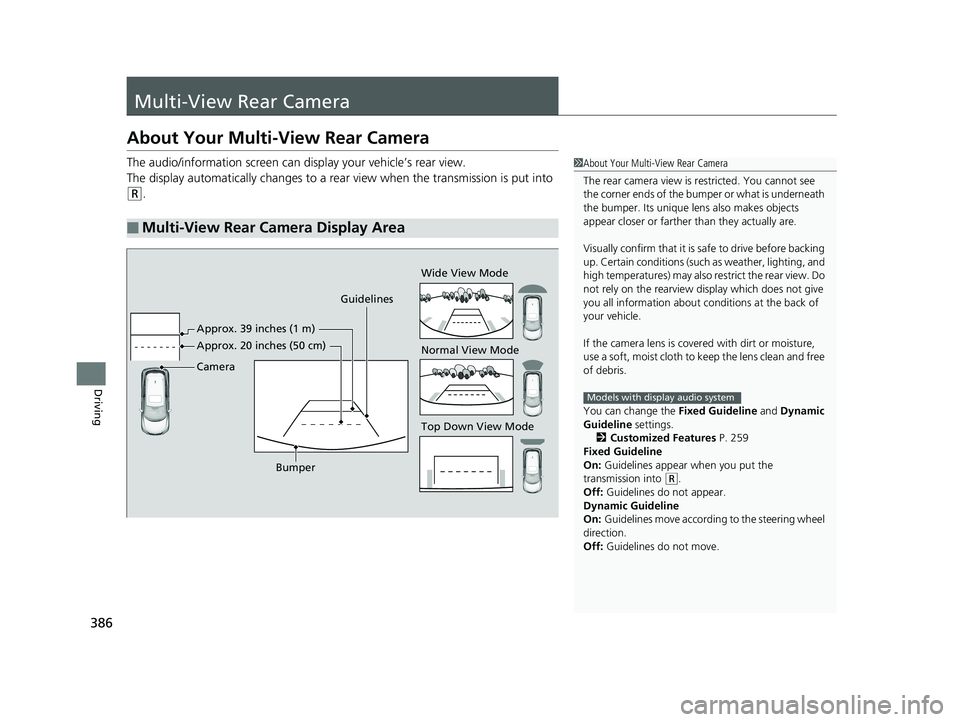
The audio/information screen can display your vehicle’s rear view.
The display automatically changes to a rear view when the transmission is put into
(R.
■Multi-View Rear Camera Display Area
1About Your Multi-View Rear Camera
The rear camera view is restricted. You cannot see
the corner ends of the bum per or what is underneath
the bumper. Its unique le ns also makes objects
appear closer or farther than they actually are.
Visually confirm that it is safe to drive before backing
up. Certain conditions (such as weather, lighting, and
high temperatures) may also restrict the rear view. Do
not rely on the rearview display which does not give
you all information about c onditions at the back of
your vehicle.
If the camera lens is cove red with dirt or moisture,
use a soft, moist cloth to keep the lens clean and free
of debris.
You can change the Fixed Guideline and Dynamic
Guideline settings.
2 Customized Features P. 259
Fixed Guideline
On: Guidelines appear when you put the
transmission into
( R.
Off: Guidelines do not appear.
Dynamic Guideline
On: Guidelines move according to the steering wheel
direction.
Off: Guidelines do not move.
Models with display audio system
Guidelines
Bumper Wide View Mode
Normal View Mode
Top Down View Mode
Camera Approx. 20 inches (50 cm) Approx. 39 inches (1 m)
18 HR-V-31T7A6200.book 386 ページ 2017年6月30日 金曜日 午後1時23分
Page 389 of 503
387
uuMulti-View Rear Camera uAbout Your Multi-View Rear Camera
Driving
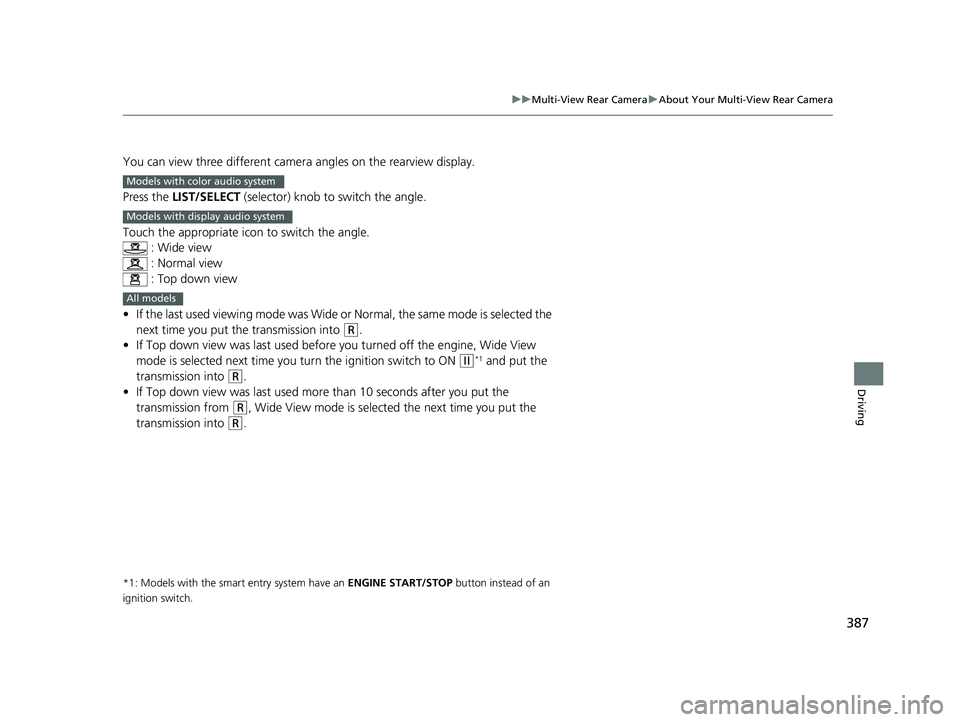
You can view three different camera angles on the rearview display.
Press the LIST/SELECT (selector) knob to switch the angle.
Touch the appropriate icon to switch the angle. : Wide view
: Normal view
: Top down view
• If the last used viewing mode was Wide or Normal, the same mode is selected the
next time you put the transmission into
(R.
• If Top down view was last used before you turned off the engine, Wide View
mode is selected next time you turn the ignition switch to ON
(w*1 and put the
transmission into
(R.
• If Top down view was last used more than 10 seconds after you put the
transmission from
(R, Wide View mode is selected the next time you put the
transmission into
(R.
*1: Models with the smart entry system have an ENGINE START/STOP button instead of an
ignition switch.
Models with color audio system
Models with display audio system
All models
18 HR-V-31T7A6200.book 387 ページ 2017年6月30日 金曜日 午後1時23分
Page 392 of 503
390
Driving
Fuel Economy and CO2 Emissions
Improving Fuel Economy and Reducing CO2
Emissions
Achieving fuel economy and reducing CO2 emissions is dependent on several
factors, including driving conditions, load weight, idling time, driving habits, and
vehicle condition. Depending on these and other factors, you may not achieve the
rated fuel economy of this vehicle.
You can optimize your fuel economy with proper maintenance of your vehicle.
Always maintain your vehicle in accord ance with the messages displayed on the
information display.
• Use the recommended viscosity engine oil, displaying the API Certification Seal.
• Maintain the specified tire pressure.
• Do not load the vehicl e with excess cargo.
• Keep your vehicle clean. A buildup of snow or mud on your vehicle’s underside
adds weight and increases wind resistance.
■Maintenance and Fuel Economy
1Improving Fuel Economy and Reducing CO2 Emissions
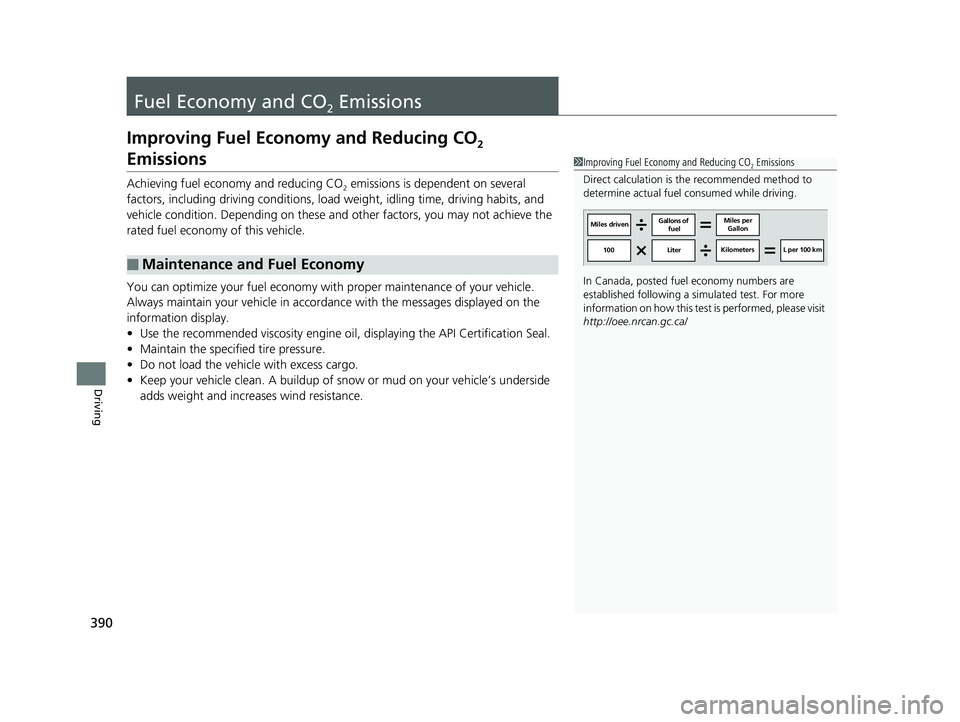
Direct calculation is the recommended method to
determine actual fuel consumed while driving.
In Canada, posted fuel economy numbers are
established following a simulated test. For more
information on how this test is performed, please visit
http://oee.nrcan.gc.ca/
Miles driven Gallons of
fuel Miles per
Gallon
100 Liter Kilometers L per 100 km
18 HR-V-31T7A6200.book 390 ページ 2017年6月30日 金曜日 午後1時23分
Page 394 of 503
392
Maintenance
Before Performing Maintenance
Inspection and Maintenance
For your safety, perform all listed inspections and maintenance to keep your vehicle
in good condition. If you become aware of any abnormality (noise, smell, insufficient
brake fluid, oil residue on the ground, etc.), have your vehicle inspected by a dealer.
(Note, however, that service at a dealer is not mandatory to keep your warranties in
effect.)
■Daily inspections
Perform inspections before long distance tri ps, when washing the vehicle, or when
refueling.
■Periodic inspections
• Check the brake/clutch* fluid level monthly.
2 Brake/Clutch* Fluid P. 409
•Check the tire pressure monthly. Examin e the tread for wear and foreign objects.
2Checking and Maintaining Tires P. 423
•Check the operation of the exterior lights monthly.
2 Replacing Light Bulbs P. 411
•Check the condition of the wiper bl ades at least every six months.
2Checking and Maintaining Wiper Blades P. 419
■Types of Inspection and Maintenance
1Inspection and Maintenance
Maintenance, replacement, or repair of
emissions control devices and systems may be
done by any automotive repair establishment or
individuals using parts that are “certified” to
EPA standards.
According to state and fede ral regulations, failure to
perform maintenance on the maintenance main
items marked with # will not void your emissions
warranties. However, all ma intenance services should
be performed in accordan ce with the intervals
indicated by the information display.
2 Maintenance Service Items P. 397
If you want to perform complex maintenance tasks
that require more skills a nd tools, you can purchase a
subscription to the Service Express website at
www.techinfo.honda.com .
2 Authorized Manuals P. 489
If you want to perform ma intenance yourself, make
sure that you have the necessary tools and skills first.
After performing ma intenance, update the records in
the separate maintenance booklet.
U.S. models
* Not available on all models
18 HR-V-31T7A6200.book 392 ページ 2017年6月30日 金曜日 午後1時23分
Page 397 of 503
395Continued
Maintenance
Maintenance MinderTM
If the engine oil life is less than 15%, you will see the Maintenance Minder messages
appear on the information display every time you turn the ignition switch to ON
(w*1. The messages notify you when to change the engine oil, or when to bring your
vehicle to a dealer for indicated maintenance services.
To Use Maintenance MinderTM
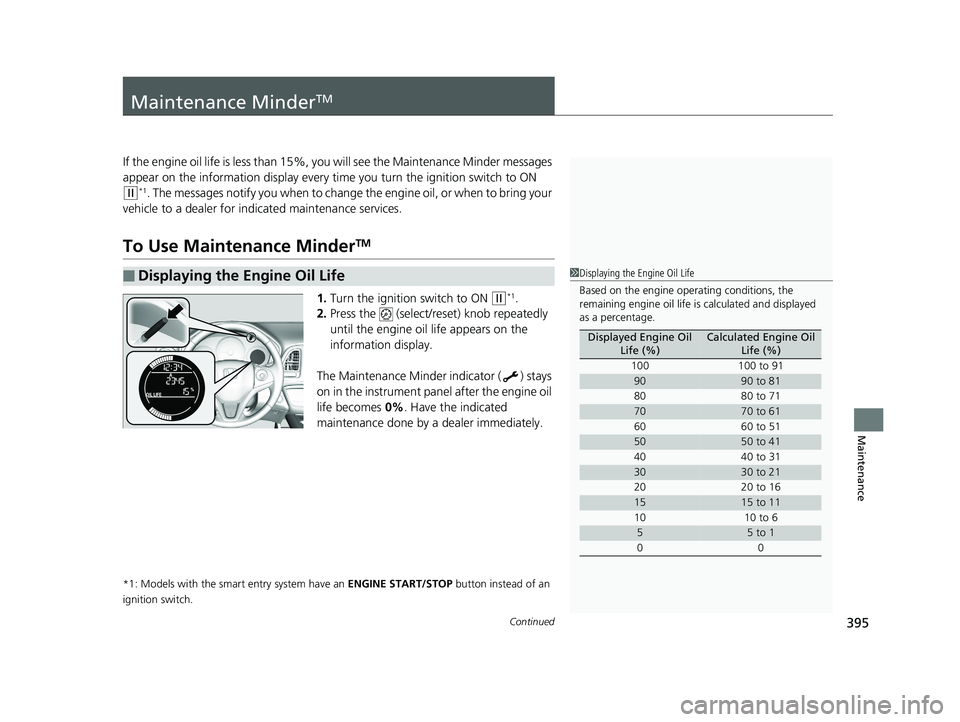
1. Turn the ignition switch to ON (w*1.
2. Press the (select/reset) knob repeatedly
until the engine oil life appears on the
information display.
The Maintenance Minder indicator ( ) stays
on in the instrument panel after the engine oil
life becomes 0% . Have the indicated
maintenance done by a dealer immediately.
*1: Models with the smart entry system have an ENGINE START/STOP button instead of an
ignition switch.
■Displaying the Engine Oil Life1 Displaying the Engine Oil Life
Based on the engine ope rating conditions, the
remaining engine oi l life is calculated and displayed
as a percentage.
Displayed Engine Oil Life (%)Calculated Engine Oil Life (%)
100 100 to 91
9090 to 81
80 80 to 71
7070 to 61
60 60 to 51
5050 to 41
40 40 to 31
3030 to 21
20 20 to 16
1515 to 11
10 10 to 6
55 to 1
00
18 HR-V-31T7A6200.book 395 ページ 2017年6月30日 金曜日 午後1時23分