Steering HONDA ODYSSEY 2006 RB1-RB2 / 3.G User Guide
[x] Cancel search | Manufacturer: HONDA, Model Year: 2006, Model line: ODYSSEY, Model: HONDA ODYSSEY 2006 RB1-RB2 / 3.GPages: 420, PDF Size: 6.01 MB
Page 82 of 420
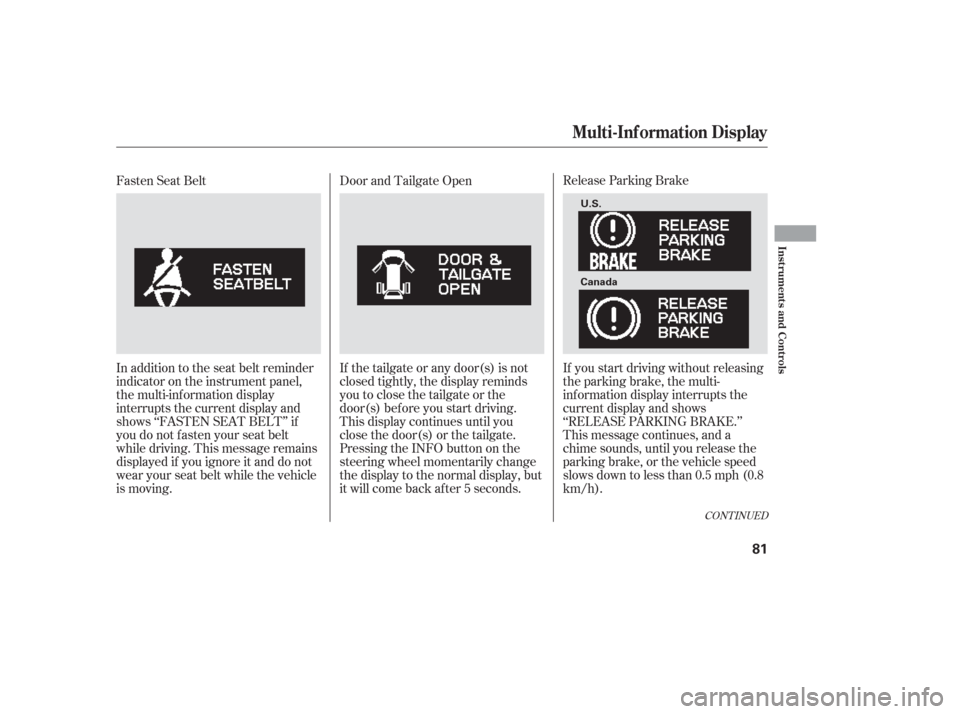
Release Parking Brake
If you start driving without releasing
the parking brake, the multi-
inf ormation display interrupts the
current display and shows
‘‘RELEASE PARKING BRAKE.’’
This message continues, and a
chime sounds, until you release the
parking brake, or the vehicle speed
slows down to less than 0.5 mph (0.8
km/h).
Door and Tailgate Open
If the tailgate or any door(s) is not
closed tightly, the display reminds
you to close the tailgate or the
door(s) bef ore you start driving.
This display continues until you
close the door(s) or the tailgate.
Pressing the INFO button on the
steering wheel momentarily change
the display to the normal display, but
it will come back af ter 5 seconds.
Fasten Seat Belt
In addition to the seat belt reminder
indicator on the instrument panel,
the multi-information display
interrupts the current display and
shows ‘‘FASTEN SEAT BELT’’ if
you do not f asten your seat belt
while driving. This message remains
displayed if you ignore it and do not
wear your seat belt while the vehicle
is moving.
CONT INUED
Multi-Inf ormation Display
Inst rument s and Cont rols
81
U.S.
Canada
Page 92 of 420
You can also use the trip meter
SELECT/RESET knob in the
instrument panel to select and enter
your selections while the multi-
inf ormation display is in the
customizing mode. Turn the knob to
select a setting and press it to enter
your selection. UsetheINFObuttononthesteering
wheel to see the settings, and the
SEL/RESET button to enter your
selections.
If you want the settings as they were
when the vehicle lef t the f actory,
select ‘‘DEFAULT ALL,’’ as
described on page .
If you want to change any vehicle
control settings, select ‘‘CHANGE
SETTING,’’ and f ollow the
instructions on page .
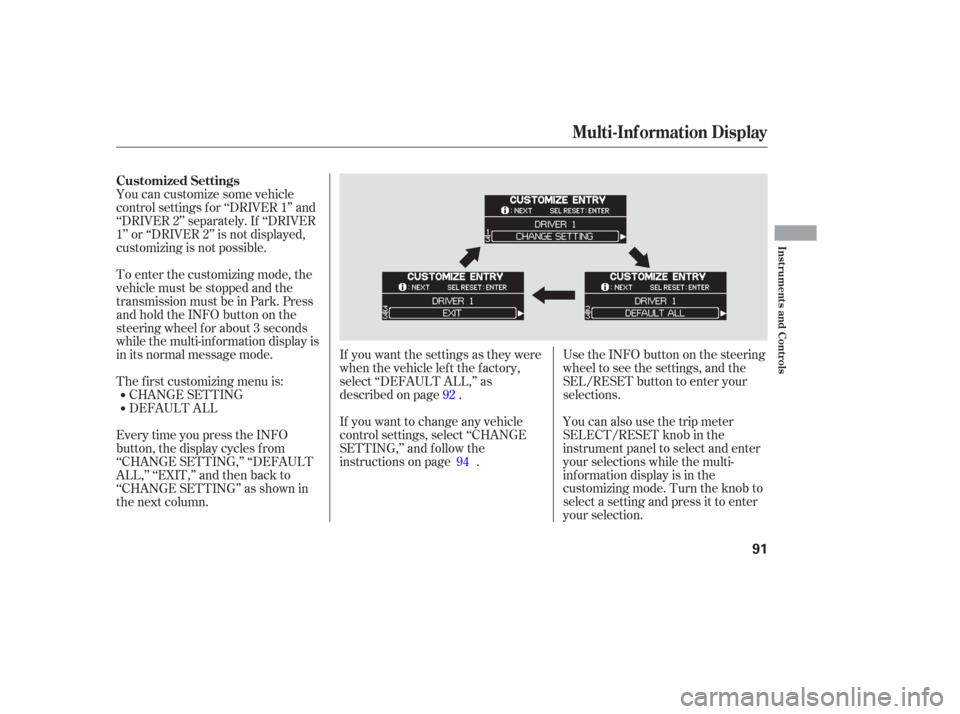
EverytimeyoupresstheINFO
button, the display cycles from
‘‘CHANGE SETTING,’’ ‘‘DEFAULT
ALL,’’ ‘‘EXIT,’’ and then back to
‘‘CHANGE SETTING’’ as shown in
the next column. You can customize some vehicle
control settings f or ‘‘DRIVER 1’’ and
‘‘DRIVER 2’’ separately. If ‘‘DRIVER
1’’ or ‘‘DRIVER 2’’ is not displayed,
customizing is not possible.
DEFAULT ALL CHANGE SETTING
The f irst customizing menu is: To enter the customizing mode, the
vehicle must be stopped and the
transmission must be in Park. Press
andholdtheINFObuttononthe
steering wheel f or about 3 seconds
while the multi-information display is
in its normal message mode.
92
94
Customized Settings
Multi-Inf ormation Display
Inst rument s and Cont rols
91
Page 93 of 420
Press the SEL/RESET button again
to select ‘‘DEFAULT ALL.’’
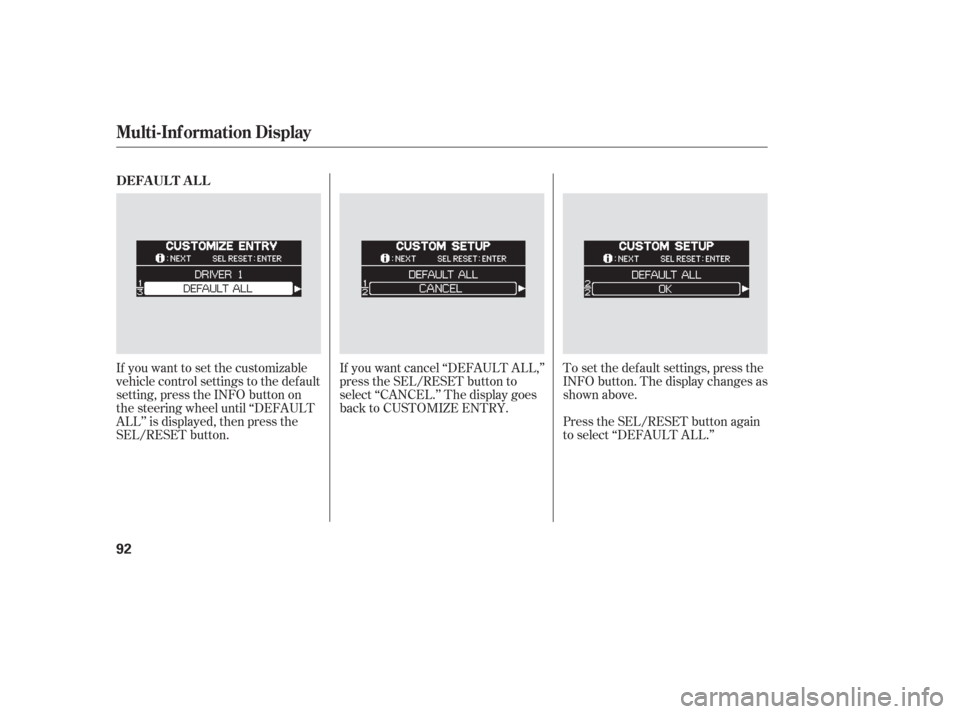
If you want to set the customizable
vehicle control settings to the default
setting, press the INFO button on
the steering wheel until ‘‘DEFAULT
ALL’’ is displayed, then press the
SEL/RESET button. If you want cancel ‘‘DEFAULT ALL,’’
press the SEL/RESET button to
select ‘‘CANCEL.’’ The display goes
back to CUSTOMIZE ENTRY.
To set the def ault settings, press the
INFO button. The display changes as
shown above.
DEFAUL T AL L
Multi-Inf ormation Display
92
Page 96 of 420
There are f our custom settings items
in the Meter Setup:LANGUAGE SELECTION (see
page )
ADJUST OUTSIDE TEMP.
DISPLAY (see page )
TRIP A & AVG. FUEL A RESET
with REFUEL (see page )
COMPASS ZONE SELECTION
(see page )
To customize a setting, press the
INFO button repeatedly until you see
the setting, and press the SEL/
RESET button. Then, f ollow the
procedures described on the
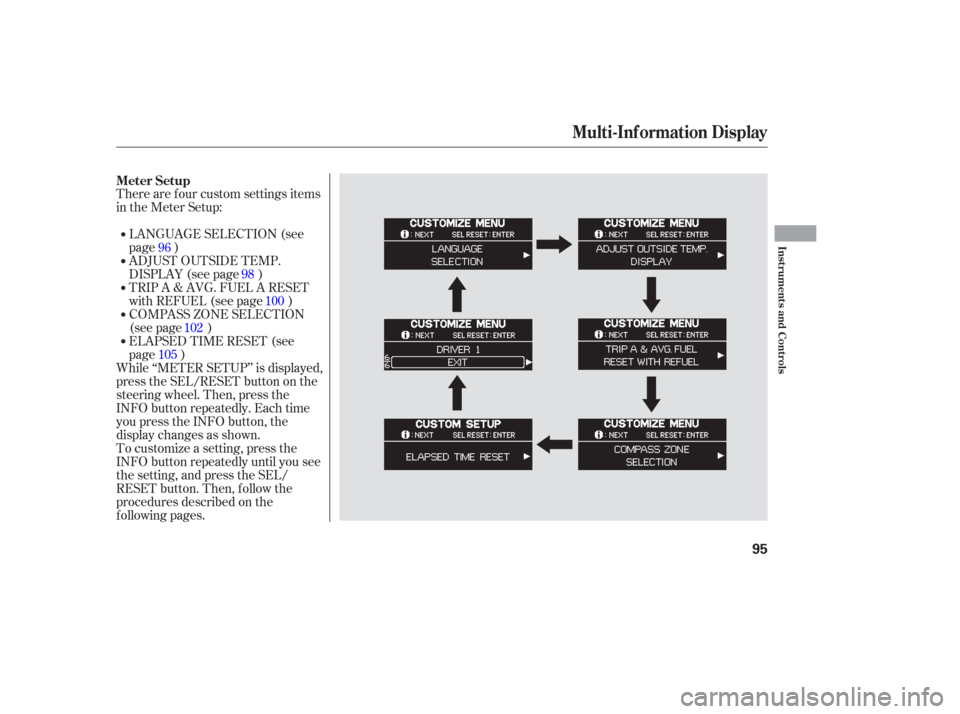
f ollowing pages. While ‘‘METER SETUP’’ is displayed,
press the SEL/RESET button on the
steering wheel. Then, press the
INFO button repeatedly. Each time
you press the INFO button, the
display changes as shown. ELAPSED TIME RESET (see
page ) 96
98100
102
105
Meter Setup
Multi-Inf ormation Display
Inst rument s and Cont rols
95
Page 97 of 420
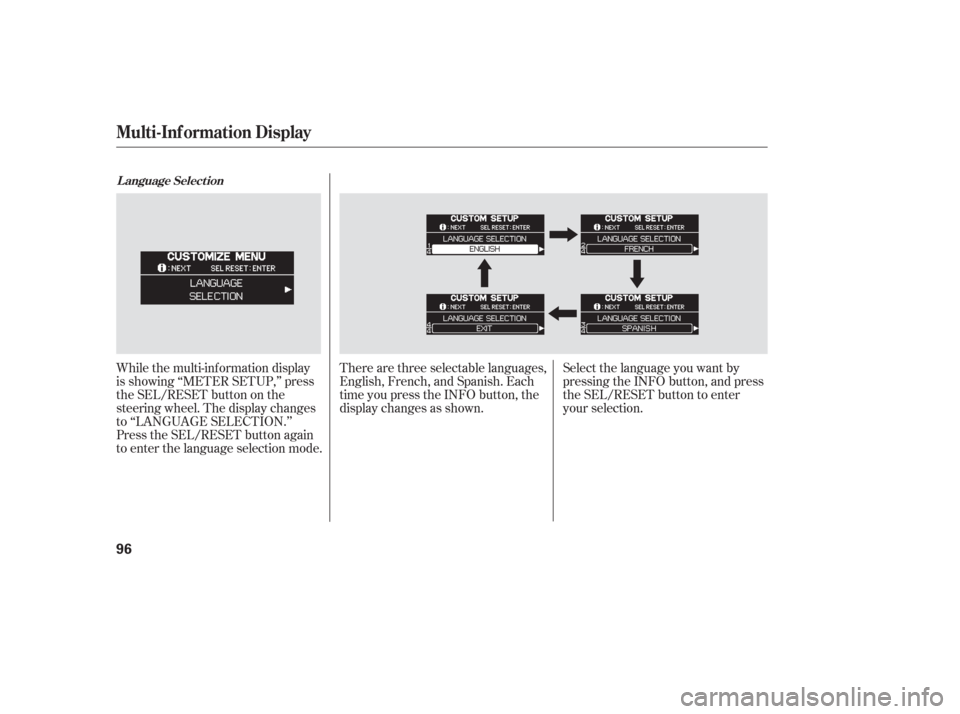
While the multi-information display
is showing ‘‘METER SETUP,’’ press
the SEL/RESET button on the
steering wheel. The display changes
to ‘‘LANGUAGE SELECTION.’’
Press the SEL/RESET button again
to enter the language selection mode.There are three selectable languages,
English, French, and Spanish. Each
time you press the INFO button, the
display changes as shown.
Select the language you want by
pressing the INFO button, and press
the SEL/RESET button to enter
your selection.
L anguage Select ion
Multi-Inf ormation Display
96
Page 99 of 420
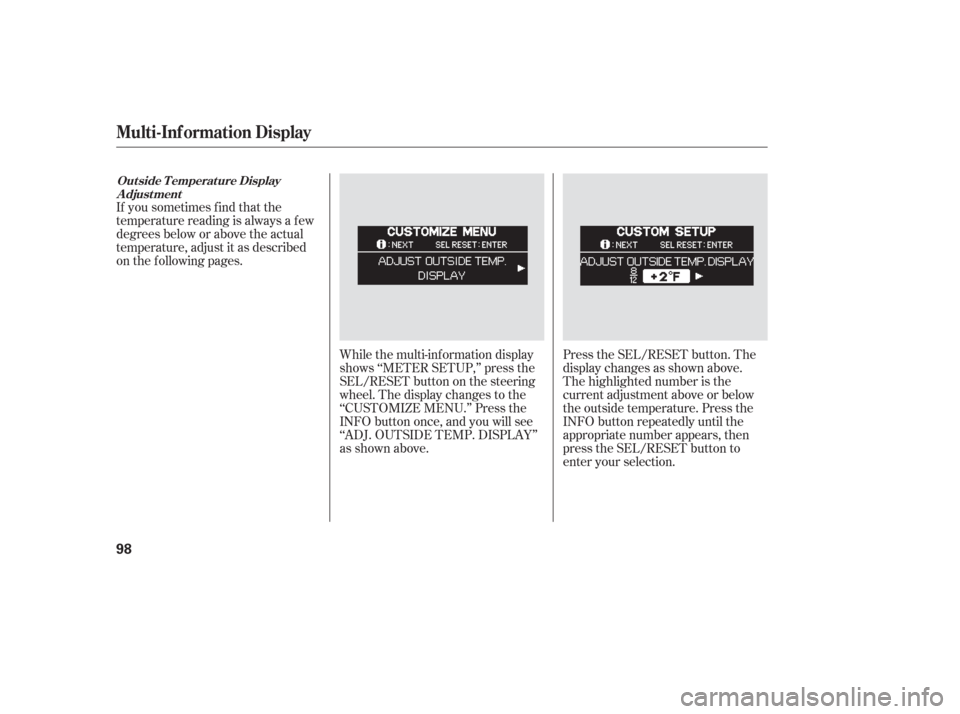
Press the SEL/RESET button. The
display changes as shown above.
The highlighted number is the
current adjustment above or below
the outside temperature. Press the
INFO button repeatedly until the
appropriate number appears, then
press the SEL/RESET button to
enter your selection.
If you sometimes f ind that the
temperature reading is always a f ew
degrees below or above the actual
temperature, adjust it as described
on the f ollowing pages.
While the multi-information display
shows ‘‘METER SETUP,’’ press the
SEL/RESET button on the steering
wheel. The display changes to the
‘‘CUSTOMIZE MENU.’’ Press the
INFO button once, and you will see
‘‘ADJ. OUTSIDE TEMP. DISPLAY’’
as shown above.
Out side T emperat ure DisplayA djust ment
Multi-Inf ormation Display
98
Page 101 of 420
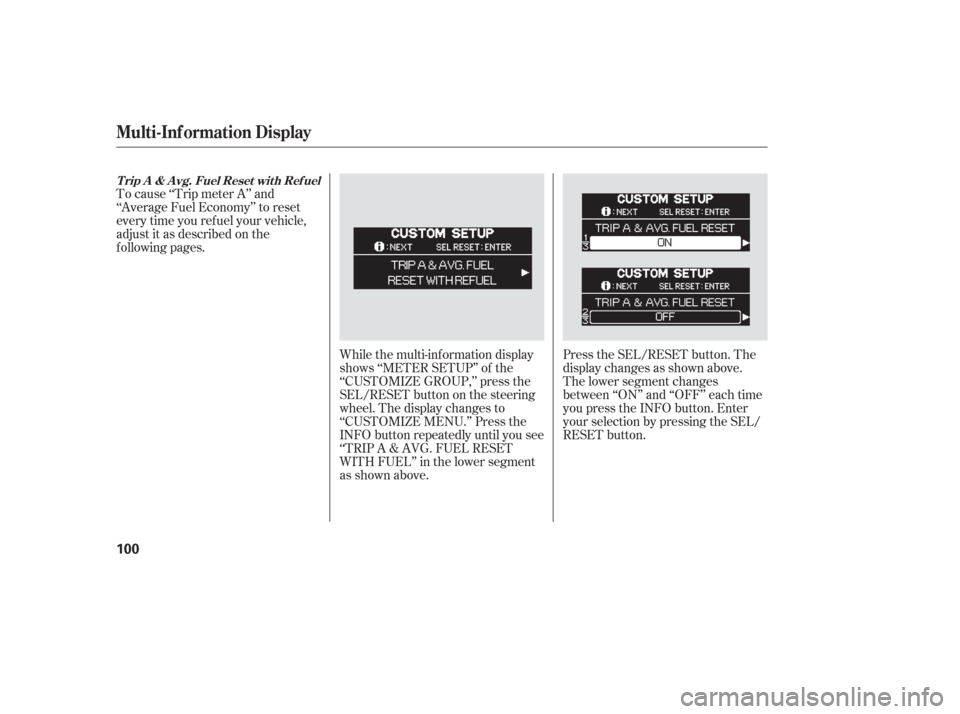
To cause ‘‘Trip meter A’’ and
‘‘Average Fuel Economy’’ to reset
every time you ref uel your vehicle,
adjust it as described on the
f ollowing pages.While the multi-information display
shows ‘‘METER SETUP’’ of the
‘‘CUSTOMIZE GROUP,’’ press the
SEL/RESET button on the steering
wheel. The display changes to
‘‘CUSTOMIZE MENU.’’ Press the
INFO button repeatedly until you see
‘‘TRIP A & AVG. FUEL RESET
WITH FUEL’’ in the lower segment
as shown above.Press the SEL/RESET button. The
display changes as shown above.
The lower segment changes
between ‘‘ON’’ and ‘‘OFF’’ each time
you press the INFO button. Enter
your selection by pressing the SEL/
RESET button.
T rip A & A vg. Fuel Reset wit h Ref uel
Multi-Inf ormation Display
100
Page 103 of 420
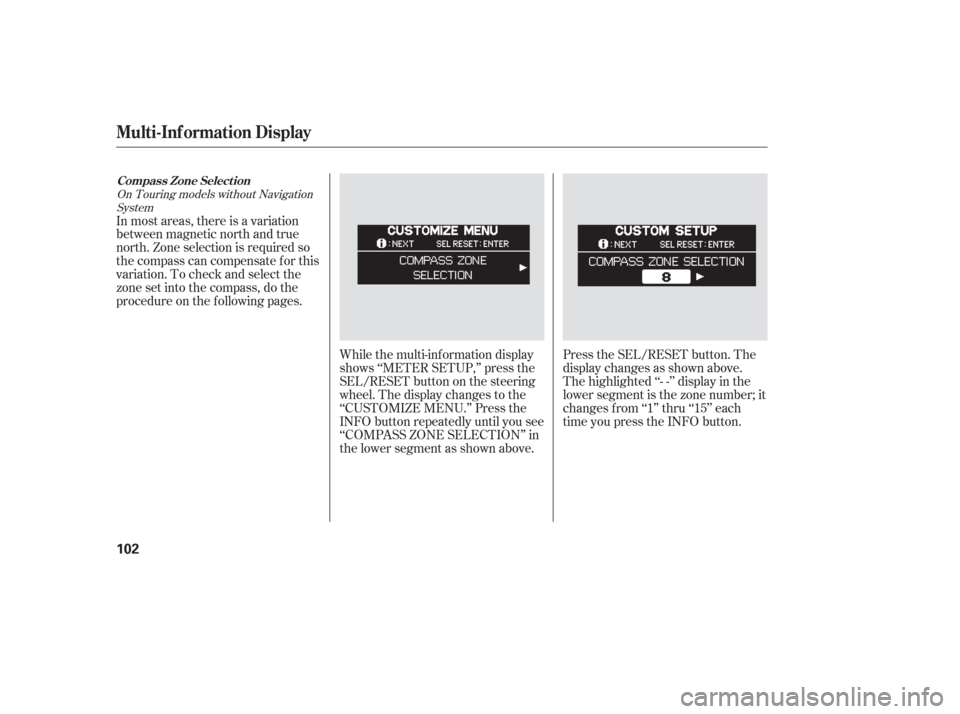
While the multi-information display
shows ‘‘METER SETUP,’’ press the
SEL/RESET button on the steering
wheel. The display changes to the
‘‘CUSTOMIZE MENU.’’ Press the
INFO button repeatedly until you see
‘‘COMPASS ZONE SELECTION’’ in
the lower segment as shown above.Press the SEL/RESET button. The
display changes as shown above.
The highlighted ‘‘- -’’ display in the
lower segment is the zone number; it
changes f rom ‘‘1’’ thru ‘‘15’’ each
time you press the INFO button.
In most areas, there is a variation
between magnetic north and true
north. Zone selection is required so
the compass can compensate f or this
variation. To check and select the
zone set into the compass, do the
procedure on the f ollowing pages.
On Touring models without Navigation
System
Compass Zone Select ion
Multi-Inf ormation Display
102
Page 106 of 420
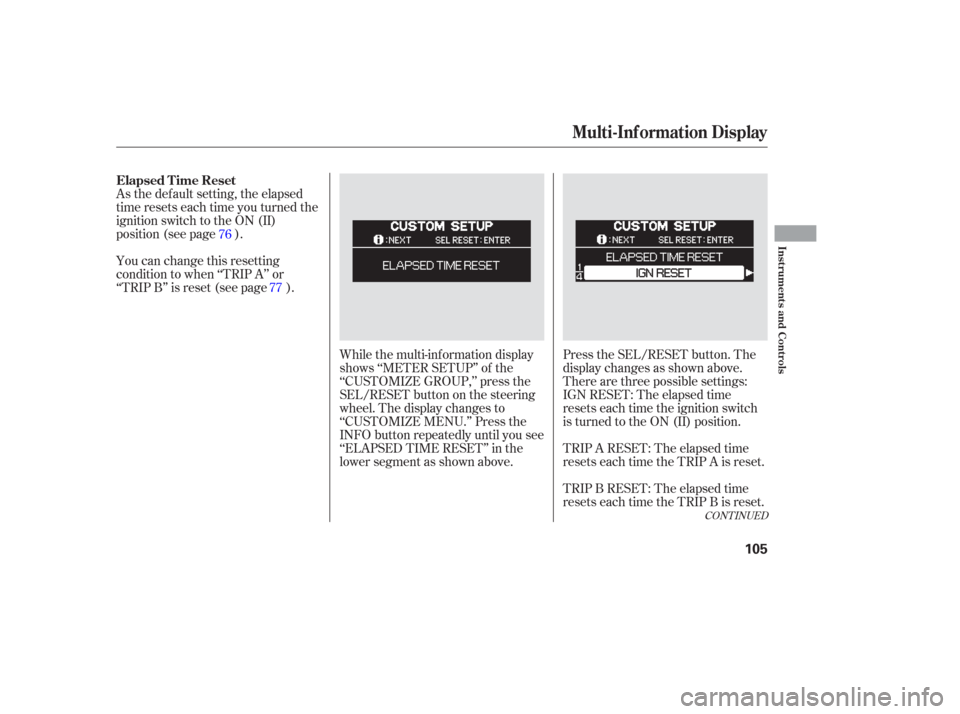
As the default setting, the elapsed
time resets each time you turned the
ignition switch to the ON (II)
position (see page ).
You can change this resetting
condition to when ‘‘TRIP A’’ or
‘‘TRIP B’’ is reset (see page ).While the multi-information display
shows ‘‘METER SETUP’’ of the
‘‘CUSTOMIZE GROUP,’’ press the
SEL/RESET button on the steering
wheel. The display changes to
‘‘CUSTOMIZE MENU.’’ Press the
INFO button repeatedly until you see
‘‘ELAPSED TIME RESET’’ in the
lower segment as shown above.Press the SEL/RESET button. The
display changes as shown above.
Therearethreepossiblesettings:
IGN RESET: The elapsed time
resets each time the ignition switch
is turned to the ON (II) position.
TRIP A RESET: The elapsed time
resets each time the TRIP A is reset.
TRIP B RESET: The elapsed time
resets each time the TRIP B is reset.
76
77
CONT INUED
Elapsed T ime Reset
Multi-Inf ormation Display
Inst rument s and Cont rols
105
Page 108 of 420
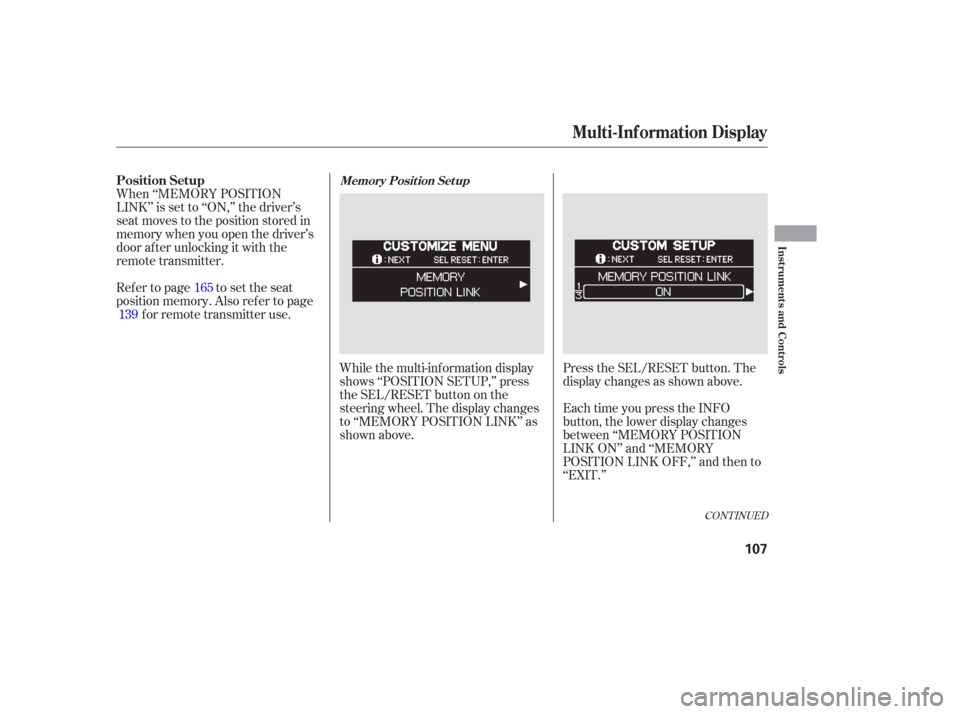
While the multi-information display
shows ‘‘POSITION SETUP,’’ press
the SEL/RESET button on the
steering wheel. The display changes
to ‘‘MEMORY POSITION LINK’’ as
shown above.Press the SEL/RESET button. The
display changes as shown above.
When ‘‘MEMORY POSITION
LINK’’ is set to ‘‘ON,’’ the driver’s
seat moves to the position stored in
memory when you open the driver’s
door af ter unlocking it with the
remote transmitter.
Ref er to page to set the seat
position memory. Also ref er to page
forremotetransmitteruse.
Each time you press the INFO
button, the lower display changes
between ‘‘MEMORY POSITION
LINK ON’’ and ‘‘MEMORY
POSITION LINK OFF,’’ and then to
‘‘EXIT.’’
165
139
CONT INUED
Position SetupMemory Posit ion Set up
Multi-Inf ormation Display
Inst rument s and Cont rols
107