light HONDA ODYSSEY 2012 RB3-RB4 / 4.G Service Manual
[x] Cancel search | Manufacturer: HONDA, Model Year: 2012, Model line: ODYSSEY, Model: HONDA ODYSSEY 2012 RB3-RB4 / 4.GPages: 441, PDF Size: 14.07 MB
Page 178 of 441
Continued
177
uuInterior Lights/Interior Convenience ItemsuInterior Convenience Items
Controls
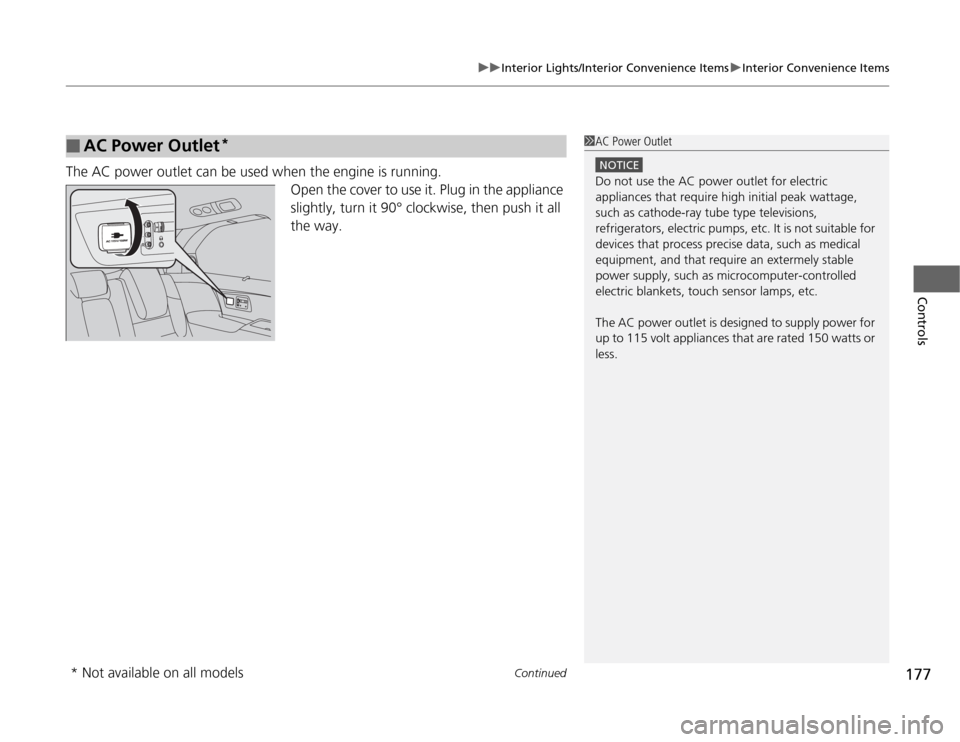
The AC power outlet can be used when the engine is running.
Open the cover to use it. Plug in the appliance
slightly, turn it 90° clockwise, then push it all
the way.■
AC Power Outlet
*
1AC Power Outlet
NOTICEDo not use the AC power outlet for electric
appliances that require high initial peak wattage,
such as cathode-ray tube type televisions,
refrigerators, electric pumps, etc. It is not suitable for
devices that process precise data, such as medical
equipment, and that require an extermely stable
power supply, such as microcomputer-controlled
electric blankets, touch sensor lamps, etc.
The AC power outlet is designed to supply power for
up to 115 volt appliances that are rated 150 watts or
less.
* Not available on all models
Page 179 of 441
uuInterior Lights/Interior Convenience ItemsuInterior Convenience Items
178Controls
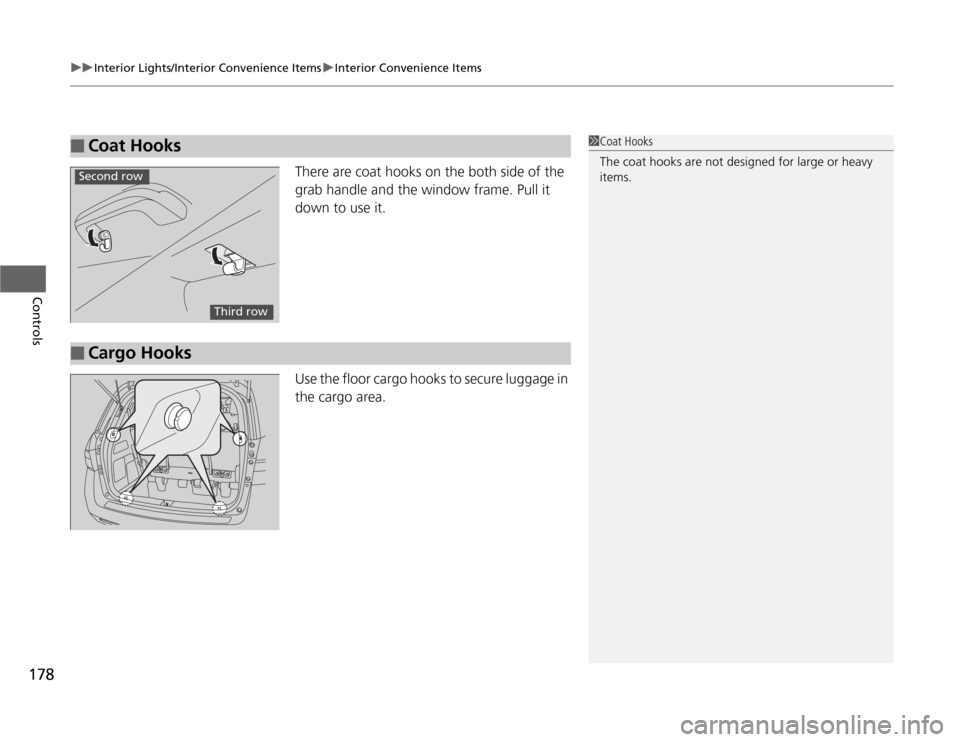
There are coat hooks on the both side of the
grab handle and the window frame. Pull it
down to use it.
Use the floor cargo hooks to secure luggage in
the cargo area.
■
Coat Hooks
1Coat Hooks
The coat hooks are not designed for large or heavy
items.
Second row
Third row
■
Cargo Hooks
Page 180 of 441
Continued
179
uuInterior Lights/Interior Convenience ItemsuInterior Convenience Items
Controls
■
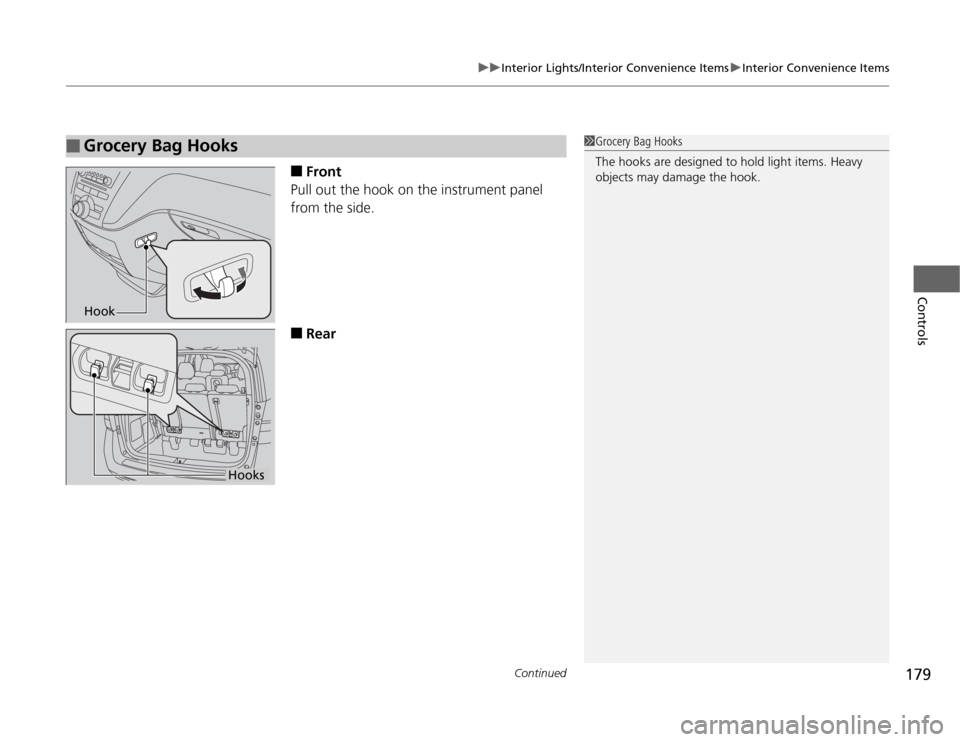
Front
Pull out the hook on the instrument panel
from the side.
■
Rear
■
Grocery Bag Hooks
1Grocery Bag Hooks
The hooks are designed to hold light items. Heavy
objects may damage the hook.
Hook
Hooks
Page 181 of 441
uuInterior Lights/Interior Convenience ItemsuInterior Convenience Items
180Controls
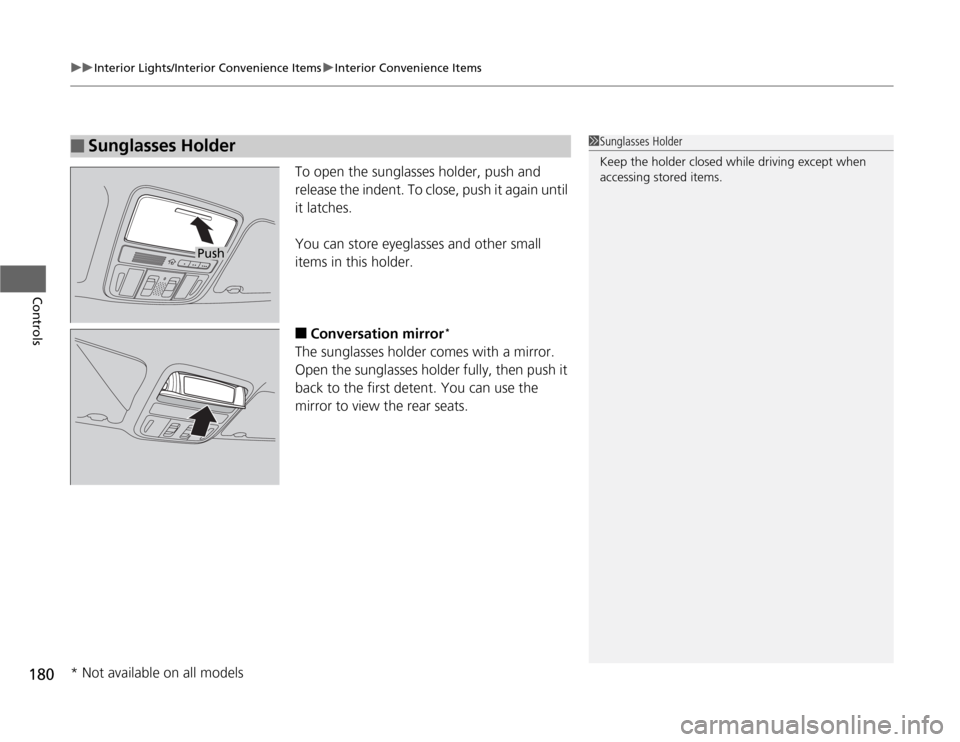
To open the sunglasses holder, push and
release the indent. To close, push it again until
it latches.
You can store eyeglasses and other small
items in this holder.■
Conversation mirror
*
The sunglasses holder comes with a mirror.
Open the sunglasses holder fully, then push it
back to the first detent. You can use the
mirror to view the rear seats.
■
Sunglasses Holder
1Sunglasses Holder
Keep the holder closed while driving except when
accessing stored items.
Push
* Not available on all models
Page 182 of 441
Continued
181
uuInterior Lights/Interior Convenience ItemsuInterior Convenience Items
Controls
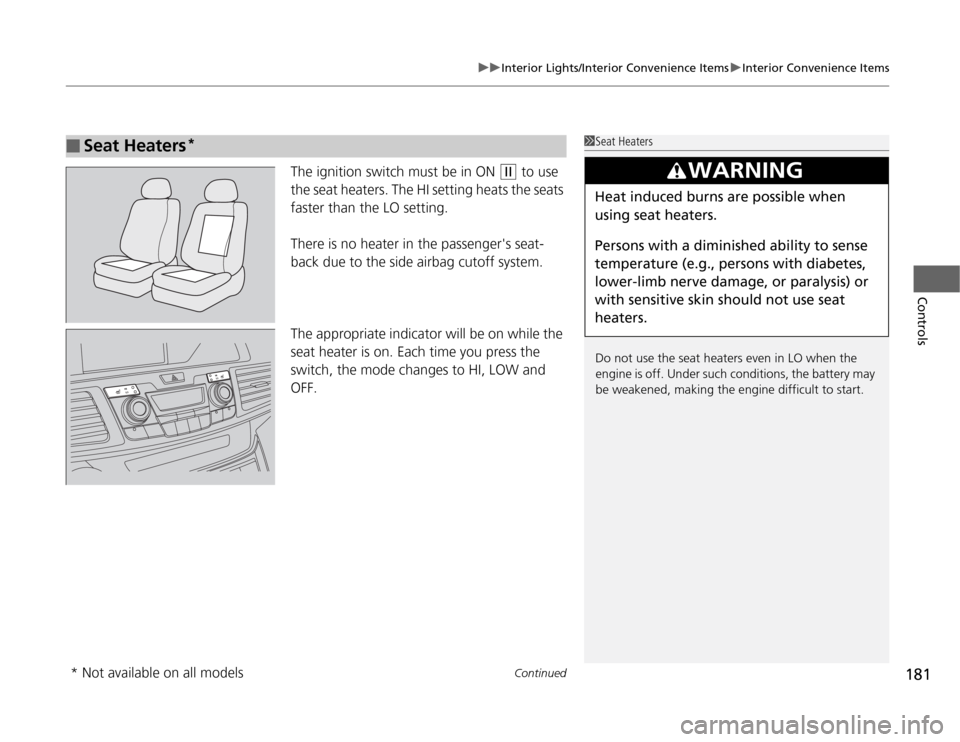
The ignition switch must be in ON
(w
to use
the seat heaters. The HI setting heats the seats
faster than the LO setting.
There is no heater in the passenger's seat-
back due to the side airbag cutoff system.
The appropriate indicator will be on while the
seat heater is on. Each time you press the
switch, the mode changes to HI, LOW and
OFF.
■
Seat Heaters
*
1Seat Heaters
Do not use the seat heaters even in LO when the
engine is off. Under such conditions, the battery may
be weakened, making the engine difficult to start.
3
WARNING
Heat induced burns are possible when
using seat heaters.
Persons with a diminished ability to sense
temperature (e.g., persons with diabetes,
lower-limb nerve damage, or paralysis) or
with sensitive skin should not use seat
heaters.
* Not available on all models
Page 183 of 441
uuInterior Lights/Interior Convenience ItemsuInterior Convenience Items
182Controls
■
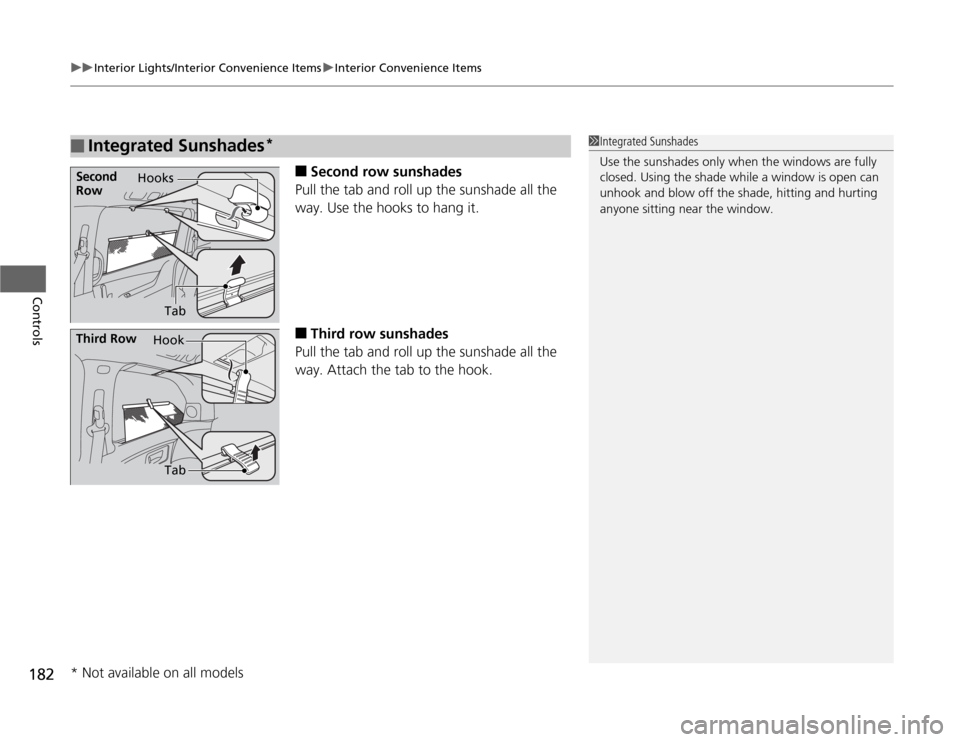
Second row sunshades
Pull the tab and roll up the sunshade all the
way. Use the hooks to hang it.
■
Third row sunshades
Pull the tab and roll up the sunshade all the
way. Attach the tab to the hook.
■
Integrated Sunshades
*
1Integrated Sunshades
Use the sunshades only when the windows are fully
closed. Using the shade while a window is open can
unhook and blow off the shade, hitting and hurting
anyone sitting near the window.
Second
RowHooks
TabThird Row
Hook
Tab* Not available on all models
Page 193 of 441
192
uuClimate Control System
*uAutomatic Climate Control Sensors
Controls
Automatic Climate Control Sensors
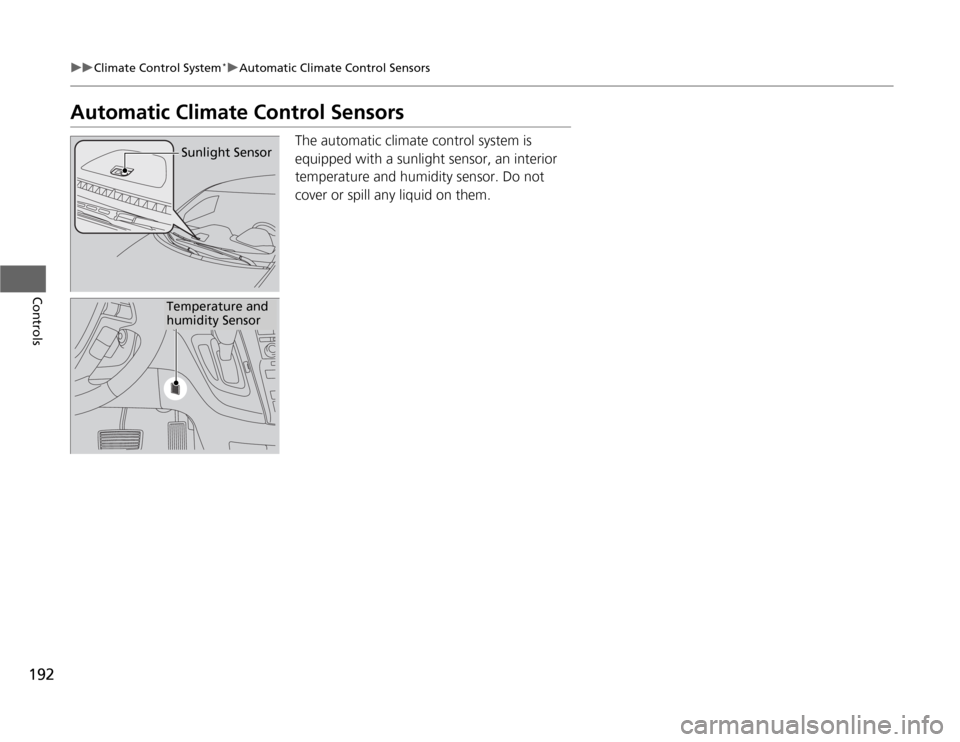
The automatic climate control system is
equipped with a sunlight sensor, an interior
temperature and humidity sensor. Do not
cover or spill any liquid on them.
Sunlight Sensor
Temperature and
humidity Sensor
Page 196 of 441
195
uuAudio SystemuUSB Adapter Cable
*
Features
USB Adapter Cable
*
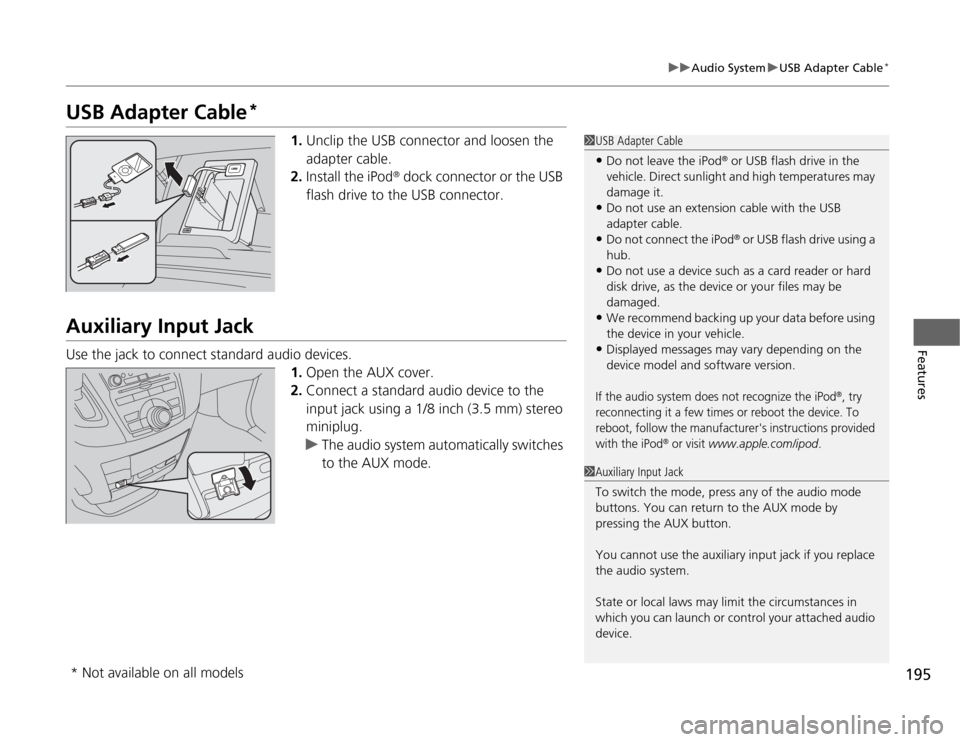
1.Unclip the USB connector and loosen the
adapter cable.
2.Install the iPod
® dock connector or the USB
flash drive to the USB connector.
Auxiliary Input JackUse the jack to connect standard audio devices.
1.Open the AUX cover.
2.Connect a standard audio device to the
input jack using a 1/8 inch (3.5 mm) stereo
miniplug.
uThe audio system automatically switches
to the AUX mode.
1USB Adapter Cable•Do not leave the iPod
® or USB flash drive in the
vehicle. Direct sunlight and high temperatures may
damage it.
•Do not use an extension cable with the USB
adapter cable.•Do not connect the iPod
® or USB flash drive using a
hub.
•Do not use a device such as a card reader or hard
disk drive, as the device or your files may be
damaged.•We recommend backing up your data before using
the device in your vehicle.•Displayed messages may vary depending on the
device model and software version.If the audio system does not recognize the iPod
®, try
reconnecting it a few times or reboot the device. To
reboot, follow the manufacturer's instructions provided
with the iPod
® or visit
www.apple.com/ipod
.
1Auxiliary Input Jack
To switch the mode, press any of the audio mode
buttons. You can return to the AUX mode by
pressing the AUX button.
You cannot use the auxiliary input jack if you replace
the audio system.
State or local laws may limit the circumstances in
which you can launch or control your attached audio
device.
* Not available on all models
Page 240 of 441
239
uuGeneral Information on the Audio SystemuRecommended CDs
Features
■
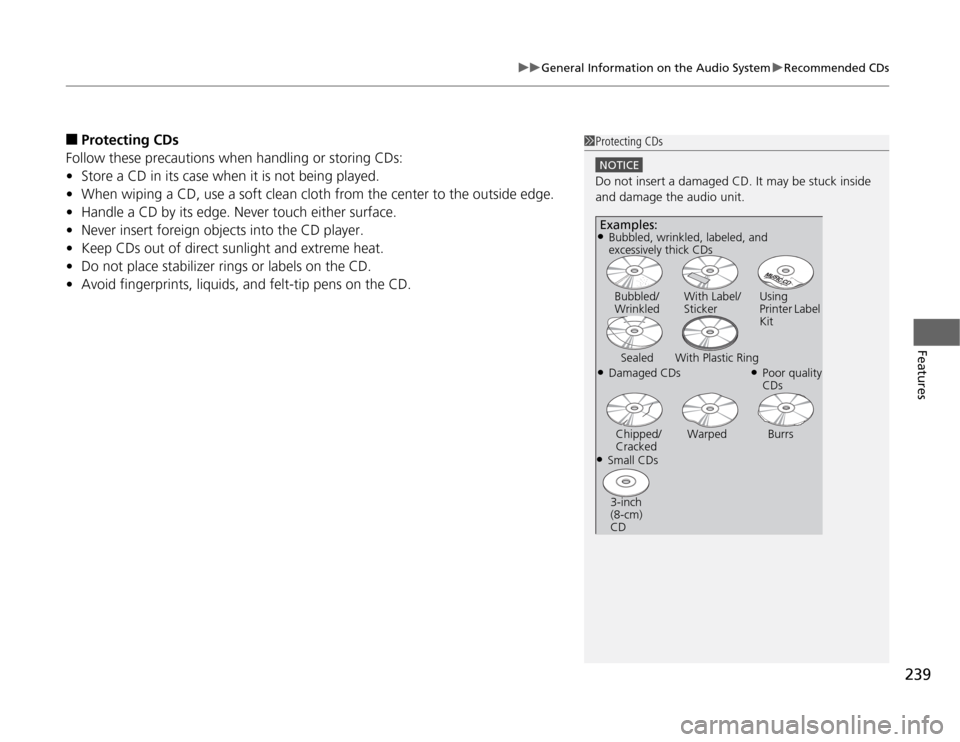
Protecting CDs
Follow these precautions when handling or storing CDs:
•Store a CD in its case when it is not being played.
•When wiping a CD, use a soft clean cloth from the center to the outside edge.
•Handle a CD by its edge. Never touch either surface.
•Never insert foreign objects into the CD player.
•Keep CDs out of direct sunlight and extreme heat.
•Do not place stabilizer rings or labels on the CD.
•Avoid fingerprints, liquids, and felt-tip pens on the CD.
1Protecting CDs
NOTICEDo not insert a damaged CD. It may be stuck inside
and damage the audio unit.Examples:●Damaged CDsBubbled/
WrinkledWith Label/
StickerUsing
Printer Label
Kit
Sealed With Plastic Ring
●Poor quality
CDs
Chipped/
CrackedWarped Burrs
●Small CDs
3-inch
(8-cm)
CD●Bubbled, wrinkled, labeled, and
excessively thick CDs
Page 244 of 441
243
uuRear Entertainment System
*uOperating the System
Continued
Features
■
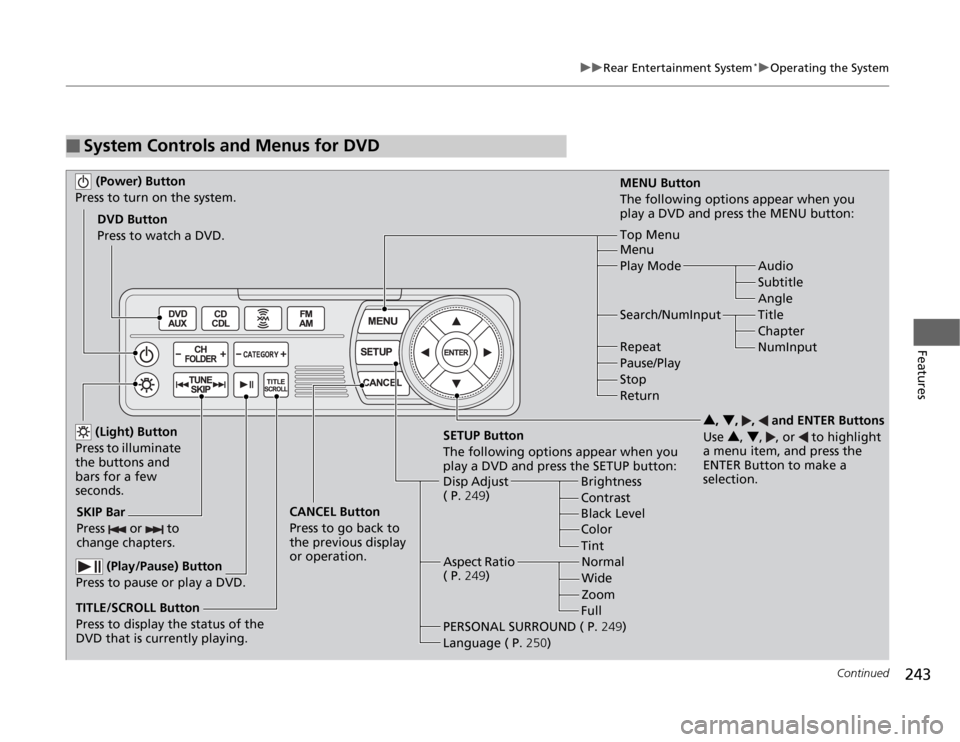
System Controls and Menus for DVD (Power) Button
Press to turn on the system.DVD Button
Press to watch a DVD.
(Light) Button
Press to illuminate
the buttons and
bars for a few
seconds.
SKIP Bar
Press or to
change chapters.
(Play/Pause) Button
Press to pause or play a DVD.
TITLE/SCROLL Button
Press to display the status of the
DVD that is currently playing.MENU Button
The following options appear when you
play a DVD and press the MENU button:
Top Menu
Menu
Play Mode Audio
Subtitle
Angle
Search/NumInput Title
Chapter
NumInput Repeat
Pause/Play
Stop
Return
SETUP Button
The following options appear when you
play a DVD and press the SETUP button:
Disp Adjust
( P.249)Brightness
Contrast
Black Level
Color CANCEL Button
Press to go back to
the previous display
or operation.3, 4, , and ENTER Buttons
Use 3, 4, , or to highlight
a menu item, and press the
ENTER Button to make a
selection.
Tint
Normal
Wide
Zoom
Full Aspect Ratio
( P.249)
PERSONAL SURROUND ( P.249)
Language ( P.250)