HONDA ODYSSEY 2013 RC1-RC2 / 5.G Navigation Manual
ODYSSEY 2013 RC1-RC2 / 5.G
HONDA
HONDA
https://www.carmanualsonline.info/img/13/5981/w960_5981-0.png
HONDA ODYSSEY 2013 RC1-RC2 / 5.G Navigation Manual
Trending: change language, pairing phone, tow, gas type, trip computer, traction control, radio antenna
Page 101 of 267
99
Map Menu
Displaying the Map Menu
Navigation
•Guidance Menu: Allows you to set or confirm the guidance points and freeway
exits for your route.2 Guidance Menu
P. 100
• Find Nearest…: Allows you to find the nearest place/landmark (e.g., nearest gas
station) by specifying a category. You ca n then add the location to the list of
destinations, set as a waypoint, or set as your destination.
2Changing Your Destination
P. 123
• Map Information: Allows you to select the in formation icons to display on the
map, change the orientation of the map, or display your current location.
2 Map Information
P. 105
• Cancel Route: Cancels your current route.
2Canceling the Route
P. 117
Page 102 of 267
100
Map Menu
Guidance Menu
Navigation
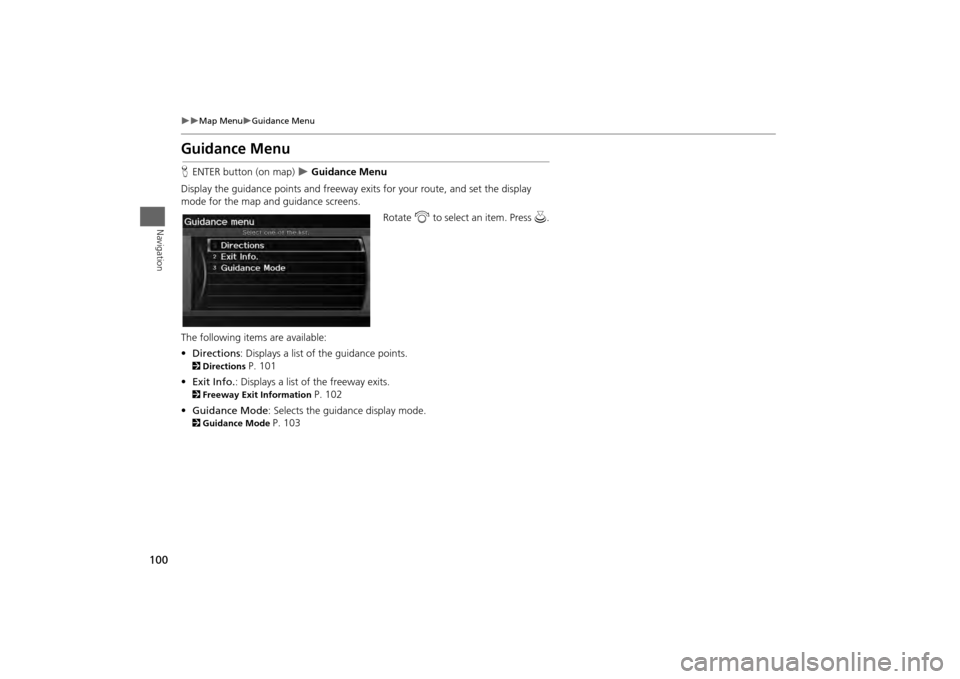
Guidance MenuHENTER button (on map)
Guidance Menu
Display the guidance points and freeway ex its for your route, and set the display
mode for the map an d guidance screens.
Rotate i to select an item. Press u .
The following item s are available:
• Directions : Displays a list of the guidance points.
2Directions
P. 101
• Exit Info. : Displays a list of the freeway exits.
2Freeway Exit Information
P. 102
• Guidance Mode : Selects the guidance display mode.
2Guidance Mode
P. 103
Page 103 of 267
101
Map Menu
Guidance Menu
Navigation
HENTER button (on map)
Guidance Menu
Directions
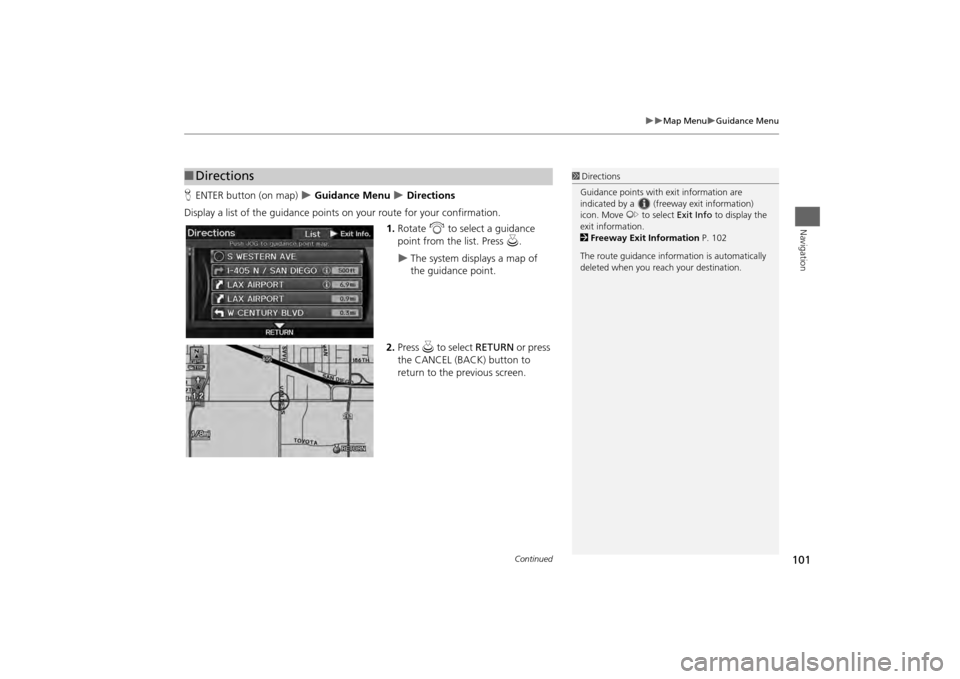
Display a list of the guidance points on your route for your confirmation.
1.Rotate i to select a guidance
point from the list. Press u.
The system displays a map of
the guidance point.
2. Press u to select RETURN or press
the CANCEL (BACK) button to
return to the previous screen.
■ Directions
1 Directions
Guidance points with exit information are
indicated by a (freeway exit information)
icon. Move y to select Exit Info to display the
exit information.
2 Freeway Exit Information P. 102
The route guidance inform ation is automatically
deleted when you reac h your destination.
Continued
Page 104 of 267
102
Map Menu
Guidance Menu
Navigation
HENTER button (on map)
Guidance Menu
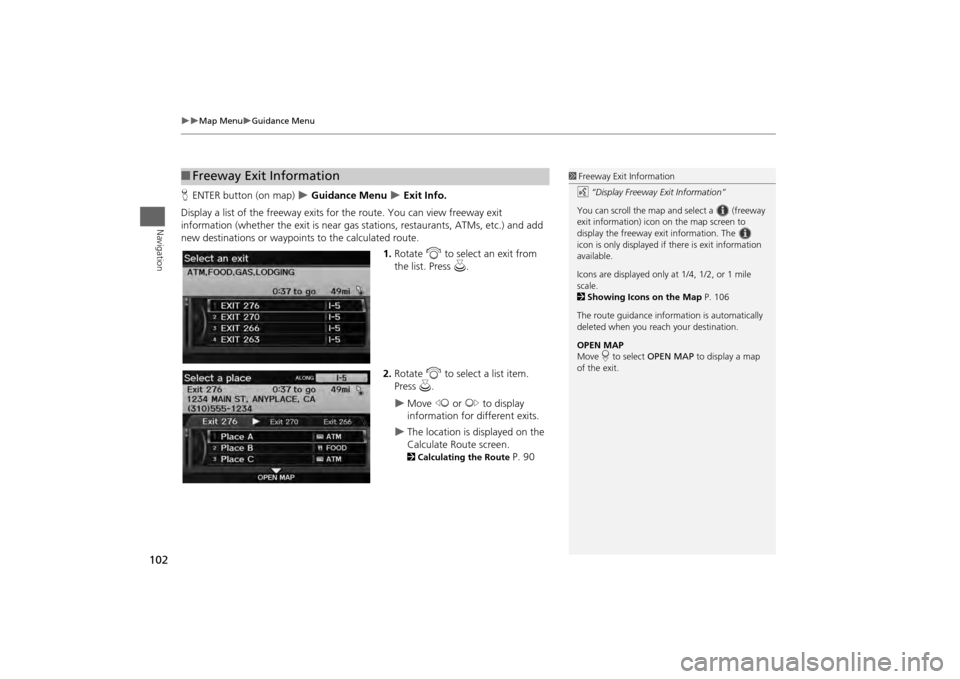
Exit Info.
Display a list of the freeway exits for the route. You can view freeway exit
information (whether the exit is near gas stations, restaurants, ATMs, etc.) and add
new destinations or waypoints to the calculated route.
1.Rotate i to select an exit from
the list. Press u.
2. Rotate i to select a list item.
Press u.
Move w or y to display
information for different exits.
The location is displayed on the
Calculate Route screen. 2 Calculating the Route
P. 90
■Freeway Exit Information
1 Freeway Exit Information
d “Display Freeway Exit Information”
You can scroll the map a nd select a (freeway
exit information) icon on the map screen to
display the freeway exit information. The
icon is only displayed if there is exit information
available.
Icons are displayed only at 1/4, 1/2, or 1 mile
scale.
2 Showing Icons on the Map P. 106
The route guidance inform ation is automatically
deleted when you reac h your destination.
OPEN MAP
Move r to select OPEN MAP to display a map
of the exit.
Page 105 of 267
103
Map Menu
Guidance Menu
Navigation
HENTER button (on map)
Guidance Menu
Guidance Mode
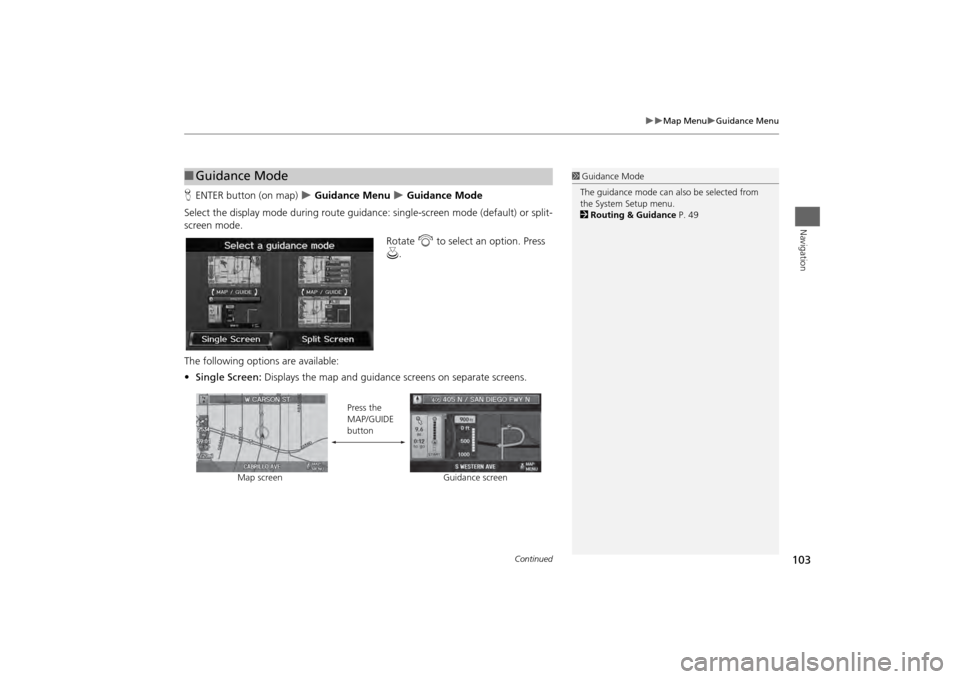
Select the display mode during route guidan ce: single-screen mode (default) or split-
screen mode.
Rotate i to select an option. Press
u .
The following options are available:
• Single Screen: Displays the map and guidance screens on separate screens.
■Guidance Mode
1 Guidance Mode
The guidance mode can al so be selected from
the System Setup menu.
2 Routing & Guidance P. 49
Map screen Press the
MAP/GUIDE
button
Guidance screen
Continued
Page 106 of 267
104
Map Menu
Guidance Menu
Navigation
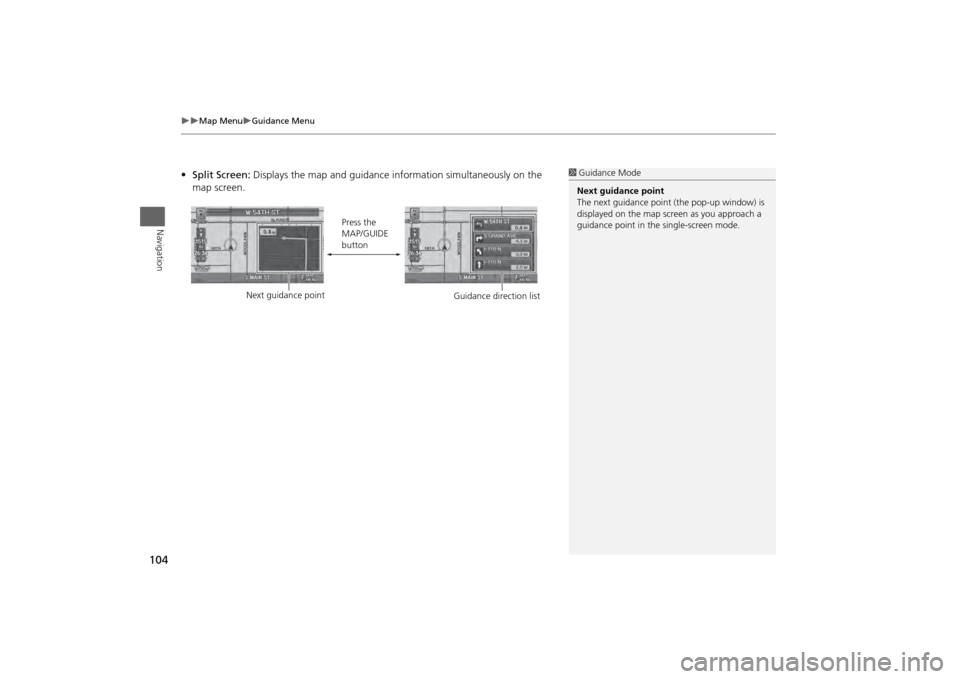
•Split Screen: Displays the map and guidance information simultaneously on the
map screen.
1 Guidance Mode
Next guidance point
The next guidance point (the pop-up window) is
displayed on the map scre en as you approach a
guidance point in the single-screen mode.
Next guidance point Press the
MAP/GUIDE
button
Guidance direction list
Page 107 of 267
105
Map Menu
Map Information
Navigation
Map InformationHENTER button (on map)
Map Information
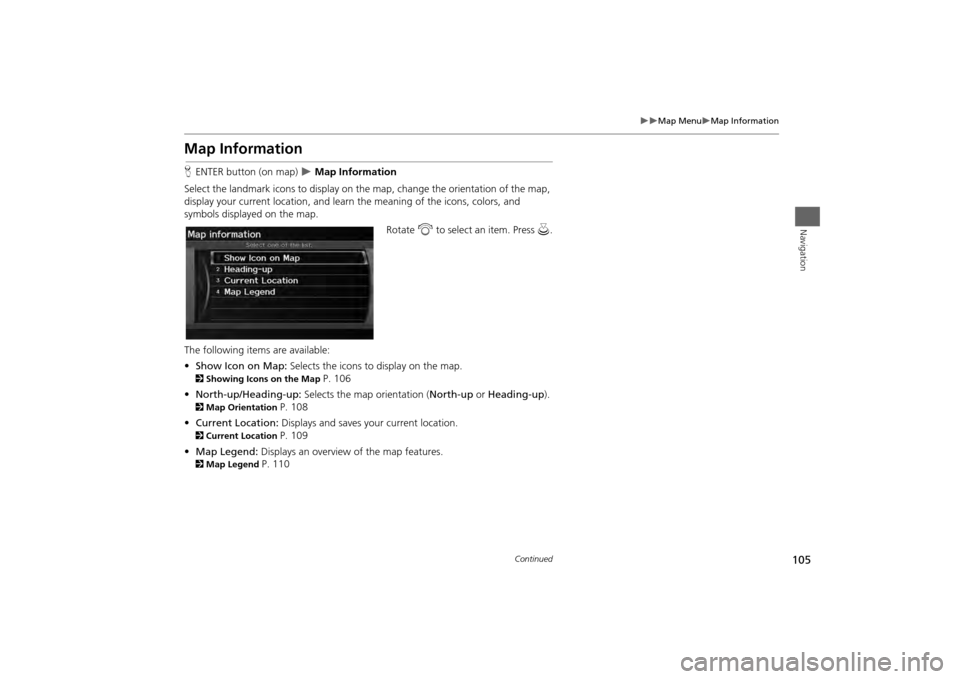
Select the landmark icons to display on the map, change the orientation of the map,
display your current location, and learn the meaning of the icons, colors, and
symbols displayed on the map.
Rotate i to select an item. Press u.
The following items are available:
• Show Icon on Map: Selects the icons to display on the map.
2 Showing Icons on the Map
P. 106
• North-up/Heading-up: Selects the map orientation ( North-up or Heading-up).
2Map Orientation
P. 108
• Current Location: Displays and saves your current location.
2Current Location
P. 109
• Map Legend: Displays an overview of the map features.
2Map Legend
P. 110
Continued
Page 108 of 267
106
Map Menu
Map Information
Navigation
HENTER button (on map)
Map Information
Show Icon on Map
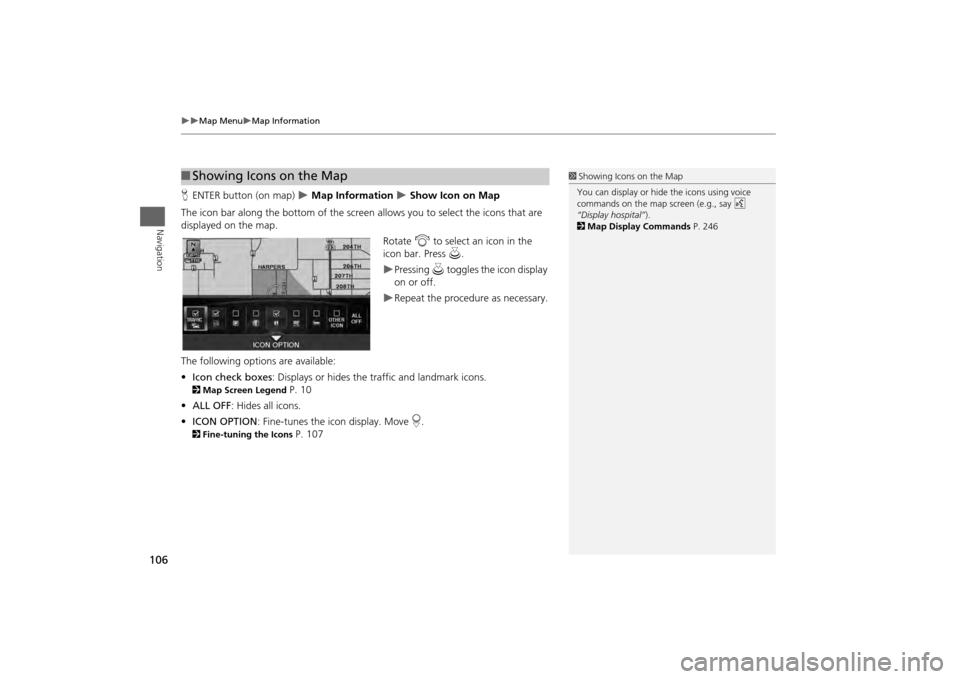
The icon bar along the bottom of the screen allows you to select the icons that are
displayed on the map. Rotate i to select an icon in the
icon bar. Press u.
Pressing u toggles the icon display
on or off.Repeat the procedure as necessary.
The following options are available:
• Icon check boxes : Displays or hides the traffic and landmark icons.
2Map Screen Legend
P. 10
• ALL OFF: Hides all icons.
• ICON OPTION : Fine-tunes the icon display. Move r.
2 Fine-tuning the Icons
P. 107
■Showing Icons on the Map
1 Showing Icons on the Map
You can display or hide the icons using voice
commands on the map screen (e.g., say d
“Display hospital” ).
2 Map Display Commands P. 246
Page 109 of 267
107
Map Menu
Map Information
Navigation
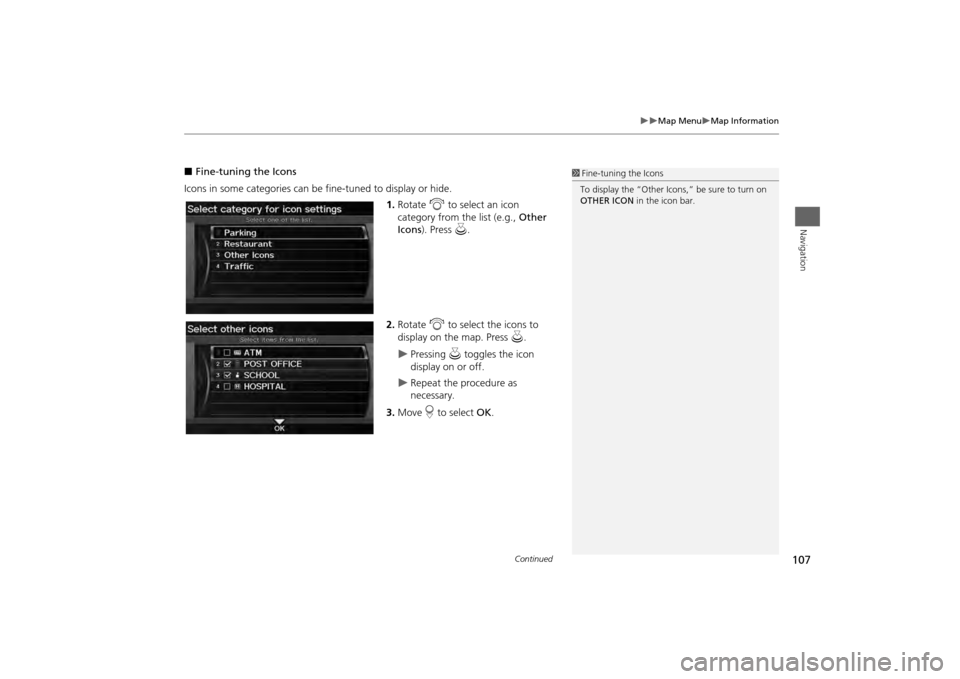
■Fine-tuning the Icons
Icons in some categories can be fine-tuned to display or hide. 1.Rotate i to select an icon
category from the list (e.g., Other
Icons ). Press u.
2. Rotate i to select the icons to
display on the map. Press u.
Pressing u toggles the icon
display on or off.
Repeat the procedure as
necessary.
3. Move r to select OK.
1Fine-tuning the Icons
To display the “Other Icons,” be sure to turn on
OTHER ICON in the icon bar.
Continued
Page 110 of 267
108
Map Menu
Map Information
Navigation
HENTER button (on map)
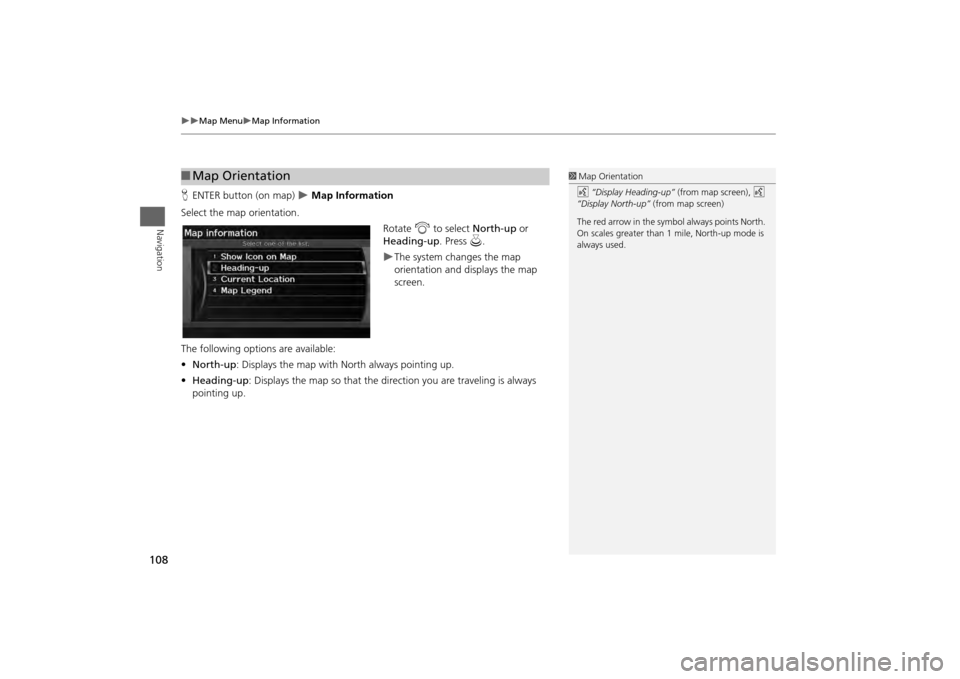
Map Information
Select the map orientation. Rotate i to select North-up or
Heading-up . Press u.
The system changes the map
orientation and displays the map
screen.
The following options are available:
• North-up : Displays the map with North always pointing up.
• Heading-up: Displays the map so that the di rection you are traveling is always
pointing up.
■ Map Orientation
1 Map Orientation
d “Display Heading-up” (from map screen), d
“Display North-up” (from map screen)
The red arrow in the symbol always points North.
On scales greater than 1 mile, North-up mode is
always used.
Trending: width, warning, tailgate, engine, service, technical data, audio

