HONDA PILOT 2016 3.G Navigation Manual
PILOT 2016 3.G
HONDA
HONDA
https://www.carmanualsonline.info/img/13/6022/w960_6022-0.png
HONDA PILOT 2016 3.G Navigation Manual
Trending: warning, navigation update, length, Home, steering wheel, ECO mode, clock
Page 21 of 145
20
uuPersonal Information uSaved Locations
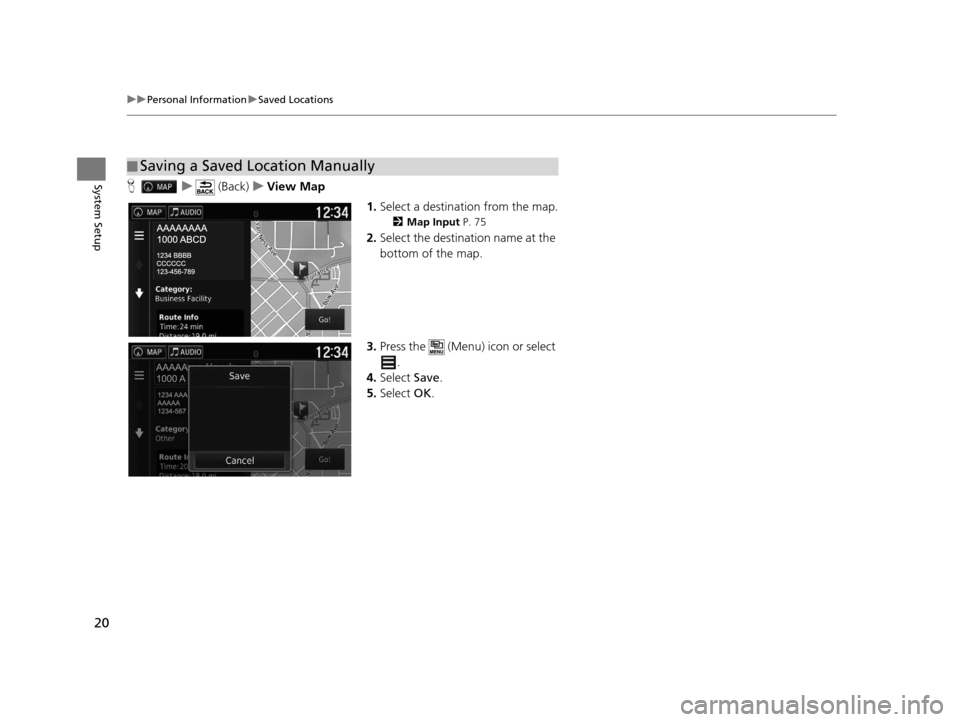
System SetupH u (Back) uView Map
1.Select a destination from the map.
2 Map Input P. 75
2.Select the destination name at the
bottom of the map.
3. Press the (Menu) icon or select
.
4. Select Save.
5. Select OK.
■Saving a Saved Location Manually
16 PILOT NAVI-31TG78000.book 20 ページ 2015年4月21日 火曜日 午前8時30分
Page 22 of 145
21
uuPersonal Information uSaved Locations
Continued
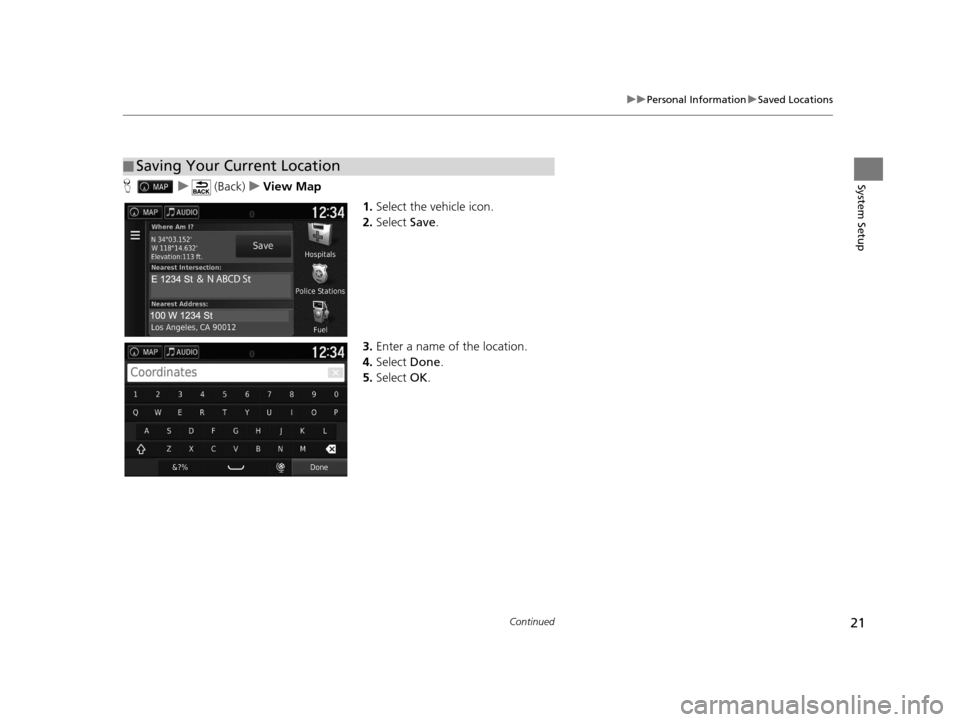
System SetupH u (Back) uView Map
1.Select the vehicle icon.
2. Select Save.
3. Enter a name of the location.
4. Select Done.
5. Select OK.
■Saving Your Current Location
16 PILOT NAVI-31TG78000.book 21 ページ 2015年4月21日 火曜日 午前8時30分
Page 23 of 145
22
uuPersonal Information uSaved Locations
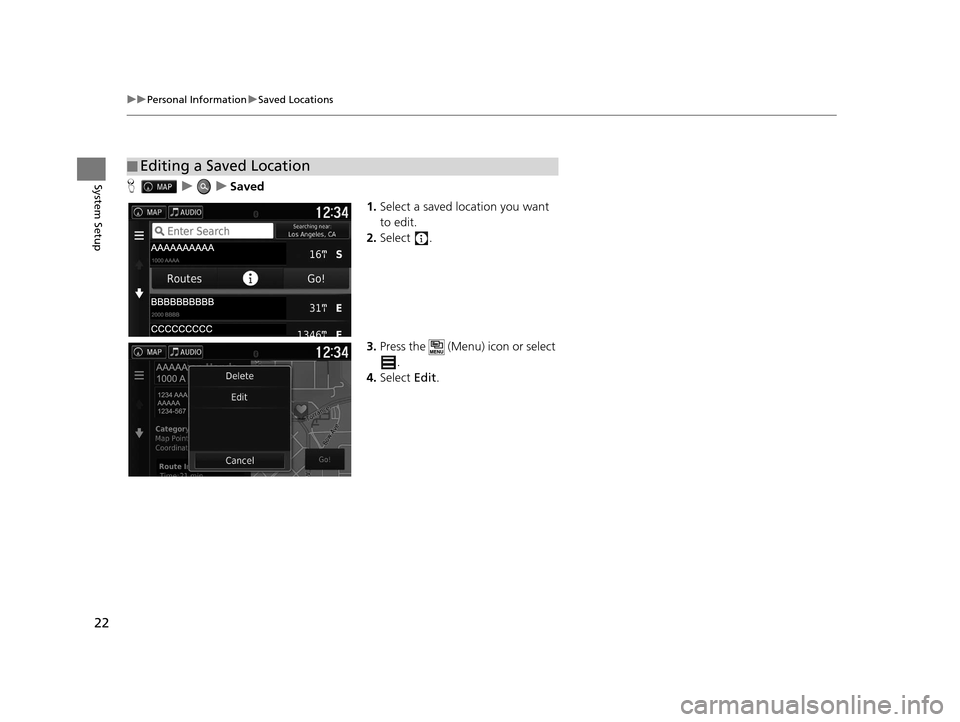
System SetupH uuSaved
1.Select a saved location you want
to edit.
2. Select .
3. Press the (Menu) icon or select
.
4. Select Edit.
■Editing a Saved Location
16 PILOT NAVI-31TG78000.book 22 ページ 2015年4月21日 火曜日 午前8時30分
Page 24 of 145
23
uuPersonal Information uSaved Locations
Continued
System Setup
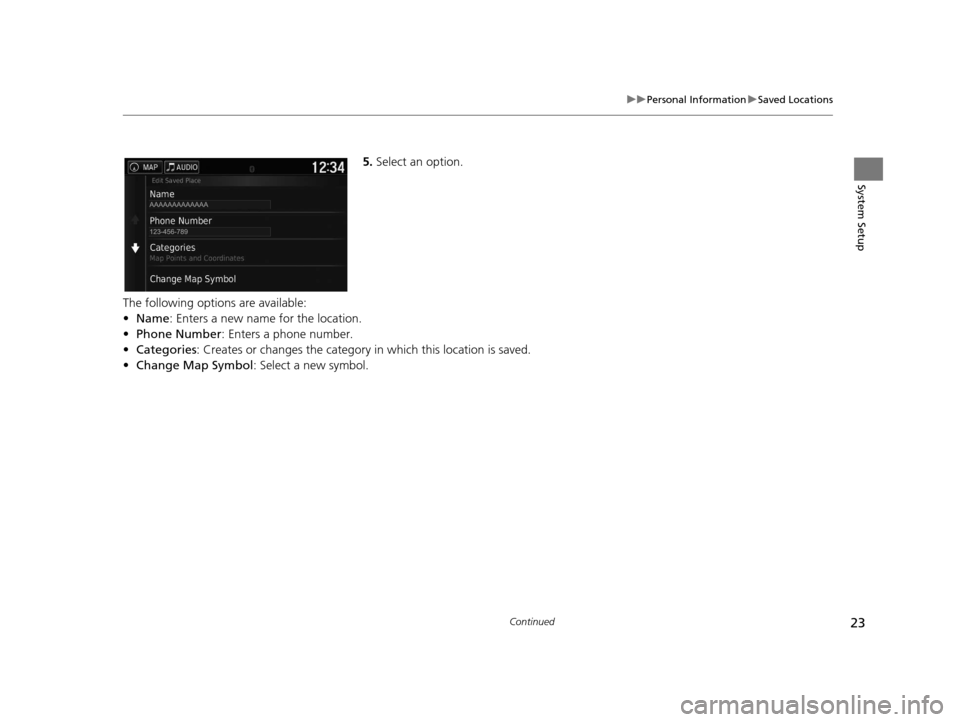
5. Select an option.
The following options are available:
• Name: Enters a new name for the location.
• Phone Number: Enters a phone number.
• Categories : Creates or changes the category in which this location is saved.
• Change Map Symbol : Select a new symbol.
16 PILOT NAVI-31TG78000.book 23 ページ 2015年4月21日 火曜日 午前8時30分
Page 25 of 145
24
uuPersonal Information uSaved Locations
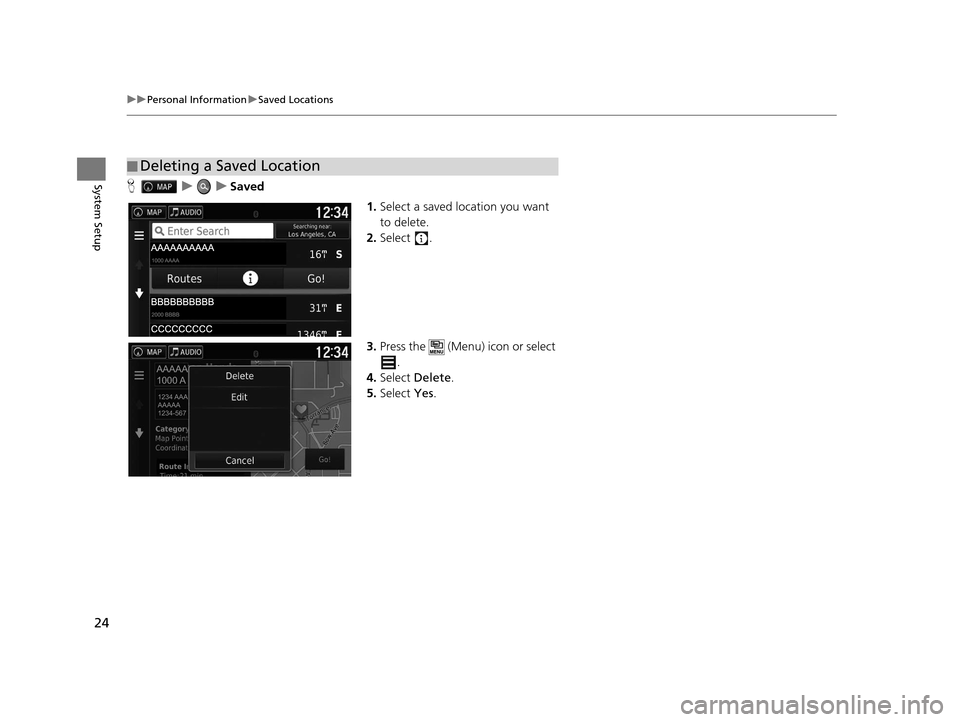
System SetupH uuSaved
1.Select a saved location you want
to delete.
2. Select .
3. Press the (Menu) icon or select
.
4. Select Delete.
5. Select Yes.
■Deleting a Saved Location
AAAAA
1000 A
1234 AAA
AAAAA
1234-567
16 PILOT NAVI-31TG78000.book 24 ページ 2015年4月21日 火曜日 午前8時30分
Page 26 of 145
25
uuPersonal Information uSaved Locations
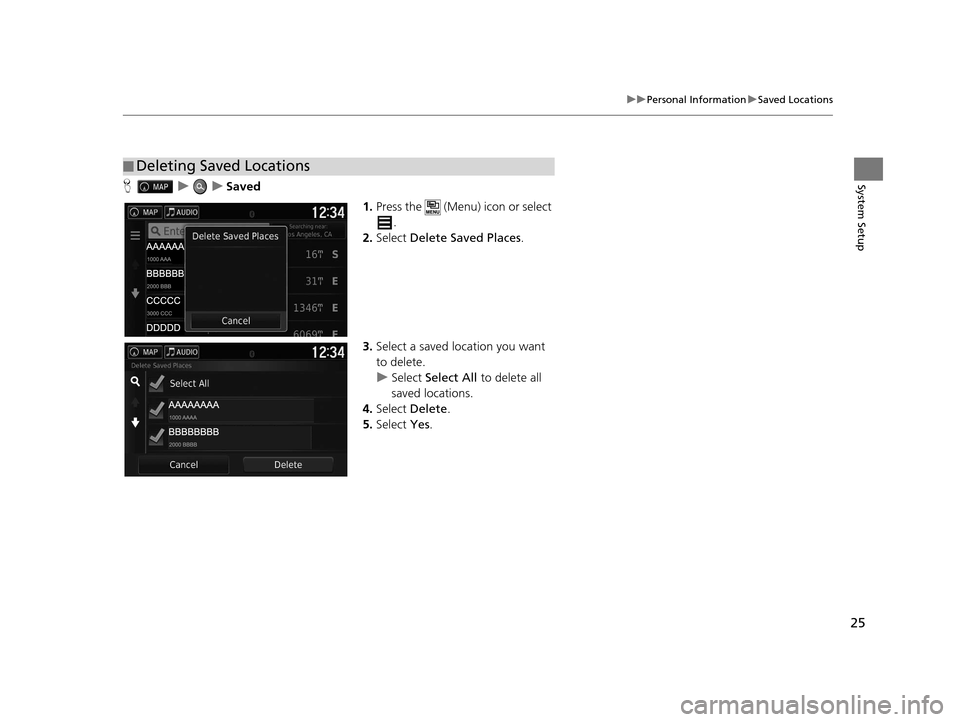
System SetupH uuSaved
1.Press the (Menu) icon or select
.
2. Select Delete Saved Places .
3. Select a saved location you want
to delete.
u Select Select All to delete all
saved locations.
4. Select Delete .
5. Select Yes.
■Deleting Saved Locations
16 PILOT NAVI-31TG78000.book 25 ページ 2015年4月21日 火曜日 午前8時30分
Page 27 of 145
26
System Setup
Display Mode Settings
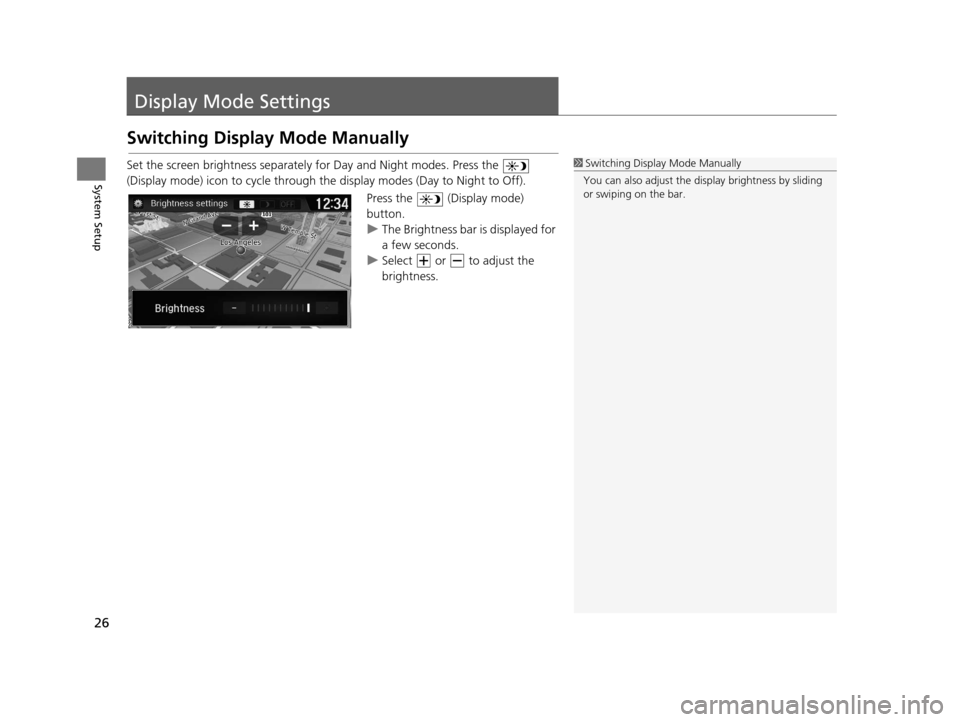
Switching Display Mode Manually
Set the screen brightness separately for Day and Night modes. Press the
(Display mode) icon to cycle through the display modes (Day to Night to Off).
Press the (Display mode)
button.
uThe Brightness bar is displayed for
a few seconds.
u Select or to adjust the
brightness.1Switching Display Mode Manually
You can also adjust the display brightness by sliding
or swiping on the bar.
16 PILOT NAVI-31TG78000.book 26 ページ 2015年4月21日 火曜日 午前8時30分
Page 28 of 145
27
uuDisplay Mode Settings uSwitching Display Mode Manually
System SetupIllumination
control Priority Operation
button1Selects Day or Night display mode when the user
wants to change the brightness of the display
temporarily.
Remember:
This button overrides all other display
brightness adjustment that is set by the sunlight
sensor automatically or you changed manually from
the System settings screen.
Sunlight sensor
*
(see your Owner’s
Manual for
location) 2 If the sunlight sensor detects daylight and the
headlights are turned on, the system automatically
overrides the Nigh t display and displays the Day
display mode.
Remember: If desired, use the button to
override this automatic choice.
Dash illumination
adjustment
buttons (see your
Owner’s Manual
for location)3When the headlights are turn ed on, and you wish to
have the Day display mode, adjust the illumination
to the full brightness (beeps).
Remember: Adjust the dash brightness back to
midrange to allow auto switching by sensing the
headlights are on or off.
Headlights
(Auto
*/On/Off) 4 When turned on, the di
splay changes to Night
display mode.
The previous three controls listed above can
“cancel” this function.
Remember: Use the button, or adjust the
dash illumination to full brightness, to set the display
to your desired choice.
16 PILOT NAVI-31TG78000.book 27 ページ 2015年4月21日 火曜日 午前8時30分
Page 29 of 145
28
System Setup
Map & Vehicle
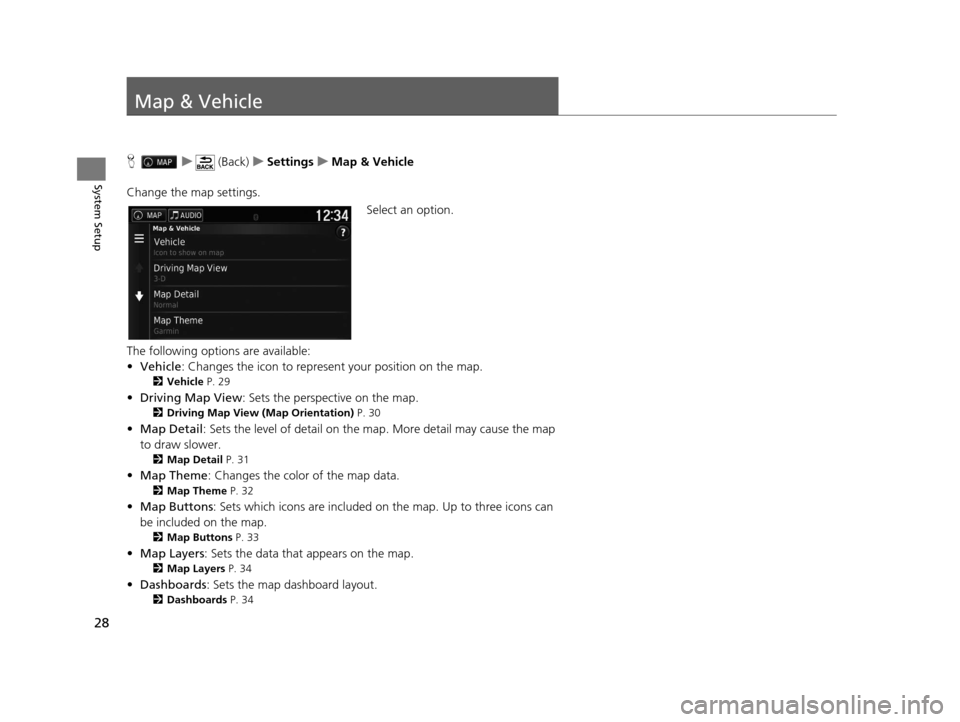
Hu (Back) uSettings uMap & Vehicle
Change the map settings. Select an option.
The following options are available:
• Vehicle : Changes the icon to represent your position on the map.
2Vehicle P. 29
•Driving Map View : Sets the perspective on the map.
2Driving Map View (Map Orientation) P. 30
•Map Detail : Sets the level of detail on the map. More detail may cause the map
to draw slower.
2 Map Detail P. 31
•Map Theme : Changes the color of the map data.
2Map Theme P. 32
•Map Buttons : Sets which icons are included on the map. Up to three icons can
be included on the map.
2 Map Buttons P. 33
•Map Layers : Sets the data that appears on the map.
2Map Layers P. 34
•Dashboards : Sets the map dashboard layout.
2Dashboards P. 34
16 PILOT NAVI-31TG78000.book 28 ページ 2015年4月21日 火曜日 午前8時30分
Page 30 of 145
29
uuMap & Vehicle uVehicle
System Setup
• myMaps : Sets which installed maps the system uses.
2myMaps P. 35
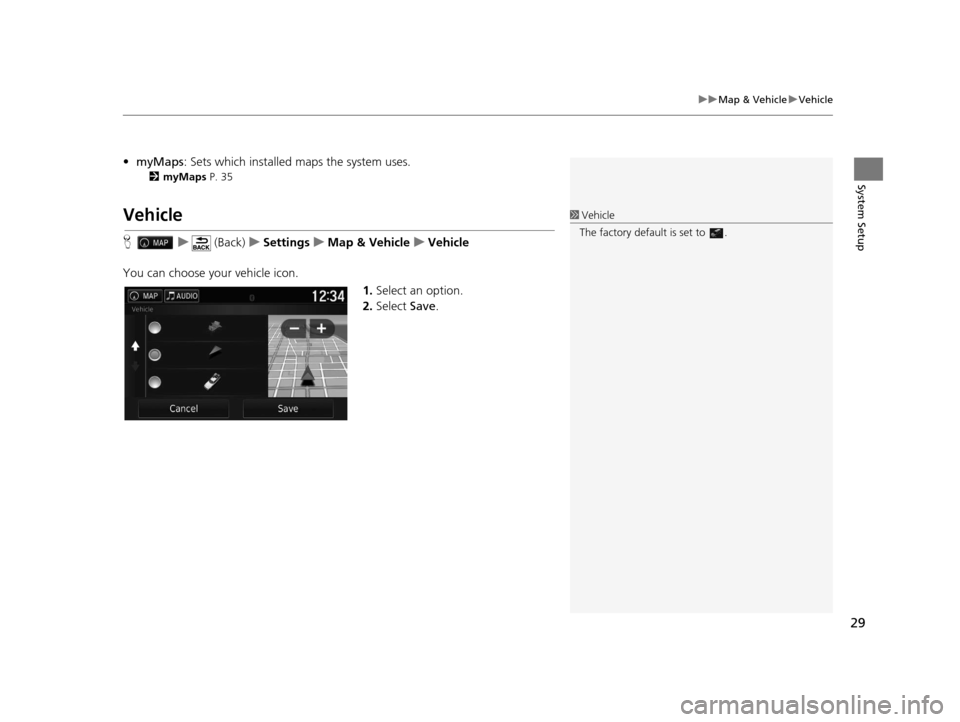
Vehicle
H u (Back) uSettings uMap & Vehicle uVehicle
You can choose your vehicle icon. 1.Select an option.
2. Select Save.
1Vehicle
The factory default is set to .
16 PILOT NAVI-31TG78000.book 29 ページ 2015年4月21日 火曜日 午前8時30分
Trending: Home, wheel, remote start, stop start, dashboard, warning, buttons
