check engine Hyundai Coupe 2008 Service Manual
[x] Cancel search | Manufacturer: HYUNDAI, Model Year: 2008, Model line: Coupe, Model: Hyundai Coupe 2008Pages: 407, PDF Size: 11.03 MB
Page 220 of 407
6
DO-IT-YOURSELF MAINTENANCE
19CHANGING THE CLIMATE CONTROL AIR FILTER
G145A03GK-GAT
(In front of blower unit)(If installed)
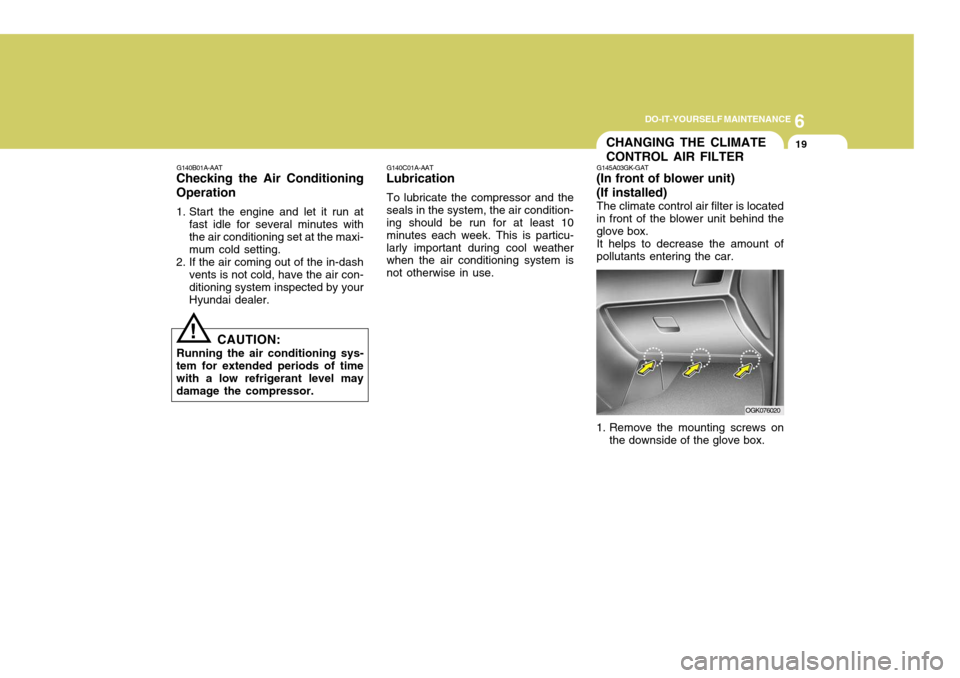
The climate control air filter is located in front of the blower unit behind the glove box.It helps to decrease the amount ofpollutants entering the car.
1. Remove the mounting screws on the downside of the glove box. OGK076020
G140C01A-AAT
Lubrication
To lubricate the compressor and theseals in the system, the air condition- ing should be run for at least 10 minutes each week. This is particu-larly important during cool weather when the air conditioning system is not otherwise in use.
!
G140B01A-AAT
Checking the Air Conditioning Operation
1. Start the engine and let it run at
fast idle for several minutes with the air conditioning set at the maxi- mum cold setting.
2. If the air coming out of the in-dash vents is not cold, have the air con-ditioning system inspected by yourHyundai dealer.
CAUTION:
Running the air conditioning sys-
tem for extended periods of timewith a low refrigerant level maydamage the compressor.
Page 225 of 407
6 DO-IT-YOURSELF MAINTENANCE
24
!
CHECKING ELECTRIC COOLING FANS
G220A01A-AAT
WARNING:
The cooling fan is controlled by engine coolant temperature and may sometimes operate even whenthe engine is not running. Use extreme caution when working near the blades of the coolant fan,so that you are not injured by a rotating fan blade. As the coolant temperature decreases the fan willautomatically shut off. This is a normal condition.
Keep batteries out of the reach of children because batteries contain highly corrosive SULFURIC ACID.Do not allow battery acid to contact your skin, eyes, clothing or paint finish.If any electrolyte gets intoyour eyes, flush your eyeswith clean water for at least 15 minutes and get imme- diate medical attention. Ifpossible, continue to ap- ply water with a sponge or cloth until medical atten-tion is received.If electrolyte gets on yourskin, thoroughly wash thecontacted area.If you feel a pain or a burn-ing sensation, get medi- cal attention immediately. Wear eye protection when charging or working near a battery. Always provide ventilation when working in an en- closed space.o When lifting a plastic-cased bat- tery, excessive pressure on the case may cause battery acid toleak, resulting in personal in- jury. Lift with a battery carrier or with your hands on oppositecorners.
o Never attempt to charge the bat- tery when the battery cables are connected.
o The electrical ignition system works with high voltage. Never touch these componentswith the engine running or the ignition switched on.
Page 226 of 407
6
DO-IT-YOURSELF MAINTENANCE
25
G220B01A-AAT
Checking Engine Cooling Fan
The engine coolant fan should come on automatically if the engine coolant temperature is high. G220C01A-AAT
Checking Condenser Cooling Fan
The condenser coolant fan should come on automatically whenever the air conditioning is in operation. G230A01GK-GAT
POWER STEERING FLUID LEVEL
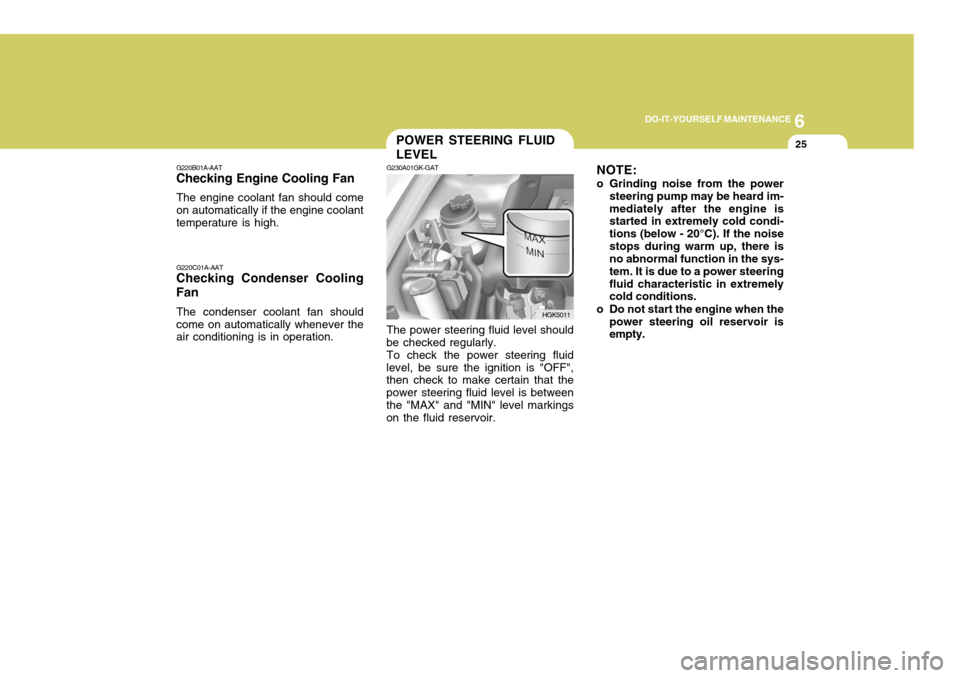
The power steering fluid level should
be checked regularly.
To check the power steering fluid
level, be sure the ignition is "OFF", then check to make certain that the power steering fluid level is betweenthe "MAX" and "MIN" level markings on the fluid reservoir. NOTE:
o Grinding noise from the power
steering pump may be heard im- mediately after the engine is started in extremely cold condi- tions (below - 20°C). If the noisestops during warm up, there is no abnormal function in the sys- tem. It is due to a power steeringfluid characteristic in extremely cold conditions.
o Do not start the engine when the power steering oil reservoir isempty.
HGK5011
Page 227 of 407
6 DO-IT-YOURSELF MAINTENANCE
26
OGK076068N
G240A01A-AAT Power Steering Hoses It is suggested that you check the power steering hose connections for fluid leakage daily. The power steer- ing hoses should be replaced if thereis severe surface cracking, pulling, scuffing or worn spots. Deterioration of the hose could cause prematurefailure. G290A02GK-GAT
HEADLIGHT AIMING ADJUSTMENT
1. Keep all tires inflated to the correctpressure.
2. Place the vehicle on level ground and press the front bumper & rearbumper down several times. Placevehicle at a distance of 3m (118 in.) from the test wall.
3. See that the vehicle is unloaded (except for full levels of coolant, engine oil and fuel, and spare tire,jack, and tools).
4. Clean the head light lenses and
turn on the headlights.
5. Open the hood.
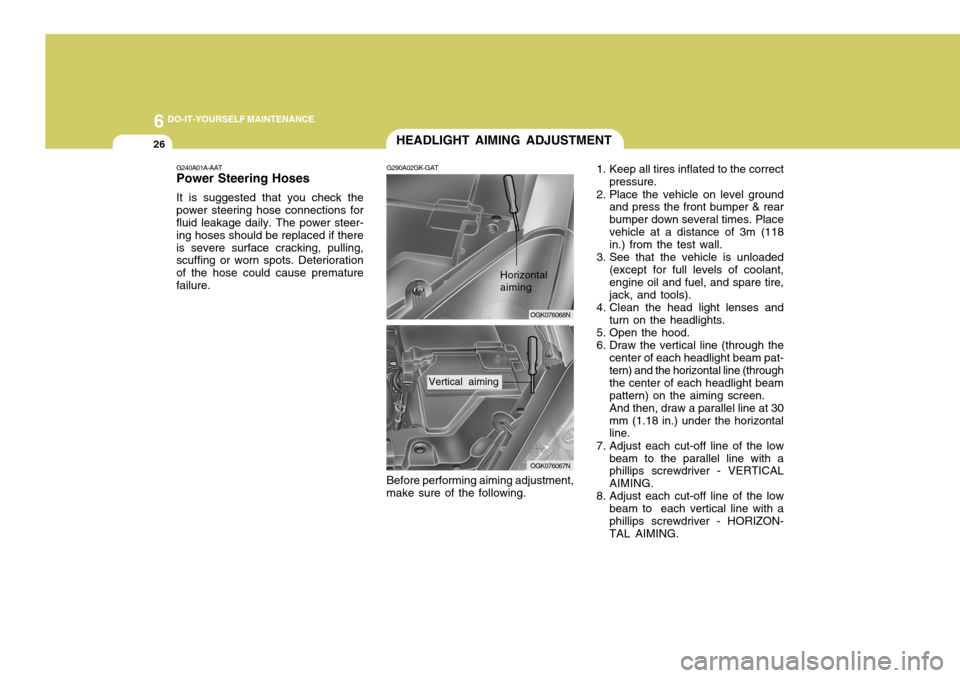
6. Draw the vertical line (through the center of each headlight beam pat- tern) and the horizontal line (through the center of each headlight beampattern) on the aiming screen.And then, draw a parallel line at 30mm (1.18 in.) under the horizontal line.
7. Adjust each cut-off line of the low beam to the parallel line with aphillips screwdriver - VERTICAL AIMING.
8. Adjust each cut-off line of the low
beam to each vertical line with aphillips screwdriver - HORIZON- TAL AIMING.
Before performing aiming adjustment,
make sure of the following.
OGK076067N
Horizontal aiming
Vertical aiming
Page 253 of 407
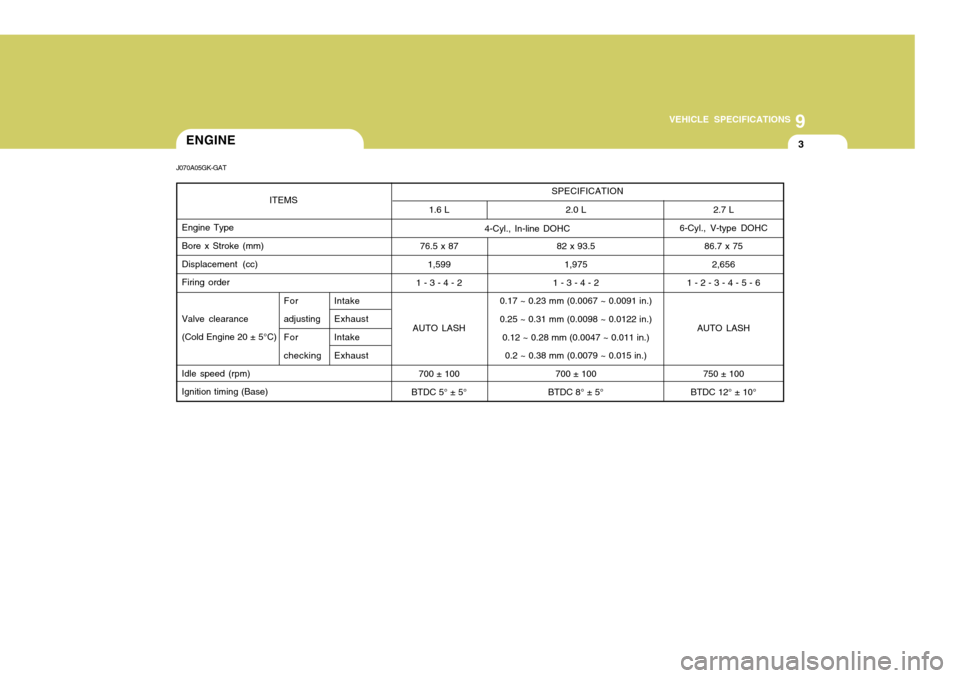
9
VEHICLE SPECIFICATIONS
3
SPECIFICATION 2.0 L
82 x 93.5 1,975
1 - 3 - 4 - 2
0.17 ~ 0.23 mm (0.0067 ~ 0.0091 in.) 0.25 ~ 0.31 mm (0.0098 ~ 0.0122 in.)
0.12 ~ 0.28 mm (0.0047 ~ 0.011 in.) 0.2 ~ 0.38 mm (0.0079 ~ 0.015 in.)
700 ± 100
BTDC 8° ± 5° 2.7 L
6-Cyl., V-type DOHC 86.7 x 75
2,656
1 - 2 - 3 - 4 - 5 - 6
AUTO LASH
750 ± 100
BTDC 12° ± 10°
4-Cyl., In-line DOHC
1.6 L
76.5 x 87 1,599
1 - 3 - 4 - 2
AUTO LASH
700 ± 100
BTDC 5° ± 5°
ITEMS
Engine TypeBore x Stroke (mm) Displacement (cc) Firing order Valve clearance (Cold Engine 20 ± 5°C) Idle speed (rpm) Ignition timing (Base)ENGINE
J070A05GK-GAT
For adjustingFor checking Intake ExhaustIntake Exhaust
Page 257 of 407

10
INDEX
3
Driving Economical driving .................................................. 2-16
Smooth corneri ng ..................................................... 2-17
Winter driving ........................................................... 2-17
E Electronic Stability Program (ESP) ............................2-13
Emissions Control Systems ........................................ 7-2 Engine Before starting the engine ........................................ 2-3
Changing the oil and filter ......................................... 6-6Compartment (1.6L, 2.0L, 2.7L) ................................ 6-2
Coolant ..................................................................... 6-9
Coolant temperature gauge ......................................1-50
If the engine overheats ............................................. 3-4
Number ..................................................................... 8-2
Oil ............................................................................. 6-6Oil consumption ........................................................ 6-8
Starting ..................................................................... 2-5
Engine Exhaust Can Be Dangerous ............................ 2-2
FFog Light .................................................................... 1-62
Front Seats Adjustable front seats .............................................. 1-13
Adjustable headrests ............................................... 1-14
Adjusting seat forward and rearward ........................ 1-13
Adjusting seatback angle ........................................ 1-14
Lumbar support control ............................................ 1-16
Seat cushion height adjustment .............................. 1-16Seat warmer
............................................................ 1-16
Fuel Capacity ................................................................... 9-2
Gauge ...................................................................... 1-49
Recommendations .................................................... 1-2
Fuel Filler Lid Remote release ....................................................... 1-76
Fuse Panel Description .............................................. 6-37
Fuses ......................................................................... 6-21
G
General Everyday Checks ..... ...................................... 6-5
Glove box ................................................................... 1-71
H Hazard Warning System ............................................. 1-62
Headlight Leveling Device S ystem .............................1-66
Heating and Air Conditioning Control Rotary type .............................................................. 1-87
Automatic type ........................................................ 1-96
High-mounted rear stoplight .. ......................................1-74
Hood Release ............................................................. 1-75
Horn ............................................................................ 1-80
I Ignition Switch ............................................................. 2-4
Immobilizer System ..................................................... 1-4
Instrument Cluster and Indicator Lights ...................... 1-42
Instrument Panel Light Control (Rheostat) .................. 1-64
Intermittent Wiper ....................................................... 1-61
Page 296 of 407
2
DRIVING YOUR HYUNDAI
3TO START THE ENGINEBEFORE STARTING THE ENGINE
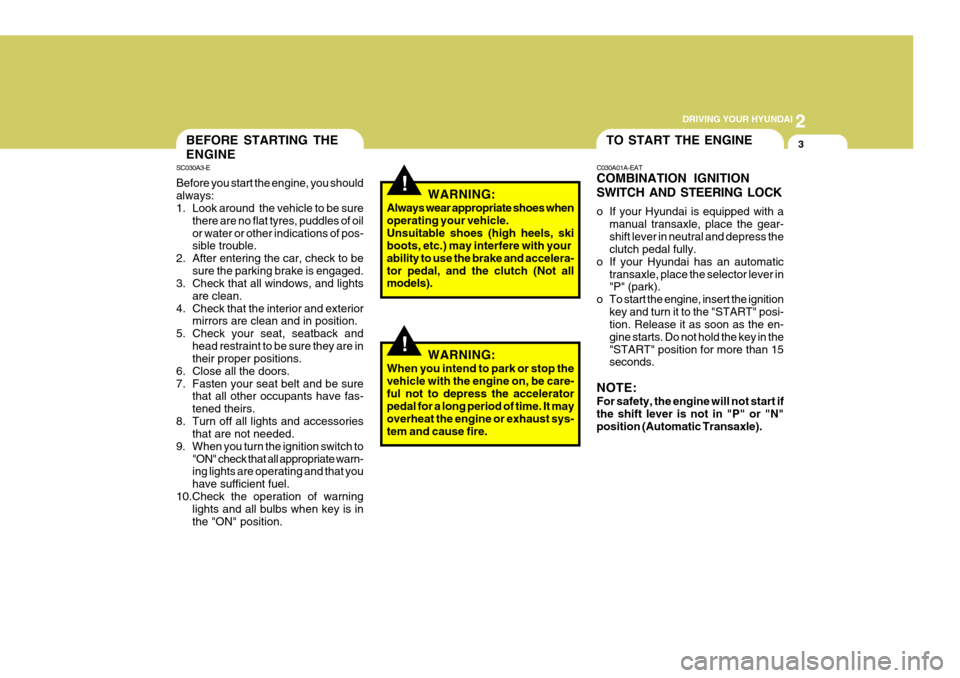
SC030A3-E Before you start the engine, you should always:
1. Look around the vehicle to be sure
there are no flat tyres, puddles of oil or water or other indications of pos- sible trouble.
2. After entering the car, check to be sure the parking brake is engaged.
3. Check that all windows, and lights
are clean.
4. Check that the interior and exterior mirrors are clean and in position.
5. Check your seat, seatback and head restraint to be sure they are intheir proper positions.
6. Close all the doors.
7. Fasten your seat belt and be sure that all other occupants have fas-tened theirs.
8. Turn off all lights and accessories that are not needed.
9. When you turn the ignition switch to "ON" check that all appropriate warn- ing lights are operating and that you have sufficient fuel.
10.Check the operation of warning lights and all bulbs when key is inthe "ON" position.
!WARNING:
Always wear appropriate shoes when operating your vehicle.Unsuitable shoes (high heels, ski boots, etc.) may interfere with your ability to use the brake and accelera-tor pedal, and the clutch (Not all models). C030A01A-EAT COMBINATION IGNITION SWITCH AND STEERING LOCK
o If your Hyundai is equipped with a
manual transaxle, place the gear- shift lever in neutral and depress the clutch pedal fully.
o If your Hyundai has an automatic
transaxle, place the selector lever in"P" (park).
o To start the engine, insert the ignition key and turn it to the "START" posi-tion. Release it as soon as the en- gine starts. Do not hold the key in the"START" position for more than 15 seconds.
NOTE: For safety, the engine will not start if the shift lever is not in "P" or "N" position (Automatic Transaxle).
!WARNING:
When you intend to park or stop the vehicle with the engine on, be care-ful not to depress the accelerator pedal for a long period of time. It may overheat the engine or exhaust sys-tem and cause fire.
Page 306 of 407

2
DRIVING YOUR HYUNDAI
13
o Check the automatic transaxle fluid level regularly, and add fluid as necessary.
o See the maintenance schedule for
the proper fluid recommendation.
C090N05O-EAT General Operating Instructions
o The engine may only be started when
the selector lever is at position "P".
o Ensure that the footbrake is firmly applied when shifting from "P" or "N", to "R" or "D" and vice versa.
o Always engage the parking brake when the vehicle is unattended, neveruse the "P" or "R" position in place ofthe parking brake.
o Under normal circumstances, the
selector lever should be placed in the"D" position and the transaxle al- lowed to select the most ideal ratio for the circumstances. In this posi-tion maximum fuel economy will be achieved.
o When descending steep gradients where engine braking is required, theselector lever should be shifted into 1st gear whilst in sport mode de-pending upon the vehicle speed.
o When climbing steep gradients and
using large throttle openings, thetransaxle may repeatedly change between two adjacent ratios. This is a normal characteristic and may beprevented by shifting into 1st gear whilst in sport mode depending upon the vehicle speed. o Never move the selector lever to or
from the "P" or "N" position with theaccelerator depressed.
o If rapid acceleration is required, fully
depress the accelerator pedal. Inthis condition, the kickdown mecha- nism will be operated and the transaxle will automatically down-shift according to the vehicle speed.
o Do not depress the accelerator pedal
with the brakes applied and the se-lector at the "R" or "D" position.
o The automatic transaxle may be used
to great effect if the vehicle becomesstuck in snow or mud by allowing the vehicle to be rocked to and fro. The engine speed should be held at ap-proximately 1,000rpm by means of the accelerator pedal and the selec- tor lever moved between the "D" and"R" positions to induce a rocking motion.
o Optimum vehicle performance and economy is obtained by smoothlydepressing and releasing the accel- erator pedal.
Page 308 of 407
2
DRIVING YOUR HYUNDAI
15
!WARNING:
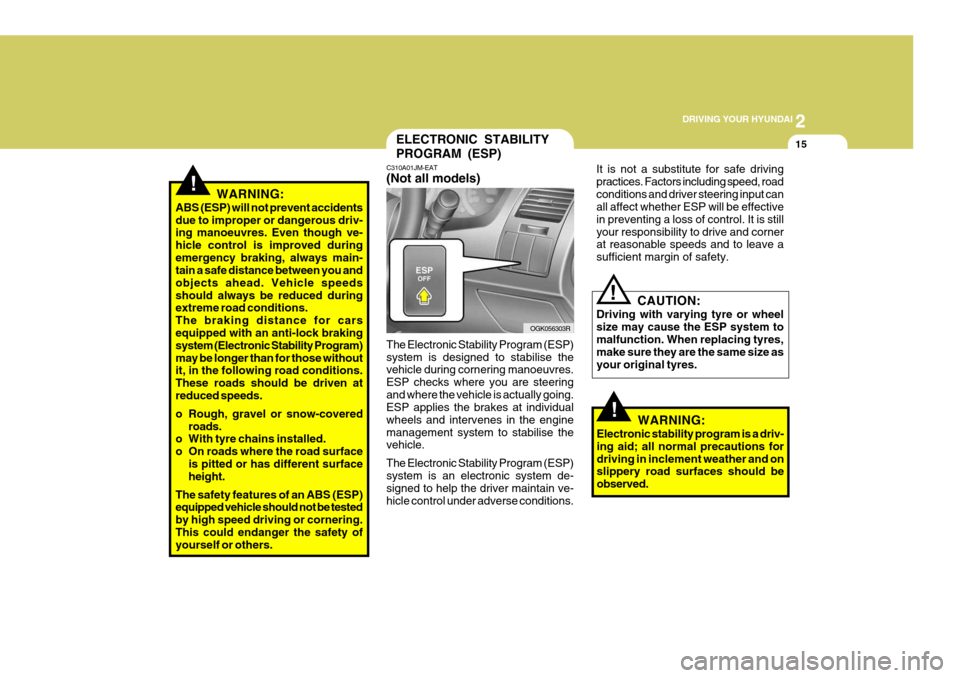
ABS (ESP) will not prevent accidents due to improper or dangerous driv- ing manoeuvres. Even though ve- hicle control is improved duringemergency braking, always main- tain a safe distance between you and objects ahead. Vehicle speedsshould always be reduced during extreme road conditions. The braking distance for carsequipped with an anti-lock braking system (Electronic Stability Program) may be longer than for those without it, in the following road conditions. These roads should be driven atreduced speeds.
o Rough, gravel or snow-covered roads.
o With tyre chains installed.
o On roads where the road surface
is pitted or has different surface height.
The safety features of an ABS (ESP)equipped vehicle should not be tested by high speed driving or cornering.This could endanger the safety of yourself or others.
!
!
ELECTRONIC STABILITY PROGRAM (ESP)
C310A01JM-EAT (Not all models) It is not a substitute for safe driving practices. Factors including speed, roadconditions and driver steering input can all affect whether ESP will be effective in preventing a loss of control. It is stillyour responsibility to drive and corner at reasonable speeds and to leave a sufficient margin of safety.
The Electronic Stability Program (ESP)system is designed to stabilise the vehicle during cornering manoeuvres. ESP checks where you are steeringand where the vehicle is actually going. ESP applies the brakes at individual wheels and intervenes in the enginemanagement system to stabilise the vehicle. The Electronic Stability Program (ESP) system is an electronic system de- signed to help the driver maintain ve-hicle control under adverse conditions.
OGK056303R CAUTION:
Driving with varying tyre or wheel size may cause the ESP system to malfunction. When replacing tyres, make sure they are the same size asyour original tyres.
WARNING:
Electronic stability program is a driv-ing aid; all normal precautions fordriving in inclement weather and on slippery road surfaces should be observed.
Page 309 of 407
2DRIVING YOUR HYUNDAI
16EFFECTIVE BRAKING
SC140A2-E Braking system performance and fric- tion material life are greatly affected by the driving style adopted. The following suggestions are made to assist inachieving the best results from the braking system.
o Anticipate the road and conditions ahead in order that heavy braking may be avoided.
o When descending long gradients, use the engine to assist in retarding thevehicle to minimise the possibility ofbrake fade occurring.
o When trailer towing, ensure that the
trailer brakes function correctly anduse engine braking to assist the vehicle braking system.
o Use only genuine Hyundai replace- ment brake pads and shoes to en-sure consistent friction characteris- tics and wear rates.
o After driving through deep water (e.g. fording), the brakes may becomewet and performance reduced. Al-ways check brake efficiency after emerging from the water and dry the brakes by lightly depressing the brakepedal several times whilst driving slowly.
C310B01JM-AAT ESP ON/OFF Mode When the ESP is operating, the ESP indicator in the instrument cluster willblink. If you turn the system off by pressing the ESP switch, the ESP-OFF indica-tor will come on and stay on. In the ESP-OFF mode, the stability control will be deactivated. Adjust your drivingaccordingly. To turn the system back on, press the switch again. The ESP- OFF indicator should go off. NOTE: The ESP mode will automatically be turned ON after the engine is turnedoff and restarted.
C310D02JM-EAT Indicators and Warning The indicators should illuminate when the ignition key is turned ON or STARTbut should go out after approximately 3 seconds. If the indicators do not illuminate, or theESP-OFF indicator does not go out after approximately 3 seconds, have the vehicle checked by a Hyundaiauthorised repairer. Should there be any unusual conditions in the device whilst driving, ESP-OFF indicator illuminates as a warning. If ESP-OFF indicator illuminates, pullyour car to a safe place and stop the engine. Then, start the engine again to check ifthe ESP-OFF indicator goes out. If the indicator remains lit even after the engine has been started, have your car checked by a Hyundai authorised re- pairer.