audio HYUNDAI KONA EV 2021 Owners Manual
[x] Cancel search | Manufacturer: HYUNDAI, Model Year: 2021, Model line: KONA EV, Model: HYUNDAI KONA EV 2021Pages: 478, PDF Size: 32.83 MB
Page 14 of 478
I IN
NS
ST
TR
RU
UM
ME
EN
NT
T
P
PA
AN
NE
EL
L
O
OV
VE
ER
RV
VI
IE
EW
W
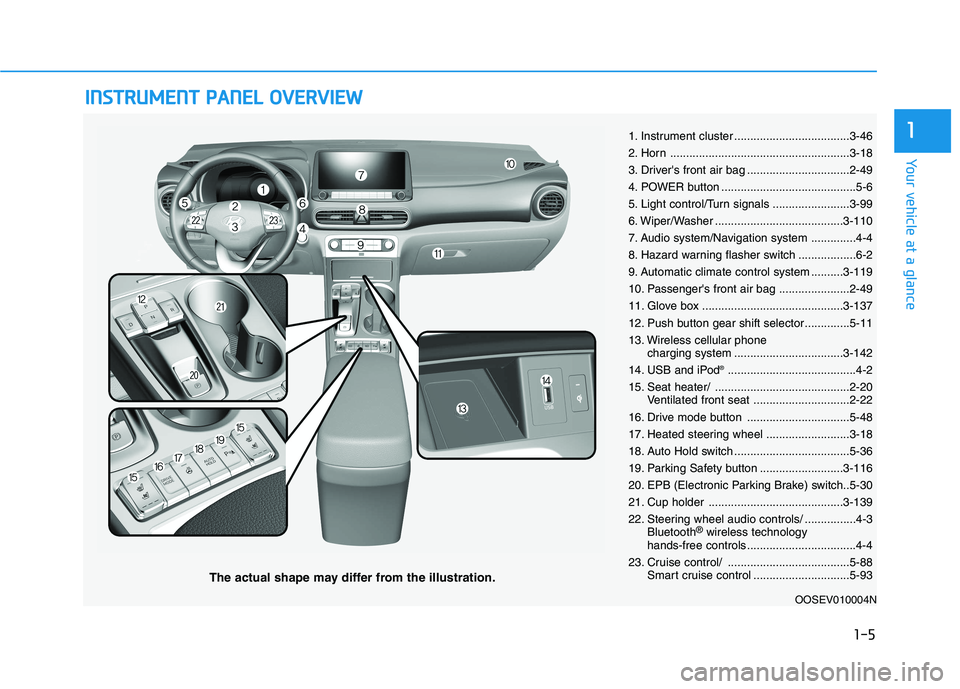
The actual shape may differ from the illustration.
1-5
Your vehicle at a glance
11. Instrument cluster ....................................3-46
2. Horn ........................................................3-18
3. Driver's front air bag ................................2-49
4. POWER button ..........................................5-6
5. Light control/Turn signals ........................3-99
6. Wiper/Washer ........................................3-110
7. Audio system/Navigation system ..............4-4
8. Hazard warning flasher switch ..................6-2
9. Automatic climate control system ..........3-119
10. Passenger's front air bag ......................2-49
11. Glove box ............................................3-137
12. Push button gear shift selector..............5-11
13. Wireless cellular phone
charging system ..................................3-142
14. USB and iPod
®........................................4-2
15. Seat heater/ ..........................................2-20
Ventilated front seat ..............................2-22
16. Drive mode button ................................5-48
17. Heated steering wheel ..........................3-18
18. Auto Hold switch ....................................5-36
19. Parking Safety button ..........................3-116
20. EPB (Electronic Parking Brake) switch..5-30
21. Cup holder ..........................................3-139
22. Steering wheel audio controls/ ................4-3
Bluetooth
®wireless technology
hands-free controls ..................................4-4
23. Cruise control/ ......................................5-88
Smart cruise control ..............................5-93
OOSEV010004N
Page 103 of 478
3-19
Convenient features of your vehicle
3
M MI
IR
RR
RO
OR
RS
S
Inside Rearview Mirror
Before driving your vehicle, check to
see that your inside rearview mirror
is properly positioned. Adjust the
rearview mirror so that the view
through the rear window is properly
centered.
When cleaning the mirror, use a
paper towel or similar material
dampened with glass cleaner. Do
not spray glass cleaner directly on
the mirror as this may cause the
liquid cleaner to enter the mirror
housing.
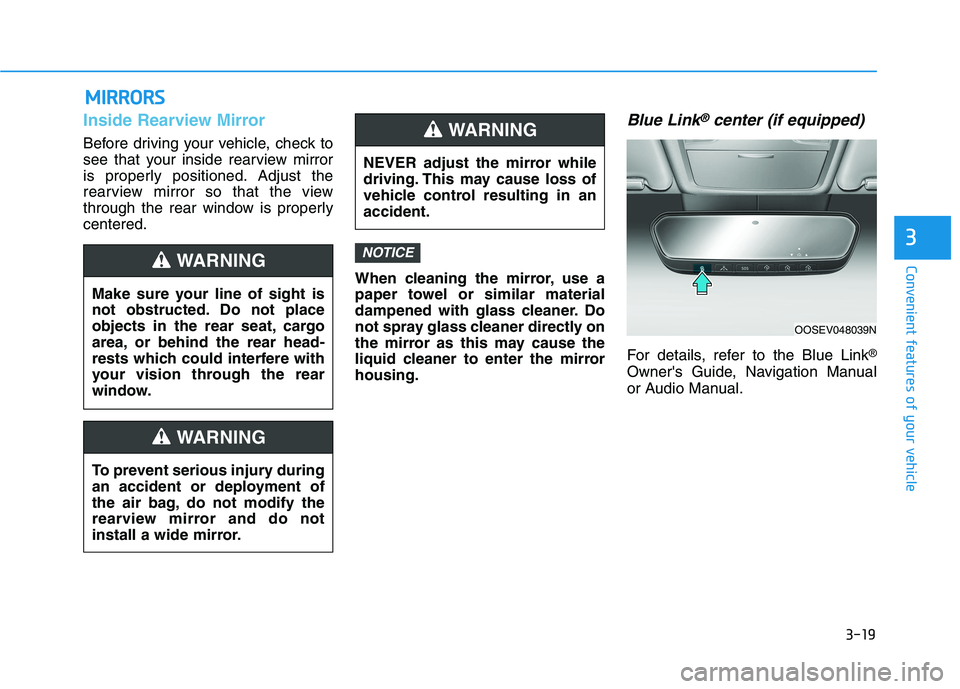
Blue Link®center (if equipped)
For details, refer to the Blue Link®
Owner's Guide, Navigation Manual
or Audio Manual.
NOTICE
NEVER adjust the mirror while
driving. This may cause loss of
vehicle control resulting in an
accident.
WARNING
Make sure your line of sight is
not obstructed. Do not place
objects in the rear seat, cargo
area, or behind the rear head-
rests which could interfere with
your vision through the rear
window.
WARNING
To prevent serious injury during
an accident or deployment of
the air bag, do not modify the
rearview mirror and do not
install a wide mirror.
WARNING
OOSEV048039N
Page 131 of 478
3-47
Convenient features of your vehicle
3
Instrument Cluster Control
Adjusting instrument cluster
illumination
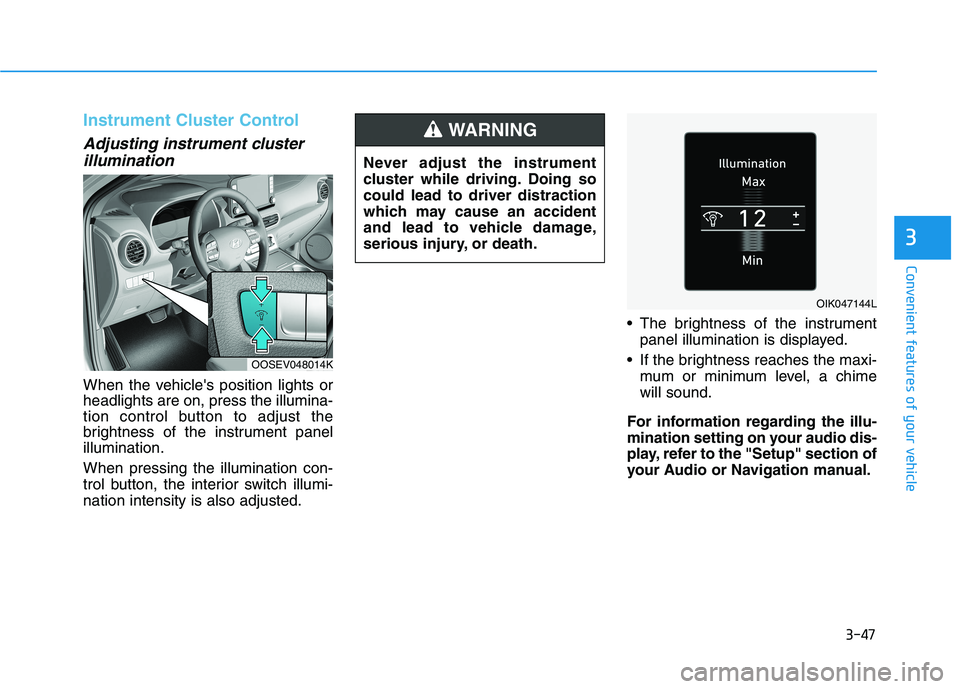
When the vehicle's position lights or
headlights are on, press the illumina-
tion control button to adjust the
brightness of the instrument panel
illumination.
When pressing the illumination con-
trol button, the interior switch illumi-
nation intensity is also adjusted. The brightness of the instrument
panel illumination is displayed.
If the brightness reaches the maxi-
mum or minimum level, a chime
will sound.
For information regarding the illu-
mination setting on your audio dis-
play, refer to the "Setup" section of
your Audio or Navigation manual. Never adjust the instrument
cluster while driving. Doing so
could lead to driver distraction
which may cause an accident
and lead to vehicle damage,
serious injury, or death.
WARNING
OOSEV048014K
OIK047144L
Page 182 of 478
3-98
Head Up Display Information
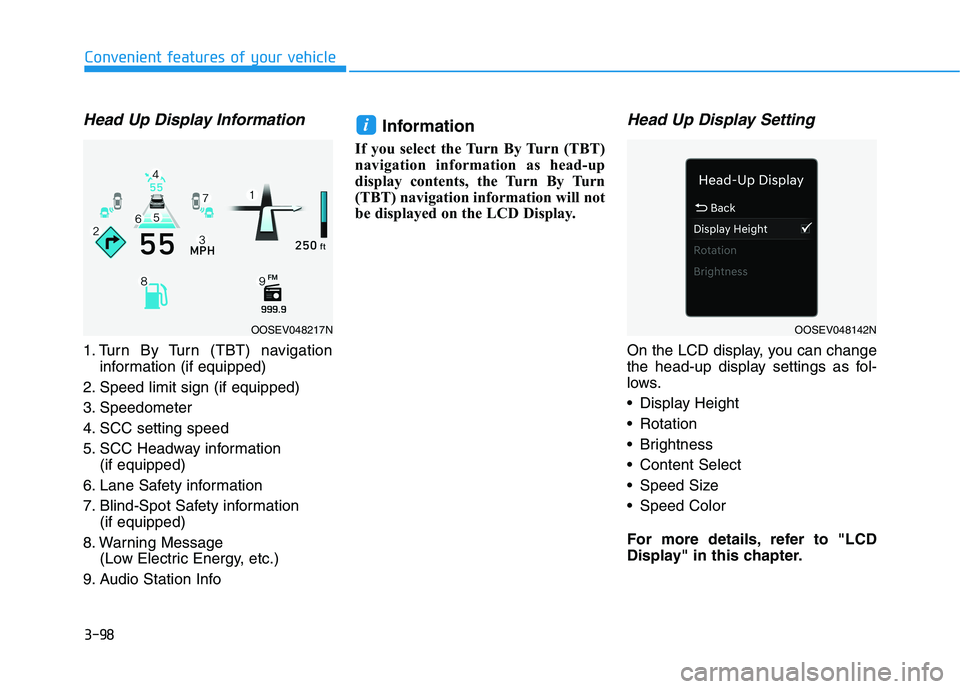
1. Turn By Turn (TBT) navigation
information (if equipped)
2. Speed limit sign (if equipped)
3. Speedometer
4. SCC setting speed
5. SCC Headway information
(if equipped)
6. Lane Safety information
7. Blind-Spot Safety information
(if equipped)
8. Warning Message
(Low Electric Energy, etc.)
9. Audio Station Info
Information
If you select the Turn By Turn (TBT)
navigation information as head-up
display contents, the Turn By Turn
(TBT) navigation information will not
be displayed on the LCD Display.
Head Up Display Setting
On the LCD display, you can change
the head-up display settings as fol-
lows.
Display Height
Rotation
Brightness
Content Select
Speed Size
Speed Color
For more details, refer to "LCD
Display" in this chapter.
i
Convenient features of your vehicle
OOSEV048217NOOSEV048142N
Page 198 of 478
3-114
Convenient features of your vehicle
R RE
EA
AR
R
V
VI
IE
EW
W
M
MO
ON
NI
IT
TO
OR
R
(
(R
RV
VM
M)
)
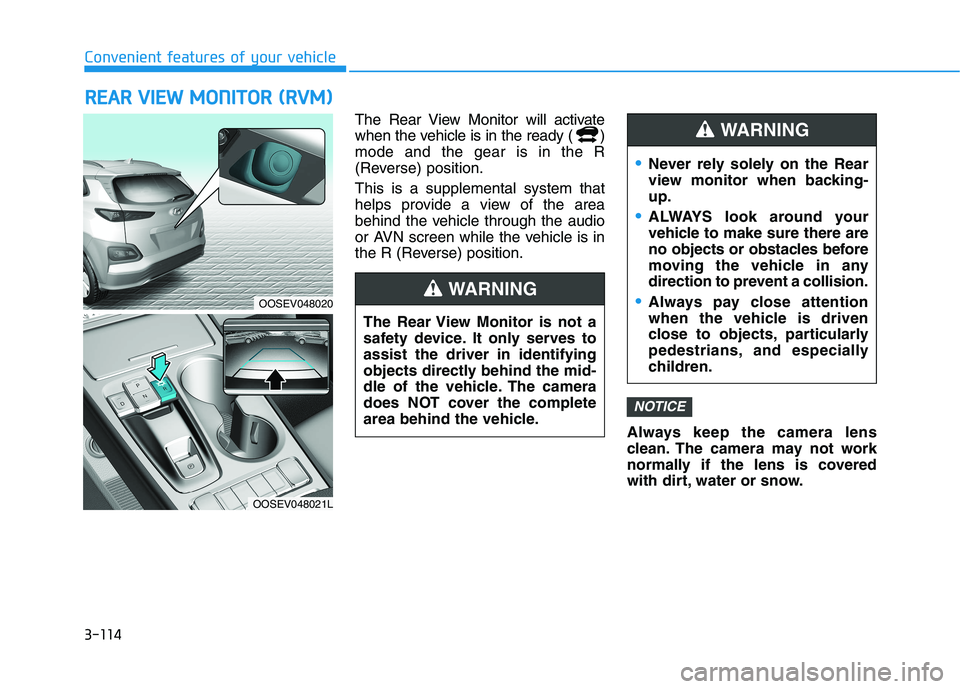
The Rear View Monitor will activate
when the vehicle is in the ready ( )
mode and the gear is in the R
(Reverse) position.
This is a supplemental system that
helps provide a view of the area
behind the vehicle through the audio
or AVN screen while the vehicle is in
the R (Reverse) position.
Always keep the camera lens
clean. The camera may not work
normally if the lens is covered
with dirt, water or snow.
NOTICE
The Rear View Monitor is not a
safety device. It only serves to
assist the driver in identifying
objects directly behind the mid-
dle of the vehicle. The camera
does NOT cover the complete
area behind the vehicle.
WARNING
Never rely solely on the Rear
view monitor when backing-
up.
ALWAYS look around your
vehicle to make sure there are
no objects or obstacles before
moving the vehicle in any
direction to prevent a collision.
Always pay close attention
when the vehicle is driven
close to objects, particularly
pedestrians, and especially
children.
WARNING
OOSEV048020
OOSEV048021L
Page 211 of 478
3-127
Convenient features of your vehicle
3
Air conditioning
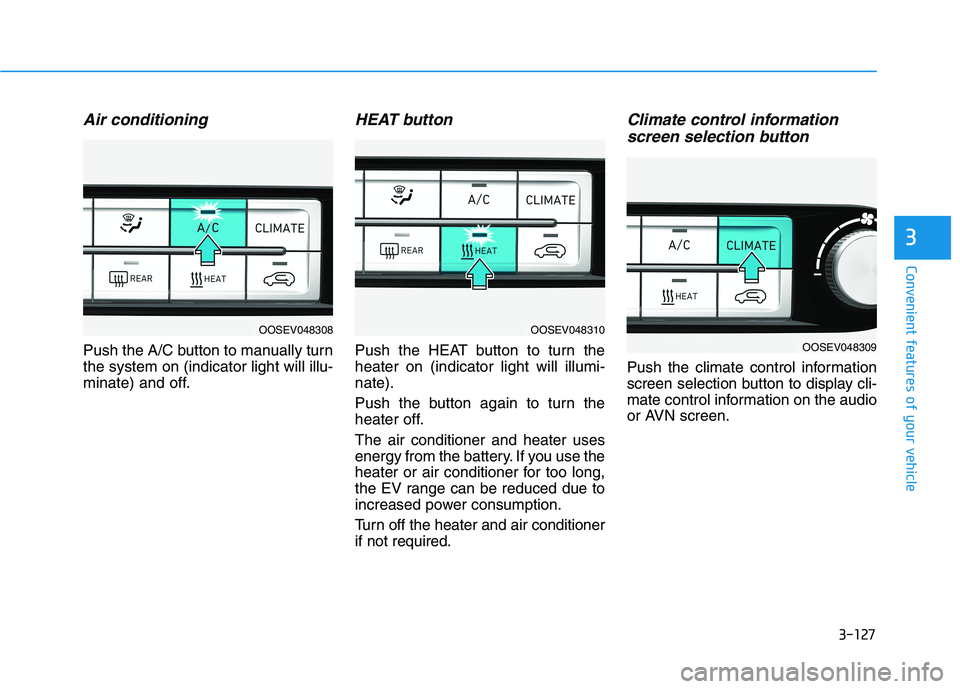
Push the A/C button to manually turn
the system on (indicator light will illu-
minate) and off.
HEAT button
Push the HEAT button to turn the
heater on (indicator light will illumi-
nate).
Push the button again to turn the
heater off.
The air conditioner and heater uses
energy from the battery. If you use the
heater or air conditioner for too long,
the EV range can be reduced due to
increased power consumption.
Turn off the heater and air conditioner
if not required.
Climate control information
screen selection button
Push the climate control information
screen selection button to display cli-
mate control information on the audio
or AVN screen.
OOSEV048308OOSEV048310
OOSEV048309
Page 225 of 478
3-141
Convenient features of your vehicle
3
Power Outlet
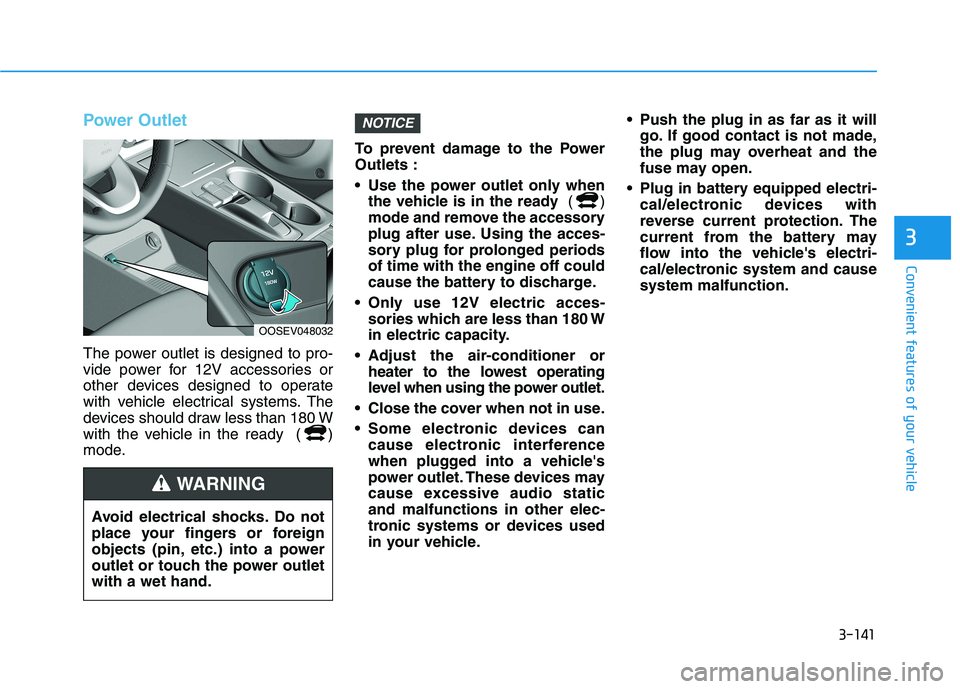
The power outlet is designed to pro-
vide power for 12V accessories or
other devices designed to operate
with vehicle electrical systems. The
devices should draw less than 180 W
with the vehicle in the ready ( )
mode.To prevent damage to the Power
Outlets :
Use the power outlet only when
the vehicle is in the ready ()
mode and remove the accessory
plug after use. Using the acces-
sory plug for prolonged periods
of time with the engine off could
cause the battery to discharge.
Only use 12V electric acces-
sories which are less than 180 W
in electric capacity.
Adjust the air-conditioner or
heater to the lowest operating
level when using the power outlet.
Close the cover when not in use.
Some electronic devices can
cause electronic interference
when plugged into a vehicle's
power outlet. These devices may
cause excessive audio static
and malfunctions in other elec-
tronic systems or devices used
in your vehicle. Push the plug in as far as it will
go. If good contact is not made,
the plug may overheat and the
fuse may open.
Plug in battery equipped electri-
cal/electronic devices with
reverse current protection. The
current from the battery may
flow into the vehicle's electri-
cal/electronic system and cause
system malfunction.
NOTICE
Avoid electrical shocks. Do not
place your fingers or foreign
objects (pin, etc.) into a power
outlet or touch the power outlet
with a wet hand.
WARNING
OOSEV048032
Page 226 of 478
3-142
Convenient features of your vehicle
USB Charger
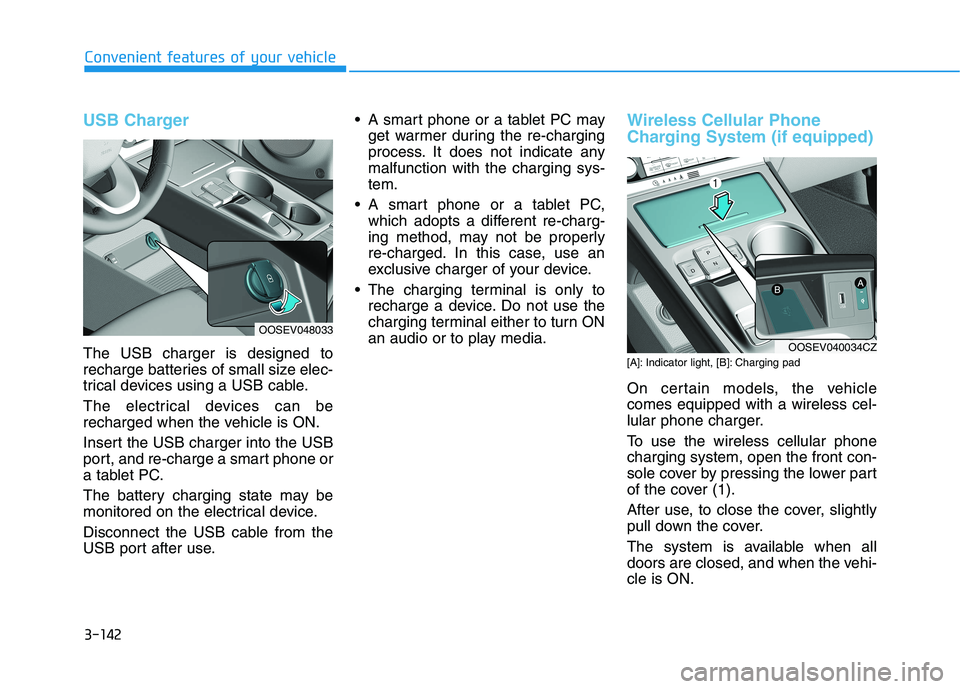
The USB charger is designed to
recharge batteries of small size elec-
trical devices using a USB cable.
The electrical devices can be
recharged when the vehicle is ON.
Insert the USB charger into the USB
port, and re-charge a smart phone or
a tablet PC.
The battery charging state may be
monitored on the electrical device.
Disconnect the USB cable from the
USB port after use. A smart phone or a tablet PC may
get warmer during the re-charging
process. It does not indicate any
malfunction with the charging sys-
tem.
A smart phone or a tablet PC,
which adopts a different re-charg-
ing method, may not be properly
re-charged. In this case, use an
exclusive charger of your device.
The charging terminal is only to
recharge a device. Do not use the
charging terminal either to turn ON
an audio or to play media.
Wireless Cellular Phone
Charging System (if equipped)
[A]: Indicator light, [B]: Charging pad
On certain models, the vehicle
comes equipped with a wireless cel-
lular phone charger.
To use the wireless cellular phone
charging system, open the front con-
sole cover by pressing the lower part
of the cover (1).
After use, to close the cover, slightly
pull down the cover.
The system is available when all
doors are closed, and when the vehi-
cle is ON.
OOSEV048033
OOSEV040034CZ
Page 228 of 478
3-144
Convenient features of your vehicle
The wireless charging process
may temporarily stop, when tem-
perature abnormally increases
inside the wireless cellular phone
charging system. Stop the charg-
ing cellular phone and wait until
temperature falls to a certain level.
The wireless charging process
may temporarily stop when there
is any metallic item, such as a
coin, between the wireless cellular
phone charging system and the
cellular phone.
When charging some cellular
phones with a self-protection fea-
ture, the wireless charging speed
may decrease and the wireless
charging may stop.
If the cellular phone has a thick
cover, the wireless charging may
not be possible.
If the cell phone is not completely
contacting the charging pad, wire-
less charging may not operate
properly.
Some magnetic items like credit
cards, phone cards or rail tickets
may be damaged if left with the
cellular phone during the charging
process. When any cellular phone without a
wireless charging function or a
metallic object is placed on the
charging pad, a small noise may
sound. This small sound is due to
the vehicle discerning compatibil-
ity of the object placed on the
charging pad. It does not affect
your vehicle or the cellular phone
in any way.
Information
If the POWER button is in the OFF
position, the charging also stops.
Information
This device complies with part 15 of
the FCC Rules.
Operation is subject to the following
two conditions:
1. This device may not cause harmful
interference, and
2. This device must accept any inter-
ference received, including inter-
ference that may cause undesired
operation.
Clock
Vehicles with Audio system
Select the [SETUP]button on the
audio system ➟Select [Date/Time].
Set time: Set the time displayed on
the audio screen.
Time format: Choose between 12-
hour and 24-hour time formats.
Vehicles with Navigation system
Select the Settings menu on the
Navigation system➟Select
[Date/Time].
GPS time: Displays time according
to the received GNSS time.
24-hour: Switches to 12 hour or 24
hour.
i
i
Do not attempt to adjust the
clock while driving. Doing so
may result in distracted driving
which may lead to an accident
involving personal injury or
death.
WARNING
Page 232 of 478
Multimedia System
Multimedia System.................................................4-2
USB and iPod®Port ..........................................................4-2
Antenna ...............................................................................4-3
Steering Wheel Audio Controls ......................................4-3
Bluetooth®Wireless Technology ..................................4-4
Audio (Display Audio) / Video /
Navigation System (AVN).................................................4-4
4