torque Hyundai Terracan 2005 Owner's Manual
[x] Cancel search | Manufacturer: HYUNDAI, Model Year: 2005, Model line: Terracan, Model: Hyundai Terracan 2005Pages: 539, PDF Size: 18.03 MB
Page 171 of 539
2 DRIVING YOUR HYUNDAI
16
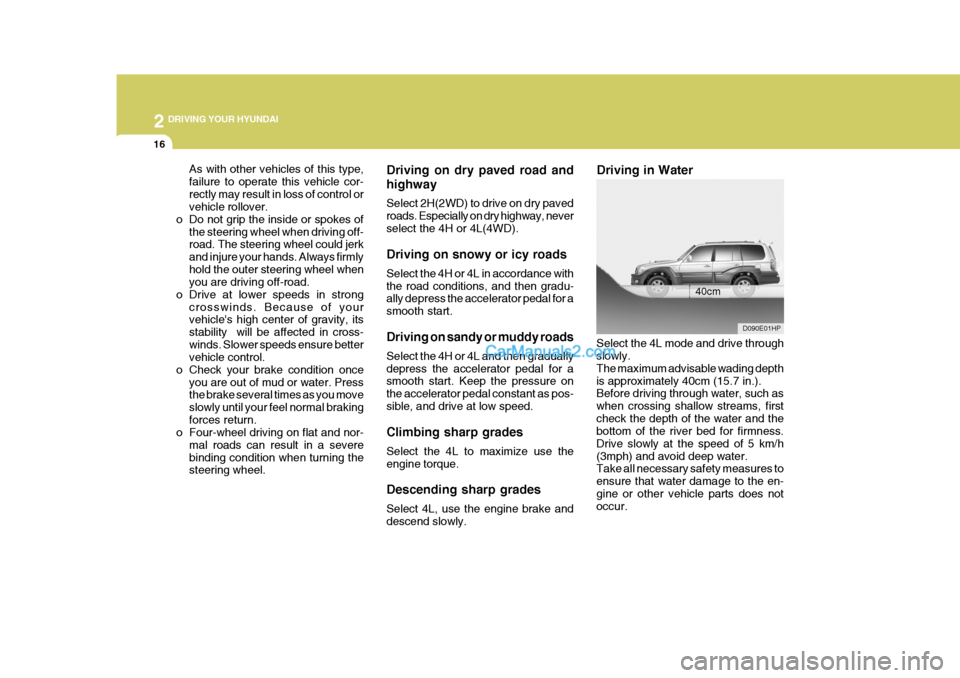
Driving on dry paved road and highway Select 2H(2WD) to drive on dry paved roads. Especially on dry highway, neverselect the 4H or 4L(4WD). Driving on snowy or icy roads Select the 4H or 4L in accordance with the road conditions, and then gradu- ally depress the accelerator pedal for a smooth start. Driving on sandy or muddy roads Select the 4H or 4L and then gradually depress the accelerator pedal for a smooth start. Keep the pressure on the accelerator pedal constant as pos-sible, and drive at low speed. Climbing sharp grades Select the 4L to maximize use the engine torque. Descending sharp grades Select 4L, use the engine brake and descend slowly. Driving in Water
Select the 4L mode and drive throughslowly. The maximum advisable wading depthis approximately 40cm (15.7 in.). Before driving through water, such as when crossing shallow streams, firstcheck the depth of the water and the bottom of the river bed for firmness. Drive slowly at the speed of 5 km/h(3mph) and avoid deep water. Take all necessary safety measures to ensure that water damage to the en-gine or other vehicle parts does not occur. 40cm
D090E01HP
As with other vehicles of this type, failure to operate this vehicle cor-rectly may result in loss of control or vehicle rollover.
o Do not grip the inside or spokes of
the steering wheel when driving off-road. The steering wheel could jerk and injure your hands. Always firmlyhold the outer steering wheel when you are driving off-road.
o Drive at lower speeds in strong crosswinds. Because of yourvehicle's high center of gravity, its stability will be affected in cross-winds. Slower speeds ensure better vehicle control.
o Check your brake condition once you are out of mud or water. Pressthe brake several times as you move slowly until your feel normal brakingforces return.
o Four-wheel driving on flat and nor-
mal roads can result in a severebinding condition when turning the steering wheel.
Page 173 of 539
2 DRIVING YOUR HYUNDAI
18
!
When driving on a snow-covered road or a slippery, muddy surface,make sure that you keep a suffi- cient distance between your ve- hicle and the one ahead of you.
(6) Since the driving torque is always applied to the 4 wheels, the perfor-mance of the full-time 4WD vehicleis greatly affected by the condition of the tires. Be sure to equip it with all four tires of the same size andtype.
o When replacement of any of the
tires or disc wheels is neces-sary, replace all of them.
o Rotate the tires and check the
tire pressure at regular inter-vals. (7)The full-time 4WD vehicle can-
not be towed by an ordinary towtruck. Make sure that the vehicle is towed with its four wheels raised off the ground.
o If the vehicle is towed with its only two wheels raised off theground, the 4WD system could be damaged.
o In unavoidable case, if the ve-
hicle is being towed with all fourwheels on the ground, it should be towed only forward directionwith rope.
WARNING:
Your vehicle is equipped with tiresdesigned to provide for safe rideand handling capability. Do not use a size and type of tire and wheel that is different from theone that was originally installed on your vehicle. It can affect the safety and performance of your vehicle,which could lead to handling fail-ure or rollover and serious injury. When replacing the tires, be sure to equip all four tires with the tire andwheel of the same size, type, tread, brand and load-carrying capacity. If you nevertheless decide to equipyour vehicle with any tire/wheel combination not recommended by Hyundai for off-road driving, youshould not use these tires for high- way driving.
LOW
��
��
� AUTO
1. Stop the vehicle.
2. Depress the clutch pedal (Manual Transmission) or put the shift lever into "N (neutral)" position (Automatic Transmission).
3. Turn the transfer shift knob to
"AUTO" mode.
Driving 4WD Safely
(1) Be sure to wear the seat belt.
(2) Drive at lower speeds in strong crosswinds. Because of yourvehicle's high center of gravity, its stability will be affected in cross- winds. Slower speeds ensure bet-ter vehicle control.
(3) Check the brake condition after
driving in wet or muddy conditions.Press the brake several times as you move slowly until you feel nor- mal braking forces return.
(4) Do not drive the vehicle through water. (i.e. streams, rivers, lakes,etc.)
(5) The stopping distance of the full- time 4WD vehicle differs very littlefrom that of the 2WD vehicle.
Page 175 of 539
2 DRIVING YOUR HYUNDAI
20
Water can wash the grease from wheel bearings, causing rusting and prema-ture failure, and may also enter the axles, transmission and transfer case, reducing the gear oil's lubricating quali-ties.
!
CAUTION:
o While the full-time 4WD vehicle is being raised on a jack, never start the engine or cause the tires to rotate. There is the danger that rotatingtires touching the ground could cause the vehicle to go off the jack and to jump forward.
o If one of the front or rear wheels begins to spin in mud, snow,etc., the vehicle can sometimesbe driven out by depressing the accelerator pedal further; how- ever, avoid running the enginecontinuously at high rpm be- cause doing so could damage the 4WD system.
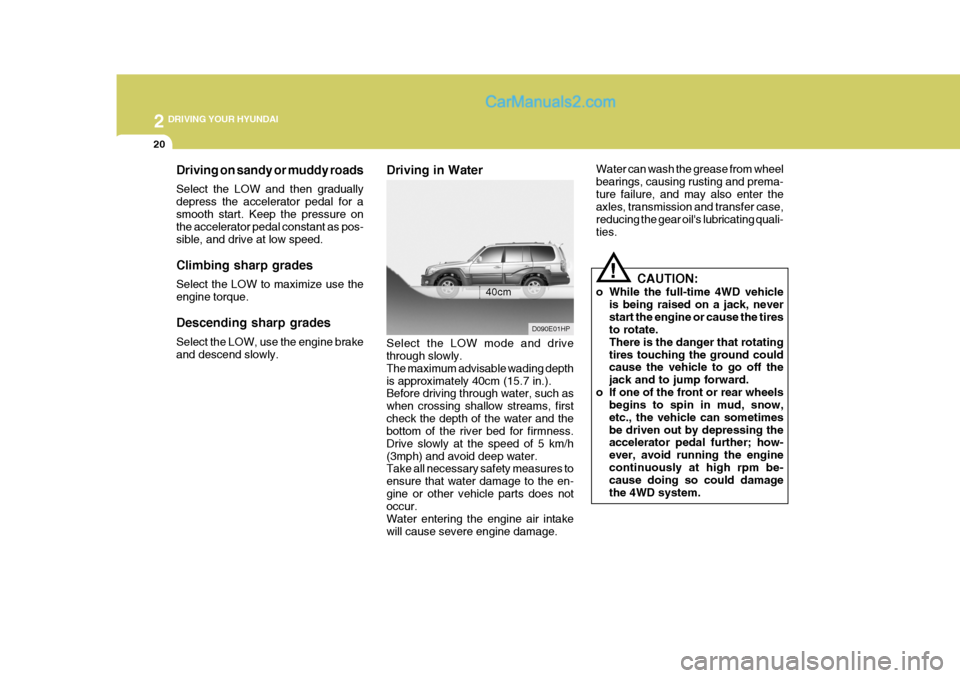
Driving in Water Select the LOW mode and drive through slowly. The maximum advisable wading depthis approximately 40cm (15.7 in.). Before driving through water, such as when crossing shallow streams, firstcheck the depth of the water and the bottom of the river bed for firmness. Drive slowly at the speed of 5 km/h(3mph) and avoid deep water. Take all necessary safety measures to ensure that water damage to the en-gine or other vehicle parts does not occur. Water entering the engine air intakewill cause severe engine damage.
D090E01HP
40cm
Driving on sandy or muddy roads Select the LOW and then gradually depress the accelerator pedal for asmooth start. Keep the pressure on the accelerator pedal constant as pos- sible, and drive at low speed. Climbing sharp grades Select the LOW to maximize use the engine torque. Descending sharp grades Select the LOW, use the engine brake and descend slowly.
Page 177 of 539
2 DRIVING YOUR HYUNDAI
22
!
C130A01HP-GAT
WARNING:
Nothing should be carried on top of the cargo area cover behind the rear seat. If there were an accident or a sudden stop, such objectscould move forward and cause dam- age to the vehicle or injure the oc- cupants.
o After being parked, check to be sure the parking brake is not engaged and that the parking brake indicator light is out before driving away.
o Driving through water may get the brakes wet. They can also get wetwhen the car is washed. Wet brakes can be dangerous! Your car will notstop as quickly if the brakes are wet. Wet brakes cause the car to pull to one side. To dry the brakes, applythe brakes lightly until the braking action returns to normal, taking care to keep the car under control at alltimes. If the braking action does not return to normal, stop as soon as it is safe to do so and call your Hyundaidealer for assistance.
GOOD BRAKING PRAC- TICES
LIMITED-SLIP DIFFEREN- TIAL (LSD)
D190A01HP-GAT (If Installed) A limited-slip differential, if equipped, is for the rear wheel differential only.The features of this limited-slip differ- ential are described below: Just as with a conventional differential,the wheel on one side is allowed to turn at a different speed from the wheel on the other side when the vehicle iscornering. The difference between the limited-slip differential and a conven- tional differential is that if the wheel onone side of the vehicle loses traction, a greater amount of torque is applied to the rear wheel on the other side toimprove traction. CAUTION:
o Never start the engine with the gearshift lever placed in the for-ward or reverse while one of therear wheels is jacked up and the other in contact with the ground; doing so may cause the vehicleto jump forward.
o Use only recommended oil for
LSD in the rear axle.See page 9-5 for the recom- mended oil descriptions.
!
Page 193 of 539
3 WHAT TO DO IN AN EMERGENCY
6
!
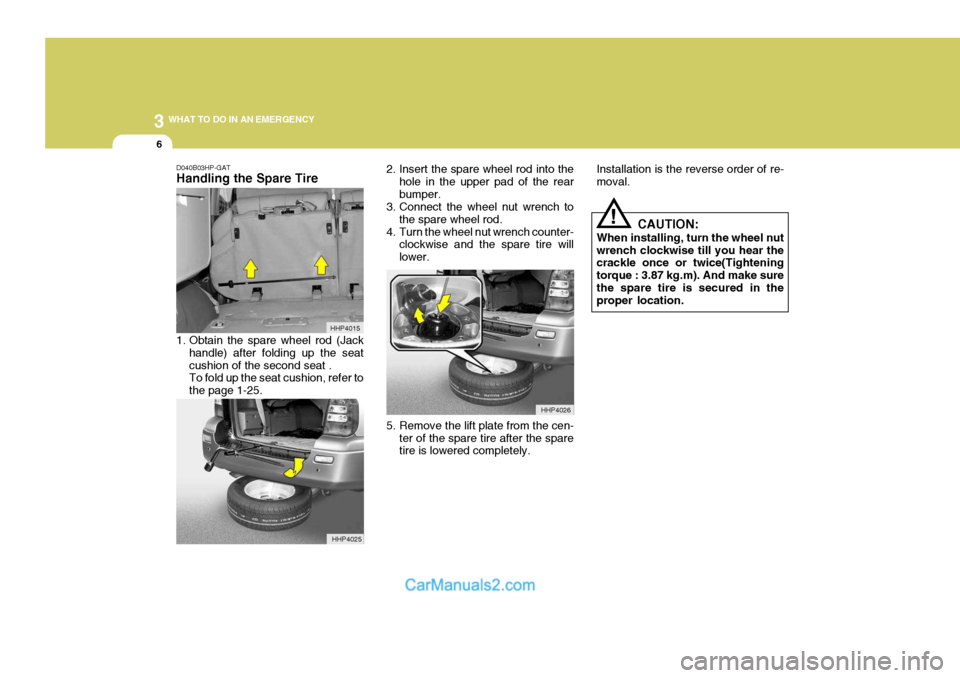
D040B03HP-GAT Handling the Spare Tire
1. Obtain the spare wheel rod (Jack
handle) after folding up the seat cushion of the second seat . To fold up the seat cushion, refer to the page 1-25. 2. Insert the spare wheel rod into the
hole in the upper pad of the rearbumper.
3. Connect the wheel nut wrench to
the spare wheel rod.
4. Turn the wheel nut wrench counter- clockwise and the spare tire willlower.
5. Remove the lift plate from the cen- ter of the spare tire after the spare tire is lowered completely. CAUTION:
When installing, turn the wheel nut wrench clockwise till you hear the crackle once or twice(Tightening torque : 3.87 kg.m). And make surethe spare tire is secured in the proper location.
HHP4015
HHP4025 HHP4026Installation is the reverse order of re- moval.
Page 200 of 539
3
WHAT TO DO IN AN EMERGENCY
13
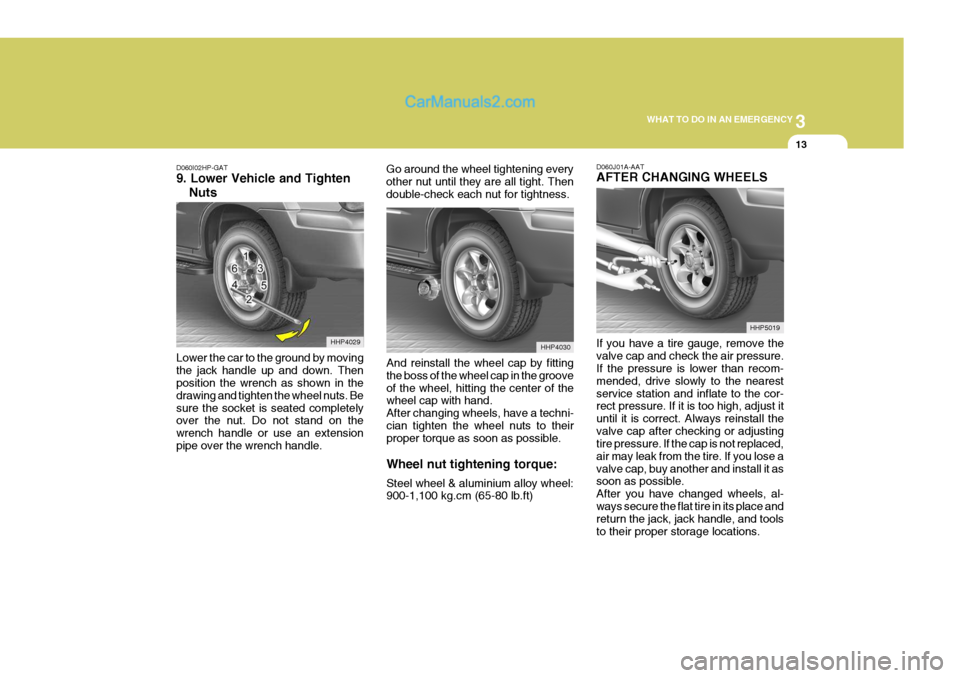
D060I02HP-GAT 9. Lower Vehicle and Tighten
Nuts
Lower the car to the ground by moving the jack handle up and down. Then position the wrench as shown in the drawing and tighten the wheel nuts. Besure the socket is seated completely over the nut. Do not stand on the wrench handle or use an extensionpipe over the wrench handle. Go around the wheel tightening everyother nut until they are all tight. Thendouble-check each nut for tightness.
D060J01A-AAT AFTER CHANGING WHEELS If you have a tire gauge, remove the valve cap and check the air pressure. If the pressure is lower than recom- mended, drive slowly to the nearestservice station and inflate to the cor- rect pressure. If it is too high, adjust it until it is correct. Always reinstall thevalve cap after checking or adjusting tire pressure. If the cap is not replaced, air may leak from the tire. If you lose avalve cap, buy another and install it as soon as possible. After you have changed wheels, al-ways secure the flat tire in its place and return the jack, jack handle, and tools to their proper storage locations.
HHP4029
HHP5019
And reinstall the wheel cap by fittingthe boss of the wheel cap in the grooveof the wheel, hitting the center of the wheel cap with hand. After changing wheels, have a techni-cian tighten the wheel nuts to their proper torque as soon as possible. Wheel nut tightening torque: Steel wheel & aluminium alloy wheel: 900-1,100 kg.cm (65-80 lb.ft) HHP4030
Page 221 of 539
5
VEHICLE MAINTENANCE REQUIREMENTS
11
F070E03HP-GAT
o Automatic Transmission Fluid
The fluid level should be in the "HOT" range of the dipstick, after the engine and transmission are at normal operat- ing temperature. Check the automatictransmission fluid level with the engine running and the transmission in neu- tral, with the parking brake properlyapplied. Use MOBIL DEXRON-II when adding or changing fluid.
F070D01A-AAT
o Manual Transmission Oil
Inspect the manual transmission oil according to the maintenance sched- ule.
NOTE: If the oil level is low, check for possible leaks before adding oil. Donot overfill. F070F01A-AAT
o Brake Hoses and Lines
Visually check for proper installation,
chafing, cracks, deterioration and any leakage. Replace any deteriorated or damaged parts immediately.
F070G02A-AAT
o Brake Fluid
Check brake fluid level in the brake
fluid reservoir. The level should bebetween "MIN" and "MAX" marks on the side of the reservoir. Use only hydraulic brake fluid conforming to DOT3 or DOT 4.
F070H01A-AAT
o Rear Brake Drums/ Linings
Parking Brake
Check the rear brake drums and lin-
ings for scoring, burning, leaking fluid,broken parts, and excessive wear. In-spect the parking brake system in- cluding the parking brake lever and cables. For detailed service proce-dures, refer to the Shop Manual. F070J01A-AAT
o Brake Pads, Calipers and
Rotors
Check the pads for excessive wear, discs for run out and wear, and cali- pers for fluid leakage. F070K01A-AAT o Exhaust Pipe and Muffler Visually inspect the exhaust pipes, muffler and hangers for cracks, dete- rioration, or damage. Start the engine and listen carefully for any exhaustgas leakage. Tighten connections or replace parts as necessary. F070L01A-AAT o Suspension Mounting Bolts Check the suspension connections for looseness or damage. Retighten to the specified torque.
Page 227 of 539
6
DO-IT-YOURSELF MAINTENANCE
5GENERAL CHECKS
G020A01HP-GAT
Engine Compartment
The following should be checked regu- larly:
o Engine oil level and condition
o Transmission fluid level and condi- tion
o Brake fluid level
o Clutch fluid level
o Engine coolant level
o Windshield washer fluid level
o Accessory drive belt condition
o Engine coolant hose condition
o Fluid leaks
(on or below components)
o Power steering fluid level
o Battery condition
o Air filter condition G020B01A-AAT
Vehicle Exterior
The following should be checked
monthly:
o Overall appearance and condition
o Wheel condition and wheel nut
torque
o Exhaust system condition
o Light condition and operation
o Windshield glass condition
o Wiper blade condition
o Paint condition and body corrosion
o Fluid leaks
o Door and hood lock condition
o Tire pressure and condition (including spare tire) o Defroster, heating system opera-
tion (and air conditioning, if in- stalled)
o Steering operation and condition
o Mirror condition and operation
o Turn signal operation
o Accelerator pedal operation
o Brake operation, including parking brake
o Manual transmission operation, in-
cluding clutch operation
o Automatic transmission operation, including "Park" mechanism opera-tion
o Seat control condition and opera-
tion
o Seat belt condition and operation
o Sun visor operation If you notice anything that does not operate correctly or appears to be functioning incorrectly, inspect it care- fully and seek assistance from yourHyundai dealer if service is needed.
G020C01HP-GAT
Vehicle Interior
The following should be checked each
time when the vehicle is driven:
o Lights operation
o Windshield wiper operation
o Horn operation
Page 232 of 539

6 DO-IT-YOURSELF MAINTENANCE
10CHANGING THE ENGINE OIL AND FILTER
!
The engine oil and filter should be changed at those intervals specified in the maintenance schedule in Sec- tion 5. If the car is being driven in severe conditions, more frequent oiland filter changes are required. The procedure for changing the oil and filter is as follows:
1. Park the car on level ground and set the parking brake. Start the engine and let it warm up until the needle on the coolant temperature gauge moves above the lowestmark. Turn the engine off and place the gear selector lever in "P" (auto- WARNING:
Be very careful when draining the engine oil as it may be hot enough to burn you!
4. When the oil has stopped draining, replace the drain plug using a new gasket and retighten by turning itclockwise. Oil pan drain plug tightening torque: 3.5 ~ 4.5 kgf.m
G040A03HP-GAT
HHP5004
G040A01HP
G040A02HP matic transmission) or reverse gear (manual transmission).
2. Open the hood and remove the engine oil filler cap.
3. Slide underneath the car and loosen the drain plug by turning it counter-clockwise with a wrench of theproper size. Be sure that a drain pan is in position to catch the oil as it drains out, then remove the drainplug.
Diesel Engine (2.9 CRDi)
Diesel Engine (2.5 TCI)
Gasoline Engine
Oil filter
Drain plug Oil filler cap
Oil filler cap
Oil filter
Drain plug Oil filler cap
Oil filter
Drain plug
Page 233 of 539
6
DO-IT-YOURSELF MAINTENANCE
11CHECKING AND CHANGING THE ENGINE COOLANT
!
G050A01A-AAT
WARNING:
Do not remove the radiator cap when the engine is hot. When the engine is hot, the engine coolantis under pressure and may erupt through the opening if the cap is removed. You could be seriouslyburned if you do not observe this precaution. Do not remove the radiator cap until the radiator iscool to touch.
!
5. Remove the oil filter by turning it counterclockwise with a oil filter wrench of the proper size. A cer- tain amount of oil will come out when you remove the filter. So besure to have your drain pan in place underneath it.
6. Install a new oil filter in accordance with the instructions on the cartonor on the filter itself. Do not over- tighten (Tightening torque: Gaso-
line- 1.2 ~ 1.6 kgf.m, Diesel - 2.3 ~ 2.5 kgf.m) . Be sure that the
mounting surface on the engine is clean and that the old gasket is removed completely. Lubricate the new gasket on the filter with cleanengine oil before installation.
7. Remove the engine oil level dip- stick.
8. Refill the crankcase with the rec- ommended engine oil slowly. Referto the specification in chapter 9 for engine oil capacity.
! CAUTION:
Slowly pour the recommended oil by using a funnel. Do not overfill not to damage the engine. 9. Start the engine and check to be
sure no oil is leaking from thedrain plug or oil filter.
10.Shut off the engine and recheck
the oil level.
NOTE: Always dispose of used engine oil
in an environmentally acceptable manner. It is suggested that it be placed in a sealed container andtaken to a service station for recla- mation. Do not pour the oil on the ground or put it into the house-hold trash.
WARNING:
Used motor oil may cause irrita-
tion or cancer of the skin if left incontact with the skin for prolongedperiods of time. Wash your hands thoroughly with soap and warm water as soon as possible afterhandling used oil.