INFINITI QX30 2019 Infiniti Connection
Manufacturer: INFINITI, Model Year: 2019, Model line: QX30, Model: INFINITI QX30 2019Pages: 283, PDF Size: 1.59 MB
Page 31 of 283

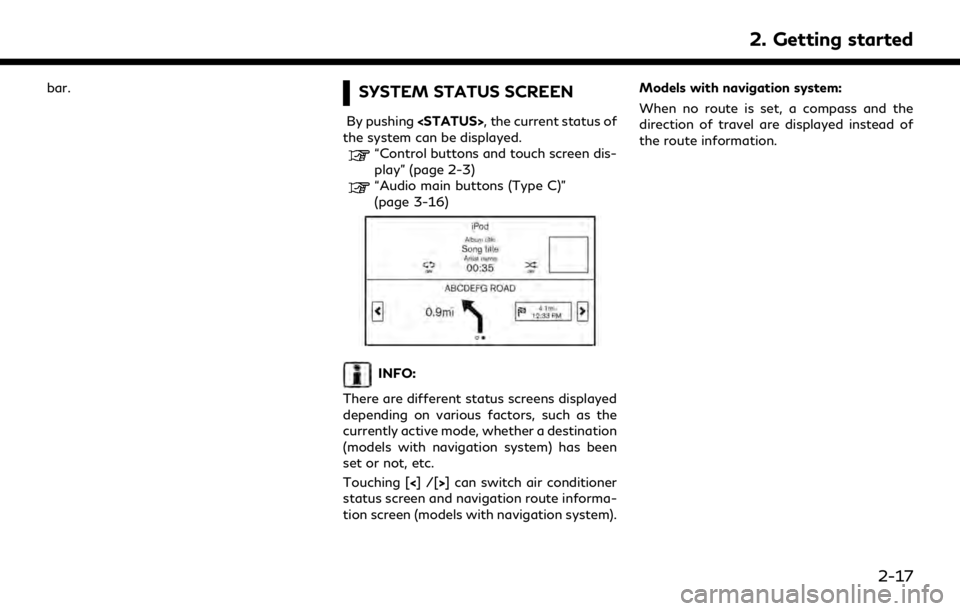
bar.SYSTEM STATUS SCREEN
By pushing
the system can be displayed.
“Control buttons and touch screen dis-
play” (page 2-3)
“Audio main buttons (Type C)”
(page 3-16)
INFO:
There are different status screens displayed
depending on various factors, such as the
currently active mode, whether a destination
(models with navigation system) has been
set or not, etc.
Touching [<]/[ >] can switch air conditioner
status screen and navigation route informa-
tion screen (models with navigation system). Models with navigation system:
When no route is set, a compass and the
direction of travel are displayed instead of
the route information.
2. Getting started
2-17
Page 32 of 283
![INFINITI QX30 2019 Infiniti Connection 2. Getting started
SHORTCUT MENU
DISPLAYING SHORTCUT MENU
SCREEN (models with navigation
system)
Models with INFINITI controller:
To display the shortcut menu, push <
/OK>or touch [] while the current INFINITI QX30 2019 Infiniti Connection 2. Getting started
SHORTCUT MENU
DISPLAYING SHORTCUT MENU
SCREEN (models with navigation
system)
Models with INFINITI controller:
To display the shortcut menu, push <
/OK>or touch [] while the current](/img/42/35077/w960_35077-31.png)
2. Getting started
SHORTCUT MENU
DISPLAYING SHORTCUT MENU
SCREEN (models with navigation
system)
Models with INFINITI controller:
To display the shortcut menu, push <
/OK>or touch [] while the current
location map screen is displayed.
Models with control panel:
To display the shortcut menu, push
] while the current
location map screen is displayed.
Available items
. [Audio Source]
. [Audio List] .
[Call History]
. [Phonebook]
. [Cancel Route]
. [Nearby Places]
. [Store Location]
. [View Settings]
. [Select Add/Edit]
. (Blank)
DISPLAYING SHORTCUT MENU
SCREEN (models without naviga-
tion system)
Models with INFINITI controller:
To display the shortcut menu, push <
/OK>on the INFINITI controller while the
climate or status screen is displayed.
Models with control panel:
To display the shortcut menu, push
] while the climate
or status screen is displayed.
Available items
. [Audio Source]
. [Audio List]
. [Call History]
. [Phonebook]
. [Select Add/Edit]
. (Blank)
EDIT SHORTCUT MENU
The items on the shortcut menu can be
customized to your preference.
The following procedure can be used to edit
or sort the shortcut menu.
1. Select [Select Add/Edit] to register a
new item to the menu, or to change an
existing menu item.
2-18
Page 33 of 283
![INFINITI QX30 2019 Infiniti Connection 2. Select the preferred setting.
.[Change Order]Change the order in which shortcut
menu items are shown. Touch and
hold the [
] displayed next to the item
you wish to relocate. Drag the icon to
the po INFINITI QX30 2019 Infiniti Connection 2. Select the preferred setting.
.[Change Order]Change the order in which shortcut
menu items are shown. Touch and
hold the [
] displayed next to the item
you wish to relocate. Drag the icon to
the po](/img/42/35077/w960_35077-32.png)
2. Select the preferred setting.
.[Change Order]Change the order in which shortcut
menu items are shown. Touch and
hold the [
] displayed next to the item
you wish to relocate. Drag the icon to
the position in the list where you wish
to insert the item.
.[Edit Shortcut Items]
Select items to be displayed in the
shortcut menu.
MAP MENU (models with navi-
gation system)
DISPLAYING MAP MENU
Models with INFINITI controller:
While scrolling the map screen, push <
/OK>or touch [] to display the map
menu.
Models with control panel:
While scrolling the map screen, push
] to display the map
menu.
Available items
. [New Destination]
. [Show Current Location]
. [Store Location] .
[Nearby Places]
. [Delete Stored Location]
INFO:
[Delete Stored Locations] is available only
when aligned the cross pointer over the
stored location.
2. Getting started
2-19
Page 34 of 283

2. Getting started
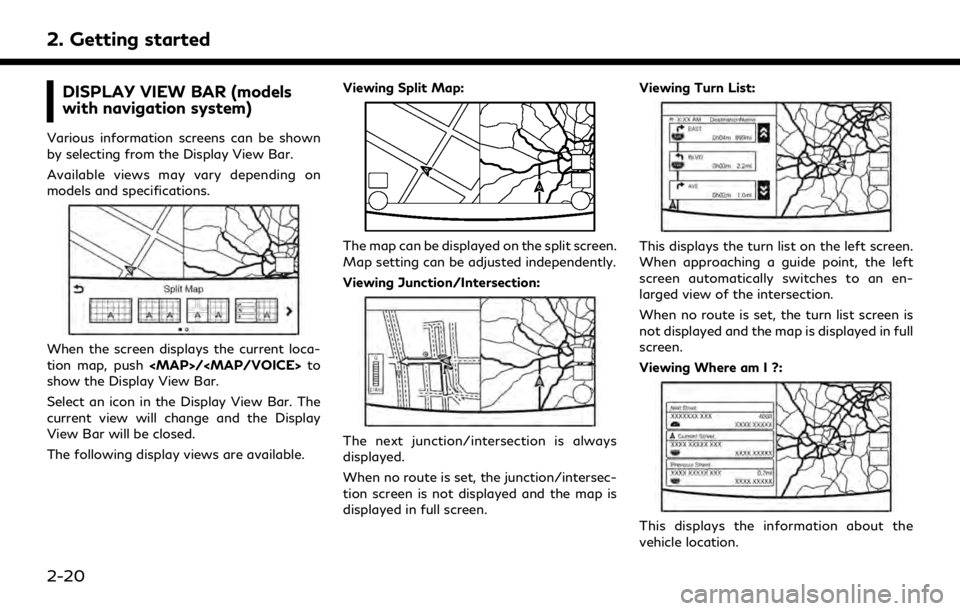
DISPLAY VIEW BAR (models
with navigation system)
Various information screens can be shown
by selecting from the Display View Bar.
Available views may vary depending on
models and specifications.
When the screen displays the current loca-
tion map, push
Page 35 of 283

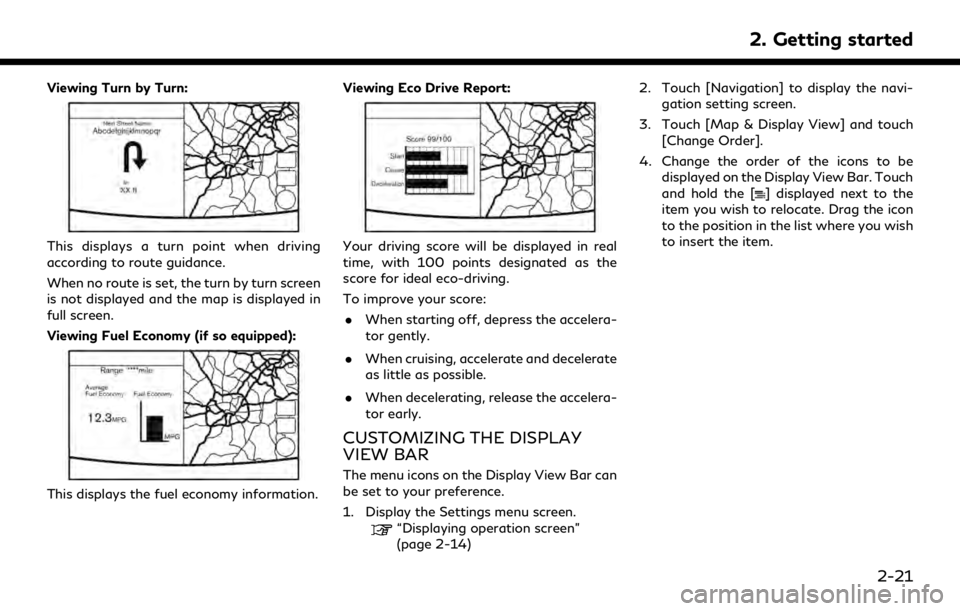
Viewing Turn by Turn:
This displays a turn point when driving
according to route guidance.
When no route is set, the turn by turn screen
is not displayed and the map is displayed in
full screen.
Viewing Fuel Economy (if so equipped):
This displays the fuel economy information.Viewing Eco Drive Report:
Your driving score will be displayed in real
time, with 100 points designated as the
score for ideal eco-driving.
To improve your score:
. When starting off, depress the accelera-
tor gently.
. When cruising, accelerate and decelerate
as little as possible.
. When decelerating, release the accelera-
tor early.
CUSTOMIZING THE DISPLAY
VIEW BAR
The menu icons on the Display View Bar can
be set to your preference.
1. Display the Settings menu screen.
“Displaying operation screen”
(page 2-14) 2. Touch [Navigation] to display the navi-
gation setting screen.
3. Touch [Map & Display View] and touch [Change Order].
4. Change the order of the icons to be displayed on the Display View Bar. Touch
and hold the [
] displayed next to the
item you wish to relocate. Drag the icon
to the position in the list where you wish
to insert the item.
2. Getting started
2-21
Page 36 of 283

2. Getting started
HOW TO INPUT LETTERS AND
NUMBERS
ALPHANUMERIC CHARACTER
(letters and numbers) INPUT
SCREEN
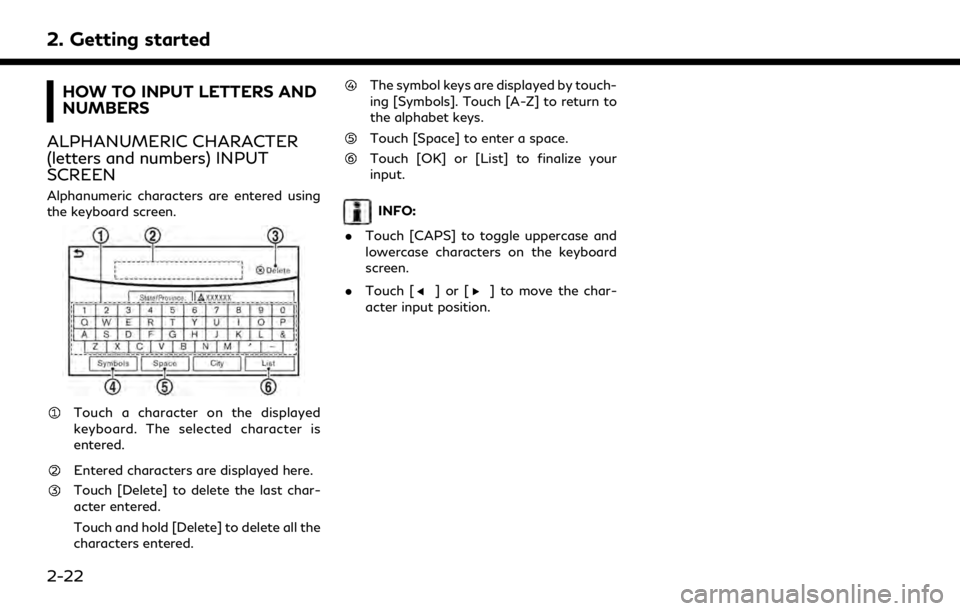
Alphanumeric characters are entered using
the keyboard screen.
Touch a character on the displayed
keyboard. The selected character is
entered.
Entered characters are displayed here.
Touch [Delete] to delete the last char-
acter entered.
Touch and hold [Delete] to delete all the
characters entered.
The symbol keys are displayed by touch-
ing [Symbols]. Touch [A-Z] to return to
the alphabet keys.
Touch [Space] to enter a space.
Touch [OK] or [List] to finalize your
input.
INFO:
. Touch [CAPS] to toggle uppercase and
lowercase characters on the keyboard
screen.
. Touch [
]or[] to move the char-
acter input position.
2-22
Page 37 of 283

SYSTEM SETTINGS
SETTINGS MENU
The system settings can be changed to your preference.
Available setting items may vary depending on models and specifications.
Select setting item from the Settings menu screen.
“Displaying operation screen” (page 2-14)
Setting item Result
[Bluetooth] Sets the Bluetooth® streaming audio and Phone.
“Bluetooth® settings” (page 2-31)
[Phone/Mail] Displays the Phone/Mail setting screen.
“Phone and text message assistant settings” (page 4-9)
[Vehicle] Displays the vehicle settings screen.
“Vehicle settings” (page 2-25)
[Navigation] Displays the Navigation setting screen.
“Navigation settings” (page 6-56)
[Audio] Displays the Audio setting screen.
“Audio settings” (page 3-40)
[Screen] Sets the Screen display to the preferred settings.
“Screen settings” (page 2-26)
[Volume Adjustment] Sets the Volume Adjustment.
“Volume settings” (page 2-27)
[Clock] Sets the Clock to your preferred settings.
“Clock settings” (page 2-30)
[InTouch Services] Sets Infiniti InTouchTMServices to your preferred settings.“Infiniti InTouchTMServices settings” (page 5-27)
2. Getting started
2-23
Page 38 of 283
![INFINITI QX30 2019 Infiniti Connection 2. Getting started
Setting itemResult
[Voice Recognition] Displays the voice recognition function setting screen.
“Voice Recognition settings” (page 7-14)
[Camera/Sonar] Displays the camera/sonar INFINITI QX30 2019 Infiniti Connection 2. Getting started
Setting itemResult
[Voice Recognition] Displays the voice recognition function setting screen.
“Voice Recognition settings” (page 7-14)
[Camera/Sonar] Displays the camera/sonar](/img/42/35077/w960_35077-37.png)
2. Getting started
Setting itemResult
[Voice Recognition] Displays the voice recognition function setting screen.
“Voice Recognition settings” (page 7-14)
[Camera/Sonar] Displays the camera/sonar system setting screen.
For additional information, refer to the vehicle Owner’s Manual.
[Drive Mode Enhancement] Displays the Drive Mode Enhancement setting screen.
For additional information, refer to the vehicle Owner’s Manual.
[Driver Assistance] Displays the Driver Assistance setting screen.
For additional information, refer to the vehicle Owner’s Manual.
[Other] [Language] Set the Language to your preferred settings.
“Language setting” (page 2-28)
[Language & Units] Displays the language and units setting screen.
“Language & Units settings” (page 2-29)
[Keyboard Type] Set the Keyboard Type to [ABC] or [QWERTY].
[Low on Fuel Alert] Set the fuel low notification to on/off.
[Software Information] Display the Software Information.
2-24
Page 39 of 283

Vehicle settings (if so equipped)
This menu turns the vehicle setting on/off.
Available setting items may vary depending on models and specifications.
1. Display the Settings menu screen.
“Displaying operation screen” (page 2-14)
2. Touch [Vehicle].
Setting item Result
[Lamp ON When Door Unlocks] When this item is set to on, the interior lights illuminate when any door is unlocked.
[Light Sensitivity] Sets the auto light sensitivity.
[Light Off Delay] Sets the auto light delay timer.
[Speed Sensing Wiper Interval] Sets the wiper interval to be adjusted automatically according to the vehicle speed.
[Selective Door Unlock] Sets the selective door unlock.
[Intelligent Key Lock/Unlock] When this item is turned on, door lock/unlock function by pushing the door handle request switch will
be activated.
[Lift Steering Wheel on Exit] Sets the lift steering wheel on exit.
[Slide Driver’s Seat Back on Exit] Sets the driver’s seat back on exit.
[Reset Settings] All vehicle setting values are returned to the default settings.
2. Getting started
2-25
Page 40 of 283

2. Getting started
Screen settings
This menu turns on/off the display and adjusts the image quality of the screen.
Available setting items may vary depending on models and specifications.
1. Display the Settings menu screen.
“Displaying operation screen” (page 2-14)
2. Touch [Screen].
Setting item Action
[Display Settings] [Brightness] Adjust the brightness.
[Contrast] Adjust the contrast.
[Black Level] Adjust the black level.
[Display OFF] Turn the screen on or off.
Push and hold
the display on.
[Day/Night] Adjust the display brightness. Toggle between the daytime screen and nighttime screen.
[Change Map Color] Toggle the map color between the daytime screen and nighttime screen.
[Reset Settings] This restores the display settings to the default settings.
2-26