climate settings INFINITI QX55 2023 Owners Manual
[x] Cancel search | Manufacturer: INFINITI, Model Year: 2023, Model line: QX55, Model: INFINITI QX55 2023Pages: 526, PDF Size: 5.75 MB
Page 86 of 526
2 Instruments and controls
Instrument panel.................................2-2
Meters and gauges ..............................2-4
Speedometer and odometer ...................2-4
Tachometer ..................................2-6
Engine coolant temperature gauge ............2-6
Fuel gauge ...................................2-7
Distance To Empty (DTE) .....................2-7
Variable Compression Turbo ..................2-8
Warning lights, indicator lights and audible
reminders ........................................2-9
Checking lights .............................. 2-10
Warning/Indicator lights (red) ...............2-10
Warning/Indicator lights (yellow) ............2-13
Warning/Indicator lights (other) ..............2-17
Audible reminders ........................... 2-18
Vehicle information display .....................2-19
How to use the vehicle information
display ...................................... 2-20
Startup display .............................. 2-20
Trip computer ............................... 2-21
Resetting the trip computer .................2-24
Tire Pressure Information (Display
Settings) .................................... 2-24
Oil control system ........................... 2-25
Vehicle information display warnings and
indicators ................................... 2-25
Security systems ............................... 2-33Vehicle security system
......................2-33
INFINITI Vehicle Immobilizer System .........2-34
Wiper and washer switch ......................2-36
Switch operation ............................ 2-36
Rain-sensing auto wiper system
(if so equipped) ............................. 2-37
Rear switch operation ....................... 2-38
Rear window defroster, outside mirror
defroster, and wiper deicer (if so equipped)
switch ......................................... 2-39
Headlight switch ............................... 2-40
Headlight control switch ....................2-40
LED Daytime Running Lights (DRL)
system ..................................... 2-45
Instrument brightness control ................2-46
Turn signal switch ........................... 2-46
Fog light switch ............................. 2-47
Horn .......................................... 2-47
Climate
controlled seat switches
(if so equipped) ................................ 2-48
Heated seats (if so equipped) ...................2-49
Heated rear seat switches (if so equipped) ......2-50
Steering Assist switch ........................... 2-51
Front and rear sonar system switch
(if so equipped) ................................. 2-51
Head Up Display (HUD) (if so equipped) .........2-52
Page 180 of 526
LOG-IN FUNCTION
After setting up the user information, the
system will automatically recognize the user
upon turning on the vehicle.
There will be a personalized welcome greet-
ing and screen prompt to log in.
This feature allows four drivers to use their
own registration, drive mode, driving posi-
tion, air conditioner, and auto settings and
memorizes these custom settings.
The log-in user can be changed on the wel-
come greeting screen or the User List screen.
For additional information, refer to the sepa-
rate INFINITI InTouch™ Owner’s Manual.
The log-in function is linked to the following
features:
• Meter
• Audio
• Navigation system display (if so equipped)
• Navigation settings (if so equipped)
• Air conditioner
• Memory seat (if so equipped)
• Engine/Transmission
• Steering
• Active Trace Control
• Active Engine Brake• Head Up Display (HUD) (if so equipped)
• Vehicle Setting
• Driver assistance (if so equipped) except for
the Forward Emergency Braking (FEB)
with Pedestrian Detection system
The
button will be on the INFINITI
Intelligent Key if the vehicle has Remote En-
gine Start. This feature allows the engine to
start from outside the vehicle.
Vehicles with an automatic climate control
system may default to either a heating or
cooling mode depending on outside and
cabin temperatures. For additional informa-
tion, see “Remote Engine Start with Intelli-
gent Climate Control” (P. 4-34).
Laws in some local communities may restrict
or prohibit the use of Remote Engine Start, or
the amount of time a parked vehicle engine
may idle. For example, some laws require a
person using Remote Engine Start to have
LPD2995
REMOTE ENGINE START
3-18Pre-driving checks and adjustments
Page 200 of 526

Linking log-in function to a stored
memory position
The log-in function can be linked to a stored
memory position with the following
procedure.
1. Place the ignition switch in the ON posi-tion while carrying the Intelligent Key that
was registered to the vehicle with a log-in
function.
NOTE:Make sure the Intelligent Keys are far apart.
Otherwise, the vehicle may detect the
wrong Intelligent Key.
2. Adjust the position of the driver’s seat, steering column and outside mirrors. For
additional information, see “Seats”
(P. 1-2), “Steering wheel” (P. 3-32) and
“Outside mirrors” (P. 3-35).
3. Place the ignition switch in the OFF position.
The next time you log in (selecting the user on
the display) after placing the ignition switch in
the ON position while carrying the Intelligent
Key, the system will automatically adjust to
the memorized driving position. For additional information, see the separate
INFINITI InTouch™ Owner’s Manual and
“Log-in function” (P. 3-18).
ENTRY/EXIT FUNCTION
This system is designed so that the driver's
seat and steering column will automatically
move when the vehicle is engaged in the P
(Park) position. This allows the driver to easily
get in and out of the driver’s seat.
The driver’s seat will slide backward and the
steering column will move up when the igni-
tion is switched to OFF and the driver’s door
is opened.
The driver’s seat and steering wheel will re-
turn to the previous position when the igni-
tion is switched to ON.
The entry/exit function can be adjusted or
canceled through the “Comfort & Conve-
nience” options of the “Settings” menu in the
lower touch-screen display by performing the
following:
• Switch the Lift Steering upon Exit from ON
to OFF.
• Switch the Slide Driver Seat Back on Exit from ON to OFF.
For additional information, refer to the sepa-
rate INFINITI InTouch™ Owner’s Manual.
Restarting the entry/exit function
If the battery cable is disconnected, or if the
fuse opens, the stored memory positions will
be lost and some of the functions will be
restricted:
1. Drive the vehicle over 25 mph (40 km/h).
OR
2. Open and close the driver's door more than two times with the ignition switch in
the OFF position.
The entry/exit function should now work
properly.
SETTING MEMORY FUNCTION
The position of the following settings can be
linked to the Intelligent Key and the memo-
rized settings can be available for each Intel-
ligent Key.
• Climate control system
• Navigation system
• Audio system
3-38Pre-driving checks and adjustments
Page 201 of 526
To use the memory function, set the climate
and audio systems to the driver's preferred
settings. Lock the doors with the Intelligent
Key. Each Intelligent Key may be set with the
driver's individual preferences. When a new
Intelligent Key is used, “Connection with the
key has been done” will be displayed on the
vehicle information display and the memo-
rized settings are available.
To engage the memorized settings, perform
the following:
1. Carry the Intelligent Key that is linked tothe memorized settings.
2. Unlock the doors by pushing the driver’s door handle request switch or the
button on the Intelligent Key.
3. Place the ignition switch in the ON posi- tion. The settings linked to the Intelligent
Key will start.
For additional information on using the cli-
mate control system, see “Heater and air con-
ditioner (automatic)” (P. 4-33).
For additional information on using the navi-
gation and audio systems, refer to the sepa-
rate INFINITI InTouch™ Owner’s Manual.
SYSTEM OPERATION
The memory seat system will not work or will
stop operating under the following
conditions:
• When the vehicle speed is above 4 mph (7 km/h).
• When any of the memory switches are pushed while the memory seat system is
operating.
• When the switch for the driver’s seat and steering column is pushed while the
memory seat system is operating.
• When the seat has already been moved to the memorized position.
• When no seat position is stored in the memory switch.
• When the shift lever is moved from P (Park) to any other position.
The memory seat system can be adjusted and
canceled. It is recommended you visit an
INFINITI retailer for this service.
Pre-driving checks and adjustments3-39
Page 203 of 526
4 Monitor, climate, audio, phone and voice
recognition systems
INFINITI InTouch™ Owner’s Manual..............4-2
RearView Monitor (if so equipped) ................4-3
RearView Monitor system operation ...........4-4
How to read the displayed lines ................4-4
Difference between predicted and actual
distances .....................................4-5
How to park with predicted course lines .......4-6
Adjusting the screen ......................... 4-8
How to turn on and off predicted course
lines ..........................................4-9
RearView Monitor system limitations ..........4-9
System maintenance ........................ 4-10
Around View® Monitor (if so equipped) ..........4-11
Around View® Monitor system operation ....4-12
Difference between predicted and actual
distances ................................... 4-16
How to park with predicted course lines .....4-18
How to switch the display ...................4-19
Around View® Monitor settings .............4-20
Adjusting the screen ........................ 4-21
Around View® Monitor system
limitations .................................. 4-21
System maintenance ........................ 4-23
Camera aiding sonar (parking sensor)
(if so equipped) ................................ 4-24Sonar system operation
.....................4-24
Turning on and off the sonar function ........4-25
Sonar system limitations ....................4-26
System temporarily unavailable ..............4-26
System maintenance ........................ 4-26
Moving Object Detection (MOD)
(if so equipped) ................................ 4-27
MOD system operation .....................4-28
Turning MOD on and off ....................4-30
MOD system limitations .....................4-30
System maintenance ........................ 4-31
Vents .......................................... 4-32
Heater and air conditioner (automatic) ..........4-33
Automatic operation ........................ 4-34
Manual operation ........................... 4-35
Operating tips .............................. 4-36
CLIMATE setting screen ....................4-37
Rear climate control (if so equipped) .........4-39
Heater
and air conditioner settings
(if so equipped) ................................ 4-40
Servicing air conditioner ........................ 4-41
Antenna ....................................... 4-41
Car phone or CB radio ......................... 4-42
iPod®/iPhone® ................................ 4-42
Page 204 of 526
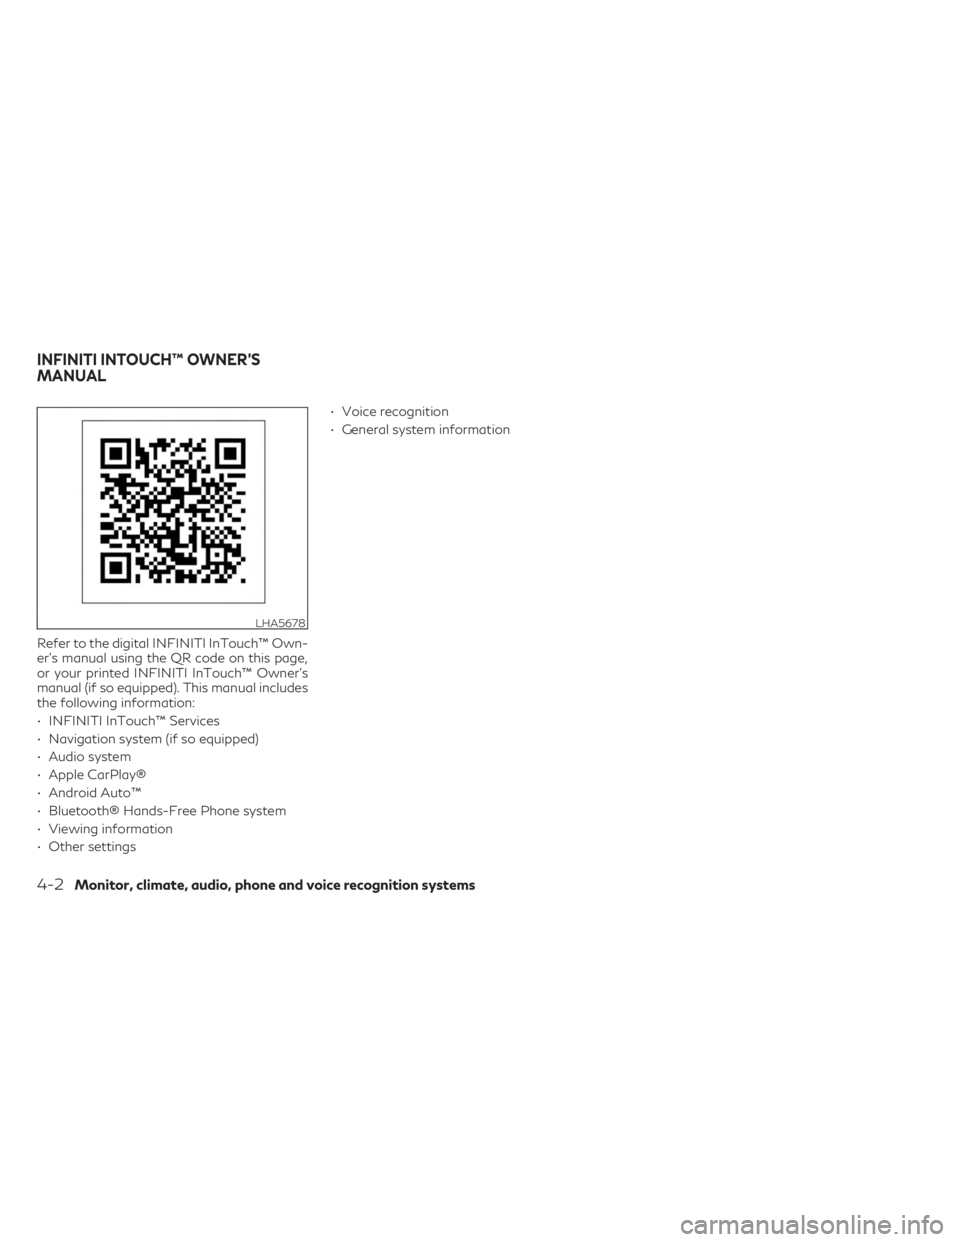
Refer to the digital INFINITI InTouch™ Own-
er’s manual using the QR code on this page,
or your printed INFINITI InTouch™ Owner’s
manual (if so equipped). This manual includes
the following information:
• INFINITI InTouch™ Services
• Navigation system (if so equipped)
• Audio system
• Apple CarPlay®
• Android Auto™
• Bluetooth® Hands-Free Phone system
• Viewing information
• Other settings• Voice recognition
• General system information
LHA5678
INFINITI INTOUCH™ OWNER’S
MANUAL
4-2Monitor, climate, audio, phone and voice recognition systems
Page 210 of 526
4. Maneuver the steering wheel to make thevehicle width guide lines
ODparallel to the
parking space
OCwhile referring to the
predicted course lines.
5. When the vehicle is parked in the space completely, press the P (Park) button lo-
cated near the shift lever to place the
vehicle in the P (Park) position and apply
the parking brake.
ADJUSTING THE SCREEN
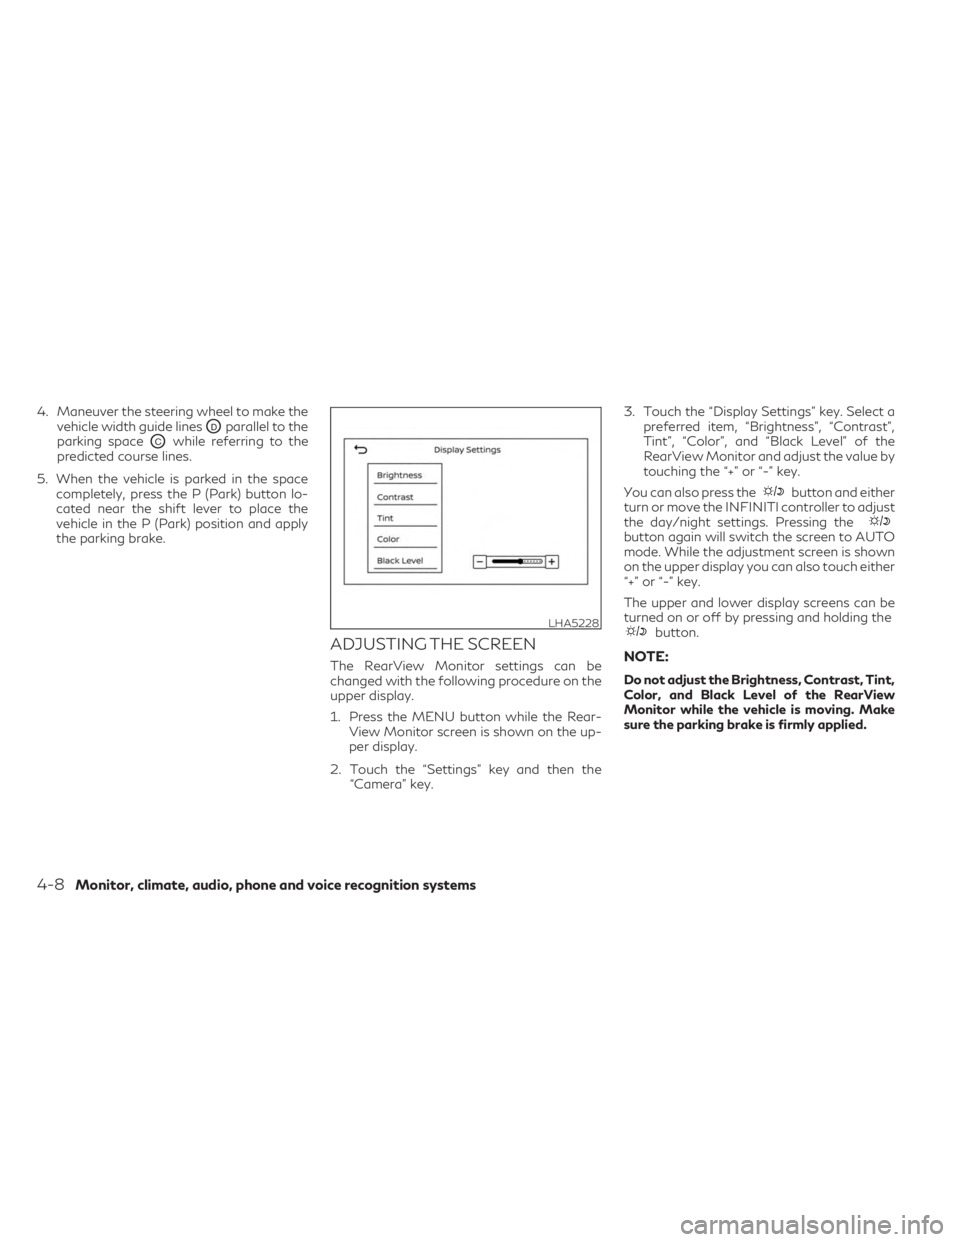
The RearView Monitor settings can be
changed with the following procedure on the
upper display.
1. Press the MENU button while the Rear-View Monitor screen is shown on the up-
per display.
2. Touch the “Settings” key and then the “Camera” key. 3. Touch the “Display Settings” key. Select a
preferred item, “Brightness”, “Contrast”,
Tint”, “Color”, and “Black Level” of the
RearView Monitor and adjust the value by
touching the “+” or “-” key.
You can also press the
button and either
turn or move the INFINITI controller to adjust
the day/night settings. Pressing the
button again will switch the screen to AUTO
mode. While the adjustment screen is shown
on the upper display you can also touch either
“+” or “-” key.
The upper and lower display screens can be
turned on or off by pressing and holding the
button.
NOTE:
Do not adjust the Brightness, Contrast, Tint,
Color, and Black Level of the RearView
Monitor while the vehicle is moving. Make
sure the parking brake is firmly applied.
LHA5228
4-8Monitor, climate, audio, phone and voice recognition systems
Page 211 of 526

HOW TO TURN ON AND OFF
PREDICTED COURSE LINES
To toggle on and off the predicted course
lines while in the P (Park) position:
1. Press the MENU button.
2. Touch the “Settings” key.
3. Touch the “Camera” key.
4. Touch the “Predicted Course Lines” key toturn the feature on or off.
When the predicted course lines are
turned on, the indicator light is on.
REARVIEW MONITOR SYSTEM
LIMITATIONS
WARNING
Listed below are the system limitations for
RearView Monitor. Failure to operate the
vehicle in accordance with these system
limitations could result in serious injury or
death.
• The system cannot completely eliminate
blind spots and may not show every
object. •
Underneath the bumper and the corner
areas of the bumper cannot be viewed on
the RearView Monitor because of its
monitoring range limitation. The system
will not show small objects below the
bumper, and may not show objects close
to the bumper or on the ground.
• Objects viewed in the RearView Monitor
differ from actual distance because a
wide-angle lens is used.
• Objects in the RearView Monitor will ap-
pear visually opposite compared to when
viewed in the rearview and outside
mirrors.
• Use the displayed lines as a reference.
The lines are highly affected by the num-
ber of occupants, fuel level, vehicle posi-
tion, road conditions and road grade.
• Make sure that the liftgate is securely
closed when backing up.
• Do not put anything on the rearview
camera. The rearview camera is installed
above the license plate.
• When washing the vehicle with high
pressure water, be sure not to spray it
around the camera. Otherwise, water
may enter the camera unit causing water
condensation on the lens, a malfunction,
fire or an electric shock. •
Do not strike the camera. It is a precision
instrument. Otherwise, it may malfunc-
tion or cause damage resulting in a fire or
an electric shock.
The following are operating limitations and
do not represent a system malfunction:
• When the temperature is extremely high or low, the screen may not clearly display
objects.
• When strong light directly shines on the camera, objects may not be displayed
clearly.
• Vertical lines may be seen in objects on the screen. This is due to strong reflected light
from the bumper.
• The screen may flicker under fluorescent light.
• The colors of objects on the RearView Monitor may differ somewhat from the ac-
tual color of objects.
• Objects on the monitor may not be clear in a dark environment.
• There may be a delay when switching be- tween views.
• If dirt, rain or snow accumulate on the cam- era, the RearView Monitor may not display
objects clearly. Clean the camera.
Monitor, climate, audio, phone and voice recognition systems4-9
Page 222 of 526
If the shift position is in the P (Park) or D
(Drive) position, the available views are:
• Front view/bird’s-eye view split screen
• Front view/front-side view split screen
• Front-wide view
The display will switch from the Around
View® Monitor screen when:
• The shift lever is in the D (Drive) positionand the vehicle speed increases above ap-
proximately 6 mph (10 km/h).
• A different screen is selected.
AROUND VIEW® MONITOR
SETTINGS
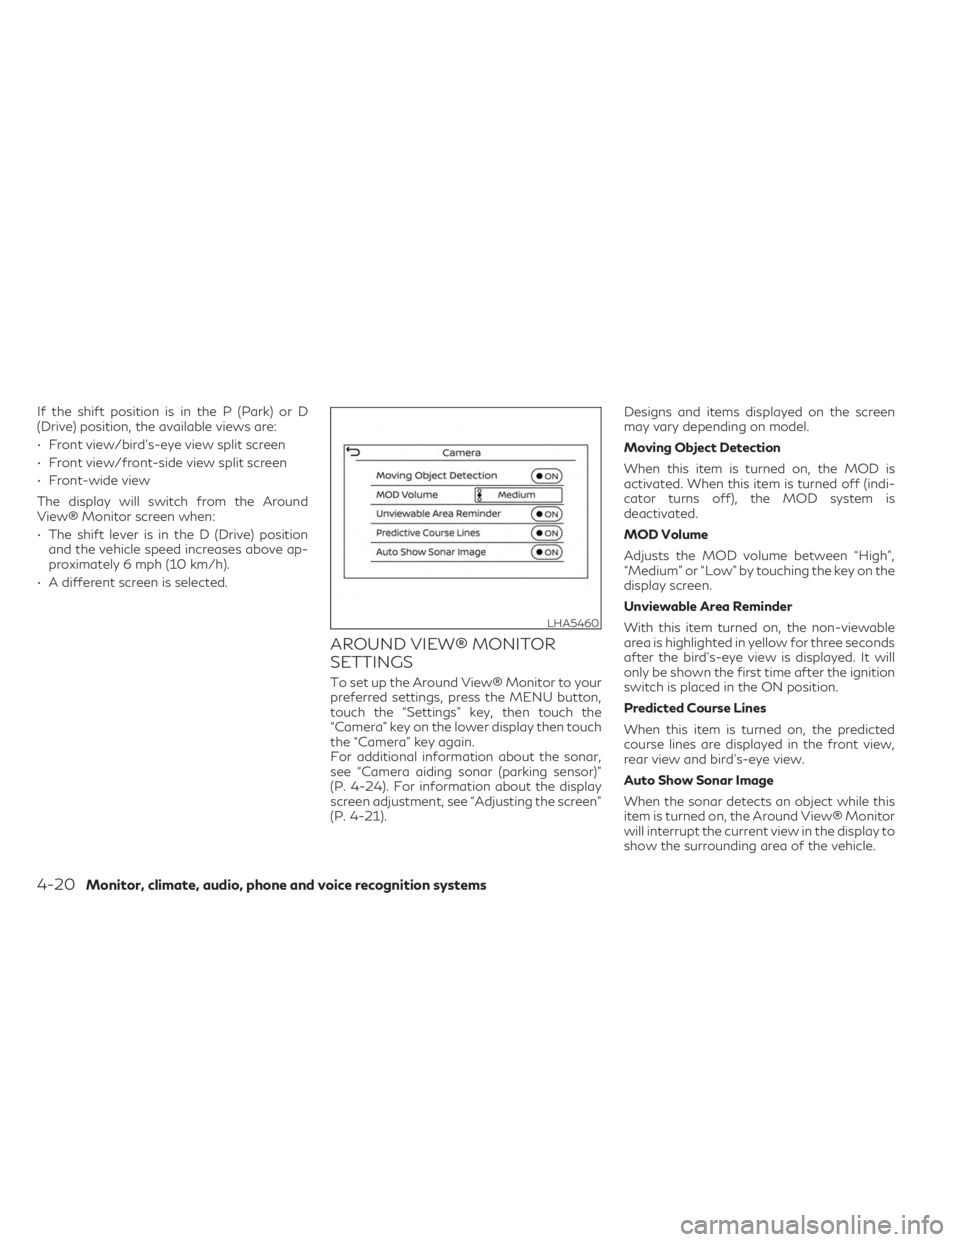
To set up the Around View® Monitor to your
preferred settings, press the MENU button,
touch the “Settings” key, then touch the
“Camera” key on the lower display then touch
the “Camera” key again.
For additional information about the sonar,
see “Camera aiding sonar (parking sensor)”
(P. 4-24). For information about the display
screen adjustment, see “Adjusting the screen”
(P. 4-21). Designs and items displayed on the screen
may vary depending on model.
Moving Object Detection
When this item is turned on, the MOD is
activated. When this item is turned off (indi-
cator turns off), the MOD system is
deactivated.
MOD Volume
Adjusts the MOD volume between “High”,
“Medium” or “Low” by touching the key on the
display screen.
Unviewable Area Reminder
With this item turned on, the non-viewable
area is highlighted in yellow for three seconds
after the bird's-eye view is displayed. It will
only be shown the first time after the ignition
switch is placed in the ON position.
Predicted Course Lines
When this item is turned on, the predicted
course lines are displayed in the front view,
rear view and bird's-eye view.
Auto Show Sonar Image
When the sonar detects an object while this
item is turned on, the Around View® Monitor
will interrupt the current view in the display to
show the surrounding area of the vehicle.
LHA5460
4-20Monitor, climate, audio, phone and voice recognition systems
Page 223 of 526
ADJUSTING THE SCREEN
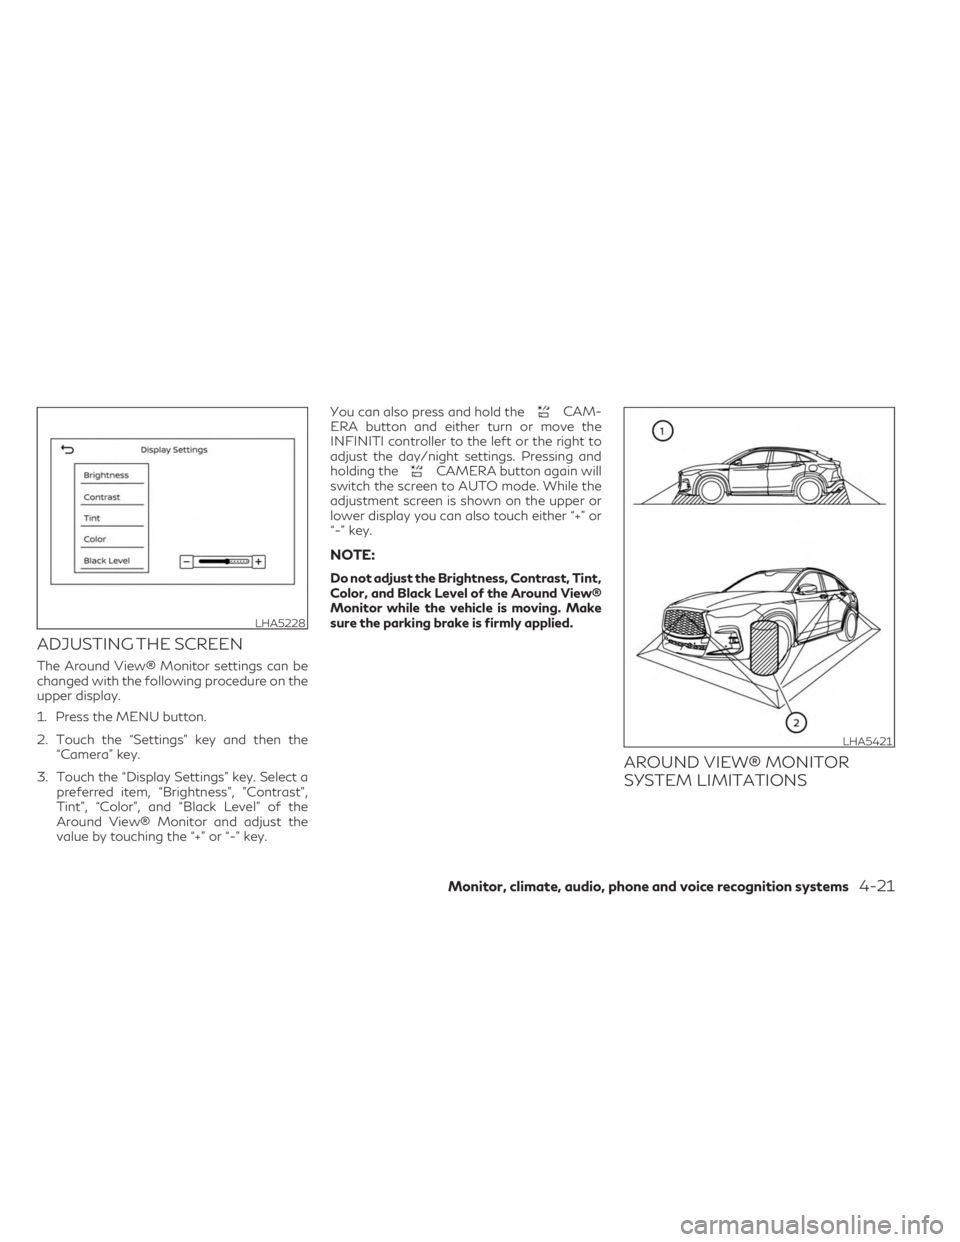
The Around View® Monitor settings can be
changed with the following procedure on the
upper display.
1. Press the MENU button.
2. Touch the “Settings” key and then the“Camera” key.
3. Touch the “Display Settings” key. Select a preferred item, “Brightness”, ”Contrast”,
Tint”, “Color”, and “Black Level” of the
Around View® Monitor and adjust the
value by touching the “+” or “-” key. You can also press and hold the
CAM-
ERA button and either turn or move the
INFINITI controller to the left or the right to
adjust the day/night settings. Pressing and
holding the
CAMERA button again will
switch the screen to AUTO mode. While the
adjustment screen is shown on the upper or
lower display you can also touch either “+” or
“-” key.
NOTE:
Do not adjust the Brightness, Contrast, Tint,
Color, and Black Level of the Around View®
Monitor while the vehicle is moving. Make
sure the parking brake is firmly applied.
AROUND VIEW® MONITOR
SYSTEM LIMITATIONS
LHA5228
LHA5421
Monitor, climate, audio, phone and voice recognition systems4-21