Battery JAGUAR XFR 2010 1.G Workshop Manual
[x] Cancel search | Manufacturer: JAGUAR, Model Year: 2010, Model line: XFR, Model: JAGUAR XFR 2010 1.GPages: 3039, PDF Size: 58.49 MB
Page 1203 of 3039
Removal steps in this procedure may contain installation details.
Some variation in the illustrations may occur, but the essential information is always correct.
1. Refer to: Petrol and Petrol-Ethanol Fuel Systems Health and Safety Precautions (100-00 General Information, Description and Operation).
2. Refer to: Battery Disconnect and Connect (414-01 Battery, Mounting and Cables, General Procedures).
3. Refer to: Fuel System Pressure Release - V8 5.0L Petrol/V8 S/C 5.0L Petrol (310-00 Fuel System - General Information, General Procedures).
4. Refer to: Secondary Bulkhead Panel RH - TDV6 3.0L Diesel /V8 5.0L Petrol/V8 S/C 5.0L Petrol (501-02 Front End Body Panels, Removal and Installation).
5. Refer to: Fuel Injection Component Cleaning (303-04D Fuel Charging and Controls - V8 5.0L Petrol, General Procedures).
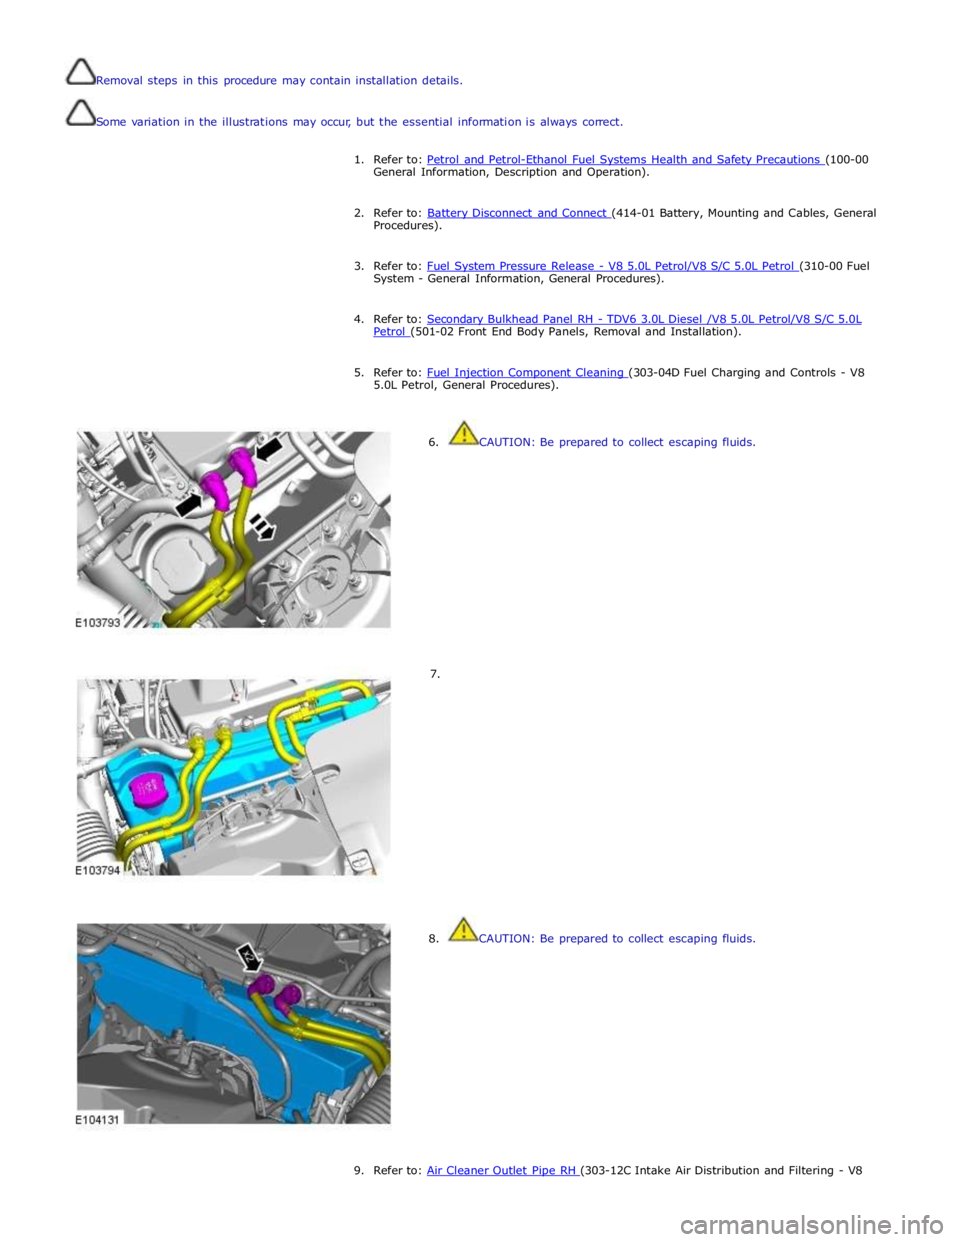
6. CAUTION: Be prepared to collect escaping fluids.
7.
8. CAUTION: Be prepared to collect escaping fluids.
9. Refer to: Air Cleaner Outlet Pipe RH (303-12C Intake Air Distribution and Filtering - V8
Page 1216 of 3039
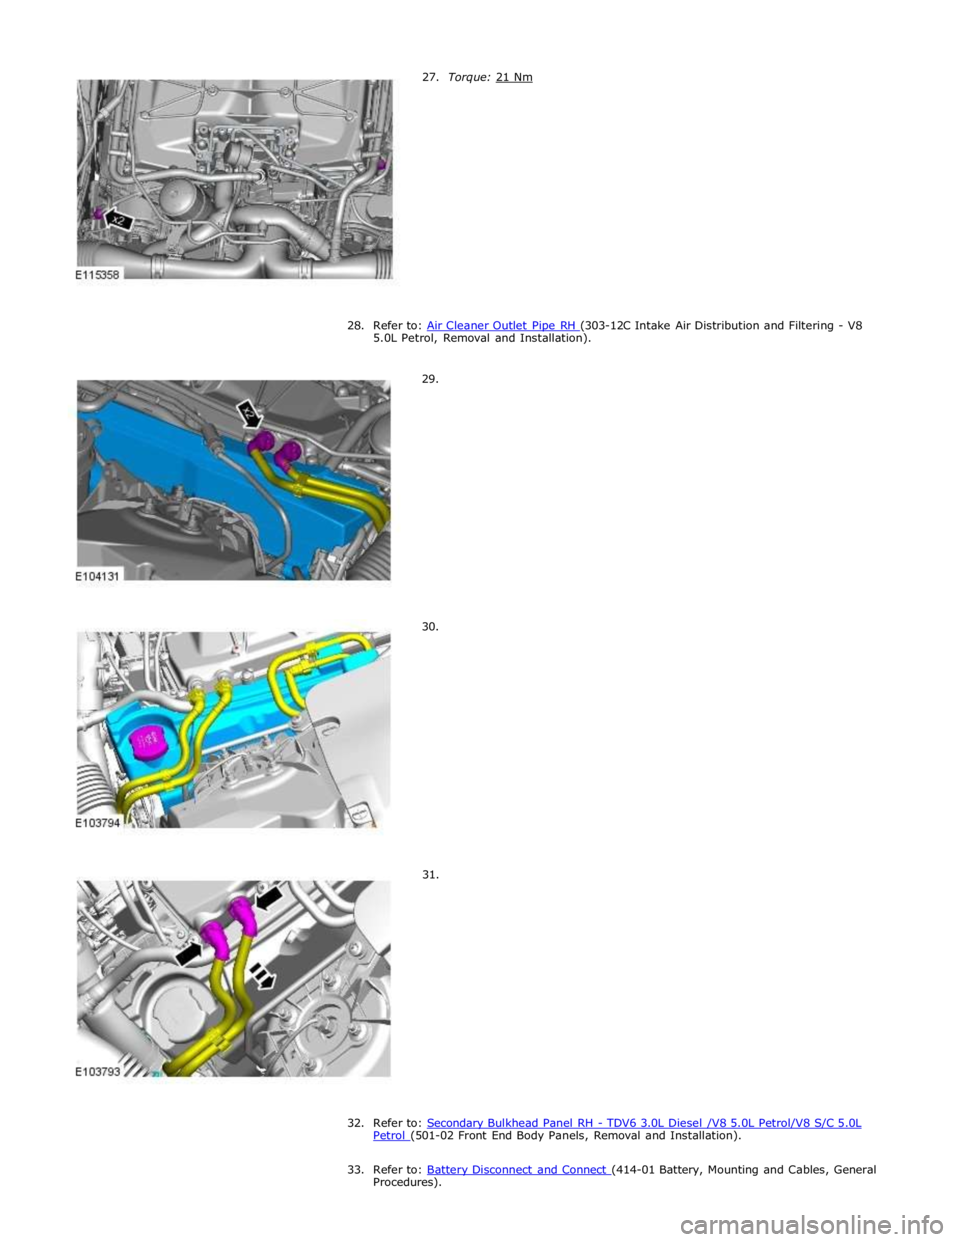
28. Refer to: Air Cleaner Outlet Pipe RH (303-12C Intake Air Distribution and Filtering - V8 5.0L Petrol, Removal and Installation).
29.
30.
31.
32. Refer to: Secondary Bulkhead Panel RH - TDV6 3.0L Diesel /V8 5.0L Petrol/V8 S/C 5.0L Petrol (501-02 Front End Body Panels, Removal and Installation).
33. Refer to: Battery Disconnect and Connect (414-01 Battery, Mounting and Cables, General Procedures).
Page 1228 of 3039
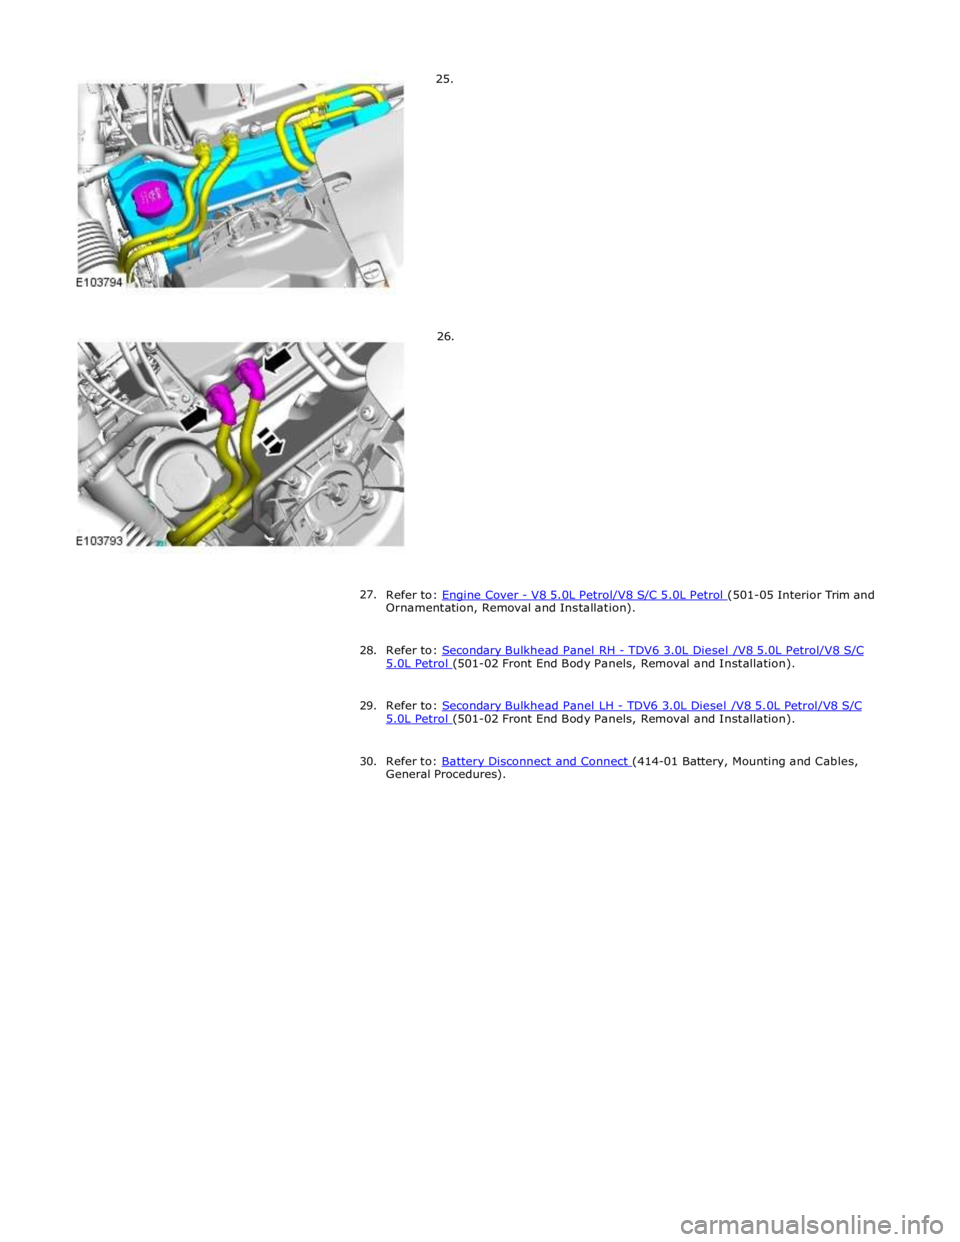
Ornamentation, Removal and Installation).
28. Refer to: Secondary Bulkhead Panel RH - TDV6 3.0L Diesel /V8 5.0L Petrol/V8 S/C 5.0L Petrol (501-02 Front End Body Panels, Removal and Installation).
29. Refer to: Secondary Bulkhead Panel LH - TDV6 3.0L Diesel /V8 5.0L Petrol/V8 S/C 5.0L Petrol (501-02 Front End Body Panels, Removal and Installation).
30. Refer to: Battery Disconnect and Connect (414-01 Battery, Mounting and Cables, General Procedures).
Page 1242 of 3039
5.0L Petrol (501-02 Front End Body Panels, Removal and Installation).
31. Refer to: Secondary Bulkhead Panel LH - TDV6 3.0L Diesel /V8 5.0L Petrol/V8 S/C 5.0L Petrol (501-02 Front End Body Panels, Removal and Installation).
32. Refer to: Battery Disconnect and Connect (414-01 Battery, Mounting and Cables, General Procedures).
www.JagDocs.com
Page 1243 of 3039

Fuel Charging and Controls - V8 S/C 5.0L Petrol - Throttle Body
Removal and Installation
Removal
NOTE: Removal steps in this procedure may contain installation details. Published: 08-Nov-2013
1. WARNING: Do not work on or under a vehicle supported only by a jack.
Always support the vehicle on safety stands.
Raise and support the vehicle.
2. Refer to: Battery Disconnect and Connect (414-01 Battery, Mounting and Cables, General Procedures).
3. Refer to: Cooling System Partial Draining, Filling and Bleeding (303-03E,
General Procedures).
4. Refer to: Engine Cover - V8 5.0L Petrol/V8 S/C 5.0L Petrol (501-05 Interior Trim and Ornamentation, Removal and Installation).
5. Refer to: Air Cleaner Outlet Pipe (303-12E, Removal and Installation).
6.
Page 1250 of 3039
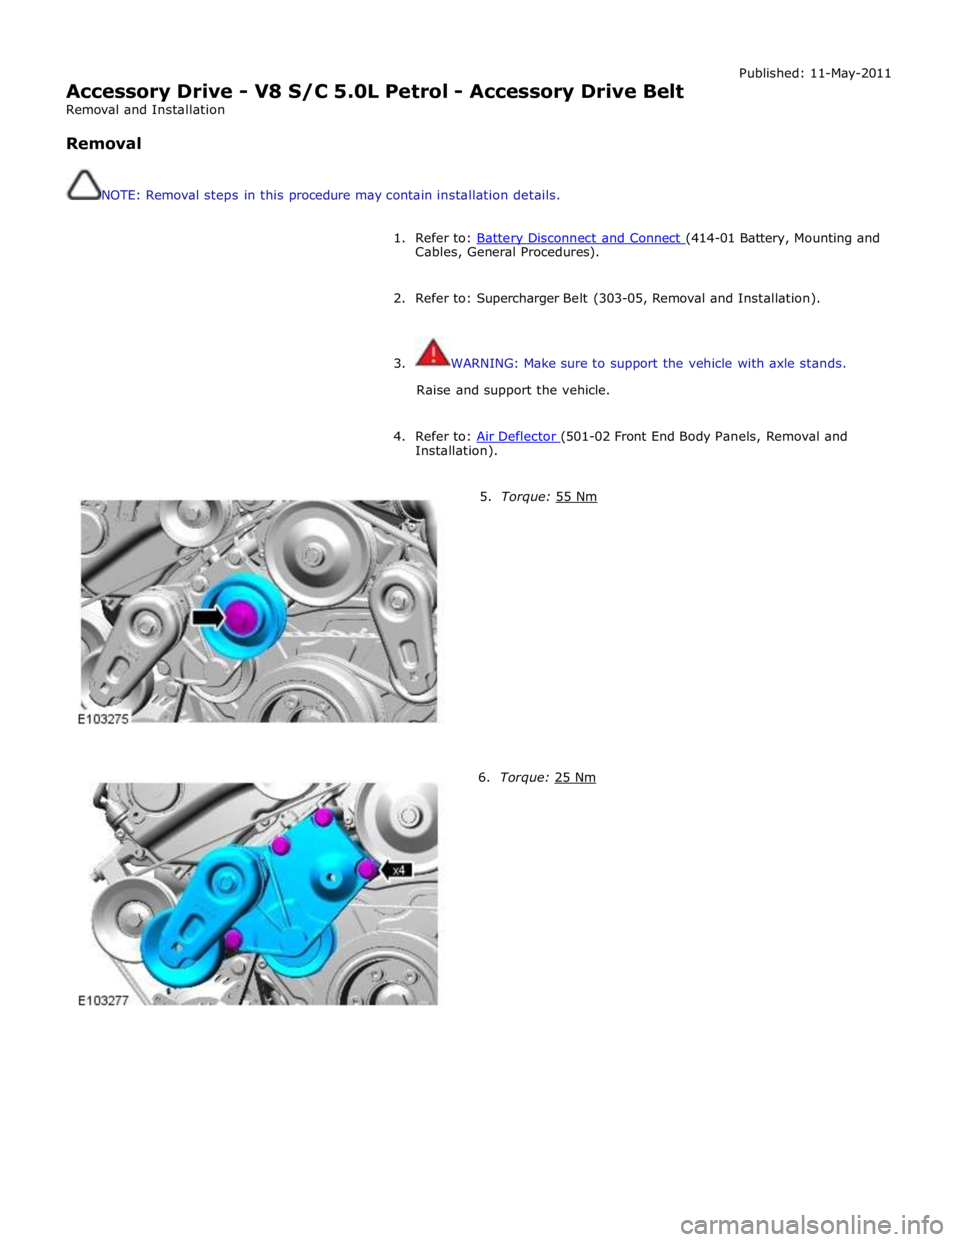
Accessory Drive - V8 S/C 5.0L Petrol - Accessory Drive Belt
Removal and Installation
Removal
NOTE: Removal steps in this procedure may contain installation details. Published: 11-May-2011
1. Refer to: Battery Disconnect and Connect (414-01 Battery, Mounting and Cables, General Procedures).
2. Refer to: Supercharger Belt (303-05, Removal and Installation).
3. WARNING: Make sure to support the vehicle with axle stands.
Raise and support the vehicle.
4. Refer to: Air Deflector (501-02 Front End Body Panels, Removal and Installation).
5. Torque: 55 Nm 6. Torque: 25 Nm
Page 1252 of 3039
Published: 11-May-2011
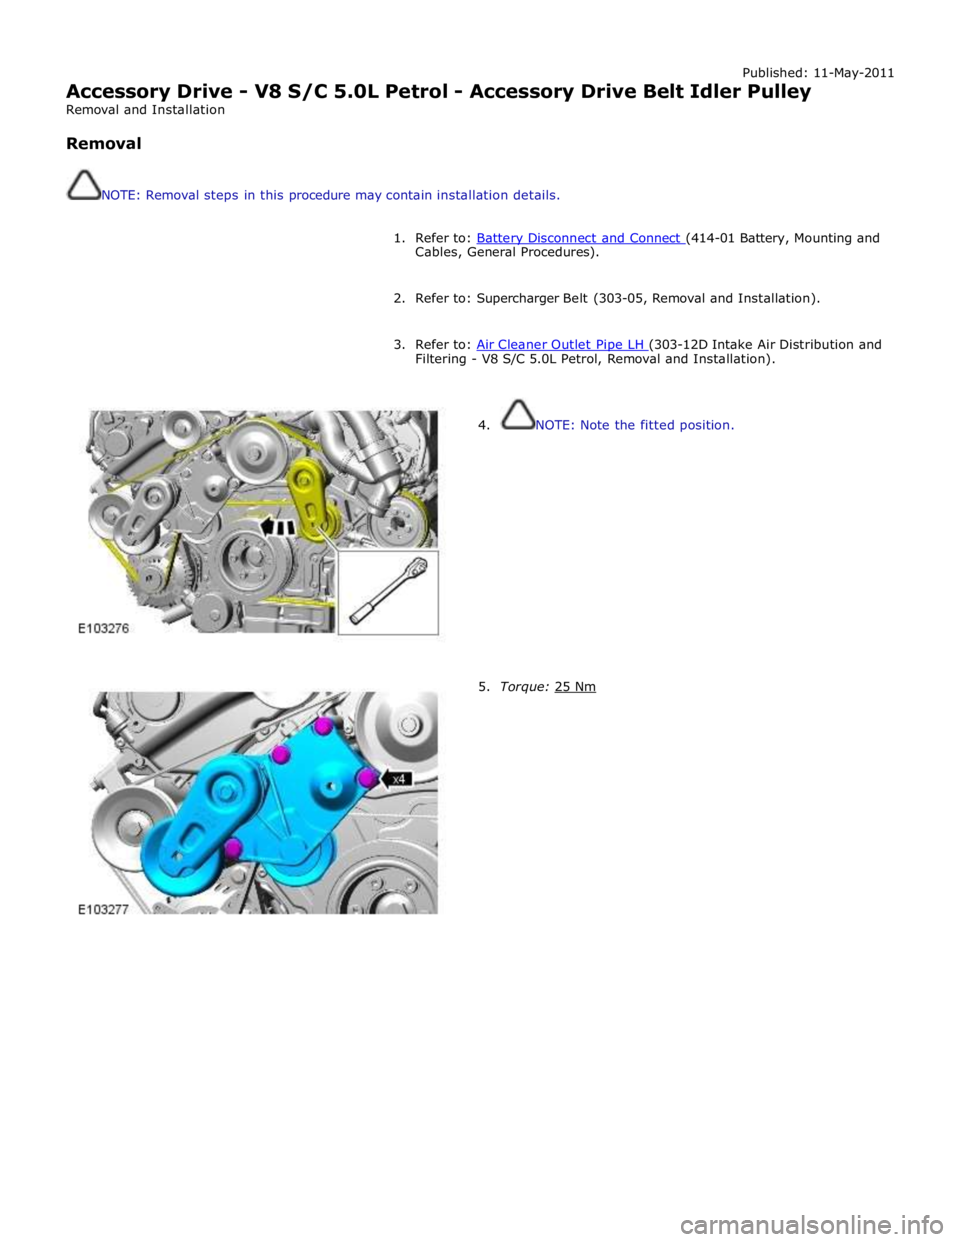
Accessory Drive - V8 S/C 5.0L Petrol - Accessory Drive Belt Idler Pulley
Removal and Installation
Removal
NOTE: Removal steps in this procedure may contain installation details.
1. Refer to: Battery Disconnect and Connect (414-01 Battery, Mounting and Cables, General Procedures).
2. Refer to: Supercharger Belt (303-05, Removal and Installation).
3. Refer to: Air Cleaner Outlet Pipe LH (303-12D Intake Air Distribution and Filtering - V8 S/C 5.0L Petrol, Removal and Installation).
4. NOTE: Note the fitted position.
5. Torque: 25 Nm
Page 1254 of 3039
Published: 11-May-2011
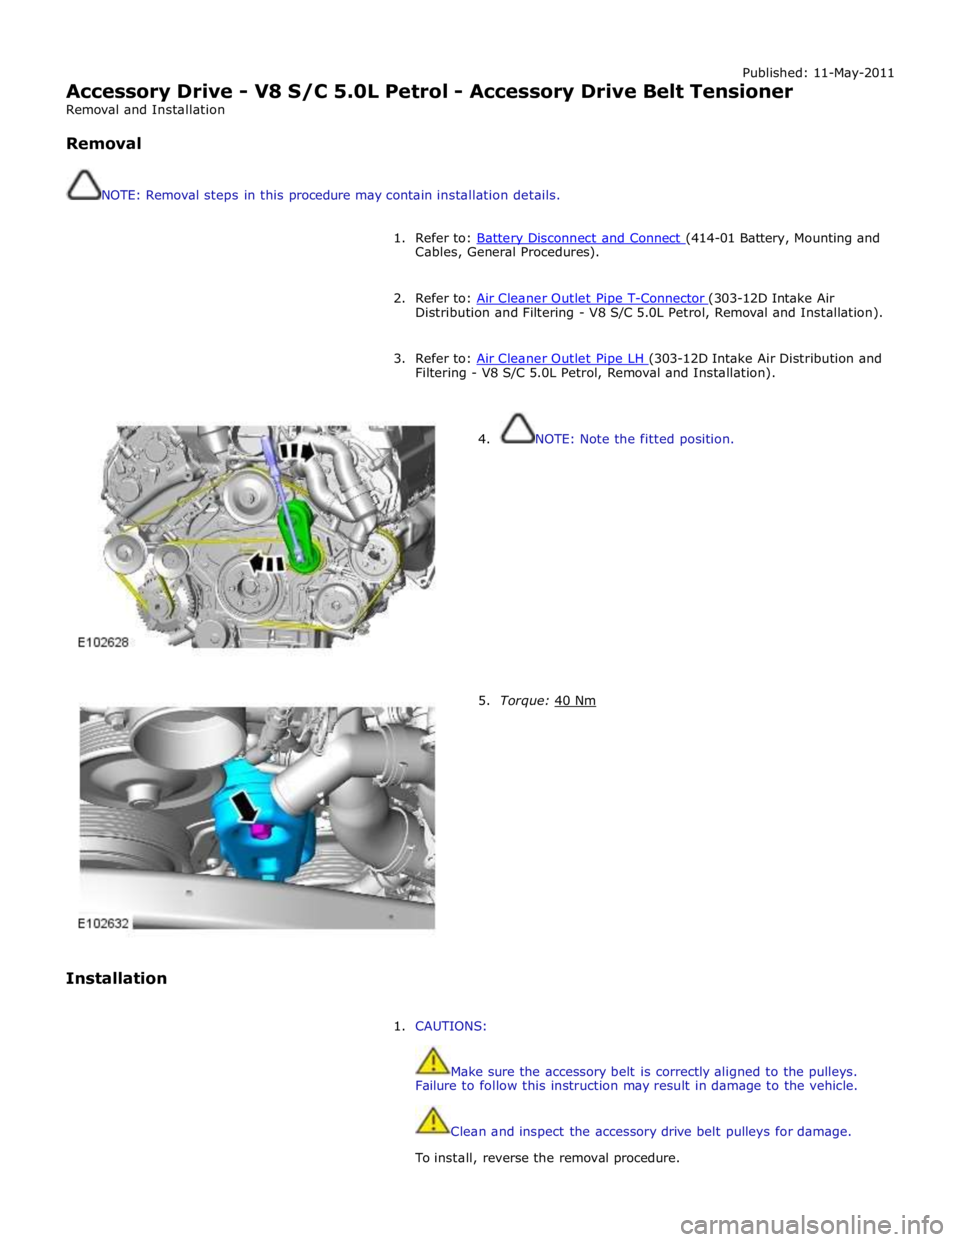
Accessory Drive - V8 S/C 5.0L Petrol - Accessory Drive Belt Tensioner
Removal and Installation
Removal
NOTE: Removal steps in this procedure may contain installation details.
1. Refer to: Battery Disconnect and Connect (414-01 Battery, Mounting and Cables, General Procedures).
2. Refer to: Air Cleaner Outlet Pipe T-Connector (303-12D Intake Air Distribution and Filtering - V8 S/C 5.0L Petrol, Removal and Installation).
3. Refer to: Air Cleaner Outlet Pipe LH (303-12D Intake Air Distribution and Filtering - V8 S/C 5.0L Petrol, Removal and Installation).
Installation
4. NOTE: Note the fitted position.
5. Torque: 40 Nm
1. CAUTIONS:
Make sure the accessory belt is correctly aligned to the pulleys.
Failure to follow this instruction may result in damage to the vehicle.
Clean and inspect the accessory drive belt pulleys for damage.
To install, reverse the removal procedure.
Page 1255 of 3039

Published: 11-May-2011
Accessory Drive - V8 S/C 5.0L Petrol - Supercharger Belt Idler Pulley
Removal and Installation
Removal
NOTE: Removal steps in this procedure may contain installation details.
1. Refer to: Battery Disconnect and Connect (414-01 Battery, Mounting and Cables, General Procedures).
2. Refer to: Air Cleaner Outlet Pipe RH (303-12D Intake Air Distribution and Filtering - V8 S/C 5.0L Petrol, Removal and Installation).
3. Refer to: Air Cleaner Outlet Pipe T-Connector (303-12D Intake Air Distribution and Filtering - V8 S/C 5.0L Petrol, Removal and Installation).
Installation
4. NOTES:
Note the fitted position.
Engine shown removed for clarity.
5. Torque: 40 Nm
1. CAUTION: Make sure the supercharger belt is correctly aligned to the
pulleys. Failure to follow this instruction may result in damage to
the vehicle.
To install, reverse the removal procedure.
Page 1256 of 3039
Published: 11-May-2011
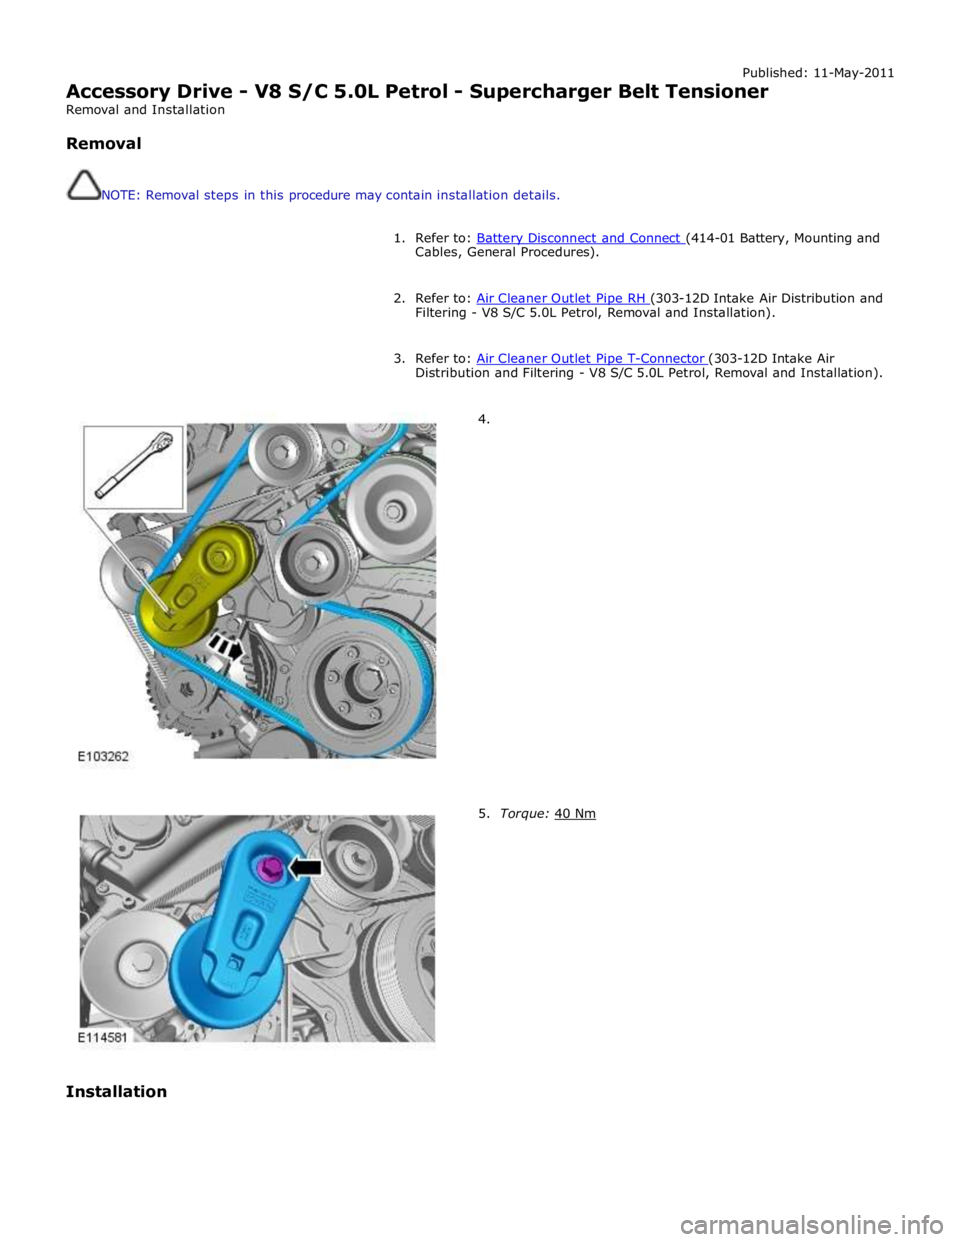
Accessory Drive - V8 S/C 5.0L Petrol - Supercharger Belt Tensioner
Removal and Installation
Removal
NOTE: Removal steps in this procedure may contain installation details.
1. Refer to: Battery Disconnect and Connect (414-01 Battery, Mounting and Cables, General Procedures).
2. Refer to: Air Cleaner Outlet Pipe RH (303-12D Intake Air Distribution and Filtering - V8 S/C 5.0L Petrol, Removal and Installation).
3. Refer to: Air Cleaner Outlet Pipe T-Connector (303-12D Intake Air Distribution and Filtering - V8 S/C 5.0L Petrol, Removal and Installation).
Installation
4.
5. Torque: 40 Nm