ESP JEEP GRAND CHEROKEE 2015 WK2 / 4.G Owner's Manual
[x] Cancel search | Manufacturer: JEEP, Model Year: 2015, Model line: GRAND CHEROKEE, Model: JEEP GRAND CHEROKEE 2015 WK2 / 4.GPages: 717, PDF Size: 18.54 MB
Page 246 of 717
of the vehicle to assist with aligning to a hitch/receiver.
The following table shows the approximate distances for
each zone:
ZoneDistance to the rear of the vehicle
Red0 - 1 ft (0 - 30 cm)
Yellow1 ft - 6.5 ft (30 cm - 2 m)
Green6.5 ft or greater (2 m or greater)
WARNING!
Drivers must be careful when backing up even when
using the ParkView® Rear Back Up Camera. Always
check carefully behind your vehicle, and be sure to
check for pedestrians, animals, other vehicles, ob-
structions, or blind spots before backing up. You are
responsible for the safety of your surroundings and
must continue to pay attention while backing up.
Failure to do so can result in serious injury or death.
244 UNDERSTANDING THE FEATURES OF YOUR VEHICLE
Page 258 of 717
WARNING!(Continued)
use a garage door opener without these safety fea-
tures. Call toll-free 1–800–355–3515 or, on the Internet
atHomeLink.com for safety information or assis-
tance.
General Information
This device complies with FCC rules Part 15 and Industry
Canada RSS-210. Operation is subject to the following
two conditions:
1. This device may not cause harmful interference.
2. This device must accept any interference that may be
received including interference that may cause unde-
sired operation.
NOTE:
•The transmitter has been tested and it complies with
FCC and IC rules. Changes or modifications not ex-
pressly approved by the party responsible for compli-
ance could void the user ’s authority to operate the
device.
•The term IC before the certification/registration num-
ber only signifies that Industry Canada technical speci-
fications were met.
256 UNDERSTANDING THE FEATURES OF YOUR VEHICLE
Page 287 of 717
•If (or any metallic object) is placed over the satellite
radio antenna (if equipped), you may experience in-
terruption of satellite radio reception. For improved
satellite radio reception, avoid placing the rear cross-
bar over the satellite radio antenna.
CAUTION!
•To prevent damage to the roof of your vehicle, do
not carry any loads on the roof rack without the
crossbars installed. The load should be secured and
placed on top of the crossbars, not directly on the
roof. If it is necessary to place the load on the roof,
place a blanket or some other protection between
the load and the roof surface.
(Continued)
CAUTION!(Continued)
•To avoid damage to the roof rack and vehicle, do
not exceed the maximum roof rack load capacity of
150 lb (68 kg). Always distribute heavy loads as
evenly as possible and secure the load appropri-
ately.
•Long loads which extend over the windshield, such
as wood panels or surfboards, or loads with large
frontal area should be secured to both the front and
rear of the vehicle.
•Travel at reduced speeds and turn corners carefully
when carrying large or heavy loads on the roof
rack. Wind forces, due to natural causes or nearby
truck traffic, can add sudden upward lift to a load.
This is especially true on large flat loads and may
result in damage to the cargo or your vehicle.
3
UNDERSTANDING THE FEATURES OF YOUR VEHICLE 285
Page 299 of 717
The light also will turn on when the parking brake is
applied with the ignition switch in the ON/RUN posi-
tion.
NOTE:This light shows only that the parking brake is
applied. It does not show the degree of brake application.
13. Fuel Gauge/Fuel Door Reminder
The fuel pump symbol points to the side of the vehicle
where the fuel door is located. The pointer shows the
level of fuel in the fuel tank when the ignition switch is in
the ON/RUN position.
14. Tire Pressure Monitoring Telltale Light
Each tire, including the spare (if provided),
should be checked monthly when cold and
inflated to the inflation pressure recommended
by the vehicle manufacturer on the vehicle
placard or tire inflation pressure label. (If your vehicle
has tires of a different size than the size indicated on the
vehicle placard or tire inflation pressure label, you should
determine the proper tire inflation pressure for those
tires.)
As an added safety feature, your vehicle has been
equipped with a Tire Pressure Monitoring System
(TPMS) that illuminates a low tire pressure telltale when
one or more of your tires is significantly under-inflated.
Accordingly, when the low tire pressure telltale illumi-
nates, you should stop and check your tires as soon as
possible, and inflate them to the proper pressure. Driving
on a significantly under-inflated tire causes the tire to
overheat and can lead to tire failure. Under-inflation also
reduces fuel efficiency and tire tread life, and may affect
the vehicle’s handling and stopping ability.
Please note that the TPMS is not a substitute for proper
tire maintenance, and it is the driver ’s responsibility to
maintain correct tire pressure, even if under-inflation has
not reached the level to trigger illumination of the TPMS
low tire pressure telltale.
4
UNDERSTANDING YOUR INSTRUMENT PANEL 297
Page 326 of 717
•Set Language
When in this display, you may select one of multiple
languages (English/Français/Español) for all display no-
menclature, including the trip functions and the naviga-
tion system (if equipped). Press the “Set Language”
button on the touchscreen, then press the desired lan-
guage button on the touchscreen. Press the back arrow
button on the touchscreen to return to the previous
menu.
•Units
When in this display, you may select to have the DID,
odometer, and navigation system (if equipped) changed
between US and Metric units of measure. Press “US” or
“Metric” to make your selection. Press the back arrow
button on the touchscreen to return to the previous
menu.
•Touchscreen Beep
When in this display, you may turn on or shut off the
sound heard when a button on the touchscreen is
pressed. Press the “Touchscreen Beep” button on the
touchscreen then select from “on” or “off.” Press the back
arrow button on the touchscreen to return to the previous
menu.
Voice
•Voice Response Length
When in this display, you may change the Voice Re-
sponse Length settings. To change the Voice Response
Length, press the “Voice Response Length” button on the
touchscreen and select from “Brief” or “Detailed.” Press
the back arrow button on the touchscreen to return to the
previous menu.
324 UNDERSTANDING YOUR INSTRUMENT PANEL
Page 327 of 717
•Show Command List
When in this display, you may change the Show Com-
mand List settings. To change the Show Command List
settings, press the “Show Command List” button on the
touchscreen and select from “Always,” “With Help” or
“Never.” Press the back arrow button on the touchscreen
to return to the previous menu.
Clock & Date
After pressing the “Clock” button on the touchscreen the
following settings will be available:
•Set Time
When in this display, you may set the time and format
manually. Press the “Set Time” button then choose from
a 12 hour or 24 hour format. Press the corresponding
arrow above and below the current time to adjust, then
select AM or PM. Press the back arrow button on the
touchscreen to return to the previous menu.
•Set Date
When in this display, you may set the date manually.
Press the “Set Date” button then press the corresponding
arrows above and below the current date to adjust. Press
the back arrow button on the touchscreen to return to the
previous menu.
Safety/Assistance
After pressing the “Safety/Assistance” button on the
touchscreen the following settings will be available:
•ParkSense®
The ParkSense® system will scan for objects behind the
vehicle when the transmission shift lever/gear selector is
in REVERSE and the vehicle speed is less than 11 mph (18
km/h). It will provide an alert (audible and/or visual) to
indicate the proximity to other objects. The system can be
enabled with Sound Only, or Sound and Display. To
change the ParkSense® status, press and release the
4
UNDERSTANDING YOUR INSTRUMENT PANEL 325
Page 343 of 717
•Set Language
When in this display, you may select one of multiple
languages (English/Français/Español) for all display no-
menclature, including the trip functions and the naviga-
tion system (if equipped.) Press the “Set Language”
button on the touchscreen and then press the desired
language button until a check-mark appears next to the
language, showing that setting has been selected. Press
the back arrow button on the touchscreen to return to the
previous menu.
•Units
When in this display, you may select to have the DID,
odometer, and navigation system (if equipped) changed
between US and Metric units of measure. Press “US” or
“Metric” until a check-mark appears next to the setting,
showing that setting has been selected. Press the back
arrow button on the touchscreen to return to the previous
menu.
•Touchscreen Beep
When in this display, you may turn on or shut off the
sound heard when button on the touchscreen is pressed.
Press the “Touchscreen Beep” button on the touchscreen
until a check-mark appears next to the setting, showing
that setting has been selected. Press the back arrow
button on the touchscreen to return to the previous
menu.
•Controls Screen Time-Out
When in this display, you may turn on or shut off the
ability for the controls screen to time out. Press the
“Controls Screen Time-Out” button on the touchscreen
until a check-mark appears next to the setting, showing
that setting has been selected. Press the back arrow
button on the touchscreen to return to the previous
menu.
4
UNDERSTANDING YOUR INSTRUMENT PANEL 341
Page 344 of 717
•Navigation Turn-By-Turn Displayed In Cluster — If
Equipped
When this feature is selected, To make your selection,
press the “Navigation Turn-By-Turn Displayed In Clus-
ter” button on the touchscreen, until a check-mark ap-
pears next to the setting, showing that setting has been
selected. Press the back arrow button on the touchscreen
to return to the previous menu.
Voice
•Voice Response Length
When in this display, you may change the Voice Re-
sponse Length settings. To change the Voice Response
Length, press the “Brief” or “Detailed” button on the
touchscreen until a check-mark appears next to the
setting, showing that setting has been selected. Press the
back arrow button on the touchscreen to return to the
previous menu.
•Show Command List
When in this display, you may choose to Always, With
Help, or Never display the Teleprompter with possible
options while in a voice session. To change the Show
Command List settings, press the “Always,” “With
Help,” or “Never” button on the touchscreen until a
check-mark appears next to the setting, showing that
setting has been selected. Press the back arrow button on
the touchscreen to return to the previous menu.
Clock
After pressing the “Clock” button on the touchscreen the
following settings will be available:
•Sync Time With GPS
This feature will allow the radio to sync time with a GPS
signal. To change the Sync Time setting, press the “Sync
342 UNDERSTANDING YOUR INSTRUMENT PANEL
Page 407 of 717
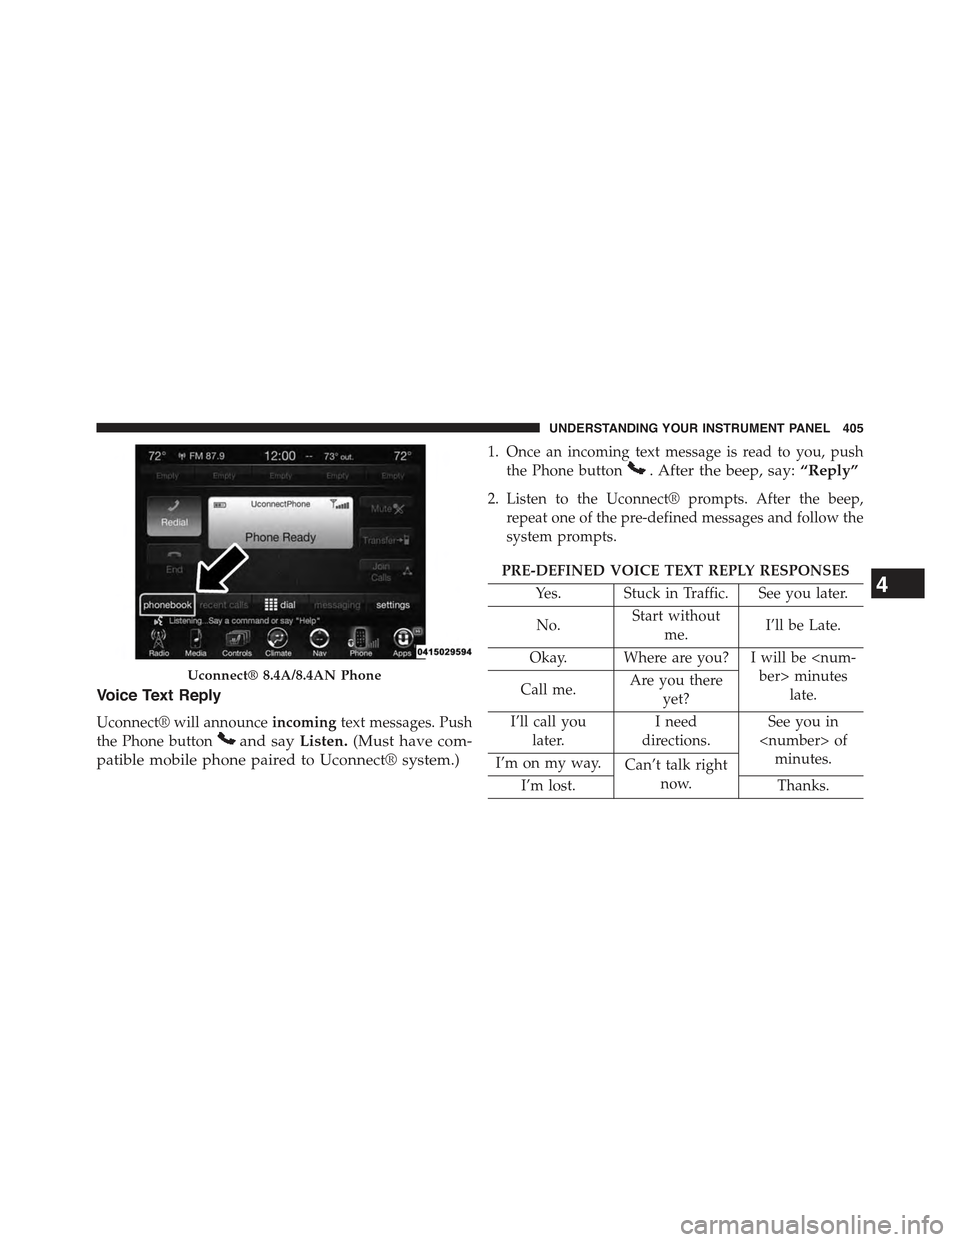
Voice Text Reply
Uconnect® will announceincomingtext messages. Push
the Phone buttonand sayListen.(Must have com-
patible mobile phone paired to Uconnect® system.)
1. Once an incoming text message is read to you, push
the Phone button. After the beep, say:“Reply”
2. Listen to the Uconnect® prompts. After the beep,
repeat one of the pre-defined messages and follow the
system prompts.
PRE-DEFINED VOICE TEXT REPLY RESPONSES
Yes. Stuck in Traffic. See you later.
No.Start without
me.I’ll be Late.
Okay. Where are you? I will be
late.Call me.Are you there
yet?
I’ll call you
later.
I need
directions.
See you in
minutes.I’m on my way.Can’t talk right
now.I’m lost.Thanks.
Uconnect® 8.4A/8.4AN Phone
4
UNDERSTANDING YOUR INSTRUMENT PANEL 405
Page 434 of 717
Gear Ranges
DO NOT race the engine when shifting from PARK or
NEUTRAL into another gear range.
NOTE:After selecting any gear range, wait a moment to
allow the selected gear to engage before accelerating.
This is especially important when the engine is cold.
PARK (P)
This range supplements the parking brake by locking the
transmission. The engine can be started in this range.
Never attempt to use PARK while the vehicle is in
motion. Apply the parking brake when leaving the
vehicle in this range.
When parking on a level surface, you may shift the
transmission into PARK first, and then apply the parking
brake.
When parking on a hill, apply the parking brake before
shifting the transmission to PARK. As an added precau-
tion, turn the front wheels toward the curb on a downhill
grade and away from the curb on an uphill grade.
NOTE:On four-wheel drive vehicles be sure that the
transfer case is in a drive position.
WARNING!
•Never use the PARK position as a substitute for the
parking brake. Always apply the parking brake
fully when parked to guard against vehicle move-
ment and possible injury or damage.
•Your vehicle could move and injure you and others
if it is not in PARK. Check by trying to move the
shift lever out of PARK with the brake pedal
released. Make sure the transmission is in PARK
before leaving the vehicle.
(Continued)
432 STARTING AND OPERATING