ECO mode KIA BORREGO 2015 Owner's Manual
[x] Cancel search | Manufacturer: KIA, Model Year: 2015, Model line: BORREGO, Model: KIA BORREGO 2015Pages: 420, PDF Size: 41.56 MB
Page 230 of 420
Features of your vehicle
156
4
Using CD Player
1. CD Slot
Please place the CD with the printed
side upward, and then gently push in.
CDP models support both 8cm and 12 cm CDs.
CDC models support only 12 cm CD.
If VCD, Data CD, DVD are loaded, "MEDIA ERROR" message will appear and the CD will eject.
2. CD Eject Button
Press this button to eject the CD during CD playback.
If there is no CD in the deck, "NO DISC" will be displayed for 5 seconds
and returns to the previous mode.
❈ ALL EJECT(CDC ONLY)
Press this button for more than 0.8 second to eject all discs inside the
decks in the respective order. 3. RANDOM Button
Press this button for less than 0.8 second
to activate 'RDM' mode and more than
0.8 second to activate 'ALL RDM' mode.
RDM : Only files/tracks in a folder/disc
are played in random sequence.
ALL RDM (MP3/WMA Only) : All files /tracks in a folder/disc are played in
random sequence.
4. TRACK Button
Press [TRACK ] to return to the beginning of the current track(file).
Press again within 1 seconds to return
to the previous track(file).
Press and hold [TRACK ] to initiate rewind search.
Press [SEEK ] for less than 0.8 sec- ond to advance the next track(file).
Press and hold [SEEK ] to initiate fast forward search. 5. REPEAT Button
Press this button for less than 0.8 second
to activate 'RPT' mode and more than 0.8
second to activate 'FLD RPT' mode.
RPT : Only a track(file) is played
repeatedly.
FLD RPT(MP3/WMA Only) : Only files in a folder are played repeatedly.
6. SCROLL Button
File names are scrolled for 5 seconds on
the display.
7. CD Indicator(CD Player:PA910HMGB)
When the ignition switch is in the ACCor ON position and if the CD is loaded,this indicator is illuminated.
8. CD Button
If the CD is loaded, turns to CD mode.
If there is no Disc in the deck, it dis- plays "NO DISC" for 5 seconds and
returns to the previous mode.
9. SCAN Button
Plays back the first 10 seconds of each
song in the CD.
CAUTION
Don’t insert a CD, if CD indicator is illuminated in the CDP.
Page 232 of 420
Features of your vehicle
158
4
CAUTION IN USING
USB DEVICE
To use an external USB device, make sure the device is not con-nected when starting up the vehi-cle. Connect the device afterstarting up.
If you start the engine when the USB device is connected, it maydamage the USB device. (USBflashdrives are very sensitive to
electric shock.)
If the engine is started up or turned off while the external USBdevice is connected, the externalUSB device may not work.
It may not play inauthentic MP3 or WMA files.
1) It can only play MP3 files with the compression rate between8Kbps~320Kbps.
2) It can only play WMA music files with the compression ratebetween 8Kbps~320Kbps.
Take precautions for static electrici- ty when connecting or disconnect-ing the external USB device.
(Continued)
(Continued) An encrypted MP3 PLAYER is not recognizable.
Depending on the condition of the external USB device, the con-
nected external USB device can be unrecognizable.
When the formatted byte/sector setting of External USB device isnot either 512BYTE or 2048BYTE,
then the device will not be recog- nized.
Use only a USB device formatted to FAT 12/16/32.
USB devices without USB I/F authentication may not be recog-nizable.
Make sure the USB connection terminal does not come in contactwith the human body or other
objects.
If you repeatedly connect or dis- connect the USB device in a shortperiod of time, it may break thedevice.
You may hear a strange noise when connecting or disconnect-ing a USB device.
(Continued)(Continued) If you disconnect the external USB device during playback in USBmode, the external USB device canbe damaged or may malfunction.
Therefore, disconnect the externalUSB device when the audio is turned off or in another mode. (e.g,
Radio or CD)
Depending on the type and capac- ity of the external USB device orthe type of the files stored in thedevice, there is a difference in the
time taken for recognition of thedevice.
Do not use the USB device for pur- poses other than playing musicfiles.
Use of USB accessories such as rechargers or heaters using USBI/F may lower performance orcause trouble.
If you use devices such as a USB hub purchased separately, thevehicle’s audio system may not recognize the USB device. In thatcase, connect the USB device
directly to the multimedia termi- nal of the vehicle.
(Continued)
Page 236 of 420
Features of your vehicle
162
4
Using USB device
1. RANDOM Button
Press this button for less than 0.8 second
to activate 'RDM' mode and more than
0.8 second to activate 'ALL RDM' mode.
RDM : Only files in a folder are played
back in random sequence.
ALL RDM : All files in a USB memory are played back in random sequence.
2. TRACK Button
Press [TRACK ] to return to the beginning of the current file.
Press again within 1 seconds to return
the previous file.
Press and hold [TRACK ] to initiate rewind search.
Press [TRACK ] for less than 0.8 second to advance the next file.
Press and hold [TRACK ] to initiate fast forward search. 3. REPEAT Button
Press this button for less than 0.8 second
to activate 'RPT' mode and more than
0.8 second to activate 'FLD RPT' mode.
RPT : Only a file is played repeatedly.
FLD RPT : Only files in a folder are
played repeatedly.
4. SCROLL Button
File names are scrolled for 5 seconds on
the display.
5. AUX/USB Button
If auxiliary device/USB/ is connected, it turns to USB/AUX mode and toggles
as below when the button is pressed
each time.
AUX/USB : AUX ➟USB ➟AUX...
If no auxiliary device and USB is con- nected, it displays "No Media" for 5
seconds and returns to the previous
mode. 6. INFO(INFORMATION) Button
Displays the information of the current
CD TRACK(FILE) as below when the
button is pressed each time. FILE NAME
➟TITLE ➟ARTIST ➟ALBUM
➟ FOLDER NAME ➟TOTAL FILE...
7. TUNE Knob & ENTER Button
Turn this knob clockwise to display the File name after the current song.
Turn this knob counterclockwise to dis- play the File name before the current song.
To select the displayed song, press the button.
8. FOLDER Button
Folder name/File name(the first song in the folder) is moved up or down from
currently playing folder.
To select the displayed folder, press ENTER(NO.6) button.
9. SCAN Button
Plays back the first 10 seconds of each
song in the USB memory.
Page 237 of 420
4163
Features of your vehicle
Using iPod®
1. RANDOM Button
Press this button for less than 0.8 second
to activate ' ' mode and more than 0.8
second to activate ''mode.
'' : All songs in the current catego-
ry are played in random.
'' : An album in the iPod is selected
in random and is played in the order of
the songs in the album.
2. TRACK Button
Press [TRACK ] to return to the beginning of the current file.
Press again within 1 second to return
the previous file.
Press and hold [TRACK ] to initiate rewind search.
Press [TRACK ] for less than 0.8 second to advance to the next file.
Press and hold [TRACK ] to initiate fast forward search.
3. REPEAT Button
A single song is played repeatedly. 4. SCROLL Button
File names are scrolled for 5 seconds on
the display.
5. AUX/USB Button (iPod)
If iPod is connected, it turns to iPod mode.
6. INFO(INFORMATION) Button
Displays the information of the file cur-
rently played as below when the button is
pressed each time. TITLE
➟
ARTIST ➟ALBUM...
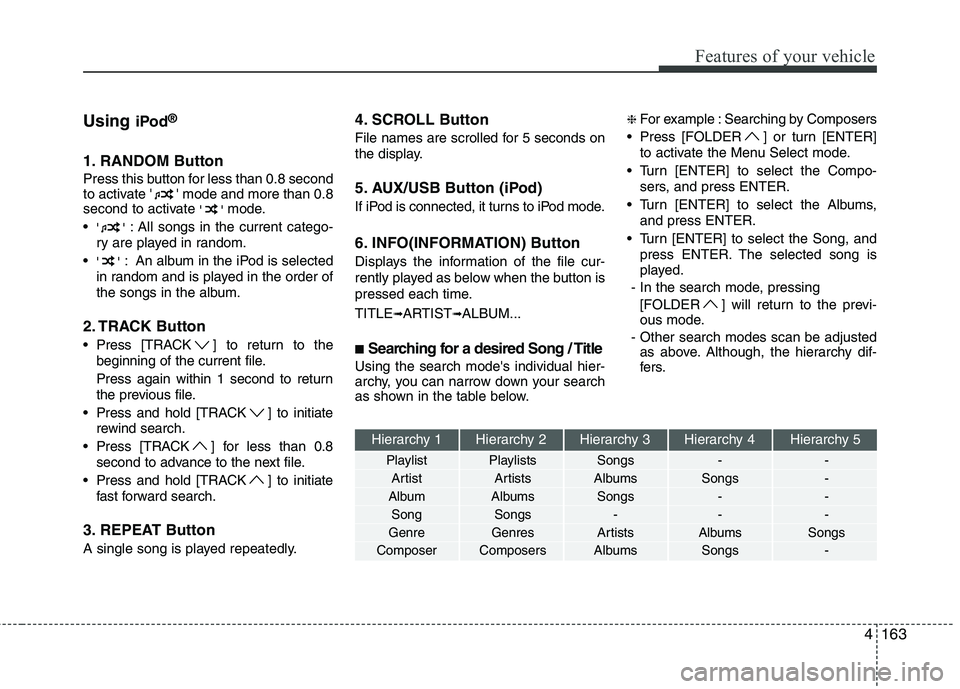
■ Searching for a desired Song / Title
Using the search mode's individual hier-
archy, you can narrow down your search
as shown in the table below. ❈
For example : Searching by Composers
Press [FOLDER ] or turn [ENTER] to activate the Menu Select mode.
Turn [ENTER] to select the Compo- sers, and press ENTER.
Turn [ENTER] to select the Albums, and press ENTER.
Turn [ENTER] to select the Song, and press ENTER. The selected song is
played.
- In the search mode, pressing [FOLDER ] will return to the previ-
ous mode.
- Other search modes scan be adjusted as above. Although, the hierarchy dif-
fers.
Hierarchy 1 Hierarchy 2 Hierarchy 3 Hierarchy 4 Hierarchy 5
Playlist Playlists Songs - -
Artist Artists Albums Songs -
Album Albums Songs - - Song Songs - - -
Genre Genres Artists Albums Songs
Composer Composers Albums Songs -
Page 242 of 420
Features of your vehicle
168
4
✽✽
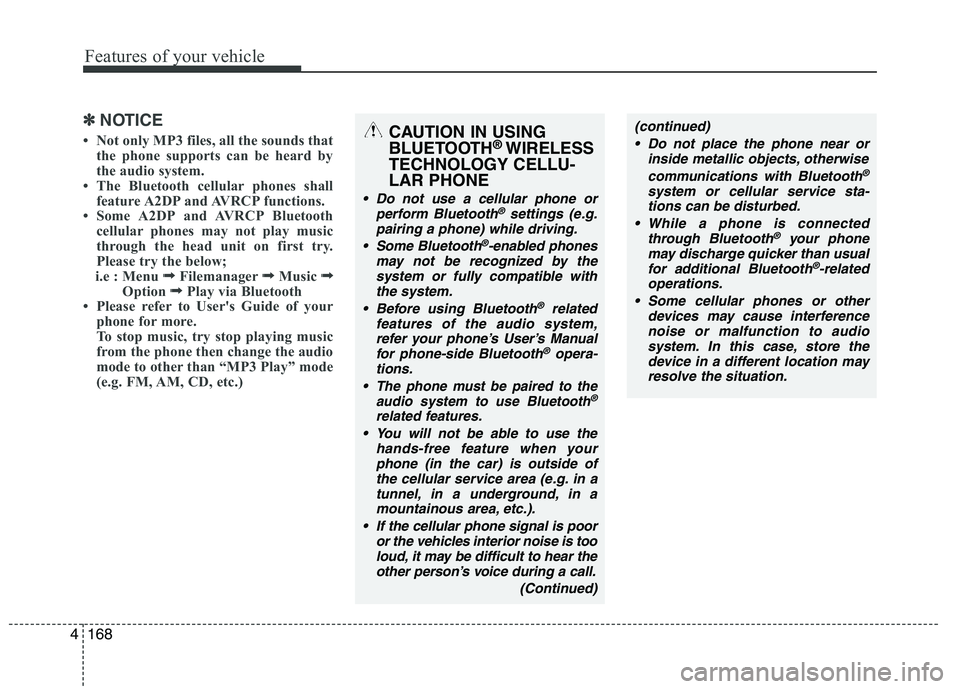
NOTICE
Not only MP3 files, all the sounds that the phone supports can be heard by
the audio system.
The Bluetooth cellular phones shall feature A2DP and AVRCP functions.
Some A2DP and AVRCP Bluetooth cellular phones may not play music
through the head unit on first try.
Please try the below;
i.e : Menu ➟
➟
Filemanager ➟➟
Music ➟➟
Option ➟➟
Play via Bluetooth
Please refer to User's Guide of your
phone for more.
To stop music, try stop playing music
from the phone then change the audio
mode to other than “MP3 Play” mode
(e.g. FM, AM, CD, etc.)
CAUTION IN USING
BLUETOOTH ®
WIRELESS
TECHNOLOGY CELLU-LAR PHONE
Do not use a cellular phone or perform Bluetooth®settings (e.g.
pairing a phone) while driving.
Some Bluetooth
®-enabled phones
may not be recognized by the system or fully compatible withthe system.
Before using Bluetooth
®related
features of the audio system, refer your phone’s User’s Manual for phone-side Bluetooth
®opera-
tions.
The phone must be paired to the audio system to use Bluetooth®
related features.
You will not be able to use the
hands-free feature when yourphone (in the car) is outside of
the cellular service area (e.g. in atunnel, in a underground, in a mountainous area, etc.).
If the cellular phone signal is poor or the vehicles interior noise is tooloud, it may be difficult to hear theother person’s voice during a call.
(Continued)
(continued) Do not place the phone near or inside metallic objects, otherwise
communications with Bluetooth
®
system or cellular service sta-tions can be disturbed.
While a phone is connected through Bluetooth
®your phone
may discharge quicker than usual for additional Bluetooth
®-related
operations.
Some cellular phones or other devices may cause interferencenoise or malfunction to audio
system. In this case, store thedevice in a different location may resolve the situation.
Page 250 of 420

Driving your vehicle
8
5
E040000BUN-EU E040100CHM
Starting the engine with an igni-
tion key (if equipped)
Gasoline engine
1. Make sure the parking brake is
applied.
2. Place the transmission shift lever in P (Park). Depress the brake pedal fully.
You can also start the engine when
the shift lever is in the N (Neutral) position.
3. Turn the ignition switch to START and hold it there until the engine starts (a
maximum of 10 seconds), then
release the key.
4. Do not wait for the engine to warm up while the vehicle remains stationary.
Start driving at moderate engine
speeds. (Steep accelerating and decel-
erating should be avoided.)
It should be started without depressing
the accelerator.
Diesel engine
To start the diesel engine when the engine is cold, it has to be pre-heated
before starting the engine and then have
to be warmed up before starting to drive.
1. Make sure the parking brake is applied.
2. Place the transmission shift lever in P(park). Depress the brake pedal fully.
You can also start the engine when the
shift lever is in the N(neutral) position.
STARTING THE ENGINE
WARNING
Always wear appropriate shoes when operating your vehicle.
Unsuitable shoes (high heels, ski
boots,etc.) may interfere with
your ability to use the brake andaccelerator pedal.
Do not start the vehicle with the accelerator pedal depressed. The
vehicle can move and lead to anaccident.
Wait until the engine rpm is nor- mal. The vehicle may suddenly
move if the brake padel isreleased when the rpm is high.
CAUTION
If the engine stalls while the vehicle
is in motion, do not attempt to movethe shift lever to the P (Park) posi-tion. If the traffic and road conditionspermit, you may put the shift lever in
the N (Neutral) position while thevehicle is still moving and turn theignition switch to the START positionin an attempt to restart the engine.
CAUTION
Do not engage the starter for more than 10 seconds. If the
engine stalls or fails to start, wait 5 to 10 seconds before re-engag-ing the starter. Improper use ofthe starter may damage it.
Do not turn the ignition switch to the START position with theengine running. It may damage the starter.
Page 251 of 420

59
Driving your vehicle
3. Turn the ignition switch to the ON posi-tion to pre-heat the engine. Then the
glow indicator light will illuminate.
4. If the glow indicator light goes out, turn the ignition switch to the START posi-tion and hold it there until the engine
starts (a maximum of 10 seconds),
then release the key.
✽✽
NOTICE
If the engine does not start within 10
seconds after the preheating is complet-
ed, turn the ignition switch once more to
the LOCK position for 10 seconds, and
then to the ON position, in order to pre-
heat again.
Starting and stopping the engine for tur-
bocharger intercooler
1. Do not race or accelerate the engine immediately after starting.
If the engine is cold, idle for several
seconds before sufficient lubrication isensured in the turbocharger unit.
2. After high speed or extended driving, requiring a heavy engine load, idle the
engine about 1 minute before turning it
off.
This idle time will allow the tur- bocharger to cool prior to shutting the
engine off. E040300CHM
Starting the engine with a smart
key (if equipped)
Gasoline engine
1. Carry the smart key or leave it inside
the vehicle.
2. Make sure the parking brake is firmly applied
3. Place the transmission shift lever in P (Park).
4. Press the ENGINE START/STOP but- ton while depressing the brake pedal.
5. Do not wait for the engine to warm up while the vehicle remains stationary.
Start driving at moderate engine
speeds. (Steep accelerating and
decelerating should be avoided.)
It should be started without depressing
the accelerator.
W-60
Glow indicator light
CAUTION
Do not turn the engine off immedi- ately after it has been subjected toa heavy load. Doing so may causesevere damage to the engine or tur-
bocharger unit.
OHM058033
Page 256 of 420

Driving your vehicle
14
5
R (Reverse)
Use this position to drive the vehicle
backward. N (Neutral)
The wheels and transmission are not
engaged. The vehicle will roll freely even
on the slightest incline unless the parking
brake or service brakes are applied.
D (Drive)
This is the normal forward driving posi-
tion. The transmission will automatically
shift through a 5 (6 or 8) -gear sequence,
providing the best fuel economy and
power.
For extra power when passing another
vehicle or climbing grades, depress the
accelerator fully, at which time the trans-
mission will automatically downshift to
the next lower gear.
✽✽
NOTICE
Always come to a complete stop before
shifting into D (Driving).
Sports mode
Whether the vehicle is stopped or in
motion, sports mode is selected by push-
ing the shift lever from the D (Drive) posi-
tion into the manual gate. To return to the
D (Drive) range operation, push the shift
lever back into the main gate.
In sports mode, moving the shift lever
backwards and forwards will allow you to
make gearshifts rapidly. In contrast to a
manual transmission, the sports mode
allows gearshifts with the acceleratorpedal depressed.
Up (+) : Push the lever forward once to shift up one gear.
Down (-) : Pull the lever backwards once to shift down one gear.
CAUTION
The transmission may be damaged
if you shift into P (Park) while the
vehicle is in motion.
CAUTION
Always come to a complete stopbefore shifting into or out of R(Reverse); you may damage the transmission if you shift into R(Reverse) while the vehicle is in
motion, except when “Rocking thevehicle” explained in this section.OHM058005L
+ (UP)
- (DOWN)
Sports modeWARNING
Do not drive with the shift lever in N (Neutral).
The engine brake will not work and lead to an accident.
Page 260 of 420

Driving your vehicle
18
5
FOUR WHEEL DRIVE (4WD) (IF EQUIPPED)
E170000AHM
Engine power can be delivered to all front
and rear wheels for maximum traction.
4WD is useful when extra traction is
required on road, such as, when driving
on slippery, muddy, wet, or snow-covered
roads. These vehicles are not designed
for challenging off-road use. Occasional
off-road use such as established
unpaved roads and trails are OK. It is
always important when traveling off-high-
way that the driver carefully reduces the
speed to a level that does not exceed the
safe operating speed for those condi-
tions. In general, off-road conditions pro-
vide less traction and braking effective-
ness than normal road conditions. The
driver must be especially alert to avoid
driving on slopes which tilt the vehicle to
either side.
These factors must be carefully consid-
ered when driving off-road. Keeping the
vehicle in contact with the driving surfaceand under control in these conditions is
always the driver's responsibility for the
safety of him/herself and his or her pas-
sengers. E170201AHM
Tight corner brake effect
Tight corner brake effect is a unique
characteristic of four-wheel drive vehicles
caused by the difference in tire rotation at
the four wheels and the zero-degreealignment of the front wheels and sus-pension.
Sharp turns at low speeds should be car-
ried out with caution.
WARNING
- Off road driving
This vehicle is designed primarily
for on road use although it can oper-
ate effectively off road. However, it
was not designed to drive in chal-
lenging off-road conditions. Driving
in conditions that exceed the vehi-
cle's intended design or the driver's
experience level may result in
severe injury or death.
CAUTION - 4WD
When turning sharply on a paved
road at low speed while in four-wheel drive (4L mode for full-time 4WD operation or 4L/4H mode for
part-time 4WD operation), steering control will be difficult.
CAUTION
Do not select four wheel drive on flat and normal roads.
Four-wheel driving on flat roads for a long period causes poor fueleconomy and noise and it alsocauses tires to wear faster.
Four-wheel driving on flat and normal roads can result in asevere binding and chatteringcondition when turning the steer- ing wheel.
Four-wheel driving on flat roads for a long period can also causethe differential oil temperature to increase, resulting in damage toparts in the power train.
Page 261 of 420

519
Driving your vehicle
Transfer mode Shift knob Indicator light Description
This mode is used when driving on normal roads and highway.
This mode is used when driving on slippery roads such as
snowy and rainy roads at normal speed.
Maximum speed: 80 km/h (50 mph)This mode is used when increased traction is required, such as
climbing or descending hills, driving off-roads, and towing a
vehicle.
Maximum speed: 40 km/h (25 mph)
44 WW DD
H
H II
4WD
HI
4WD
LOW
44 WW DD
L
L OO WW2H
(Rear-wheel drive)
4H
(High-speed
4-wheel drive)
4L
(Low-speed
4-wheel drive) (not illuminated)
✽✽
NOTICE
4WD transfer has a time delay for a few seconds until the actual shift is made after turning the transfe r shift knob.
When the 4WD transfer mode is shifted, it may cause mechanical noise. It is not a mechanical failur e but a normal condition.
E170800AHM
Part-Time 4WD (if equipped)
CAUTION
When you stop the vehicle to transfer the shift knob, wait until the corresponding indicator light turns on or off to
depart. If the vehicle moves before the transfer is completed, the vehicle may be damaged.
(illuminated)
(illuminated)