window KIA CADENZA 2020 User Guide
[x] Cancel search | Manufacturer: KIA, Model Year: 2020, Model line: CADENZA, Model: KIA CADENZA 2020Pages: 560, PDF Size: 11.37 MB
Page 112 of 560
Features of your vehicle
30 4
Power windows
The ENGINE START/STOP button
must be in the ON position for power
windows to operate. Each door has a
power window switch that controls the
door’s window. The driver has a power
window lock switch which can block
the operation of rear passenger win-
dows.
The power windows can be operated
for approximately 30 seconds after
engine is turned off. However, if the
front doors are opened, the power
windows cannot be operated even
within the 30 second period.
If the window cannot be closed
because it is blocked by objects,
remove the objects and close the
window.
✽ ✽
NOTICE
While driving with the rear windows
down or with the sunroof in an open
(or partially open) position, your
vehicle may demonstrate a wind
buffeting or pulsation noise. This
noise is a normal occurrence and
can be reduced or eliminated by tak-
ing the following actions. If the noise
occurs with one or both of the rear
windows down, partially lower both
front windows approximately one
inch (2.5 cm). If you experience the
noise with the sunroof open, slightly
reduce the size of the sunroof open-
ing.
Window opening and closing
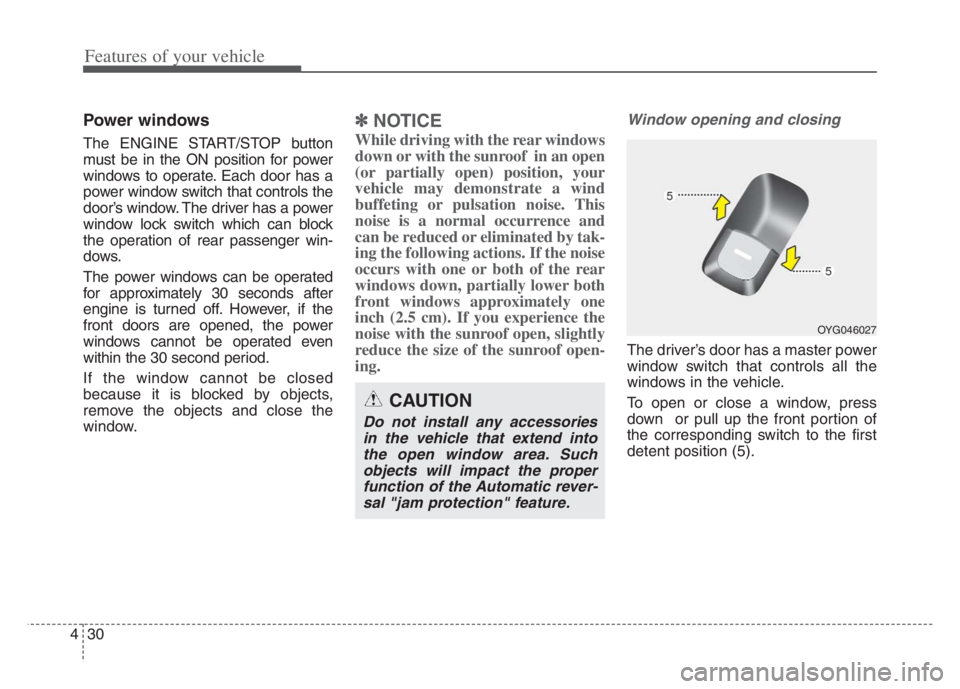
The driver’s door has a master power
window switch that controls all the
windows in the vehicle.
To open or close a window, press
down or pull up the front portion of
the corresponding switch to the first
detent position (5).
OYG046027
CAUTION
Do not install any accessories
in the vehicle that extend into
the open window area. Such
objects will impact the proper
function of the Automatic rever-
sal "jam protection" feature.
Page 113 of 560
431
Features of your vehicle
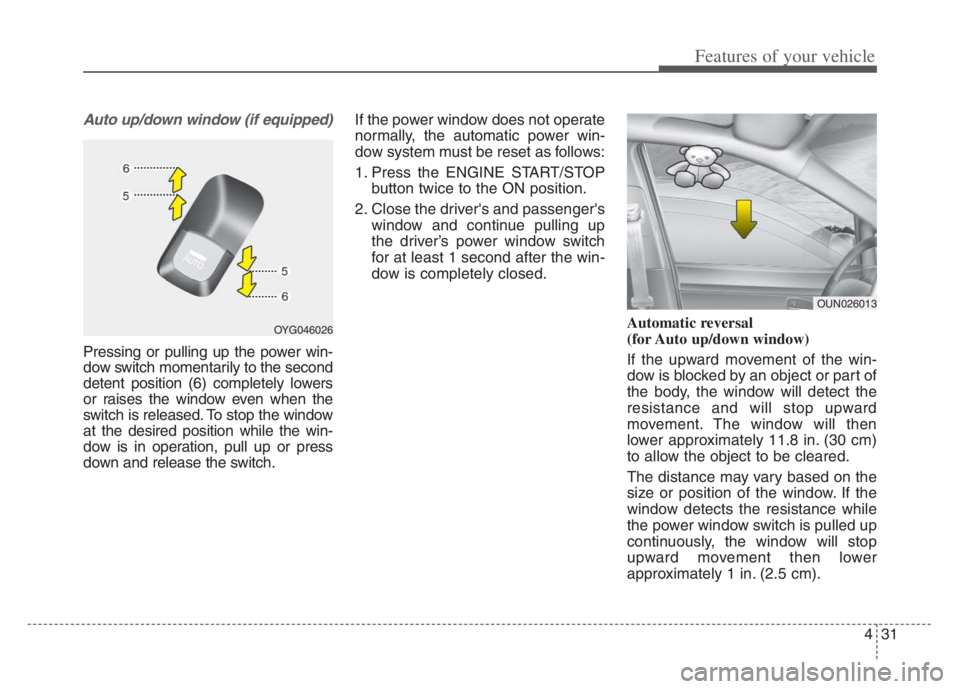
Auto up/down window (if equipped)
Pressing or pulling up the power win-
dow switch momentarily to the second
detent position (6) completely lowers
or raises the window even when the
switch is released. To stop the window
at the desired position while the win-
dow is in operation, pull up or press
down and release the switch.If the power window does not operate
normally, the automatic power win-
dow system must be reset as follows:
1. Press the ENGINE START/STOP
button twice to the ON position.
2. Close the driver's and passenger's
window and continue pulling up
the driver’s power window switch
for at least 1 second after the win-
dow is completely closed.
Automatic reversal
(for Auto up/down window)
If the upward movement of the win-
dow is blocked by an object or part of
the body, the window will detect the
resistance and will stop upward
movement. The window will then
lower approximately 11.8 in. (30 cm)
to allow the object to be cleared.
The distance may vary based on the
size or position of the window. If the
window detects the resistance while
the power window switch is pulled up
continuously, the window will stop
upward movement then lower
approximately 1 in. (2.5 cm).
OUN026013
OYG046026
Page 114 of 560
Features of your vehicle
32 4
If the power window switch is pulled
up continuously again within 5 sec-
onds after the window is lowered by
the automatic window reversal fea-
ture, the automatic window reversal
will not operate.
The automatic reverse feature is only
active when the “auto up” feature is
used by fully pulling up the switch.
The automatic reverse feature will
not operate if the window is raised
using the halfway position on the
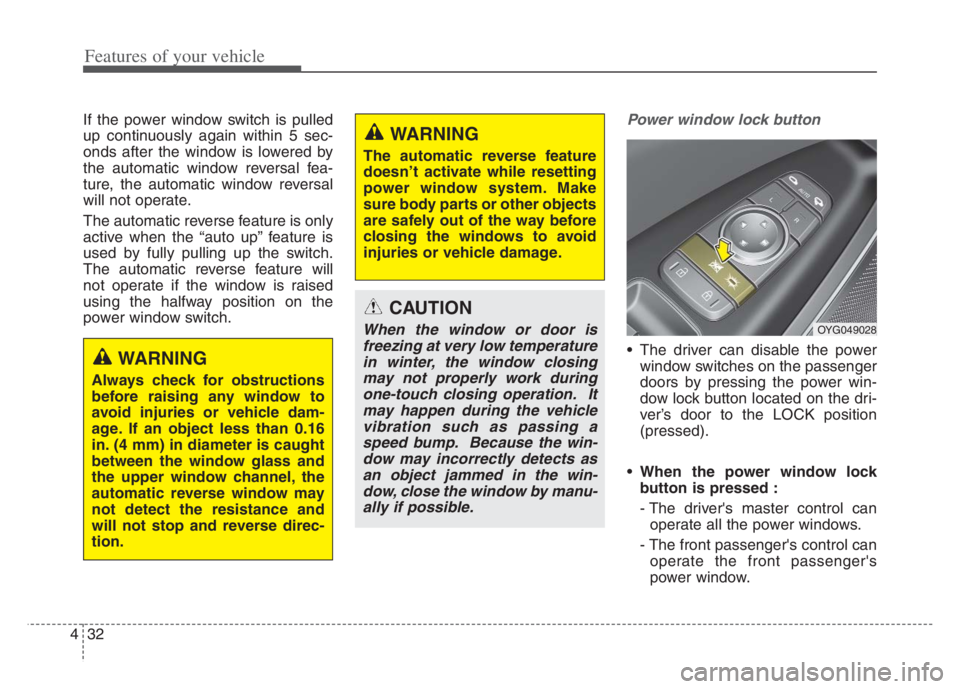
power window switch.Power window lock button
The driver can disable the power
window switches on the passenger
doors by pressing the power win-
dow lock button located on the dri-
ver’s door to the LOCK position
(pressed).
When the power window lock
button is pressed :
- The driver's master control can
operate all the power windows.
- The front passenger's control can
operate the front passenger's
power window.
OYG049028
WARNING
Always check for obstructions
before raising any window to
avoid injuries or vehicle dam-
age. If an object less than 0.16
in. (4 mm) in diameter is caught
between the window glass and
the upper window channel, the
automatic reverse window may
not detect the resistance and
will not stop and reverse direc-
tion.
WARNING
The automatic reverse feature
doesn’t activate while resetting
power window system. Make
sure body parts or other objects
are safely out of the way before
closing the windows to avoid
injuries or vehicle damage.
CAUTION
When the window or door is
freezing at very low temperature
in winter, the window closing
may not properly work during
one-touch closing operation. It
may happen during the vehicle
vibration such as passing a
speed bump. Because the win-
dow may incorrectly detects as
an object jammed in the win-
dow, close the window by manu-
ally if possible.
Page 115 of 560

433
Features of your vehicle
- The rear passenger's control can-
not operate the rear passenger's
power window.
Always double check to make sure
all arms, hands, head and other
obstructions are safely out of the way
before closing a window.
CAUTION- Opening /clos-
ing Window
To prevent possible damage to
the power window system, do
not open or close two windows
or more at the same time. This
will also ensure the longevity of
the fuse.
WARNING- Power win-
dows
Do not allow children to play
with the power windows. Keep
the power window lock button
(on the driver's door) in the
LOCK (pressed) position.
Page 133 of 560
451
Features of your vehicle
MIRRORS
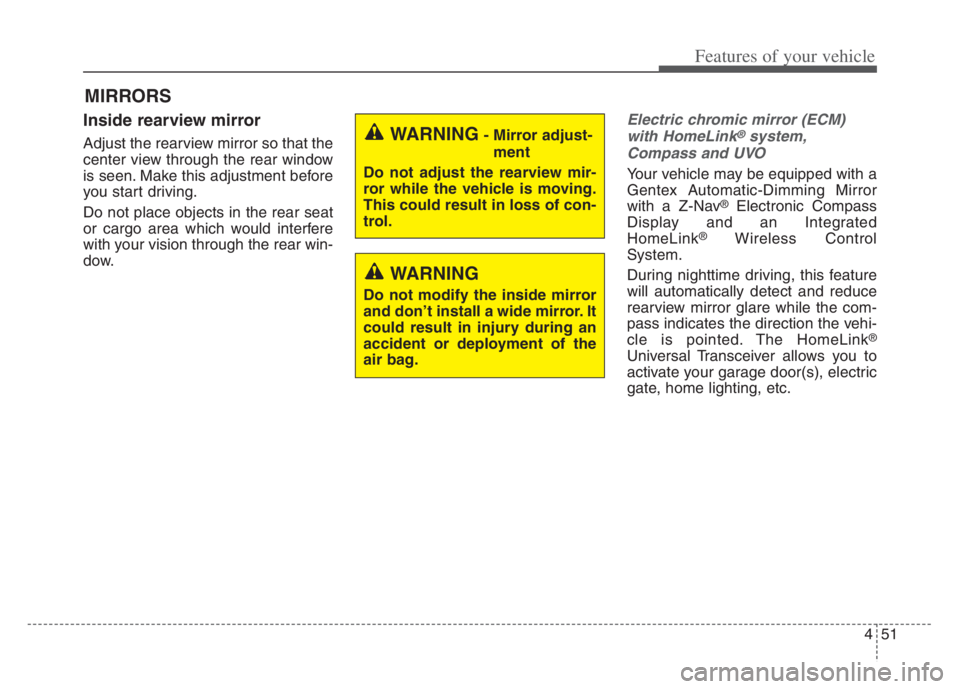
Inside rearview mirror
Adjust the rearview mirror so that the
center view through the rear window
is seen. Make this adjustment before
you start driving.
Do not place objects in the rear seat
or cargo area which would interfere
with your vision through the rear win-
dow.
Electric chromic mirror (ECM)
with HomeLink®system,
Compass and UVO
Your vehicle may be equipped with a
Gentex Automatic-Dimming Mirror
with a Z-Nav
®Electronic Compass
Display and an Integrated
HomeLink
®Wireless Control
System.
During nighttime driving, this feature
will automatically detect and reduce
rearview mirror glare while the com-
pass indicates the direction the vehi-
cle is pointed. The HomeLink
®
Universal Transceiver allows you to
activate your garage door(s), electric
gate, home lighting, etc.
WARNING- Mirror adjust-
ment
Do not adjust the rearview mir-
ror while the vehicle is moving.
This could result in loss of con-
trol.
WARNING
Do not modify the inside mirror
and don’t install a wide mirror. It
could result in injury during an
accident or deployment of the
air bag.
Page 135 of 560
453
Features of your vehicle
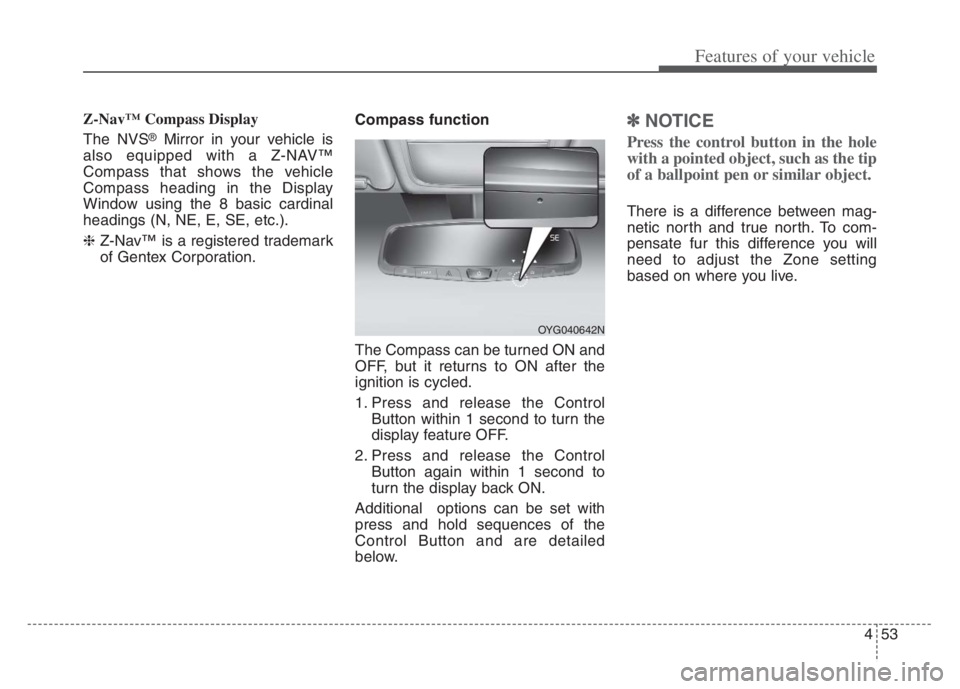
Z-Nav™ Compass Display
The NVS
®Mirror in your vehicle is
also equipped with a Z-NAV™
Compass that shows the vehicle
Compass heading in the Display
Window using the 8 basic cardinal
headings (N, NE, E, SE, etc.).
❈Z-Nav™ is a registered trademark
of Gentex Corporation.Compass function
The Compass can be turned ON and
OFF, but it returns to ON after the
ignition is cycled.
1. Press and release the Control
Button within 1 second to turn the
display feature OFF.
2. Press and release the Control
Button again within 1 second to
turn the display back ON.
Additional options can be set with
press and hold sequences of the
Control Button and are detailed
below.
✽ ✽
NOTICE
Press the control button in the hole
with a pointed object, such as the tip
of a ballpoint pen or similar object.
There is a difference between mag-
netic north and true north. To com-
pensate fur this difference you will
need to adjust the Zone setting
based on where you live.
OYG040642N
Page 199 of 560

4117
Features of your vehicle
High beam operation
To turn on the high beam headlamp,
push the lever away from you. The lever
will return to its original position. The
high beam indicator will light when the
headlight high beams are switched on.
To turn off the high beam headlamps,
pull the lever towards you. It will return
to the normal (low beam) position
when released.
To prevent the battery from being
discharged, do not leave the lights
on for a prolonged time while the
engine is not running.
WARNING - High beams
Do not use high beam when
there are other vehicles in front
of your vehicle. Using high
beam could obstruct the other
driver’s vision.
OYG040637N
CAUTION
Never place anything over the
sensor (1) located on the
instrument panel, this will
ensure better auto-light sys-
tem control.
Don’t clean the sensor using a
window cleaner, the cleaner
may leave a light film which
could interfere with sensor
operation.
Page 202 of 560
Features of your vehicle
120 4
The driver must be cautious in the
below situations may not work prop-
erly when recognition of light from
on-coming or front vehicle is poor or
limited :
When the light from on-coming or
front vehicle is poor
- When the light from the on-com-
ing or front vehicle is not detected
because of lamp damage, hidden
from sight, etc.
- When the lamp of the on-coming
or front vehicle is covered with
dust, snow or water.
- When the front vehicle’s head-
lamps are off but the fog lamps
on and etc.
When external condition is inter-
vened
- When there is a similar shape
lamp with the front vehicle’s
lamps.
- When the headlamp is not
repaired or replaced at an author-
ized dealer.- When headlamp aiming is not
properly adjusted.
- When driving on a narrow curved
road, rough road, downhill or
uphill.
- When only part of the vehicle in
front is visible on a crossroad or
curved road.
- When there is a traffic light,
reflecting sign, flashing sign or
mirror ahead.
- When there is a temporary reflec-
tor or flash ahead (construction
area).
- When the road conditions are bad
such as being wet, iced or cov-
ered with snow.
- When a vehicle suddenly
appears from a curve.
- When the vehicle is tilted from a
flat tire or being towed.
- When Lane Keeping Assist failure
indicator (yellow) illuminates (if
equipped) and etc.When front visibility is poor
- When the lamp of the on-coming
or front vehicle is covered with
dust, snow or water.
- When the light from the on-com-
ing or front vehicle is not detected
because of exhaust fume, smoke,
fog, snow, etc.
- When the front window is covered
with foreign matters.
- When it is hard to see because of
fog, heavy rain or snow and etc.
- The system may not work around
15 seconds after starting the
vehicle or the initialization or
rebooting of the front vehicle
camera.
- Do not disassemble a front view
camera temporarily for tinted win-
dow or attaching any types of
coatings and accessories. If you
disassemble the camera and
assemble it again, take your vehi-
cle to an authorized Kia dealer
and have the system checked to
need a calibration.
Page 214 of 560

Features of your vehicle
132 4
If you want to defrost and defog the
front windshield, refer to “Windshield
defrosting and defogging” in this sec-
tion.
Rear window defroster
The defroster heats the window to
remove frost, fog and thin ice from
the rear window, while the engine is
running.To activate the rear window
defroster, press the rear window
defroster button located in the center
facia switch panel. The indicator on
the rear window defroster button illu-
minates when the defroster is ON.
If there is heavy accumulation of
snow on the rear window, brush it off
before operating the rear defroster.
The rear window defroster automati-
cally turns off after approximately 20
minutes or when the Engine
Start/Stop button is turned off. To turn
off the defroster, press the rear win-
dow defroster button again.
Outside rearview mirror defroster
If your vehicle is equipped with the
outside rearview mirror defrosters,
they will operate at the same time you
turn on the rear window defroster.
Wiper deicer (if equipped)
If your vehicle is equipped with the
wiper deicer, it will operate when you
turn on the rear window defroster.
DEFROSTER
CAUTION - Conductors
To prevent damage to the con-
ductors bonded to the inside
surface of the rear window,
never use sharp instruments or
window cleaners containing
abrasives to clean the window.
OYG049342
Page 215 of 560

4133
Features of your vehicle
AUTOMATIC CLIMATE CONTROL SYSTEM
OYG040345N/OYG040616N
System Overview
1. Front windshield defroster button
2. Rear window defroster button
3. SYNC temperature control selection button
4. Passenger's temperature control button
5. Driver’s temperature control button
6. AUTO (automatic control) button
7. OFF button
8. Air conditioning button
9. Fan speed control button
10. Mode selection button
11. Air intake control button
12. Climate information screen selection but-
ton
■ ■
Type B
■ ■
Type A
CAUTION
Operating the blower when the
Engine Start/Stop button is in
the ON position could cause the
battery to discharge. Operate
the blower when the engine is
running.