stop start KIA K900 2020 Manual Online
[x] Cancel search | Manufacturer: KIA, Model Year: 2020, Model line: K900, Model: KIA K900 2020Pages: 593, PDF Size: 14.99 MB
Page 446 of 593
What to do in an emergency
46
IF THE ENGINE WILL NOT START
If engine doesn't turn over or
turns over slowly
1. Be sure the shift lever is in N(Neutral) or P (Park) and the
emergency brake is set.
2. Check the battery connections to be sure they are clean and tight.
3. Turn on the interior light. If the light dims or goes out when you oper-
ate the starter, the battery is dis-
charged.
4. Check the starter connections to be sure they are securely tight-
ened.
5. Do not push or pull the vehicle to start it. See instructions for "Jump
starting".
If engine turns over normally
but does not start
1. Check the fuel level.
2. With the Engine Start/Stop Buttonin the OFF position, check all con-
nectors at the ignition coils and
spark plugs. Reconnect any that
may be disconnected or loose.
3. Check the fuel line in the engine compartment.
4. If the engine still does not start, call an authorized K900 Kia dealer
or seek other qualified assistance.
WARNING - Push/
pull start
Do not push or pull the vehicle
to start it. Push or pull starting
may cause the catalytic con-
verter to overload and create a
fire hazard.
Page 451 of 593
69
What to do in an emergency
Each tire, including the spare (if pro-
vided), should be checked monthly
when cold and inflated to the inflation
pressure recommended by the vehi-
cle manufacturer on the vehicle plac-
ard or tire inflation pressure label. (If
your vehicle has tires of a different
size than the size indicated on the
vehicle placard or tire inflation pres-
sure label, you should determine the
proper tire inflation pressure for
those tires.)
As an added safety feature, your
vehicle has been equipped with a tire
pressure monitoring system (TPMS)
that illuminates a low tire pressure
indicator when one or more of your
tires is significantly under-inflated.
Accordingly, when the low tire pres-
sure telltale illuminates, you should
stop and check your tires as soon as
possible, and inflate them to the
proper pressure. Driving on a signifi-
cantly under-inflated tire causes the
tire to overheat and can lead to tire
failure. Under-inflation also reduces
fuel efficiency and tire tread life, and
may affect the vehicle’s handling and
stopping ability.Please note that the TPMS is not a
substitute for proper tire maintenance,
and it is the driver’s responsibility to
maintain correct tire pressure, even if
under-inflation has not reached the
level to trigger illumination of the
TPMS low tire pressure telltale.
Your vehicle has also been equipped
with a TPMS malfunction indicator to
indicate when the system is not
operating properly. The TPMS mal-
function indicator is combined with
the low tire pressure telltale. When
the system detects a malfunction,
the telltale will flash for approximate-
ly one minute and then remain con-
tinuously illuminated. This sequence
will continue upon subsequent vehi-
cle start-ups as long as the malfunc-
tion exists. When the malfunction
indicator is illuminated, the system
may not be able to detect or signal
low tire pressure as intended. TPMS
malfunctions may occur for a variety
of reasons, including the installation
of replacement or alternate tires or
wheels on the vehicle that prevent
the TPMS from functioning properly.
Always check the TPMS malfunction
telltale after replacing one or more
tires or wheels on your vehicle to
ensure that the replacement or alter-
nate tires and wheels allow the
TPMS to continue to function proper-
ly.
Page 452 of 593
What to do in an emergency
10
6
✽ ✽
NOTICE
If the TPMS, Low Tire Pressure
indicator does not illuminate for 3
seconds when the Engine Start/Stop
button is turned to the ON, or
engine is running, or if it remain
illuminated after coming on for
approximately 3 seconds, take your
vehicle to your nearest authorized
K900 Kia dealer and have the sys-
tem checked.
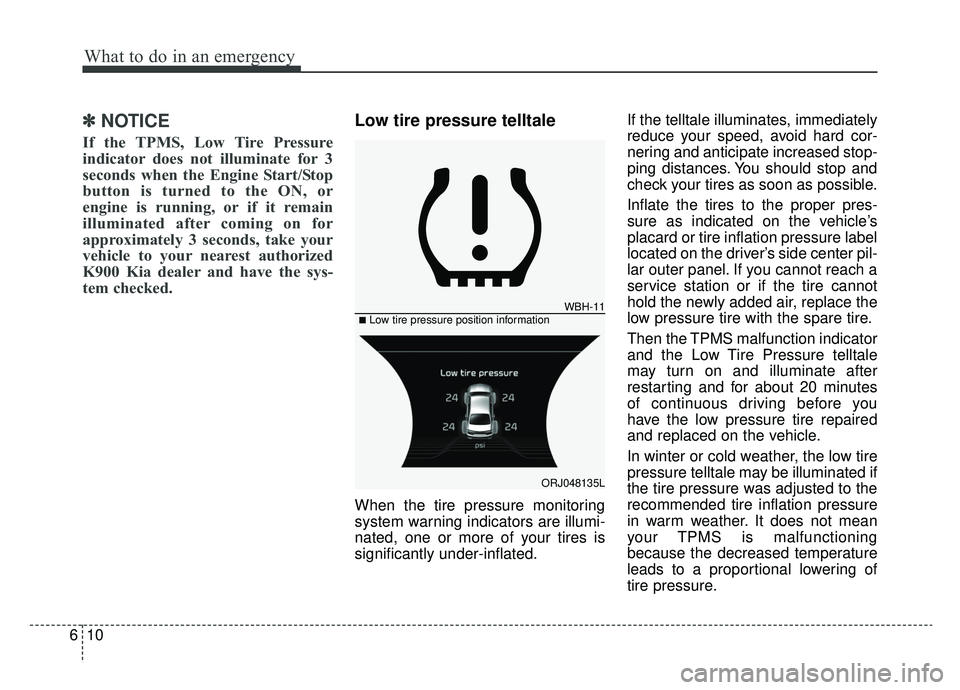
Low tire pressure telltale
When the tire pressure monitoring
system warning indicators are illumi-
nated, one or more of your tires is
significantly under-inflated. If the telltale illuminates, immediately
reduce your speed, avoid hard cor-
nering and anticipate increased stop-
ping distances. You should stop and
check your tires as soon as possible.
Inflate the tires to the proper pres-
sure as indicated on the vehicle’s
placard or tire inflation pressure label
located on the driver’s side center pil-
lar outer panel. If you cannot reach a
service station or if the tire cannot
hold the newly added air, replace the
low pressure tire with the spare tire.
Then the TPMS malfunction indicator
and the Low Tire Pressure telltale
may turn on and illuminate after
restarting and for about 20 minutes
of continuous driving before you
have the low pressure tire repaired
and replaced on the vehicle.
In winter or cold weather, the low tire
pressure telltale may be illuminated if
the tire pressure was adjusted to the
recommended tire inflation pressure
in warm weather. It does not mean
your TPMS is malfunctioning
because the decreased temperature
leads to a proportional lowering of
tire pressure.
WBH-11
ORJ048135L
■Low tire pressure position information
Page 466 of 593
What to do in an emergency
24
6
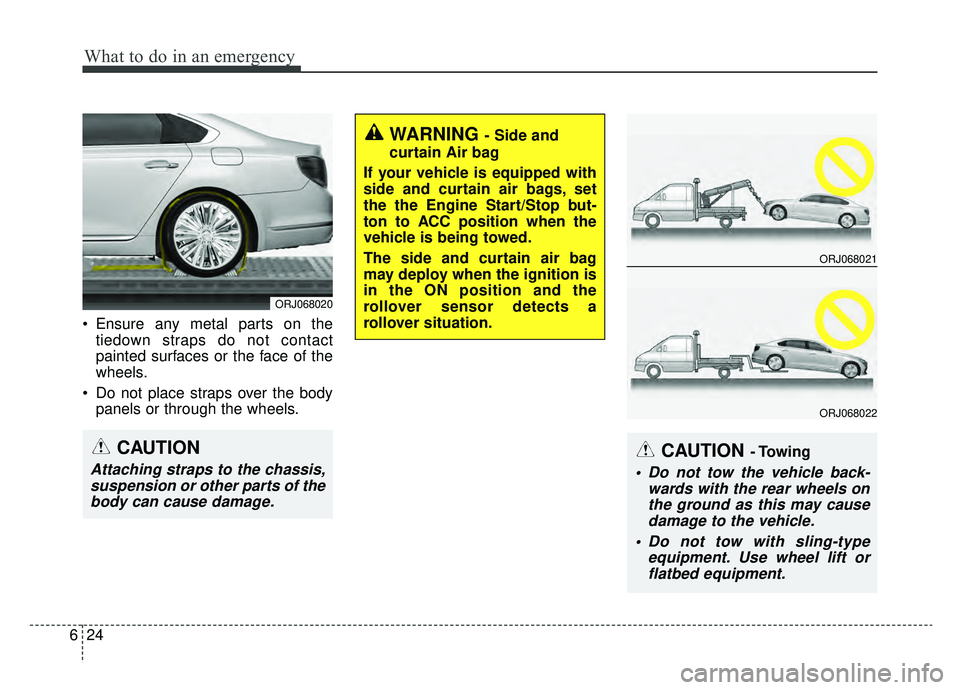
Ensure any metal parts on the
tiedown straps do not contact
painted surfaces or the face of the
wheels.
Do not place straps over the body panels or through the wheels.
WARNING - Side and
curtain Air bag
If your vehicle is equipped with
side and curtain air bags, set
the the Engine Start/Stop but-
ton to ACC position when the
vehicle is being towed.
The side and curtain air bag
may deploy when the ignition is
in the ON position and the
rollover sensor detects a
rollover situation.
ORJ068020
CAUTION
Attaching straps to the chassis, suspension or other parts of thebody can cause damage.
ORJ068021
ORJ068022
CAUTION - Towing
Do not tow the vehicle back- wards with the rear wheels onthe ground as this may causedamage to the vehicle.
Do not tow with sling-type equipment. Use wheel lift orflatbed equipment.
Page 467 of 593
625
What to do in an emergency
When towing your vehicle in an
emergency without wheel dollies :
1. Set the Engine Start/Stop buttonto ACC position.
2. Place the transmission shift lever in N (Neutral).
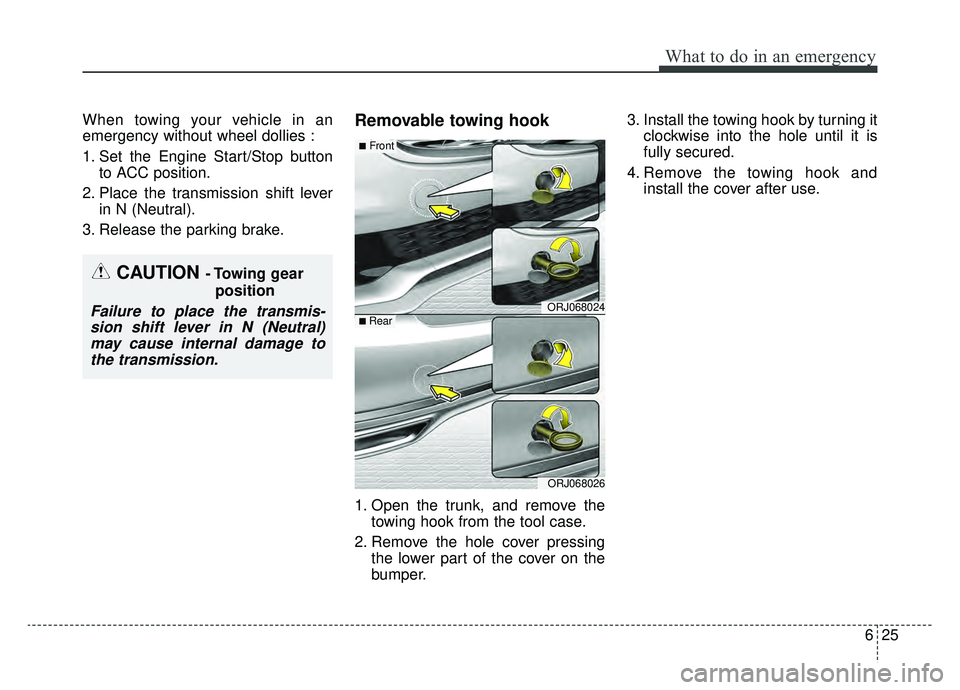
3. Release the parking brake.Removable towing hook
1. Open the trunk, and remove the towing hook from the tool case.
2. Remove the hole cover pressing the lower part of the cover on the
bumper. 3. Install the towing hook by turning it
clockwise into the hole until it is
fully secured.
4. Remove the towing hook and install the cover after use.
CAUTION - Towing gear
position
Failure to place the transmis-sion shift lever in N (Neutral)may cause internal damage tothe transmission.ORJ068024
ORJ068026
■Front
■ Rear
Page 470 of 593
What to do in an emergency
28
6
Emergency towing precautions
Turn the Engine Start/Stop button
to ACC position so the steering
wheel isn’t locked.
Place the transmission shift lever in N (Neutral).
Release the parking bake.
Press the brake pedal with more force than normal since you will
have reduced brake performance.
More steering effort will be required because the power steer-
ing system will be disabled.
If you are driving down a long hill, the brakes may overheat and brake
performance will be reduced. Stop
often and let the brakes cool off.
The vehicle should be towed at a speed of 15 mph (25 km/h) or less
within a distance of 12 miles (20
km). If the car is being towed with all
four wheels on the ground, it can
be towed only from the front. Be
sure that the transmission is in
neutral. Be sure the steering is
unlocked by placing the Engine
Start/Stop button to ACC position.
A driver must be in the towed vehi-
cle to operate the steering and
brakes.CAUTION- Automatic
transmission
To avoid serious damage to the automatic, limit the vehiclespeed to 10 mph (15 km/h) anddrive less than 1 mile (1.5 km)when towing.
Before towing, check the auto- matic transmission for fluidleaks under your vehicle. If theautomatic transmission fluidis leaking, flatbed equipmentor a towing dolly must beused.
Page 490 of 593
Maintenance
20
7
Parking brake
Inspect the parking brake system
including the parking brake pedal
and cables.
Brake discs, pads, calipers
and rotors
Check the pads and discs for exces-
sive wear and calipers for fluid leak-
age.
Exhaust pipe and muffler
Visually inspect the exhaust pipes,
muffler and hangers for cracks, dete-
rioration, or damage. Start the
engine and listen carefully for any
exhaust gas leakage. Tighten con-
nections or replace parts as neces-
sary.
Suspension mounting bolts
Check the suspension connections
for looseness or damage. Retighten
to the specified torque.
Steering gear box, linkage &
boots/lower arm ball joint
With the vehicle stopped and engine
off, check for excessive free-play in
the steering wheel.
Check the linkage for bends or dam-
age. Check the dust boots and ball
joints for deterioration, cracks, or
damage. Replace any damaged
parts.
Drive shafts and boots
Check the drive shafts, boots and
clamps for cracks, deterioration, or
damage. Replace any damaged
parts and, if necessary, repack the
grease.
Air conditioning refrigerant
Check the air conditioning lines and
connections for leakage and damage. When checking engine oil, engine
coolant, brake fluid, and washer fluid,
always be sure to clean the area
around any filler plug, drain plug, or
dipstick before checking or draining
any lubricant or fluid. This is espe-
cially important in dusty or sandy
areas and when the vehicle is used
on unpaved roads. Cleaning the plug
and dipstick areas will prevent dirt
and grit from entering the engine and
other mechanisms that could be
damaged.
CHECKING FLUID LEVELS
Page 564 of 593
Maintenance
94
7
Do not operate the engine in con-
fined or closed areas (such as
garages) any more than what is
necessary to move the vehicle in or
out of the area.
When the vehicle is stopped in an open area for more than a short
time with the engine running,
adjust the ventilation system (as
needed) to draw outside air into the
vehicle.
Never sit in a parked or stopped vehicle for any extended time with
the engine running.
When the engine stalls or fails to start, excessive attempts to restart
the engine may cause damage to
the emission control system.Operating precautions for catalyt-
ic converters (if equipped)
WARNING- Catalytic converter
Keep away from the catalytic
converter and exhaust system
while the vehicle is running or
immediately thereafter. The
exhaust and catalytic systems
are very hot and may burn you.
WARNING- Fire
Do not park, idle or drive the vehicle over or near flamma-
ble objects, such as grass,
vegetation, paper, leaves, etc.
A hot exhaust system can
ignite flammable items under
your vehicle.
Also, do not remove the heat sink around the exhaust sys-
tem, do not seal the bottom of
the vehicle or do not coat the
vehicle for corrosion control.
It may present a fire risk under
certain conditions.
Page 585 of 593
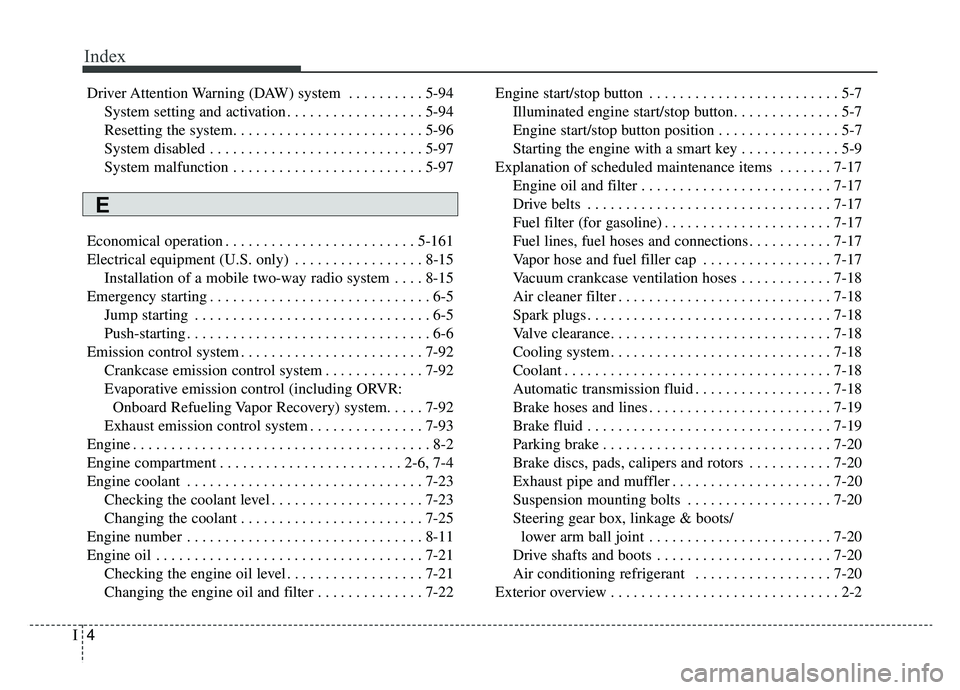
Index
4I
Driver Attention Warning (DAW) system . . . . . . . . . . 5-94System setting and activation . . . . . . . . . . . . . . . . . . 5-94
Resetting the system. . . . . . . . . . . . . . . . . . . . . . . . . 5-96
System disabled . . . . . . . . . . . . . . . . . . . . . . . . . . . . 5-97
System malfunction . . . . . . . . . . . . . . . . . . . . . . . . . 5-97
Economical operation . . . . . . . . . . . . . . . . . . . . . . . . . 5-161
Electrical equipment (U.S. only) . . . . . . . . . . . . . . . . . 8-15 Installation of a mobile two-way radio system . . . . 8-15
Emergency starting . . . . . . . . . . . . . . . . . . . . . . . . . . . . . 6-5 Jump starting . . . . . . . . . . . . . . . . . . . . . . . . . . . . . . . 6-5
Push-starting . . . . . . . . . . . . . . . . . . . . . . . . . . . . . . . . 6-6
Emission control system . . . . . . . . . . . . . . . . . . . . . . . . 7-92 Crankcase emission control system . . . . . . . . . . . . . 7-92
Evaporative emission control (including ORVR:Onboard Refueling Vapor Recovery) system. . . . . 7-92
Exhaust emission control system . . . . . . . . . . . . . . . 7-93
Engine . . . . . . . . . . . . . . . . . . . . . . . . . . . . . . . . . . . . \
. . . 8-2
Engine compartment . . . . . . . . . . . . . . . . . . . . . . . . 2-6, 7-4
Engine coolant . . . . . . . . . . . . . . . . . . . . . . . . . . . . . . . 7-23 Checking the coolant level . . . . . . . . . . . . . . . . . . . . 7-23
Changing the coolant . . . . . . . . . . . . . . . . . . . . . . . . 7-25
Engine number . . . . . . . . . . . . . . . . . . . . . . . . . . . . . . . 8-11
Engine oil . . . . . . . . . . . . . . . . . . . . . . . . . . . . . . . . . . . 7-\
21 Checking the engine oil level . . . . . . . . . . . . . . . . . . 7-21
Changing the engine oil and filter . . . . . . . . . . . . . . 7-22 Engine start/stop button . . . . . . . . . . . . . . . . . . . . . . . . . 5-7
Illuminated engine start/stop button. . . . . . . . . . . . . . 5-7
Engine start/stop button position . . . . . . . . . . . . . . . . 5-7
Starting the engine with a smart key . . . . . . . . . . . . . 5-9
Explanation of scheduled maintenance items . . . . . . . 7-17 Engine oil and filter . . . . . . . . . . . . . . . . . . . . . . . . . 7-17
Drive belts . . . . . . . . . . . . . . . . . . . . . . . . . . . . . . . . 7-17
Fuel filter (for gasoline) . . . . . . . . . . . . . . . . . . . . . . 7-17
Fuel lines, fuel hoses and connections . . . . . . . . . . . 7-17
Vapor hose and fuel filler cap . . . . . . . . . . . . . . . . . 7-17
Vacuum crankcase ventilation hoses . . . . . . . . . . . . 7-18
Air cleaner filter . . . . . . . . . . . . . . . . . . . . . . . . . . . . 7-18
Spark plugs . . . . . . . . . . . . . . . . . . . . . . . . . . . . . . . . 7-18
Valve clearance. . . . . . . . . . . . . . . . . . . . . . . . . . . . . 7-18
Cooling system . . . . . . . . . . . . . . . . . . . . . . . . . . . . . 7-18
Coolant . . . . . . . . . . . . . . . . . . . . . . . . . . . . . . . . . . . 7-\
18
Automatic transmission fluid . . . . . . . . . . . . . . . . . . 7-18
Brake hoses and lines . . . . . . . . . . . . . . . . . . . . . . . . 7-19
Brake fluid . . . . . . . . . . . . . . . . . . . . . . . . . . . . . . . . 7-19
Parking brake . . . . . . . . . . . . . . . . . . . . . . . . . . . . . . 7-20
Brake discs, pads, calipers and rotors . . . . . . . . . . . 7-20
Exhaust pipe and muffler . . . . . . . . . . . . . . . . . . . . . 7-20
Suspension mounting bolts . . . . . . . . . . . . . . . . . . . 7-20
Steering gear box, linkage & boots/lower arm ball joint . . . . . . . . . . . . . . . . . . . . . . . . 7-20
Drive shafts and boots . . . . . . . . . . . . . . . . . . . . . . . 7-20
Air conditioning refrigerant . . . . . . . . . . . . . . . . . . 7-20
Exterior overview . . . . . . . . . . . . . . . . . . . . . . . . . . . . . . 2-2
E
Page 587 of 593
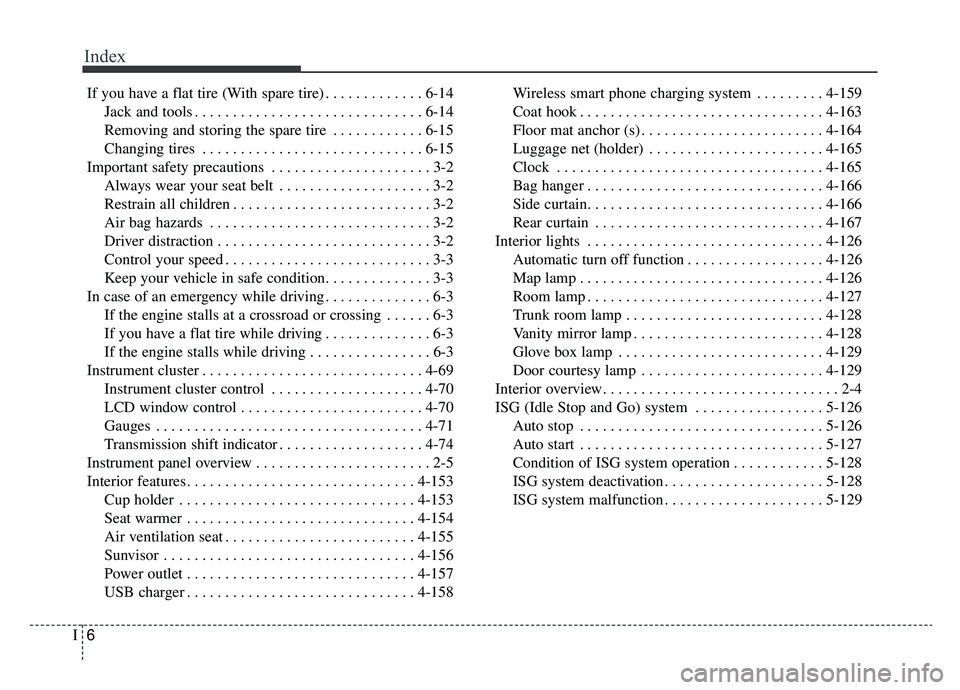
Index
6I
If you have a flat tire (With spare tire) . . . . . . . . . . . . . 6-14Jack and tools . . . . . . . . . . . . . . . . . . . . . . . . . . . . . . 6-14
Removing and storing the spare tire . . . . . . . . . . . . 6-15
Changing tires . . . . . . . . . . . . . . . . . . . . . . . . . . . . . 6-15
Important safety precautions . . . . . . . . . . . . . . . . . . . . . 3-2 Always wear your seat belt . . . . . . . . . . . . . . . . . . . . 3-2
Restrain all children . . . . . . . . . . . . . . . . . . . . . . . . . . 3-2
Air bag hazards . . . . . . . . . . . . . . . . . . . . . . . . . . . . . 3-2
Driver distraction . . . . . . . . . . . . . . . . . . . . . . . . . . . . 3-2
Control your speed . . . . . . . . . . . . . . . . . . . . . . . . . . . 3-3
Keep your vehicle in safe condition. . . . . . . . . . . . . . 3-3
In case of an emergency while driving . . . . . . . . . . . . . . 6-3 If the engine stalls at a crossroad or crossing . . . . . . 6-3
If you have a flat tire while driving . . . . . . . . . . . . . . 6-3
If the engine stalls while driving . . . . . . . . . . . . . . . . 6-3
Instrument cluster . . . . . . . . . . . . . . . . . . . . . . . . . . . . . 4-69 Instrument cluster control . . . . . . . . . . . . . . . . . . . . 4-70
LCD window control . . . . . . . . . . . . . . . . . . . . . . . . 4-70
Gauges . . . . . . . . . . . . . . . . . . . . . . . . . . . . . . . . . . . 4-\
71
Transmission shift indicator . . . . . . . . . . . . . . . . . . . 4-74
Instrument panel overview . . . . . . . . . . . . . . . . . . . . . . . 2-5
Interior features. . . . . . . . . . . . . . . . . . . . . . . . . . . . . . 4-153 Cup holder . . . . . . . . . . . . . . . . . . . . . . . . . . . . . . . 4-153
Seat warmer . . . . . . . . . . . . . . . . . . . . . . . . . . . . . . 4-154
Air ventilation seat . . . . . . . . . . . . . . . . . . . . . . . . . 4-155
Sunvisor . . . . . . . . . . . . . . . . . . . . . . . . . . . . . . . . . 4-156
Power outlet . . . . . . . . . . . . . . . . . . . . . . . . . . . . . . 4-157
USB charger . . . . . . . . . . . . . . . . . . . . . . . . . . . . . . 4-158 Wireless smart phone charging system . . . . . . . . . 4-159
Coat hook . . . . . . . . . . . . . . . . . . . . . . . . . . . . . . . . 4-163
Floor mat anchor (s) . . . . . . . . . . . . . . . . . . . . . . . . 4-164
Luggage net (holder) . . . . . . . . . . . . . . . . . . . . . . . 4-165
Clock . . . . . . . . . . . . . . . . . . . . . . . . . . . . . . . . . . . 4-\
165
Bag hanger . . . . . . . . . . . . . . . . . . . . . . . . . . . . . . . 4-166
Side curtain. . . . . . . . . . . . . . . . . . . . . . . . . . . . . . . 4-166
Rear curtain . . . . . . . . . . . . . . . . . . . . . . . . . . . . . . 4-167
Interior lights . . . . . . . . . . . . . . . . . . . . . . . . . . . . . . . 4-126 Automatic turn off function . . . . . . . . . . . . . . . . . . 4-126
Map lamp . . . . . . . . . . . . . . . . . . . . . . . . . . . . . . . . 4-126
Room lamp . . . . . . . . . . . . . . . . . . . . . . . . . . . . . . . 4-127
Trunk room lamp . . . . . . . . . . . . . . . . . . . . . . . . . . 4-128
Vanity mirror lamp . . . . . . . . . . . . . . . . . . . . . . . . . 4-128
Glove box lamp . . . . . . . . . . . . . . . . . . . . . . . . . . . 4-129
Door courtesy lamp . . . . . . . . . . . . . . . . . . . . . . . . 4-129
Interior overview. . . . . . . . . . . . . . . . . . . . . . . . . . . . . . . 2-4
ISG (Idle Stop and Go) system . . . . . . . . . . . . . . . . . 5-126 Auto stop . . . . . . . . . . . . . . . . . . . . . . . . . . . . . . . . 5-126
Auto start . . . . . . . . . . . . . . . . . . . . . . . . . . . . . . . . 5-127
Condition of ISG system operation . . . . . . . . . . . . 5-128
ISG system deactivation . . . . . . . . . . . . . . . . . . . . . 5-128
ISG system malfunction . . . . . . . . . . . . . . . . . . . . . 5-129