ECO mode KIA NIRO 2020 Owner's Manual
[x] Cancel search | Manufacturer: KIA, Model Year: 2020, Model line: NIRO, Model: KIA NIRO 2020Pages: 687, PDF Size: 11.43 MB
Page 220 of 687
483
Features of your vehicle
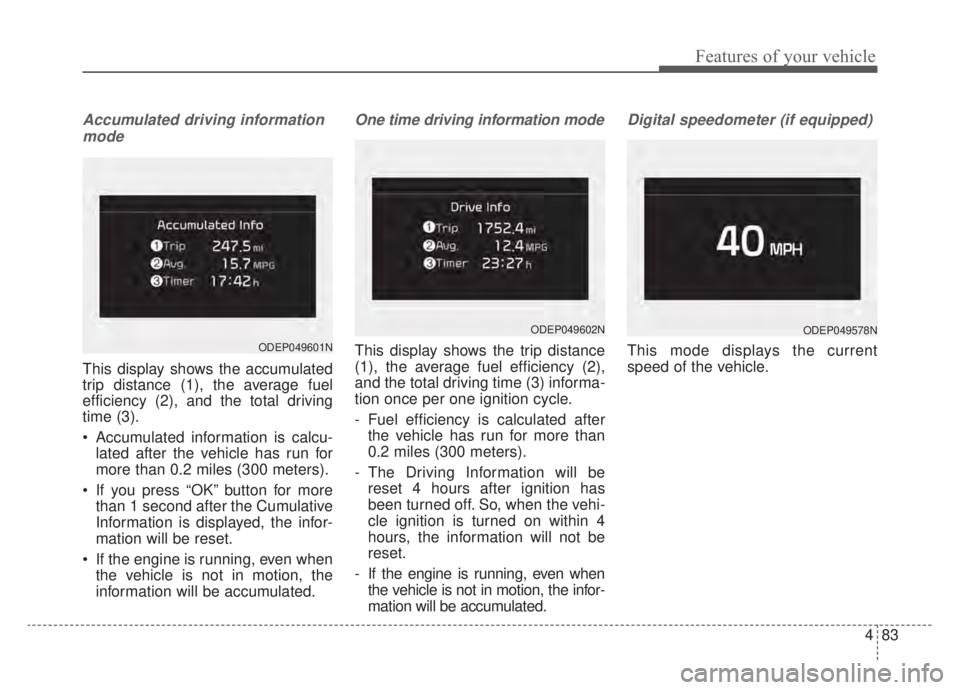
Accumulated driving informationmode
This display shows the accumulated
trip distance (1), the average fuel
efficiency (2), and the total driving
time (3).
Accumulated information is calcu- lated after the vehicle has run for
more than 0.2 miles (300 meters).
If you press “OK” button for more than 1 second after the Cumulative
Information is displayed, the infor-
mation will be reset.
If the engine is running, even when the vehicle is not in motion, the
information will be accumulated.
One time driving information mode
This display shows the trip distance
(1), the average fuel efficiency (2),
and the total driving time (3) informa-
tion once per one ignition cycle.
- Fuel efficiency is calculated afterthe vehicle has run for more than
0.2 miles (300 meters).
- The Driving Information will be reset 4 hours after ignition has
been turned off. So, when the vehi-
cle ignition is turned on within 4
hours, the information will not be
reset.
- If the engine is running, even when the vehicle is not in motion, the infor-
mation will be accumulated.
Digital speedometer (if equipped)
This mode displays the current
speed of the vehicle.
ODEP049602N
ODEP049601N
ODEP049578N
Page 221 of 687
Features of your vehicle
84
4
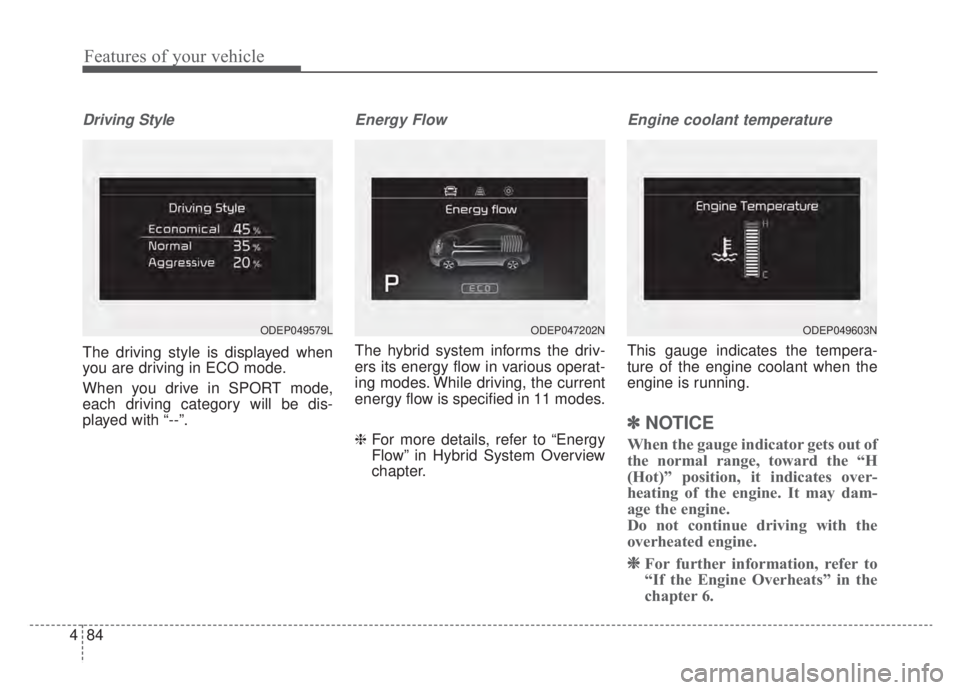
Driving Style
The driving style is displayed when
you are driving in ECO mode.
When you drive in SPORT mode,
each driving category will be dis-
played with “--”.
Energy Flow
The hybrid system informs the driv-
ers its energy flow in various operat-
ing modes. While driving, the current
energy flow is specified in 11 modes.
❈ For more details, refer to “Energy
Flow” in Hybrid System Overview
chapter.
Engine coolant temperature
This gauge indicates the tempera-
ture of the engine coolant when the
engine is running.
✽ ✽
NOTICE
When the gauge indicator gets out of
the normal range, toward the “H
(Hot)” position, it indicates over-
heating of the engine. It may dam-
age the engine.
Do not continue driving with the
overheated engine.
❈ ❈
For further information, refer to
“If the Engine Overheats” in the
chapter 6.
ODEP049579LODEP047202NODEP049603N
Page 226 of 687
489
Features of your vehicle
Press START button again (for smart key system)
This warning message illuminates if you can not operate the ENGINE
START/STOP button when there is
a problem with the ENGINE
START/STOP button system.
It means that you could start the engine by pressing the ENGINE
START/STOP button once more.
If the warning illuminates each time you press the ENGINE
START/STOP button, have your
vehicle inspected by an authorized
Kia dealer.
Press START button with key (for
smart key system)
This warning message illuminates if you press the ENGINE
START/STOP button while the
warning message “Key not detect-
ed” is illuminating.
At this time, the immobilizer indica- tor light blinks.
Check BRAKE SWITH fuse
(for smart key system)
This warning message illuminates if the brake switch fuse is discon-
nected.
It means that you should replace the fuse with a new one. If that is
not possible, you can start the
engine by pressing the ENGINE
START/STOP button for 10 sec-
onds in the ACC position.
Shift to P or N to start engine
(for smart key system)
This warning message illuminates if you try to start the engine with
the shift lever not in the P (Park) or
N (Neutral) position.
✽ ✽ NOTICE
You can start the engine with the
shift lever in the N (Neutral) posi-
tion. But, for your safety, we recom-
mend that you start the engine with
the shift lever in the P (Park) posi-
tion.
Low washer fluid
This warning message illuminates
on the service reminder mode if
the washer fluid level in the reser-
voir is nearly empty.
It means that you should refill the washer fluid.
Low fuel
This warning message illuminatesif the fuel tank is nearly empty.
- When the low fuel level warning
light is illuminates.
Add fuel as soon as possible.
Page 229 of 687
Features of your vehicle
92
4
❈ Example of a deceleration event is
going down an extended hill, slow-
ing down approaching a toll booth,
and approaching reduced speed
zones.
The driver can activate or deactivate
the Coasting Guide by placing the igni-
tion switch or ENGINE START/STOP
in the ON position and by selecting
“User Settings → Convenience →
Coasting Guide →Enable Coasting
Guide”.
For the explanation of the system,
press and hold the [OK] bu tton.
To activate the system, take the fol-
lowing procedures. Enter your desti-
nation information on the navigation
and select the driving route. Select
the ECO mode by driving the vehicle
in D (Drive). Then, satisfy the follow-
ing.
- The driving speed should be
between 37 mph (60 km/h) and 99
mph (160km/h).
❈ The operating speed may vary due
to difference between instrument
cluster and navigation effected by
tire inflation level.Unplug vehicle to start
(Plug-in hybrid)
The message is displayed when you
start the engine without unplugging
the charging cable. Unplug the
charging cable, and then start the
vehicle.
Remaining Time (Plug-in hybrid)
The message is displayed to notify
the remaining time to fully charge the
battery.
Page 247 of 687
Features of your vehicle
110
4
SPORT Mode Indicator
Light
This indicator light illuminates:
When the driver moves the shift lever to S (Sport).
❈ For more information, refer to
"Dual Clutch Transmission" in
chapter 5.
ECO Mode Indicator
Light
This indicator light illuminates:
When the driver moves the shift lever to D (Drive).
❈ Formore information, refer to
"Dual Clutch Transmission" in
chapter 5.
Page 264 of 687
4127
Features of your vehicle
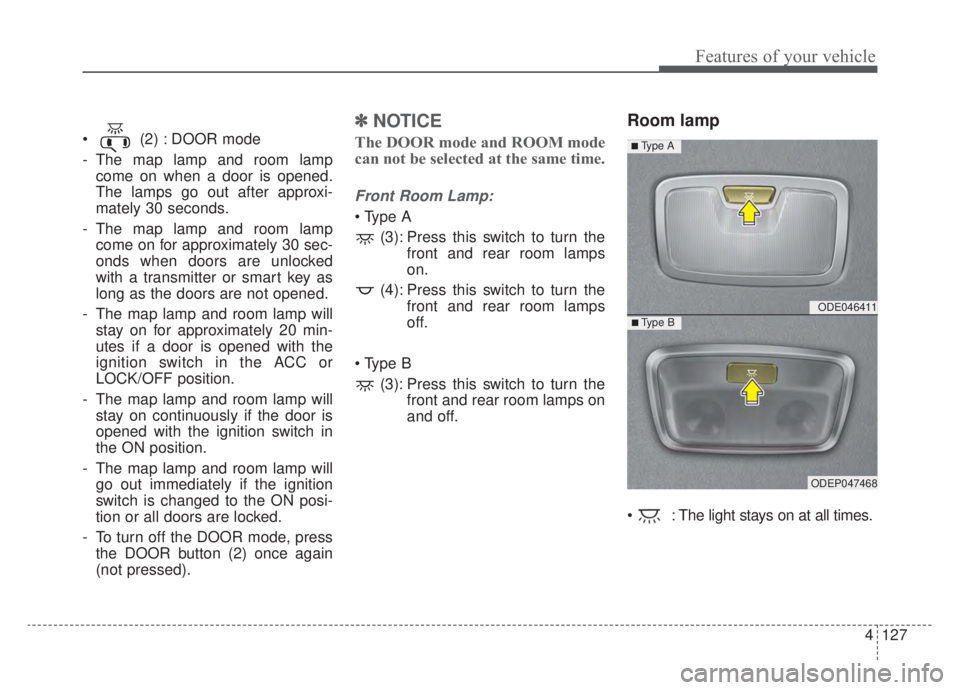
(2) : DOOR mode
- The map lamp and room lampcome on when a door is opened.
The lamps go out after approxi-
mately 30 seconds.
- The map lamp and room lamp come on for approximately 30 sec-
onds when doors are unlocked
with a transmitter or smart key as
long as the doors are not opened.
- The map lamp and room lamp will stay on for approximately 20 min-
utes if a door is opened with the
ignition switch in the ACC or
LOCK/OFF position.
- The map lamp and room lamp will stay on continuously if the door is
opened with the ignition switch in
the ON position.
- The map lamp and room lamp will go out immediately if the ignition
switch is changed to the ON posi-
tion or all doors are locked.
- To turn off the DOOR mode, press the DOOR button (2) once again
(not pressed).
✽ ✽ NOTICE
The DOOR mode and ROOM mode
can not be selected at the same time.
Front Room Lamp:
(3): Press this switch to turn the front and rear room lamps
on.
(4): Press this switch to turn the front and rear room lamps
off.
(3): Press this switch to turn the front and rear room lamps on
and off.
Room lamp
: The light stays on at all times.
ODE046411
ODEP047468
■ Type B
■ Type A
Page 274 of 687
4137
Features of your vehicle
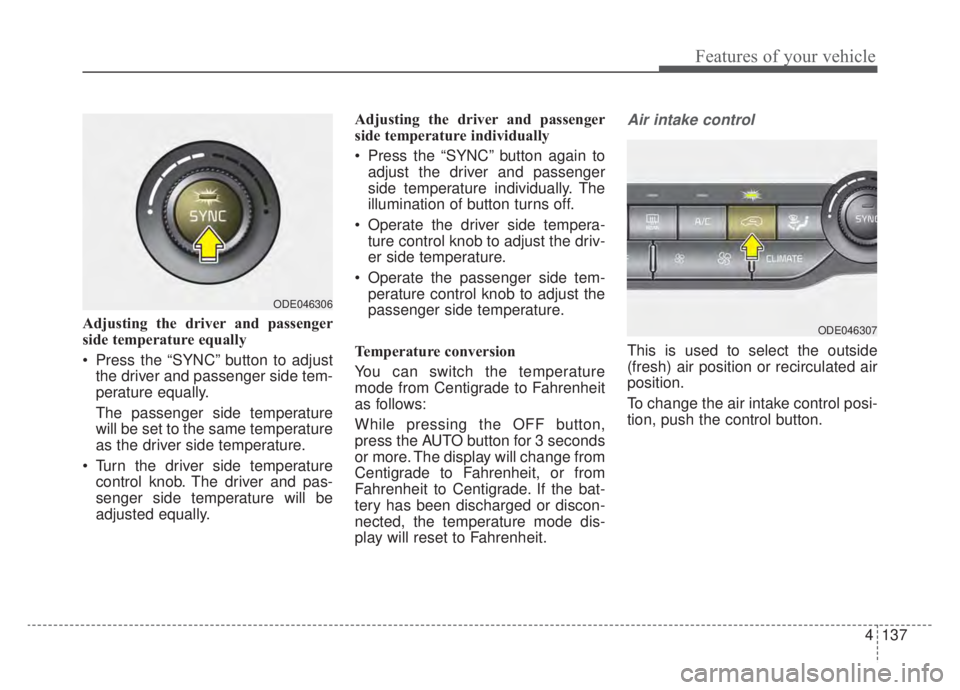
Adjusting the driver and passenger
side temperature equally
Press the “SYNC” button to adjustthe driver and passenger side tem-
perature equally.
The passenger side temperature
will be set to the same temperature
as the driver side temperature.
Turn the driver side temperature control knob. The driver and pas-
senger side temperature will be
adjusted equally. Adjusting the driver and passenger
side temperature individually
Press the “SYNC” button again to
adjust the driver and passenger
side temperature individually. The
illumination of button turns off.
Operate the driver side tempera- ture control knob to adjust the driv-
er side temperature.
Operate the passenger side tem- perature control knob to adjust the
passenger side temperature.
Temperature conversion
You can switch the temperature
mode from Centigrade to Fahrenheit
as follows:
While pressing the OFF button,
press the AUTO button for 3 seconds
or more. The display will change from
Centigrade to Fahrenheit, or from
Fahrenheit to Centigrade. If the bat-
tery has been discharged or discon-
nected, the temperature mode dis-
play will reset to Fahrenheit.
Air intake control
This is used to select the outside
(fresh) air position or recirculated air
position.
To change the air intake control posi-
tion, push the control button.
ODE046307
ODE046306
Page 279 of 687
Features of your vehicle
142
4
Air conditioning system operation tips
If the vehicle has been parked in
direct sunlight during hot weather,
open the windows for a short time
to let the hot air inside the vehicle
escape.
To help reduce moisture inside of the windows on rainy or humid
days, decrease the humidity inside
the vehicle by operating the air
conditioning system.
During air conditioning system operation, you may occasionally
notice a slight change in engine
speed as the air conditioning com-
pressor cycles. This is a normal
system operation characteristic.
Use the air conditioning system every month only for a few minutes
to ensure maximum system per-
formance.
When using the air conditioning system, you may notice clear water
dripping (or even puddling) on the
ground under the passenger side
of the vehicle. This is a normal sys-
tem operation characteristic. Operating the air conditioning sys-
tem in the recirculated air position
provides maximum cooling; howev-
er, continual operation in this mode
may cause the air inside the vehi-
cle to become stale.
During cooling operation, you may occasionally notice a misty air flow
because of rapid cooling and
humid air intake. This is a normal
system operation characteristic.
Automatic ventilation
The system automatically selects the
outside (fresh) air position when the
climate control system operates over
a certain period of time (5 minutes)
in low temperature with the recircu-
lated air position selected. (when
floor mode or bi-level mode) To cancel or reset the Automatic
Ventilation
When the air conditioning system is
on, select Face Level ( ) mode
and while pressing the A/C button,
press the air intake control button 5
times within 3 seconds.
When the automatic ventilation func-
tion is canceled, the indicator light
blinks 3 times at an interval of 0.5
seconds.
The air intake will be automatically
controlled to the fresh air position,
and the flow and air conditioning will
be automatically controlled.
When the automatic ventilation func-
tion is selected, the indicator light
blinks 6 times at an interval of 0.25
seconds.
The air intake will be automatically
controlled to the fresh air position,
and the flow and air conditioning will
be automatically controlled.
After the battery has been dis-
charged or separated, the automatic
ventilation function will be reset, so
please selected, according to you
preference.
Page 280 of 687
4143
Features of your vehicle
Sunroof inside air recircula-
tion (if equipped)
The outside (fresh) air position is
automatically selected when the sun-
roof is opened.
When you select the recirculated air
position, the system maintains the
recirculated air position for 3 minutes
and then automatically converts to
the outside (fresh) air position.
When the sunroof is closed, the air
intake position will return to the orig-
inal position that was selected.
Recirculated air at washer
fluid spray
To prevent the odor from entering to
inside the vehicle, the ventilation sys-
tem changes to Recirculated Air
Mode for a while when the wind-
shield washer fluid sprayed.
However, at low outside temperature,
to prevent from windshield fogging,
the system continues to outside air
mode.
System setting
1. ENGINE START/STOP button isOn or ignition switch ON.
2. Select Floor-Level ( ) air flow direction by pressing
Mode Selection button.
3. With pressing Air Conditioning but- ton, press the Recirculated Air but-
ton more than 4 times within 2
seconds.
4. If the system is set up, the indica- tor on Recirculated Air button will
blinks 6 times.
System cancellation
1. ENGINE START/STOP button isOn or ignition switch ON.
2. Select Floor-Level ( ) air flow direction by pressing
Mode Selection button.
3. With pressing Air Conditioning but- ton, press the Recirculated Air but-
ton more than 4 times within 2
seconds.
4. If the system is cancelled, the indi- cator on Recirculated Air button
will blinks 3 times.
Page 292 of 687
4155
Features of your vehicle
Temperature control (Manual)
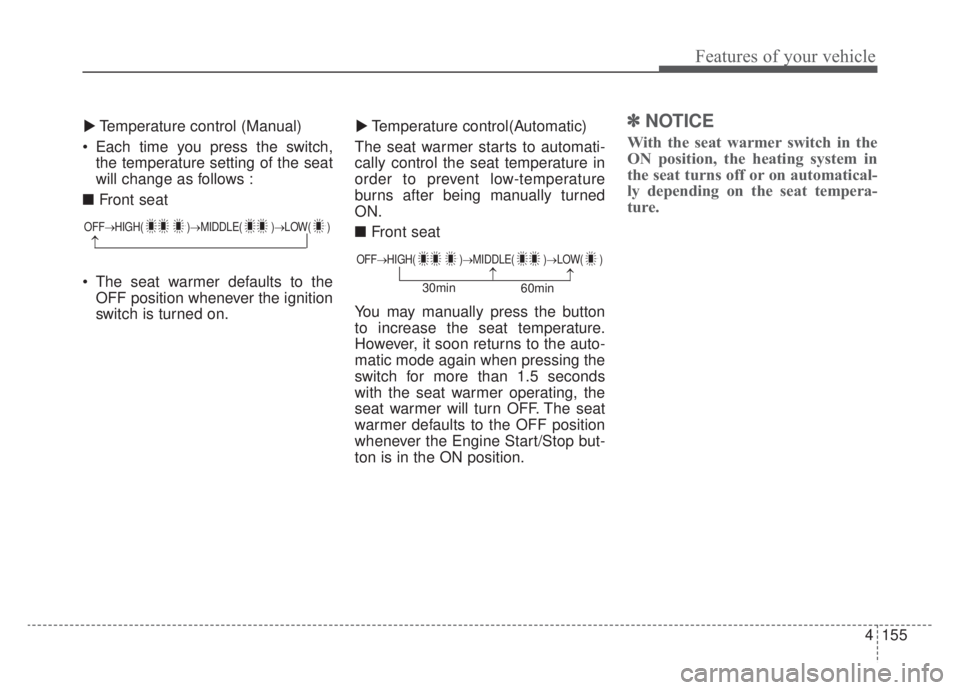
Each time you press the switch, the temperature setting of the seat
will change as follows :
■ Front seat
The seat warmer defaults to the OFF position whenever the ignition
switch is turned on. Temperature control(Automatic)
The seat warmer starts to automati-
cally control the seat temperature in
order to prevent low-temperature
burns after being manually turned
ON.
■ Front seat
You may manually press the button
to increase the seat temperature.
However, it soon returns to the auto-
matic mode again when pressing the
switch for more than 1.5 seconds
with the seat warmer operating, the
seat warmer will turn OFF. The seat
warmer defaults to the OFF position
whenever the Engine Start/Stop but-
ton is in the ON position.✽ ✽ NOTICE
With the seat warmer switch in the
ON position, the heating system in
the seat turns off or on automatical-
ly depending on the seat tempera-
ture.▼ ▼
OFF→ HIGH( )→ MIDDLE( )→LOW( )
→OFF→HIGH( )→ MIDDLE( )→LOW( )
→→30min
60min