clock KIA NIRO HYBRID EV 2022 Owners Manual
[x] Cancel search | Manufacturer: KIA, Model Year: 2022, Model line: NIRO HYBRID EV, Model: KIA NIRO HYBRID EV 2022Pages: 684, PDF Size: 9.67 MB
Page 160 of 684
Features of your vehicle
22 4
DOOR LOCKS
Operating door locks from
outside the vehicle
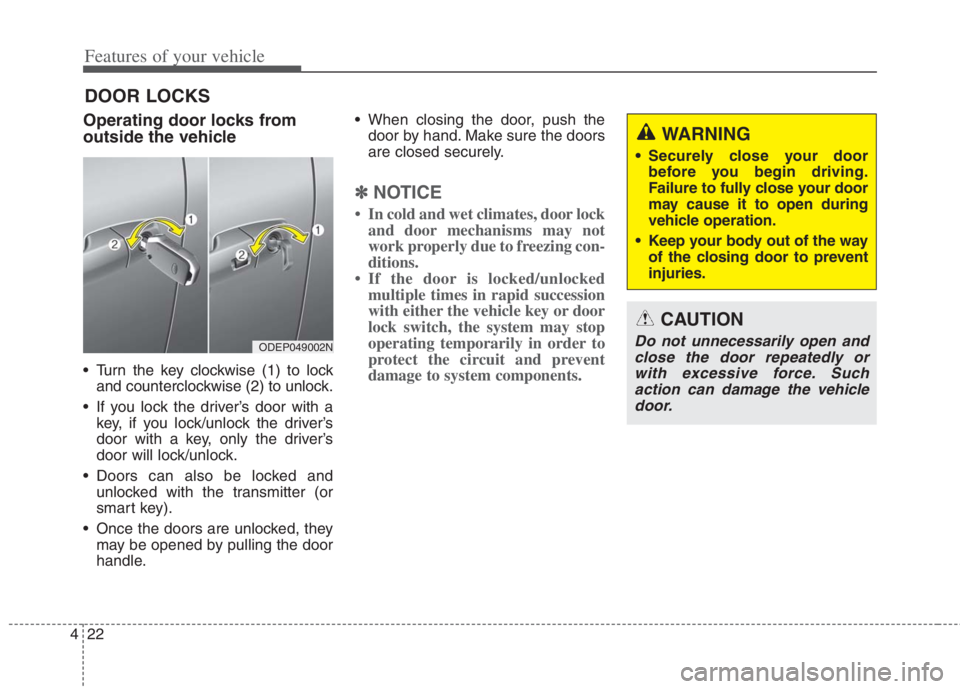
Turn the key clockwise (1) to lock
and counterclockwise (2) to unlock.
If you lock the driver’s door with a
key, if you lock/unlock the driver’s
door with a key, only the driver’s
door will lock/unlock.
Doors can also be locked and
unlocked with the transmitter (or
smart key).
Once the doors are unlocked, they
may be opened by pulling the door
handle. When closing the door, push the
door by hand. Make sure the doors
are closed securely.
✽ ✽
NOTICE
• In cold and wet climates, door lock
and door mechanisms may not
work properly due to freezing con-
ditions.
• If the door is locked/unlocked
multiple times in rapid succession
with either the vehicle key or door
lock switch, the system may stop
operating temporarily in order to
protect the circuit and prevent
damage to system components.
ODEP049002N
WARNING
Securely close your door
before you begin driving.
Failure to fully close your door
may cause it to open during
vehicle operation.
Keep your body out of the way
of the closing door to prevent
injuries.
CAUTION
Do not unnecessarily open and
close the door repeatedly or
with excessive force. Such
action can damage the vehicle
door.
Page 176 of 684
Features of your vehicle
38 4
Opening the fuel filler door
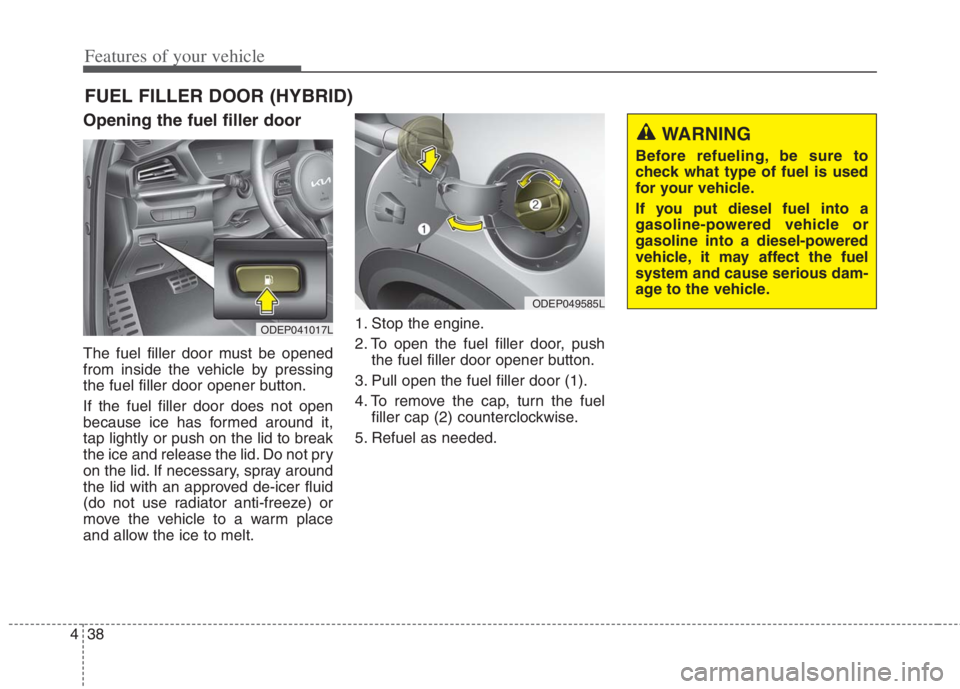
The fuel filler door must be opened
from inside the vehicle by pressing
the fuel filler door opener button.
If the fuel filler door does not open
because ice has formed around it,
tap lightly or push on the lid to break
the ice and release the lid. Do not pry
on the lid. If necessary, spray around
the lid with an approved de-icer fluid
(do not use radiator anti-freeze) or
move the vehicle to a warm place
and allow the ice to melt.1. Stop the engine.
2. To open the fuel filler door, push
the fuel filler door opener button.
3. Pull open the fuel filler door (1).
4. To remove the cap, turn the fuel
filler cap (2) counterclockwise.
5. Refuel as needed.
FUEL FILLER DOOR (HYBRID)
ODEP041017L
ODEP049585L
WARNING
Before refueling, be sure to
check what type of fuel is used
for your vehicle.
If you put diesel fuel into a
gasoline-powered vehicle or
gasoline into a diesel-powered
vehicle, it may affect the fuel
system and cause serious dam-
age to the vehicle.
Page 177 of 684
439
Features of your vehicle
Closing the fuel filler door
1. To install the cap, turn it clockwise
until it “clicks” once. This indicates
that the cap is securely tightened.
2. Close the fuel filler door and push
it in lightly making sure that it is
securely closed.
✽ ✽
NOTICE
• There may be an intermittent
noise near the refueling hole while
the engine is idling if the fuel cap is
not closed securely. This occurs
normally with the OBD system.
• When refueling on unlevel
ground, the fuel gauge may not
point to the F position.
It is not a malfunction. If you
move your vehicle to a level
ground, the fuel gauge will move
to the full position.
• Tighten the cap until it clicks once,
otherwise the fuel cap open warn-
ing indicator light will illumi-
nate.
Page 178 of 684
Features of your vehicle
40 4
Opening the fuel filler door
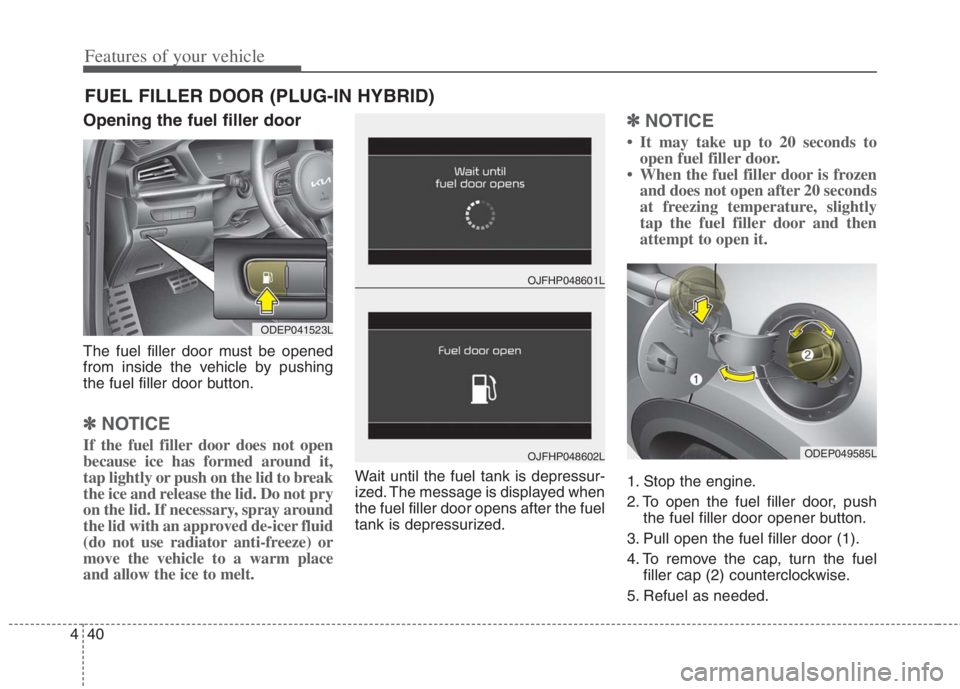
The fuel filler door must be opened
from inside the vehicle by pushing
the fuel filler door button.
✽ ✽
NOTICE
If the fuel filler door does not open
because ice has formed around it,
tap lightly or push on the lid to break
the ice and release the lid. Do not pry
on the lid. If necessary, spray around
the lid with an approved de-icer fluid
(do not use radiator anti-freeze) or
move the vehicle to a warm place
and allow the ice to melt.
Wait until the fuel tank is depressur-
ized. The message is displayed when
the fuel filler door opens after the fuel
tank is depressurized.
✽ ✽
NOTICE
• It may take up to 20 seconds to
open fuel filler door.
• When the fuel filler door is frozen
and does not open after 20 seconds
at freezing temperature, slightly
tap the fuel filler door and then
attempt to open it.
1. Stop the engine.
2. To open the fuel filler door, push
the fuel filler door opener button.
3. Pull open the fuel filler door (1).
4. To remove the cap, turn the fuel
filler cap (2) counterclockwise.
5. Refuel as needed.
FUEL FILLER DOOR (PLUG-IN HYBRID)
ODEP041523L
OJFHP048601L
OJFHP048602LODEP049585L
Page 179 of 684
441
Features of your vehicle
✽ ✽
NOTICE
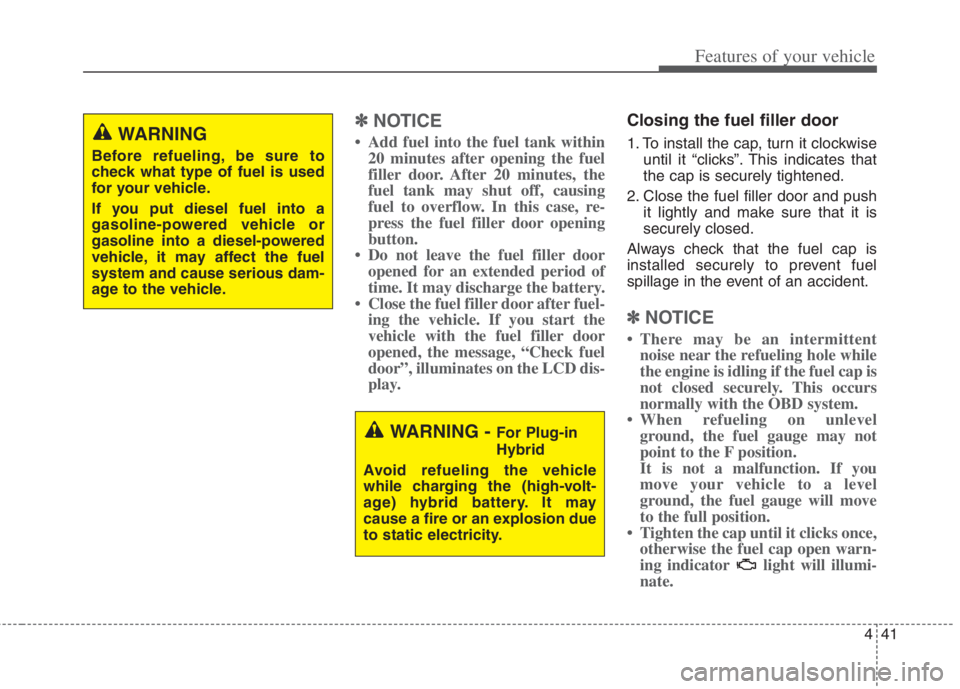
• Add fuel into the fuel tank within
20 minutes after opening the fuel
filler door. After 20 minutes, the
fuel tank may shut off, causing
fuel to overflow. In this case, re-
press the fuel filler door opening
button.
• Do not leave the fuel filler door
opened for an extended period of
time. It may discharge the battery.
• Close the fuel filler door after fuel-
ing the vehicle. If you start the
vehicle with the fuel filler door
opened, the message, “Check fuel
door”, illuminates on the LCD dis-
play.
Closing the fuel filler door
1. To install the cap, turn it clockwise
until it “clicks”. This indicates that
the cap is securely tightened.
2. Close the fuel filler door and push
it lightly and make sure that it is
securely closed.
Always check that the fuel cap is
installed securely to prevent fuel
spillage in the event of an accident.
✽ ✽
NOTICE
• There may be an intermittent
noise near the refueling hole while
the engine is idling if the fuel cap is
not closed securely. This occurs
normally with the OBD system.
• When refueling on unlevel
ground, the fuel gauge may not
point to the F position.
It is not a malfunction. If you
move your vehicle to a level
ground, the fuel gauge will move
to the full position.
• Tighten the cap until it clicks once,
otherwise the fuel cap open warn-
ing indicator light will illumi-
nate.
WARNING - For Plug-in
Hybrid
Avoid refueling the vehicle
while charging the (high-volt-
age) hybrid battery. It may
cause a fire or an explosion due
to static electricity.
WARNING
Before refueling, be sure to
check what type of fuel is used
for your vehicle.
If you put diesel fuel into a
gasoline-powered vehicle or
gasoline into a diesel-powered
vehicle, it may affect the fuel
system and cause serious dam-
age to the vehicle.
Page 518 of 684
What to do in an emergency
20 6
Removing and storing the
spare tire
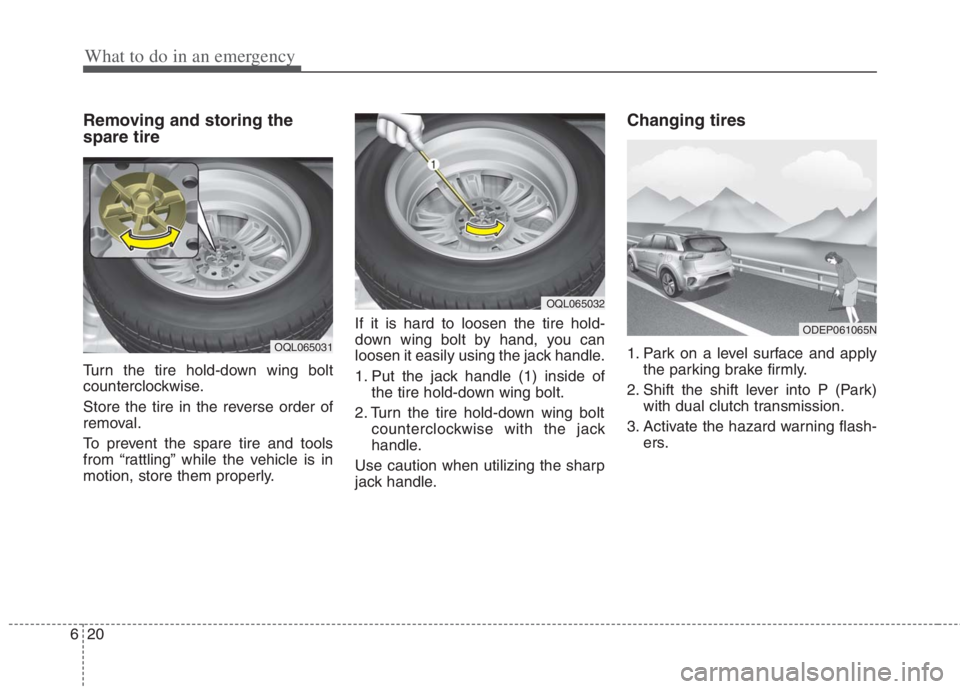
Turn the tire hold-down wing bolt
counterclockwise.
Store the tire in the reverse order of
removal.
To prevent the spare tire and tools
from “rattling” while the vehicle is in
motion, store them properly.If it is hard to loosen the tire hold-
down wing bolt by hand, you can
loosen it easily using the jack handle.
1. Put the jack handle (1) inside of
the tire hold-down wing bolt.
2. Turn the tire hold-down wing bolt
counterclockwise with the jack
handle.
Use caution when utilizing the sharp
jack handle.
Changing tires
1. Park on a level surface and apply
the parking brake firmly.
2. Shift the shift lever into P (Park)
with dual clutch transmission.
3. Activate the hazard warning flash-
ers.OQL065031
OQL065032
ODEP061065N
Page 519 of 684
621
What to do in an emergency
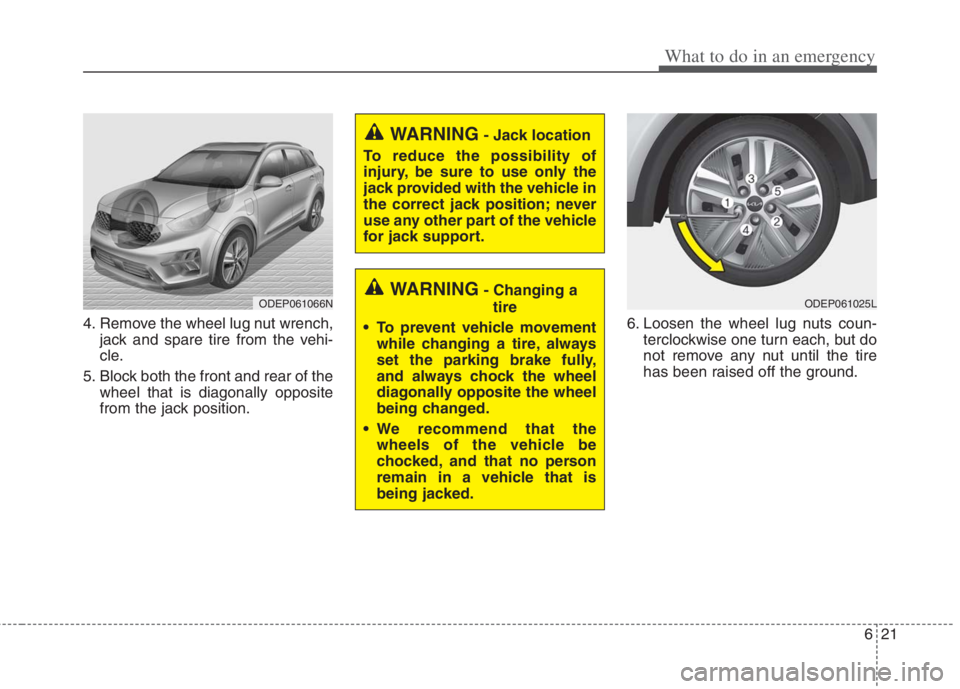
4. Remove the wheel lug nut wrench,
jack and spare tire from the vehi-
cle.
5. Block both the front and rear of the
wheel that is diagonally opposite
from the jack position.6. Loosen the wheel lug nuts coun-
terclockwise one turn each, but do
not remove any nut until the tire
has been raised off the ground.
WARNING- Jack location
To reduce the possibility of
injury, be sure to use only the
jack provided with the vehicle in
the correct jack position; never
use any other part of the vehicle
for jack support.
WARNING- Changing a
tire
To prevent vehicle movement
while changing a tire, always
set the parking brake fully,
and always chock the wheel
diagonally opposite the wheel
being changed.
We recommend that the
wheels of the vehicle be
chocked, and that no person
remain in a vehicle that is
being jacked.ODEP061066NODEP061025L
Page 520 of 684
What to do in an emergency
22 6
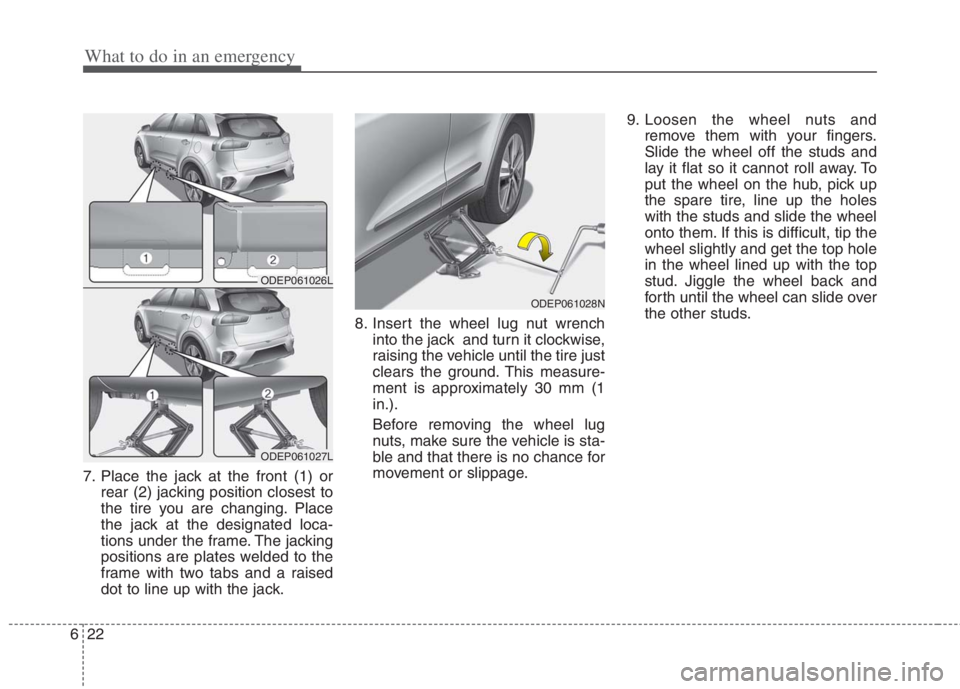
7. Place the jack at the front (1) or
rear (2) jacking position closest to
the tire you are changing. Place
the jack at the designated loca-
tions under the frame. The jacking
positions are plates welded to the
frame with two tabs and a raised
dot to line up with the jack.8. Insert the wheel lug nut wrench
into the jack and turn it clockwise,
raising the vehicle until the tire just
clears the ground. This measure-
ment is approximately 30 mm (1
in.).
Before removing the wheel lug
nuts, make sure the vehicle is sta-
ble and that there is no chance for
movement or slippage.9. Loosen the wheel nuts and
remove them with your fingers.
Slide the wheel off the studs and
lay it flat so it cannot roll away. To
put the wheel on the hub, pick up
the spare tire, line up the holes
with the studs and slide the wheel
onto them. If this is difficult, tip the
wheel slightly and get the top hole
in the wheel lined up with the top
stud. Jiggle the wheel back and
forth until the wheel can slide over
the other studs.
ODEP061028N
ODEP061026L
ODEP061027L
Page 521 of 684
623
What to do in an emergency
Wheels may have sharp edges.
Handle them carefully to avoid possi-
ble severe injury. Before putting the
wheel into place, be sure that there
is nothing on the hub or wheel (such
as mud, tar, gravel, etc.) that pre-
vents the wheel from fitting solidly
against the hub.10. To install the wheel, hold it on the
studs, put the wheel nuts on the
studs and tighten them finger
tight. Jiggle the tire to be sure it is
completely seated, then tighten
the nuts as much as possible
with your fingers again.
11. Insert the wrench into the jack
and lower the vehicle to the
ground by turning the wheel nut
wrench counterclockwise.
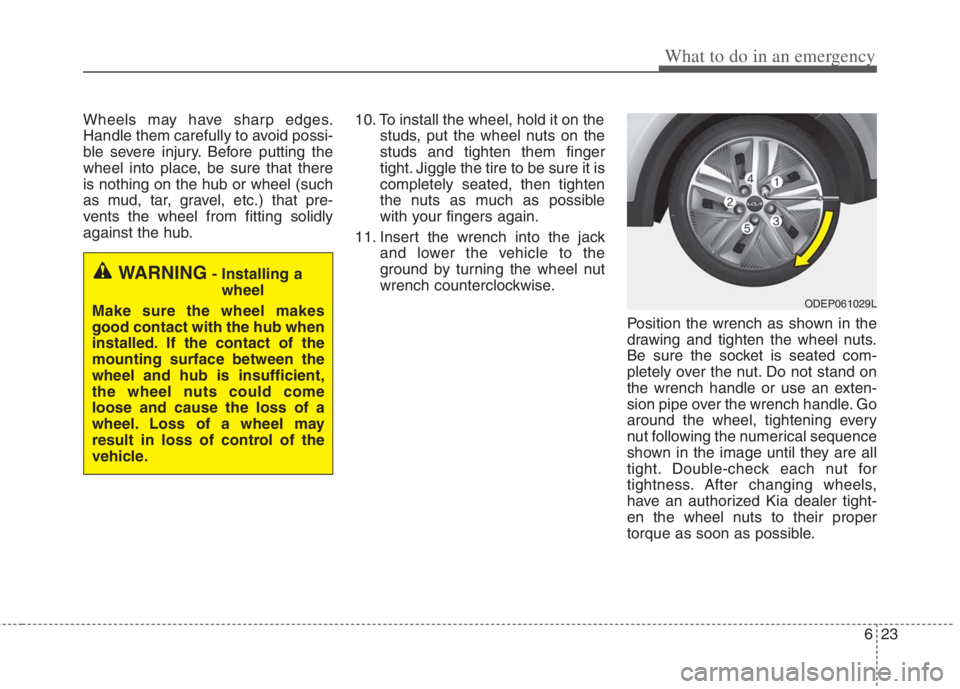
Position the wrench as shown in the
drawing and tighten the wheel nuts.
Be sure the socket is seated com-
pletely over the nut. Do not stand on
the wrench handle or use an exten-
sion pipe over the wrench handle. Go
around the wheel, tightening every
nut following the numerical sequence
shown in the image until they are all
tight. Double-check each nut for
tightness. After changing wheels,
have an authorized Kia dealer tight-
en the wheel nuts to their proper
torque as soon as possible.
WARNING- Installing a
wheel
Make sure the wheel makes
good contact with the hub when
installed. If the contact of the
mounting surface between the
wheel and hub is insufficient,
the wheel nuts could come
loose and cause the loss of a
wheel. Loss of a wheel may
result in loss of control of the
vehicle.
ODEP061029L
Page 539 of 684
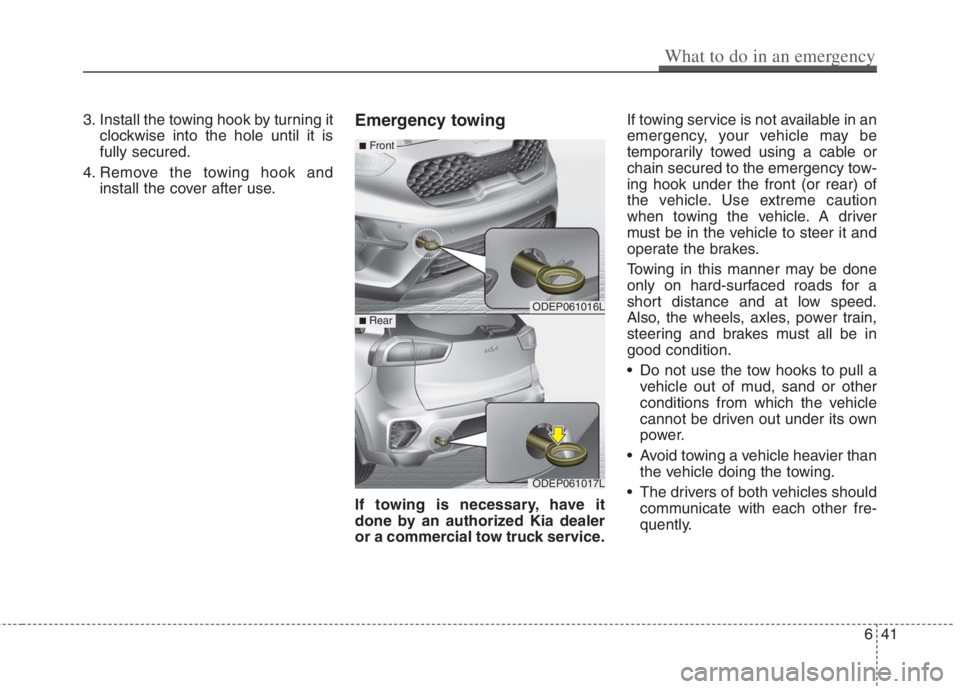
3. Install the towing hook by turning it
clockwise into the hole until it is
fully secured.
4. Remove the towing hook and
install the cover after use.Emergency towing
If towing is necessary, have it
done by an authorized Kia dealer
or a commercial tow truck service.If towing service is not available in an
emergency, your vehicle may be
temporarily towed using a cable or
chain secured to the emergency tow-
ing hook under the front (or rear) of
the vehicle. Use extreme caution
when towing the vehicle. A driver
must be in the vehicle to steer it and
operate the brakes.
Towing in this manner may be done
only on hard-surfaced roads for a
short distance and at low speed.
Also, the wheels, axles, power train,
steering and brakes must all be in
good condition.
Do not use the tow hooks to pull a
vehicle out of mud, sand or other
conditions from which the vehicle
cannot be driven out under its own
power.
Avoid towing a vehicle heavier than
the vehicle doing the towing.
The drivers of both vehicles should
communicate with each other fre-
quently.
ODEP061016L
ODEP061017L
■Front
■ Rear
What to do in an emergency
41 6