ECO mode Lexus ES300h 2019 (OM33D00U) Workshop Manual
[x] Cancel search | Manufacturer: LEXUS, Model Year: 2019, Model line: ES300h, Model: Lexus ES300h 2019Pages: 456, PDF Size: 8.65 MB
Page 263 of 456
2635-3. Using the air conditioning system
5
Interior features
■Operation condition
The power switch is in ON mode.
■Air conditioning system-linked control
mode
When the seat ventilato r fan speed level is
Hi (when AUTO is selected), the seat venti-
lator fan speed may become higher
according to the fan speed of the air condi-
tioning system.
■When AUTO mode is selected
The following functions may turn off
according to the air conditioning set tem-
perature, outside temperature, etc.
●Seat heaters
●Seat ventilators
■Stored settings
When the power switch is turned to ON
mode, the following stored settings are
recalled.
●Seat heaters
●Seat ventilators
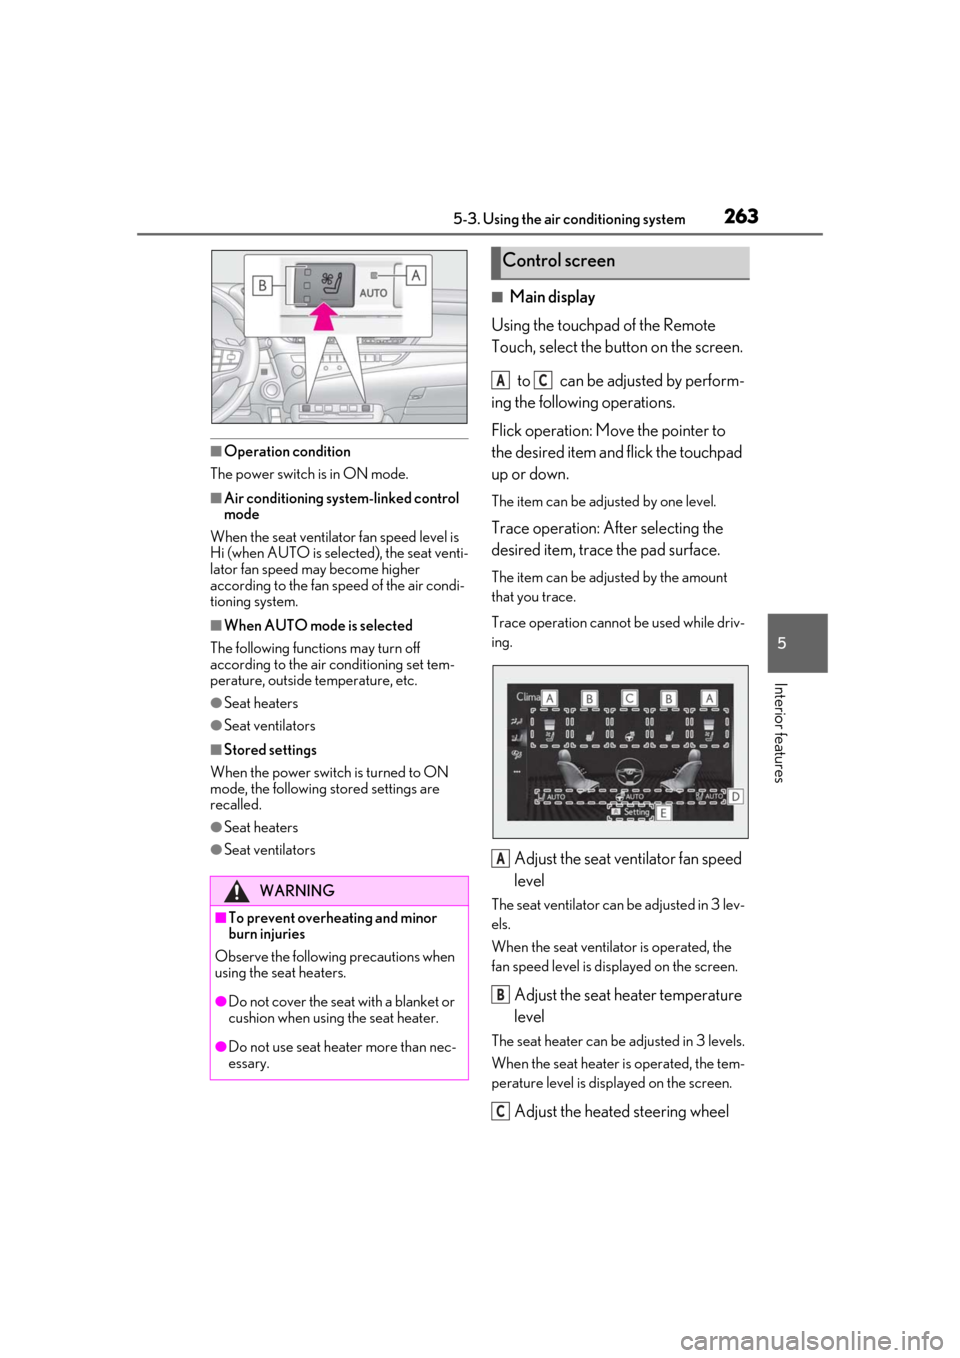
■Main display
Using the touchpad of the Remote
Touch, select the button on the screen.
to can be adjusted by perform-
ing the following operations.
Flick operation: Move the pointer to
the desired item and flick the touchpad
up or down.
The item can be adjusted by one level.
Trace operation: After selecting the
desired item, trace the pad surface.
The item can be adjusted by the amount
that you trace.
Trace operation cannot be used while driv-
ing.
Adjust the seat ventilator fan speed
level
The seat ventilator can be adjusted in 3 lev-
els.
When the seat ventilator is operated, the
fan speed level is displayed on the screen.
Adjust the seat heater temperature
level
The seat heater can be adjusted in 3 levels.
When the seat heater is operated, the tem-
perature level is disp layed on the screen.
Adjust the heated steering wheel
WARNING
■To prevent overheating and minor
burn injuries
Observe the following precautions when
using the seat heaters.
●Do not cover the seat with a blanket or
cushion when using the seat heater.
●Do not use seat heater more than nec-
essary.
Control screen
AC
A
B
C
Page 276 of 456
2765-6. Using the other interior features
■Lighting conditions of operation
indicator light
*: Depending on the portable device, there are cases where the operation indicator
light will continue being lit up orange
even after the char ging is complete.
When the operation indicator light
flashes
When an error occurs , the operation indi-
cator light flashes an orange color. Handle
the error based on the following tables.
• Flashing repeatedly once every second (Orange)
• Repeatedly flashes 3 times continuously (Orange) • Repeatedly flashes 4 times continuously
(Orange)
■The wireless charger can be operated
when
The power switch is in ACCESSORY or
ON mode.
■Usable portable devices
●Qi standard wireless charge standard
can be used on compatible devices.
However, not all Qi standard devices and
compatibility ar e guaranteed.
●Starting with mobile phones and smart
phones, it is aimed for low power electri-
cally supplied portable devices of no
more than 5W.
■When covers and accessories are
attached to portable devices
Do not charge in situations where cover
and accessories not able to handle Qi are
attached to the portable device. Depending
on the type of cover and accessory, it may
not be possible to charge. When charging is
not performed even with the portable
device placed on the charge area, remove
the cover and accessories.
Operation indicator light
Conditions
Turning offWhen the Wireless charger
power supply is off
Green
(comes on)
On Standby (charging pos-
sible state)
When charging is complete*
Orange
(comes on)
When placing the portable
device on the charging area
(detecting the portable
device)
Charging
Suspected causeHandling method
Vehicle to charger
communication fail-
ure.Contact your Lexus
dealer.
Suspected causesHandling method
A foreign substance
is between the por-
table device and
charge area.Remove the foreign
substance from
between portable
device and the
charge area.
The portable device
is out of sync due to
the device being
shifted from the cen-
ter of the charge
area.
Place the portable
device near the cen-
ter of the charge
area.
Suspected causeHandling method
Temperature rising
within the wireless
charger.Stop charging at
once and start
charging again after
for a while.
Page 294 of 456
2945-6. Using the other interior features
Connects drivers to response-center sup-
port. (
P.295)
Enhanced Roadside Assistance
Provides drivers various on-road assis-
tance. (
P.295)
After you have signed the Telematics
Subscription Service Agreement and
are enrolled, you can begin receiving
services.
A variety of subscription terms is avail-
able for purchase. Contact your Lexus
dealer, call the following or push the
“SOS” button in your vehicle for fur-
ther subscription details.
The United States
1-800-25-LEXUS (1-800-255-3987)
Canada
1-800-26-LEXUS (1-800-265-3987)
Puerto Rico
1-877-539-8777
■Safety Connect Serv ices Information
●Phone calls using the vehicles Blue-
tooth® technology will not be possible
during Safety Connect.
●Safety Connect is available beginning Fall
2009 on select Lexus models (in the
contiguous United States only). Contact
with the Safety Connect response center
is dependent upon the telematics device
being in operative co ndition, cellular con-
nection availability, and GPS satellite sig-
nal reception, which ca n limit the ability to
reach the response center or receive
emergency service support. Enrollment
and Telematics Subscription Service
Agreement required. A variety of sub-
scription terms is available; charges vary
by subscription term selected and loca- tion.
●Automatic Collision Notification, Emer-
gency Assistance and Stolen Vehicle
Location will function in the United
States, including Hawaii and Alaska,
Puerto Rico and in Canada, and
Enhanced Roadside Assistance will func-
tion in the United States, Puerto Rico and
in Canada.
●Automatic Collision Notification, Emer-
gency Assistance, Stolen Vehicle and
Enhanced Road Assistance will not func-
tion in the United St
ates Virgin Islands.
For vehicles first sold in the USVI, no
Safety Connect services will function in
and outside the United States Virgin
Islands.
●Safety Connect services are not subject
to section 255 of the Telecommunica-
tions Act and the device is not TTY com-
patible.
■Languages
The Safety Connect re sponse center will
offer support in mult iple languages. The
Safety Connect system will offer voice
prompts in English, Spanish, and French.
Please indicate your language of choice
when enrolling.
■When contacting the response center
You may be unable to contact the response
center if the network is busy.
When the power switch is turned to
ON mode, the red indicator light
comes on for 2 seconds then turns off.
Afterward, the green indicator light
comes on, indicating that the service is
active.
The following indicator light patterns
indicate specific system usage condi-
tions:
Green indicator light on = Active
Subscription
Safety Connect LED light Indi-
cators
Page 300 of 456
3006-1. Maintenance and care
6-1.Maintenance and care
Working from top to bottom, liber-
ally apply water to the vehicle body,
wheel wells and underside of the
vehicle to remove any dirt and dust.
Wash the vehicle body using a
sponge or soft cloth, such as a
chamois.
For hard-to-remove marks, use car
wash soap and rinse thoroughly with
water.
Wipe away any water.
Wax the vehicle when the water-
proof coating deteriorates.
If water does not bead on a clean surface,
apply wax when the vehicle body is cool.
■Self-restoring coat
The vehicle body has a self-restoring coat-
ing that is resistant to small surface
scratches caused in a car wash etc.
●The coating lasts for 5 to 8 years from
when the vehicle is delivered from the
plant.
●The restoration time differs depending on
the depth of the scratch and outside tem-
perature.
The restoration time may become
shorter when the coating is warmed by
applying warm water.
●Deep scratches caused by keys, coins,
etc. cannot be restored.
●Do not use wax that contain abrasives.
■Automatic car washes
●Fold the mirrors befo re washing the vehi-
cle. Start washing from the front of the
vehicle. Make sure to extend the mirrors
before driving.
●Brushes used in automatic car washes
may scratch the vehicle body and dam-
age the paint.
●Rear spoiler may not be washable in
some automatic car washes. There may
also be an increased risk of damage to
vehicle.
■High pressure car washes
●Do not allow the nozzles of the car wash
to come within close proximity of the win-
dows.
●Before using the car wash, check that the
fuel filler door on your vehicle is closed
properly.
■Notes for the smart access system with
push-button start
If the door handle becomes wet while the
electronic key is within the effective range,
the door may lock and unlock repeatedly. In
that case, follow the following correction
procedures to wash the vehicle:
●Place the key in a position 6 ft. (2 m) or
more separate from the vehicle while the
vehicle is being wash ed. (Take care to
ensure that the key is not stolen.)
●Set the electronic key to battery-saving
mode to disable the smart access system
with push-button start. ( P.103)
■Aluminum wheels
●Remove any dirt immediately by using a
neutral detergent.
●Wash detergent off with water immedi-
ately after use.
●To protect the paint from damage, make
sure to observe the following precau-
tions.
• Do not use acidic, alkaline or abrasive detergent
• Do not use hard brushes
• Do not use detergent on the wheels when
they are hot, such as after driving or park-
ing in hot weather
Cleaning and protecting the
vehicle exterior
Perform cleaning in a manner
appropriate to each component
and its material.
Cleaning instructions
Page 315 of 456
3156-3. Do-it-yourself maintenance
6
Maintenance and care
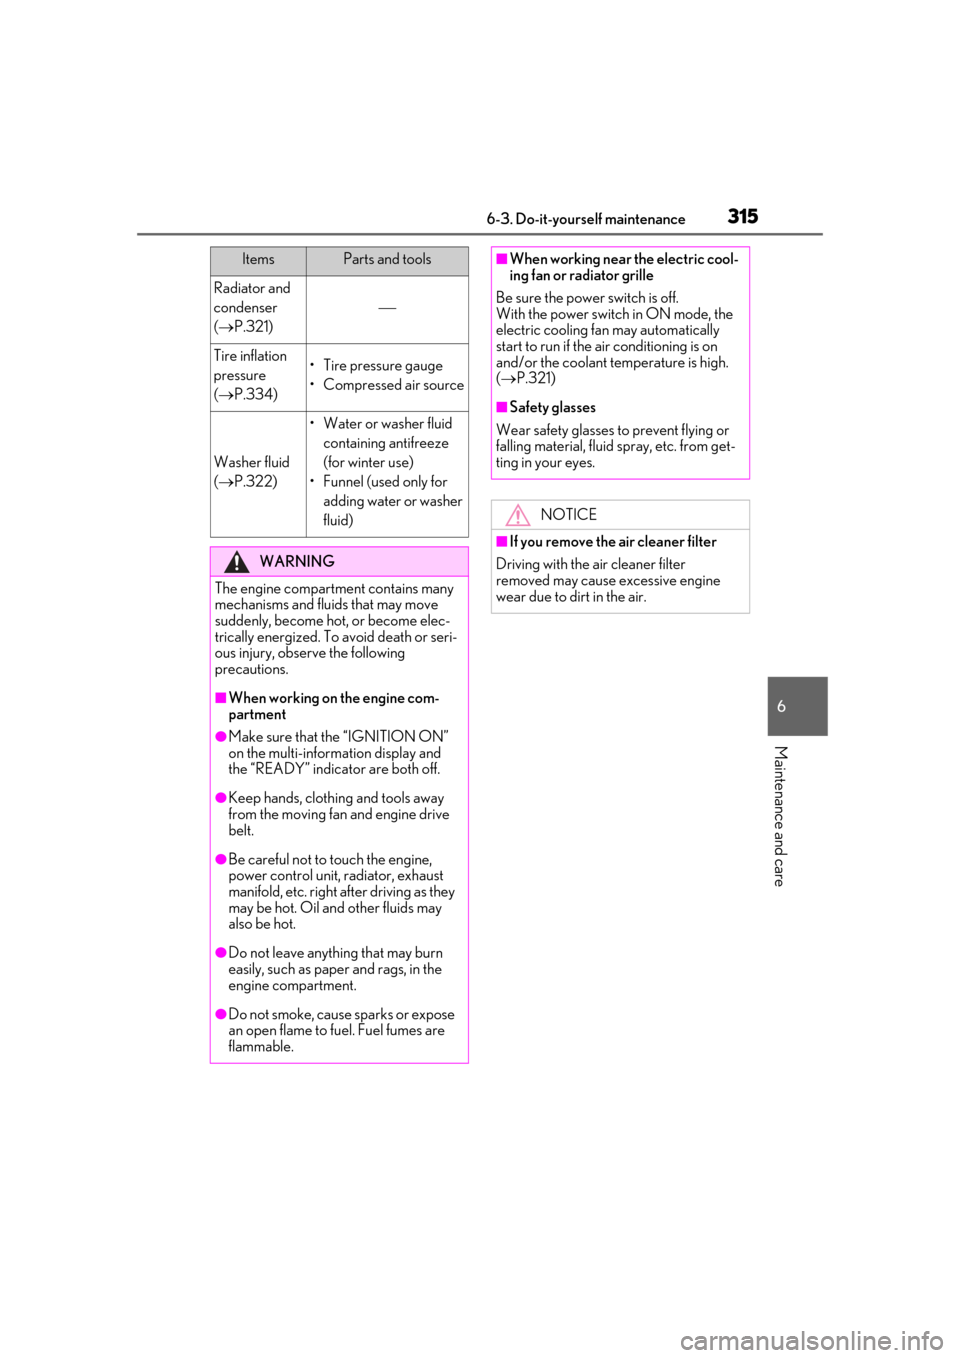
Radiator and
condenser
( P.321)
Tire inflation
pressure
( P.334)• Tire pressure gauge
• Compressed air source
Washer fluid
( P.322)
• Water or washer fluid
containing antifreeze
(for winter use)
• Funnel (used only for adding water or washer
fluid)
WARNING
The engine compartment contains many
mechanisms and fluids that may move
suddenly, become hot, or become elec-
trically energized. To avoid death or seri-
ous injury, observe the following
precautions.
■When working on the engine com-
partment
●Make sure that the “IGNITION ON”
on the multi-information display and
the “READY” indicator are both off.
●Keep hands, clothi ng and tools away
from the moving fan and engine drive
belt.
●Be careful not to touch the engine,
power control unit, radiator, exhaust
manifold, etc. right after driving as they
may be hot. Oil and other fluids may
also be hot.
●Do not leave anything that may burn
easily, such as paper and rags, in the
engine compartment.
●Do not smoke, cause sparks or expose
an open flame to fuel. Fuel fumes are
flammable.
ItemsParts and tools■When working near the electric cool-
ing fan or radiator grille
Be sure the power switch is off.
With the power switch in ON mode, the
electric cooling fan may automatically
start to run if the air conditioning is on
and/or the coolant temperature is high.
( P.321)
■Safety glasses
Wear safety glasses to prevent flying or
falling material, fluid spray, etc. from get-
ting in your eyes.
NOTICE
■If you remove the air cleaner filter
Driving with the air cleaner filter
removed may cause excessive engine
wear due to dirt in the air.
Page 323 of 456
3236-3. Do-it-yourself maintenance
6
Maintenance and care
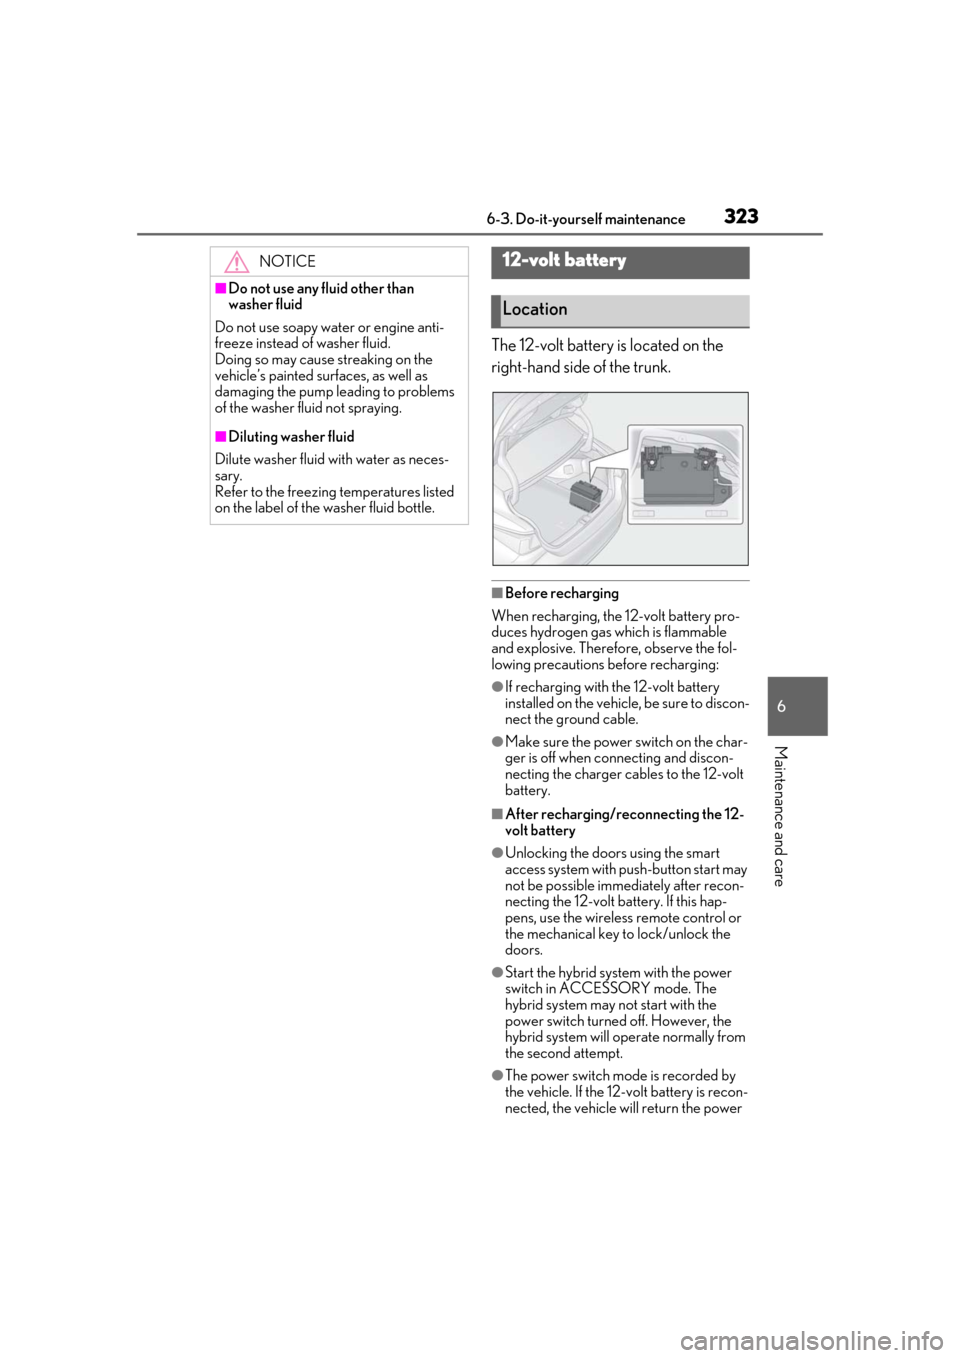
The 12-volt battery is located on the
right-hand side of the trunk.
■Before recharging
When recharging, the 12-volt battery pro-
duces hydrogen gas which is flammable
and explosive. Therefore, observe the fol-
lowing precautions before recharging:
●If recharging with the 12-volt battery
installed on the vehicle, be sure to discon-
nect the ground cable.
●Make sure the power switch on the char-
ger is off when connecting and discon-
necting the charger cables to the 12-volt
battery.
■After recharging/reconnecting the 12-
volt battery
●Unlocking the doors using the smart
access system with pu sh-button start may
not be possible immediately after recon-
necting the 12-volt battery. If this hap-
pens, use the wireless remote control or
the mechanical key to lock/unlock the
doors.
●Start the hybrid system with the power
switch in ACCESSORY mode. The
hybrid system may not start with the
power switch turned off. However, the
hybrid system will operate normally from
the second attempt.
●The power switch mode is recorded by
the vehicle. If the 12-volt battery is recon-
nected, the vehicle will return the power
NOTICE
■Do not use any fluid other than
washer fluid
Do not use soapy water or engine anti-
freeze instead of washer fluid.
Doing so may cause streaking on the
vehicle’s painted surfaces, as well as
damaging the pump leading to problems
of the washer fluid not spraying.
■Diluting washer fluid
Dilute washer fluid with water as neces-
sary.
Refer to the freezing temperatures listed
on the label of the washer fluid bottle.
12-volt battery
Location
Page 327 of 456
3276-3. Do-it-yourself maintenance
6
Maintenance and care
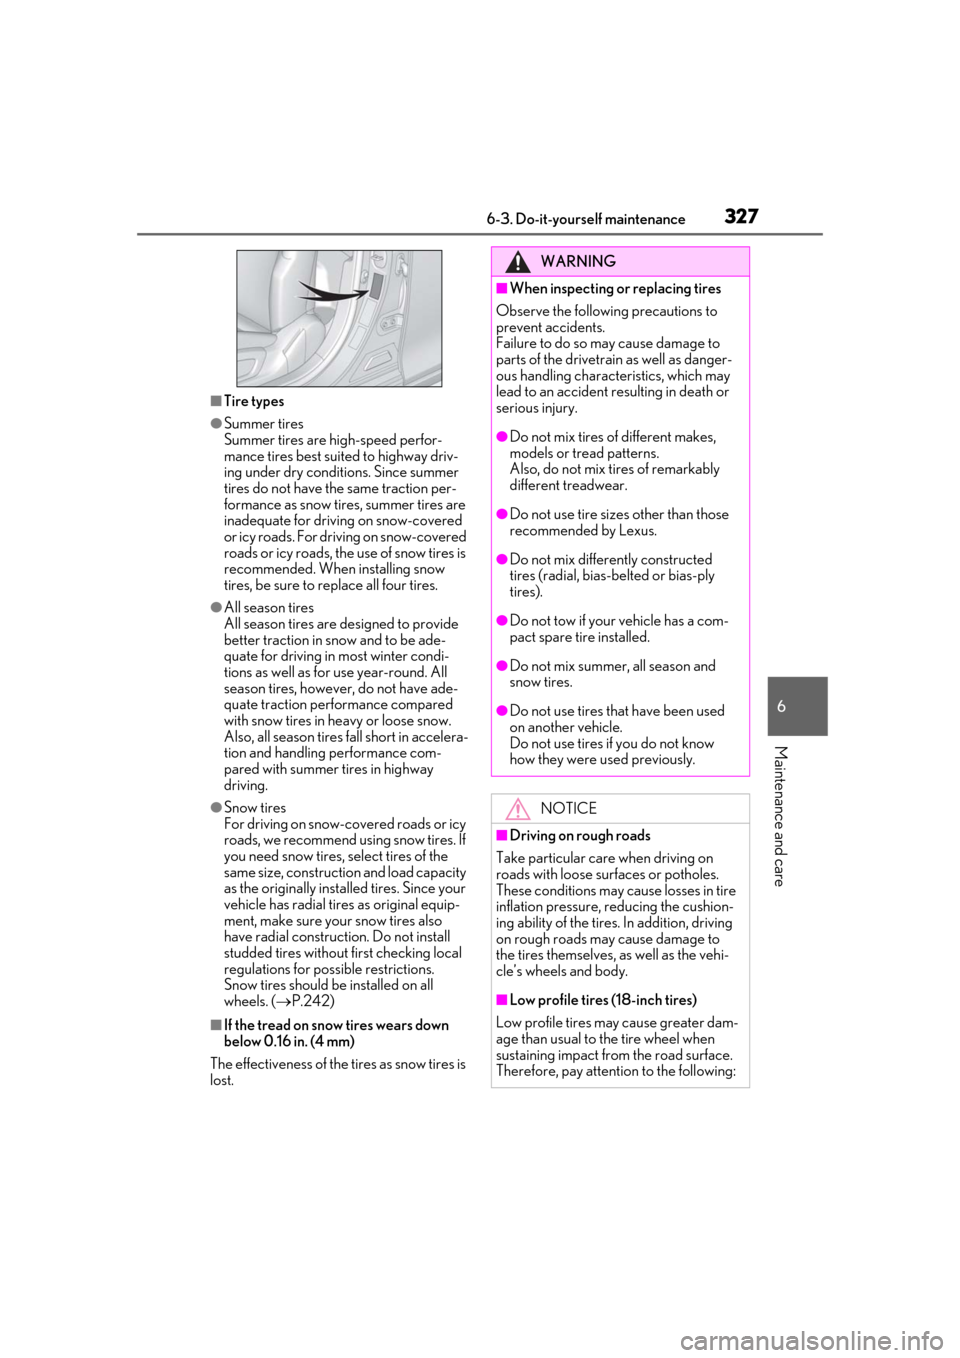
■Tire types
●Summer tires
Summer tires are high-speed perfor-
mance tires best suited to highway driv-
ing under dry conditions. Since summer
tires do not have the same traction per-
formance as snow tires, summer tires are
inadequate for driving on snow-covered
or icy roads. For driving on snow-covered
roads or icy roads, the use of snow tires is
recommended. When installing snow
tires, be sure to replace all four tires.
●All season tires
All season tires are designed to provide
better traction in snow and to be ade-
quate for driving in most winter condi-
tions as well as for use year-round. All
season tires, however, do not have ade-
quate traction performance compared
with snow tires in heavy or loose snow.
Also, all season tires fall short in accelera-
tion and handling performance com-
pared with summer tires in highway
driving.
●Snow tires
For driving on snow-covered roads or icy
roads, we recommend using snow tires. If
you need snow tires, select tires of the
same size, construction and load capacity
as the originally insta lled tires. Since your
vehicle has radial tires as original equip-
ment, make sure your snow tires also
have radial construction. Do not install
studded tires without first checking local
regulations for possible restrictions.
Snow tires should be installed on all
wheels. ( P.242)
■If the tread on snow tires wears down
below 0.16 in. (4 mm)
The effectiveness of the tires as snow tires is
lost.
WARNING
■When inspecting or replacing tires
Observe the following precautions to
prevent accidents.
Failure to do so may cause damage to
parts of the drivetrain as well as danger-
ous handling characteristics, which may
lead to an accident resulting in death or
serious injury.
●Do not mix tires of different makes,
models or tread patterns.
Also, do not mix tires of remarkably
different treadwear.
●Do not use tire sizes other than those
recommended by Lexus.
●Do not mix differently constructed
tires (radial, bias-belted or bias-ply
tires).
●Do not tow if your vehicle has a com-
pact spare tire installed.
●Do not mix summer, all season and
snow tires.
●Do not use tires that have been used
on another vehicle.
Do not use tires if you do not know
how they were used previously.
NOTICE
■Driving on rough roads
Take particular care when driving on
roads with loose surfaces or potholes.
These conditions may cause losses in tire
inflation pressure, reducing the cushion-
ing ability of the tires. In addition, driving
on rough roads may cause damage to
the tires themselves, as well as the vehi-
cle’s wheels and body.
■Low profile tires (18-inch tires)
Low profile tires may cause greater dam-
age than usual to the tire wheel when
sustaining impact from the road surface.
Therefore, pay attention to the following:
Page 328 of 456
3286-3. Do-it-yourself maintenance
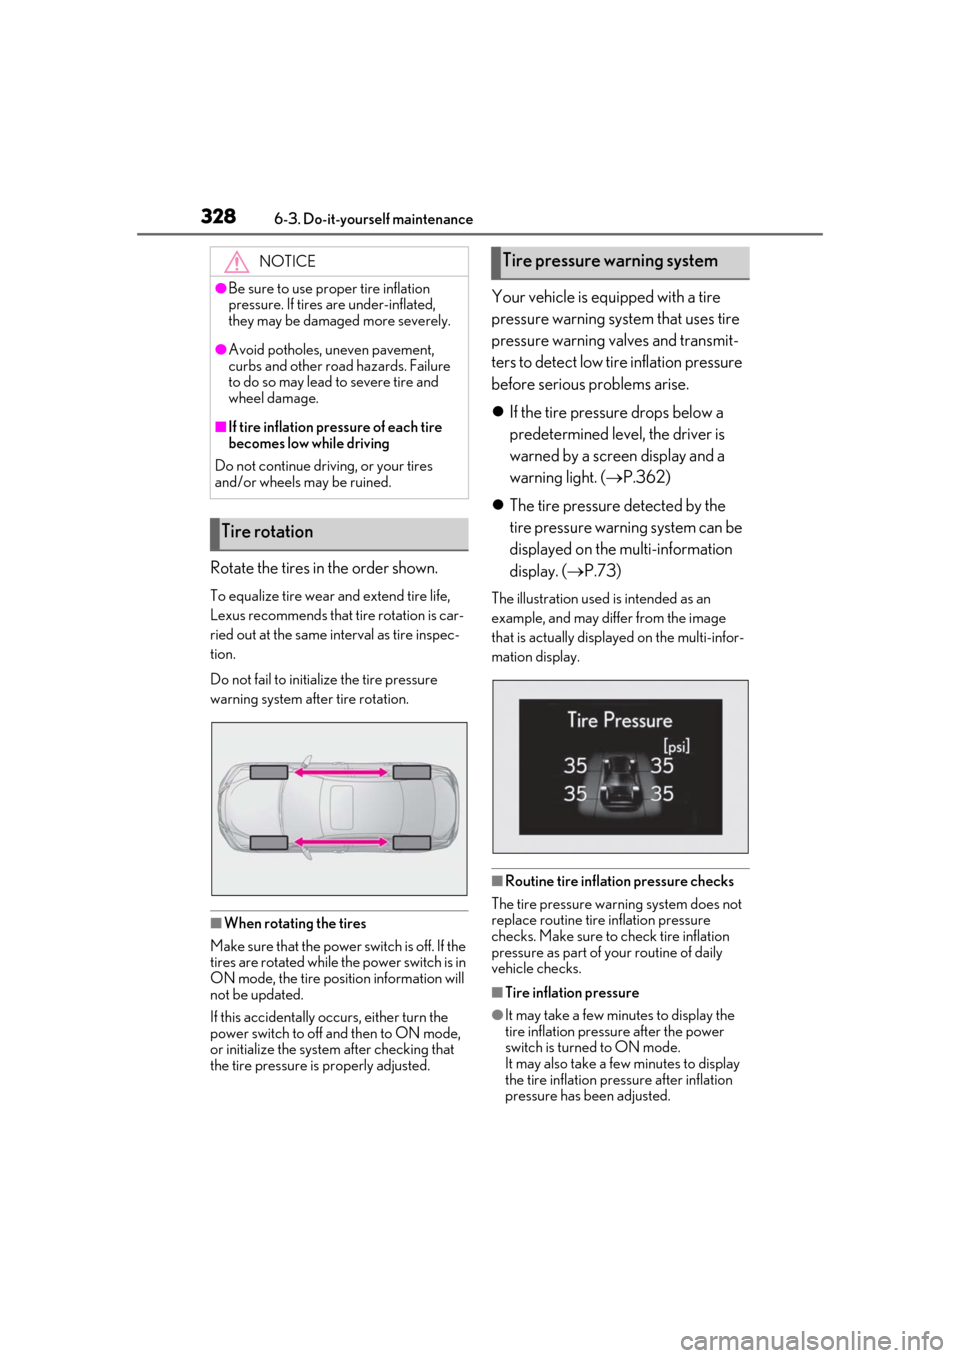
Rotate the tires in the order shown.
To equalize tire wear and extend tire life,
Lexus recommends that tire rotation is car-
ried out at the same interval as tire inspec-
tion.
Do not fail to initialize the tire pressure
warning system after tire rotation.
■When rotating the tires
Make sure that the power switch is off. If the
tires are rotated while the power switch is in
ON mode, the tire position information will
not be updated.
If this accidentally oc curs, either turn the
power switch to off and then to ON mode,
or initialize the system after checking that
the tire pressure is properly adjusted.
Your vehicle is equipped with a tire
pressure warning system that uses tire
pressure warning valves and transmit-
ters to detect low ti re inflation pressure
before serious problems arise.
If the tire pressure drops below a
predetermined level, the driver is
warned by a screen display and a
warning light. ( P.362)
The tire pressure detected by the
tire pressure warning system can be
displayed on the multi-information
display. ( P.73)
The illustration used is intended as an
example, and may differ from the image
that is actually displayed on the multi-infor-
mation display.
■Routine tire inflation pressure checks
The tire pressure warning system does not
replace routine tire inflation pressure
checks. Make sure to check tire inflation
pressure as part of your routine of daily
vehicle checks.
■Tire inflation pressure
●It may take a few minutes to display the
tire inflation pressu re after the power
switch is turned to ON mode.
It may also take a few minutes to display
the tire inflation pressure after inflation
pressure has b een adjusted.
NOTICE
●Be sure to use proper tire inflation
pressure. If tires are under-inflated,
they may be damaged more severely.
●Avoid potholes, uneven pavement,
curbs and other road hazards. Failure
to do so may lead to severe tire and
wheel damage.
■If tire inflation pres sure of each tire
becomes low while driving
Do not continue driving, or your tires
and/or wheels may be ruined.
Tire rotation
Tire pressure warning system
Page 332 of 456
3326-3. Do-it-yourself maintenance
a vehicle speed of approximately 25 mph
(40 km/h) or more.
●Make sure to carry out initialization after
adjusting the tire inflation pressure.
Also, make sure the tires are cold before
carrying out initializat ion or tire inflation
pressure adjustment.
●The tire pressure warning system can be
initialized by yourse lf, but depending on
the driving conditions and driving envi-
ronment, initialization may take some
time to complete.
■The initialization operation
●If you have accidenta lly turned the power
switch off during initialization, it is not
necessary to manually restart the initial-
ization again, as initialization will restart
automatically the next time the power
switch is turned to ON mode.
●If you accidentally perform initialization
when initialization is not necessary, adjust
the tire inflation pres sure to the specified
level when the tires are cold, and conduct
initialization again.
●While the position of each tire is being
determined and the inflation pressures
are not being displayed on the multi-
information display, if the inflation pres-
sure of a tire drops, the tire pressure
warning light will come on.
■If the tire pressure warning system is not
initialized properly
●In the following situations, initialization
may take longer than usual to be com-
pleted or may not be possible. Normally,
initialization completes within approxi-
mately 30 minutes.
• Vehicle is not driven at approximately 25
mph (40 km/h) or more
• Vehicle is driven on unpaved roads
• Vehicle is driven near other vehicles and
system cannot recognize tire pressure
warning valve and tran smitters of your
vehicle over those of other vehicles
If initialization does not complete after driv-
ing for 1 hour or more, park the vehicle in a
safe place for approximately 20 minutes
and then drive the vehicle again.
●If the vehicle is reversed during initializa-
tion, the data up to that point is reset, so perform the initiali
zation procedure
again from the beginning.
●In the following situations, initialization
will not be started or was not completed
properly and the system will not operate
properly. Perform the initialization proce-
dure again.
• If, when attempting to start initialization,
the tire pressure warning light does not
blink 3 times.
• If, when the vehicle has been driven for
about 20 minutes after performing ini-
tialization, the tire pressure warning light
blinks for approximately 1 minute and
then illuminates.
If initialization canno t be completed after
performing the above procedure, contact
your Lexus dealer.
Every tire pressure warning valve and
transmitter has a unique ID code.
When replacing a tire pressure warn-
ing valve and transmitter, it is necessary
to register the ID code.
When registering the ID codes, per-
form the following procedure.
1 Park the vehicle in a safe place, wait
for approximately 20 minutes, and
then start the hybrid system.
(P.135)
WARNING
■When initializing the tire pressure
warning system
Do not initialize tire inflation pressure
without first adjusting the tire inflation
pressure to the spec ified level. Other-
wise, the tire pressu re warning light may
not come on even if the tire inflation pres-
sure is low, or it may come on when the
tire inflation pressure is actually normal.
Registering ID codes
Page 361 of 456
3617-2. Steps to take in an emergency
7
When trouble arises
■Low fuel level warning light
■Driver’s and front passenger’s seat belt reminder light (warning buzzer)*
*: Driver’s seat belt warning buzzer:
The driver’s seat belt warning buzzer sounds to al ert the driver that his or her seat belt is not
fastened. Once the power switch is turned to ON mode, the buzzer sounds for 6 seconds.
If the vehicle reaches a speed of 12 mph (20 km/h), the buzzer sounds once. If the seat belt
is still unfastened after 24 seconds, the buzzer will sound intermittently for 6 seconds. Then,
if the seat belt is st ill unfastened, the buzzer will sound in a different tone for 90 more sec-
onds.
Front passenger’s seat belt warning buzzer:
The front passenger’s seat belt warning buzzer sounds to alert the front passenger that his
or her seat belt is not fastened. The buzzer sounds once if the vehicle reaches a speed of 12
mph (20 km/h). If the seat belt is still unfastened after 24 seconds, the buzzer will sound
intermittently for 6 seconds. Th en, if the seat belt is still unfastened, the buzzer will sound in
a different tone for 90 more seconds.
■Rear passengers’ seat belt r eminder lights (warning buzzer)*
*: Rear passengers’ seat belt warning buzzer:
The rear passengers’ seat belt warning buzzer sounds to alert the rear passengers that his
or her seat belt is not fastened. The buzzer sounds once if the vehicle reaches a speed of 12
mph (20 km/h). If the seat belt is still unfastened after 24 seconds, the buzzer will sound
intermittently for 6 seconds. Th en, if the seat belt is still unfastened, the buzzer will sound in
a different tone for 30 more seconds.
Warning lightDetails/Actions
Indicates that remaining fuel is approximately 1.8 gal. (7 L, 1.5 Imp.gal.)
or less
Refuel the vehicle.
Warning lightDetails/Actions
Warns the driver and/or front passe nger to fasten their seat belts
Fasten the seat belt.
If the front passenger’s seat is occupied, the front passenger’s seat
belt also needs to be fastened to make the warning light (warning
buzzer) turn off.
Warning lightDetails/Actions
Warns the rear passengers to fasten their seat belts
Fasten the seat belt.