Lexus ES350 2010 Setup
ES350 2010
Lexus
Lexus
https://www.carmanualsonline.info/img/36/12979/w960_12979-0.png
Lexus ES350 2010 Setup
Trending: stop start, sensor, warning, check transmission fluid, clock, ECU, language
Page 41 of 76
SETUP
333
3. Touch the desired phone number.
4. Touch the button you want to regis-
ter in.
5. If you touch a button you registered
before, this screen is displayed.
Touch “Yes” if you want to replace it.
6. When this screen is displayed, the
operation is complete.
Page 42 of 76
SETUP
334
You can also register the speed dial in
the following ways.
From “Speed Dial” screen
1. Push the “INFO/PHONE” button.
2. Touch “Phone”.
3. Touch “Speed Dials”.
4. Touch “(add new)”.
5. Touch “Yes” to set new speed dial.
6. Touch the data you want to register.
7. Touch the desired phone number.
Page 43 of 76
SETUP
335
From “Contact Data” screen
1. Push the “INFO/PHONE” button.
2. Touch “Phone”.
3. Touch “Contacts”.
4. Touch the desired data from the list.
5. Touch “Options”.
6. Touch “Set Speed Dial”.
7. This screen is displayed.
The following operations are the same
as the operation when you operate it
from “Setup” screen.
Page 44 of 76
SETUP
336 �
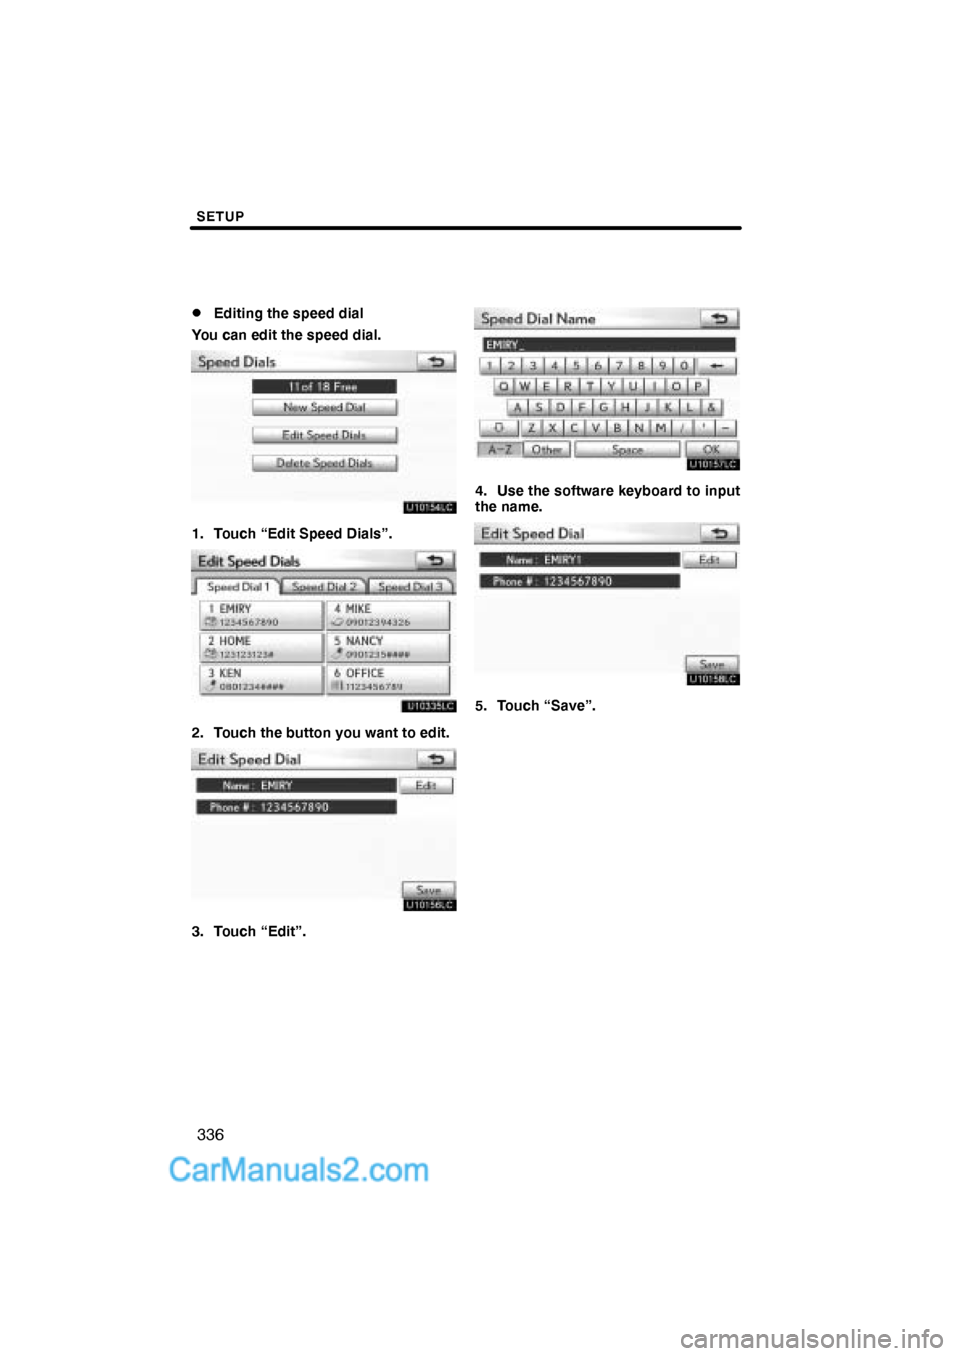
Editing the speed dial
You can edit the speed dial.
1. Touch “Edit Speed Dials”.
2. Touch the button you want to edit.
3. Touch “Edit”.
4. Use the software keyboard to input
the name.
5. Touch “Save”.
Page 45 of 76
SETUP
337 �
Deleting the speed dial
You can delete the speed dial.
1. Touch “Delete Speed Dials”.
2. Touch the desired data or touch
“Select All”, then touch “Delete”.
You can touch multiple data and delete
them at the same time.
3. Touch “Yes”.
Page 46 of 76
SETUP
338
You can delete the call history.
1. Touch “Delete Call History”.
2. Touch the desired history to delete.
3. Touch the desired data or touch
“Select All”, then touch “Delete”.
You can touch multiple data and delete
them at the same time.
4. Touch “Yes”.
— Deleting call history
Page 47 of 76
SETUP
339
You can also delete the call history in
the following way.
1. Push the “INFO/PHONE” button.
2. Touch “Phone”.
3. Touch “Call History”.
4. Touch “Delete”.
5. This screen is displayed.
The following operations are the same
as the operation when you operate it
from “Setup” screen.
You can similarly operate other call his-
tory.“Setting the voice tag” is done by dis-
playing “Voice Tags” screen.
1. Push the “SETUP” button.
2. Touch “Phone”.
3. Touch “Phonebook”.
4. Touch “Manage Voice Tags”.
Please refer to the following pages for
each setting.
— Setting the voice tag
Page 48 of 76
SETUP
340
You can also display “Voice Tags”
screen in the following way.
1. Push the “INFO/PHONE” button.
2. Touch “Phone”.
3. Touch “Contacts”.
4. Touch “Options”.
5. Touch “Manage Voice Tags”.
�Registering the voice tag
You can register a voice tag for up to 20
numbers.
1. Touch “New Voice Tag”.
2. Touch the data you want to register.
Page 49 of 76
SETUP
341
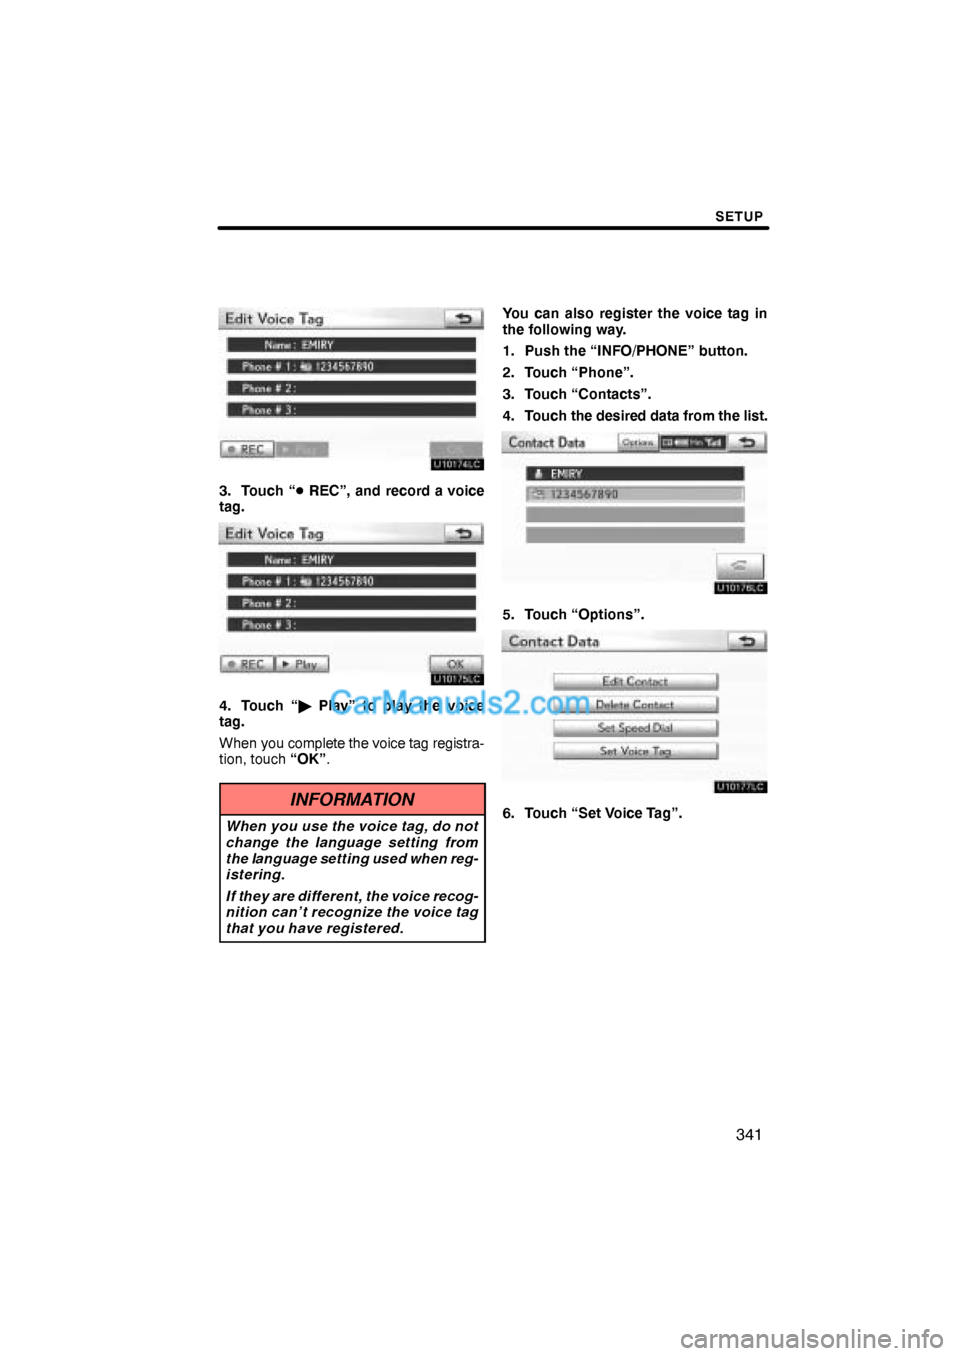
3. Touch “� REC”, and record a voice
tag.
4. Touch “� Play” to play the voice
tag.
When you complete the voice tag registra-
tion, touch “OK”.
INFORMATION
When you use the voice tag, do not
change the language setting from
the language setting used when reg-
istering.
If they are different, the voice recog-
nition can’t recognize the voice tag
that you have registered.
You can also register the voice tag in
the following way.
1. Push the “INFO/PHONE” button.
2. Touch “Phone”.
3. Touch “Contacts”.
4. Touch the desired data from the list.
5. Touch “Options”.
6. Touch “Set Voice Tag”.
Page 50 of 76
SETUP
342
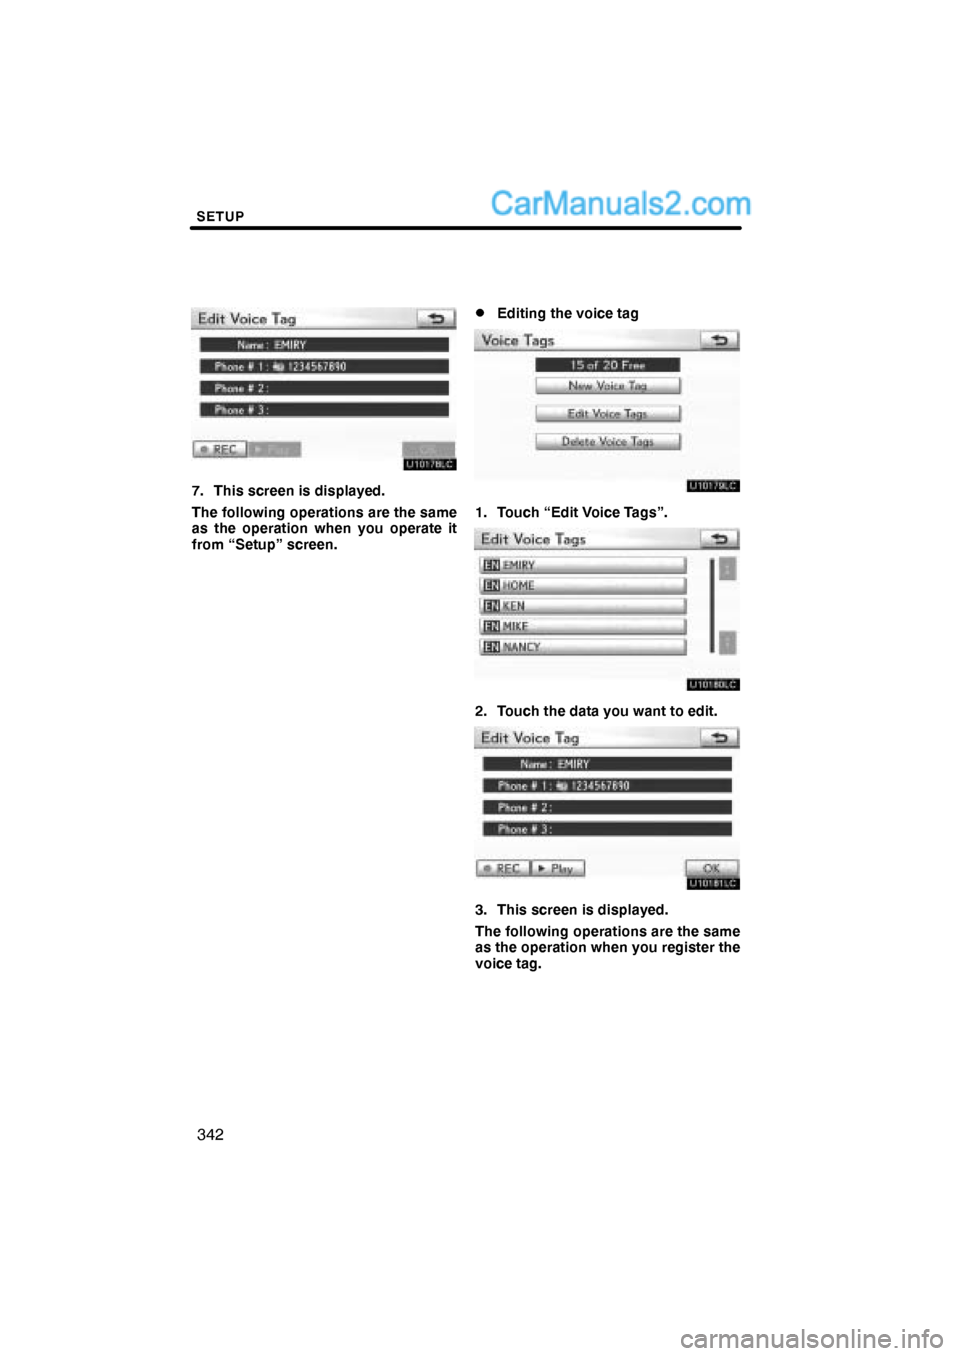
7. This screen is displayed.
The following operations are the same
as the operation when you operate it
from “Setup” screen.
�Editing the voice tag
1. Touch “Edit Voice Tags”.
2. Touch the data you want to edit.
3. This screen is displayed.
The following operations are the same
as the operation when you register the
voice tag.
Trending: battery, ignition, service, phone, check oil, sensor, tires