stop start Lexus IS F 2012 Repair Manual
[x] Cancel search | Manufacturer: LEXUS, Model Year: 2012, Model line: IS F, Model: Lexus IS F 2012Pages: 578, PDF Size: 7.07 MB
Page 349 of 578
348
3-7. Other interior features
IS F_U
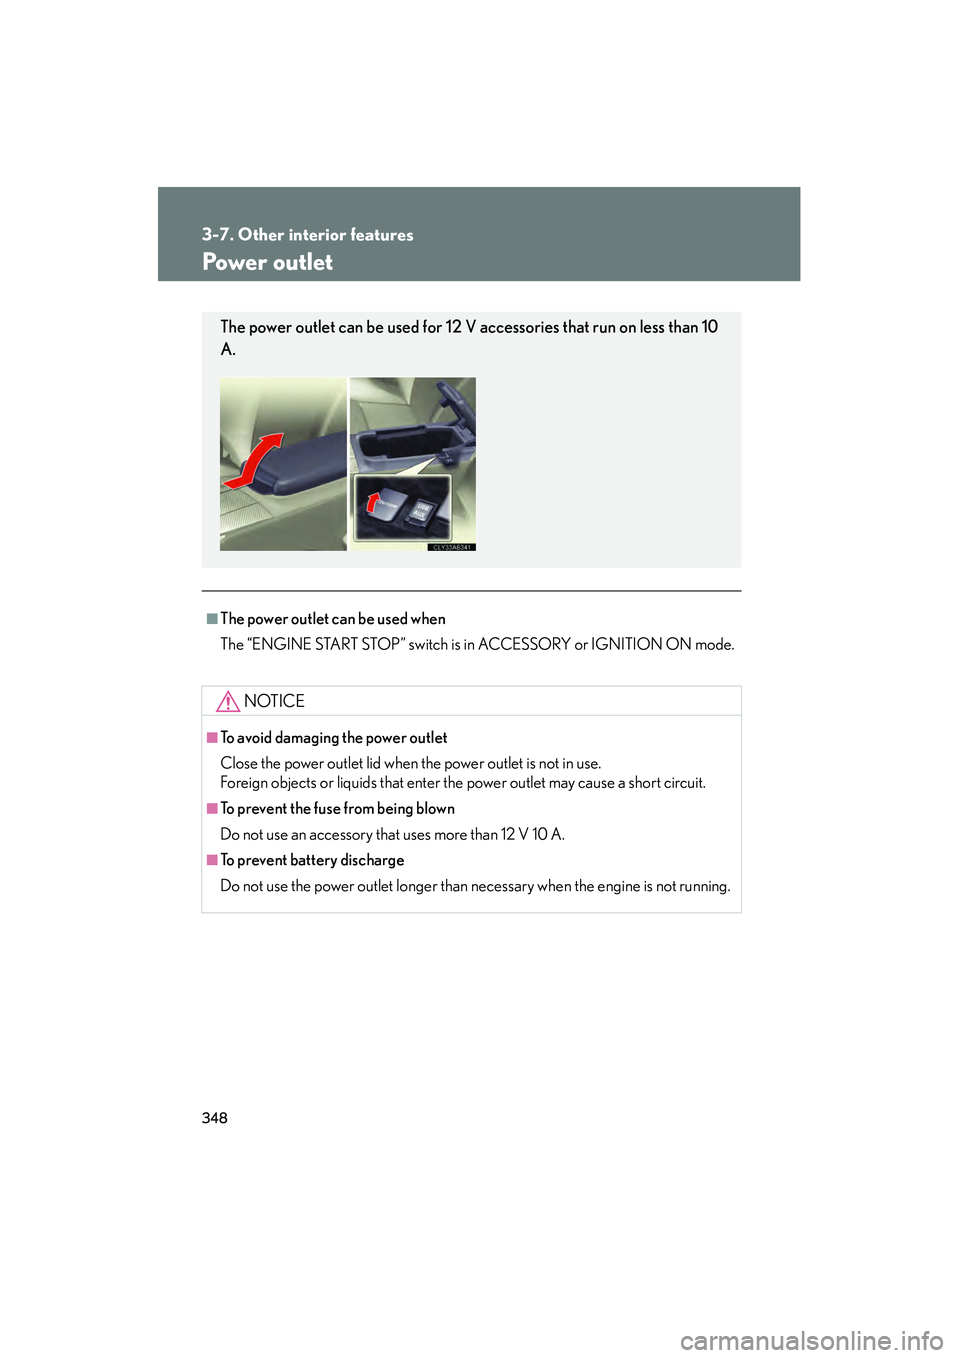
Power outlet
■The power outlet can be used when
The “ENGINE START STOP” switch is in ACCESSORY or IGNITION ON mode.
NOTICE
■To avoid damaging the power outlet
Close the power outlet lid when the power outlet is not in use.
Foreign objects or liquids that enter the power outlet may cause a short circuit.
■To prevent the fuse from being blown
Do not use an accessory that uses more than 12 V 10 A.
■To prevent battery discharge
Do not use the power outlet longer than necessary when the engine is not running.
The power outlet can be used for 12 V accessories that run on less than 10
A.
Page 350 of 578
349
3-7. Other interior features
3
Interior features
IS F_U
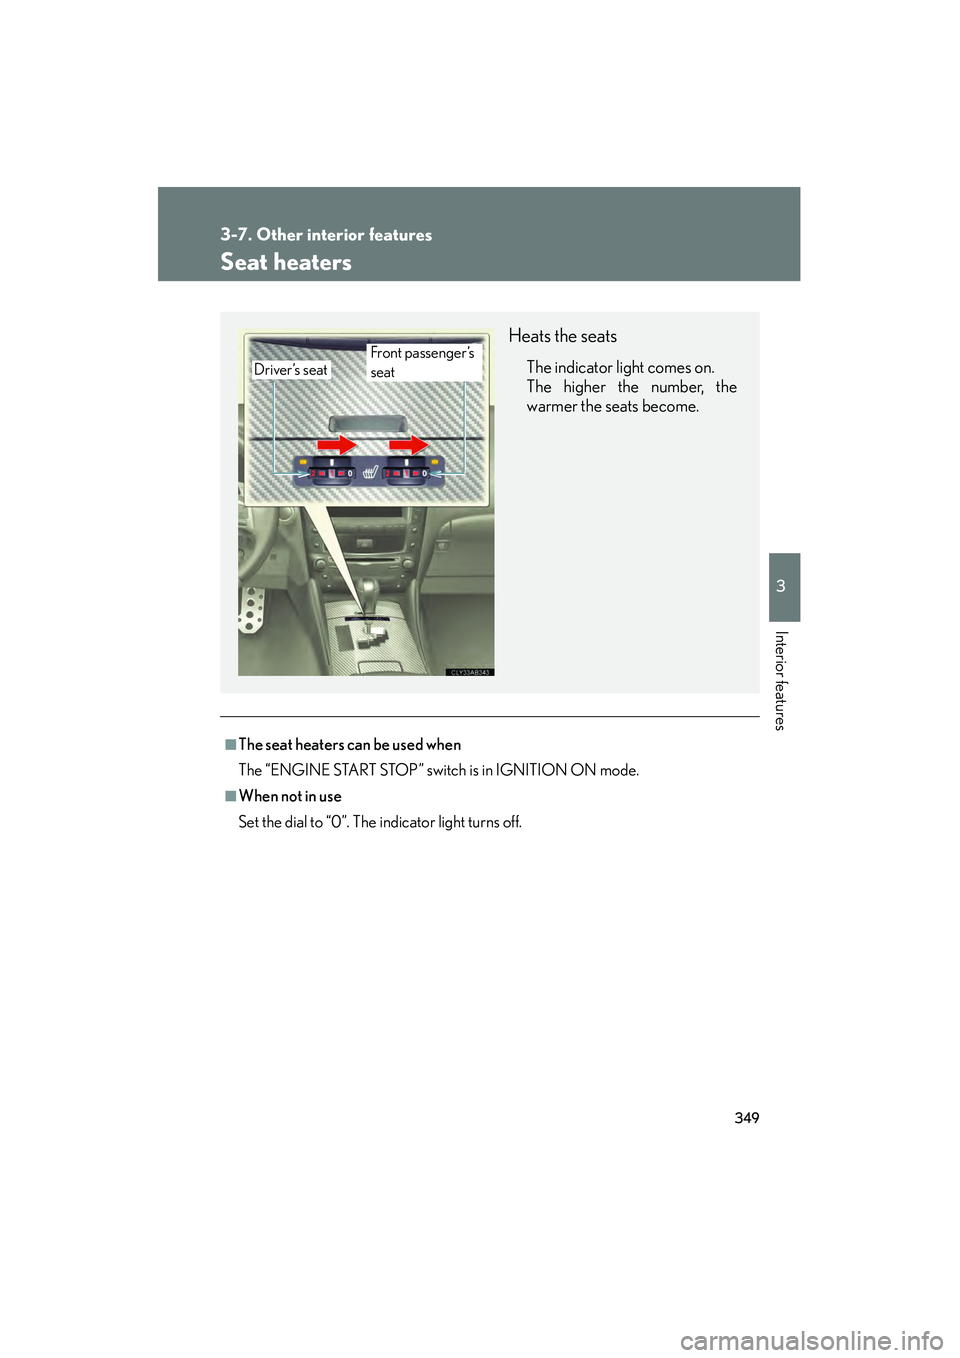
Seat heaters
■The seat heaters can be used when
The “ENGINE START STOP” switch is in IGNITION ON mode.
■When not in use
Set the dial to “0”. The indicator light turns off.
Heats the seats
The indicator light comes on.
The higher the number, the
warmer the seats become.Driver’s seat
Front passenger ’s
seat
Page 373 of 578
372
3-7. Other interior features
IS F_U
Safety Connect LED light IndicatorsWhen the “ENGINE START STOP” switch is turned to IGNITION ON
mode, the red indicator light comes on for 2 seconds then turns off.
Afterward, the green indicator light comes on, indicating that the service
is active.
The following indicator light patterns indicate specific system usage con-
ditions:
● Green indicator light on = Active service
● Green indicator light flashing = Safety Connect call in process
● Red indicator light (except at vehicle start-up) = System malfunction
(contact your Lexus dealer)
● No indicator light (off) = Safety Connect service not active
Safety Connect services
■ Automatic Collis ion Notification
In case of either airbag deployment or severe rear-end collision, the
system is designed to automatically call the response center. The
responding agent receives the vehicle’s location and attempts to speak
with the vehicle occupants to assess the level of emergency. If the
occupants are unable to communicate, the agent automatically treats
the call as an emergency, contacts the nearest emergency services
provider to describe the situation, and requests that assistance be sent
to the location.
Page 386 of 578

385
4-2. Maintenance
4
Maintenance and care
IS F_U
■Reset the maintenance data (U.S.A. only)
After the required maintenance is performed according to the maintenance sched-
ule, please reset the maintenance data.
To reset the data, follow the procedures described below:Switch the display to the odometer ( →P. 150) when the engine is running.
Turn the “ENGINE START STOP” switch OFF.
While pressing the trip meter reset button, set the “ENGINE START
STOP” switch to IGNITION ON mode (but do not start the engine
because otherwise the reset mode will be cancelled). Continue to press
and hold the button until the multi-information display .
■Allow inspection and repairs to be performed by a Lexus dealer
●Lexus technicians are well-trained specialists and are kept up to date with the
latest service information. They are well informed about the operations of all
systems on your vehicle.
●Keep a copy of the repair order. It proves that the maintenance that has been
performed is under warranty coverage. If any problem should arise while your
vehicle is under warranty, your Lexus dealer will promptly take care of it.
CAUTION
■If your vehicle is not properly maintained
It could result in serious damage to the vehicle and possible serious injury or death.
■Warning in handling of battery
●Engine exhaust, some of its constituents, and a wide variety of automobile com-
ponents contain or emit chemicals known to the State of California to cause can-
cer and birth defects and other reproductive harm. Work in a well ventilated area.
●Oils, fuels and fluids contained in vehicles as well as waste produced by compo-
nent wear contain or emit chemicals known to the State of California to cause
cancer and birth defects or other reproductive harm. Avoid exposure and wash
any affected area immediately.
●Battery posts, terminals and related accessories contain lead and lead com-
pounds which are known to cause brain damage. Wash your hands after han-
dling. ( →P. 406)
STEP1
STEP2
STEP3
Page 393 of 578
392
4-3. Do-it-yourself maintenance
IS F_U
CAUTION
The engine compartment contains many mechanisms and fluids that may move sud-
denly, become hot, or become electrically energized. To avoid death or serious injury,
observe the following precautions.
■When working on the engine compartment:
●Keep hands, clothing, and tools away from the moving fan and engine drive belt.
●Be careful not to touch the engine, radiator, exhaust manifold, etc. right after driv-
ing as they may be hot. Oil and other fluids may also be hot.
●Do not leave anything that may burn easily, such as paper or rags, in the engine
compartment.
●Do not smoke, cause sparks or expose an open flame to fuel or the battery. Fuel
and battery fumes are flammable.
●Be extremely cautious when working on the battery. It contains poisonous and
corrosive sulfuric acid.
■When working near the electric cooling fan or radiator grille:
Be sure the “ENGINE START STOP” switch is OFF.
With the “ENGINE START STOP” switch in IGNITION ON mode, the electric
cooling fan may automatically start to run if the air conditioning is on and/or the
coolant temperature is high. (→P. 4 0 4 )
■Safety glasses
Wear safety glasses to prevent flying or falling material, fluid spray, etc. from getting
in the eyes.
NOTICE
■If you remove the air cleaner filter
Driving with the air cleaner filter removed may cause excessive engine wear due to
dirt in the air. Also, a backfire could cause a fire in the engine compartment.
Page 396 of 578

395
4-3. Do-it-yourself maintenance
4
Maintenance and care
IS F_U
CAUTION
■When raising your vehicle:
Make sure to observe the following to reduce the possibility of death or serious
injury.
●When using a floor jack, follow the instructions of the manual provided with the
jack.
●Do not use the jack that was supplied with your vehicle.
●Do not put any part of your body or get underneath the vehicle supported only by
the floor jack.
●Always use floor jack and/or automotive jack stands on a solid, flat, level surface.
●Do not start the engine while the vehicle is supported by the floor jack.
●Stop the vehicle on level firm ground, firmly set the parking brake and put the shift
lever in P.
●Make sure to set the floor jack properly at the jack point.
Raising the vehicle with an improperly positioned floor jack will damage the vehi-
cle and may cause the vehicle to fall off the floor jack.
●Do not raise the vehicle while someone is in the vehicle.
●When raising the vehicle, do not place any objects on top of or underneath the
floor jack.
●Lift up the vehicle using a floor jack such as
the one shown in the illustration.
Page 408 of 578
407
4-3. Do-it-yourself maintenance
4
Maintenance and care
IS F_U■
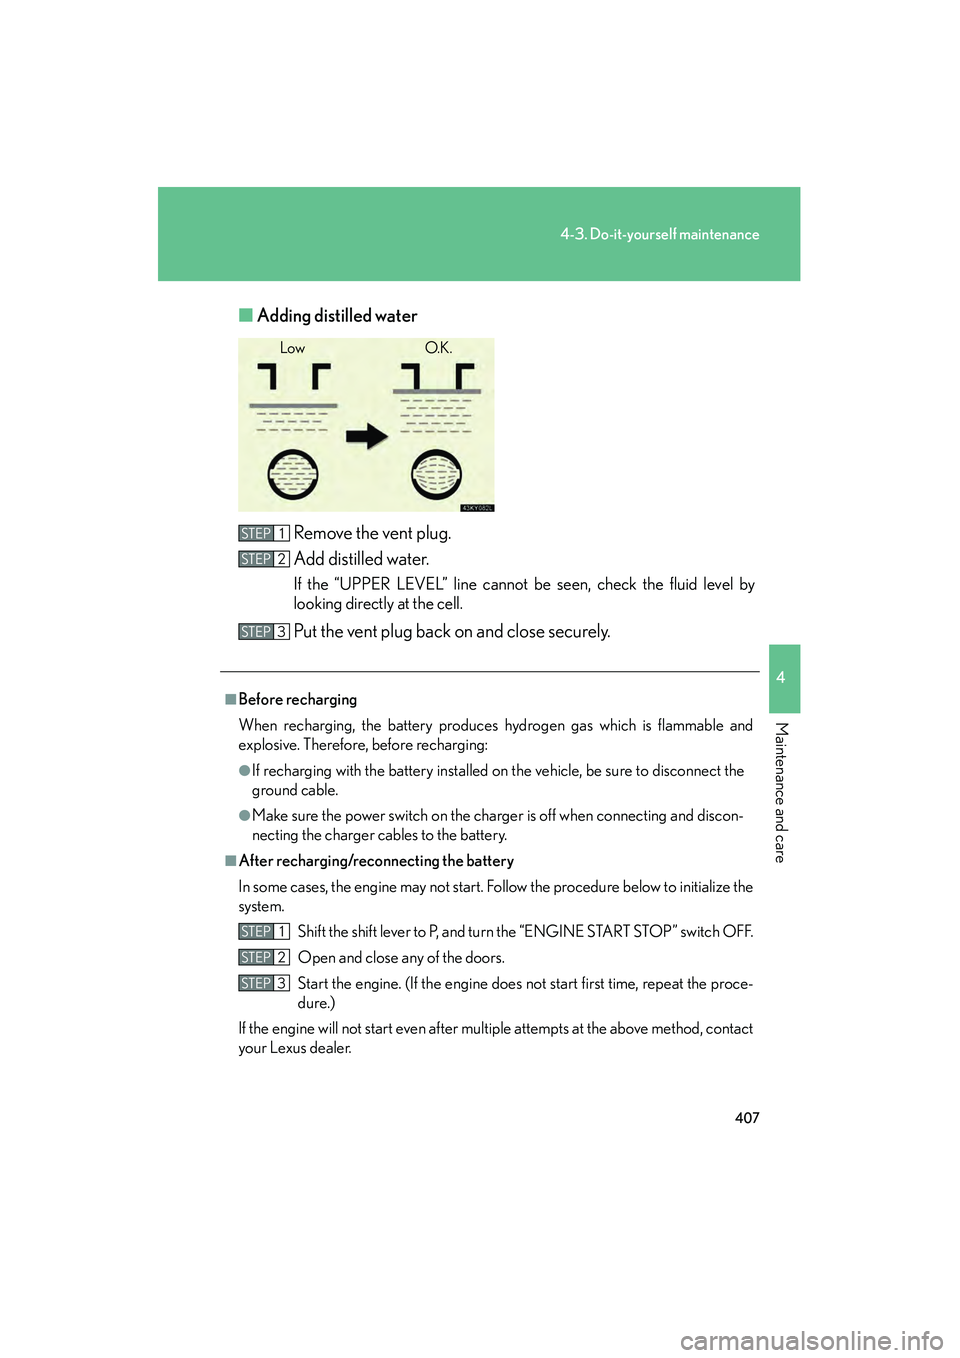
Adding distilled water
Remove the vent plug.
Add distilled water.
If the “UPPER LEVEL” line cannot be seen, check the fluid level by
looking directly at the cell.
Put the vent plug back on and close securely.
Low O.K.
■Before recharging
When recharging, the battery produces hydrogen gas which is flammable and
explosive. Therefore, before recharging:
●If recharging with the battery installed on the vehicle, be sure to disconnect the
ground cable.
●Make sure the power switch on the charger is off when connecting and discon-
necting the charger cables to the battery.
■After recharging/reconnecting the battery
In some cases, the engine may not start. Follow the procedure below to initialize the
system.
Shift the shift lever to P, and turn the “ENGINE START STOP” switch OFF.
Open and close any of the doors.
Start the engine. (If the engine does not start first time, repeat the proce-
dure.)
If the engine will not start even after multiple attempts at the above method, contact
your Lexus dealer.
STEP1
STEP2
STEP3
STEP1
STEP2
STEP3
Page 412 of 578

411
4-3. Do-it-yourself maintenance
4
Maintenance and care
IS F_U
Initializing the tire pressure warning system■ The tire pressure warning system must be initialized when the tire
inflation pressure is changed (such as when changing traveling
speed.)
When the tire pressure warning system is initialized, the current tire
inflation pressure is set as the benchmark pressure.
■ How to initialize the tire pressure warning system
To initialize the system, use the satellite switch. ( →P. 343)
Park the vehicle in safe place and turn the “ENGINE START
STOP” switch to OFF.
While the vehicle is moving, initialization is not performed.
Adjust the tire inflation pressure to the specified cold tire inflation
pressure level. (→ P. 5 2 1 )
Make sure to adjust the tire pressure to the specified cold tire inflation
pressure level. The tire pressure warning system will operate based on
this pressure level.
Turn the “ENGINE START STOP” switch to IGNITION ON
mode.
STEP1
STEP2
STEP3
Page 413 of 578

412
4-3. Do-it-yourself maintenance
IS F_UThe tire inflation pressure initial-
ization setting display
Continue to press “<” or “>” until
the initialization setting display
appears.
It may take several minutes to com-
plete the setting. Wait for several
minutes before turning the
“ENGINE START STOP” switch to
OFF if necessary.
Recording tire inflation pressure
settings
Press and hold the “ON/OFF” but-
ton until the tire pressure warning
light blinks slowly 3 times to indi-
cate that the initial setting is com-
plete.
Wait for a few minutes with the IGNITION ON mode, and then
turn the “ENGINE START STOP” switch to OFF.
STEP4
STEP5
Page 427 of 578

426
4-3. Do-it-yourself maintenance
IS F_U
Air conditioning filter
The air conditioning filter must be cleaned or changed regularly to main-
tain air conditioning efficiency.
■ Removal method
Set the air conditioning system to recirculated mode.
(→P. 2 2 0 )
The air conditioning filter case cannot be removed with the system in
the outside air mode.
Turn the “ENGINE START STOP” switch to OFF.
Open the glove box. Lift and
remove the partition.
Remove the filter cover.
Remove the filter case.
STEP1
STEP2
STEP3
STEP4
STEP5