set clock LINCOLN AVIATOR 2003 Owners Manual
[x] Cancel search | Manufacturer: LINCOLN, Model Year: 2003, Model line: AVIATOR, Model: LINCOLN AVIATOR 2003Pages: 288, PDF Size: 3.32 MB
Page 27 of 288
Soft mute
When the vehicle is in reverse, and an obstacle is detected by Rear Park
Assist, the radio volume is reduced to a level that allows the warning to
be heard. After the obstacle warning is gone, the radio will return to the
previously set volume level.
Setting the clock
Your vehicle is equipped with a separate instrument panel mounted
clock. Please refer toClockin theDriver controls chapterfor
instructions on setting the clock.
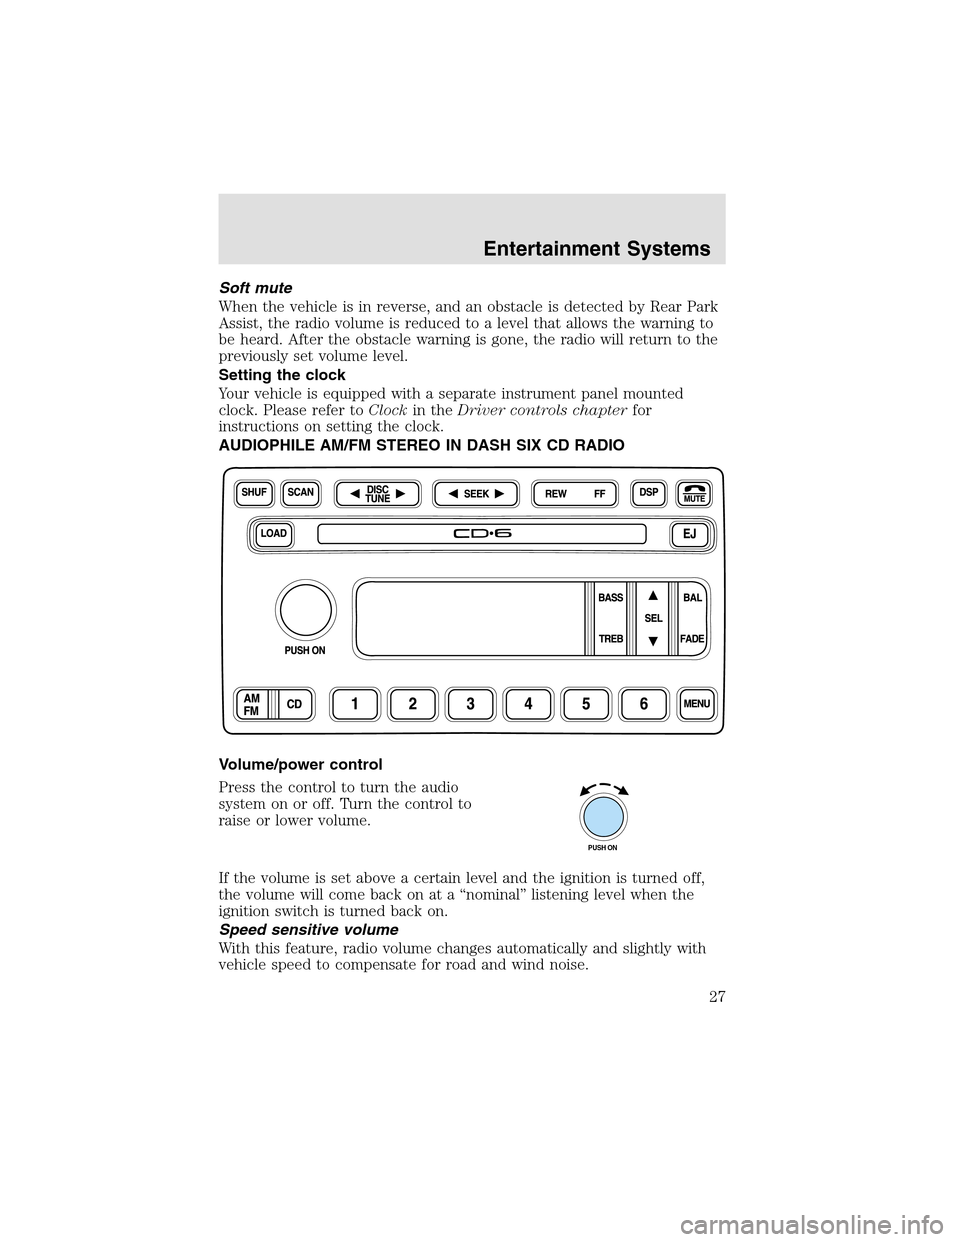
AUDIOPHILE AM/FM STEREO IN DASH SIX CD RADIO
Volume/power control
Press the control to turn the audio
system on or off. Turn the control to
raise or lower volume.
If the volume is set above a certain level and the ignition is turned off,
the volume will come back on at a “nominal” listening level when the
ignition switch is turned back on.
Speed sensitive volume
With this feature, radio volume changes automatically and slightly with
vehicle speed to compensate for road and wind noise.
PUSH ON
Entertainment Systems
27
Page 38 of 288
Soft mute
When the vehicle is in reverse, and an obstacle is detected by Rear Park
Assist, the radio volume is reduced to a level that allows the warning to
be heard. After the obstacle warning is gone, the radio will return to the
previously set volume level.
Setting the clock
Your vehicle is equipped with a separate instrument panel mounted
clock. Please refer toClockin theDriver controls chapterfor
instructions on setting the clock.
Digital signal processing
The digital signal processing (DSP) feature allows you to change the
signal mode to suit your listening tastes.
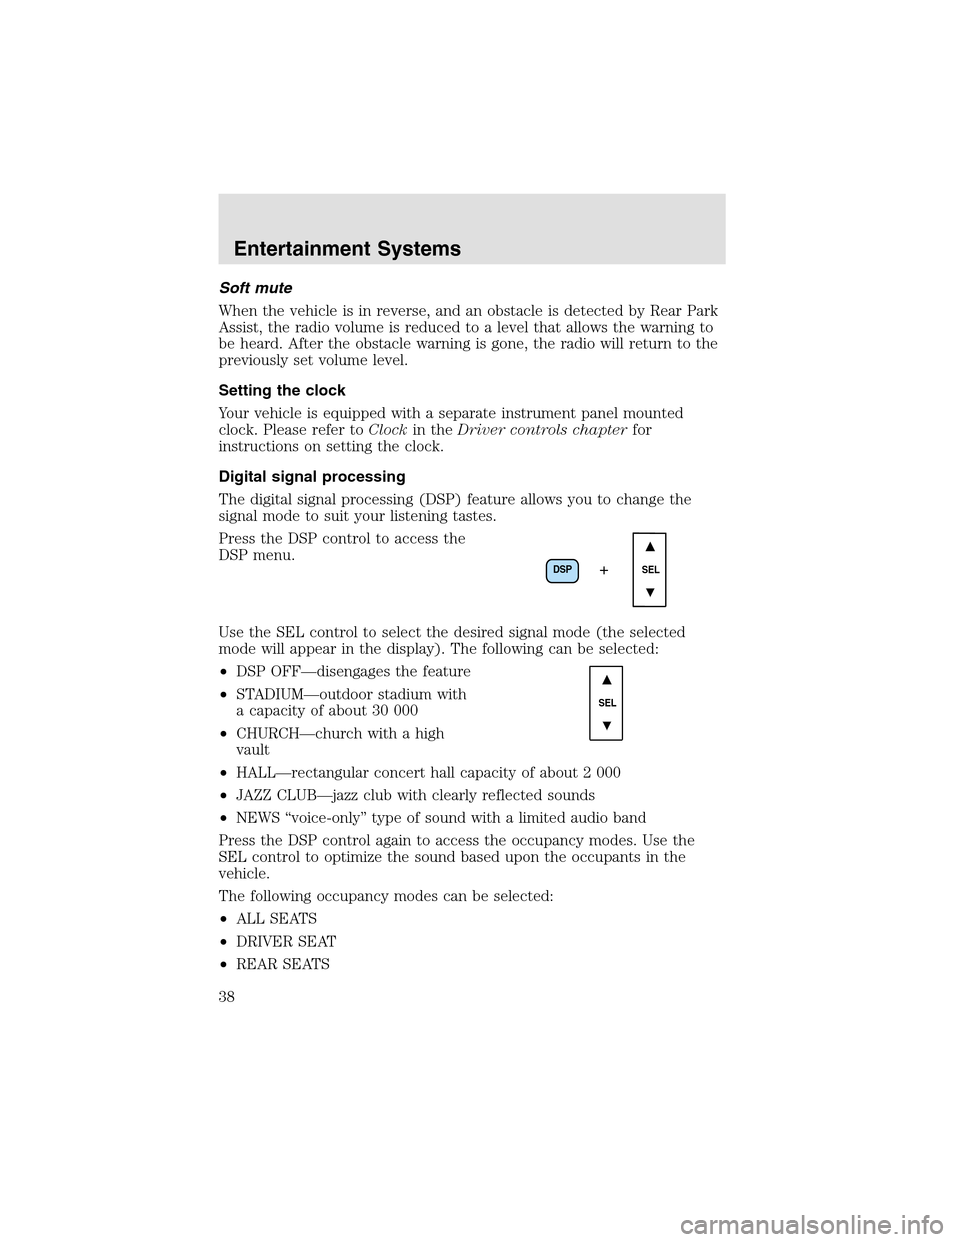
Press the DSP control to access the
DSP menu.
Use the SEL control to select the desired signal mode (the selected
mode will appear in the display). The following can be selected:
•DSP OFF—disengages the feature
•STADIUM—outdoor stadium with
a capacity of about 30 000
•CHURCH—church with a high
vault
•HALL—rectangular concert hall capacity of about 2 000
•JAZZ CLUB—jazz club with clearly reflected sounds
•NEWS “voice-only” type of sound with a limited audio band
Press the DSP control again to access the occupancy modes. Use the
SEL control to optimize the sound based upon the occupants in the
vehicle.
The following occupancy modes can be selected:
•ALL SEATS
•DRIVER SEAT
•REAR SEATS
DSP
SEL+
SEL
Entertainment Systems
38
Page 58 of 288
Replacing headlamp bulbs
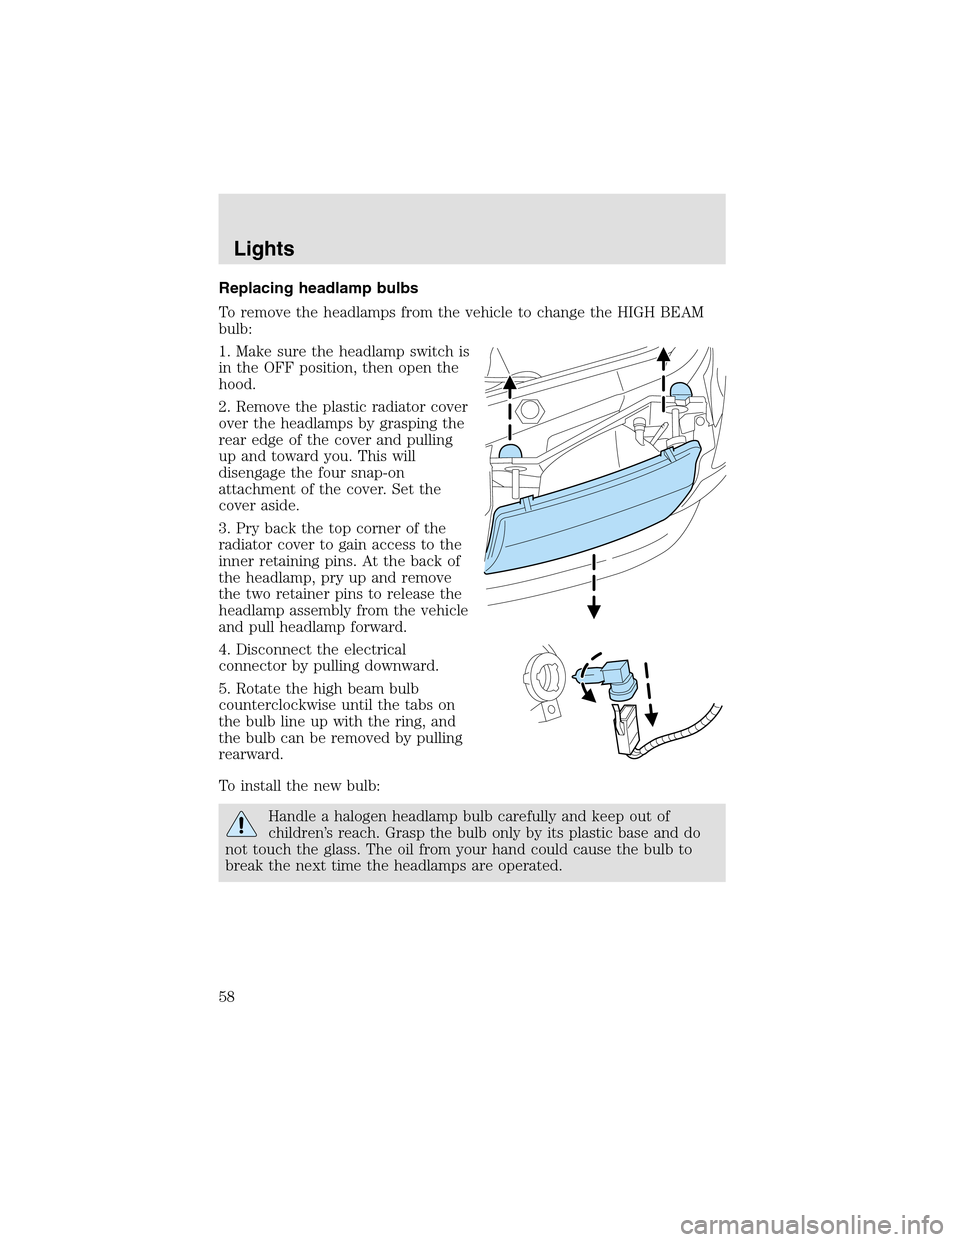
To remove the headlamps from the vehicle to change the HIGH BEAM
bulb:
1. Make sure the headlampswitch is
in the OFF position, then open the
hood.
2. Remove the plastic radiator cover
over the headlamps by grasping the
rear edge of the cover and pulling
upand toward you. This will
disengage the four snap-on
attachment of the cover. Set the
cover aside.
3. Pry back the topcorner of the
radiator cover to gain access to the
inner retaining pins. At the back of
the headlamp, pry up and remove
the two retainer pins to release the
headlampassembly from the vehicle
and pull headlamp forward.
4. Disconnect the electrical
connector by pulling downward.
5. Rotate the high beam bulb
counterclockwise until the tabs on
the bulb line upwith the ring, and
the bulb can be removed by pulling
rearward.
To install the new bulb:
Handle a halogen headlampbulb carefully and keepout of
children’s reach. Graspthe bulb only by its plastic base and do
not touch the glass. The oil from your hand could cause the bulb to
break the next time the headlamps are operated.
Lights
58
Page 60 of 288
Replacing front parking lamp/turn signal/sidemarker bulbs
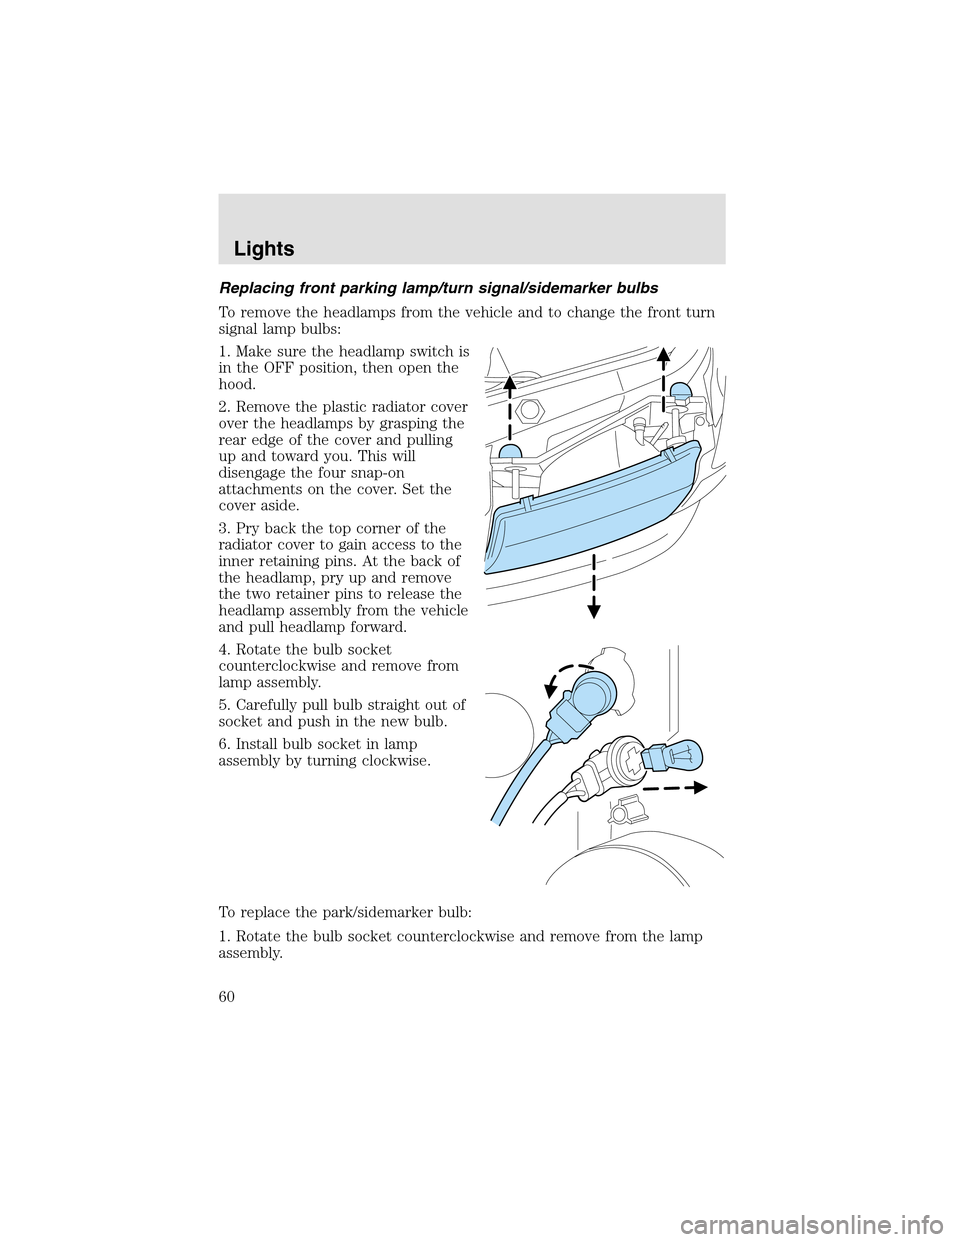
To remove the headlamps from the vehicle and to change the front turn
signal lampbulbs:
1. Make sure the headlampswitch is
in the OFF position, then open the
hood.
2. Remove the plastic radiator cover
over the headlamps by grasping the
rear edge of the cover and pulling
upand toward you. This will
disengage the four snap-on
attachments on the cover. Set the
cover aside.
3. Pry back the topcorner of the
radiator cover to gain access to the
inner retaining pins. At the back of
the headlamp, pry up and remove
the two retainer pins to release the
headlampassembly from the vehicle
and pull headlamp forward.
4. Rotate the bulb socket
counterclockwise and remove from
lampassembly.
5. Carefully pull bulb straight out of
socket and push in the new bulb.
6. Install bulb socket in lamp
assembly by turning clockwise.
To replace the park/sidemarker bulb:
1. Rotate the bulb socket counterclockwise and remove from the lamp
assembly.
Lights
60
Page 215 of 288
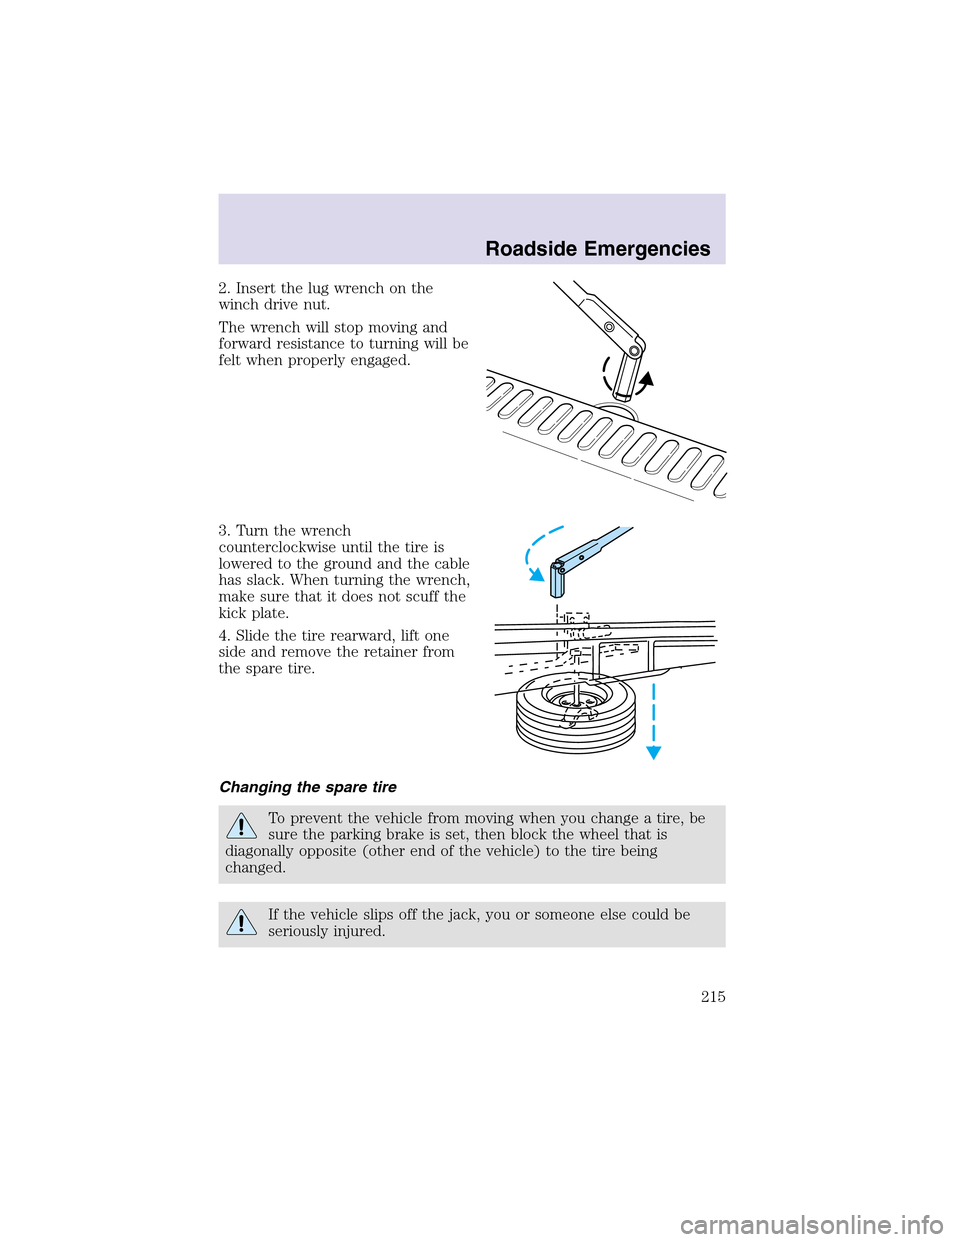
2. Insert the lug wrench on the
winch drive nut.
The wrench will stopmoving and
forward resistance to turning will be
felt when properly engaged.
3. Turn the wrench
counterclockwise until the tire is
lowered to the ground and the cable
has slack. When turning the wrench,
make sure that it does not scuff the
kick plate.
4. Slide the tire rearward, lift one
side and remove the retainer from
the spare tire.
Changing the spare tire
To prevent the vehicle from moving when you change a tire, be
sure the parking brake is set, then block the wheel that is
diagonally opposite (other end of the vehicle) to the tire being
changed.
If the vehicle slips off the jack, you or someone else could be
seriously injured.
Roadside Emergencies
215
Page 251 of 288
If the battery has been disconnected or a new battery has been installed,
the clock and the preset radio stations must be reset once the battery is
reconnected.
•Always dispose of automotive
batteries in a responsible manner.
Follow your local authorized
standards for disposal. Call your
local authorized recycling center
to find out more about recycling
automotive batteries.
ENGINE COOLANT
Checking engine coolant
The concentration and level of engine coolant should be checked at the
mileage intervals listed in the scheduled maintenance guide. The coolant
concentration should be maintained at 50/50 coolant and distilled water,
which equates to a freeze point of -36° C (-34° F). Coolant concentration
testing is possible with a hydrometer or antifreeze tester (such as the
Rotunda Battery and Antifreeze Tester, 014–R1060). The level of coolant
should be maintained at the “cold full” of “cold fill range” level in the
coolant reservoir. If the level falls below, refer to instructions in the
Adding engine coolantsection.
Your vehicle was factory-filled with a 50/50 engine coolant and water
concentration. If the concentration of coolant falls below 40% or above
60%, the engine parts could become damaged or not work properly.A
50–50 mixture of coolant and water provides the following:
•Freeze protection down to -36° C (-34° F).
•Boiling protection up to 129° C (265° F).
•Protection against rust and other forms of corrosion.
•Enables calibrated gauges to work properly.
LEAD
RETURN
RECYCLE
Maintenance and Specifications
251
Page 282 of 288
Child safety restraints ..............151
child safety belts ....................151
Child safety seats ......................154
attaching with tether straps ..159
in front seat ............................156
in rear seat ..............................156
Cleaning your vehicle
engine compartment ..............237
instrument panel ....................239
interior .............................239–240
interior trim ............................240
plastic parts ............................238
washing ....................................236
waxing .....................................236
wheels ......................................237
wiper blades ............................238
Clock ................................27, 38, 69
Compass, electronic
set zone adjustment .................87
Console ........................................99
overhead ..............................67–68
rear ............................................99
Controls
power seat ...............................123
steering column ........................80
Coolant
checking and adding ..............251
coolant temperature light ........13
refill capacities ................253, 270
specifications ..................273, 275
Cruise control
(see Speed control) ....................76
Customer Assistance ................200
Ford accessories for
your vehicle ....................241, 278
Ford Extended Service
Plan ..........................................228
Getting assistance outside
the U.S. and Canada ..............232Getting roadside assistance ...200
Getting the service
you need .................................226
Ordering additional
owner’s literature ...................233
The Dispute Settlement
Board .......................................229
Utilizing the Mediation/
Arbitration Program ...............232
D
Daytime running lamps
(see Lamps) ................................52
Defrost
rear window ..............................49
Dipstick
automatic transmission
fluid ..........................................265
engine oil .................................245
Doors
door ajar warning .....................14
lubricant specifications ..........273
Driving under special
conditions ..........................184, 187
sand .........................................186
snow and ice ...........................188
through water .................186, 190
Dual automatic temperature
control (DATC) ...........................41
E
Electronic message center .........86
Emergencies, roadside
jump-starting ..........................219
Emission control system ..........263
Engine ........................................275
check engine/service engine
soon light ..................................10
Index
282