LINCOLN LS 2003 Manual Online
Manufacturer: LINCOLN, Model Year: 2003, Model line: LS, Model: LINCOLN LS 2003Pages: 288, PDF Size: 3.19 MB
Page 81 of 288
7. Close the hood and turn off the lamps.
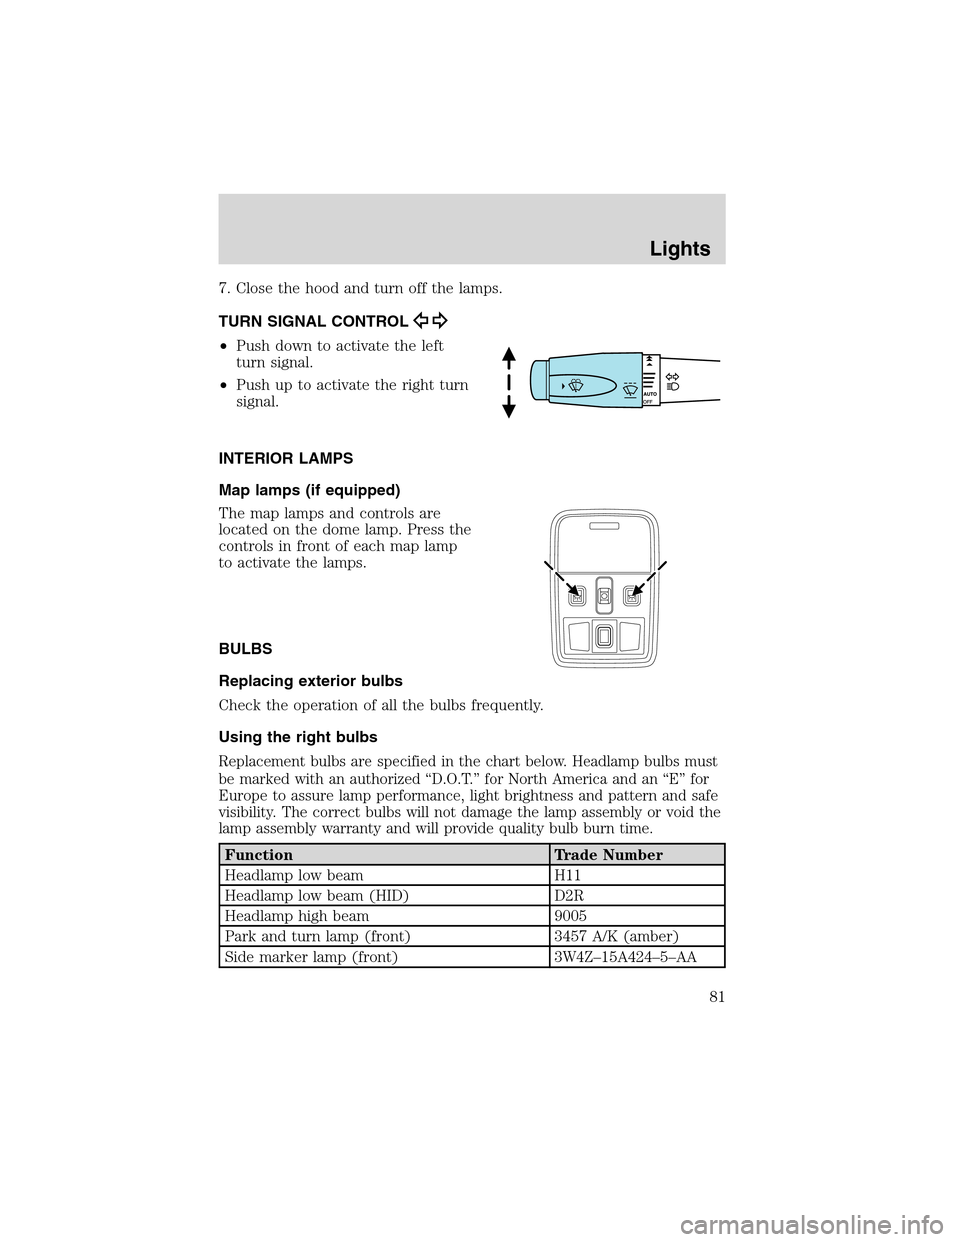
TURN SIGNAL CONTROL
•Push down to activate the left
turn signal.
•Push up to activate the right turn
signal.
INTERIOR LAMPS
Map lamps (if equipped)
The map lamps and controls are
located on the dome lamp. Press the
controls in front of each map lamp
to activate the lamps.
BULBS
Replacing exterior bulbs
Check the operation of all the bulbs frequently.
Using the right bulbs
Replacement bulbs are specified in the chart below. Headlamp bulbs must
be marked with an authorized“D.O.T.”for North America and an“E”for
Europe to assure lamp performance, light brightness and pattern and safe
visibility. The correct bulbs will not damage the lamp assembly or void the
lamp assembly warranty and will provide quality bulb burn time.
Function Trade Number
Headlamp low beam H11
Headlamp low beam (HID) D2R
Headlamp high beam 9005
Park and turn lamp (front) 3457 A/K (amber)
Side marker lamp (front) 3W4Z–15A424–5–AA
Lights
81
Page 82 of 288
Function Trade Number
Foglamp 9145
Tail lamp, brakelamp, side lamp 3157K
Rear turn lamp 3157 A/K (amber)
Backup lamp 921
License plate lamp 168
High-mount brakelamp 3W4Z–13A613–AA
Map lamp (with moon roof) 906
Rail lamp (rear) 168
Map lamp (front) 906
Sun visor lighted mirror lamp Part # E9SB-13465-BA
Glove compartment 194
Ashtray 194
Luggage compartment lamp 212-2
All replacement bulbs are clear in color except where noted.
To replace all instrument panel lights - see your dealer.
Interior bulbs
Check the operation of all bulbs frequently.
Map lamps
For bulb replacement, see a qualified service technician or your dealer.
Replacing headlamp bulbs
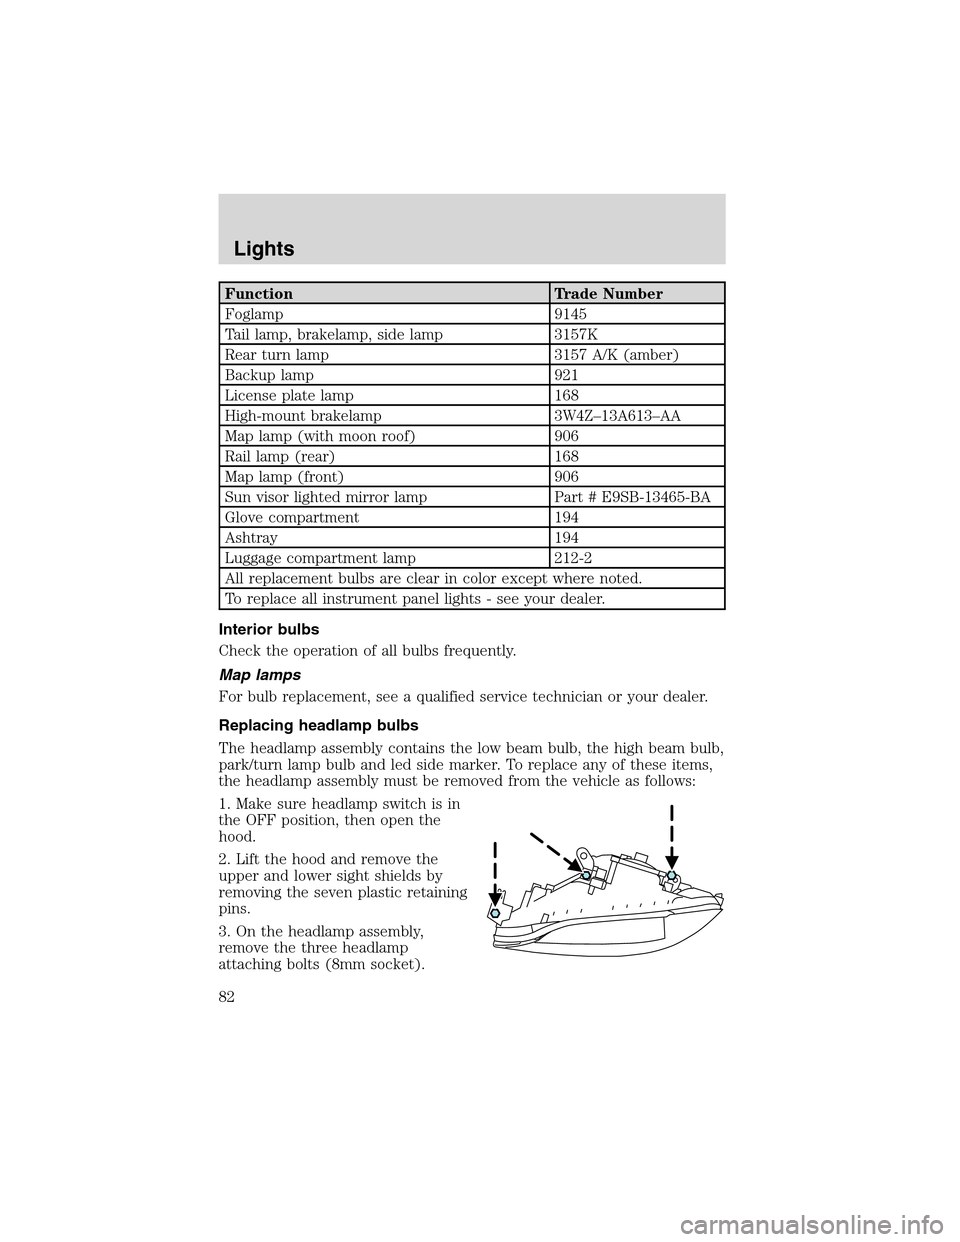
The headlamp assembly contains the low beam bulb, the high beam bulb,
park/turn lamp bulb and led side marker. To replace any of these items,
the headlamp assembly must be removed from the vehicle as follows:
1. Make sure headlamp switch is in
the OFF position, then open the
hood.
2. Lift the hood and remove the
upper and lower sight shields by
removing the seven plastic retaining
pins.
3. On the headlamp assembly,
remove the three headlamp
attaching bolts (8mm socket).
Lights
82
Page 83 of 288
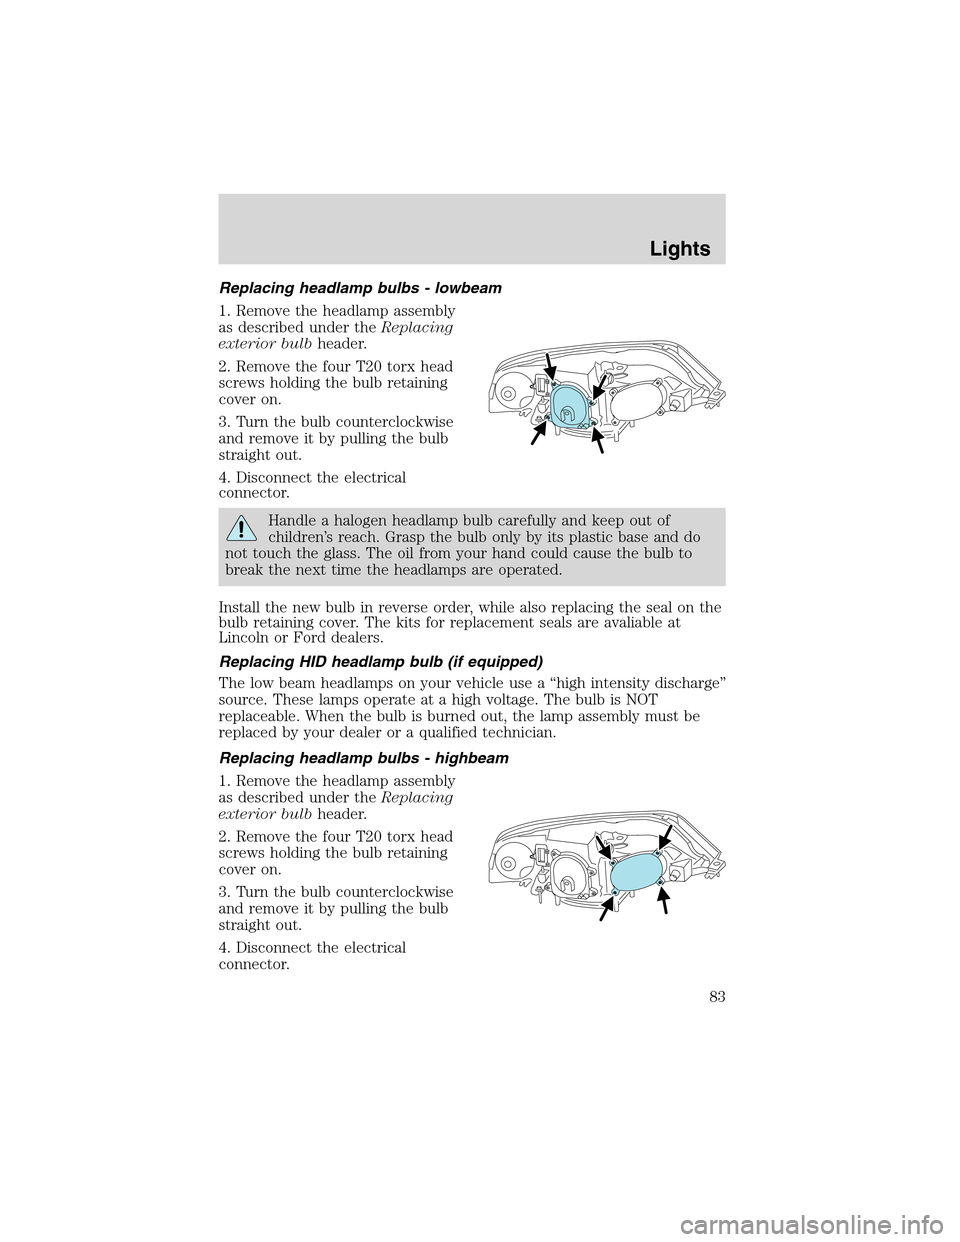
Replacing headlamp bulbs - lowbeam
1. Remove the headlamp assembly
as described under theReplacing
exterior bulbheader.
2. Remove the four T20 torx head
screws holding the bulb retaining
cover on.
3. Turn the bulb counterclockwise
and remove it by pulling the bulb
straight out.
4. Disconnect the electrical
connector.
Handle a halogen headlamp bulb carefully and keep out of
children’s reach. Grasp the bulb only by its plastic base and do
not touch the glass. The oil from your hand could cause the bulb to
break the next time the headlamps are operated.
Install the new bulb in reverse order, while also replacing the seal on the
bulb retaining cover. The kits for replacement seals are avaliable at
Lincoln or Ford dealers.
Replacing HID headlamp bulb (if equipped)
The low beam headlamps on your vehicle use a“high intensity discharge”
source. These lamps operate at a high voltage. The bulb is NOT
replaceable. When the bulb is burned out, the lamp assembly must be
replaced by your dealer or a qualified technician.
Replacing headlamp bulbs - highbeam
1. Remove the headlamp assembly
as described under theReplacing
exterior bulbheader.
2. Remove the four T20 torx head
screws holding the bulb retaining
cover on.
3. Turn the bulb counterclockwise
and remove it by pulling the bulb
straight out.
4. Disconnect the electrical
connector.
Lights
83
Page 84 of 288
Install the new bulb in reverse order, while also replacing the seal on the
bulb retaining cover. The kits for replacement seals are avaliable at
Lincoln or Ford dealers.
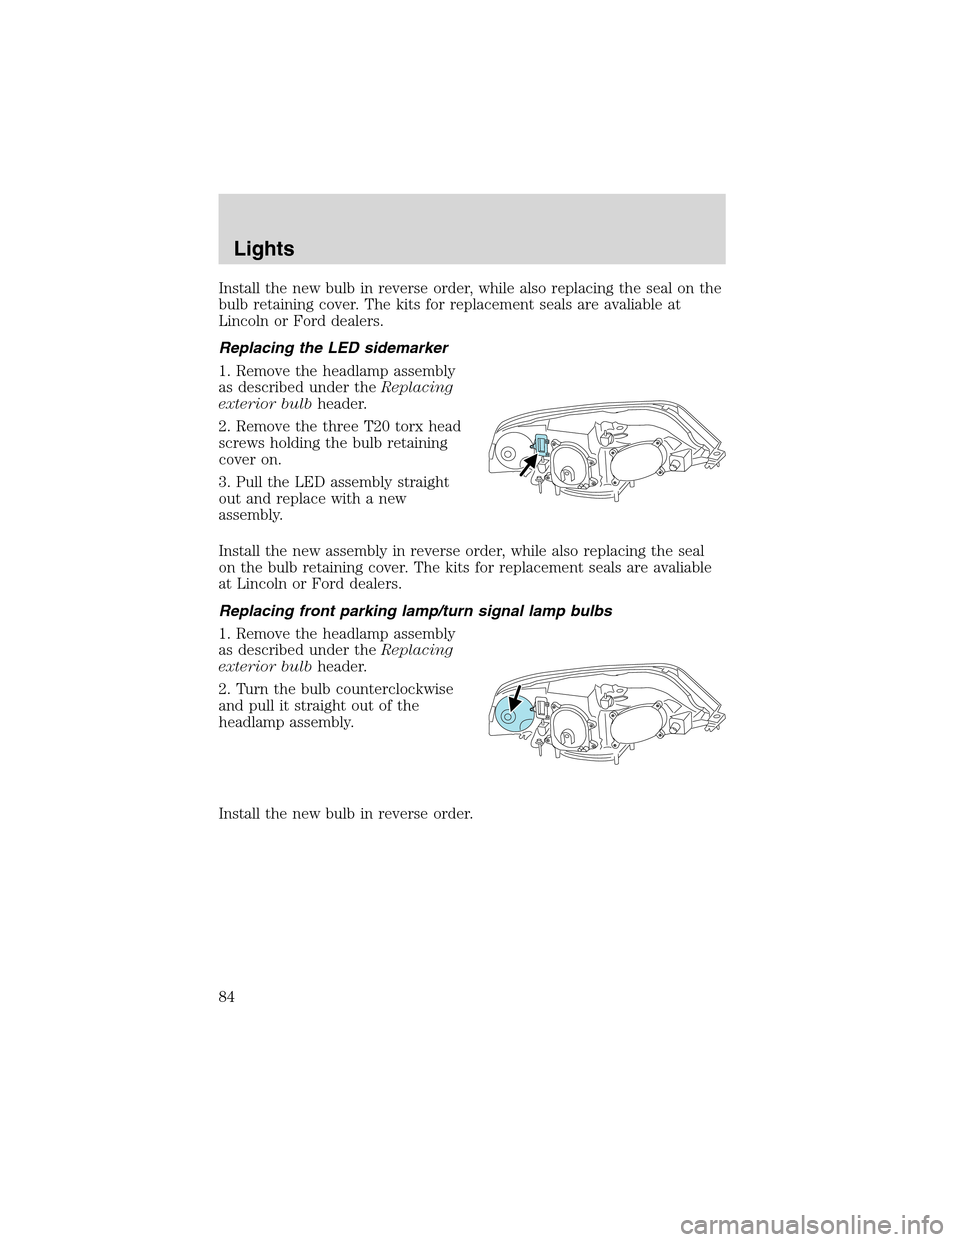
Replacing the LED sidemarker
1. Remove the headlamp assembly
as described under theReplacing
exterior bulbheader.
2. Remove the three T20 torx head
screws holding the bulb retaining
cover on.
3. Pull the LED assembly straight
out and replace with a new
assembly.
Install the new assembly in reverse order, while also replacing the seal
on the bulb retaining cover. The kits for replacement seals are avaliable
at Lincoln or Ford dealers.
Replacing front parking lamp/turn signal lamp bulbs
1. Remove the headlamp assembly
as described under theReplacing
exterior bulbheader.
2. Turn the bulb counterclockwise
and pull it straight out of the
headlamp assembly.
Install the new bulb in reverse order.
Lights
84
Page 85 of 288
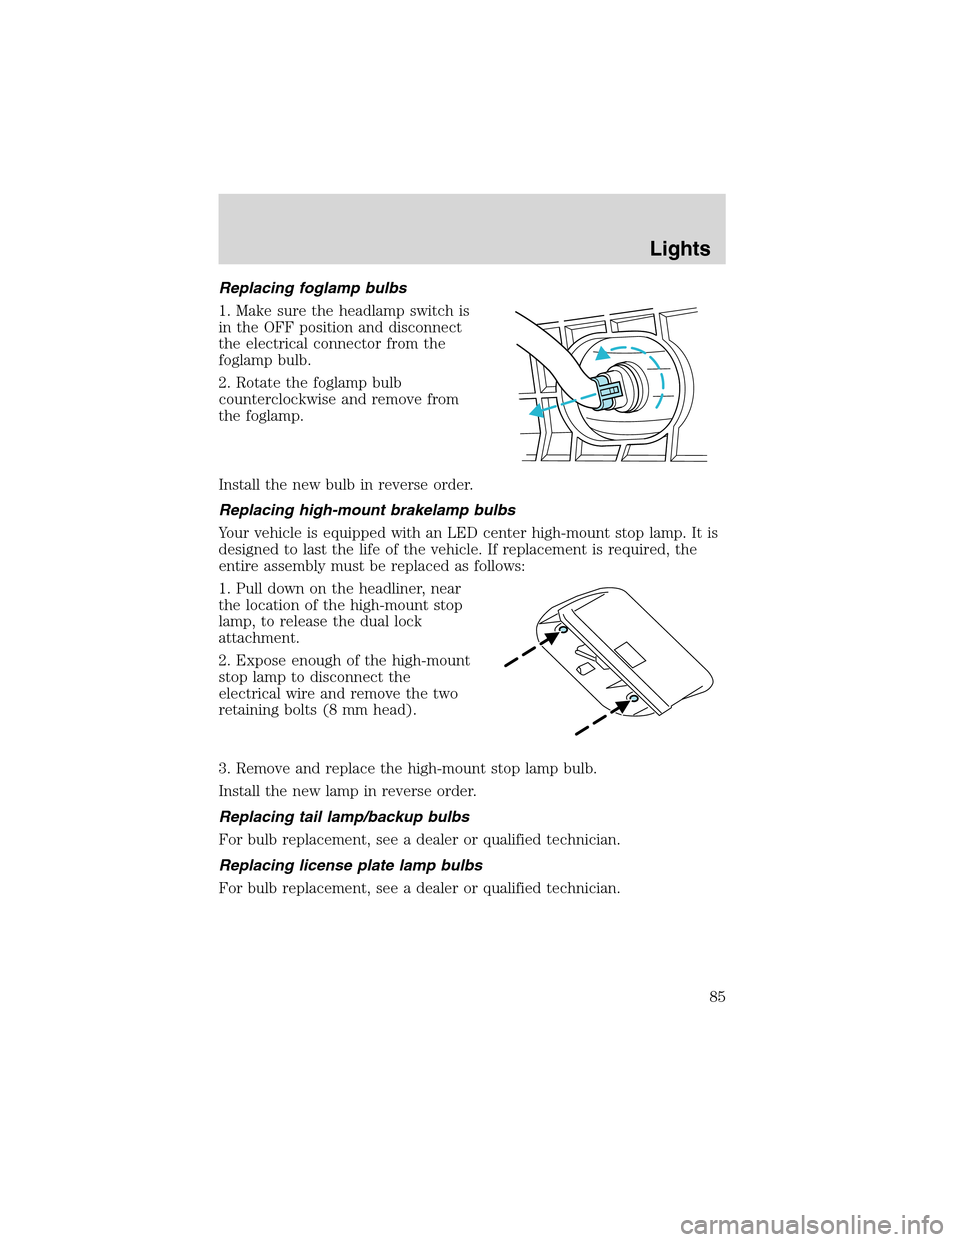
Replacing foglamp bulbs
1. Make sure the headlamp switch is
in the OFF position and disconnect
the electrical connector from the
foglamp bulb.
2. Rotate the foglamp bulb
counterclockwise and remove from
the foglamp.
Install the new bulb in reverse order.
Replacing high-mount brakelamp bulbs
Your vehicle is equipped with an LED center high-mount stop lamp. It is
designed to last the life of the vehicle. If replacement is required, the
entire assembly must be replaced as follows:
1. Pull down on the headliner, near
the location of the high-mount stop
lamp, to release the dual lock
attachment.
2. Expose enough of the high-mount
stop lamp to disconnect the
electrical wire and remove the two
retaining bolts (8 mm head).
3. Remove and replace the high-mount stop lamp bulb.
Install the new lamp in reverse order.
Replacing tail lamp/backup bulbs
For bulb replacement, see a dealer or qualified technician.
Replacing license plate lamp bulbs
For bulb replacement, see a dealer or qualified technician.
Lights
85
Page 86 of 288
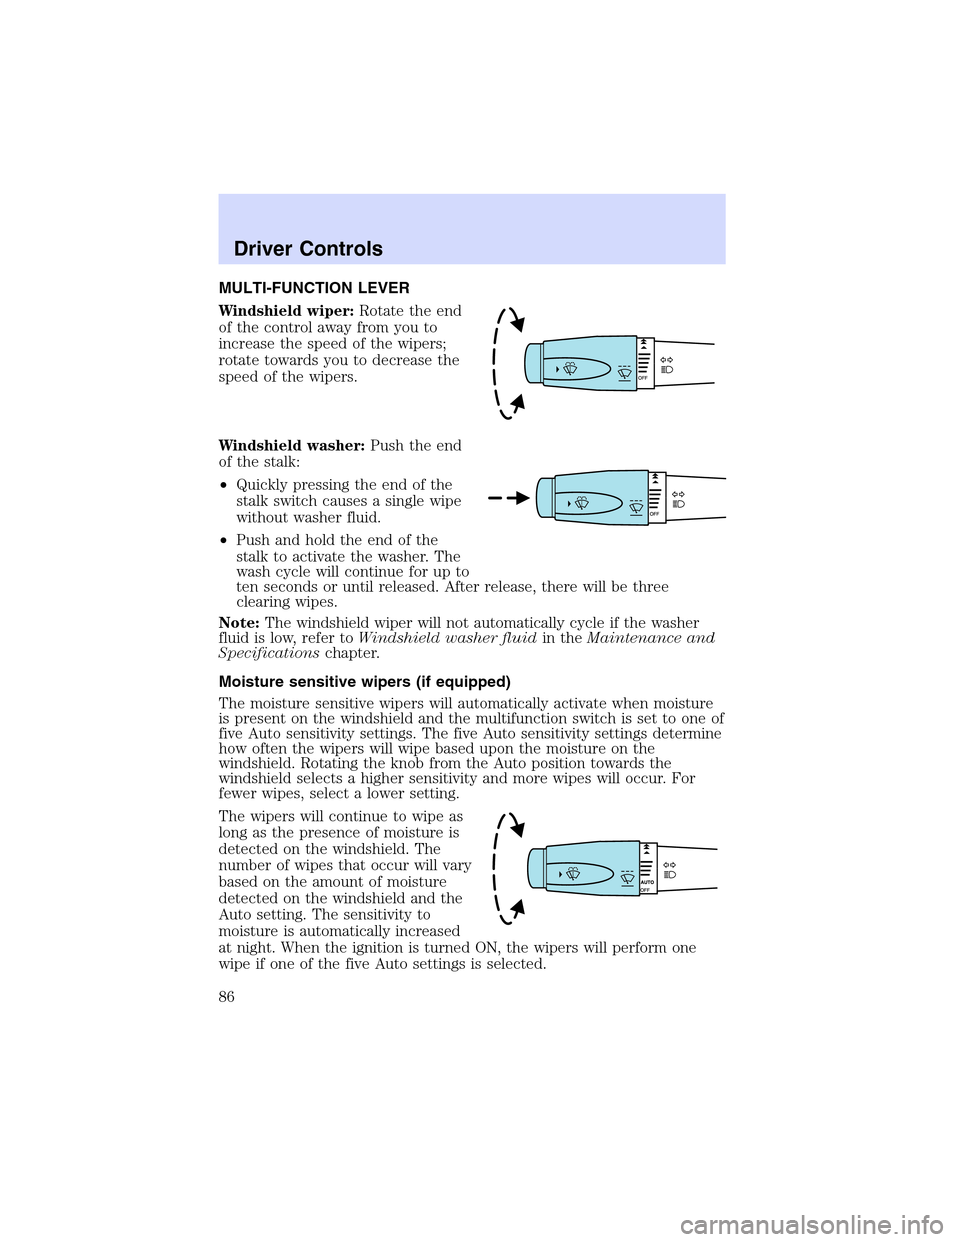
MULTI-FUNCTION LEVER
Windshield wiper:Rotate the end
of the control away from you to
increase the speed of the wipers;
rotate towards you to decrease the
speed of the wipers.
Windshield washer:Push the end
of the stalk:
•Quickly pressing the end of the
stalk switch causes a single wipe
without washer fluid.
•Push and hold the end of the
stalk to activate the washer. The
wash cycle will continue for up to
ten seconds or until released. After release, there will be three
clearing wipes.
Note:The windshield wiper will not automatically cycle if the washer
fluid is low, refer toWindshield washer fluidin theMaintenance and
Specificationschapter.
Moisture sensitive wipers (if equipped)
The moisture sensitive wipers will automatically activate when moisture
is present on the windshield and the multifunction switch is set to one of
five Auto sensitivity settings. The five Auto sensitivity settings determine
how often the wipers will wipe based upon the moisture on the
windshield. Rotating the knob from the Auto position towards the
windshield selects a higher sensitivity and more wipes will occur. For
fewer wipes, select a lower setting.
The wipers will continue to wipe as
long as the presence of moisture is
detected on the windshield. The
number of wipes that occur will vary
based on the amount of moisture
detected on the windshield and the
Auto setting. The sensitivity to
moisture is automatically increased
at night. When the ignition is turned ON, the wipers will perform one
wipe if one of the five Auto settings is selected.
Driver Controls
86
Page 87 of 288
More or less wiping may occur under the following conditions:
•on cool mornings with high humidity
•in very light mist or rain
•salty water/mist
•hydrophobic coating applied to the windshield such as Rain-X or wax
(use of these types of coatings are not recommended)
You can override the moisture sensitive wiper function by selecting
HIGH, LOW and OFF.
The moisture sensitive wiper feature should be turned OFF prior to
entering a car wash.
Changing the wiper blades
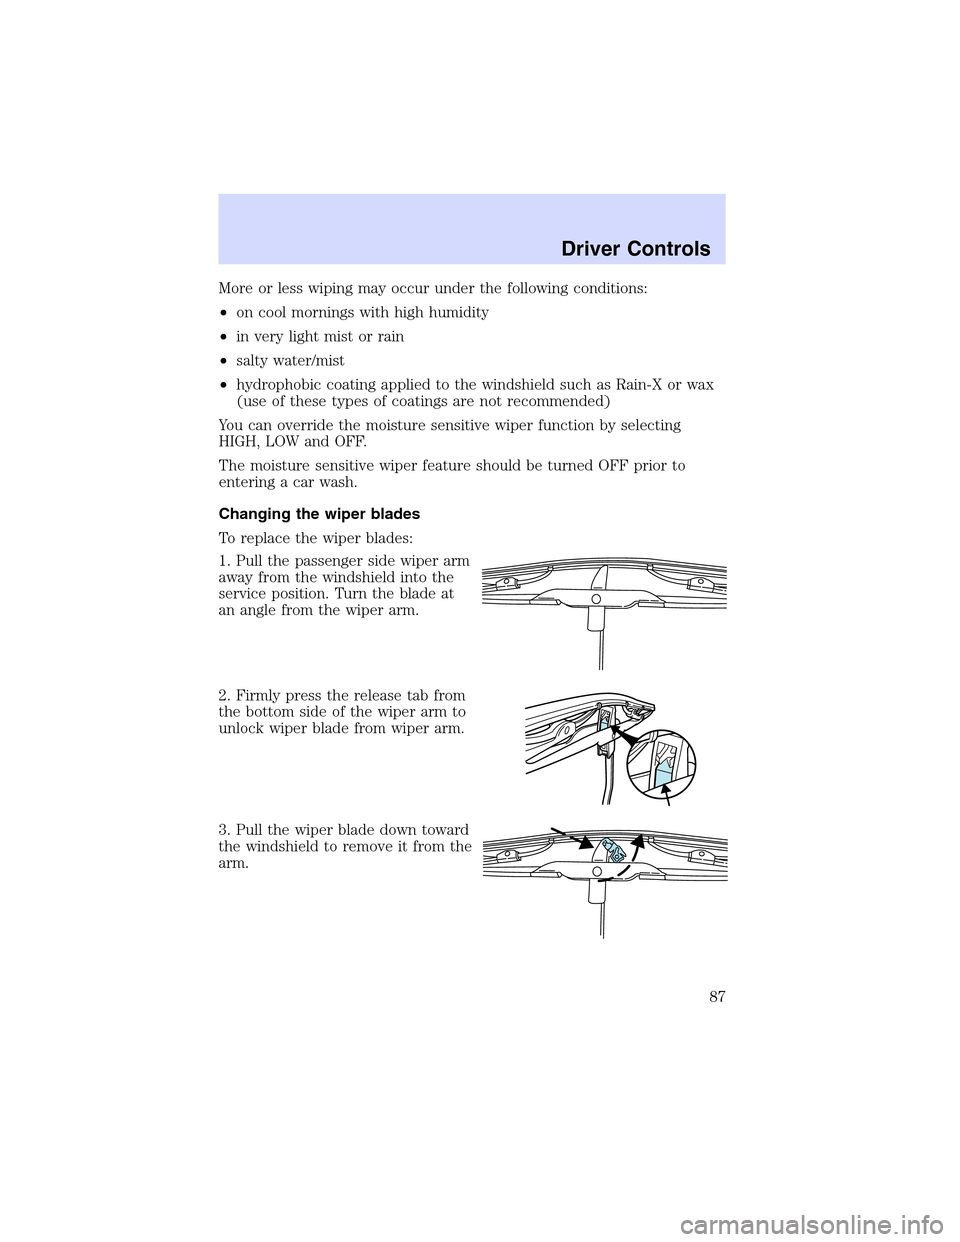
To replace the wiper blades:
1. Pull the passenger side wiper arm
away from the windshield into the
service position. Turn the blade at
an angle from the wiper arm.
2. Firmly press the release tab from
the bottom side of the wiper arm to
unlock wiper blade from wiper arm.
3. Pull the wiper blade down toward
the windshield to remove it from the
arm.
Driver Controls
87
Page 88 of 288
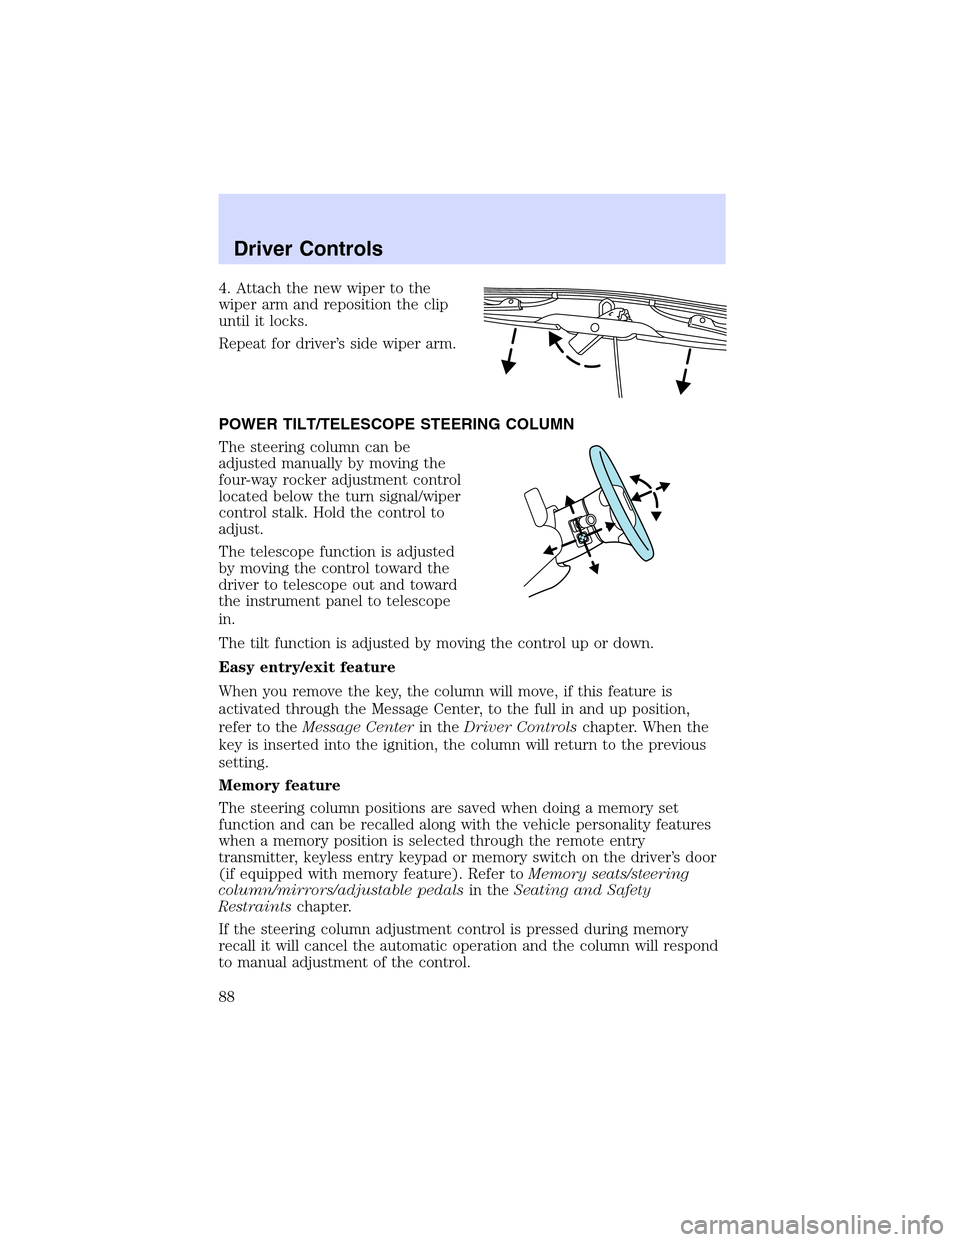
4. Attach the new wiper to the
wiper arm and reposition the clip
until it locks.
Repeat for driver’s side wiper arm.
POWER TILT/TELESCOPE STEERING COLUMN
The steering column can be
adjusted manually by moving the
four-way rocker adjustment control
located below the turn signal/wiper
control stalk. Hold the control to
adjust.
The telescope function is adjusted
by moving the control toward the
driver to telescope out and toward
the instrument panel to telescope
in.
The tilt function is adjusted by moving the control up or down.
Easy entry/exit feature
When you remove the key, the column will move, if this feature is
activated through the Message Center, to the full in and up position,
refer to theMessage Centerin theDriver Controlschapter. When the
key is inserted into the ignition, the column will return to the previous
setting.
Memory feature
The steering column positions are saved when doing a memory set
function and can be recalled along with the vehicle personality features
when a memory position is selected through the remote entry
transmitter, keyless entry keypad or memory switch on the driver’s door
(if equipped with memory feature). Refer toMemory seats/steering
column/mirrors/adjustable pedalsin theSeating and Safety
Restraintschapter.
If the steering column adjustment control is pressed during memory
recall it will cancel the automatic operation and the column will respond
to manual adjustment of the control.
Driver Controls
88
Page 89 of 288
Never adjust the steering wheel when the vehicle is moving.
STEERING COLUMN LOCK (IF EQUIPPED)
The steering column will automatically lock when the key is removed
from the ignition. When the vehicle key is inserted into the ignition, the
steering column will automatically unlock.
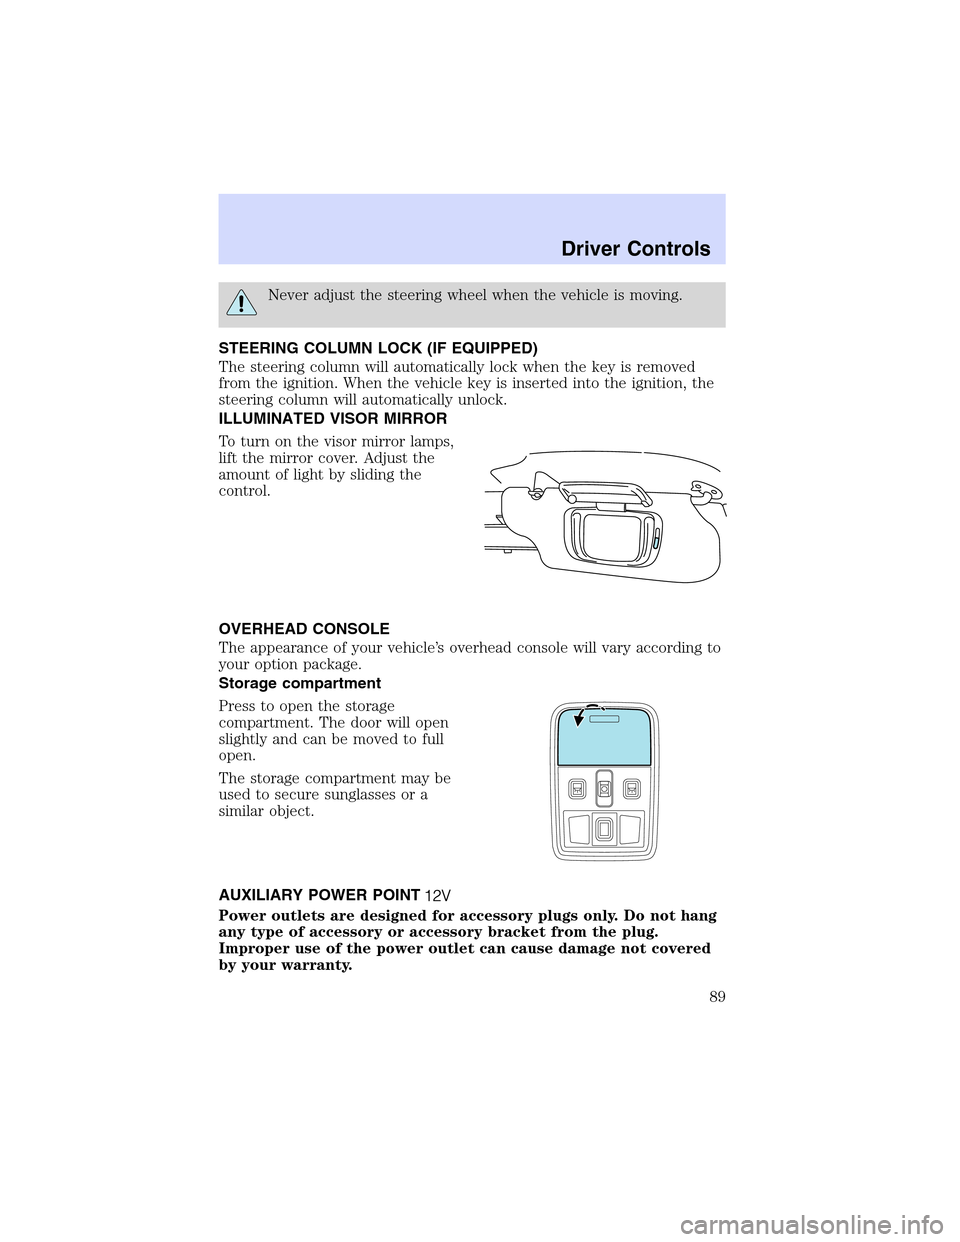
ILLUMINATED VISOR MIRROR
To turn on the visor mirror lamps,
lift the mirror cover. Adjust the
amount of light by sliding the
control.
OVERHEAD CONSOLE
The appearance of your vehicle’s overhead console will vary according to
your option package.
Storage compartment
Press to open the storage
compartment. The door will open
slightly and can be moved to full
open.
The storage compartment may be
used to secure sunglasses or a
similar object.
AUXILIARY POWER POINT
Power outlets are designed for accessory plugs only. Do not hang
any type of accessory or accessory bracket from the plug.
Improper use of the power outlet can cause damage not covered
by your warranty.
Driver Controls
89
Page 90 of 288
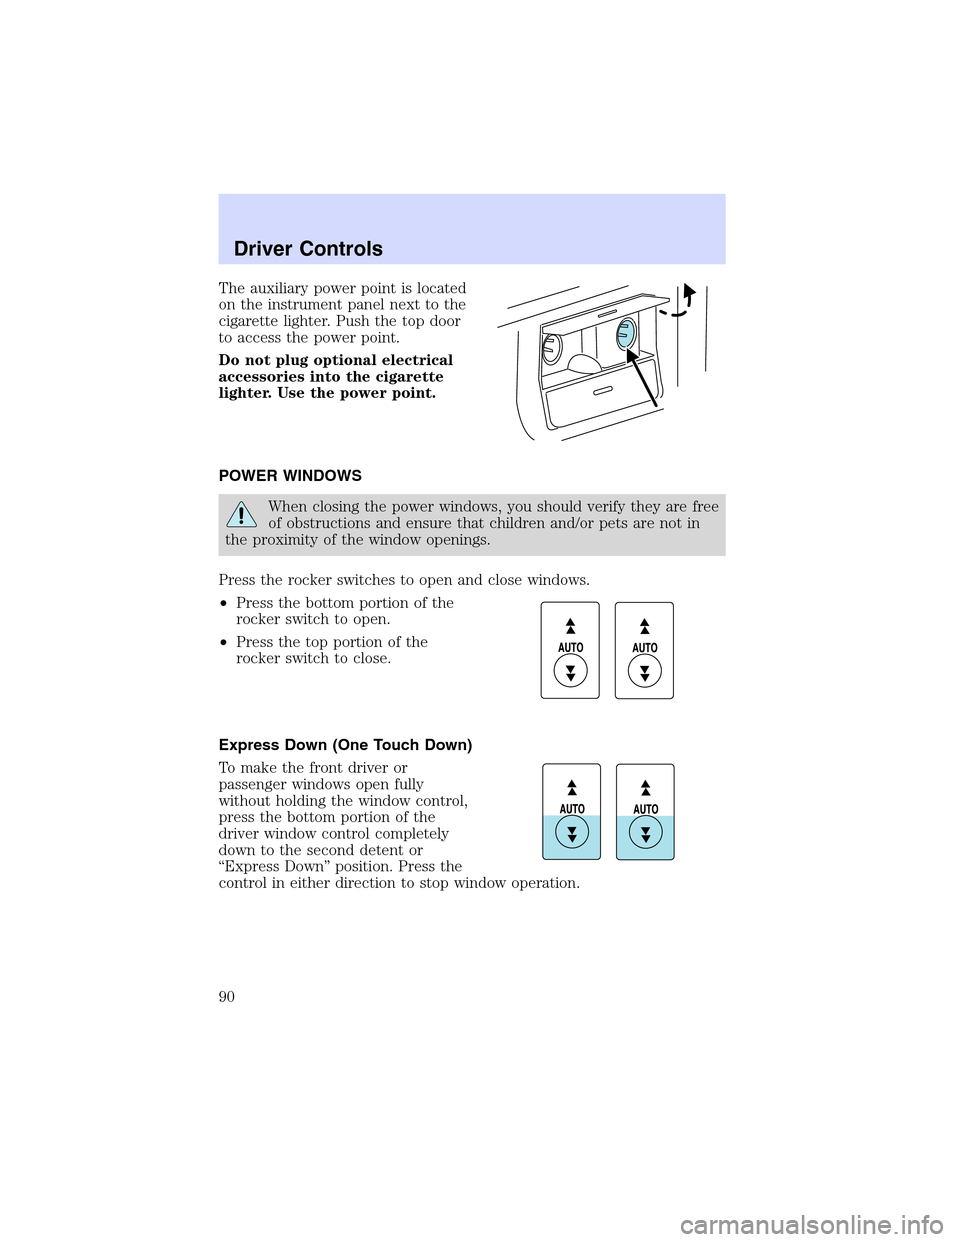
Theauxiliary power point is located
on the instrument panel next to the
cigarette lighter. Push the top door
to access the power point.
Do not plug optional electrical
accessories into the cigarette
lighter. Use the power point.
POWER WINDOWS
When closing the power windows, you should verify they are free
of obstructions and ensure that children and/or pets are not in
the proximity of the window openings.
Press the rocker switches to open and close windows.
•Press the bottom portion of the
rocker switch to open.
•Press the top portion of the
rocker switch to close.
Express Down (One Touch Down)
To make the front driver or
passenger windows open fully
without holding the window control,
press the bottom portion of the
driver window control completely
down to the second detent or
“Express Down”position. Press the
control in either direction to stop window operation.
Driver Controls
90