buttons LINCOLN MKT 2015 Quick Reference Guide
[x] Cancel search | Manufacturer: LINCOLN, Model Year: 2015, Model line: MKT, Model: LINCOLN MKT 2015Pages: 10, PDF Size: 1.22 MB
Page 4 of 10

Why You Need a SYNC Owner Account
A SYNC owner account allows you to receive
the latest software updates that add new
places, directions and information, and if
you have questions, you'll get free customer
support. Visit the website or call the toll-
free number for more information. See the
inside front cover of this guide for details.
Pairing Your Phone with SYNC
1. Make sure that your vehicle is in park (P)
and you switch on your radio and ignition.
2. Touch Add Phone in the upper left corner
of the touchscreen. Find SYNC appears
on the screen and instructs you to begin
the pairing process from your device.
3. Make sure that Bluetooth is set to ON
and that your cellular phone is in the
proper mode. See your phone’s manual,
if necessary. Select SYNC, and a
six-digit PIN appears on your device.
4. If the system prompts you to enter a
PIN on your device, then it does not
support Secure Simple Pairing. To
pair, enter the PIN displayed on the
touchscreen. Skip the next step.
5.
When prompted on your phone’s
display, confirm that the PIN
provided by SYNC matches the PIN
displayed on your cellular phone.
6. The display indicates when the pairing
is successful.
Note: SYNC may prompt you with more
phone options. For more information on
the capability of your phone, see your
phone’s manual and visit the website.
Tips Make sure you accept the request
from SYNC to access your phone.
To pair subsequent phones, please
refer to Pairing Subsequent Phones
in the MyLincoln Touch chapter
of your Owner’s Manual.
If you experience pairing problems, try
performing a clean pairing by deleting
your phone from SYNC, deleting the
SYNC connection from your phone,
and then repeating the Pairing Your
Phone with SYNC process.
Phone
Voice-control your phone to connect
with other features:
Connects automatically with a 911
Operator in the event of an accident
(feature must be on prior to an event).
Transfer calls seamlessly from SYNC to
phone as you get in or out of your vehicle.
Refer to the MyLincoln Touch chapter in
your Owner's Manual for complete details.
SYNC® with MyLincoln Touch™
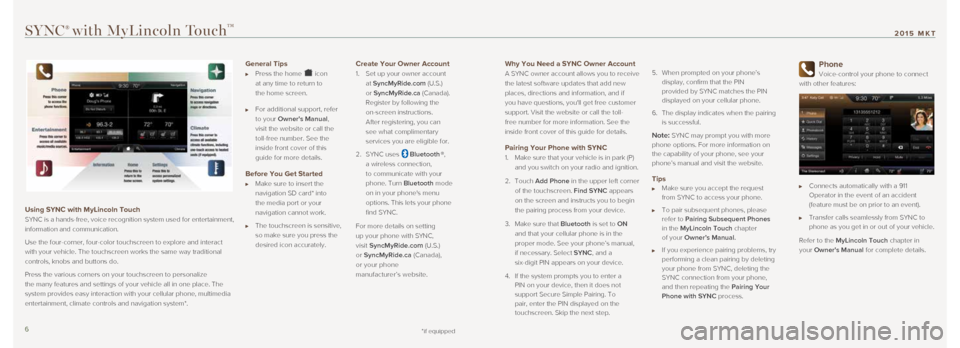
Using SYNC with MyLincoln Touch
SYNC is a hands-free, voice recognition system used for entertainment,
information and communication.
Use the four-corner, four-color touchscreen to explore and interact
with your vehicle. The touchscreen works the same way traditional
controls, knobs and buttons do.
Press the various corners on your touchscreen to personalize
the many features and settings of your vehicle all in one place. The
system provides easy interaction with your cellular phone, multimedia
entertainment, climate controls and navigation system*.
General Tips
Press the home icon
at any time to return to
the home screen.
For additional support, refer
to your Owner's Manual,
visit the website or call the
toll-free number. See the
inside front cover of this
guide for more details.
Before You Get Started
Make sure to insert the
navigation SD card* into
the media port or your
navigation cannot work.
The touchscreen is sensitive,
so make sure you press the
desired icon accurately.
Create Your Owner Account
1. Set up your owner account
at SyncMyRide.com (U.S.)
or SyncMyRide.ca (Canada).
Register by following the
on-screen instructions.
After registering, you can
see what complimentary
services you are eligible for.
2. SYNC uses
Bluetooth ®,
a wireless connection,
to communicate with your
phone. Turn Bluetooth mode
on in your phone's menu
options. This lets your phone
find SYNC.
For more details on setting
up your phone with SYNC,
visit SyncMyRide.com (U.S.)
or SyncMyRide.ca (Canada),
or your phone
manufacturer’s website.
*if equipped6 7
2015 MKT
Page 5 of 10

You can also use the touchscreen to enter a
destination and narrow your choices by city
or street as you type.
You can choose from up to three different
types of routes:
Fastest: Uses the fastest moving
roads possible.
Shortest: Uses the shortest
distance possible.
Eco (EcoRoute): Uses the most fuel
efficient route.
Tips
Save your favorite locations by touching
“Save to Favorites”.
Change your map views from Direction
Headed, North Up or 3-D.
Climate
Control the temperature, airflow
direction, fan speed and other climate
features for you and your front passenger.
Say “Climate temperature 72 degrees”
and MyLincoln Touch makes the adjustment.
Set Your Temperature
Touch the lower-right, blue Climate corner
on the touchscreen.
Set your exact, desired temperature by
using the + or – buttons.
Rear Climate Controls
Touch Rear on the lower-right corner
of the Climate screen to access the rear
climate control.
Touch Rear Control to allow the rear
passengers to adjust their climate settings.
Touch it again to control the settings
from the touchscreen. See your Owner's
Manual for complete details.
SYNC® with MyLincoln Touch™
Using Your Phone with SYNC
Note:
Enter your phone book contacts
with both first and last names to increase
the ability of SYNC to select the correct
contact. Remember to say the contact name
exactly as it is listed in your phone book.
Making a Phone Call
Use SYNC to make a phone call to anyone
in your phone book by pressing the voice
button. When prompted, say a
voice command.
For example, you could say “Call Jake Smith
at home”. SYNC repeats the command back
to you and dials the number.
Note: You can also make phone calls by
giving the voice command “Dial”, then
verbally saying the phone number.
Answering Incoming Calls
Whenever you have an incoming call,
the name and number of the person
calling appears in your display. Press
ACCEPT on the touchscreen or the phone
button to answer an incoming call.
Ending the Call
Press and hold the phone button.
Do Not Disturb Mode
This feature blocks incoming calls and
text messages, and saves them for later.
You still have access to outgoing calls
when this feature is on. Say the voice
command
“Do not disturb on” to enable
and “Do not disturb off” to disable.
Navigation*
Get started with your navigation
system by pressing the upper-right,
green corner.
The available, voice activated navigation
system includes:
SiriusXM Traffic
SiriusXM Travel Link
GPS (Global Positioning System)
technology
3-D mapping
Turn-by-turn navigation
Set a Destination
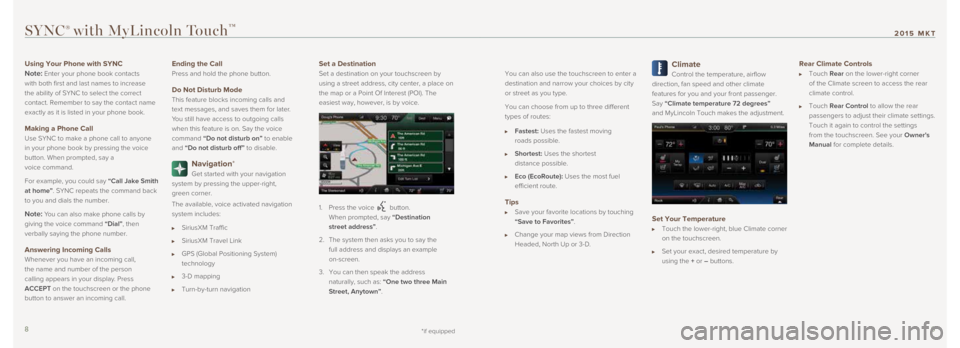
Set a destination on your touchscreen by
using a street address, city center, a place on
the map or a Point Of Interest (POI). The
easiest way, however, is by voice.
1. Press the voice button.
When prompted, say “Destination
street address”.
2. The system then asks you to say the
full address and displays an example
on-screen.
3. You can then speak the address
naturally, such as: “One two three Main
Street, Anytown”.
*if equipped8 9
2015 MKT
Page 6 of 10

SYNC® with MyLincoln Touch™
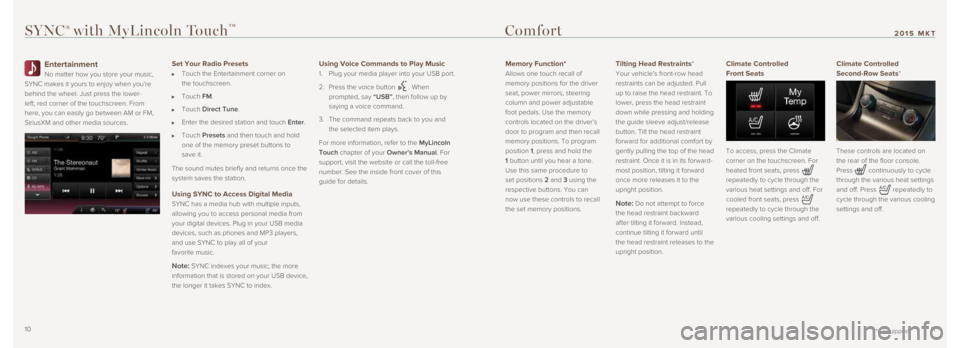
Entertainment
No matter how you store your music,
SYNC makes it yours to enjoy when you’re
behind the wheel. Just press the lower-
left, red corner of the touchscreen. From
here, you can easily go between AM or FM,
SiriusXM and other media sources.
Set Your Radio Presets
Touch the Entertainment corner on
the touchscreen.
Touch FM.
Touch Direct Tune.
Enter the desired station and touch Enter.
Touch Presets and then touch and hold
one of the memory preset buttons to
save it.
The sound mutes briefly and returns once the
system saves the station.
Using SYNC to Access Digital Media
SYNC has a media hub with multiple inputs,
allowing you to access personal media from
your digital devices. Plug in your USB media
devices, such as phones and MP3 players,
and use SYNC to play all of your
favorite music.
Note: SYNC indexes your music; the more
information that is stored on your USB device,
the longer it takes SYNC to index.
Using Voice Commands to Play Music
1. Plug your media player into your USB port.
2. Press the voice button
. When
prompted, say “USB”, then follow up by
saying a voice command.
3. The command repeats back to you and
the selected item plays.
For more information, refer to the MyLincoln
Touch chapter of your Owner’s Manual. For
support, visit the website or call the toll-free
number. See the inside front cover of this
guide for details.
Comfort
Memory Function*
Allows one touch recall of
memory positions for the driver
seat, power mirrors, steering
column and power adjustable
foot pedals. Use the memory
controls located on the driver’s
door to program and then recall
memory positions. To program
position 1, press and hold the
1 button until you hear a tone.
Use this same procedure to
set positions 2 and 3 using the
respective buttons. You can
now use these controls to recall
the set memory positions.
Tilting Head Restraints*
Your vehicle’s front-row head
restraints can be adjusted. Pull
up to raise the head restraint. To
lower, press the head restraint
down while pressing and holding
the guide sleeve adjust/release
button. Tilt the head restraint
forward for additional comfort by
gently pulling the top of the head
restraint. Once it is in its forward-
most position, tilting it forward
once more releases it to the
upright position.
Note: Do not attempt to force
the head restraint backward
after tilting it forward. Instead,
continue tilting it forward until
the head restraint releases to the
upright position.
Climate Controlled
Front Seats
To access, press the Climate
corner on the touchscreen. For
heated front seats, press
repeatedly to cycle through the
various heat settings and off. For
cooled front seats, press
repeatedly to cycle through the
various cooling settings and off.
Climate Controlled
Second-Row Seats*
These controls are located on
the rear of the floor console.
Press
continuously to cycle
through the various heat settings
and off. Press
repeatedly to
cycle through the various cooling
settings and off.
*if equipped10 11
2015 MKT
Page 7 of 10

*if equipped
Comfort
*if equipped
Power-Adjustable Pedals
The control is located on the left side of the steering column. Press
the arrow
to move the pedals closer to you or the arrow to
move the pedals further away from you. Only adjust the pedals after
stopping your vehicle and placing the transmission in park (P).
THX II® Certified Audio System*
Fourteen strategically positioned,
high-performance speakers
deliver a home theater sound
right in your vehicle. The system
automatically makes adjustments
to volume and sound distribution,
based on vehicle speed and
external road noise.
Universal Garage Door Opener
The driver-side visor has a built-in wireless transmitter that replaces \
the common hand-held garage door opener. This system can also
be programmed to security systems, entry gates and home or office
lighting. Refer to the Universal Garage Door Opener chapter in your
Owner’s Manual for programming instructions.
Console Refrigerator/Freezer*
Before using, flip the console lid forward and then remove the cover
(make sure to reinstall the cover to help maintain the temperature).
For the refrigerator, press the COOL control. In this mode, the
system cools to approximately 41°F (5°C). For the Freezer, press\
the FREEZE control. The system cools to approximately 23°F
(-5°C). Press the selected control again to turn the system off.
Note: We recommend using this feature only when the engine is
running to avoid draining your vehicle’s battery.
PowerFold® Third-Row Seat*
The third-row seat features a
power, one-touch operation that
allows you to adjust the seats with
the touch of a button. The buttons
are located behind the third-row
seats on the left-hand quarter
trim panel. To use, press the
RH/BOTH/LH button to select
the right seat, the left seat or both seats you want to move.
Then select the desired seat position.
Press the STOW button to stow the seat into the tub floor.
Press the FOLD button (the top portion of the button) to fold the
seatback down.
Press the TAILGATE button (the bottom portion of the button)
to put the seat into the tailgate position.
Press the NORMAL button to return the seat to the normal
seating position.
Note: The power folding seats
work only when the vehicle is in
park (P) and the tailgate is open.
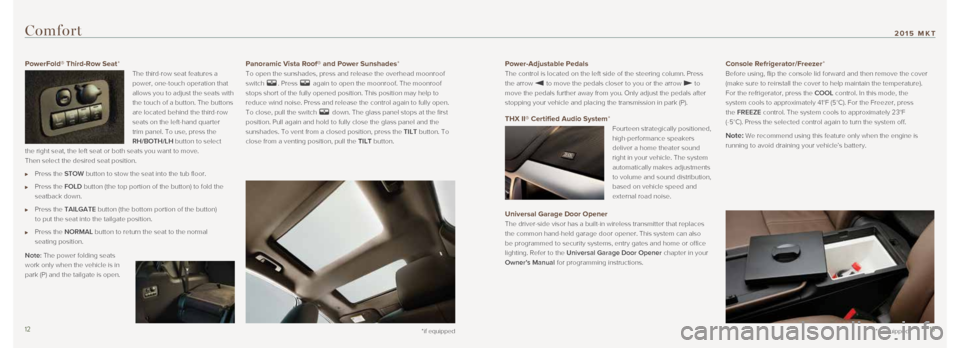
Panoramic Vista Roof® and Power Sunshades*
To open the sunshades, press and release the overhead moonroof
switch
. Press again to open the moonroof. The moonroof
stops short of the fully opened position. This position may help to
reduce wind noise. Press and release the control again to fully open.
To close, pull the switch
down. The glass panel stops at the first
position. Pull again and hold to fully close the glass panel and the
sunshades. To vent from a closed position, press the TILT button. To
close from a venting position, pull the TILT button.
12 13
2015 MKT