rear drive unit LINCOLN MKZ 2017 Owner's Manual
[x] Cancel search | Manufacturer: LINCOLN, Model Year: 2017, Model line: MKZ, Model: LINCOLN MKZ 2017Pages: 564, PDF Size: 5.54 MB
Page 188 of 564
Your vehicle has anti-lock brakes, therefore
apply the brakes steadily. Do not “pump
” the
brakes.
Driving on Snow and Ice WARNING
If you are driving in slippery conditions
that require tire chains or cables, then
it is critical that you drive cautiously. Keep
speeds down, allow for longer stopping
distances and avoid aggressive steering to
reduce the chances of a loss of vehicle
control which can lead to serious injury or
death. If the rear end of your vehicle slides
while cornering, steer in the direction of the
slide until you regain control of your vehicle. Note:
Your vehicle may have original
equipment tires designed to optimize the
performance of your vehicle in dry or wet
summer road conditions. If your vehicle is
equipped with such tires, we recommend
using a dedicated set (all 4 tires) of winter
tires in snow and ice conditions. Do not mix
winter tires and performance tires between
axles or degraded traction and handling
characteristics could result. Note:
Excessive tire slippage can cause
driveline damage.
AWD vehicles have advantages over
two-wheel drive (2WD) vehicles in snow and
ice but can skid like any other vehicle.
Should you start to slide while driving on
snowy or icy roads, turn the steering wheel
in the direction of the slide until you regain
control.
185
MKZ (CC9) Canada/United States of America, enUSA, First Printing All-Wheel Drive (If Equipped)
Page 202 of 564
PRINCIPLE OF OPERATION
WARNINGS
To help avoid personal injury, please
read and understand the limitations of
the system as contained in this section.
Sensing is only an aid for some (generally
large and fixed) objects when moving on a
flat surface at parking speeds. Certain
objects with surfaces that absorb ultrasonic
waves, surrounding vehicle's parking aid
systems, traffic control systems, fluorescent
lamps, inclement weather, air brakes, and
external motors and fans may also affect the
function of the sensing system; this may
include reduced performance or a false
activation. To help avoid personal injury, always
use caution when in reverse (R) and
when using the sensing system. WARNINGS
This system is not designed to prevent
contact with small or moving objects.
The system is designed to provide a warning
to assist the driver in detecting large
stationary objects to avoid damaging your
vehicle. The system may not detect smaller
objects, particularly those close to the
ground. Certain add-on devices such as large
trailer hitches, bike or surfboard racks
and any device that may block the normal
detection zone of the system, may create
false beeps. Note:
Keep the sensors, located on the
bumper or fascia, free from snow, ice and
large accumulations of dirt. If the sensors
are covered, the system’ s accuracy can be
affected. Do not clean the sensors with sharp
objects.
Note: If your vehicle sustains damage to the
bumper or fascia, leaving it misaligned or
bent, the sensing zone may be altered
causing inaccurate measurement of
obstacles or false alarms. Note:
The sensing system cannot be turned
off when a MyKey is present. See Principle
of Operation (page 60).
Note: If you attach certain add-on devices
such as a trailer or bike rack, the rear
sensing system may detect that add-on
device and therefore provide warnings. It is
suggested that you disable the rear sensing
system when you attach an add-on device
to your vehicle to prevent these warnings.
The sensing system warns the driver of
obstacles within a certain range of your
vehicle. The system turns on automatically
whenever you switch the ignition on. You can turn the system on or off
by pressing the parking aid button.
If your vehicle does not have a
parking aid button, the system can be
switched off through the information display
menu or from the pop-up message that
appears once you shift the transmission into
reverse (R).
See General Information (page
108).
If a fault is present in the system, a warning
message appears in the information display.
See
Information Messages (page 114).
199
MKZ (CC9) Canada/United States of America, enUSA, First Printing Parking AidsE139213
Page 205 of 564
SIDE SENSING SYSTEM (If Equipped)
The side sensing system uses the front and
rear side sensors to detect and map
obstacles that are near to the sides of your
vehicle. The side sensors are active when
the transmission is in any position other than
park (P).
Note: Obstacles that enter the side detection
area without being detected and mapped
by the front or rear side sensors will not be
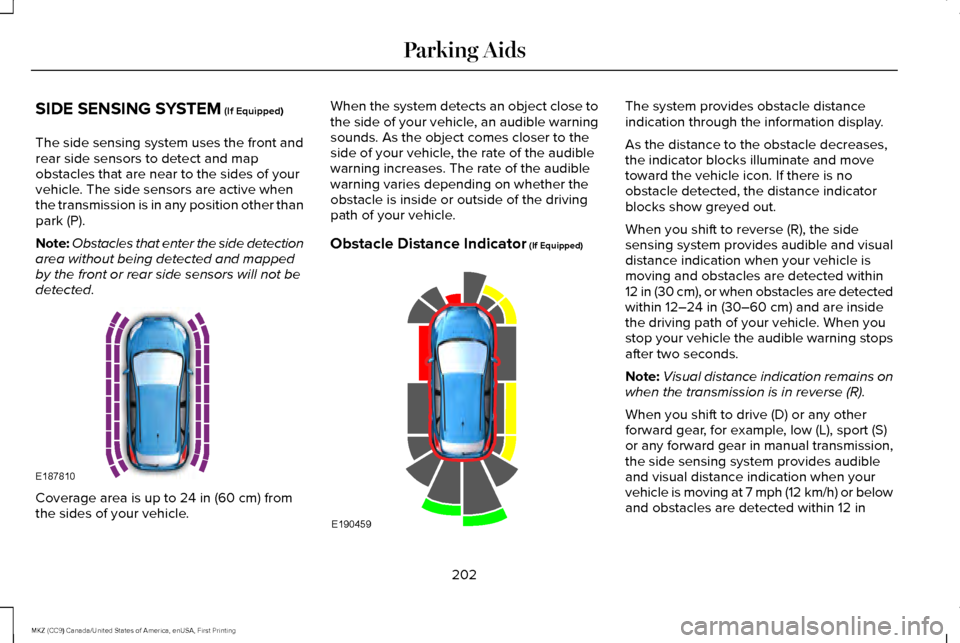
detected. Coverage area is up to
24 in (60 cm) from
the sides of your vehicle. When the system detects an object close to
the side of your vehicle, an audible warning
sounds. As the object comes closer to the
side of your vehicle, the rate of the audible
warning increases. The rate of the audible
warning varies depending on whether the
obstacle is inside or outside of the driving
path of your vehicle.
Obstacle Distance Indicator
(If Equipped) The system provides obstacle distance
indication through the information display.
As the distance to the obstacle decreases,
the indicator blocks illuminate and move
toward the vehicle icon. If there is no
obstacle detected, the distance indicator
blocks show greyed out.
When you shift to reverse (R), the side
sensing system provides audible and visual
distance indication when your vehicle is
moving and obstacles are detected within
12 in (30 cm), or when obstacles are detected
within
12–24 in (30–60 cm) and are inside
the driving path of your vehicle. When you
stop your vehicle the audible warning stops
after two seconds.
Note: Visual distance indication remains on
when the transmission is in reverse (R).
When you shift to drive (D) or any other
forward gear, for example, low (L), sport (S)
or any forward gear in manual transmission,
the side sensing system provides audible
and visual distance indication when your
vehicle is moving at 7 mph (12 km/h) or below
and obstacles are detected within
12 in
202
MKZ (CC9) Canada/United States of America, enUSA, First Printing Parking AidsE187810 E190459
Page 212 of 564
The system determines the clearance to the
front and rear of your vehicle and
automatically steers your vehicle out of a
parallel parking space (hands-free) while you
control the accelerator, gearshift and brakes.
The system visually and audibly guides you
to enter traffic.
After the system has directed your vehicle
past the adjacent vehicle or object, it guides
you to take control of the steering to
complete the exit from the parking spot.
Note:
If the clearance in front of your vehicle
allows easy departure, the Parallel Park Out
Assist feature might not be available.
Note: You are responsible for controlling
your vehicle and making sure the path is
clear prior to pulling into traffic. Note:
This system is not intended to assist
in exiting perpendicular parking spaces,
damages to your vehicle may occur.
Note: If your vehicle speed exceeds 3 mph
(5 km/h) or the maneuver is interrupted
(driver input), the system switches off and
you need to take full control of your vehicle.
Deactivating the Active Park Assist
Feature
Manually deactivate the system by:
• Pressing the active park assist button
during an active maneuver.
• Grabbing the steering wheel during an
active maneuver. •
Driving above approximately
22 mph
(35 km/h) for 30 seconds during an active
park search.
• Driving above approximately
6 mph
(10 km/h) during automatic steering.
• Switching off the traction control system.
Certain vehicle conditions can also
deactivate the system, such as:
• Traction control has activated.
• There is an anti-lock brake system
activation or failure.
If a problem occurs with the system, a
warning message displays accompanied by
a tone. Occasional system messages may
occur in normal operation. For recurring or
frequent system faults, contact an authorized
dealer to have your vehicle serviced.
Troubleshooting the System The system does not look for a space
The traction control system may be off.
The transmission is in reverse (R). Your vehicle must be moving forward to be able to detect a parking space.
209
MKZ (CC9) Canada/United States of America, enUSA, First Printing Parking Aids
Page 214 of 564
The system does not position the vehicle where I want in the space
A parked vehicle has a high attachment (salt sprayer, snowplow or moving truck bed).
The parking space length or position of parked objects changed after your vehicle passed.
The temperature around your vehicle changes quickly (driving from a hea\
ted garage into the cold, or after leaving a car wash).
REAR VIEW CAMERA WARNINGS
The rear view camera system is a
reverse aid supplement device that still
requires the driver to use it in conjunction
with the interior and exterior mirrors for
maximum coverage. Objects that are close to either corner
of the bumper or under the bumper,
might not be seen on the screen due to the
limited coverage of the camera system. Back up as slow as possible since
higher speeds might limit your reaction
time to stop your vehicle. WARNINGS
Use caution when using the rear video
camera and the trunk is ajar. If the trunk
is ajar, the camera will be out of position and
the video image may be incorrect. All
guidelines (if enabled) have been removed
when the trunk is ajar. Use caution when turning camera
features on or off while in reverse (R).
Make sure your vehicle is not moving. The rear view camera system provides a
video image of the area behind your vehicle.
The image will display in either the rear view
mirror or the display in the center of the
instrument panel.During operation, lines will appear in the
display that represent your vehicle
’s path
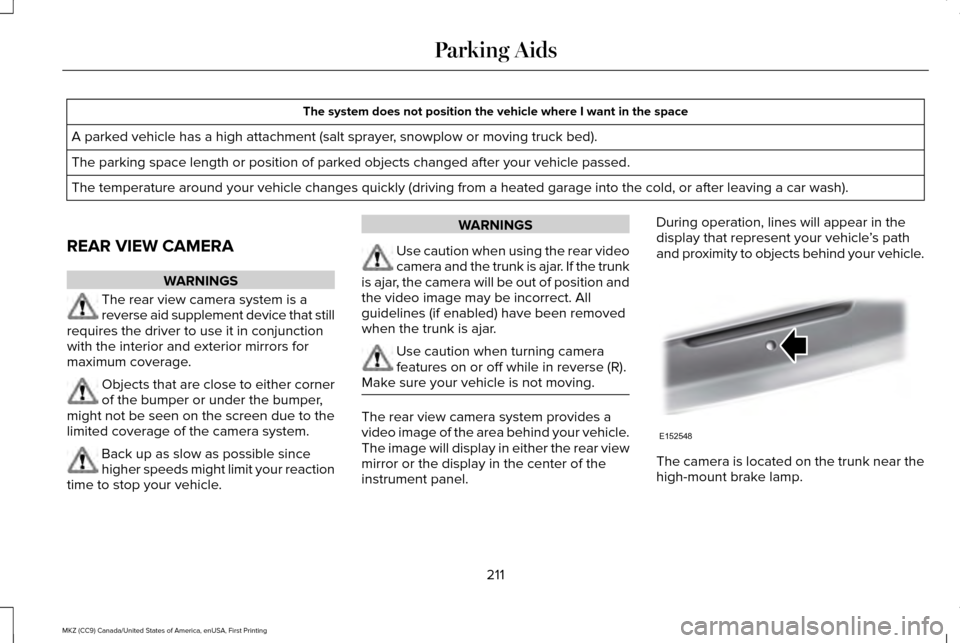
and proximity to objects behind your vehicle. The camera is located on the trunk near the
high-mount brake lamp.
211
MKZ (CC9) Canada/United States of America, enUSA, First Printing Parking AidsE152548
Page 234 of 564
BLIND SPOT INFORMATION
SYSTEM
WARNING
To help avoid injuries, NEVER use the
Blind Spot Information System as a
replacement for using the interior and
exterior mirrors or looking over your shoulder
before changing lanes. The Blind Spot
Information System is not a replacement for
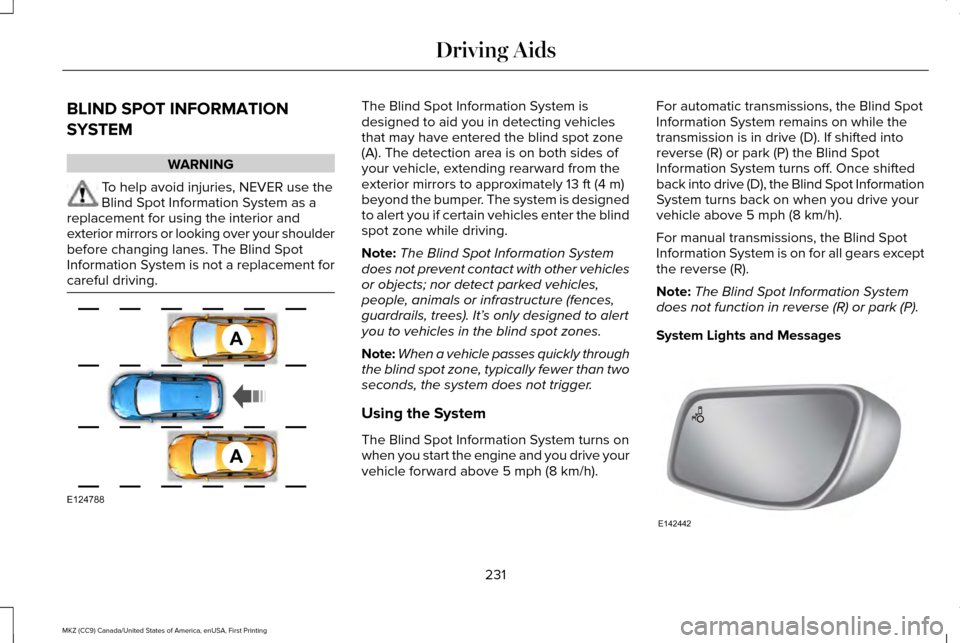
careful driving. The Blind Spot Information System is
designed to aid you in detecting vehicles
that may have entered the blind spot zone
(A). The detection area is on both sides of
your vehicle, extending rearward from the
exterior mirrors to approximately 13 ft (4 m)
beyond the bumper. The system is designed
to alert you if certain vehicles enter the blind
spot zone while driving.
Note: The Blind Spot Information System
does not prevent contact with other vehicles
or objects; nor detect parked vehicles,
people, animals or infrastructure (fences,
guardrails, trees). It’ s only designed to alert
you to vehicles in the blind spot zones.
Note: When a vehicle passes quickly through
the blind spot zone, typically fewer than two
seconds, the system does not trigger.
Using the System
The Blind Spot Information System turns on
when you start the engine and you drive your
vehicle forward above
5 mph (8 km/h). For automatic transmissions, the Blind Spot
Information System remains on while the
transmission is in drive (D). If shifted into
reverse (R) or park (P) the Blind Spot
Information System turns off. Once shifted
back into drive (D), the Blind Spot Information
System turns back on when you drive your
vehicle above
5 mph (8 km/h).
For manual transmissions, the Blind Spot
Information System is on for all gears except
the reverse (R).
Note: The Blind Spot Information System
does not function in reverse (R) or park (P).
System Lights and Messages 231
MKZ (CC9) Canada/United States of America, enUSA, First Printing Driving AidsA
A
E124788 E142442
Page 249 of 564
GAWR (Gross Axle Weight Rating)
GAWR is the maximum allowable weight
that a single axle (front or rear) can carry.
These numbers are on the Safety
Compliance Certification label. The label
is located on the door hinge pillar,
door-latch post, or the door edge that
meets the door-latch post, next to the
driver seating position.
The total load on each axle must never
exceed its Gross Axle Weight Rating.
GVWR (Gross Vehicle Weight Rating)
GVWR is the maximum allowable weight
of the fully loaded vehicle. This includes
all options, equipment, passengers and
cargo. It appears on the Safety
Compliance Certification label. The label
is located on the door hinge pillar,
door-latch post, or the door edge that
meets the door-latch post, next to the
driver seating position.
The gross vehicle weight must never
exceed the Gross Vehicle Weight Rating.
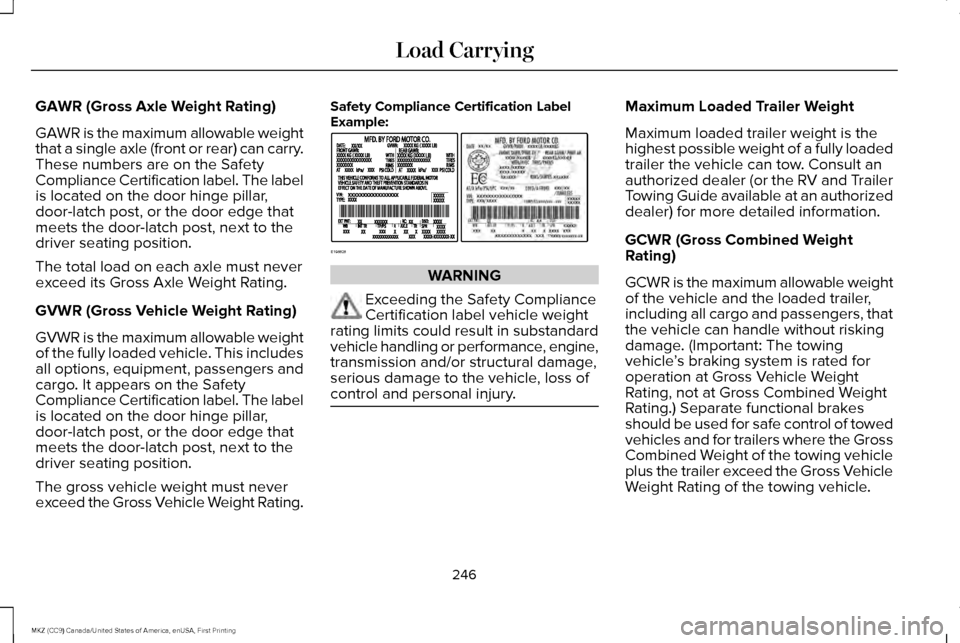
Safety Compliance Certification Label
Example:
WARNING
Exceeding the Safety Compliance
Certification label vehicle weight
rating limits could result in substandard
vehicle handling or performance, engine,
transmission and/or structural damage,
serious damage to the vehicle, loss of
control and personal injury. Maximum Loaded Trailer Weight
Maximum loaded trailer weight is the
highest possible weight of a fully loaded
trailer the vehicle can tow. Consult an
authorized dealer (or the RV and Trailer
Towing Guide available at an authorized
dealer) for more detailed information.
GCWR (Gross Combined Weight
Rating)
GCWR is the maximum allowable weight
of the vehicle and the loaded trailer,
including all cargo and passengers, that
the vehicle can handle without risking
damage. (Important: The towing
vehicle
’s braking system is rated for
operation at Gross Vehicle Weight
Rating, not at Gross Combined Weight
Rating.) Separate functional brakes
should be used for safe control of towed
vehicles and for trailers where the Gross
Combined Weight of the towing vehicle
plus the trailer exceed the Gross Vehicle
Weight Rating of the towing vehicle.
246
MKZ (CC9) Canada/United States of America, enUSA, First Printing Load CarryingE198828
Page 256 of 564
Trailer lamps are required on most towed
vehicles. Make sure all running lights, brake
lights, turn signals and hazard lights are
working.
Before Towing a Trailer
Practice turning, stopping and backing up to
get the feel of your vehicle-trailer
combination before starting on a trip. When
turning, make wider turns so the trailer
wheels clear curbs and other obstacles.
When Towing a Trailer
•
Do not drive faster than 70 mph (113
km/h) during the first 500 miles (800
kilometers).
• Do not make full-throttle starts.
• Check your hitch, electrical connections
and trailer wheel lug nuts thoroughly after
you have traveled 50 miles (80
kilometers).
• When stopped in congested or heavy
traffic during hot weather, place the
gearshift in position P to aid engine and
transmission cooling and to help A/C
performance. •
Turn off the speed control with heavy
loads or in hilly terrain. The speed control
may turn off automatically when you are
towing on long, steep grades.
• Shift to a lower gear when driving down
a long or steep hill. Do not apply the
brakes continuously, as they may
overheat and become less effective.
• If your transmission is equipped with a
Grade Assist or Tow/Haul feature, use
this feature when towing. This provides
engine braking and helps eliminate
excessive transmission shifting for
optimum fuel economy and transmission
cooling.
• Allow more distance for stopping with a
trailer attached. Anticipate stops and
brake gradually.
• Avoid parking on a grade. However, if
you must park on a grade:
1. Turn the steering wheel to point your vehicle tires away from traffic flow.
2. Set your vehicle parking brake.
3. Place the automatic transmission in position
P. 4. Place wheel chocks in front and back of
the trailer wheels. (Chocks not included
with vehicle.)
Launching or Retrieving a Boat or
Personal Watercraft (PWC)
Note: Disconnect the wiring to the trailer
before
backing the trailer into the water.
Note: Reconnect the wiring to the trailer
after
removing the trailer from the water.
When backing down a ramp during boat
launching or retrieval:
• Do not allow the static water level to rise
above the bottom edge of the rear
bumper.
• Do not allow waves to break higher than
6 inches (15 centimeters) above the
bottom edge of the rear bumper.
Exceeding these limits may allow water to
enter vehicle components:
• Causing internal damage to the
components.
• Affecting driveability, emissions, and
reliability.
253
MKZ (CC9) Canada/United States of America, enUSA, First Printing Towing
Page 257 of 564
Replace the rear axle lubricant anytime you
submerge the rear axle in water. Water may
contaminate the rear axle lubricant, which is
not a normal maintenance inspection item
unless there is a possibility of a leak or other
axle repair is required.
TOWING THE VEHICLE ON FOUR
WHEELS
Emergency Towing
WARNING
If your vehicle has a steering wheel
lock make sure the ignition is in the
accessory or on position when being towed. You can flat-tow (all wheels on the ground,
regardless of the powertrain/transmission
configuration) your disabled vehicle (without
access to wheel dollies, car-hauling trailer,
or flatbed transport vehicle) under the
following conditions:
•
Your vehicle is facing forward so you tow
it in a forward direction.
• You place the transmission in position N.
If you cannot place the transmission in
position
N, you may need to override it.
See Transmission (page 173).
• Maximum speed is 35 mph (56 km/h).
• Maximum distance is 50 miles (80
kilometers).
Recreational Towing
Note: Put your climate control system in
recirculated air mode to prevent exhaust
fumes from entering the vehicle.
See
Climate Control (page 134). Follow these guidelines if you have a need
for recreational (RV) towing. An example of
recreational towing would be towing your
vehicle behind a motorhome. These
guidelines are to make sure you do not
damage the transmission during towing.
Vehicles Equipped with a 2.0L Engine
Front-wheel drive (FWD) vehicles
CANNOT
be flat-towed (all wheels on the ground) as
vehicle or transmission damage may occur.
You must place the front wheels on a
two-wheel tow dolly. If you are using a tow
dolly, follow the instructions specified by the
equipment provider.
All-wheel drive (AWD) vehicles CANNOT be
flat-towed (all wheels on the ground), as
vehicle or transmission damage may occur.
It is recommended to tow your vehicle with
all four (4) wheels off the ground such as
when using a car-hauling trailer. Otherwise,
you cannot tow your vehicle.
254
MKZ (CC9) Canada/United States of America, enUSA, First Printing Towing
Page 268 of 564
If you need to have your vehicle towed,
contact a professional towing service, or if
you are a member of a roadside assistance
program, your roadside assistance service
provider.
We recommend the use of a wheel lift and
dollies or flatbed equipment to tow your
vehicle. Do not tow with a slingbelt. Lincoln
Motor Company has not approved a slingbelt
towing procedure. Vehicle damage may
occur if towed incorrectly, or by any other
means.
Lincoln Motor Company produces a towing
manual for all authorized tow truck operators.
Have your tow truck operator refer to this
manual for proper hook-up and towing
procedures for your vehicle.
It is acceptable to have your front-wheel
drive vehicle towed from the front if using
proper wheel lift equipment to raise the front
wheels off the ground. When towing in this
manner, the rear wheels can remain on the
ground.
Front-wheel drive vehicles must have the
front wheels placed on a tow dolly when
towing your vehicle from the rear using
wheel lift equipment. This prevents damage
to the transmission.
Towing an all-wheel drive vehicle requires
that all wheels be off the ground, such as
using a wheel lift and dollies or flatbed
equipment. This prevents damage to the
transmission, all-wheel drive system and
vehicle.
TOWING POINTS
Due to local market requirements in some
countries, some vehicles may be equipped
with a recovery hook.
Recovery Hook Location
If your vehicle is equipped with a screw-in
recovery hook, it is located with the spare
tire kit.
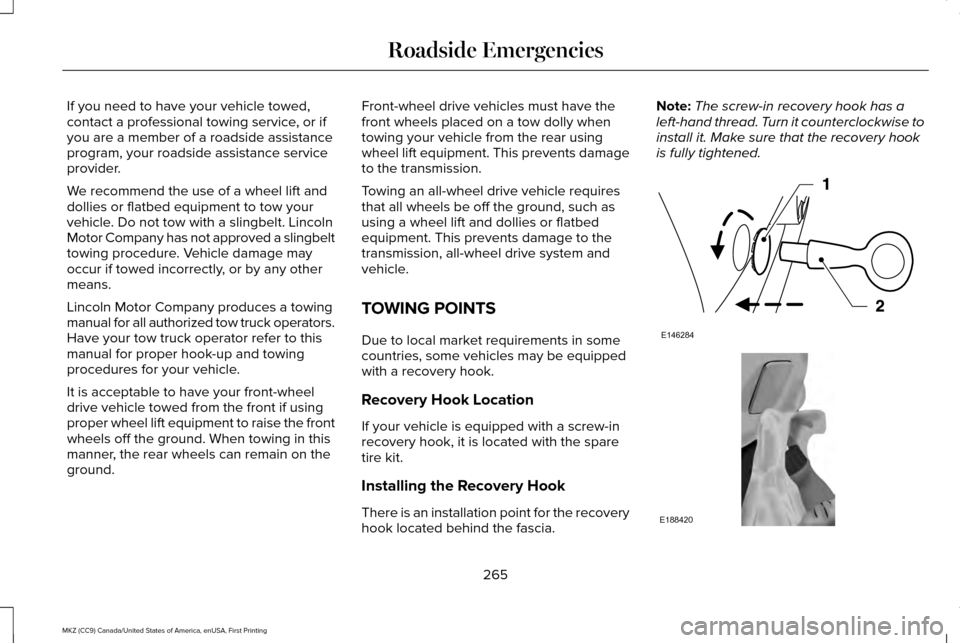
Installing the Recovery Hook
There is an installation point for the recovery
hook located behind the fascia.Note:
The screw-in recovery hook has a
left-hand thread. Turn it counterclockwise to
install it. Make sure that the recovery hook
is fully tightened. 265
MKZ (CC9) Canada/United States of America, enUSA, First Printing Roadside EmergenciesE146284 E188420