clock MASERATI LEVANTE 2019 Owners Manual
[x] Cancel search | Manufacturer: MASERATI, Model Year: 2019, Model line: LEVANTE, Model: MASERATI LEVANTE 2019Pages: 436, PDF Size: 15.24 MB
Page 99 of 436
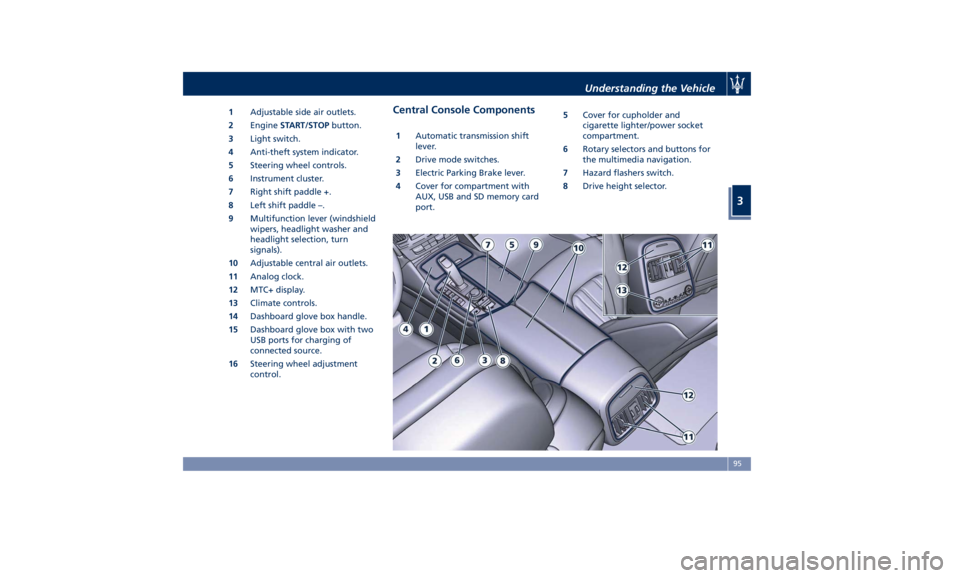
1 Adjustable side air outlets.
2 Engine START/STOP button.
3 Light switch.
4 Anti-theft system indicator.
5 Steering wheel controls.
6 Instrument cluster.
7 Right shift paddle +.
8 Left shift paddle –.
9 Multifunction lever (windshield
wipers, headlight washer and
headlight selection, turn
signals).
10 Adjustable central air outlets.
11 Analog clock.
12 MTC+ display.
13 Climate controls.
14 Dashboard glove box handle.
15 Dashboard glove box with two
USB ports for charging of
connected source.
16 Steering wheel adjustment
control. Central Console Components 1 Automatic transmission shift
lever.
2 Drive mode switches.
3 Electric Parking Brake lever.
4 Cover for compartment with
AUX, USB and SD memory card
port. 5 Cover for cupholder and
cigarette lighter/power socket
compartment.
6 Rotary selectors and buttons for
the multimedia navigation.
7 Hazard flashers switch.
8 Drive height selector.Understanding the Vehicle
3
95
Page 119 of 436
Automatic Headlights This system automatically turns the
headlights on or off according to
ambient light intensity detected by
the twilight sensor positioned on the
inner surface of the windshield, over
the rear view mirror. To turn the
system on, rotate the lights switch
clockwise to “AUTO” position.
When the automatic system is
activated, the headlight time delay
feature is activated as well. This means
the headlights will stay on for up to 90
seconds after you place the ignition
device into OFF position.
To turn the automatic system off,
move the lights switch out of “AUTO”
position.
NOTE:
The engine must be running and the
twilight sensor in “NIGHT” mode
before the headlights turn on in
automatic mode.
WARNING!
The responsibility for turning on the
lights, depending on the daylight and
regulations in force in the country of
use, always lies with the driver. The
automatic system for switching on and off the external lights is to be
considered as an aid for the driver. If
necessary, switch the lights including
the front and rear fog lights on and
off manually.
Headlights On with Wipers When this feature is active, the
headlights will turn on approximately
10 seconds after activation of the
wipers, if the lights switch is placed in
the “AUTO” position. The headlights
will additionally turn off by
deactivation of the wipers if
previously activated with this function.
NOTE:
The headlights with wipers feature
may be turned on and off using the
MTC+ System, refer to “MTC+
Settings” in section “Dashboard
Instruments and Controls”.
Headlights Time Delay This safety feature provides headlight
illumination for up to 90 seconds
(programmable) when leaving your
vehicle in an unlit area. To activate the
delay feature, place the ignition
switch in the OFF or ACC position
while the headlights are still on. Then turn off the headlights within 45
seconds.
The delay interval begins when the
lights switch is turned off (position
“0”). If you turn the headlights or
position lights on, or place the
ignition switch in RUN , the system will
cancel the delay.
If you turn the headlights off (“0”
position) before the ignition, they will
turn off in the normal mode.
NOTE:
• To activate this feature the lights
must be turned off (“0” position)
within 45 seconds of placing the
ignition switch in the OFF or ACC
position.
• The headlight delay time is
programmable using the MTC+
System, see “MTC+ Settings” in
section “Dashboard Instruments and
Controls”.
• If the low beam bulbs/LEDs are
active due to “Headlights with
Wipers”, then the headlamps delay
feature will not be activated when
the ignition switch is set in OFF
position.Understanding the Vehicle
3
115
Page 163 of 436

4 – Dashboard Instruments and Controls Instrument Cluster ...................................... 160
Infotainment System .................................... 185
Audio Controls ......................................... 192
Audio System .......................................... 193
MTC+ “Controls” Screen ................................. 195
MTC+ Settings ......................................... 198
Dashboard Compartment ................................ 210
Analog Clock .......................................... 214
Air Conditioning Controls ................................ 214
Phone and Voice Controls on Steering Wheel ................. 224
159
Page 190 of 436
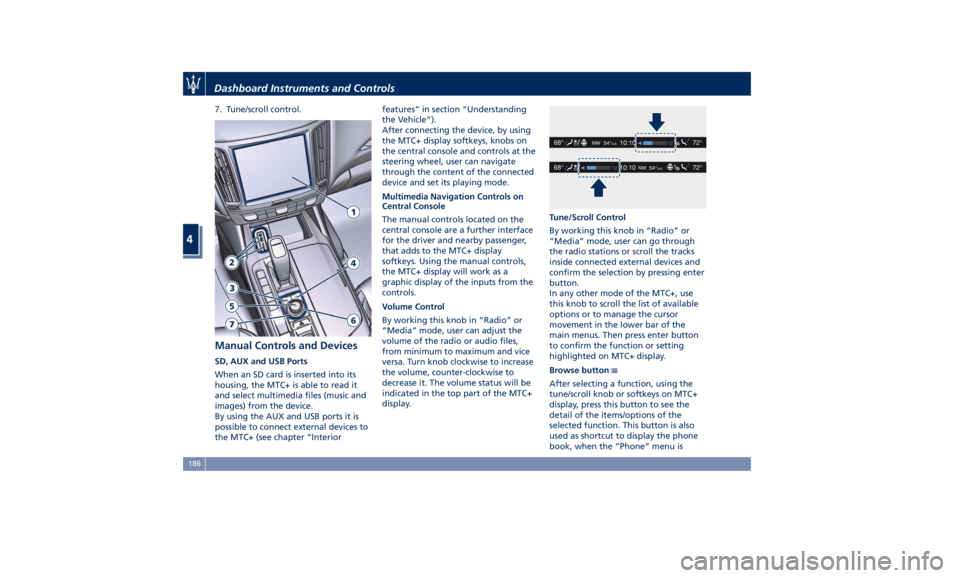
7. Tune/scroll control.
Manual Controls and Devices SD, AUX and USB Ports
When an SD card is inserted into its
housing, the MTC+ is able to read it
and select multimedia files (music and
images) from the device.
By using the AUX and USB ports it is
possible to connect external devices to
the MTC+ (see chapter “Interior features” in section “Understanding
the Vehicle”).
After connecting the device, by using
the MTC+ display softkeys, knobs on
the central console and controls at the
steering wheel, user can navigate
through the content of the connected
device and set its playing mode.
Multimedia Navigation Controls on
Central Console
The manual controls located on the
central console are a further interface
for the driver and nearby passenger,
that adds to the MTC+ display
softkeys. Using the manual controls,
the MTC+ display will work as a
graphic display of the inputs from the
controls.
Volume Control
By working this knob in “Radio” or
“Media” mode, user can adjust the
volume of the radio or audio files,
from minimum to maximum and vice
versa. Turn knob clockwise to increase
the volume, counter-clockwise to
decrease it. The volume status will be
indicated in the top part of the MTC+
display. Tune/Scroll Control
By working this knob in “Radio” or
“Media” mode, user can go through
the radio stations or scroll the tracks
inside connected external devices and
confirm the selection by pressing enter
button.
In any other mode of the MTC+, use
this knob to scroll the list of available
options or to manage the cursor
movement in the lower bar of the
main menus. Then press enter button
to confirm the function or setting
highlighted on MTC+ display.
Browse button
After selecting a function, using the
tune/scroll knob or softkeys on MTC+
display, press this button to see the
detail of the items/options of the
selected function. This button is also
used as shortcut to display the phone
book, when the “Phone” menu isDashboard Instruments and Controls
4
186
Page 203 of 436
NOTE:
• For further details refer to the
“Maserati Touch Control Plus
(MTC+)” guide.
• All settings must be edited with
ignition device set to RUN position.
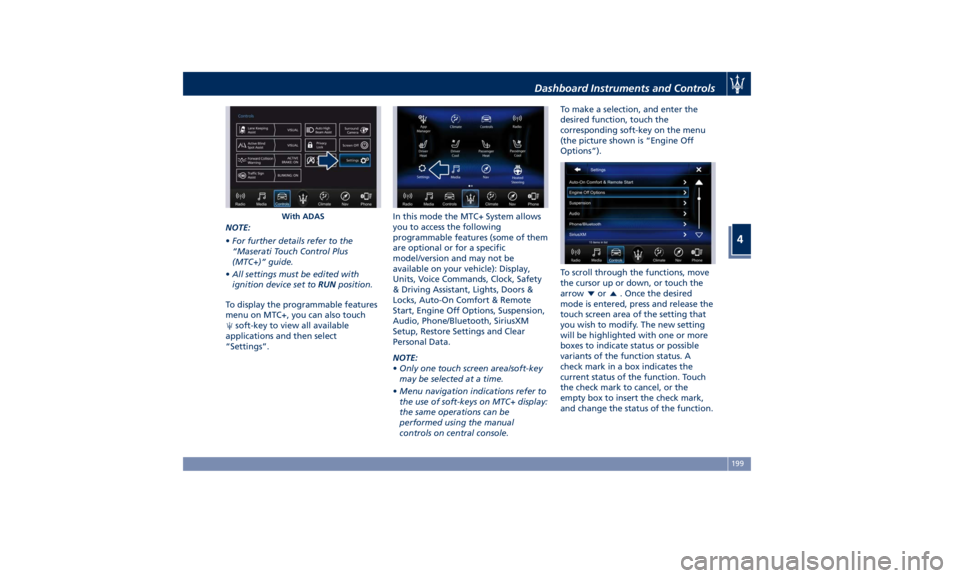
To display the programmable features
menu on MTC+, you can also touch
soft-key to view all available
applications and then select
“Settings”. In this mode the MTC+ System allows
you to access the following
programmable features (some of them
are optional or for a specific
model/version and may not be
available on your vehicle): Display,
Units, Voice Commands, Clock, Safety
& Driving Assistant, Lights, Doors &
Locks, Auto-On Comfort & Remote
Start, Engine Off Options, Suspension,
Audio, Phone/Bluetooth, SiriusXM
Setup, Restore Settings and Clear
Personal Data.
NOTE:
• Only one touch screen area/soft-key
may be selected at a time.
• Menu navigation indications refer to
the use of soft-keys on MTC+ display:
the same operations can be
performed using the manual
controls on central console. To make a selection, and enter the
desired function, touch the
corresponding soft-key on the menu
(the picture shown is “Engine Off
Options”).
To scroll through the functions, move
the cursor up or down, or touch the
arrow
or . Once the desired
mode is entered, press and release the
touch screen area of the setting that
you wish to modify. The new setting
will be highlighted with one or more
boxes to indicate status or possible
variants of the function status. A
check mark in a box indicates the
current status of the function. Touch
the check mark to cancel, or the
empty box to insert the check mark,
and change the status of the function.With ADAS Dashboard Instruments and Controls
4
199
Page 205 of 436
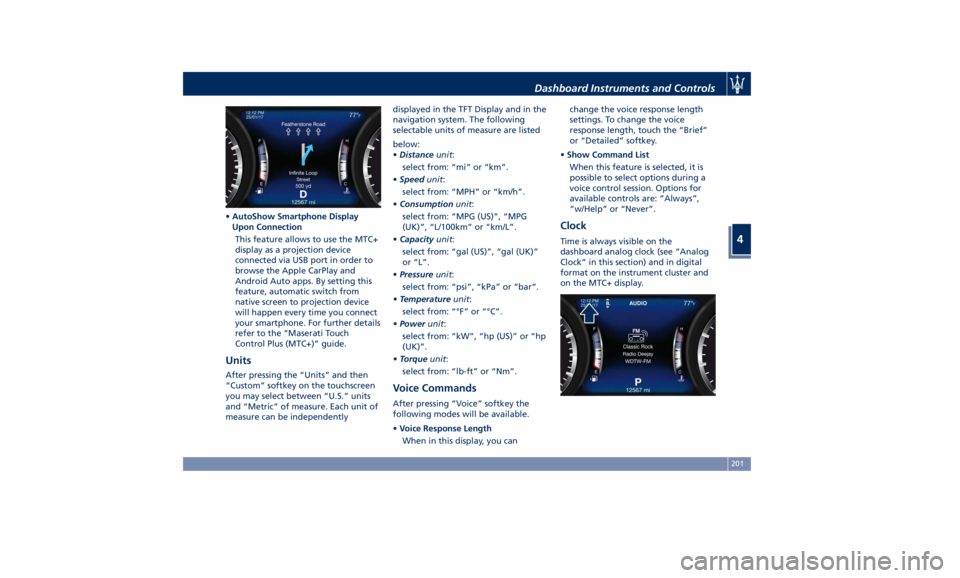
• AutoShow Smartphone Display
Upon Connection
This feature allows to use the MTC+
display as a projection device
connected via USB port in order to
browse the Apple CarPlay and
Android Auto apps. By setting this
feature, automatic switch from
native screen to projection device
will happen every time you connect
your smartphone. For further details
refer to the “Maserati Touch
Control Plus (MTC+)” guide.
Units After pressing the “Units” and then
“Custom” softkey on the touchscreen
you may select between “U.S.” units
and “Metric” of measure. Each unit of
measure can be independently displayed in the TFT Display and in the
navigation system. The following
selectable units of measure are listed
below:
• Distance unit :
select from: “mi” or “km”.
• Speed unit :
select from: “MPH” or “km/h”.
• Consumption unit :
select from: “MPG (US)”, “MPG
(UK)”, “L/100km” or “km/L”.
• Capacity unit :
select from: “gal (US)”, “gal (UK)”
or “L”.
• Pressure unit :
select from: “psi”, “kPa” or “bar”.
• Temperature unit :
select from: “°F” or “°C”.
• Power unit :
select from: “kW”, “hp (US)” or “hp
(UK)”.
• Torque unit :
select from: “lb-ft” or “Nm”.
Voice Commands After pressing “Voice” softkey the
following modes will be available.
• Voice Response Length
When in this display, you can change the voice response length
settings. To change the voice
response length, touch the “Brief”
or “Detailed” softkey.
• Show Command List
When this feature is selected, it is
possible to select options during a
voice control session. Options for
available controls are: “Always”,
“w/Help” or “Never”.
Clock Time is always visible on the
dashboard analog clock (see “Analog
Clock” in this section) and in digital
format on the instrument cluster and
on the MTC+ display.Dashboard Instruments and Controls
4
201
Page 206 of 436
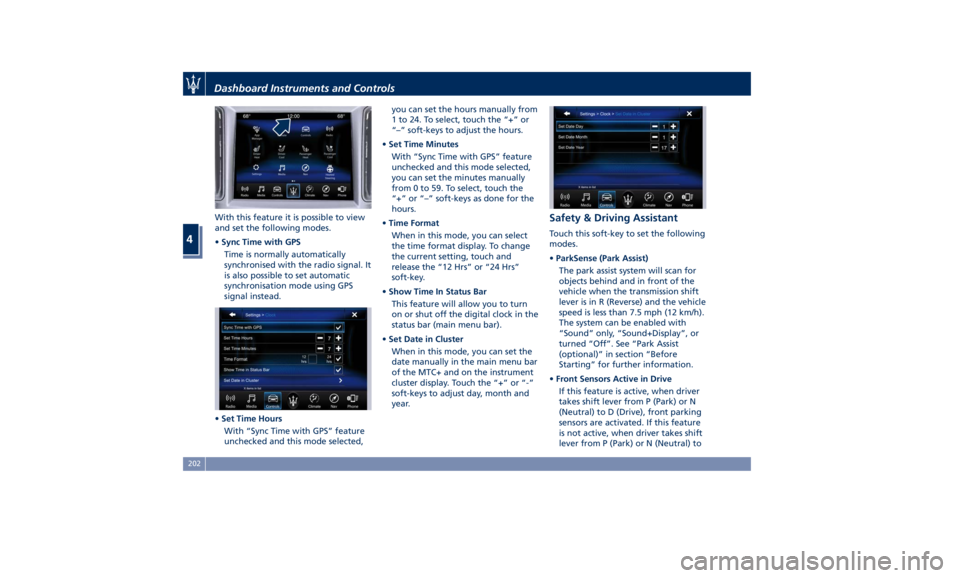
With this feature it is possible to view
and set the following modes.
• Sync Time with GPS
Time is normally automatically
synchronised with the radio signal. It
is also possible to set automatic
synchronisation mode using GPS
signal instead.
• Set Time Hours
With “Sync Time with GPS” feature
unchecked and this mode selected, you can set the hours manually from
1 to 24. To select, touch the “+” or
“–” soft-keys to adjust the hours.
• Set Time Minutes
With “Sync Time with GPS” feature
unchecked and this mode selected,
you can set the minutes manually
from 0 to 59. To select, touch the
“+” or “–” soft-keys as done for the
hours.
• Time Format
When in this mode, you can select
the time format display. To change
the current setting, touch and
release the “12 Hrs” or “24 Hrs”
soft-key.
• Show Time In Status Bar
This feature will allow you to turn
on or shut off the digital clock in the
status bar (main menu bar).
• Set Date in Cluster
When in this mode, you can set the
date manually in the main menu bar
of the MTC+ and on the instrument
cluster display. Touch the “+” or “-”
soft-keys to adjust day, month and
year. Safety & Driving Assistant Touch this soft-key to set the following
modes.
• ParkSense (Park Assist)
The park assist system will scan for
objects behind and in front of the
vehicle when the transmission shift
lever is in R (Reverse) and the vehicle
speed is less than 7.5 mph (12 km/h).
The system can be enabled with
“Sound” only, “Sound+Display”, or
turned “Off”. See “Park Assist
(optional)” in section “Before
Starting” for further information.
• Front Sensors Active in Drive
If this feature is active, when driver
takes shift lever from P (Park) or N
(Neutral) to D (Drive), front parking
sensors are activated. If this feature
is not active, when driver takes shift
lever from P (Park) or N (Neutral) toDashboard Instruments and Controls
4
202
Page 214 of 436
Restore Settings When this feature is selected, it will
reset the “Display”, “Clock”, “Audio”,
and “Radio Settings” to their default
settings.
Run this feature and a pop-up will
appear asking user to confirm default
settings resetting. Select “Yes” to
restore, or “Cancel” to exit. Once the
settings are restored, a pop-up appears
confirming that settings have been
reset to default and then the MTC+
will restart.
Clear Personal Data When this feature is selected, it will
remove personal data concerning
settings and/or options that have been
modified compared to factory settings
and will also remove from system
memory Bluetooth devices and presets.
To remove personal information, select
this feature and a pop-up will appear
asking confirmation to delete all
personal data. Select “OK” to clear, or
“Cancel” to exit. Once the data have
been cleared, a pop up appears
confirming that personal data have
been cleared and then the MTC+ will
restart. Dashboard Compartment There is a glove box compartment on
the passenger side of the dashboard to
store small items or documents.
WARNING!
Do not operate the vehicle with a
glove compartment lid in the open
position. Cellular phones, music
players, and other handheld electronic
devices should be stowed while
driving. Use of these devices while
driving could cause an accident due to
distraction.
CAUTION!
Do not place objects weighing over
22 lb (10 kg) in the glove box
compartment.
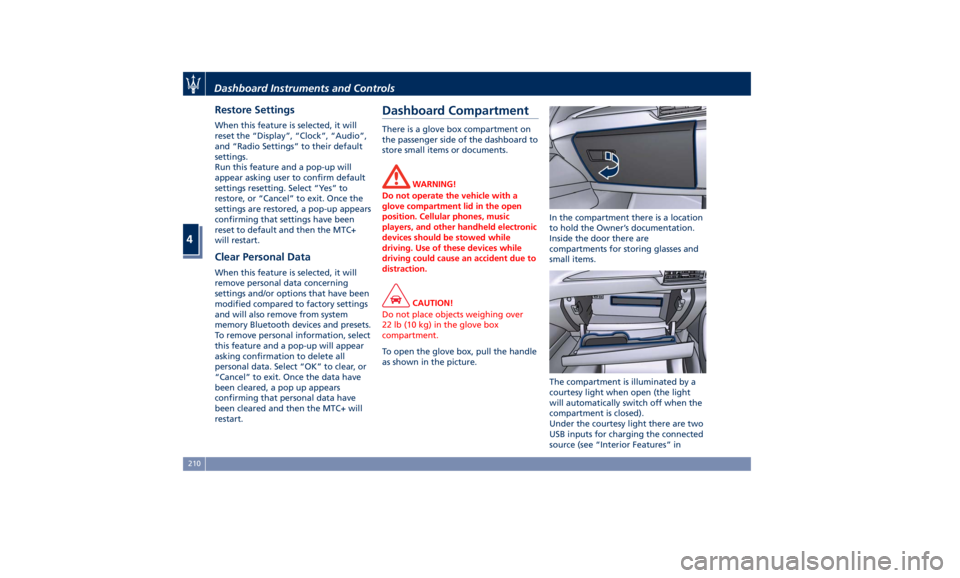
To open the glove box, pull the handle
as
shown in the picture. In the compartment there is a location
to hold the Owner’s documentation.
Inside the door there are
compartments for storing glasses and
small items.
The compartment is illuminated by a
courtesy light when open (the light
will automatically switch off when the
compartment is closed).
Under the courtesy light there are two
USB inputs for charging the connected
source (see “Interior Features” inDashboard Instruments and Controls
4
210
Page 218 of 436
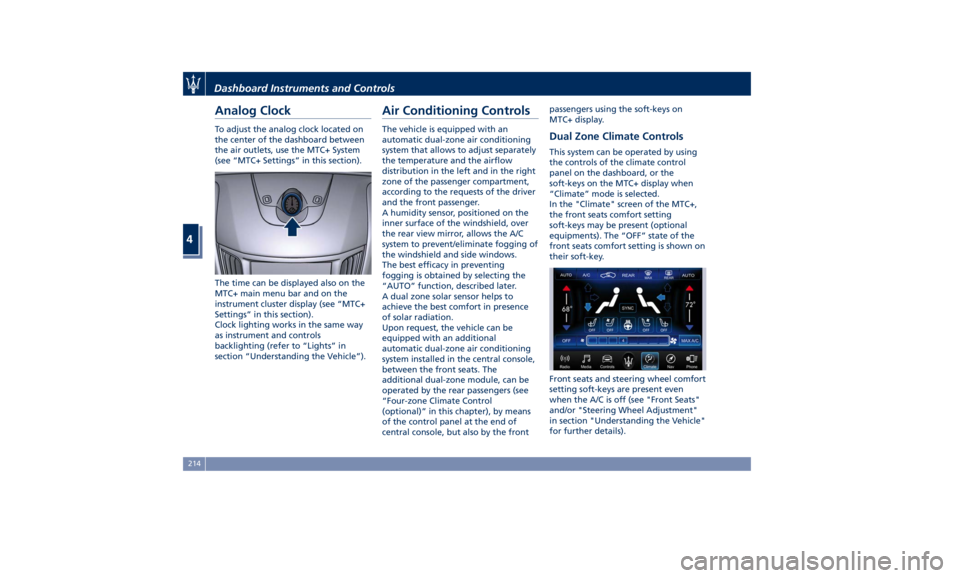
Analog Clock To adjust the analog clock located on
the center of the dashboard between
the air outlets, use the MTC+ System
(see “MTC+ Settings” in this section).
The time can be displayed also on the
MTC+ main menu bar and on the
instrument cluster display (see “MTC+
Settings” in this section).
Clock lighting works in the same way
as instrument and controls
backlighting (refer to “Lights” in
section “Understanding the Vehicle”). Air Conditioning Controls The vehicle is equipped with an
automatic dual-zone air conditioning
system that allows to adjust separately
the temperature and the airflow
distribution in the left and in the right
zone of the passenger compartment,
according to the requests of the driver
and the front passenger.
A humidity sensor, positioned on the
inner surface of the windshield, over
the rear view mirror, allows the A/C
system to prevent/eliminate fogging of
the windshield and side windows.
The best efficacy in preventing
fogging is obtained by selecting the
“AUTO” function, described later.
A dual zone solar sensor helps to
achieve the best comfort in presence
of solar radiation.
Upon request, the vehicle can be
equipped with an additional
automatic dual-zone air conditioning
system installed in the central console,
between the front seats. The
additional dual-zone module, can be
operated by the rear passengers (see
“Four-zone Climate Control
(optional)” in this chapter), by means
of the control panel at the end of
central console, but also by the front passengers using the soft-keys on
MTC+ display.
Dual Zone Climate Controls This system can be operated by using
the controls of the climate control
panel on the dashboard, or the
soft-keys on the MTC+ display when
“Climate” mode is selected.
In the "Climate" screen of the MTC+,
the front seats comfort setting
soft-keys may be present (optional
equipments). The “OFF” state of the
front seats comfort setting is shown on
their soft-key.
Front seats and steering wheel comfort
setting soft-keys are present even
when the A/C is off (see "Front Seats"
and/or "Steering Wheel Adjustment"
in section "Understanding the Vehicle"
for further details).Dashboard Instruments and Controls
4
214
Page 340 of 436
(Continued)
with proper maintenance. Have the
exhaust system inspected every time
the vehicle is raised. Have any
abnormal conditions repaired
promptly. Until repaired, drive with
all side windows fully open.
WARNING!
California Proposition 65
Operating, servicing and maintaining
a passenger vehicle or off-road vehicle
can expose you to chemicals including
such as, engine exhaust, carbon
monoxide, phthalates and lead, that
which are known to the State of
California to cause cancer and birth
defects or other reproductive harm. To
minimize exposure, avoid breathing
exhaust, do not idle the engine except
as necessary, service your vehicle in a
well-ventilated area and wear gloves
or wash your hands frequently when
servicing your vehicle. For more
information go to:
www.P65Warnings.ca.gov/passenger-
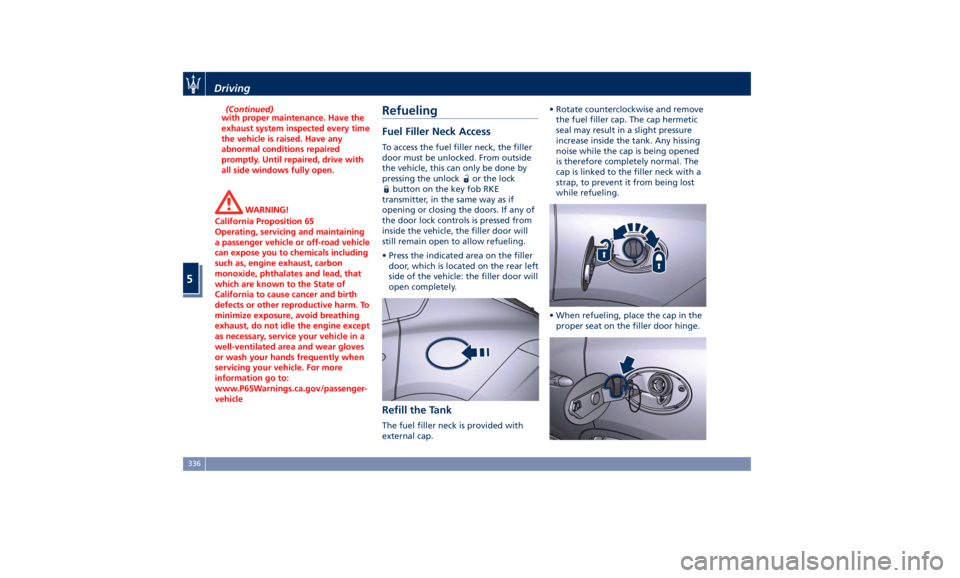
vehicle Refueling Fuel Filler Neck Access To access the fuel filler neck, the filler
door must be unlocked. From outside
the vehicle, this can only be done by
pressing the unlock
or the lock
button on the key fob RKE
transmitter, in the same way as if
opening or closing the doors. If any of
the door lock controls is pressed from
inside the vehicle, the filler door will
still remain open to allow refueling.
• Press the indicated area on the filler
door, which is located on the rear left
side of the vehicle: the filler door will
open completely.
Refill the Tank The fuel filler neck is provided with
external cap. • Rotate counterclockwise and remove
the fuel filler cap. The cap hermetic
seal may result in a slight pressure
increase inside the tank. Any hissing
noise while the cap is being opened
is therefore completely normal. The
cap is linked to the filler neck with a
strap, to prevent it from being lost
while refueling.
• When refueling, place the cap in the
proper seat on the filler door hinge.Driving
5
336