light MERCEDES-BENZ C-Class SEDAN 2017 W205 Comand Manual
[x] Cancel search | Manufacturer: MERCEDES-BENZ, Model Year: 2017, Model line: C-Class SEDAN, Model: MERCEDES-BENZ C-Class SEDAN 2017 W205Pages: 178, PDF Size: 9.47 MB
Page 125 of 178
Explanation of the access data
Input field Meaning
Phone Num‐
Phone Num‐
ber: ber: Access number for estab-
lishing the connection
The access number
depends on the mobile
phone used. For GSM/
UMTS mobile phones,
*99***1# *99***1# is used as a
standard. Access
Access
Point: Point: APN network access point
(Access
PointName)
You can obtain this infor-
mation from your mobile
phone network provider.
Entry is not necessary for
all mobile phone network
providers and mobile
phones. PDP Type: PDP Type: Internet protocol used.
You can obtain this infor-
mation from your mobile
phone network provider.
User ID: User ID: The user identification can
be obtained from your
mobile phone network pro-
vider.
Entry is not necessary for
all mobile phone network
providers. Password: Password: The password can be
obtained from your mobile
phone network provider.
Entry is not necessary for
all mobile phone network
providers. Auto DNS: Auto DNS: Automatic allocation of
DNS servers is activated. If
the function is deactivated, the DNS server addresses
must be entered manually.
DNS (Domain Name
Service). DNS1: DNS1:
DNS2: DNS2: Fields for entering the DNS
server addresses manually.
The address can be
obtained from your mobile
phone network provider. Managing existing access data
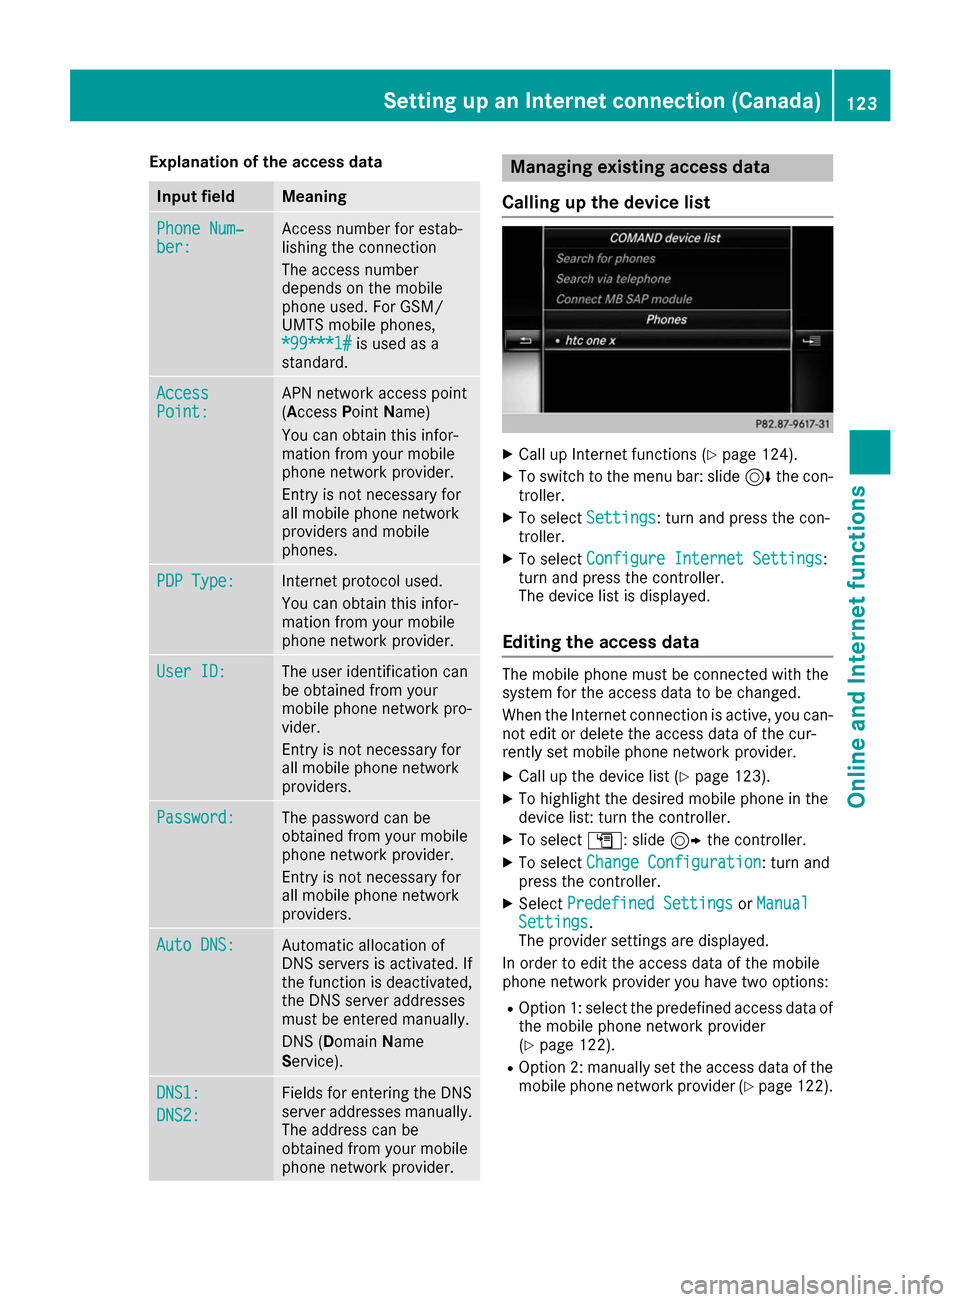
Calling up the device list X
Call up Internet functions (Y page 124).
X To switch to the menu bar: slide 6the con-
troller.
X To select Settings Settings: turn and press the con-
troller.
X To select Configure Internet Settings
Configure Internet Settings:
turn and press the controller.
The device list is displayed.
Editing the access data The mobile phone must be connected with the
system for the access data to be changed.
When the Internet connection is active, you can-
not edit or delete the access data of the cur-
rently set mobile phone network provider.
X Call up the device list (Y page 123).
X To highlight the desired mobile phone in the
device list: turn the controller.
X To select G: slide 9the controller.
X To select Change Configuration
Change Configuration: turn and
press the controller.
X Select Predefined Settings
Predefined Settings orManual Manual
Settings Settings.
The provider settings are displayed.
In order to edit the access data of the mobile
phone network provider you have two options:
R Option 1: select the predefined access data of
the mobile phone network provider
(Y page 122).
R Option 2: manually set the access data of the
mobile phone network provider (Y page 122). Setting up an Internet connection (Canada)
123Online and Internet functions Z
Page 126 of 178
Canceling Internet access permission
for a mobile phone X
Call up the device list (Y page 123).
X To highlight the desired mobile phone in the
device list: turn the controller.
X To select G: slide 9the controller.
X To select Delete Configuration
Delete Configuration: turn and
press the controller.
A prompt appears asking whether you wish to
delete the Internet configuration.
X To select Yes
Yes : turn and press the controller.
The Internet access permission for the mobile
phone is now canceled. The mobile phone can
now no longer be used by the system for
Internet functions. Setting automatic disconnection of
the Internet connection
If a preset time has elapsed during which the
Internet functions have not been used, the Inter- net automatically disconnects.
X Call up the device list (Y page 123).
X To highlight the desired mobile phone in the
device list: turn the controller.
X To select G: slide 9the controller.
X To select Disconnect Automatically
Disconnect Automatically
When Inactive When Inactive: turn and press the control-
ler.
X To select 5 Minutes
5 Minutes, 10 Minutes
10 Minutes or20
20
Minutes
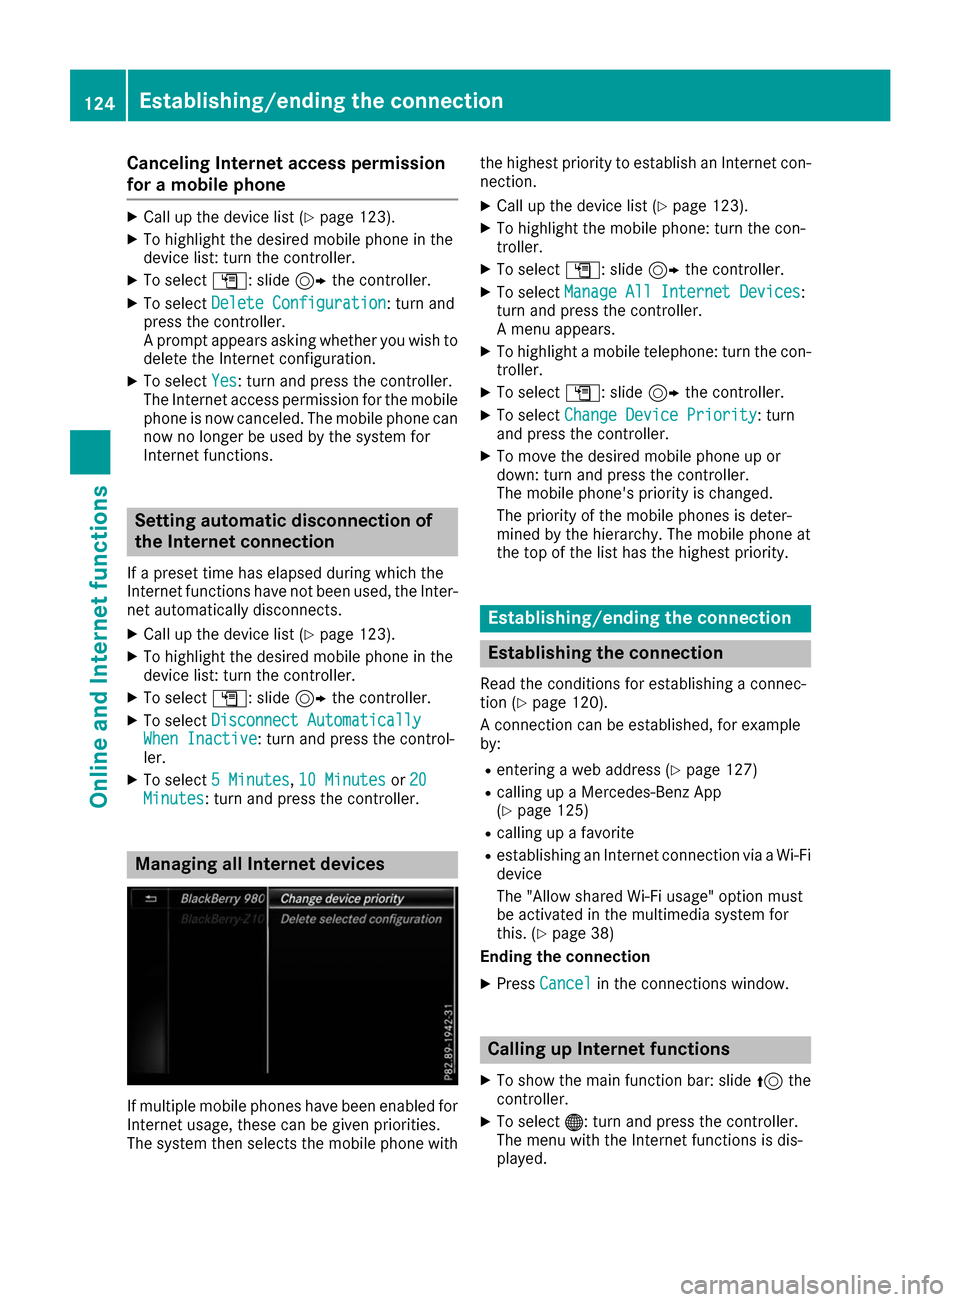
Minutes: turn and press the controller. Managing all Internet devices
If multiple mobile phones have been enabled for
Internet usage, these can be given priorities.
The system then selects the mobile phone with the highest priority to establish an Internet con-
nection.
X Call up the device list (Y page 123).
X To highlight the mobile phone: turn the con-
troller.
X To select G: slide 9the controller.
X To select Manage All Internet Devices
Manage All Internet Devices:
turn and press the controller.
A menu appears.
X To highlight a mobile telephone: turn the con-
troller.
X To select G: slide 9the controller.
X To select Change Device Priority
Change Device Priority: turn
and press the controller.
X To move the desired mobile phone up or
down: turn and press the controller.
The mobile phone's priority is changed.
The priority of the mobile phones is deter-
mined by the hierarchy. The mobile phone at
the top of the list has the highest priority. Establishing/ending the connection
Establishing the connection
Read the conditions for establishing a connec-
tion (Y page 120).
A connection can be established, for example
by:
R entering a web address (Y page 127)
R calling up a Mercedes-Benz App
(Y page 125)
R calling up a favorite
R establishing an Internet connection via a Wi-Fi
device
The "Allow shared Wi-Fi usage" option must
be activated in the multimedia system for
this. (Y page 38)
Ending the connection
X Press Cancel Cancel in the connections window. Calling up Internet functions
X To show the main function bar: slide 5the
controller.
X To select 00A7: turn and press the controller.
The menu with the Internet functions is dis-
played. 124
Establishing/ending the connectionOnline and Internet functions
Page 130 of 178
Navigating the website
Step Result
X
Turn the controller. Navigates from one
selectable item (e.g.
link, text field or
menu) to the next and
highlights the respec-
tive element on the
website. Sliding the controller:
X
Left or right 1
X Up or down 4
X Diagonally 2 Moves the pointer on
the page. X
Press the control-
ler. Opens the selected
item.
X
Press 0038. Calls up the menu.
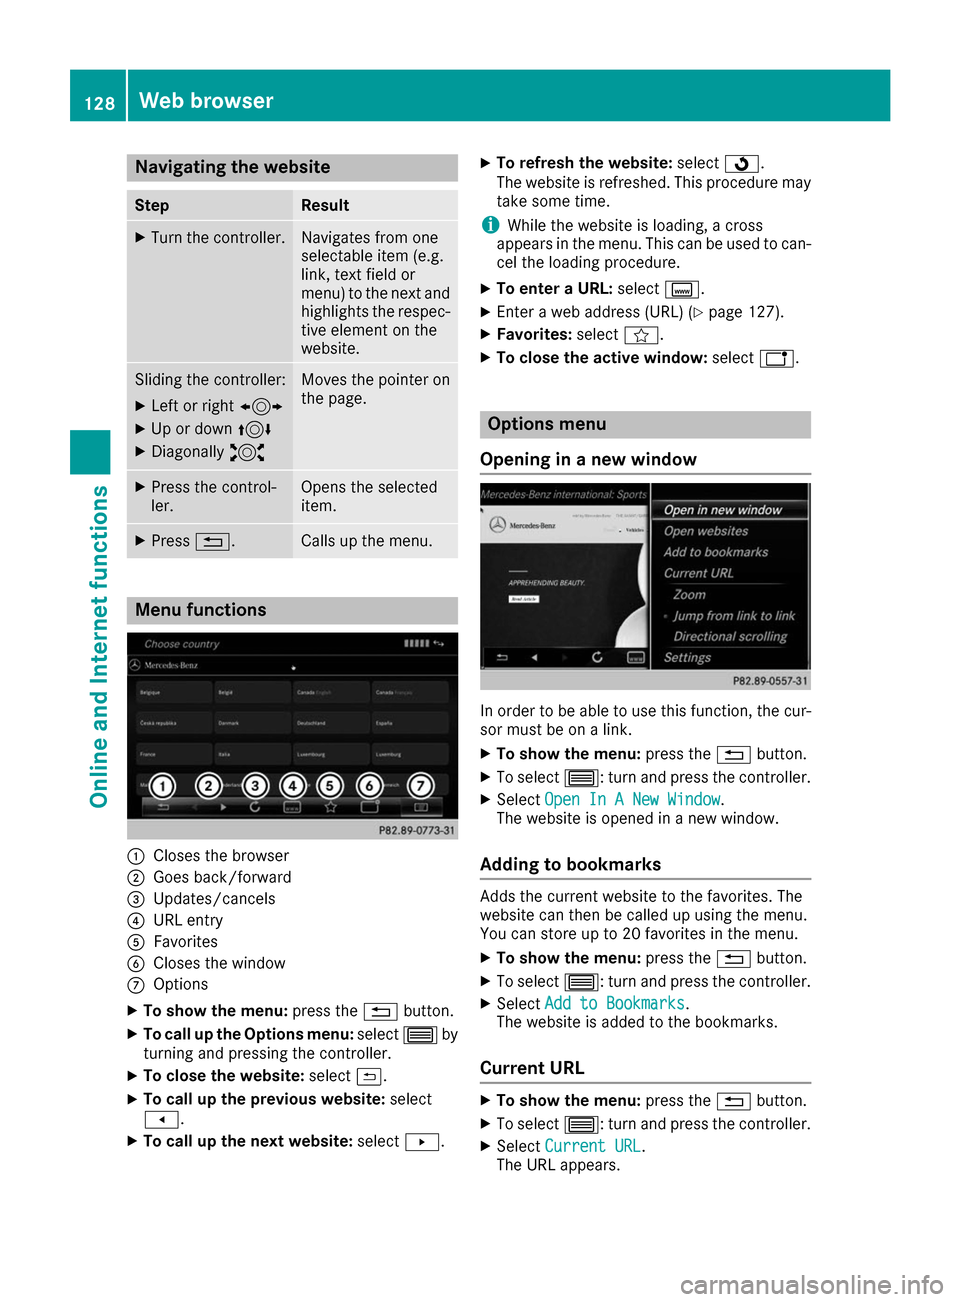
Menu functions
0043
Closes the browser
0044 Goes back/forward
0087 Updates/cancels
0085 URL entry
0083 Favorites
0084 Closes the window
006B Options
X To show the menu: press the0038button.
X To call up the Options menu: select0057by
turning and pressing the controller.
X To close the website: select0039.
X To call up the previous website: select
007F.
X To call up the next website: select0080. X
To refresh the website: select0080.
The website is refreshed. This procedure may
take some time.
i While the website is loading, a cross
appears in the menu. This can be used to can-
cel the loading procedure.
X To enter a URL: selectg.
X Enter a web address (URL) (Y page 127).
X Favorites: selectf.
X To close the active window: selecth. Options menu
Opening in a new window In order to be able to use this function, the cur-
sor must be on a link.
X To show the menu: press the0038button.
X To select 0057: turn and press the controller.
X Select Open In A New Window Open In A New Window .
The website is opened in a new window.
Adding to bookmarks Adds the current website to the favorites. The
website can then be called up using the menu.
You can store up to 20 favorites in the menu.
X To show the menu: press the0038button.
X To select 0057: turn and press the controller.
X Select Add to Bookmarks
Add to Bookmarks .
The website is added to the bookmarks.
Current URL X
To show the menu: press the0038button.
X To select 0057: turn and press the controller.
X Select Current URL
Current URL .
The URL appears. 128
Web bro
wserOnline an d Internet functions
Page 136 of 178
Using the search function
X
In radio mode: slide 6the controller.
The radio menu bar appears.
X Select 00D3and enter the first letters of the
required station using the controller.
X Press OK
OKto confirm.
The multimedia system displays a list of avail-
able stations.
X To select stations from the list: turn the con-
troller and press to confirm.
Using the preset position X
In radio mode: slide 6the controller.
X To select Preset
Preset : turn and press the control-
ler.
X To select Enter Preset Enter Preset : turn and press the
controller.
X Enter the station preset of the desired station. Station list
X In radio mode, press the controller.
The station list appears with the stations cur-
rently available. Saving/deleting a station
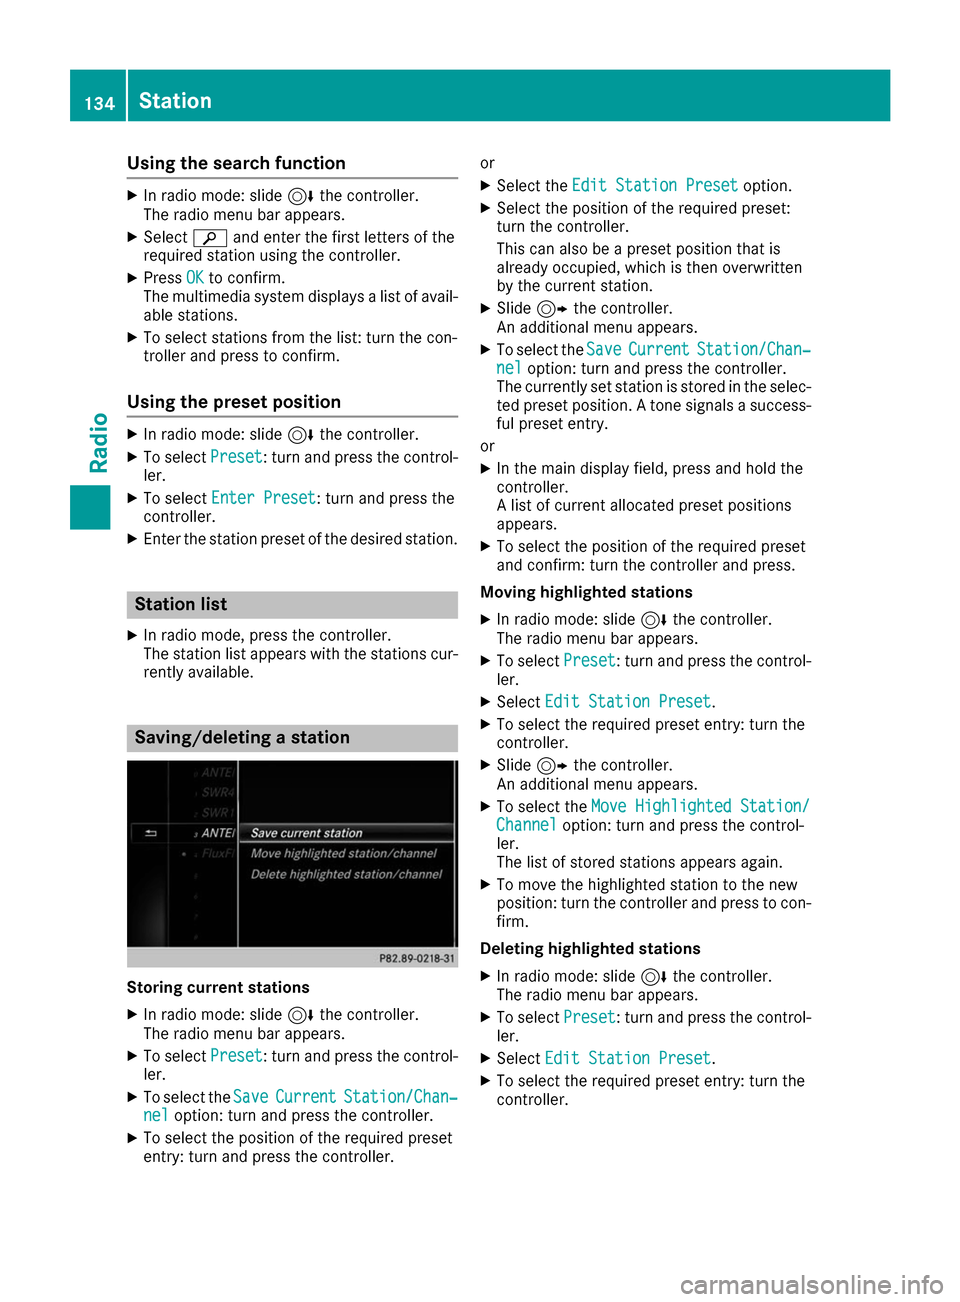
Storing current stations
X In radio mode: slide 6the controller.
The radio menu bar appears.
X To select Preset Preset: turn and press the control-
ler.
X To select the Save
SaveCurrent
Current Station/Chan‐
Station/Chan‐
nel
nel option: turn and press the controller.
X To select the position of the required preset
entry: turn and press the controller. or
X Select the Edit Station Preset
Edit Station Preset option.
X Select the position of the required preset:
turn the controller.
This can also be a preset position that is
already occupied, which is then overwritten
by the current station.
X Slide 9the controller.
An additional menu appears.
X To select the Save SaveCurrent
Current Station/Chan‐
Station/Chan‐
nel
nel option: turn and press the controller.
The currently set station is stored in the selec-
ted preset position. A tone signals a success-
ful preset entry.
or X In the main display field, press and hold the
controller.
A list of current allocated preset positions
appears.
X To select the position of the required preset
and confirm: turn the controller and press.
Moving highlighted stations X In radio mode: slide 6the controller.
The radio menu bar appears.
X To select Preset Preset: turn and press the control-
ler.
X Select Edit Station Preset
Edit Station Preset .
X To select the required preset entry: turn the
controller.
X Slide 9the controller.
An additional menu appears.
X To select the Move Highlighted Station/ Move Highlighted Station/
Channel
Channel option: turn and press the control-
ler.
The list of stored stations appears again.
X To move the highlighted station to the new
position: turn the controller and press to con-
firm.
Deleting highlighted stations
X In radio mode: slide 6the controller.
The radio menu bar appears.
X To select Preset Preset: turn and press the control-
ler.
X Select Edit Station Preset Edit Station Preset .
X To select the required preset entry: turn the
controller. 134
StationRadio
Page 137 of 178
X
Slide 9the controller.
X To select the Delete Highlighted Sta‐
Delete Highlighted Sta‐
tion/Channel
tion/Channel option in the additional menu:
turn and press the controller.
X To select Yes
Yes: turn and press the controller.
The highlighted station is deleted.
or X To select No
No: turn and press the controller.
The process is canceled.
i Frequencies have already been stored in the
multimedia system. There are 100 preset
positions available. Activating/deactivating the station
presets display
You can use this function to change to the sta-
tion presets display.
Activating
X In radio mode: slide 6the controller.
X To select Preset
Preset: turn and press the control-
ler.
X To select Station Preset View: On Station Preset View: On: turn
and press the controller.
The station preset display appears.
X To switch between the stored stations: turn
the controller.
Deactivating
X In radio mode: slide 6the controller.
X To select Preset
Preset: turn and press the control-
ler.
X To select Station
Station Preset PresetView:
View:Off
Off : turn
and press the controller.
A view of the last waveband you listened to
appears. Tagging music tracks
If an Apple ®
device is connected, the music
tracks and artist displayed in the radio text can be stored. You have the option of purchasing
this track using iTunes Store ®
. Not all radio sta-
tions support this function. X
In radio mode: slide 6the controller.
The radio menu bar appears.
X To select Options
Options: turn and press the con-
troller.
X Select Tag This Track Tag This Track.
A message appears about storing the track
information. Displaying station information
X In radio mode: slide 6the controller.
The radio menu bar appears.
X To select Options Options: turn and press the con-
troller.
X You can determine whether or not the artist,
track or station name are shown in the main
display area with 0073or0053 before Show ShowSta‐
Sta‐
tion Information
tion Information. Calling up sound settings
X In radio mode: slide 6the controller.
The radio menu bar appears.
X To select à: turn and press the controller.
The sound menu appears (Y page 165). Displaying information
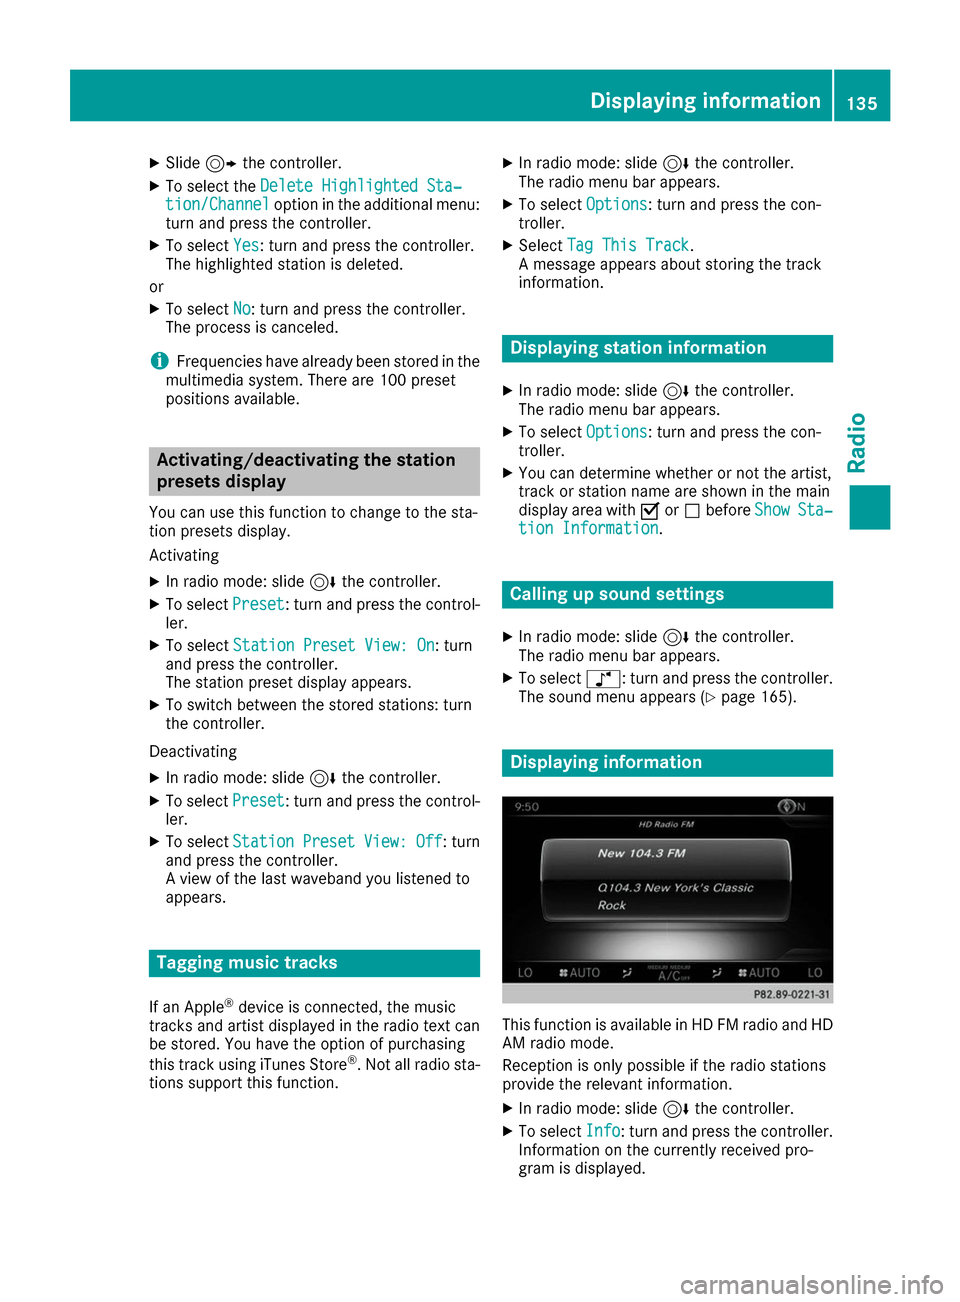
This function is available in HD FM radio and HD
AM radio mode.
Reception is only possible if the radio stations
provide the relevant information.
X In radio mode: slide 6the controller.
X To select Info Info: turn and press the controller.
Information on the currently received pro-
gram is displayed. Displaying information
135Radio
Page 152 of 178
i
Data can only be copied from an MP3 player
if this can be configured as a mass storage
device.
Video files from DVD-V cannot be copied.
While copying, several functions will not be
available. If this is the case, you will see a
message to this effect.
1. Selecting a data medium X
In media mode: press the 00FDbutton.
A menu appears with the available media
sources.
X To select the media source: turn the control-
ler and press to confirm.
X To switch to the menu bar: slide 6the con-
troller.
X To select Options Options: turn and press the con-
troller.
X Select Save Files to Media Register
Save Files to Media Register.
The media list appears. A data medium from
which files can be copied is selected auto-
matically.
i The
Save Files to Media Register
Save Files to Media Register
function can be reached from any media
application.
X Select the displayed data medium.
The data medium is loaded.
If the data medium contains files that can be
copied, a selection menu appears.
2. Selecting files X
To select All Media Files All Media Files: turn and press
the controller.
This command copies all files from the selec-
ted data medium. The symbol next to All
All Media Files Media Files
is filled in. All subsequent
entries have a checkmark 0073beside them.
X Select a folder.
A checkmark 0073next to the folder entry high-
lights the selection.
X To select Continue Continue: turn and press the con-
troller.
The copying menu appears.
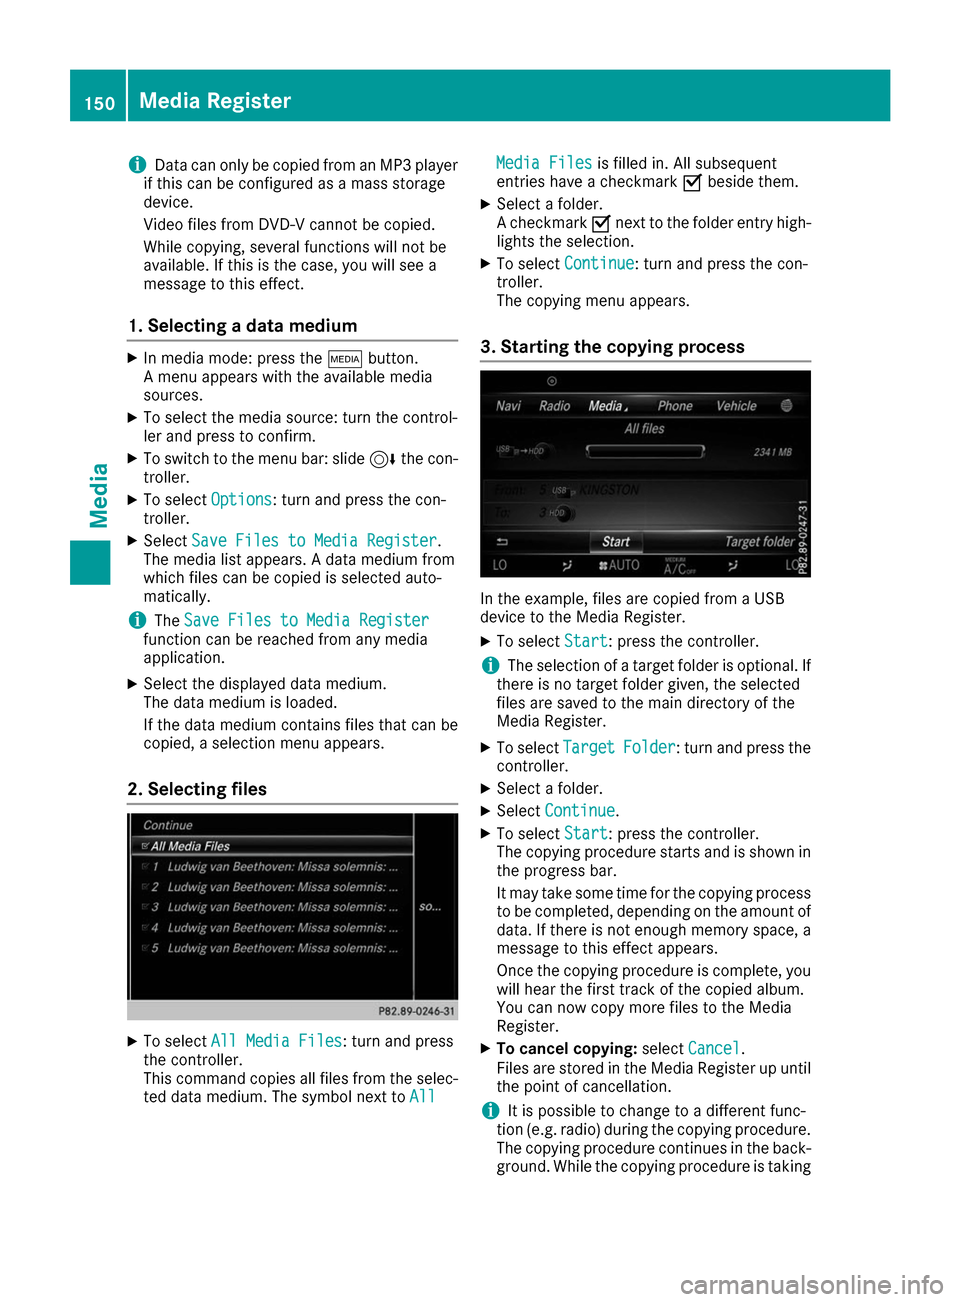
3. Starting the copying process In the example, files are copied from a USB
device to the Media Register.
X To select Start Start: press the controller.
i The selection of a target folder is optional. If
there is no target folder given, the selected
files are saved to the main directory of the
Media Register.
X To select Target TargetFolder
Folder: turn and press the
controller.
X Select a folder.
X Select Continue
Continue.
X To select Start
Start: press the controller.
The copying procedure starts and is shown in
the progress bar.
It may take some time for the copying process to be completed, depending on the amount of
data. If there is not enough memory space, a
message to this effect appears.
Once the copying procedure is complete, you will hear the first track of the copied album.
You can now copy more files to the Media
Register.
X To cancel copying: selectCancel Cancel .
Files are stored in the Media Register up until
the point of cancellation.
i It is possible to change to a different func-
tion (e.g. radio) during the copying procedure.
The copying procedure continues in the back-
ground. While the copying procedure is taking 150
Media RegisterMedia
Page 153 of 178

place, this is shown by a symbol in the status
bar. Renaming/deleting files
X
In media mode: press the 00FDbutton.
A menu appears with the available media
sources.
X To select the media source: turn the control-
ler and press to confirm.
X To switch to the menu bar: slide 6the con-
troller.
X To select Options
Options: turn and press the con-
troller.
X Select Manage Media Register Manage Media Register.
X Select Rename / Delete Files
Rename / Delete Files.
The file list is displayed.
X To highlight the file: turn and press the con-
troller.
X Slide 9the controller.
You can select between Edit
Edit andDelete Delete .
i Only folders can be renamed. Renaming a file
X To select Edit
Edit: turn and press the controller.
An input field appears.
X Rename folder.
X To save changes with 0054: turn and press
the controller.
Renaming a folder only changes the file name.
Depending on whether or not the Show Show
Track Information
Track Information option has been selec-
ted, this change may not be visible in the main
display field.
Deleting a file X To select Delete
Delete: turn and press the control-
ler. Deleting all files
! In order to prevent malfunctions, do not use
COMAND during this time.
This function deletes all files from the Media
Register.
X In media mode: press the 00FDbutton.
A menu appears with the available media
sources.
X To select the media source: turn the control-
ler and press to confirm.
X To switch to the menu bar: slide 6the con-
troller.
X To select Options Options: turn and press the con-
troller.
X Select Manage Media Register Manage Media Register.
X Select Delete All Media Files
Delete All Media Files.
A prompt appears.
X To select Yes
Yes: turn and press the controller.
All files are deleted. Media Register
151Media Z
Page 163 of 178

The DVD basic display can be shown in the fol-
lowing situations:
X To show the DVD menu: press the0038
button.
X To show in the video DVD currently play-
ing: slide 6the controller.
The video menu appears.
X Press the controller.
The basic display appears. Switching on DVD full-screen mode
It is possible to switch from the DVD basic dis-
play to full screen mode as follows:
X Slide 5the controller.
The main function bar and menu bar are hid-
den. A full-screen symbol will be shown.
X Press the controller.
The full-screen mode appears. Calling up the options menu
Selecting options
X In full-screen mode, slide 6the controller
The video menu appears.
X Press the controller.
The DVD basic display appears.
X To select Options Optionsin the menu bar: turn and
press the controller.
A menu appears.
Skip to time
X To select Skip to Time
Skip to Time: turn and press the
controller.
A menu appears.
X To set the time: turn the controller.
X To hide the menu: press the 0038button.
Displaying the DVD functions X To select DVD
DVD Functions Functions: turn and press the
controller.
A menu appears (Y page 162). Selecting video settings
Dynamic image enhancement The dynamic image enhancement function auto-
matically matches brightness, contrast and
color to the film being played. X
To activate or deactivate: tick or remove the
tick from the box in front of Dynamic DynamicImage
Image
Enhancement
Enhancement .
Manual image enhancement In order to manually adjust the brightness, con-
trast and color, the dynamic image enhance-
ment function and the automatic daylight
adjustment feature must be switched off.
X To select Brightness Brightness ,Contrast
Contrast or
Color
Color : turn and press the controller.
A sliding menu appears.
X To select the required value: turn the control-
ler.
X To exit the sliding menu: slide 8the con-
troller. Video DVD mode
161Media Z
Page 165 of 178
006E
Stops playback
006F Pauses playback
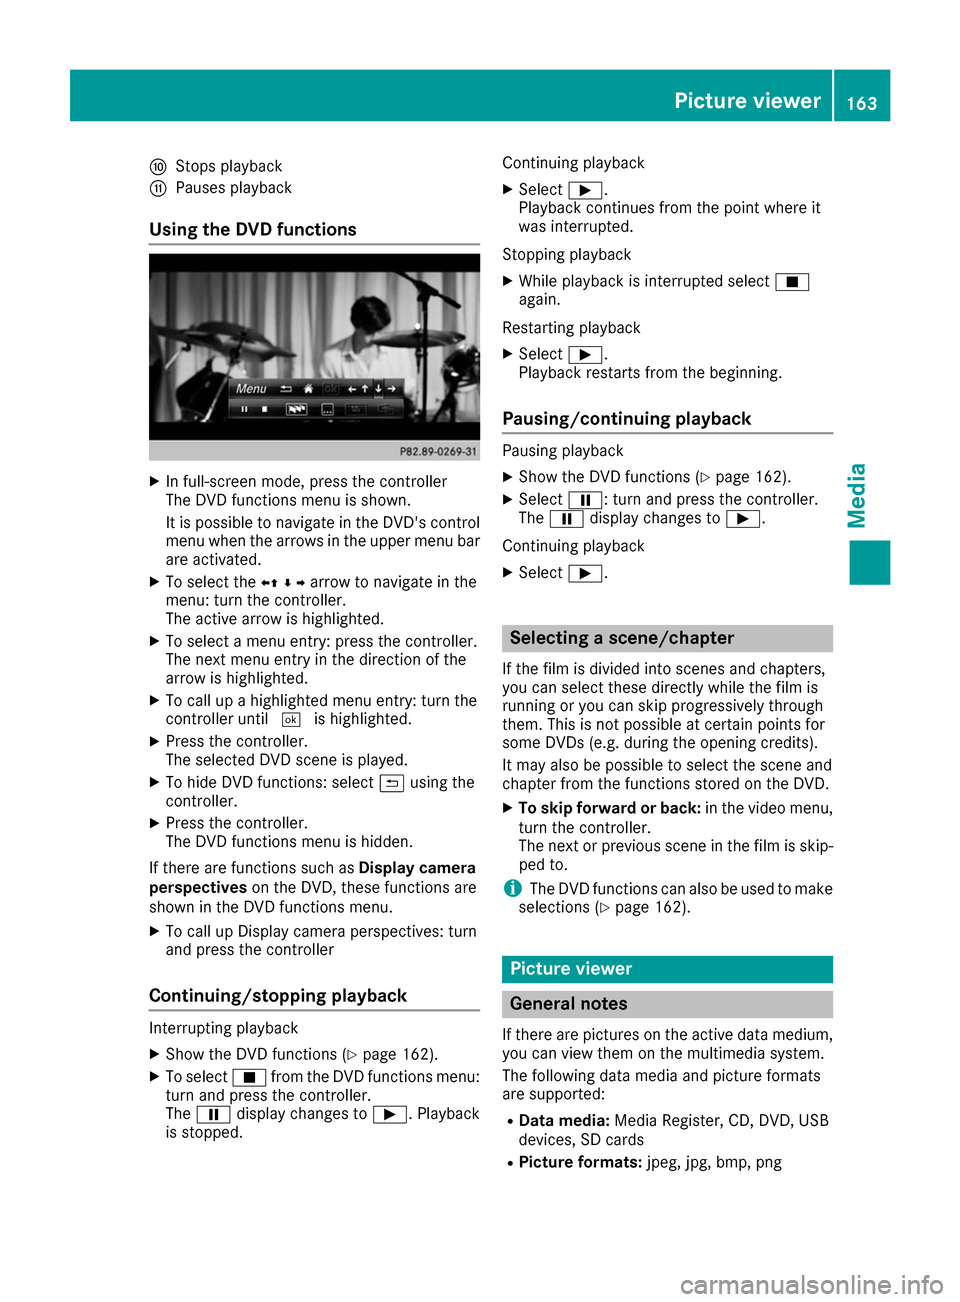
Using the DVD functions X
In full-screen mode, press the controller
The DVD functions menu is shown.
It is possible to navigate in the DVD's control
menu when the arrows in the upper menu barare activated.
X To select the 0095009700C50096arrow to navigate in the
menu: turn the controller.
The active arrow is highlighted.
X To select a menu entry: press the controller.
The next menu entry in the direction of the
arrow is highlighted.
X To call up a highlighted menu entry: turn the
controller until 0054is highlighted.
X Press the controller.
The selected DVD scene is played.
X To hide DVD functions: select 0039using the
controller.
X Press the controller.
The DVD functions menu is hidden.
If there are functions such as Display camera
perspectives on the DVD, these functions are
shown in the DVD functions menu.
X To call up Display camera perspectives: turn
and press the controller
Continuing/stopping playback Interrupting playback
X Show the DVD functions (Y page 162).
X To select 00DBfrom the DVD functions menu:
turn and press the controller.
The 00CF display changes to 00D0. Playback
is stopped. Continuing playback
X Select 00D0.
Playback continues from the point where it
was interrupted.
Stopping playback X While playback is interrupted select 00DB
again.
Restarting playback
X Select 00D0.
Playback restarts from the beginning.
Pausing/continuing playback Pausing playback
X Show the DVD functions (Y page 162).
X Select 00CF: turn and press the controller.
The 00CF display changes to 00D0.
Continuing playback X Select 00D0. Selecting a scene/chapter
If the film is divided into scenes and chapters,
you can select these directly while the film is
running or you can skip progressively through
them. This is not possible at certain points for
some DVDs (e.g. during the opening credits).
It may also be possible to select the scene and
chapter from the functions stored on the DVD.
X To skip forward or back: in the video menu,
turn the controller.
The next or previous scene in the film is skip- ped to.
i The DVD functions can also be used to make
selections (Y page 162). Picture viewer
General notes
If there are pictures on the active data medium,
you can view them on the multimedia system.
The following data media and picture formats
are supported:
R Data media: Media Register, CD, DVD, USB
devices, SD cards
R Picture formats: jpeg, jpg, bmp, png Picture viewer
163Media Z
Page 172 of 178
Option 1: selecting the area in the infor-
mation chart X
To select Town
Townin the information chart: turn
and press the controller.
X To select the current vehicle position:
select
Current Position
Current Position from the menu.
The weather data for the current vehicle posi- tion is received from the nearest weather sta-
tion and automatically displayed.
Requirement for "Near destination": a route to a
destination has been calculated (Y page 59).
The menu item is otherwise grayed out.
X To select the vicinity of the destination:
select
Near Destination
Near Destination from the menu:
turn the controller and press to confirm. X
To select a winter sports area: selectAt At
Ski Area
Ski Area from the menu: turn the controller
and press to confirm.
X Select a state, e.g. Colorado
Colorado.
X Select a winter sports area from the menu.
The weather data and other information is
displayed for the winter sports area that has
been selected. The data is supplied by the
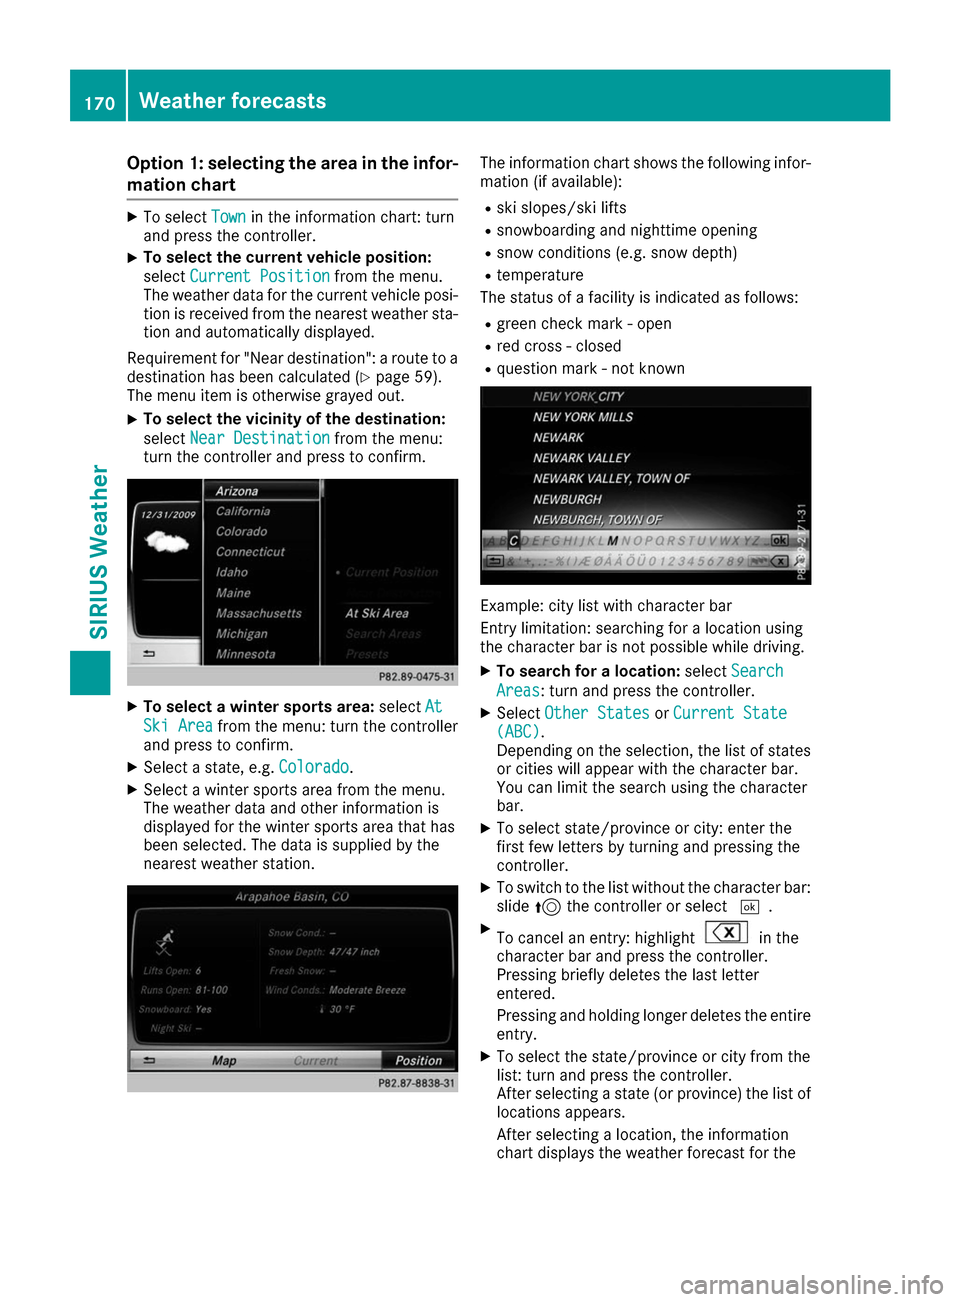
nearest weather station. The information chart shows the following infor-
mation (if available):
R ski slopes/ski lifts
R snowboarding and nighttime opening
R snow conditions (e.g. snow depth)
R temperature
The status of a facility is indicated as follows:
R green check mark - open
R red cross - closed
R question mark - not known Example: city list with character bar
Entry limitation: searching for a location using
the character bar is not possible while driving.
X To search for a location: selectSearch Search
Areas
Areas: turn and press the controller.
X Select Other States
Other States orCurrent State
Current State
(ABC)
(ABC).
Depending on the selection, the list of states or cities will appear with the character bar.
You can limit the search using the character
bar.
X To select state/province or city: enter the
first few letters by turning and pressing the
controller.
X To switch to the list without the character bar:
slide 5the controller or select 0054.
X To cancel an entry: highlight in the
character bar and press the controller.
Pressing briefly deletes the last letter
entered.
Pressing and holding longer deletes the entire
entry.
X To select the state/province or city from the
list: turn and press the controller.
After selecting a state (or province) the list of locations appears.
After selecting a location, the information
chart displays the weather forecast for the 170
Weather forecastsSIRIUS Weather