display MERCEDES-BENZ CL CLASS 2010 Service Manual
[x] Cancel search | Manufacturer: MERCEDES-BENZ, Model Year: 2010, Model line: CL CLASS, Model: MERCEDES-BENZ CL CLASS 2010Pages: 500, PDF Size: 9.32 MB
Page 92 of 500
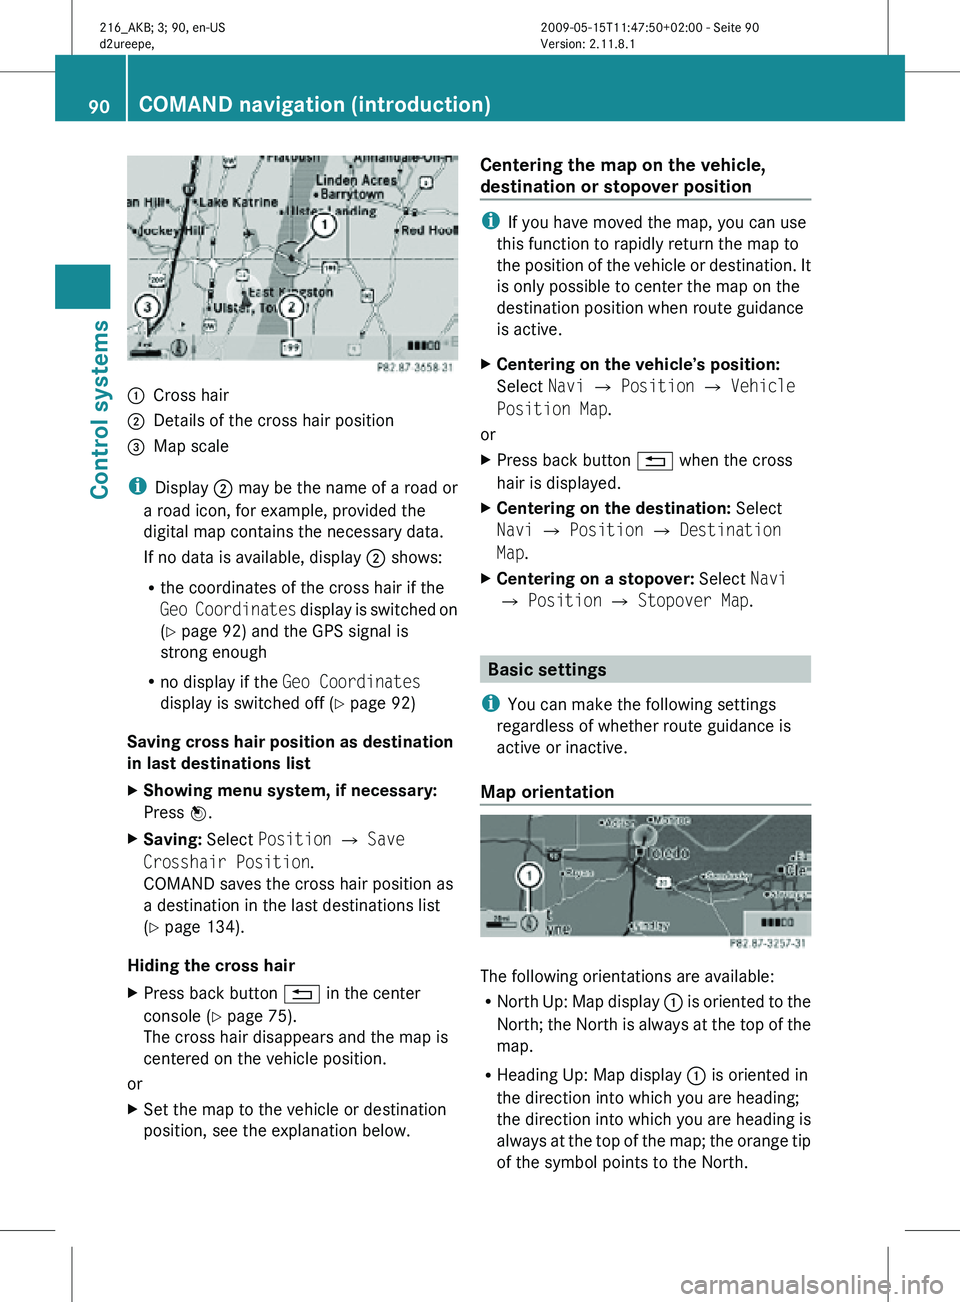
:
Cross hair
; Details of the cross hair position
= Map scale
i Display ; may be the name of a road or
a road icon, for example, provided the
digital map contains the necessary data.
If no data is available, display ; shows:
R the coordinates of the cross hair if the
Geo Coordinates display is switched on
(Y page 92) and the GPS signal is
strong enough
R no display if the Geo Coordinates
display is switched off ( Y page 92)
Saving cross hair position as destination
in last destinations list
X Showing menu system, if necessary:
Press W.
X Saving: Select Position Q Save
Crosshair Position.
COMAND saves the cross hair position as
a destination in the last destinations list
(Y page 134).
Hiding the cross hair
X Press back button % in the center
console (Y page 75).
The cross hair disappears and the map is
centered on the vehicle position.
or
X Set the map to the vehicle or destination
position, see the explanation below. Centering the map on the vehicle,
destination or stopover position i
If you have moved the map, you can use
this function to rapidly return the map to
the position of the vehicle or destination. It
is only possible to center the map on the
destination position when route guidance
is active.
X Centering on the vehicle’s position:
Select Navi Q Position Q Vehicle
Position Map.
or
X Press back button % when the cross
hair is displayed.
X Centering on the destination: Select
Navi Q Position Q Destination
Map.
X Centering on a stopover: Select Navi
Q Position Q Stopover Map. Basic settings
i You can make the following settings
regardless of whether route guidance is
active or inactive.
Map orientation The following orientations are available:
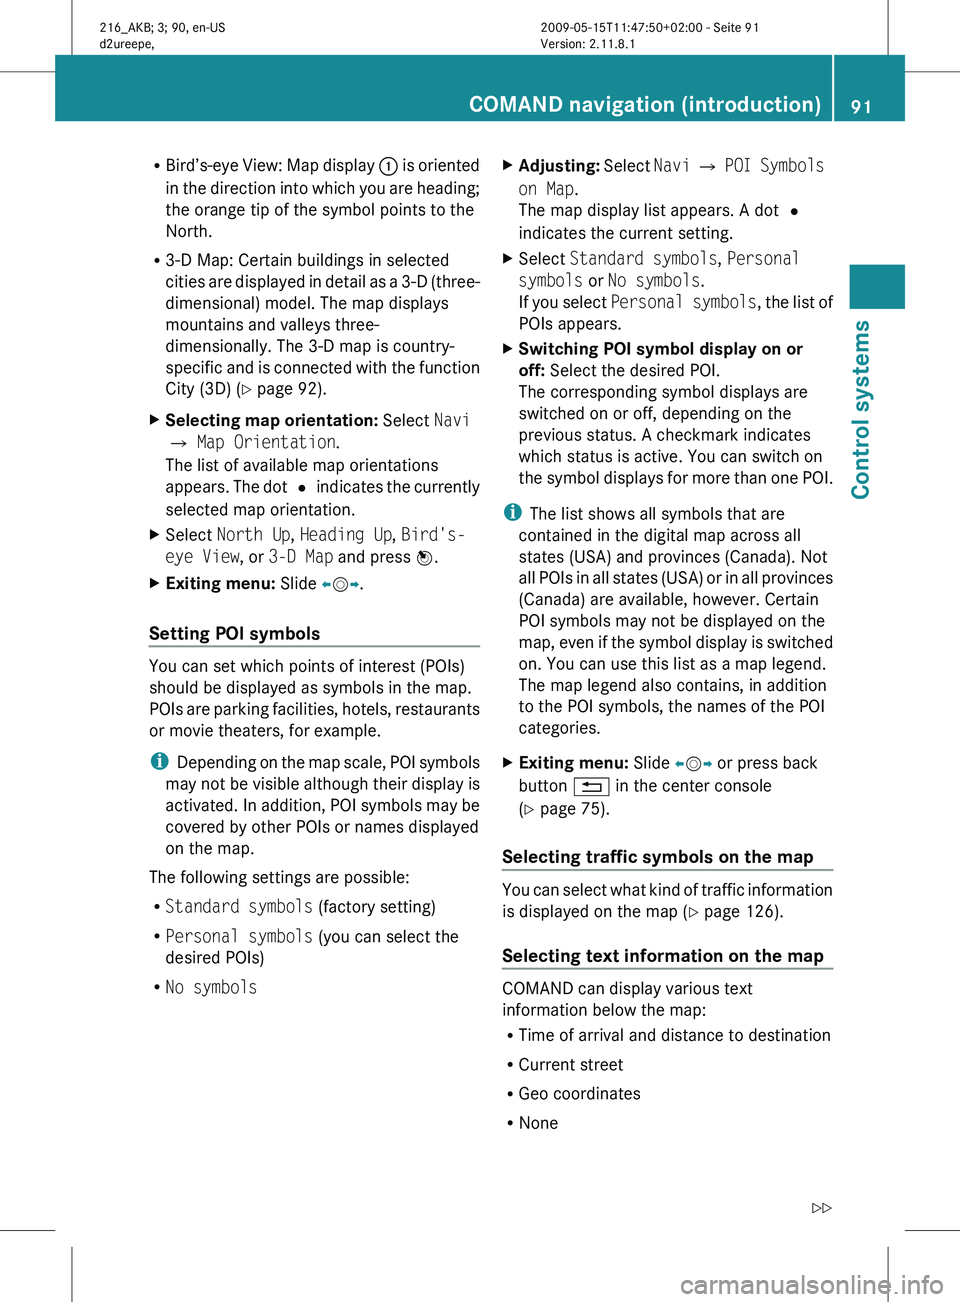
R
North Up: Map display : is oriented to the
North; the North is always at the top of the
map.
R Heading Up: Map display : is oriented in
the direction into which you are heading;
the direction into which you are heading is
always at the top of the map; the orange tip
of the symbol points to the North. 90
COMAND navigation (introduction)Control systems
216_AKB; 3; 90, en-US
d2ureepe,
Version: 2.11.8.1 2009-05-15T11:47:50+02:00 - Seite 90
Page 93 of 500
R
Bird’s-eye View:
Map display : is oriented
in the direction into which you are heading;
the orange tip of the symbol points to the
North.
R 3-D Map: Certain buildings in selected
cities are displayed in detail as a 3-D (three-
dimensional) model. The map displays
mountains and valleys three-
dimensionally. The 3-D map is country-
specific and is connected with the function
City (3D) ( Y page 92).
X Selecting map orientation: Select Navi
Q Map Orientation.
The list of available map orientations
appears. The
dot # indicates the currently
selected map orientation.
X Select North Up, Heading Up, Bird's-
eye View, or 3-D Map and press W.
X Exiting menu: Slide XVY.
Setting POI symbols You can set which points of interest (POIs)
should be displayed as symbols in the map.
POIs
are
parking facilities, hotels, restaurants
or movie theaters, for example.
i Depending on the map scale, POI symbols
may not be visible although their display is
activated. In addition, POI symbols may be
covered by other POIs or names displayed
on the map.
The following settings are possible:
R Standard symbols (factory setting)
R Personal symbols (you can select the
desired POIs)
R No symbols X
Adjusting: Select
Navi
Q POI Symbols
on Map.
The map display list appears. A dot #
indicates the current setting.
X Select Standard symbols, Personal
symbols or No symbols.
If you
select Personal symbols , the list of
POIs appears.
X Switching POI symbol display on or
off: Select the desired POI.
The corresponding symbol displays are
switched on or off, depending on the
previous status. A checkmark indicates
which status is active. You can switch on
the symbol
displays for more than one POI.
i The list shows all symbols that are
contained in the digital map across all
states (USA) and provinces (Canada). Not
all POIs
in all states (USA) or in all provinces
(Canada) are available, however. Certain
POI symbols may not be displayed on the
map, even if the symbol display is switched
on. You can use this list as a map legend.
The map legend also contains, in addition
to the POI symbols, the names of the POI
categories.
X Exiting menu: Slide XVY or press back
button % in the center console
(Y page 75).
Selecting traffic symbols on the map You can select what kind of traffic information
is displayed on the map
(Y
page 126).
Selecting text information on the map COMAND can display various text
information below the map:
R
Time of arrival and distance to destination
R Current street
R Geo coordinates
R None COMAND navigation (introduction)
91
Control systems
216_AKB; 3; 90, en-US
d2ureepe, Version: 2.11.8.1 2009-05-15T11:47:50+02:00 - Seite 91 Z
Page 94 of 500
X
Calling up menu: Select Navi Q Text
Information on Map.
The list of available text information
appears. The dot # indicates the currently
selected setting.
X Exiting menu: Slide XVY.
Time of arrival and distance
X Select Arrival Time/Distance.
The time of arrival and the distance for the
main destination are displayed by setting
the dot to Arrival Time/Distance.
Current street
X Select Current Street.
The street you are currently on is displayed
by setting the dot to Current Street.
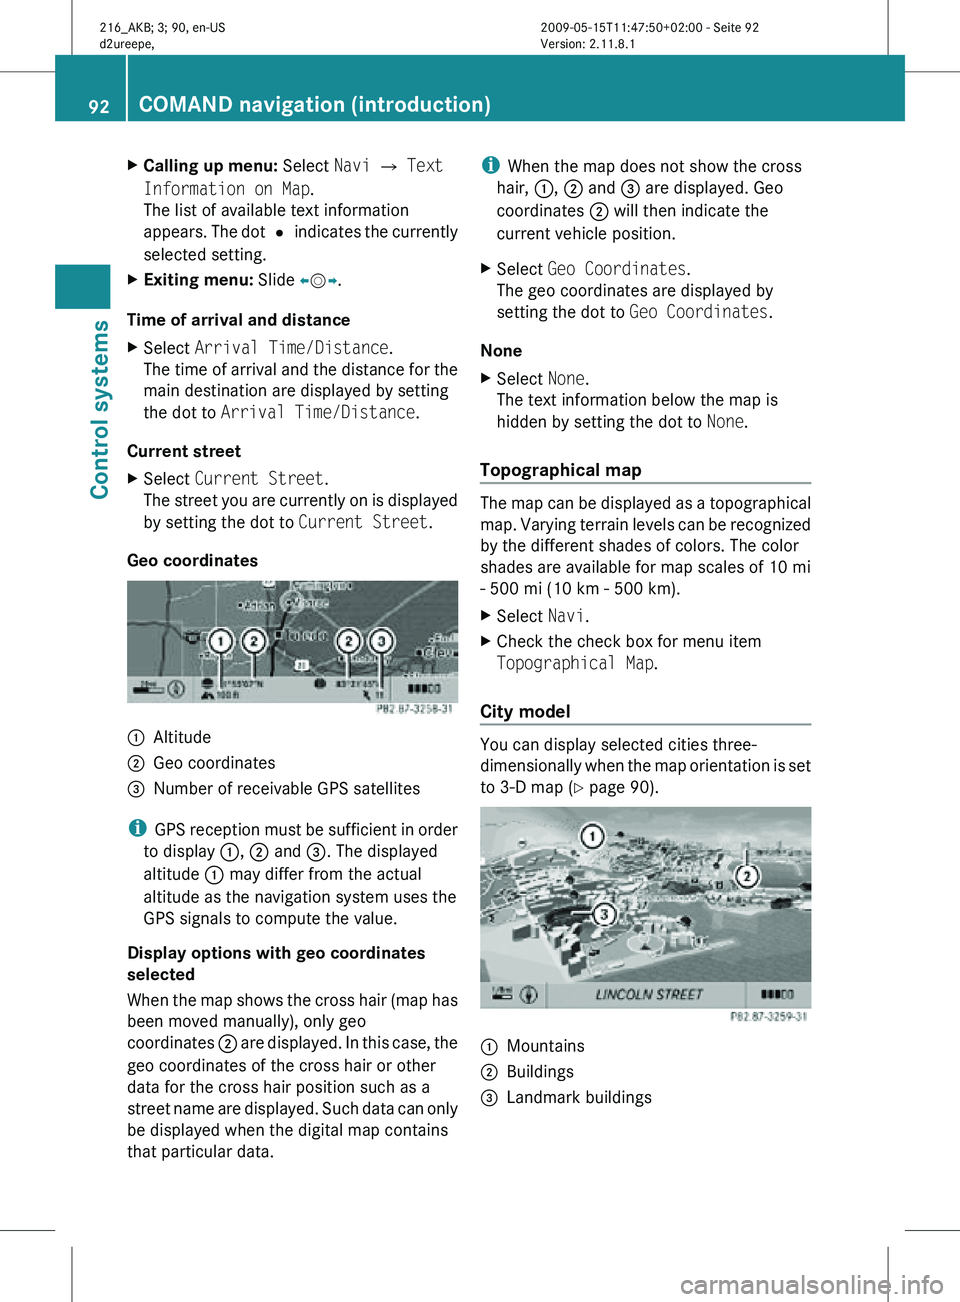
Geo coordinates :
Altitude
; Geo coordinates
= Number of receivable GPS satellites
i GPS reception must be sufficient in order
to display :, ; and =. The displayed
altitude : may differ from the actual
altitude as the navigation system uses the
GPS signals to compute the value.
Display options with geo coordinates
selected
When the map shows the cross hair (map has
been moved manually), only geo
coordinates ; are displayed. In this case, the
geo coordinates of the cross hair or other
data for the cross hair position such as a
street name are displayed. Such data can only
be displayed when the digital map contains
that particular data. i
When the map does not show the cross
hair, :, ; and = are displayed. Geo
coordinates ; will then indicate the
current vehicle position.
X Select Geo Coordinates.
The geo coordinates are displayed by
setting the dot to Geo Coordinates.
None
X Select None.
The text information below the map is
hidden by setting the dot to None.
Topographical map The map can be displayed as a topographical
map. Varying terrain levels can be recognized
by the different shades of colors. The color
shades are available for map scales of 10 mi
- 500 mi (10 km - 500 km).
X
Select Navi.
X Check the check box for menu item
Topographical Map.
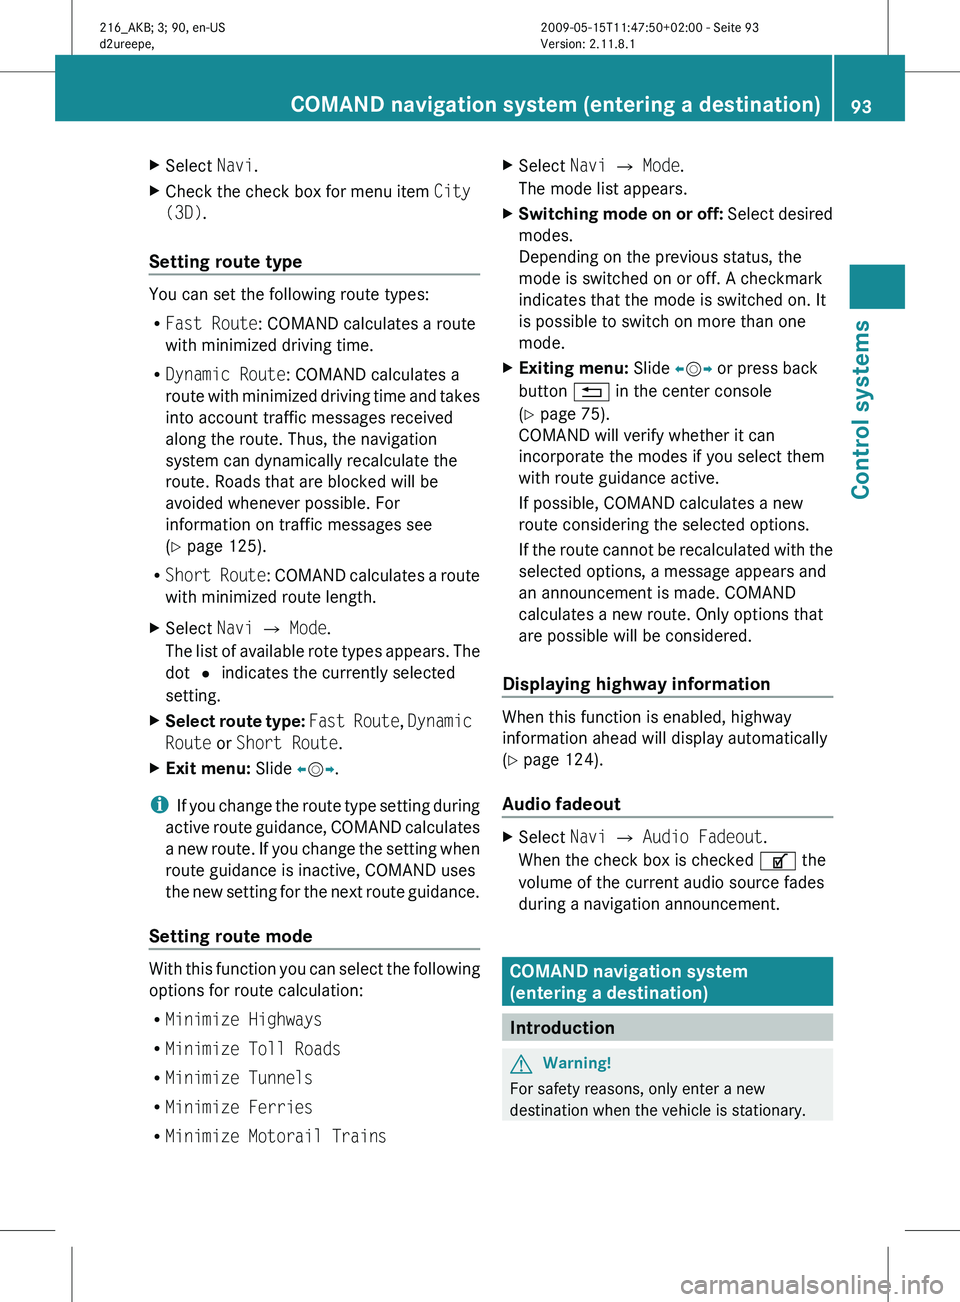
City model You can display selected cities three-
dimensionally when the map orientation is set
to 3-D map (
Y page 90). :
Mountains
; Buildings
= Landmark buildings 92
COMAND navigation (introduction)Control systems
216_AKB; 3; 90, en-US
d2ureepe,
Version: 2.11.8.1 2009-05-15T11:47:50+02:00 - Seite 92
Page 95 of 500
X
Select Navi.
X Check the check box for menu item City
(3D).
Setting route type You can set the following route types:
R
Fast Route: COMAND calculates a route
with minimized driving time.
R Dynamic Route: COMAND calculates a
route with
minimized driving time and takes
into account traffic messages received
along the route. Thus, the navigation
system can dynamically recalculate the
route. Roads that are blocked will be
avoided whenever possible. For
information on traffic messages see
(Y page 125).
R Short Route : COMAND calculates a route
with minimized route length.
X Select Navi Q Mode.
The list
of available rote types appears. The
dot # indicates the currently selected
setting.
X Select route type: Fast Route
, Dynamic
Route or Short Route.
X Exit menu: Slide XVY.
i If you
change the route type setting during
active route guidance, COMAND calculates
a new route. If you change the setting when
route guidance is inactive, COMAND uses
the new setting for the next route guidance.
Setting route mode With this function you can select the following
options for route calculation:
R
Minimize Highways
R Minimize Toll Roads
R Minimize Tunnels
R Minimize Ferries
R Minimize Motorail Trains X
Select Navi Q Mode.
The mode list appears.
X Switching mode on or off: Select
desired
modes.
Depending on the previous status, the
mode is switched on or off. A checkmark
indicates that the mode is switched on. It
is possible to switch on more than one
mode.
X Exiting menu: Slide XVY or press back
button % in the center console
(Y page 75).
COMAND will verify whether it can
incorporate the modes if you select them
with route guidance active.
If possible, COMAND calculates a new
route considering the selected options.
If the
route cannot be recalculated with the
selected options, a message appears and
an announcement is made. COMAND
calculates a new route. Only options that
are possible will be considered.
Displaying highway information When this function is enabled, highway
information ahead will display automatically
(Y page 124).
Audio fadeout
X
Select Navi Q Audio Fadeout.
When the check box is checked U the
volume of the current audio source fades
during a navigation announcement. COMAND navigation system
(entering a destination)
Introduction
G
Warning!
For safety reasons, only enter a new
destination when the vehicle is stationary. COMAND navigation system (entering a destination)
93
Control systems
216_AKB; 3; 90, en-US
d2ureepe,Version: 2.11.8.1 2009-05-15T11:47:50+02:00 - Seite 93 Z
Page 111 of 500

Entering a destination from the list of
last destinations
X Select Navi Q Destination Q From
Last Destinations.
The list of last destinations appears. The
most recent destination is at the top of the
list.
X Select desired destination.
X Starting route calculation: Select Start,
see also ( Y page 107). Entering a destination from the map
i Depending on the factory settings of the
vehicle, it may not be possible to enter a
destination while the vehicle exceeds a
preset speed. As soon as the vehicles
speed drops to below the preset speed, the
function is available again.
Calling up the map X
In the address input menu, select Map
(Y page 94).
You will see the map with a cross hair. The
map is set to the address set in the address
input menu.
or
X Select Navi Q Destination Q Via
Map.
You will see the map with a cross hair. :
Cross hair
; Details of the cross hair position
= Map scale i
Display ; may be the name of a road, for
example, provided the digital map contains
the necessary data.
If no data is available, display ; shows:
R the coordinates if the Geo
Coordinates display is switched on
(Y page 92)
R no display if the Geo Coordinates
display is switched off ( Y page 92)
Moving the map and selecting the
destination X
Moving map: Slide ZVÆ, XVY or aVb.
X Adjusting map scale: Rotate cVd.
Rotating clockwise enlarges the map,
rotating counterclockwise reduces it.
X Selecting a destination: Press W.
If the cross hair is located off the edge of
the digital map, a route cannot be
calculated to this destination and you will
see the message The destination is
located off the map..
X Select OK.
X Move the map and select a destination
again.
If the destination can be attributed, you will
see the address of the destination. If not,
you will see the display Destination
from map.
X Starting route calculation: Select Start,
see also ( Y page 107). Entering a stopover
When route guidance is active, you can enter
a stopover. Stopovers can be predefined
destinations from the following predefined
categories:
R Mercedes-Benz Service Center
R Hospital
R Gas Station
R Parking Lot COMAND navigation system (entering a destination)
109Control systems
216_AKB; 3; 90, en-US
d2ureepe,Version: 2.11.8.1 2009-05-15T11:47:50+02:00 - Seite 109 Z
Page 112 of 500
R
Restaurant
R Other
With the
option Other you can enter stopover
destinations from the destination memory,
last selected destinations, POIs, or via the
address ( Y page 110).
You can enter stopover destinations on the
route or in the vicinity of the route.
You can use the stopover function to
influence the route guidance calculation to
the main destination. When you have reached
your stopover, COMAND automatically
calculates the route to the main destination.
Entering predefined destinations X
Select Navi Q Destination Q
Stopover.
If a
stopover has already been entered, you
can change it.
Changing: Select Change Stopover.
You can now select a category.
X Selecting a category: Select category,
e.g. Gas station.
COMAND first looks for destinations along
the vehicle’s route and within the immediate
vicinity of the vehicle. If there are no
destinations available there, COMAND
searches for destinations in an area around
the vehicle position.
If COMAND does not find any destinations,
you will see a message to this effect.
X Select OK.
You can now select a different category.
If COMAND finds destinations, you will see a
list of the destinations and details of how far
away they are in the right-hand side of the
display. The information about how far away
the destinations are can take a few seconds
to be displayed.
The left-hand part of the display shows the
destinations on the map. The destination
marked in the list is highlighted in the map. X
Selecting a destination: Select the
desired destination from list.
The address of the destination appears.
X Starting route calculation: Select
Start
,
see also ( Y page 107).
Entering another destination as a
stopover X
Select Navi Q Destination Q
Stopover.
X Entering: Select Other.
You can
select between the following menu
items:
R Address Entry
R From Memory
R From Last Destinations
R From POIs
X Select a menu item.
Subsequent destination entries may differ,
depending on your selection:
R Address Entry selection:
XEnter a destination by address
(Y page 94).
R From Memory selection:
XEnter a destination from the
destination memory (Y page 107).
R From Last Destinations selection:
XEnter a destination from the list of last
destinations (Y page 109).
R From POIs selection:
XEnter a point of interest (POI)
(Y page 111).
X Starting route calculation: After
entering
a destination, select Start (Y page 107).
Changing a stopover If a stopover has already been entered, you
can change it.110
COMAND navigation system (entering a destination)
Control systems
216_AKB; 3; 90, en-US
d2ureepe,
Version: 2.11.8.1 2009-05-15T11:47:50+02:00 - Seite 110
Page 113 of 500
X
Select Navi Q Destination Q
Stopover Q Change Stopover.
X Enter another destination as a stopover.
Deleting the stopover If a stopover has already been entered, you
can delete it.
X
Select Navi Q Destination Q
Stopover Q Delete Stopover.
COMAND deletes the stopover and
calculates the route to the main
destination.
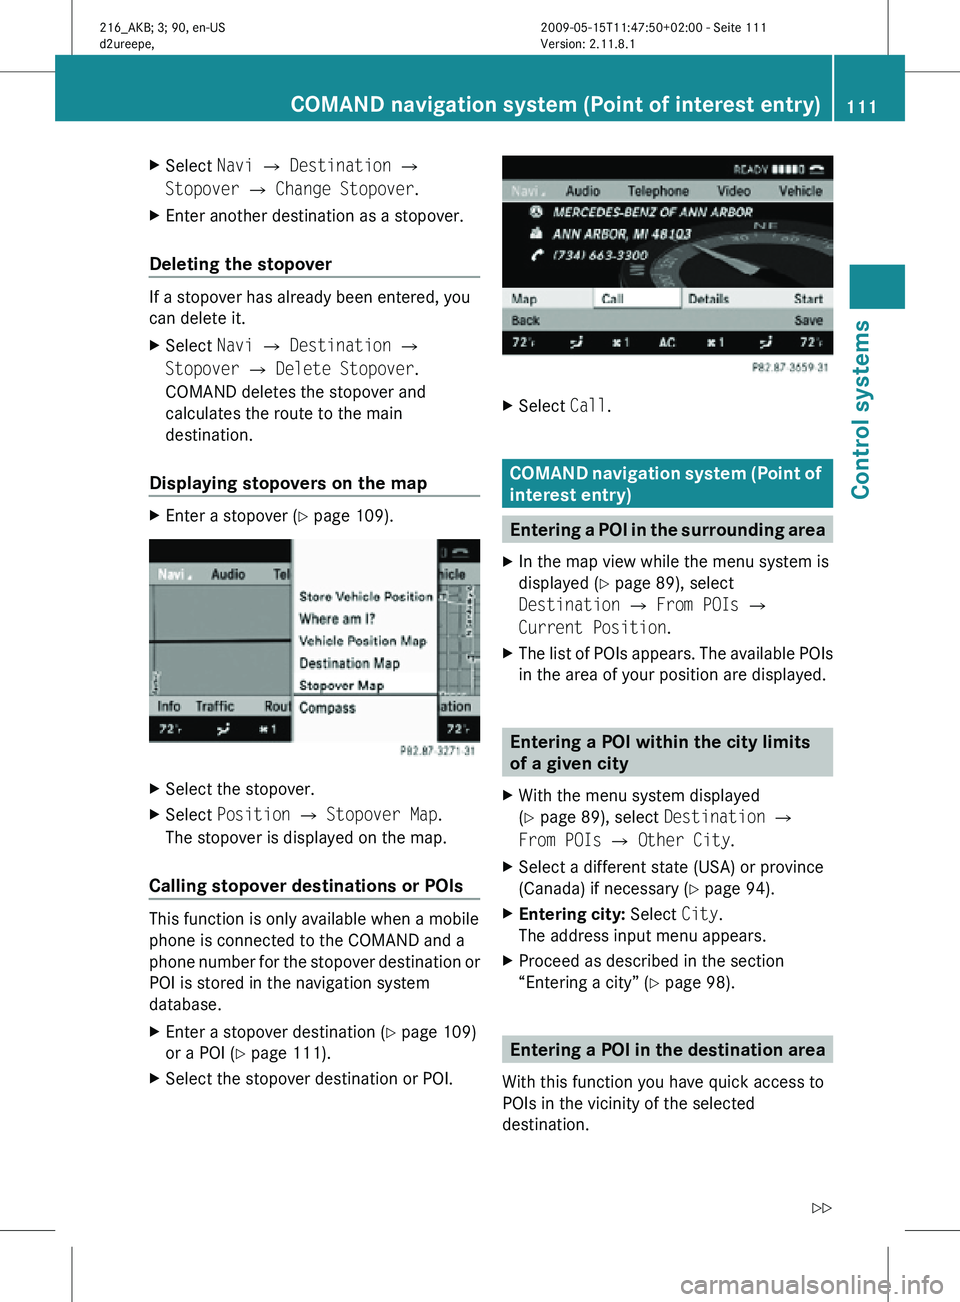
Displaying stopovers on the map X
Enter a stopover (Y page 109). X
Select the stopover.
X Select Position Q Stopover Map.
The stopover is displayed on the map.
Calling stopover destinations or POIs This function is only available when a mobile
phone is connected to the COMAND and a
phone number for the stopover destination or
POI is stored in the navigation system
database.
X
Enter a stopover destination (Y page 109)
or a POI ( Y page 111).
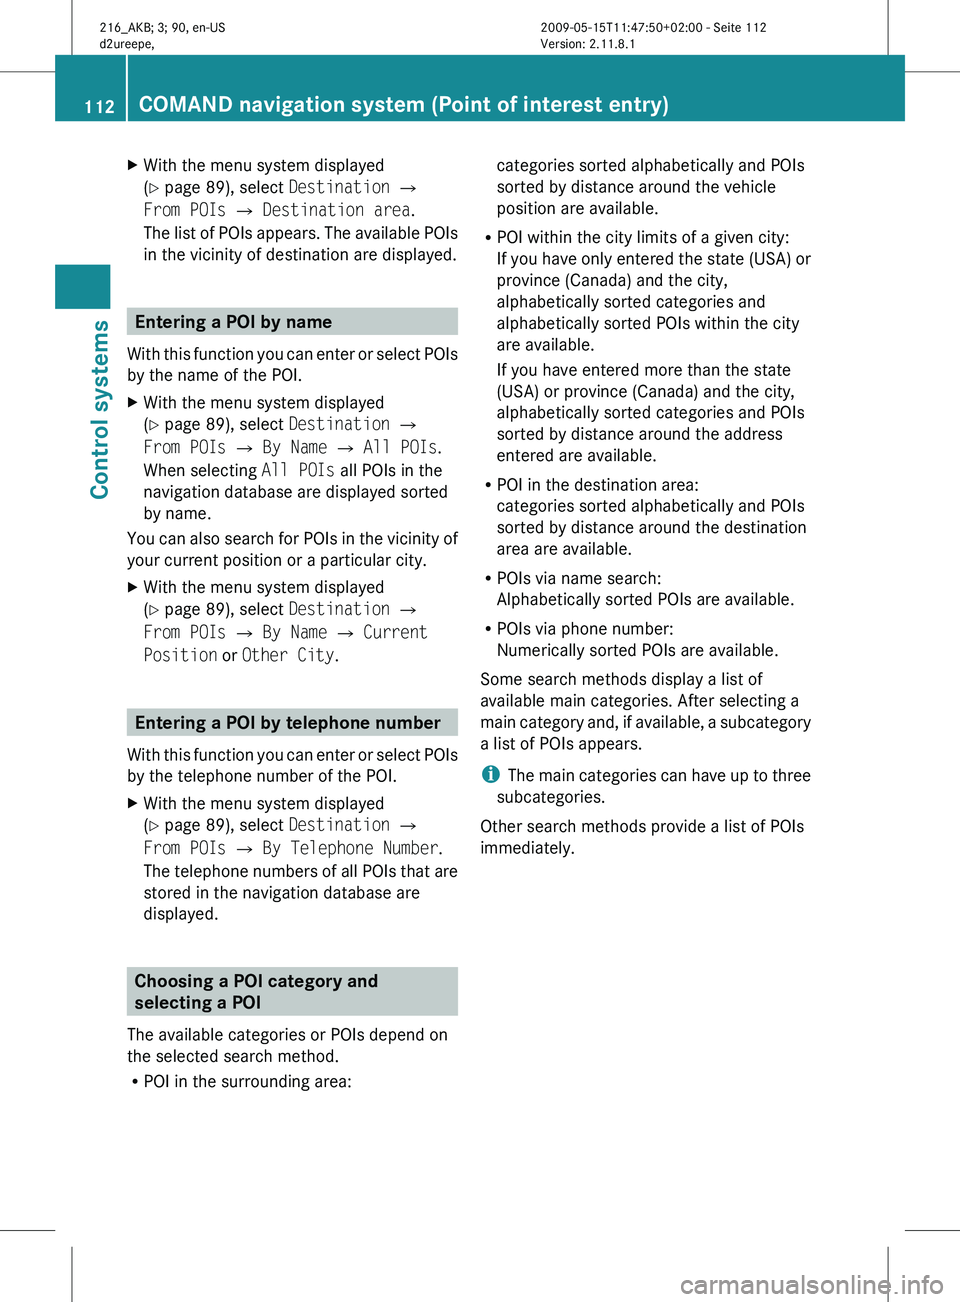
X Select the stopover destination or POI. X
Select Call. COMAND navigation system (Point of
interest entry)
Entering a POI in the surrounding area
X In the map view while the menu system is
displayed ( Y page 89), select
Destination Q From POIs Q
Current Position.
X The list of POIs appears. The available POIs
in the area of your position are displayed. Entering a POI within the city limits
of a given city
X With the menu system displayed
(Y page 89), select Destination Q
From POIs Q Other City.
X Select a different state (USA) or province
(Canada) if necessary ( Y page 94).
X Entering city: Select City.
The address input menu appears.
X Proceed as described in the section
“Entering a city” (Y page 98). Entering a POI in the destination area
With this function you have quick access to
POIs in the vicinity of the selected
destination. COMAND navigation system (Point of interest entry)
111Control systems
216_AKB; 3; 90, en-US
d2ureepe,Version: 2.11.8.1 2009-05-15T11:47:50+02:00 - Seite 111 Z
Page 114 of 500
X
With the menu system displayed
(Y page 89), select Destination Q
From POIs Q Destination area.
The list
of POIs appears. The available POIs
in the vicinity of destination are displayed. Entering a POI by name
With this
function you can enter or select POIs
by the name of the POI.
X With the menu system displayed
(Y page 89), select Destination Q
From POIs Q By Name Q All POIs.
When selecting All POIs all POIs in the
navigation database are displayed sorted
by name.
You can also search for POIs in the vicinity of
your current position or a particular city.
X With the menu system displayed
(Y page 89), select Destination Q
From POIs Q By Name Q Current
Position or Other City. Entering a POI by telephone number
With this
function you can enter or select POIs
by the telephone number of the POI.
X With the menu system displayed
(Y page 89), select Destination Q
From POIs Q By Telephone Number.
The telephone
numbers of all POIs that are
stored in the navigation database are
displayed. Choosing a POI category and
selecting a POI
The available categories or POIs depend on
the selected search method.
R POI in the surrounding area: categories sorted alphabetically and POIs
sorted by distance around the vehicle
position are available.
R POI within the city limits of a given city:
If you
have only entered the state (USA) or
province (Canada) and the city,
alphabetically sorted categories and
alphabetically sorted POIs within the city
are available.
If you have entered more than the state
(USA) or province (Canada) and the city,
alphabetically sorted categories and POIs
sorted by distance around the address
entered are available.
R POI in the destination area:
categories sorted alphabetically and POIs
sorted by distance around the destination
area are available.
R POIs via name search:
Alphabetically sorted POIs are available.
R POIs via phone number:
Numerically sorted POIs are available.
Some search methods display a list of
available main categories. After selecting a
main category and, if available, a subcategory
a list of POIs appears.
i The main categories can have up to three
subcategories.
Other search methods provide a list of POIs
immediately. 112
COMAND navigation system (Point of interest entry)
Control systems
216_AKB; 3; 90, en-US
d2ureepe,
Version: 2.11.8.1 2009-05-15T11:47:50+02:00 - Seite 112
Page 116 of 500
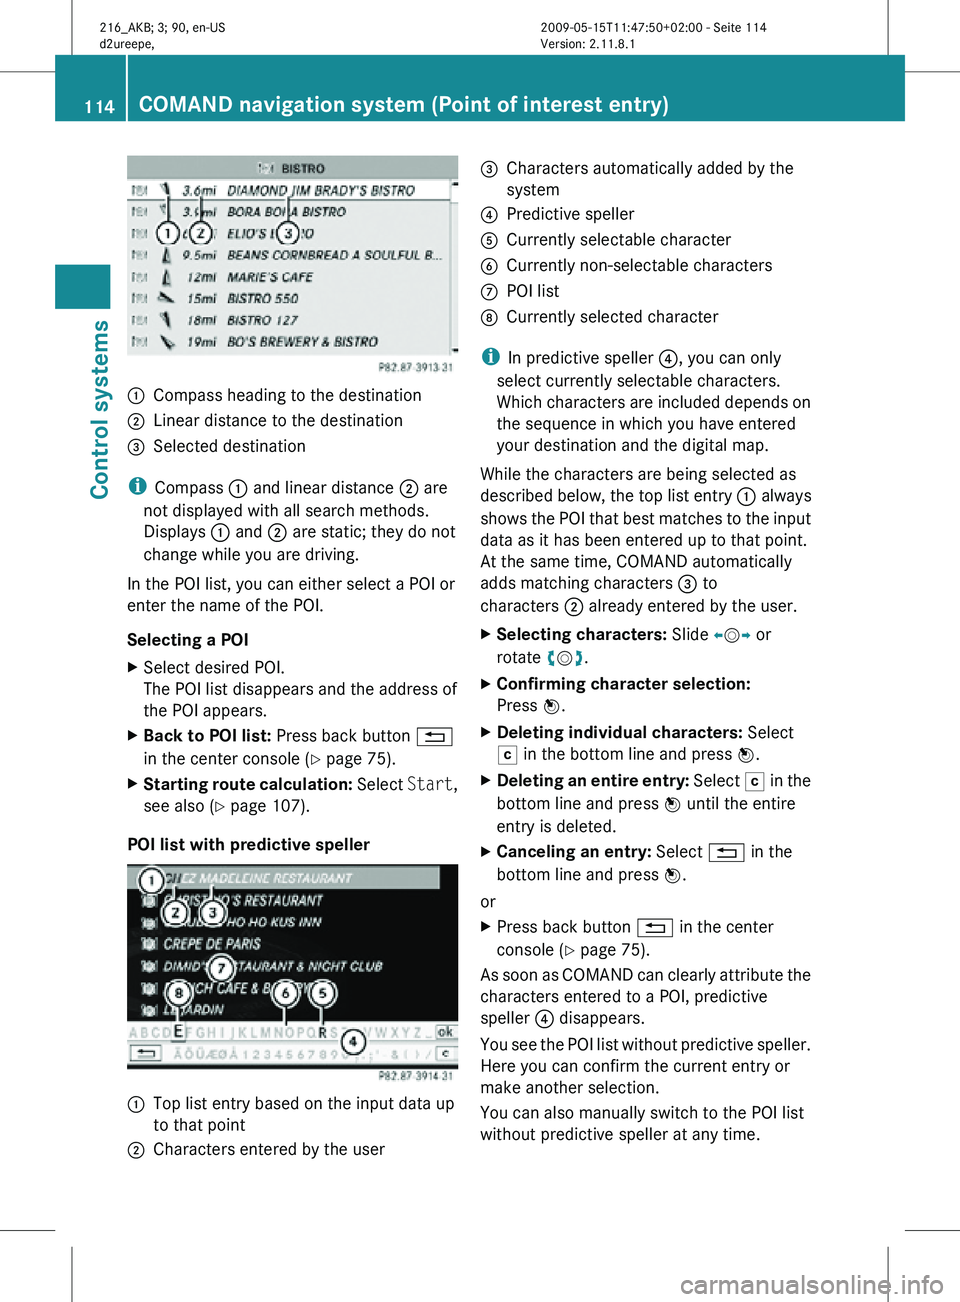
:
Compass heading to the destination
; Linear distance to the destination
= Selected destination
i Compass : and linear distance ; are
not displayed with all search methods.
Displays : and ; are static; they do not
change while you are driving.
In the POI list, you can either select a POI or
enter the name of the POI.
Selecting a POI
X Select desired POI.
The POI list disappears and the address of
the POI appears.
X Back to POI list: Press back button %
in the center console (Y page 75).
X Starting route calculation: Select Start,
see also ( Y page 107).
POI list with predictive speller :
Top list entry based on the input data up
to that point
; Characters entered by the user =
Characters automatically added by the
system
? Predictive speller
A Currently selectable character
B Currently non-selectable characters
C POI list
D Currently selected character
i In predictive speller ?, you can only
select currently selectable characters.
Which characters are included depends on
the sequence in which you have entered
your destination and the digital map.
While the characters are being selected as
described below, the top list entry : always
shows the POI that best matches to the input
data as it has been entered up to that point.
At the same time, COMAND automatically
adds matching characters = to
characters ; already entered by the user.
X Selecting characters: Slide XVY or
rotate cVd.
X Confirming character selection:
Press W.
X Deleting individual characters: Select
F in the bottom line and press W.
X Deleting an entire entry: Select F in the
bottom line and press W until the entire
entry is deleted.
X Canceling an entry: Select % in the
bottom line and press W.
or
X Press back button % in the center
console (Y page 75).
As soon as COMAND can clearly attribute the
characters entered to a POI, predictive
speller ? disappears.
You see the POI list without predictive speller.
Here you can confirm the current entry or
make another selection.
You can also manually switch to the POI list
without predictive speller at any time. 114
COMAND navigation system (Point of interest entry)Control systems
216_AKB; 3; 90, en-US
d2ureepe,
Version: 2.11.8.1 2009-05-15T11:47:50+02:00 - Seite 114
Page 117 of 500
X
Switching manually to the POI list
without predictive speller: Slide ZV.
or
X Select ¬ in the second line from the
bottom and press W.
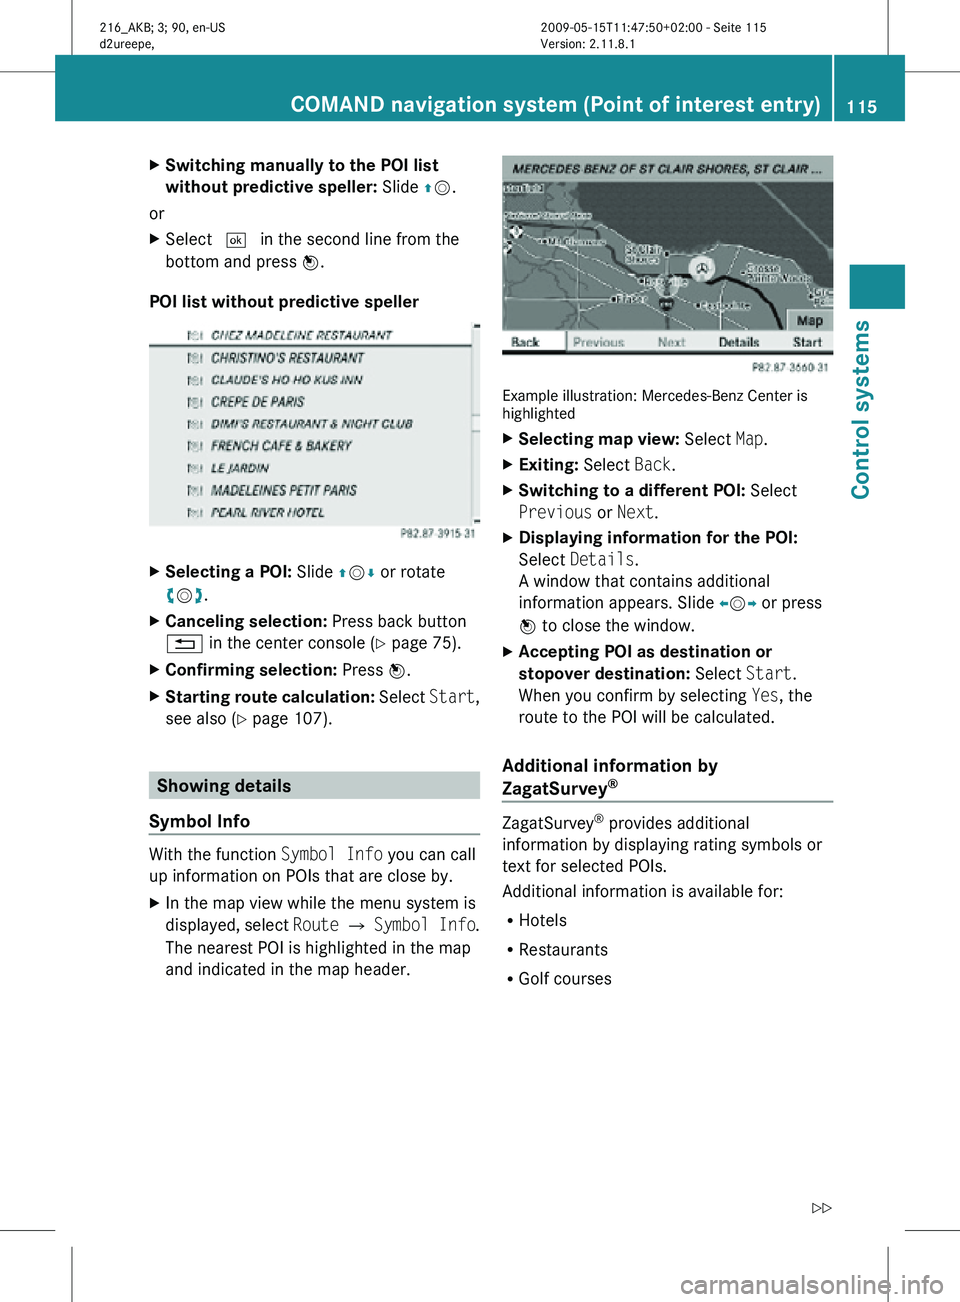
POI list without predictive speller X
Selecting a POI: Slide ZVÆ or rotate
cVd.
X Canceling selection: Press back button
% in the center console (Y page 75).
X Confirming selection: Press W.
X Starting route calculation: Select Start,
see also ( Y page 107). Showing details
Symbol Info With the function
Symbol Info you can call
up information on POIs that are close by.
X In the map view while the menu system is
displayed, select Route Q Symbol Info .
The nearest POI is highlighted in the map
and indicated in the map header. Example illustration: Mercedes-Benz Center is
highlighted
X
Selecting map view: Select Map.
X Exiting: Select Back.
X Switching to a different POI: Select
Previous or Next.
X Displaying information for the POI:
Select Details.
A window that contains additional
information appears. Slide omp or press
n to close the window.
X Accepting POI as destination or
stopover destination: Select Start.
When you confirm by selecting Yes, the
route to the POI will be calculated.
Additional information by
ZagatSurvey ®
ZagatSurvey
®
provides additional
information by displaying rating symbols or
text for selected POIs.
Additional information is available for:
R Hotels
R Restaurants
R Golf courses COMAND navigation system (Point of interest entry)
115Control systems
216_AKB; 3; 90, en-US
d2ureepe,Version: 2.11.8.1 2009-05-15T11:47:50+02:00 - Seite 115 Z