ignition MERCEDES-BENZ CL-Class 2014 C217 Repair Manual
[x] Cancel search | Manufacturer: MERCEDES-BENZ, Model Year: 2014, Model line: CL-Class, Model: MERCEDES-BENZ CL-Class 2014 C217Pages: 494, PDF Size: 13.55 MB
Page 296 of 494
more firmly. Maintain a safe distance from
vehicles in front.
After driving on a wet road or having the
vehicle washed, brake firmly while paying
attention to the traffic conditions. This will
warm up the brake discs, thereby drying them
more quickly and protecting them against
corrosion.
Limited braking performance on salt-
treated roads G
WARNING
The layer of saltont he brake discs and the
brake pads/linings may cause a delay in the
braking effect, resulting in a significantly
longer braking distance, which could lead to
an accident.
To avoid this danger, you should:
R occasionally brake carefully, without
putting other road users at risk, when you
are driving on salted roads. This helps to
remove any salt that may have started to
build up on the brake discs and the brake
pads/linings.
R maintain a greater distance to the vehicle
ahead and drive with particular care.
R carefully apply the brakes at the end of a
trip and immediately after commencing a
new trip, so that salt residues are removed
from the brake discs.
Servicing the brakes !
If the red brake warning lamp lights up in
the instrumentc luster and you hear a
warning tone while the engine is running,
the brake fluid level may be too low.
Observe additional warning messages in
the multifunction display.
The brake fluid level may be too low due to
brake pad wear or leaking brake lines.
Have the brake system checked
immediately. This work should be carried
out at a qualified specialist workshop. All checks and maintenance work on the
brake system must be carried out at a
qualified specialist workshop. Consult a
qualified specialist workshop to arrange this.
Have brake pads installed and brake fluid
replaced at a qualified specialist workshop. G
WARNING
If brake pads or brake fluid other than those
recommended are used, the braking
properties of the vehicle can be degraded to
an extent that safe braking is substantially
impaired. This could result in an accident.
! Vehicles with 4MATIC: function or
performance tests may only be carried out
on a 2-axle dynamometer. If you are
planning to have the vehicle tested on such
a dynamometer, contact an authorized
Mercedes-Benz Center to obtain further
information first. Otherwise, you could
damage the drive train or the brake system.
! Vehicles with 4MATIC: as the ESP®
system operates automatically, the engine
and the ignition must be switched off
(SmartKey in position 0or 1in the ignition
lock or Start/Stop button in position 0or
1) when the electric parking brake is being
tested on a brake dynamometer.
Braking maneuvers triggere dautomatically
by ESP ®
may seriously damage the brake
system.
! Vehicles with 4MATIC: as the ESP®
system operates automatically, the engine
and the ignition system must be switched
off (SmartKey in position 0or 1in the
ignition lock or Start/Stop button in
position 0or 1) when:
R testing the electric parking brake on a
brake dynamometer.
R you intend to have the vehicle towed with
one of the axles raised.
Braking maneuvers triggered automatically
by ESP ®
may seriously damage the brake
system. 294
Driving tipsDriving and pa
rking
Page 311 of 494
AIRMATIC
Vehicle level Important safety notes
Your vehicle regulates its height
automatically. All-round level control ensures
the best possible suspension and constant
ground clearance, eve nwith a laden vehicle.
When you drive fast, the vehicle is lowered
automatically to improve driving safety and to
reduce fuel consumption.
The following vehicle levels are possible:
R Normal
R raised: the vehicle is raised by about
1.20 in (30 mm) when compared with the
normal level
R lowered: the vehicle is lowered by about
0.40 in (10 mm) when compared with the
normal level
The "Normal" and "Raised" vehicle levels can
be set manually.
The "Lowered" vehicle level is set
automatically at speeds over 60 mph
(100 km/h).
Setting the vehicle level
Select the "Normal" setting for normal road
surfaces and "Raised" for driving with snow
chains or on particularly poor road surfaces.
Your selection remains stored even if you
remove the SmartKey from the ignition lock. G
WARNING
To help avoid personal injury, keep hands and
feet away fro mwheel housing area, and stay
away from under the vehicle when lowering
the vehicle chassis. Setting raised level
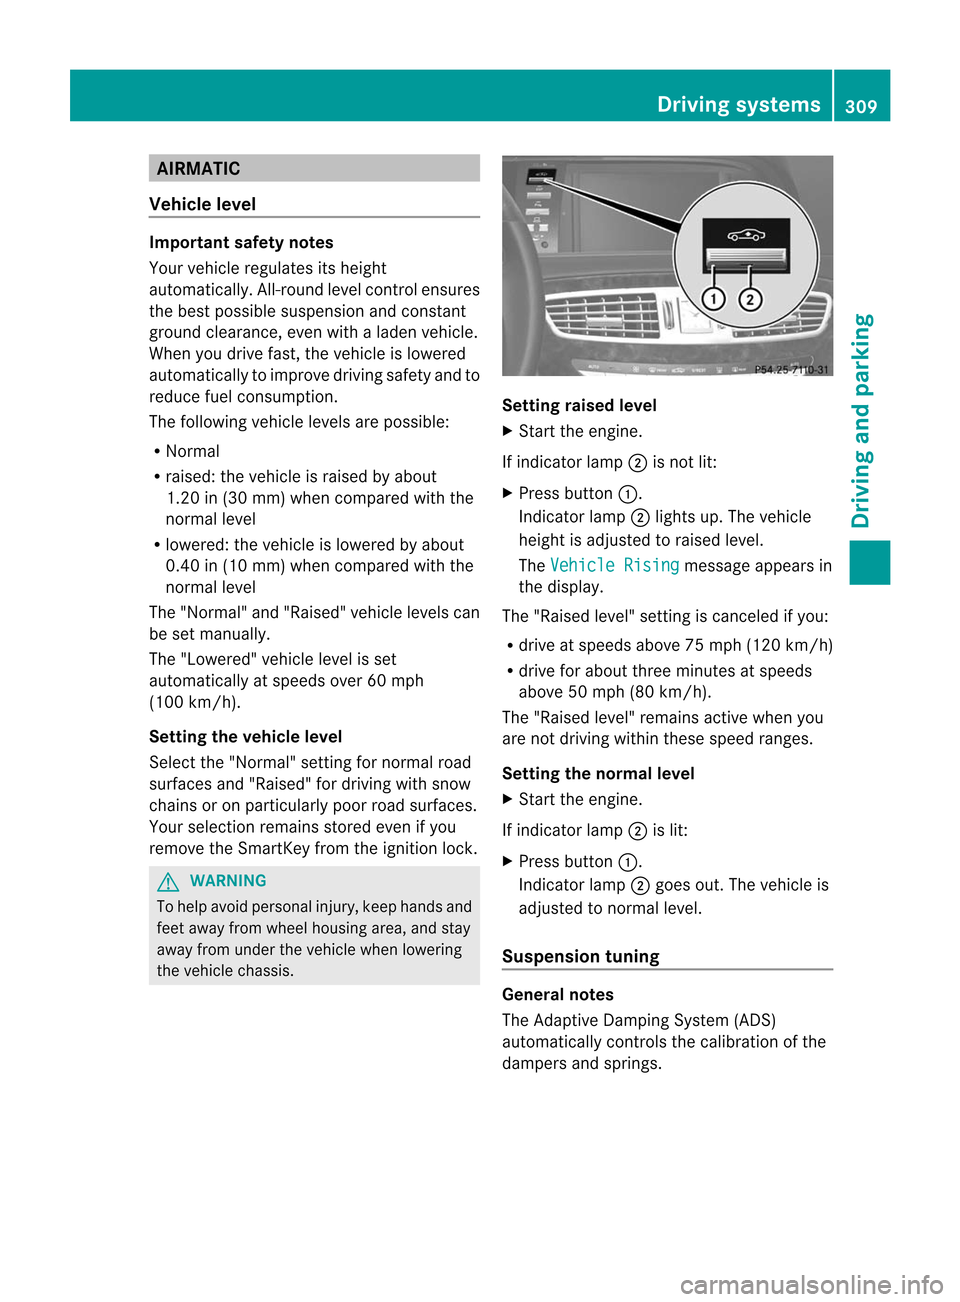
X
Start the engine.
If indicator lamp ;is not lit:
X Press button :.
Indicator lamp ;lights up. The vehicle
height is adjusted to raised level.
The Vehicle Rising message appears in
the display.
The "Raised level" setting is canceled if you:
R drive at speeds above 75 mph (120 km/h)
R drive for about three minutes at speeds
above 50 mph (80 km/h).
The "Raised level" remains active whe nyou
are not driving within these speed ranges.
Setting the normal level
X Start the engine.
If indicator lamp ;is lit:
X Press button :.
Indicator lamp ;goes out. The vehicle is
adjusted to normal level.
Suspension tuning General notes
The Adaptive Damping System (ADS)
automatically controls the calibration of the
dampers and springs. Driving systems
309Driving and parking Z
Page 312 of 494
The damping is tuned individually to each
wheel and depends on:
R
your driving style, e.g. sporty
R the road surface condition, e.g. bumps
R your individual selection, i.e. sports or
comfort
Your selection remains stored even if you
remove the SmartKey from the ignition lock. Sports tuning
The firmer suspension tunin
ginSport mode
ensures even better contact with the road.
Select this mode when employing a sporty
driving style, e.g. on winding country roads.
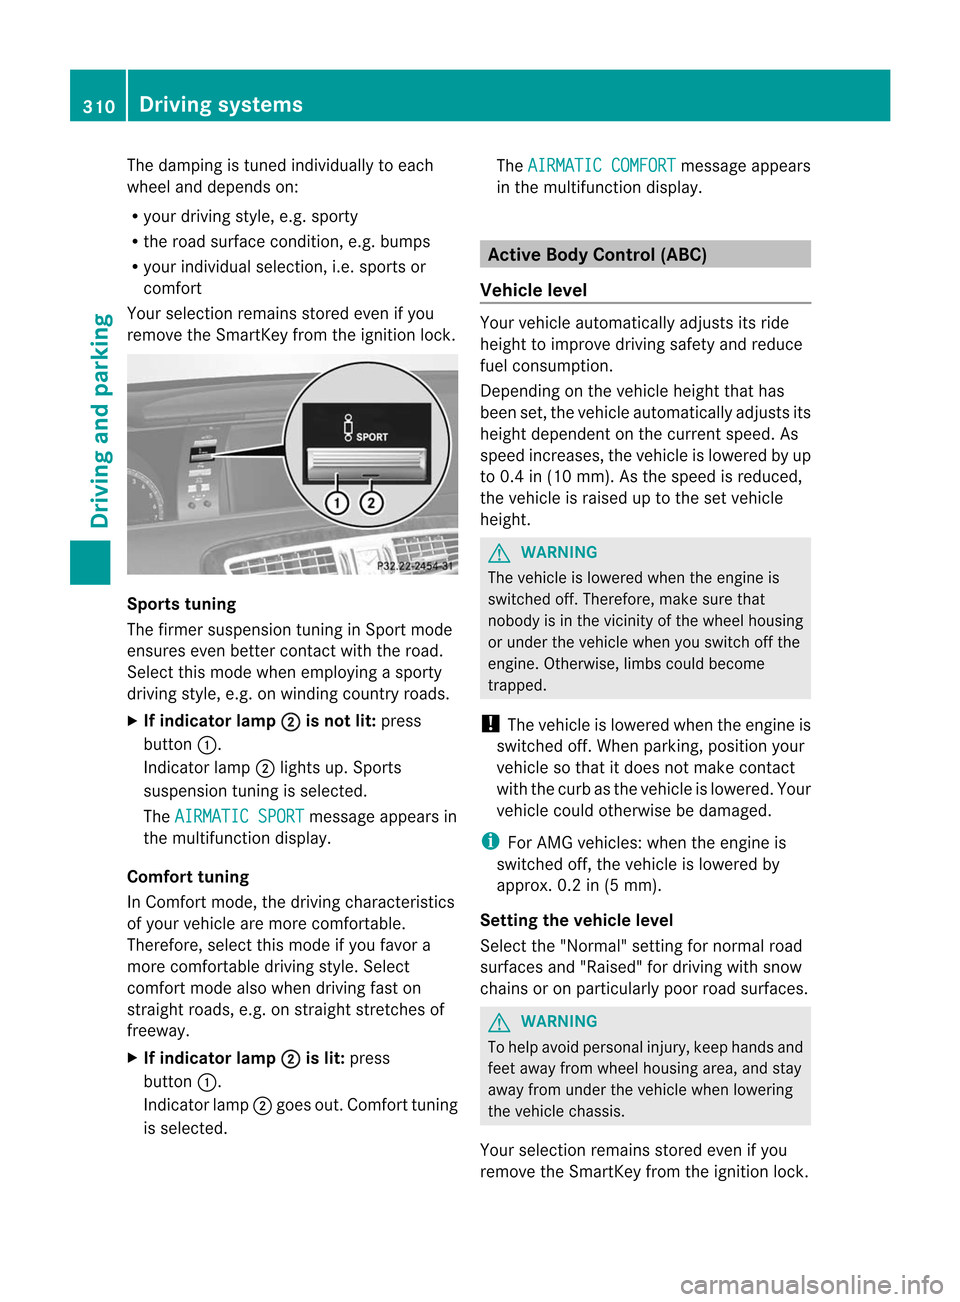
X If indicator lamp ; is not lit:
press
button :.
Indicator lamp ;lights up. Sports
suspension tuning is selected.
The AIRMATIC SPORT message appears in
the multifunction display.
Comfort tuning
In Comfort mode, the driving characteristics
of your vehicle are more comfortable.
Therefore, select this mode if you favor a
more comfortable driving style. Select
comfort mode also when driving fast on
straight roads, e.g. on straight stretches of
freeway.
X If indicator lamp ; is lit:
press
button :.
Indicator lamp ;goes out. Comfort tuning
is selected. The
AIRMATIC COMFORT message appears
in the multifunction display. Active Body Control (ABC)
Vehicle level Your vehicle automatically adjusts its ride
height to improve driving safety and reduce
fuel consumption.
Depending on the vehicle height that has
been set, the vehicle automatically adjusts its
height dependen
tonthe current speed. As
speed increases, the vehicle is lowered by up
to 0.4 in (10 mm). As the speed is reduced,
the vehicle is raised up to the set vehicle
height. G
WARNING
The vehicle is lowered when the engine is
switched off. Therefore, make sure that
nobody is in the vicinity of the wheel housing
or under the vehicle when you switch off the
engine. Otherwise, limbs could become
trapped.
! The vehicle is lowered when the engine is
switched off. When parking, position your
vehicle so that it does not make contact
with the curb as the vehicle is lowered. Your
vehicle could otherwise be damaged.
i For AMG vehicles: when the engine is
switched off, the vehicle is lowered by
approx. 0.2 in (5 mm).
Setting the vehicle level
Select the "Normal" setting for normal road
surfaces and "Raised" for driving with snow
chains or on particularly poor road surfaces. G
WARNING
To help avoid personal injury, keep hands and
feet away from wheel housing area, and stay
away from under the vehicle when lowering
the vehicle chassis.
Your selection remains stored even if you
remove the SmartKey from the ignition lock. 310
Driving systemsDriving and parking
Page 313 of 494
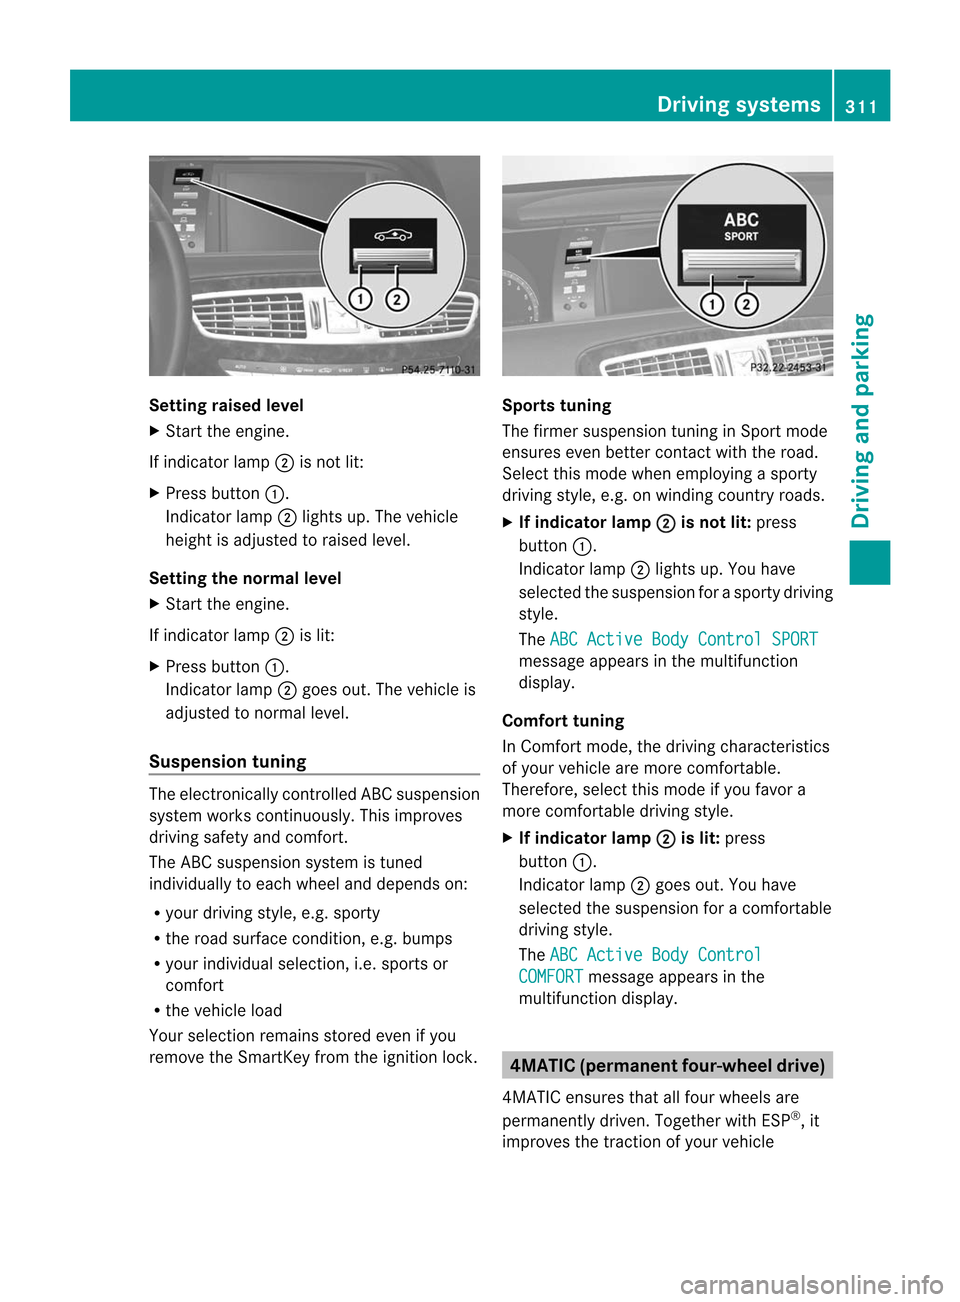
Setting raised level
X
Start the engine.
If indicator lamp ;is not lit:
X Press button :.
Indicator lamp ;lights up. The vehicle
height is adjusted to raised level.
Setting the normal level
X Start the engine.
If indicator lamp ;is lit:
X Press button :.
Indicator lamp ;goes out. The vehicle is
adjusted to normal level.
Suspension tuning The electronically controlled ABC suspension
system works continuously.T
his improves
driving safety and comfort.
The ABC suspension system is tuned
individually to each wheel and depends on:
R your driving style, e.g. sporty
R the road surface condition,e .g. bumps
R your individual selection, i.e .sports or
comfort
R the vehicle load
Your selection remains stored even if you
remove the SmartKey from the ignition lock. Sports tuning
The firmer suspension tunin
ginSport mode
ensures even better contact with the road.
Select this mode when employing a sporty
driving style, e.g. on winding country roads.
X If indicator lamp ; is not lit:
press
button :.
Indicator lamp ;lights up. You have
selected the suspension for a sporty driving
style.
The ABC Active Body Control SPORT message appears in the multifunction
display.
Comfort tuning
In Comfort mode, the driving characteristics
of your vehicle are more comfortable.
Therefore, select this mode if you favor a
more comfortable driving style.
X If indicator lamp ; is lit:
press
button :.
Indicator lamp ;goes out. You have
selected the suspension for acomfortable
driving style.
The ABC Active Body Control COMFORT message appears in the
multifunction display. 4MATIC (permanent four-wheel drive)
4MATIC ensures that all four wheels are
permanently driven. Together with ESP ®
, it
improves the traction of your vehicle Driving systems
311Driving and parking Z
Page 314 of 494
whenever a drive wheel spins due to
insufficient grip.
G
WARNING
If a drive wheel is spinning due to insufficient
traction:
R While driving off, apply as little throttle as
possible.
R While driving, ease up on the accelerator
pedal.
R Adap tyour speed and driving style to the
prevailing road conditions.
Failure to observe these guidelines could
cause the vehicle to skid.
4MATIC cannot prevent accidents resulting
from excessive speed.
! Never tow the vehicle with one axle
raised. This may damage the transfer case.
Damage of this sort is not covered by the
Mercedes-Benz Limited Warranty. All
wheels must remain either on the ground
or be fully raised. Observe the instructions
for towing the vehicle with all wheels in full
contact with the ground.
i In wintry driving conditions, the maximum
effect of 4MATIC can only be achieved if
you use winter tires (M+S tires), with snow
chains if necessary. PARKTRONIC
Important safety notes G
WARNING
The PARKTRONIC is a supplemental system.
It is not intended to, nor does it replace, the
need for extreme care. The responsibility
during parking and other critical maneuvers
always remains with the driver. G
WARNING
Make sure no persons or animals are in or
near the area in which you are parking/
maneuvering .Otherwise, they could be
injured. PARKTRONIC is an electronic parking aid with
ultrasoni
csensors. It indicates visually and
audibly the distance between your vehicle
and an object.
PARKTRONIC is activated automatically when
you:
R switch on the ignition
R shift the transmission to position D,Ror N
R release the electric parkin gbrake
PARKTRONIC is deactivated at speeds above
11 mph (18km/h). It is reactivated at lower
speeds.
PARKTRONIC monitors the area around your
vehicle using six sensors in the front and four
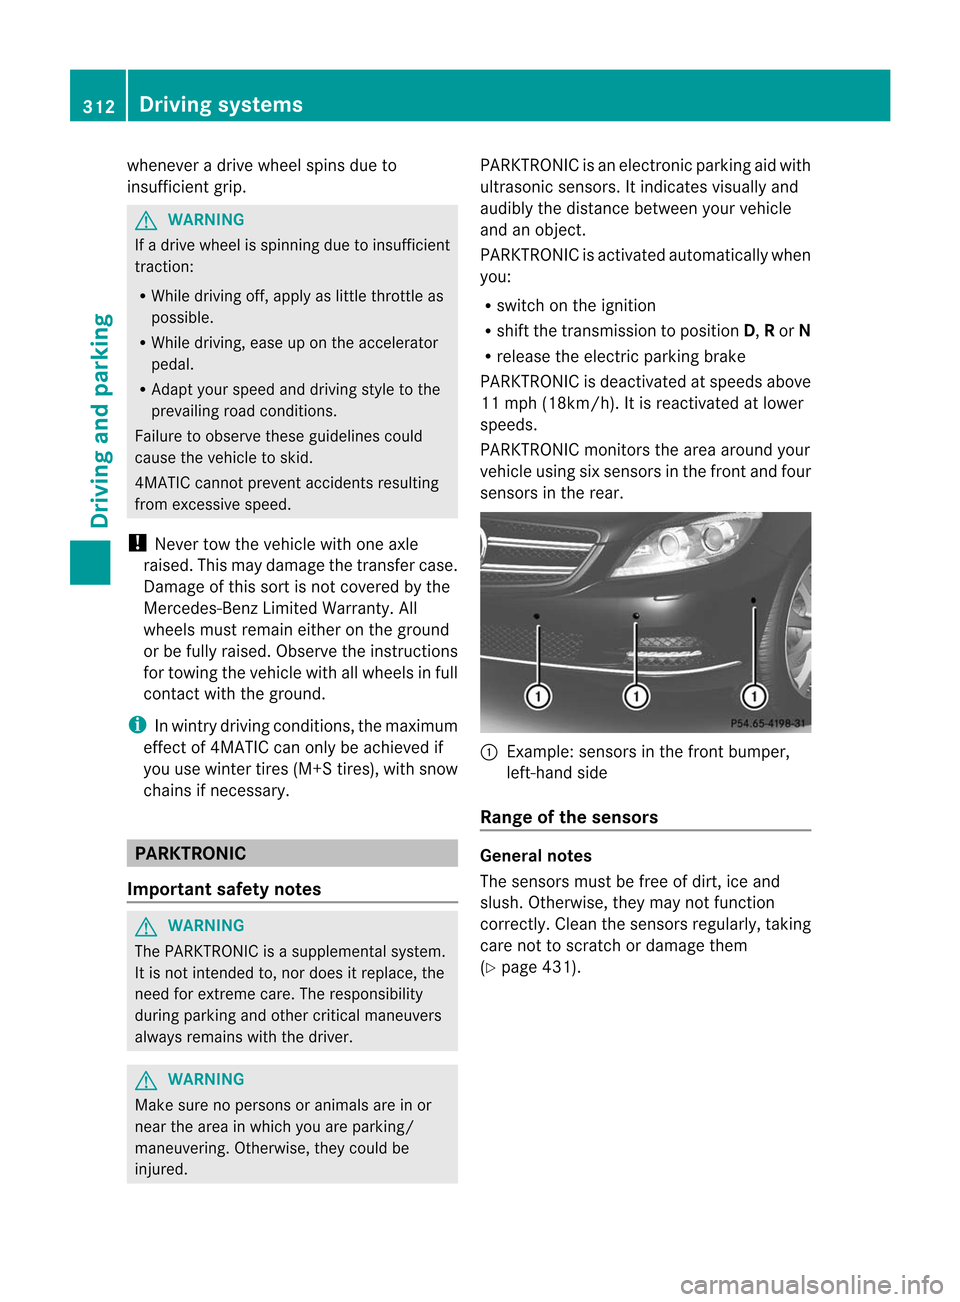
sensors in the rear. :
Example: sensors in the front bumper,
left-hand side
Range of the sensors General notes
The sensors must be free of dirt, ice and
slush. Otherwise, they may not function
correctly. Clean the sensors regularly, taking
care not to scratch or damage them
(Y
page 431). 312
Driving systemsDriving and parking
Page 316 of 494
yellow segments showing operational
readiness
=ligh tup.
The selected transmission position
determines which warning display is active
when the engine is running. Transmission
position Warning display
D
Front area activated
R
Rear and front areas
activated
N
If the electric parking
brake is engaged: no
areas are activated
If the electric parking
brake is released:
rear and front areas
are activated
P
No areas activated
One or more segments light up as the vehicle
approaches an obstacle, dependin
gonthe
vehicle's distance from the obstacle.
When the first red segment lights up, you hear
an intermittent warning for about two
seconds. From the second red segment, you
hear a continuous warning. This indicates that
you have now reached the minimum distance.
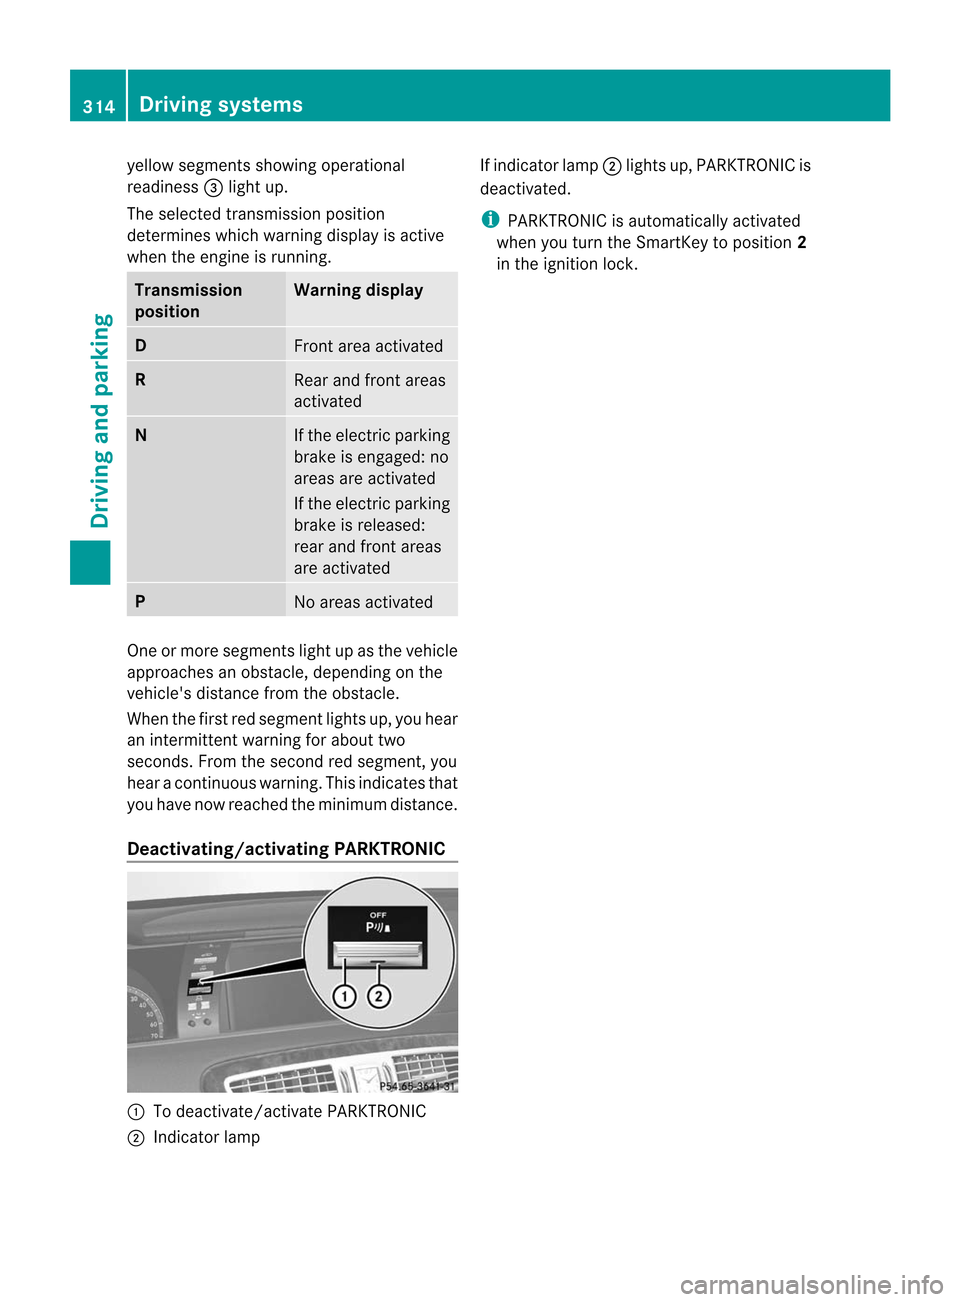
Deactivating/activating PARKTRONIC :
To deactivate/activate PARKTRONIC
; Indicator lamp If indicator lamp
;lights up, PARKTRONIC is
deactivated.
i PARKTRONIC is automatically activated
when you turn the SmartKey to position 2
in the ignition lock. 314
Driving systemsDriving and parking
Page 317 of 494
Problems with PARKTRONIC
Problem Possible causes/consequences and
M Solutions
Only the red segments
in the PARKTRONIC
warning displays are lit.
You also hear a warning
tone for approximately
two seconds.
PARKTRONIC is
deactivated after
approximately
20 seconds, and the
indicator lamp in the
PARKTRONIC button
lights up. PARKTRONIC has malfunctioned and has switched off.
X
If problems persist, have PARKTRONIC checked at a qualified
specialist workshop. Only the red segments
in the PARKTRONIC
warning displays are lit.
PARKTRONIC is
deactivated after
approximately
20 seconds. The PARKTRONIC sensors are dirty or there is interference.
X
Cleant he PARKTRONIC sensors (Y page 431).
X Switch the ignition back on. The problem may be caused by an external source of radio or
ultrasound waves.
X See if PARKTRONIC functions in a different location. Parking Guidance
Important safety notes Parking Guidance is an electronic parking aid
with ultrasound. Ultrasound is used to
measure the road on both sides of the vehicle.
As uitable parking space is indicated by the
parking symbol. You receive steering
instructions when parking .You may also use
PARKTRONIC (Y page 312). G
WARNING
Parking Guidance is merely an aid and may
display parking spaces that are not suitable
for parking, for example:
R no-parking areas
R parking spaces with unsuitable surfaces
(road surface) R
driveways
R entrances and exits
Parking Guidance detects and measures
potential parking spaces while driving past.
Changes to the parking space after this point
are not taken into account, for example if the
vehicle in front of or behind the parking space
changes position or objects in the parking
space are moved.
Even when using Parking Guidance, you are
still responsible for driving carefully. If you
rely on Parking Guidance alone, you could
cause an accident and injure yourself and
others.
Safety always remains your responsibility and
you must continue paying careful attention to
your immediate surroundings when parking
and maneuvering. Driving systems
315Driving and parking Z
Page 322 of 494
R
the trunk lid is open
R it is raining or snowing strongly or if it is
foggy
R it is night or if you are parking/
maneuvering your vehicle in a very dark
area
R a very bright white light is affecting the
camera
R the immediate vicinity is illuminated with
fluorescent light (the displa yofthe
COMAND system can flicker)
R temperature changes abruptly, for example
if you drive out of the cold into a heated
garage (condensation on the lens)
R the camera lens is dirty or covered
R the rear of your vehicle is damaged
In this case, have the position and the
setting of the camera checked at a
specialist workshop. Mercedes-Benz
recommends that you consult a Mercedes-
Benz Center for this purpose.
Do not use the rear view camera in these
situations. You could otherwise injure
yourself and other people and/or cause
damage -including damage to your vehicle -
while parking/maneuvering.
Activating the rear view camera X
Make sure tha tthe SmartKey is in position
2 in the ignition lock.
X Engage reverse gear.
The area behind the vehicle is shown in the
COMAND display with guide lines.
Guide lines in the COMAND display G
WARNING
Use of rear view camera can be dangerous if
you are color-blind or have impaired color
vision.
Only use rear view camera if you can see and
distinguish all colored guidelines shown by
rear view camera on the COMAND system
display. G
WARNING
Please note that objects that do not touch the
ground may appear to be further away than
they actually are, for example:
R the bumper of a vehicle parked behind you
R the trailer drawbar
R the ball coupling of a trailer tow hitch
R the rear end of a truck
R a slanted post
In such cases, you should not use the guide
lines to judge the distance. You may misjudge
the distance, which increases the risk of
impacting the objects.
Even if the object you approach is directly on
the ground, do not approach the object any
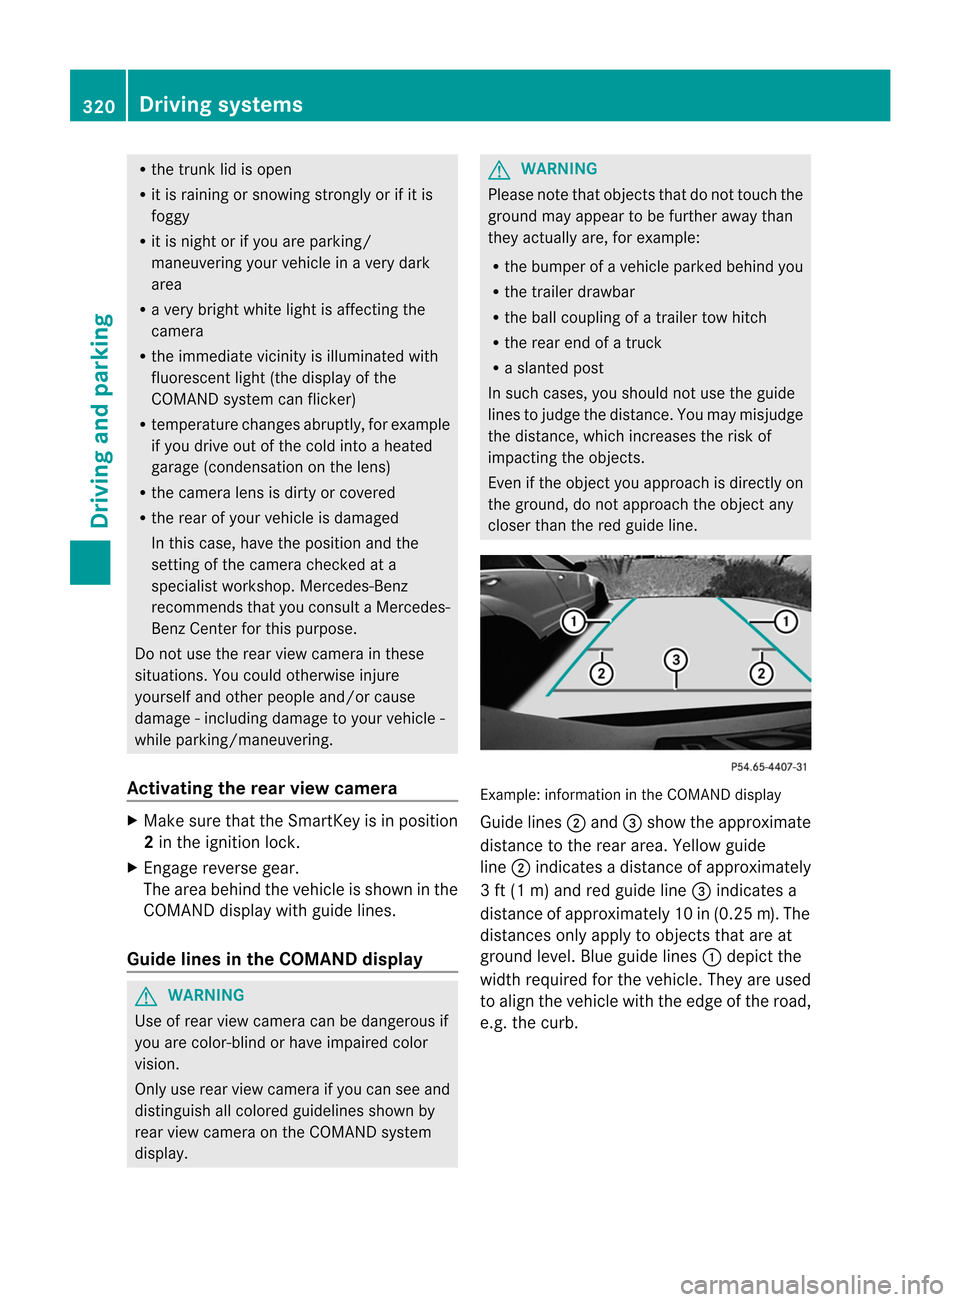
closer than the red guide line. Example: information in the COMAND display
Guide lines
;and =show the approximate
distance to the rear area. Yellow guide
line ;indicates a distance of approximately
3 ft (1 m) and red guide line =indicates a
distance of approximately 10 in (0.25 m).The
distances only apply to objects that are at
ground level. Blue guide lines :depict the
width required for the vehicle. They are used
to align the vehicle with the edge of the road,
e.g. the curb. 320
Driving systemsDriving and parking
Page 325 of 494
Pedestrian recognition
G
WARNING
Pedestrian recognition may be impaired or
inoperative if:
R pedestrians are partially or entirely
obscured by objects, e.g. parked vehicles.
R the silhouette of the pedestrian in the Night
View Assist Plus display is incomplete or
interrupted, e.g. by powerful light
reflections.
R pedestrians do not contrast with the
surroundings.
R pedestrians are not standing upright, for
example, if they are sitting, crouching or
lying down.
i Animals are not recognized by pedestrian
recognition.
Night View Assist Plus is able to recognize
pedestrians by typical characteristics, e.g. a
silhouette in the shape of aperson.
Pedestrian recognition is then switched on
automatically if:
R Night View Assist Plus is activated.
R you are driving faster than 6 mph
(10 km/h).
R the surroundings are dark, e.g. when
driving outside built-up areas without
street lighting.
If pedestrian recognition is active, the symbol
for active pedestrian recognition
(Y page 325) appears in the multifunction
display. If a pedestrian is now recognized,
they are framed and thereby highlighted. If
the pedestrian recognition system has
brought a pedestrian to your attention, look
through the windshield to evaluate the
situation .The actual distance to objects and
pedestrians cannot be gauged accurately by
looking at a screen.
It may be the case that objects are highlighted
as well as pedestrians. Spotlight function
Pedestrian recognition with spotlight
function is activated automatically if:
R
Night View Assist Plus with spotlight
function is activated.
R you are driving faster than 28 mph
(45 km/h).
R the surroundings are dark, e.g. when
driving outside built-up areas without
street lighting.
Only one person or object can be illuminated
by the spotlight at any one time.
The spotlight function will not function if:
R pedestrians or objects cannot be
recognized due to fast cornering.
R pedestrians or objects are on the driver's
side of the vehicle.
Conversely, if you switch to symmetrical
low beams (Y page 250), pedestrians or
objects located on the passenger side of
the vehicle will not be detected.
It may be the case that pedestrians and other
objects are inadvertently illuminated.
Activating/deactivating Night View
Assist Plus with spotlight function You can only activate Night View Assist Plus
with spotlight function if:
R
the SmartKey is in position 2in the ignition
lock.
R it is dark.
R the "Adaptive Highbeam Assist" function is
activated via the on-board computer
(Y page 350).
R the light switch is in position c.
R the combination switch is pushed forward
beyond the point of resistance.
R reverse gear has not been engaged. Driving systems
323Driving and parking Z
Page 327 of 494
If you push the combination switch forward
beyond the point of resistance again, both
systems are reactivated.
X To deactivate: press button:again.
X Deactivate Adaptive Highbeam Assist
(Y page 254).
i If you do not wish to use the spotlight
function, you first need to deactivate Night
View Assist Plus and then activate it again
withou tthe spotlight function
(Y page 325).
Activating/deactivating Night View
Assist Plus without spotlight function You can only activate Night View Assist Plus
without spotlight function if:
R the SmartKey is in position 2in the ignition
lock.
R it is dark.
R the light switch is in the corL
position.
R reverse gear has not been engaged.
X To activate: press and hold button :until
the active spotlight function symbol goes
out in the Night View Assist Plus display in
the multifunction display.
If you drive faster than approximately
6 mph (10 km/h), the symbol for active
pedestrian recognition without spotlight
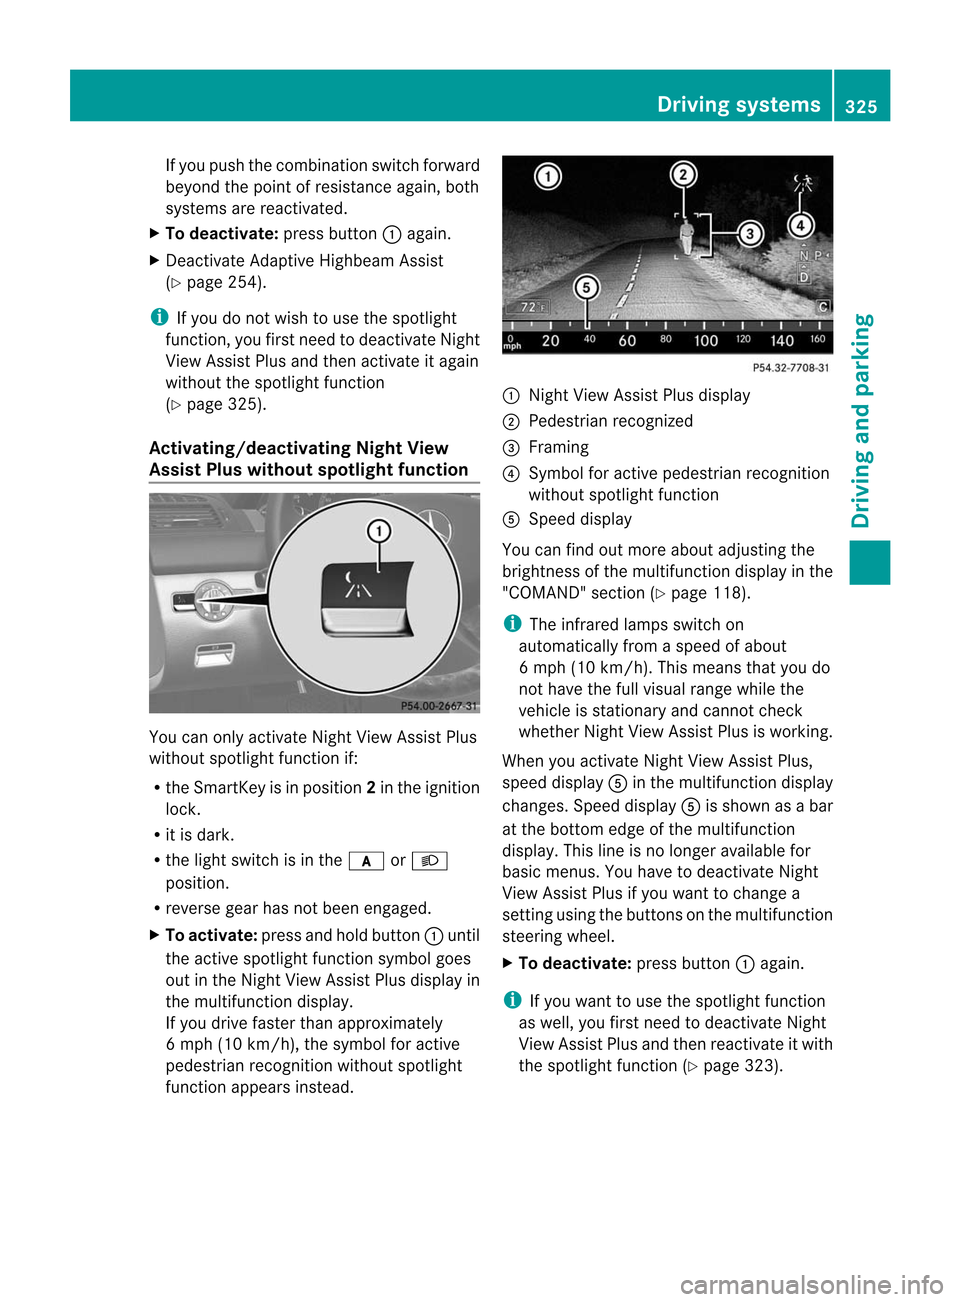
function appears instead. :
Night View Assist Plus display
; Pedestrian recognized
= Framing
? Symbol for active pedestrian recognition
without spotlight function
A Speed display
You can find out more about adjusting the
brightness of the multifunction display in the
"COMAND" section (Y page 118).
i The infrared lamps switch on
automatically from a speed of about
6 mph (10 km/h). This means that you do
not have the full visual range while the
vehicle is stationary and cannot check
whether Night View Assist Plus is working.
When you activate Night View Assist Plus,
speed display Ain the multifunction display
changes. Speed display Ais shown as a bar
at the bottom edge of the multifunction
display. This line is no longer available for
basic menus. You have to deactivate Night
View Assist Plus if you want to change a
setting using the buttons on the multifunction
steering wheel.
X To deactivate: press button:again.
i If you want to use the spotlight function
as well, you first need to deactivate Night
View Assist Plus and then reactivate it with
the spotlight function (Y page 323). Driving systems
325Driving and parking Z