language MERCEDES-BENZ CLA-Class 2016 C117 Comand Manual
[x] Cancel search | Manufacturer: MERCEDES-BENZ, Model Year: 2016, Model line: CLA-Class, Model: MERCEDES-BENZ CLA-Class 2016 C117Pages: 246, PDF Size: 6.73 MB
Page 74 of 246
SelectionContinue: IfCalculateAlter‐
native Routesis activated, alternative
routes are calculated (
Ypage 67). You can
display these and select them for route
guidance (
Ypage 92).
If route guidance has already been activa-
ted, a prompt will appear asking whether
you wish to end the current route guidance.
XTo select YesorSet as Intermediate
Destination: turn and press the control-
ler.
Yes
cancels the current route guidance and
starts route calculation to the new destina-
tion.
Set as Intermediate Destination
adds the new destination in addition to the
existing destination and opens the inter-
mediate destinations list.
iThe route is calculated using the digital
map data. The calculation time depends on the distance from the destination, for
example.
The route may differ from the ideal route,
e.g. due to incomplete map data. Please
also refer to the notes about the digital map
(
Ypage 106).
Calling up the keyword search
XTo select the magnifying glass symbol:
while in the address entry menu, slide 6,
turn and then press the controller.
Keyword search
Entering keywords
The keyword search is used to help find des-
tinations using fragments of words. If you
enable the appropriate setting in the search
options, the keyword search is tolerant of
errors (
Ypage 73).
It can be used for an address or a POI. For
example, you can search for the Empire State
Building in New York.
The keyword search finds geographically tol-
erant hits. If, for example, you are searching
for a street located on the edge of a major
city, the search will also cover adjacent
smaller cities.
The keyword search supports the character
sets of the system languages available.
XTo switch to navigation mode: press the
Ø button.
XTo show the menu: slide6the control-
ler.
XTo select Destination: turn and press the
controller.
XSelect Keyword Search.
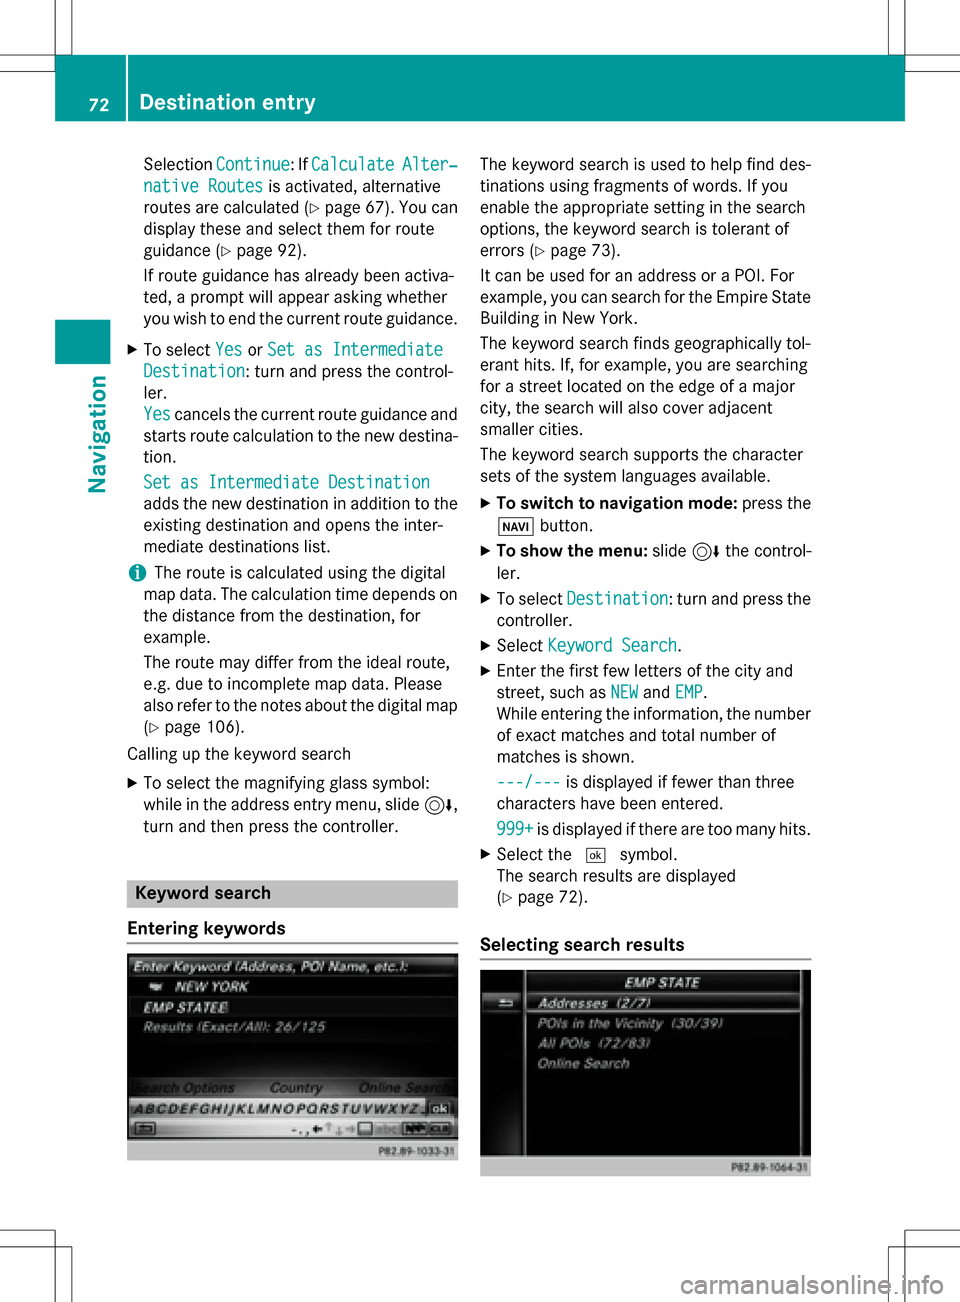
XEnter the first few letters of the city and
street, such as NEW
andEMP.
While entering the information, the number
of exact matches and total number of
matches is shown.
---/---
is displayed if fewer than three
characters have been entered.
999+
is displayed if there are too many hits.
XSelect the ¬symbol.
The search results are displayed
(
Ypage 72).
Selecting search results
72Destination entry
Navigation
Page 99 of 246
Activating/deactivating traffic informa-
ti on on themap
You can switch th efollowin gtraffic informa-
tion on th emap on/off :
RIncidents
RSpeed&Flo w
RFree Flo w
XTo switch to navigation mode: press th e
Ø button.
XTo sho wthemenu: slide 6thecontroller .
XTo selectTraffic:tur nand press th econ-
troller .
XTo select TrafficInformationOnMap:
tur nand press th econtroller .
XSelectIncidents,Speed&Flo worFre e
Flow.
The display is on Oor off ª.
Reading out traffic rep ortson the
rou te
Introd uction
The textreader function is only available while
rout eguidance is active .It read sout traffic
report saffecting th ecurren troute.
You can select from th efollowin gte xt reader
properties:
RLanguage (Ypage 48)
RTextreader spee d (Ypage 44)
You can start th ete xt reader function man -
ually or set it to automatic.
Starting the text reader function man-
ually
XTo switch to navigation mode: press th e
Ø button.
XToshow themenu: slide 6thecontroller .
XTo selectTraffic:tur nand pre ssthecon-
troller .
XSelectRea dOut All Messages on
Route.
COMAND read sout th ereport sin
sequence.
If there are no report sfor th eroute, th e
Rea d
OutAllMessagesonRoutemen u
item is gray and canno tbe selected.
XTo cance lth etext reader function :select
Cancel Read-Alou dFunction
.
COMAND read sout th ecurren treport and
then exit sth etext reader function .
Automa tic text reader function
XTo switch to navigation mode: pre ssthe
Ø button.
XTo sho wthemenu: slide 6thecontroller .
XTo selectTraffic:tur nand pre ssthecon-
troller .
XSelectRea dTraffi cAnnouncement s
Automatically.
Dependin gon th eprevious state,switch
th eoption on Oor off ª.
Recalculating the route dynamically
Rout etypes Dynami cTraffi cRouteand
Dynami c
TRF.RouteAfterReques ttake
int oaccoun tall of th etraffic report sthey
receiv efor th ecurren trout ewhen calculating
th erout e (
Ypage 66).
If you hav eselected DynamicTraffi c
Routeas therout etype, COMAND guide syou
to your destination alon gth eupdated route.
If you hav eselected th erout etyp eDynami c
TRF.Route After Reques t, aprompt will
first appear .
You can no wdecide whether to :
Raccept therout esuggested by COMAND
Rcontinu eyour original rout e
Real-time traffic reports97
Navigation
Z
Page 118 of 246
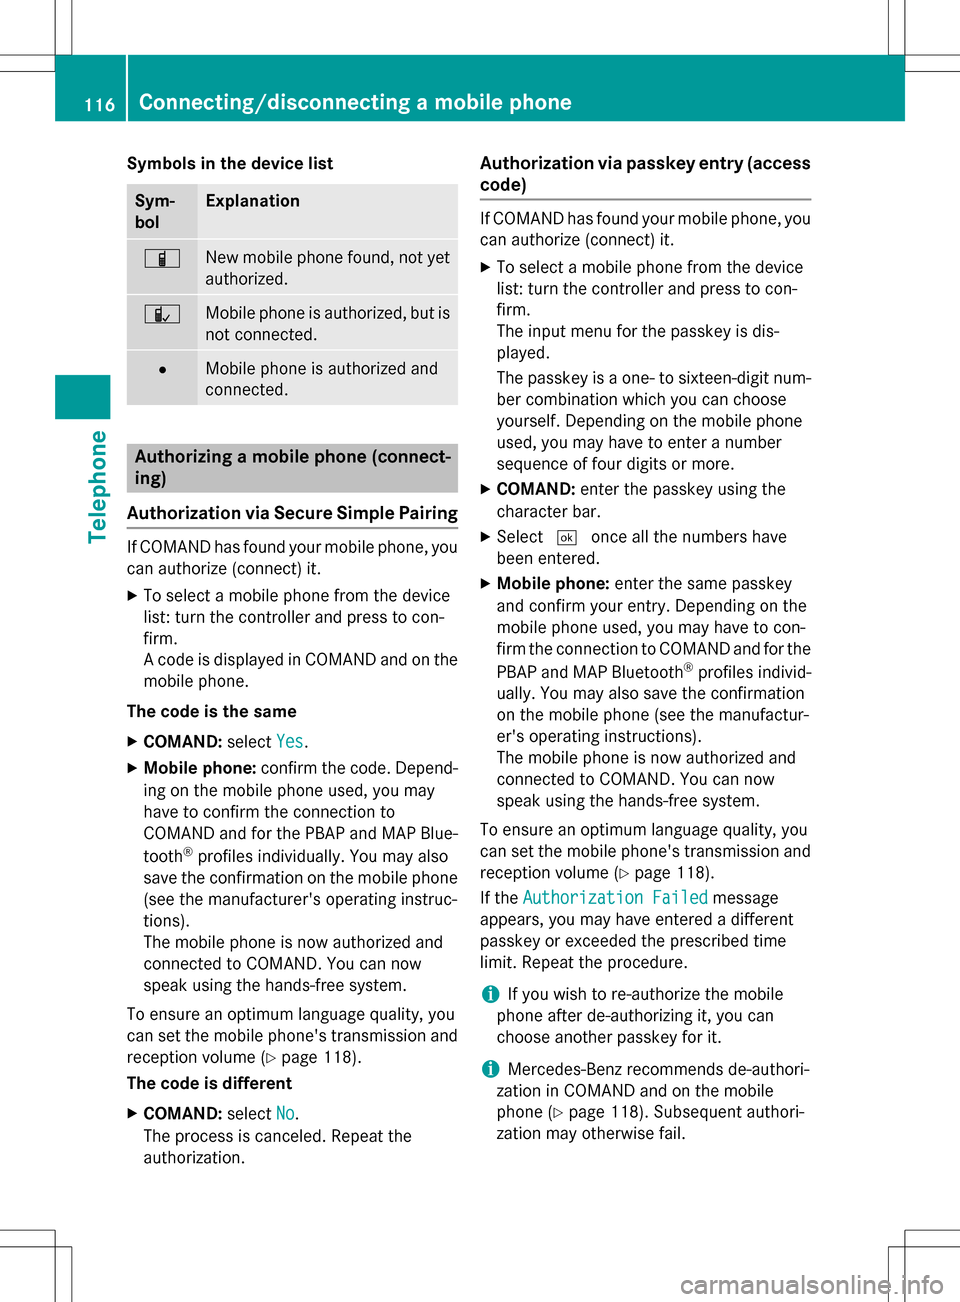
Symbols in the device list
Sym-
bolExplanation
ÏNew mobile phone found, not yet
authorized.
ÑMobile phone is authorized, but is
not connected.
#Mobile phone is authorized and
connected.
Authorizing a mobile phone (connect-
ing)
Authorization via Secure Simple Pairing
If COMAND has found your mobile phone, you
can authorize (connect) it.
XTo select a mobile phone from the device
list: turn the controller and press to con-
firm.
A code is displayed in COMAND and on the
mobile phone.
The code is the same
XCOMAND: selectYes.
XMobile phone: confirm the code. Depend-
ing on the mobile phone used, you may
have to confirm the connection to
COMAND and for the PBAP and MAP Blue-
tooth
®profiles individually. You may also
save the confirmation on the mobile phone
(see the manufacturer's operating instruc-
tions).
The mobile phone is now authorized and
connected to COMAND. You can now
speak using the hands-free system.
To ensure an optimum language quality, you
can set the mobile phone's transmission and
reception volume (
Ypage 118).
The code is different
XCOMAND: selectNo.
The process is canceled. Repeat the
authorization.
Authorization via passkey entry (access code)
If COMAND has found your mobile phone, you
can authorize (connect) it.
XTo select a mobile phone from the device
list: turn the controller and press to con-
firm.
The input menu for the passkey is dis-
played.
The passkey is a one- to sixteen-digit num-
ber combination which you can choose
yourself. Depending on the mobile phone
used, you may have to enter a number
sequence of four digits or more.
XCOMAND: enter the passkey using the
character bar.
XSelect ¬once all the numbers have
been entered.
XMobile phone: enter the same passkey
and confirm your entry. Depending on the
mobile phone used, you may have to con-
firm the connection to COMAND and for the
PBAP and MAP Bluetooth
®profiles individ-
ually. You may also save the confirmation
on the mobile phone (see the manufactur-
er's operating instructions).
The mobile phone is now authorized and
connected to COMAND. You can now
speak using the hands-free system.
To ensure an optimum language quality, you
can set the mobile phone's transmission and
reception volume (
Ypage 118).
If the Authorization Failed
message
appears, you may have entered a different
passkey or exceeded the prescribed time
limit. Repeat the procedure.
iIf you wish to re-authorize the mobile
phone after de-authorizing it, you can
choose another passkey for it.
iMercedes-Benz recommends de-authori-
zation in COMAND and on the mobile
phone (
Ypage 118). Subsequent authori-
zation may otherwise fail.
116Connecting/disconnecting a mobile phone
Telephone
Page 119 of 246
Establishing the connection from the
mobile phone
The Bluetooth®device name of COMAND is
"MB Bluetooth".
XCOMAND: call up the telephone menu.
XTo switch to the menu bar: slide 6the
controller.
XTo select Conn. Device: turn and press
the controller.
The device list is displayed.
XTo select Connect via Phone: turn and
press the controller.
A message is displayed, stating that you
can start the search on your mobile phone.
XMobile phone: start the search for a Blue-
tooth®device (see manufacturer's operat-
ing instructions).
COMAND is displayed with the name "MB
Bluetooth" in the mobile phone's device
list.
XSelect "MB Bluetooth".
A prompt appears in the COMAND display
asking if the mobile phone should be
authorized.
XCOMAND: selectYes.
If No
is selected, the procedure is canceled.
If your mobile phone supports Secure Sim-
ple Pairing, a code is now displayed on both
devices.
The code is the same
XCOMAND: selectYes.
XMobile phone: confirm the code. Depend-
ing on the mobile phone used, you may
have to confirm the connection to
COMAND and for the PBAP and MAP Blue-
tooth
®profiles individually. You may also
save the confirmation on the mobile phone
(see the manufacturer's operating instruc-
tions).
The mobile phone is now authorized and
connected to COMAND. You can now
speak using the hands-free system. To ensure an optimum language quality,
you can set the mobile phone's transmis-
sion and reception volume (
Ypage 118).
The code is different
XCOMAND: selectNo.
The process is canceled. Repeat the pro-
cedure.
If your mobile phone does not support Secure
Simple Pairing, an input menu is displayed for
the passkey. The passkey is a one- to sixteen-
digit number combination which you can
choose yourself. Enter the same passkey on
both COMAND and the mobile phone and
confirm. Depending on the mobile phone
used, you may have to confirm the connection
to COMAND and for the PBAP and MAP Blue-
tooth
®profiles.
Reconnecting automatically
COMAND always searches for the last con-
nected mobile phone.
If no connection can be made to the most
recently connected mobile phone, the system
searches for the mobile phone that was con-
nected before that one.
Switching between mobile phones
If you have authorized more than one mobile
phone, you can switch between the individual
phones.
XTo call up the telephone menu: press the
% button.
XTo switch to the menu bar: slide 6the
controller.
XTo select Conn. Device: turn and press
the controller.
The device list is displayed.
XTo select the desired mobile phone: turn
and press the controller.
The selected mobile phone is connected if
it is within Bluetooth
®range and if Blue-
tooth®is activated.
Connecting/disconnecting a mobile phone117
Telephone
Z
Page 143 of 246
This folder contains all the outgoing mes-
sages.
RDrafts
This folder contains all the messages that
you have saved as a draft.
iFolders cannot be selected if they are
empty.
Depending on the mobile phone used, the
sub-folder function may be available.
Read-aloud function for messages
XTo start the read-aloud function: press the
controller when the message is displayed.
XTo select Read Aloud: turn and press the
controller.
COMAND reads out the message.
XTo cancel the read-aloud function: press
the 8 button.
or
XPress the controller, select Cancel Read-
Aloud Functionand press the controller
again.
You can set the language (
Ypage 48) and the
speed (
Ypage 44) of the read-aloud function.
Displaying details and phone numbers
COMAND can also show a shortened sender
display in full.
XTo call up the telephone menu: press the
% button.
XTo switch to the menu bar: slide 6the
controller.
XTo select 1: turn and press the controller.
The message menu is displayed.
XTo switch to the menu bar: slide 6the
controller.
XTo select Folder: turn and press the con-
troller.
XTo select Text MessageorE-Mail: turn
and press the controller.
The selected folder is displayed.
XTo highlight the desired message: turn the
controller.
XTo select G: slide 9the controller.
XTo select Details: turn and press the con-
troller.
The detailed view appears.
XTo close the detailed display: slide8
the controller.
Writing text messages
Writing a new text message
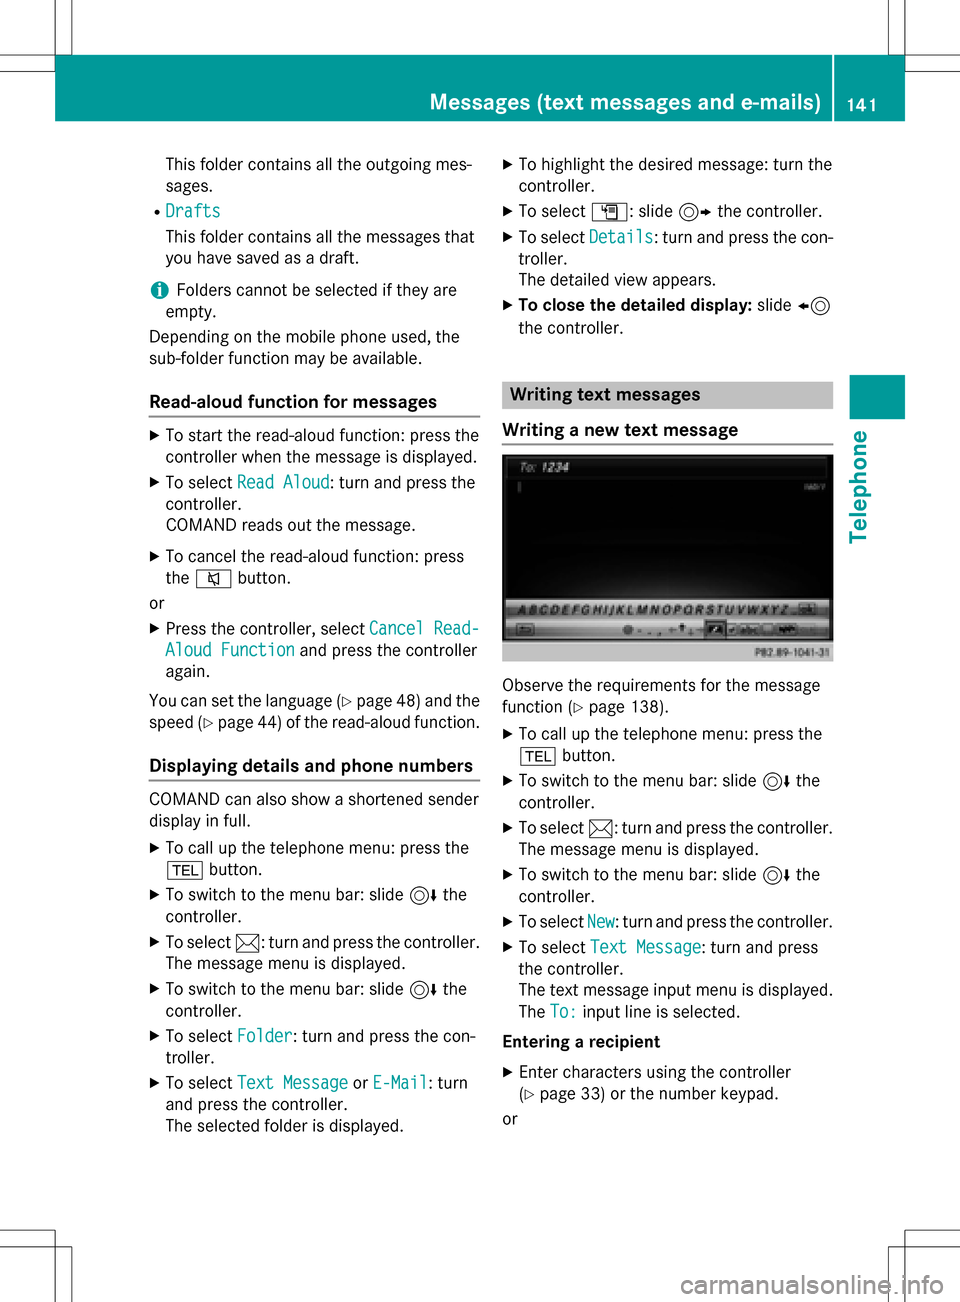
Observe the requirements for the message
function (
Ypage 138).
XTo call up the telephone menu: press the
% button.
XTo switch to the menu bar: slide 6the
controller.
XTo select 1: turn and press the controller.
The message menu is displayed.
XTo switch to the menu bar: slide 6the
controller.
XTo select New: turn and press the controller.
XTo select Text Message: turn and press
the controller.
The text message input menu is displayed.
The To:
input line is selected.
Entering a recipient
XEnter characters using the controller
(
Ypage 33) or the number keypad.
or
Messages (text messages and e-mails)141
Telephone
Z
Page 202 of 246
Bear in mind that at a speed of only 30 mph
(approximately 50 km/h) your vehicle covers
a distance of 44 feet (approximately 14m)
ever yse cond.
General notes
Notes on discs
!Do not affix stickers or labels to the discs.
They could peel off and damage COMAND.
Stickers can cause the disc to bend, which
can result in read errors and disc recogni-
tion problems.
!COMAND is designed to play discs that
comply with the EN 60908 standard. There- fore, you can only use discs with a maxi-
mum thickness of 1.3 mm.
If you insert thicker discs, e.g. those that
contain data on both sides (DVD on one
side and audio data on the other), they can-
not be ejected and can damage the device.
Only use round discs with a diameter of
12 cm. Do not use discs with a diameter of
8 cm, even with an adapter.
The variety of data media, burners and burn
software means there is no guarantee that
the system will be able to play discs that you
have copied yourself.
DVD playback conditions
If video DVDs do not conform to the NTSC or
PAL TV standards, they may create picture,
sound or other problems during playback.
COMAND is capable of playing back video
DVDs produced according to the following
standards:
RRegion code 1 or region code 0 (no region
code)
RPAL or NTSC standard
You will generally find the relevant details
either on the DVD itself or on the DVD case.
iIf you insert a video DVD with a different
region code, a message to this effect
appears.
iCOMAND is set to region code 1 at the
factory. This setting can be changed at an
authorized Mercedes-Benz Center. It is also
possible to play video DVDs with a different
region code, provided that they are pro-
duced in accordance with the PAL or NTSC
TV standard. The region code can be
changed a maximum of four times.
Control options
There are various control menus available in
DVD video mode.
Most DVDs have their own control menu.
The DVD's control menu is operated directly
using the controller or DVD functions.
Control menu and
functionOperation
RDVD's control
menu
Selection of title,
scene, language,
subtitles ...Operation with the
controller
RMenu Options
Selection of
brightness, con-
trast, color, for-
mat
Operation using the
menu bar options,
video settings
RVideo menu
Selection of
scene, fast
forward or rewindIn full-screen mode,
slide6the con-
troller
RDVD functions
Selection of title,
scene, language,
subtitles ...In full-screen mode,
press the controller
200Video DVD mode
Media
Page 204 of 246
The following options are available for the
screen format for the DVD being played:
RAuto
R16:9
R4:3
RZoom
XTo set the picture format:turn and press
the controller.
The dot before the menu entry shows the
selected format.
Manual image enhancement
XTo select Bright.,Contrastor Color:
turn and press the controller.
A sliding menu appears.
XTo select the required value: turn the con-
troller.
XTo exit the sliding menu: slide8 the
controller.
DVD's control menu
Most DVDs have their own control menu
which can be operated using the controller.
Showing the DVD's control menu
XTo select Menufrom the DVD overlay menu:
turn and press the controller.
The menu of the DVD overlay menu is hid-
den and the DVD's menu entries (e.g.
scenes, language, trailers) are displayed.
XTo select a menu entry: slide and press the
controller.
Video menu
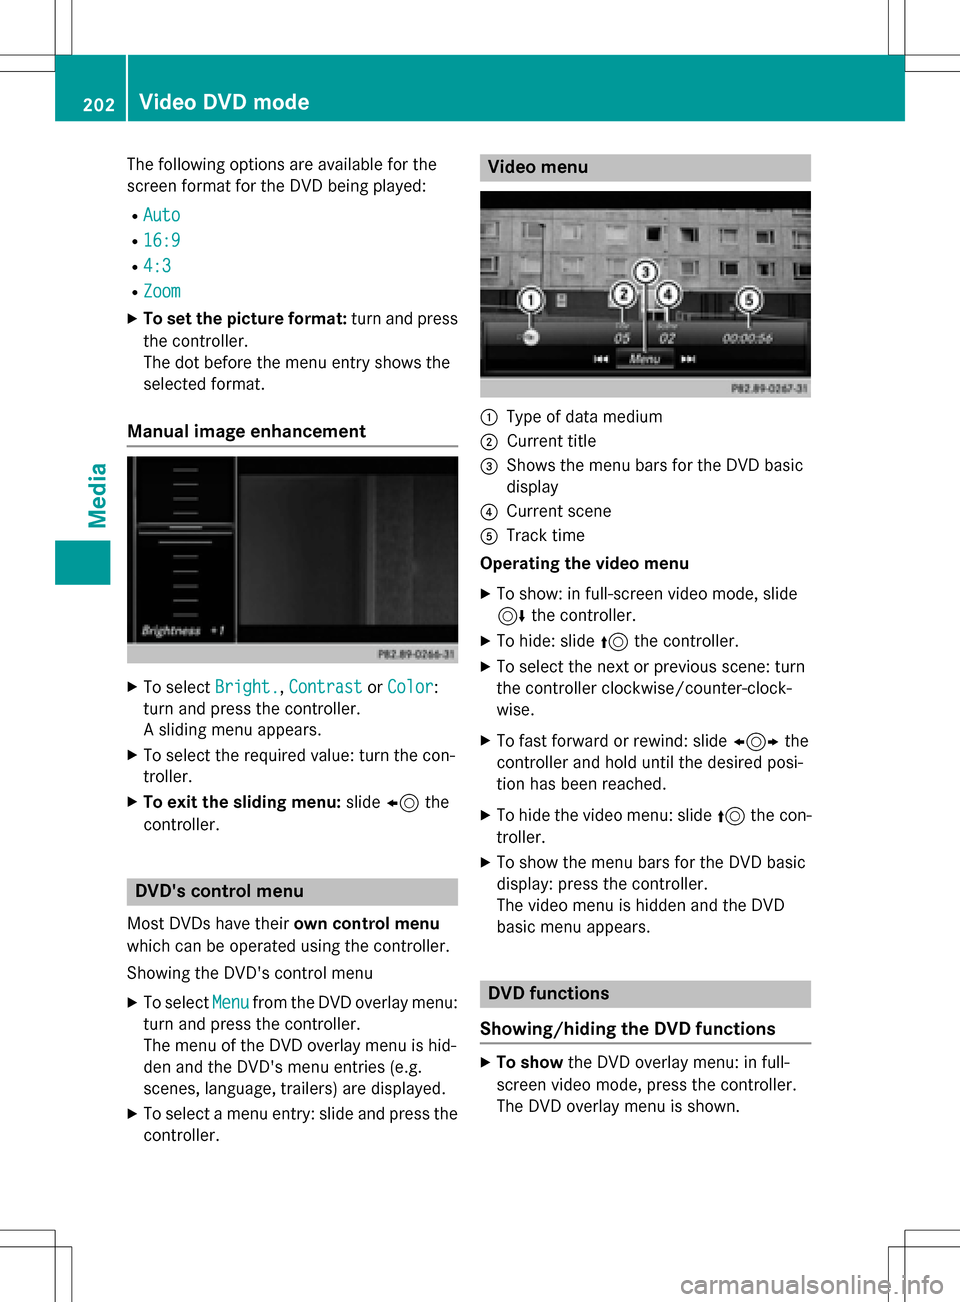
:Type of data medium
;Current title
=Shows the menu bars for the DVD basic
display
?Current scene
ATrack time
Operating the video menu
XTo show: in full-screen video mode, slide
6 the controller.
XTo hide: slide 5the controller.
XTo select the next or previous scene: turn
the controller clockwise/counter-clock-
wise.
XTo fast forward or rewind: slide 1the
controller and hold until the desired posi-
tion has been reached.
XTo hide the video menu: slide 5the con-
troller.
XTo show the menu bars for the DVD basic
display: press the controller.
The video menu is hidden and the DVD
basic menu appears.
DVD functions
Showing/hiding the DVD functions
XTo show the DVD overlay menu: in full-
screen video mode, press the controller.
The DVD overlay menu is shown.
202Video DVD mode
Media
Page 205 of 246
XTo hide:select%in the DVD overlay
menu by turning and pressing the control-
ler
XTo show the DVD basic display: select
ò in the DVD overlay menu by turning
and pressing the controller.
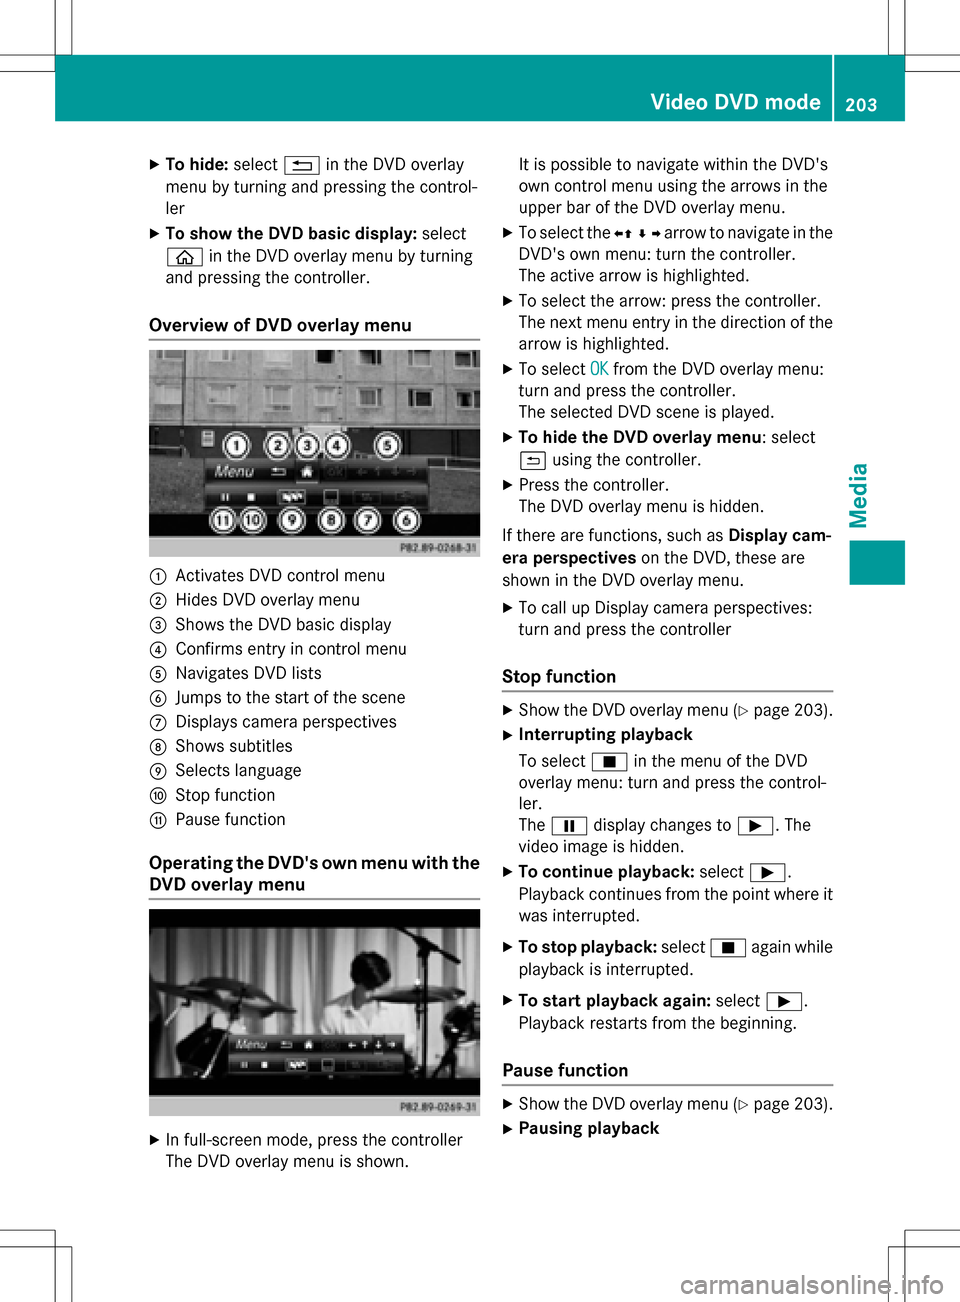
Overview of DVD overlay menu
:Activates DVD control menu
;Hides DVD overlay menu
=Shows the DVD basic display
?Confirms entry in control menu
ANavigates DVD lists
BJumps to the start of the scene
CDisplays camera perspectives
DShows subtitles
ESelects language
FStop function
GPause function
Operating the DVD's own menu with the
DVD overlay menu
XIn full-screen mode, press the controller
The DVD overlay menu is shown. It is possible to navigate within the DVD's
own control menu using the arrows in the
upper bar of the DVD overlay menu.
XTo select the
XZ¬Yarrow to navigate in the
DVD's own menu: turn the controller.
The active arrow is highlighted.
XTo select the arrow: press the controller.
The next menu entry in the direction of the
arrow is highlighted.
XTo select OKfrom the DVD overlay menu:
turn and press the controller.
The selected DVD scene is played.
XTo hide the DVD overlay menu: select
& using the controller.
XPress the controller.
The DVD overlay menu is hidden.
If there are functions, such as Display cam-
era perspectives on the DVD, these are
shown in the DVD overlay menu.
XTo call up Display camera perspectives:
turn and press the controller
Stop function
XShow the DVD overlay menu (Ypage 203).
XInterrupting playback
To select Éin the menu of the DVD
overlay menu: turn and press the control-
ler.
The Ë display changes to Ì. The
video image is hidden.
XTo continue playback: selectÌ.
Playback continues from the point where it was interrupted.
XTo stop playback: selectÉagain while
playback is interrupted.
XTo start playback again: selectÌ.
Playback restarts from the beginning.
Pause function
XShow the DVD overlay menu (Ypage 203).
XPausing playback
Video DVD mode203
Media
Z
Page 234 of 246
Selecting sound settings
You can select sound settings in the following
operating modes:
RAudio CD/MP3
RVideo DVD
RRadio (active media source in COMAND)
RAUX
XSwitch on an operating mode (e.g. audio
CD mode) (
Ypage 234).
XSelect TrebleorBassusing
the :=; buttons on the remote
control and press the 9button to confirm.
An adjustment scale appears.
XSelect a setting using the 9:but-
tons and press the 9button to confirm.
Multiple users
Simultaneous use of the rear-compart-
ment disc drive
The two rear-compartment screens can be
operated almost entirely independently from
one another. However, a conflict may occur in
some menus if the two screens are used
simultaneously.
The following functions affect both screens:
Rchanging playback options
Rselecting a track (from a track list or folder)
Rusing the play, pause and stop functions
Rfast forward and rewind or scrolling
Rcalling up the DVD menu and navigating
within it
Rsetting the language, subtitles and camera
angle
Rcalling up interactive DVD content
The following functions affect only one
screen:
Rchanging audio and video functions as well
as picture settings
Rswitching between full screen and the
menu
Switching between operating modes
When you exit an operating mode (e.g. audio
CD mode), the current setting is saved. If you
call up this operating mode again later, there
are two possibilities:
Rthe operating mode has been changed on
the other screen.
Rthe operating mode has not been changed.
In the first case, the operating mode appears as it is on the other screen.
In the second case, the setting appears on the
screen as it was when you last exited the
operating mode.
Picture settings
Overview
You can select the picture settings in video
DVD and AUX mode (
Ypage 243).
Adjusting the brightness, contrast and
color
XSwitch to video DVD mode (Ypage 237).
XTo show the menu: press the9button on
the remote control.
XSelect DVD-Videousing
the :=; buttons and press the
9 button to confirm.
XSelect Brightness,Contrastor Color
using the 9: buttons and press the
9 button to confirm.
A scale appears.
XSelect a setting using the 9:but-
tons and press the 9button to confirm.
232Basic functions
Rear Seat Entertainment
Page 235 of 246
Changing the picture format
XTo show the menu:press the9button on
the remote control.
XSelect DVD-Videousing
the :=; buttons and press the
9 button to confirm.
The dot in front of one of the menu items
Automatic
, 16:9 Optimized,4:3or
Widescreen
shows the currently set pic-
ture format.
XSelect a format using the 9:but-
tons and press the 9button to confirm.
System settings
Note
You can adjust all system settings individually
for each rear screen without affecting the
other screen.
Selecting the display language
XSelect Systemusing the 9=;
buttons on the remote control and press 9
to confirm.
You see the system menu on the selected
rear screen.
XSelect Settingsusing the :button
and press 9to confirm.
XConfirm Languageby pressing the 9but-
ton.
The list of languages appears. The #dot
indicates the current setting.
XSelect a language using the 9:but-
tons and press the 9button to confirm.
The Rear Seat Entertainment System sets
the selected language.
Switching the display design
XSelect Settingsusing the :button
and press 9to confirm.
XSelect Day Mode,Night Modeor Auto‐
maticusing the 9: buttons and
press the 9button to confirm.
The dot indicates the current setting.
DesignExplanation
Day ModeThe display is set per-
manently to day
design.
Night ModeThe display is set per-
manently to night
design.
AutomaticThe display design
changes depending on
the vehicle instrument
cluster illumination.
Setting the brightness
XSelect Settingsusing the :button
and press 9to confirm.
XSelect Brightnessusing the 9:
buttons and press the 9button to confirm.
A scale appears.
XAdjust the brightness using the 9:
buttons and press the 9button to confirm.
The bar moves up or down. The picture
becomes lighter or darker.
Showing/hiding the picture
XTo hide the picture: selectDisplay Off
in the system menu using the :;
buttons on the remote control and press
the 9button to confirm.
The picture is hidden.
XTo display the picture: press the9but-
ton.
System settings233
Rear Seat Entertainment
Z