Workshop MERCEDES-BENZ CLS-Class 2012 W218 User Guide
[x] Cancel search | Manufacturer: MERCEDES-BENZ, Model Year: 2012, Model line: CLS-Class, Model: MERCEDES-BENZ CLS-Class 2012 W218Pages: 356, PDF Size: 14.25 MB
Page 80 of 356
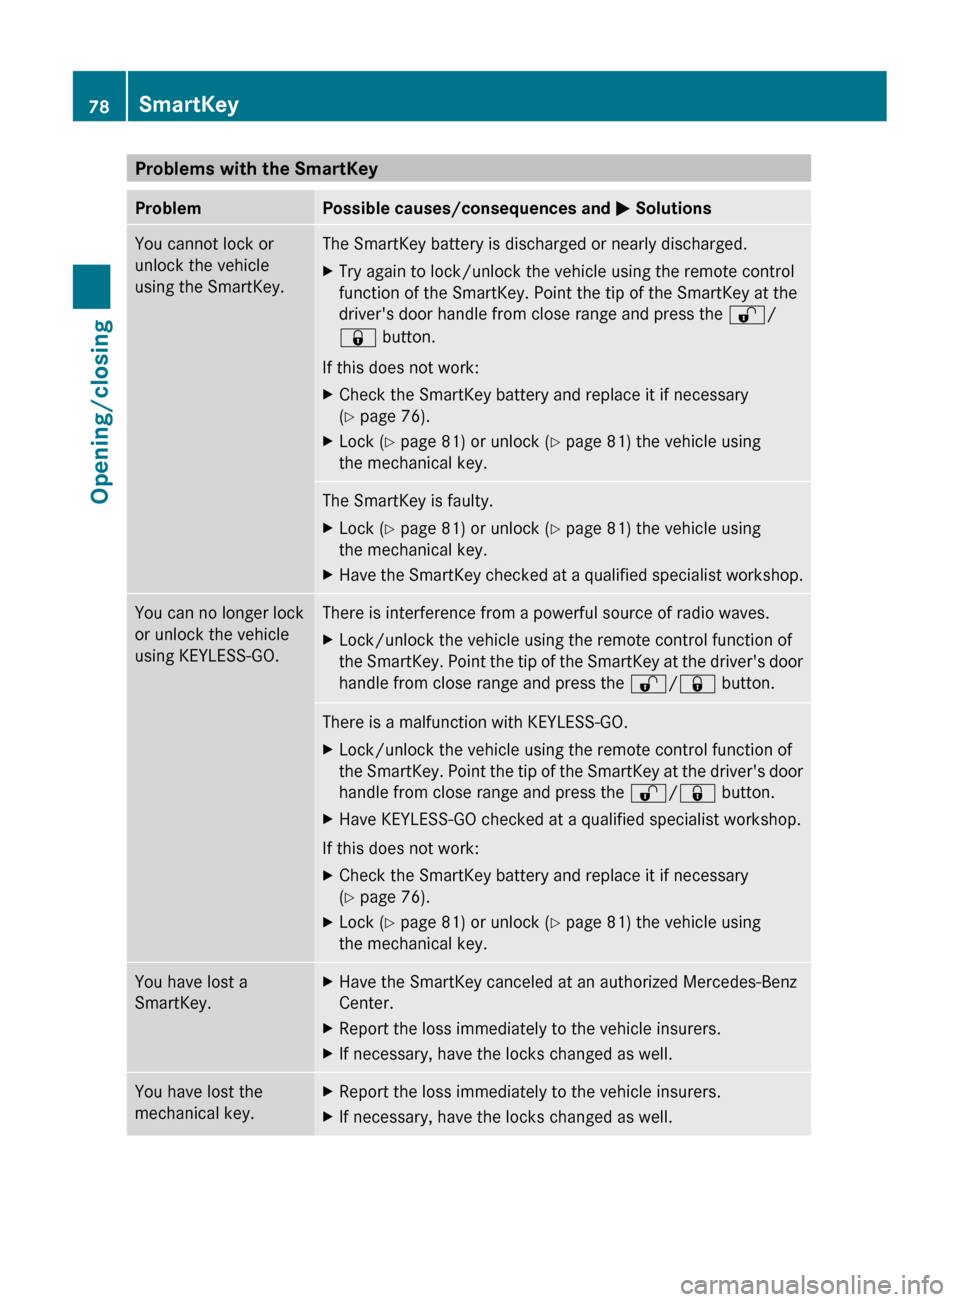
Problems with the SmartKeyProblemPossible causes/consequences and M SolutionsYou cannot lock or
unlock the vehicle
using the SmartKey.The SmartKey battery is discharged or nearly discharged.XTry again to lock/unlock the vehicle using the remote control
function of the SmartKey. Point the tip of the SmartKey at the
driver's door handle from close range and press the %/
& button.
If this does not work:
XCheck the SmartKey battery and replace it if necessary
( Y page 76).XLock ( Y page 81) or unlock ( Y page 81) the vehicle using
the mechanical key.The SmartKey is faulty.XLock ( Y page 81) or unlock ( Y page 81) the vehicle using
the mechanical key.XHave the SmartKey checked at a qualified specialist workshop.You can no longer lock
or unlock the vehicle
using KEYLESS-GO.There is interference from a powerful source of radio waves.XLock/unlock the vehicle using the remote control function of
the SmartKey. Point the tip of the SmartKey at the driver's door
handle from close range and press the %/& button.There is a malfunction with KEYLESS-GO.XLock/unlock the vehicle using the remote control function of
the SmartKey. Point the tip of the SmartKey at the driver's door
handle from close range and press the %/& button.XHave KEYLESS-GO checked at a qualified specialist workshop.
If this does not work:
XCheck the SmartKey battery and replace it if necessary
( Y page 76).XLock ( Y page 81) or unlock ( Y page 81) the vehicle using
the mechanical key.You have lost a
SmartKey.XHave the SmartKey canceled at an authorized Mercedes-Benz
Center.XReport the loss immediately to the vehicle insurers.XIf necessary, have the locks changed as well.You have lost the
mechanical key.XReport the loss immediately to the vehicle insurers.XIf necessary, have the locks changed as well.78SmartKeyOpening/closing
Page 81 of 356
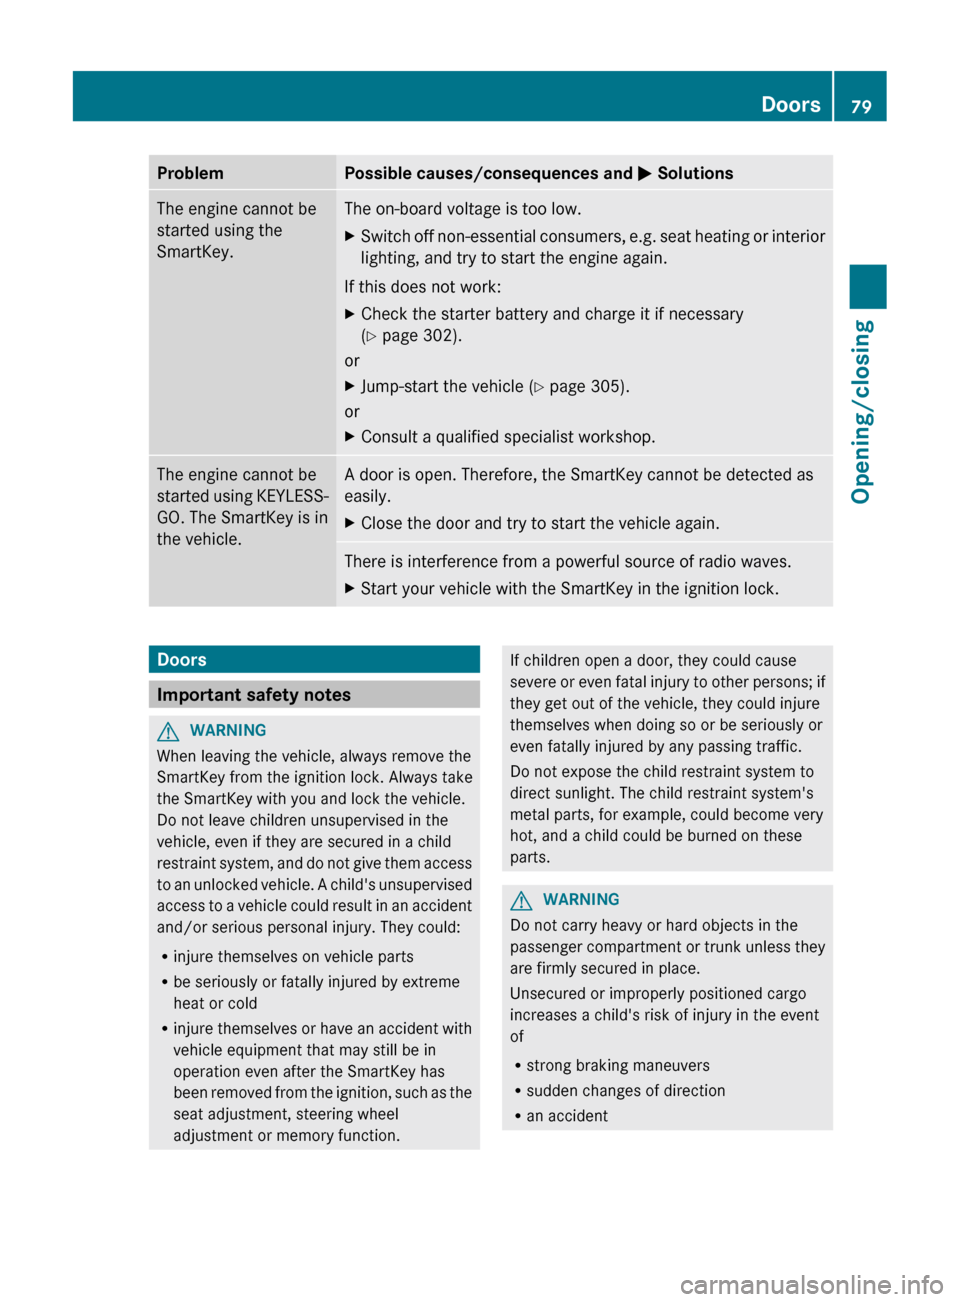
ProblemPossible causes/consequences and M SolutionsThe engine cannot be
started using the
SmartKey.The on-board voltage is too low.XSwitch off non-essential consumers, e.g. seat heating or interior
lighting, and try to start the engine again.
If this does not work:
XCheck the starter battery and charge it if necessary
( Y page 302).
or
XJump-start the vehicle ( Y page 305).
or
XConsult a qualified specialist workshop.The engine cannot be
started using KEYLESS-
GO. The SmartKey is in
the vehicle.A door is open. Therefore, the SmartKey cannot be detected as
easily.XClose the door and try to start the vehicle again.There is interference from a powerful source of radio waves.XStart your vehicle with the SmartKey in the ignition lock.Doors
Important safety notes
GWARNING
When leaving the vehicle, always remove the
SmartKey from the ignition lock. Always take
the SmartKey with you and lock the vehicle.
Do not leave children unsupervised in the
vehicle, even if they are secured in a child
restraint system, and do not give them access
to an unlocked vehicle. A child's unsupervised
access to a vehicle could result in an accident
and/or serious personal injury. They could:
R injure themselves on vehicle parts
R be seriously or fatally injured by extreme
heat or cold
R injure themselves or have an accident with
vehicle equipment that may still be in
operation even after the SmartKey has
been removed from the ignition, such as the
seat adjustment, steering wheel
adjustment or memory function.
If children open a door, they could cause
severe or even fatal injury to other persons; if
they get out of the vehicle, they could injure
themselves when doing so or be seriously or
even fatally injured by any passing traffic.
Do not expose the child restraint system to
direct sunlight. The child restraint system's
metal parts, for example, could become very
hot, and a child could be burned on these
parts.GWARNING
Do not carry heavy or hard objects in the
passenger compartment or trunk unless they
are firmly secured in place.
Unsecured or improperly positioned cargo
increases a child's risk of injury in the event
of
R strong braking maneuvers
R sudden changes of direction
R an accident
Doors79Opening/closingZ
Page 92 of 356
XMake sure that the sliding sunroof can be
fully opened and closed again (Y page 89).XIf this is not the case, repeat the steps
above again.
! If the sliding sunroof still cannot be
opened or closed fully after resetting,
contact a qualified specialist workshop.
Problems with the sliding sunroof
Problem: the sunroof cannot be closed
and you cannot see the cause.
GWARNING
You could be severely or even fatally injured
when closing the sliding sunroof with
increased closing force or if the anti-
entrapment feature is deactivated. Make sure
that nobody can become trapped when
closing the sliding sunroof.
If the sliding sunroof is obstructed during
closing and reopens again slightly:
XImmediately after the sliding sunroof
blocks, pull the 3 switch in the
overhead control panel down to the point
of resistance and hold it until the sliding
sunroof is closed.
The sliding sunroof is closed with increased
force.
If the sliding sunroof is obstructed again
during closing and reopens again slightly:
XImmediately after the sliding sunroof
blocks, pull the 3 switch in the
overhead control panel down to the point
of resistance and hold it until the sliding
sunroof is closed.
The sliding sunroof is closed without the
anti-entrapment feature.GWARNING
Pressing and holding the sliding sunroof
switch to close the sliding sunroof
immediately after it had been blocked two
times will cause the sliding sunroof to close
without the anti-entrapment feature for as
long as you hold the switch.
! If the sliding sunroof still cannot be
opened or closed due to a malfunction,
contact a qualified specialist workshop,
e.g. an authorized Mercedes-Benz Center.90Sliding sunroofOpening/closing
Page 94 of 356
Useful information
i This Operator's Manual describes all
models and all standard and optional
equipment of your vehicle available at the
time of publication of the Operator's
Manual. Country-specific differences are
possible. Please note that your vehicle may
not be equipped with all features
described. This also applies to safety-
related systems and functions.
i Please read the information on qualified
specialist workshops ( Y page 22).
Correct driver's seat position
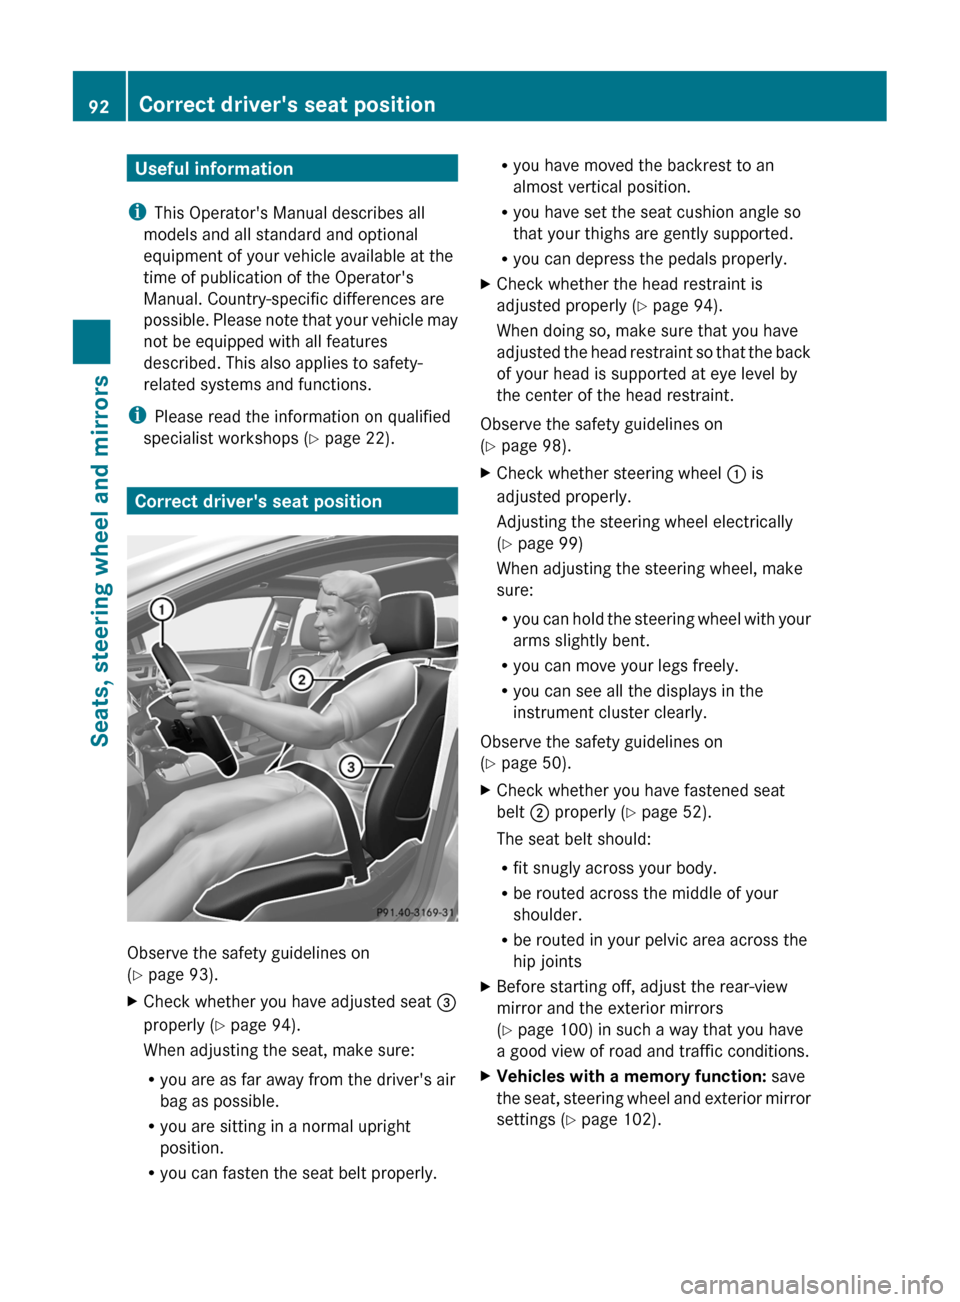
Observe the safety guidelines on
( Y page 93).
XCheck whether you have adjusted seat =
properly ( Y page 94).
When adjusting the seat, make sure:
R you are as far away from the driver's air
bag as possible.
R you are sitting in a normal upright
position.
R you can fasten the seat belt properly.Ryou have moved the backrest to an
almost vertical position.
R you have set the seat cushion angle so
that your thighs are gently supported.
R you can depress the pedals properly.XCheck whether the head restraint is
adjusted properly ( Y page 94).
When doing so, make sure that you have
adjusted the head restraint so that the back
of your head is supported at eye level by
the center of the head restraint.
Observe the safety guidelines on
( Y page 98).
XCheck whether steering wheel : is
adjusted properly.
Adjusting the steering wheel electrically
( Y page 99)
When adjusting the steering wheel, make
sure:
R you can hold the steering wheel with your
arms slightly bent.
R you can move your legs freely.
R you can see all the displays in the
instrument cluster clearly.
Observe the safety guidelines on
( Y page 50).
XCheck whether you have fastened seat
belt ; properly ( Y page 52).
The seat belt should:
R fit snugly across your body.
R be routed across the middle of your
shoulder.
R be routed in your pelvic area across the
hip jointsXBefore starting off, adjust the rear-view
mirror and the exterior mirrors
( Y page 100) in such a way that you have
a good view of road and traffic conditions.XVehicles with a memory function: save
the seat, steering wheel and exterior mirror
settings ( Y page 102).92Correct driver's seat positionSeats, steering wheel and mirrors
Page 108 of 356
Useful information
i This Operator's Manual describes all
models and all standard and optional
equipment of your vehicle available at the
time of publication of the Operator's
Manual. Country-specific differences are
possible. Please note that your vehicle may
not be equipped with all features
described. This also applies to safety-
related systems and functions.
i Please read the information on qualified
specialist workshops ( Y page 22).
Exterior lighting
Important safety notes
For reasons of safety, Mercedes-Benz
recommends that you drive with the lights
switched on even during the daytime. In some
countries, operation of the headlamps varies
due to legal requirements and self-imposed
obligations.
Information about driving abroad
Converting to symmetrical low beam
when driving abroad: switch the headlamps
to symmetrical low beam in countries in
which traffic drives on the opposite side of the
road to the country where the vehicle is
registered. This prevents glare to oncoming
traffic. Symmetrical lights do not illuminate
as large an area of the edge of the road.
Have the headlamps converted at a qualified
specialist workshop, e.g. an authorized
Mercedes-Benz Center, as close to the border
as possible before driving in these countries.
Converting to asymmetrical low beam
after returning: have the headlamps
converted back to asymmetrical low beam at
a qualified specialist workshop, e.g. an
authorized Mercedes-Benz Center, as soon as
possible after crossing the border again.
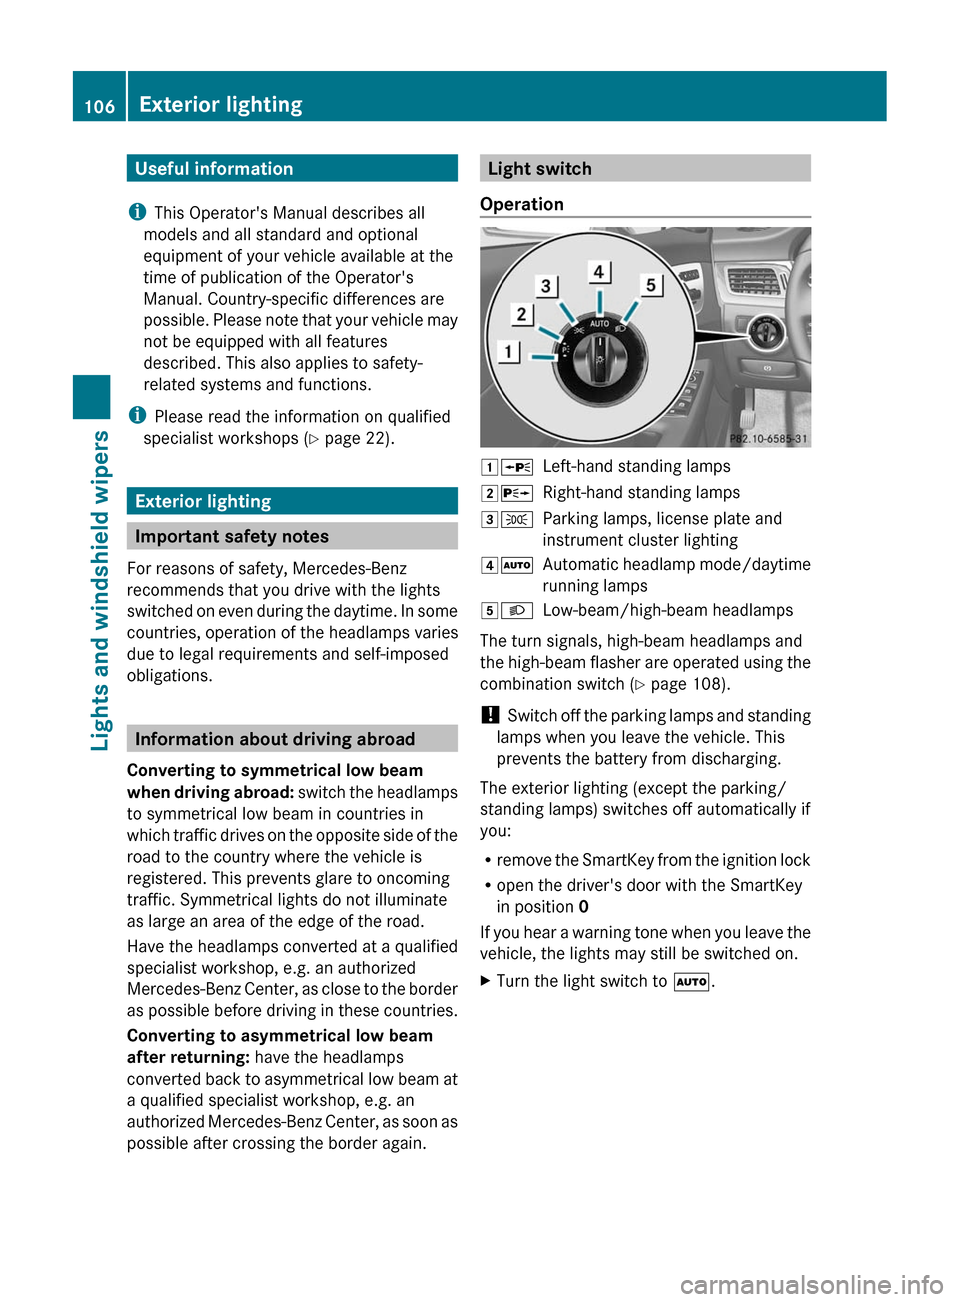
Light switch
Operation1 WLeft-hand standing lamps2XRight-hand standing lamps3TParking lamps, license plate and
instrument cluster lighting4 ÃAutomatic headlamp mode/daytime
running lamps5 LLow-beam/high-beam headlamps
The turn signals, high-beam headlamps and
the high-beam flasher are operated using the
combination switch ( Y page 108).
! Switch off the parking lamps and standing
lamps when you leave the vehicle. This
prevents the battery from discharging.
The exterior lighting (except the parking/
standing lamps) switches off automatically if
you:
R remove the SmartKey from the ignition lock
R open the driver's door with the SmartKey
in position 0
If you hear a warning tone when you leave the
vehicle, the lights may still be switched on.
XTurn the light switch to Ã.106Exterior lightingLights and windshield wipers
Page 112 of 356
If you are driving faster than approximately
28 mph (45 km/h):
the headlamp range is set automatically
depending on the distance between the
vehicle and other road users.
If you are driving faster than approximately
35 mph (55 km/h) and no other road users
are identified:
the high-beam headlamps are switched on
automatically. The K indicator lamp in
the instrument cluster also lights up.
If you are driving slower than approximately
30 mph (45 km/h), or other road users are
identified, or the roads are sufficiently
illuminated:
the high-beam headlamps are switched off
automatically. The K indicator lamp in
the instrument cluster goes out. The _
indicator lamp in the instrument cluster
stays on.XTo deactivate: move the combination
switch back to its normal position.
The _ indicator lamp in the instrument
cluster goes out.GWARNING
The Adaptive Highbeam Assist is only an aid
intended to support you while driving. The
driver is and remains responsible for proper
vehicle lighting in accordance with the
prevailing light, sight and traffic conditions.
The system may be impaired or unavailable
when
R visibility is poor, e.g. due to snow, rain, fog,
or heavy spray
R the optical sensor area of the windshield is
dirty, fogged up, or covered by a sticker for
example
The system cannot recognize the following
road users:
R Road users without a lighting system of
their own, e.g. pedestrians
R Road users with dim lighting of their own,
e.g. cyclists
R Road users whose lighting is obstructed,
e.g. road users behind a guardrail
R In some seldom cases, even road users with
a lighting system of their own may be
recognized too late or not at all.
The automatic high-beam headlamps will then
not be deactivated or it will be activated in
spite of preceding or oncoming road users.
This could endanger you and/or others and
cause an accident. Always pay close attention
to the traffic situation and switch off the high
beam manually if necessary.
Headlamps fogged up on the inside
The headlamps may fog up on the inside if
there is high atmospheric humidity.
XDrive with the headlamps switched on.
The level of moisture diminishes,
depending on the length of the journey and
the weather conditions (humidity and
temperature).
If the level of moisture does not diminish:
XHave the headlamps checked at a qualified
specialist workshop.110Exterior lightingLights and windshield wipers
Page 114 of 356
XTo switch off the crash-responsive
emergency lighting: press the hazard
warning lamp button.
or
XLock and then unlock the vehicle using the
key.
Replacing bulbs
Important safety notes
Xenon bulbs
GWARNING
Xenon bulbs carry a high voltage. You could
get an electric shock and be seriously or even
fatally injured if you touch the electric
contacts on Xenon bulbs. Therefore, never
remove the cover from Xenon bulbs.
Do not change Xenon bulbs yourself, but have
them replaced at a qualified specialist
workshop which has the necessary specialist
knowledge and tools to carry out the work
required.
Mercedes-Benz recommends that you use an
authorized Mercedes-Benz Center for this
purpose. In particular, work relevant to safety
or on safety-related systems must be carried
out at a qualified specialist workshop.
Bulbs and lamps are an important aspect of
vehicle safety. You must therefore make sure
that these function correctly at all times.
Have the headlamp setting checked regularly.
LED lamps
You can neither replace Xenon bulbs nor LED
bulbs. Have LED bulbs changed at a qualified
specialist workshop.
Mercedes-Benz recommends that you use an
authorized Mercedes-Benz Center for this
purpose. In particular, work relevant to safety
or on safety-related systems must be carried
out at a qualified specialist workshop.
Bulbs and lamps are an important aspect of
vehicle safety. You must therefore make sure
that these function correctly at all times.
Have the headlamp setting checked regularly.
Other bulbsGWARNING
Bulbs and lamps can be very hot. You should
therefore allow them to cool down before you
change them. Otherwise, you could be burned
if you touch them.
Keep bulbs out of the reach of children.
Otherwise, they could damage the bulbs, for
example, and injure themselves.
Never use a bulb which has been dropped.
Such a bulb may break or even explode and
injure you.
Halogen bulbs are pressurized and can
explode when you change them, particularly
if they are very hot. You should therefore wear
eye protection and gloves when you are
changing them.
There are bulbs other than Xenon and LED
bulbs that you cannot replace. Replace only
the bulbs listed (Y page 113). Have the bulbs
that you cannot replace yourself changed at
a qualified specialist workshop.
Mercedes-Benz recommends that you use an
authorized Mercedes-Benz Center for this
purpose. In particular, work relevant to safety
or on safety-related systems must be carried
out at a qualified specialist workshop.
If you require assistance changing bulbs,
consult a qualified specialist workshop.
Do not touch the glass tube of new bulbs with
your bare hands. Even minor contamination
can burn into the glass surface and reduce
the service life of the bulbs. Always use a lint-
free cloth or only touch the base of the bulb
when installing.
Only use bulbs of the correct type.
If the new bulb still does not light up, consult
a qualified specialist workshop.
Bulbs and lamps are an important aspect of
vehicle safety. You must therefore make sure
112Replacing bulbsLights and windshield wipers
Page 117 of 356
Make sure that the wiper blade slides fully
into the retainer on the wiper arm.XTurn the wiper blade parallel to the wiper
arm.XFold the wiper arm back onto the
windshield.
Problems with the windshield wipers
The windshield wipers are obstructed
Leaves or snow, for example, may be
obstructing the windshield wiper movement.
The wiper motor has been deactivated.
XFor safety reasons, you should remove the
SmartKey from the ignition lock.
or
XSwitch off the engine using the Start/Stop
button and open the driver's door.XRemove the cause of the obstruction.XSwitch the windshield wipers back on.
The windshield wipers are inoperative
The windshield wiper drive is malfunctioning.
XSelect another wiper speed on the
combination switch.XHave the windshield wipers checked at a
qualified specialist workshop.
The spray nozzles are misaligned
The windshield washer fluid from the spray
nozzles no longer hits the center of the
windshield. The spray nozzles are misaligned.
XHave the spray nozzles adjusted at a
qualified specialist workshop.Windshield wipers115Lights and windshield wipersZ
Page 120 of 356
Useful information
i This Operator's Manual describes all
models and all standard and optional
equipment of your vehicle available at the
time of publication of the Operator's
Manual. Country-specific differences are
possible. Please note that your vehicle may
not be equipped with all features
described. This also applies to safety-
related systems and functions.
i Please read the information on qualified
specialist workshops ( Y page 22).
Overview of climate control systems
Important safety notes
GWARNING
Severe conditions (e.g. strong air pollution)
may require replacement of the filter before
its scheduled replacement interval. A clogged
filter will reduce the air volume to the interior
and the windows could fog up, impairing
visibility and endangering you and others.
Have a blocked filter replaced at a Mercedes-
Benz Center as soon as possible.
GWARNING
Follow the recommended settings for heating
and cooling given on the following pages.
Otherwise, the windows could fog up,
impairing visibility and endangering you and
others.
The automatic climate control/automatic
climate control controls the temperature and
the humidity of the vehicle interior and filters
out undesirable substances from the air.
The automatic climate control is only
operational when the engine is running. 10
Optimum operation is only achieved if you
drive with the side windows and sliding
sunroof/panorama roof with power tilt/
sliding panel closed.
i Ventilate the vehicle for a brief period
during warm weather, e.g. using the
convenience opening feature ( Y page 87).
This will speed up the cooling process and
the desired vehicle interior temperature
will be reached more quickly.
i The integrated filter can filter out most
particles of dust and completely filters out
pollen. A clogged filter reduces the amount
of air supplied to the vehicle interior. For
this reason, you should always observe the
interval for replacing the filter, which is
specified in the Service Booklet. As it
depends on environmental conditions, e.g.
heavy air pollution, the interval may be
shorter than stated in the Service Booklet.10 The residual heat function can only be activated/deactivated when the ignition is switched off.118Overview of climate control systemsClimate control
Page 125 of 356
iThe cooling with air dehumidification
function uses refrigerant R134a. This
coolant does not contain
chlorofluorocarbons, and therefore does
not damage the ozone layer.
Activating/deactivatingXTo activate: press the ¿ button.
The indicator lamp in the ¿ button lights
up.XTo switch off: press the ¿ button.
The indicator lamp in the ¿ button goes
out. The cooling with air dehumidification
function has a delayed switch-off feature.
Problems with the cooling with air
dehumidification function
When you press the ¿ button, the
indicator lamp in the button flashes three
times or remains off. You can no longer switch
on the cooling with air dehumidification
function.
XConsult a qualified specialist workshop.
Setting climate control to automatic
GWARNING
If you switch off the cooling function, the
vehicle will not be cooled when weather
conditions are warm. The windows can fog up
more quickly. Window fogging may impair
visibility and endanger you and others.
In automatic mode, the set temperature is
maintained automatically at a constant level.
The system automatically regulates the
temperature of the dispensed air, the airflow
and the air distribution.
Automatic mode will achieve optimal
operation if cooling with air dehumidification
is also activated. If desired, cooling with air
dehumidification can be deactivated.
Adjusting the climate mode settings
(AIR FLOW)
This function is only available with automatic
climate control.
The climate control settings are especially
effective at high temperatures.
You can select the following climate control
settings in automatic mode:FOCUShigh airflow that is set slightly
coolerMEDIUMmedium airflow, standard settingDIFFUSElow airflow that is set slightly
warmer and with a lower rate of
airflowXTurn the SmartKey to position 2 in the
ignition lock.XPress the à button.XPress the ñ button repeatedly until the
desired climate mode appears in the
display.
Setting the temperature
Dual-zone automatic climate control
Different temperatures can be set for the
driver's and front-passenger sides.
XTurn the SmartKey to position 2 in the
ignition lock.XTo increase/reduce: turn controls : and
B clockwise or counter-clockwise
( Y page 119).
Only change the temperature setting in
small increments. Start at 72 ‡ (22 † ).Operating the climate control system123Climate controlZ