MERCEDES-BENZ E-CLASS CABRIOLET 2017 Owners Manual
Manufacturer: MERCEDES-BENZ, Model Year: 2017, Model line: E-CLASS CABRIOLET, Model: MERCEDES-BENZ E-CLASS CABRIOLET 2017Pages: 521, PDF Size: 10.64 MB
Page 231 of 521
#
Toscroll in the menu bar: swipetothe left
or right on the left-hand Touch Control. #
Tocall up the menu or confirm the selec‐
tion: press the left-hand Touch Control. #
Toscroll through displa ysor lists in the
menu: swipe upwards or down wards on the
left-hand Touch Control. #
Tocall up the submenu or confirm the
selection: pressthe left-hand Touch Control. #
Toexitth e submenu: pressthe back button
on the left.
If yo u are br owsing a submenu and you press
and hold the back button on the left, the menu
bar appears. Displa
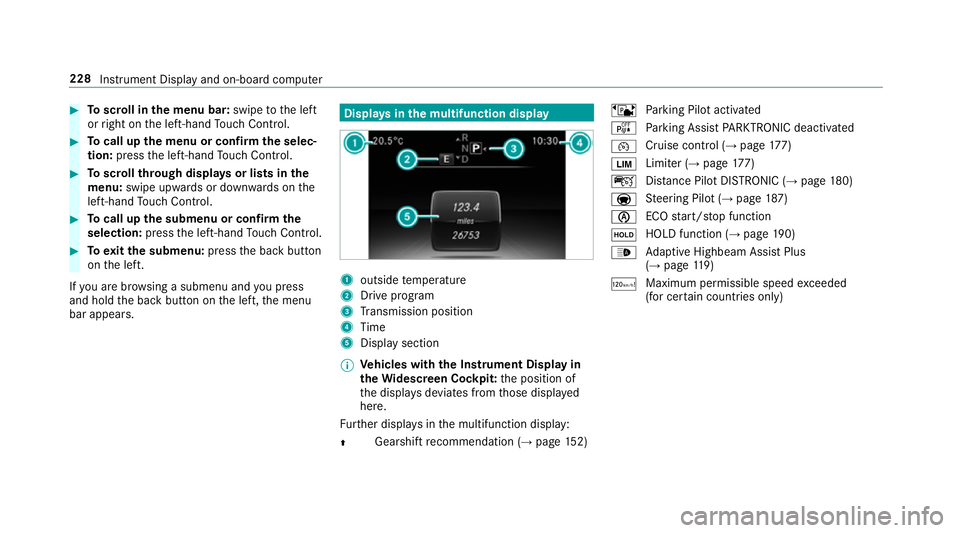
ysinthe multifunction display 1
outside temp erature
2 Drive prog ram
3 Transmission position
4 Time
5 Display section
% Ve
hicles with the Instrument Display in
th eWi descreen Co ckpit: the position of
th e displa ysdeviates from those displa yed
here.
Fu rther displa ysinthe multifunction display:
Z Gearshift
recommendation (→ page 152) ë
Parking Pilot activated
é Parking Assist PARKTRONIC deacti vated
¯ Cruise cont
rol (→ page 177)
È Limi
ter (→ page 177)
ç Distance Pilot DISTRONIC (→ page 180)
a St
eering Pilot (→ page187)
è ECO
start/ stop function
ë HOLD function (→
page190)
_ Ad
aptive Highbeam Assist Plus
(→ page 119)
ð Ma
ximum pe rmissible speed exceeded
(for cer tain countries only) 228
Instrument Display and on-board computer
Page 232 of 521
Ad
justing the in stru ment lighting #
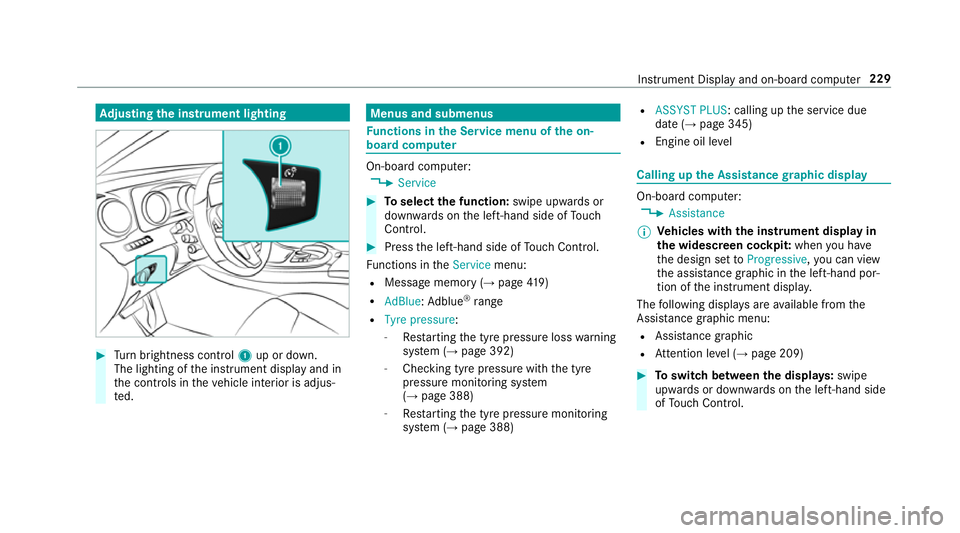
Turn brightness control 1up or down.
The lighting of the instrument display and in
th e controls in theve hicle interior is adjus‐
te d. Menus and submenus
Fu
nctions in the Service menu of the on-
board compu ter On-board computer:
, Service #
Toselect the function: swipe upwards or
down wards on the left-hand side of Touch
Control. #
Press the left-hand side of Touch Control.
Fu nctions in theService menu:
R Message memory (→ page419)
R AdBlue: Adblue ®
ra nge
R Tyre pressure:
-Restarting the tyre pressure loss warning
sy stem (→ page 392)
- Checking tyre pressure with the tyre
pressure monitoring sy stem
(→ page 388)
- Restarting the tyre pressure monitoring
sy stem (→ page 388) R
ASSYST PLUS: calling up the service due
date (→ page 345)
R Engine oil le vel Calling up
the Assistance graphic display On-board computer:
, Assistance
% Ve
hicles with the instrument display in
th e widescreen cockpit: whenyou ha ve
th e design set toProgressive ,yo u can view
th e assis tance graphic in the left-hand por‐
tion of the instrument displa y.
The following displa ysare available from the
Assi stance graphic menu:
R Assis tance graphic
R Attention le vel (→ page 209) #
Toswitch between the displa ys:swipe
up wa rds or down wards on the left-hand side
of Touch Control. In
stru ment Display and on-board computer 229
Page 233 of 521
St
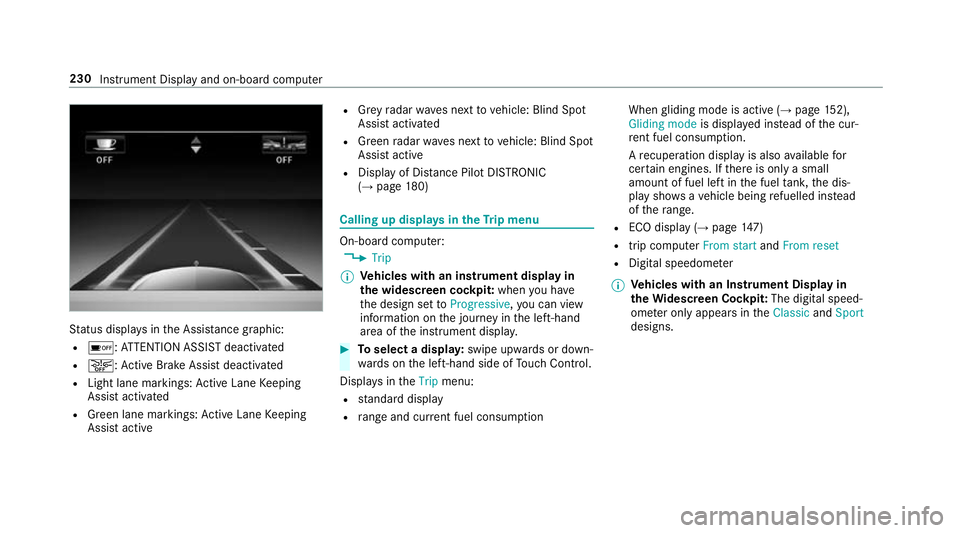
atus displa ysinthe Assis tance graphic:
R é: ATTENTION ASSIST deactivated
R æ: Active Brake Assi stdeactivated
R Light lane markings: Active Lane Keeping
Assist activated
R Green lane markings: Active Lane Keeping
Assist active R
Grey radar waves next tovehicle: Blind Spot
Assist activated
R Green radar waves next tovehicle: Blind Spot
Assist active
R Display of Dis tance Pilot DISTRONIC
(→ page 180) Calling up
displays in theTr ip menu On-board computer:
, Trip
% Ve
hicles with an instrument display in
th e widescreen cockpit: whenyou ha ve
th e design set toProgressive ,yo u can view
information on the journey in the left-hand
area of the instrument displa y. #
Toselect a displa y:swipe upwards or down‐
wa rds on the left-hand side of Touch Control.
Displa ysintheTrip menu:
R standard display
R range and cur rent fuel consu mption When
gliding mode is active (→ page152),
Gliding mode is displayed ins tead of the cur‐
re nt fuel consu mption.
A recuperation displ ayis also available for
cer tain engines. If there is only a small
amount of fuel left in the fuel tank, the dis‐
play sho wsave hicle being refuelled ins tead
of thera nge.
R ECO displ ay (→page 147)
R trip computer From startandFrom reset
R Digital speedome ter
% Ve
hicles with an Instrument Display in
th eWi descreen Co ckpit: The digital speed‐
ome ter only appears in theClassic andSport
designs. 230
Instrument Display and on-board computer
Page 234 of 521
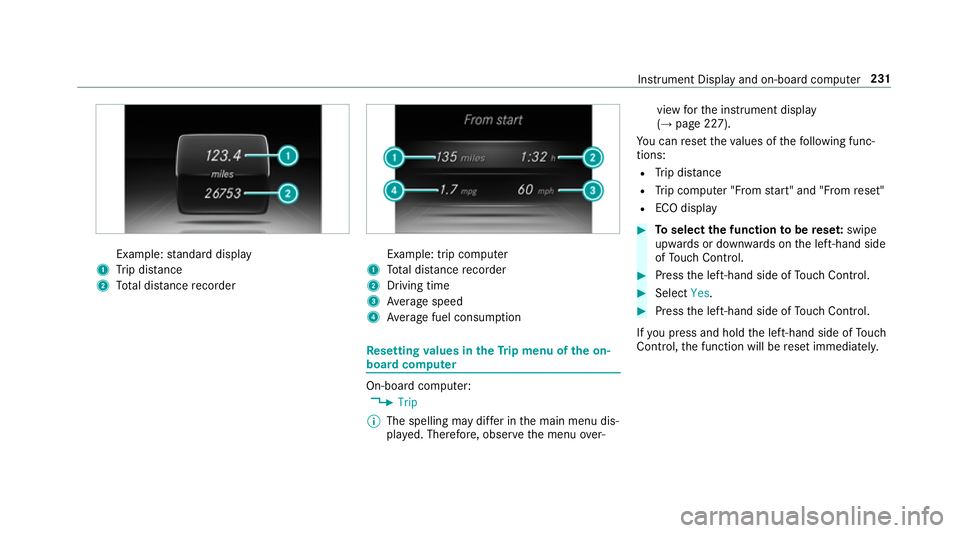
Example:
standard display
1 Trip dis tance
2 Total dis tance recorder Example: trip compu
ter
1 Total dis tance recorder
2 Driving time
3 Average speed
4 Average fuel consum ption Re
setting values in theTr ip menu of the on-
board compu ter On-board computer:
, Trip
% The spelling may dif fer in the main menu dis‐
pla yed. Therefore, obser vethe menu over‐ view
forth e instrument display
(→ page 227).
Yo u can reset theva lues of thefo llowing func‐
tions:
R Trip dis tance
R Trip computer "F rom start" and "F rom reset"
R ECO display #
Toselect the function tobe rese t:swipe
upwards or down wards on the left-hand side
of Touch Control. #
Press the left-hand side of Touch Control. #
Select Yes. #
Press the left-hand side of Touch Control.
If yo u press and hold the left-hand side of Touch
Control, the function will be reset immediately. Instrument Display and on-board computer
231
Page 235 of 521
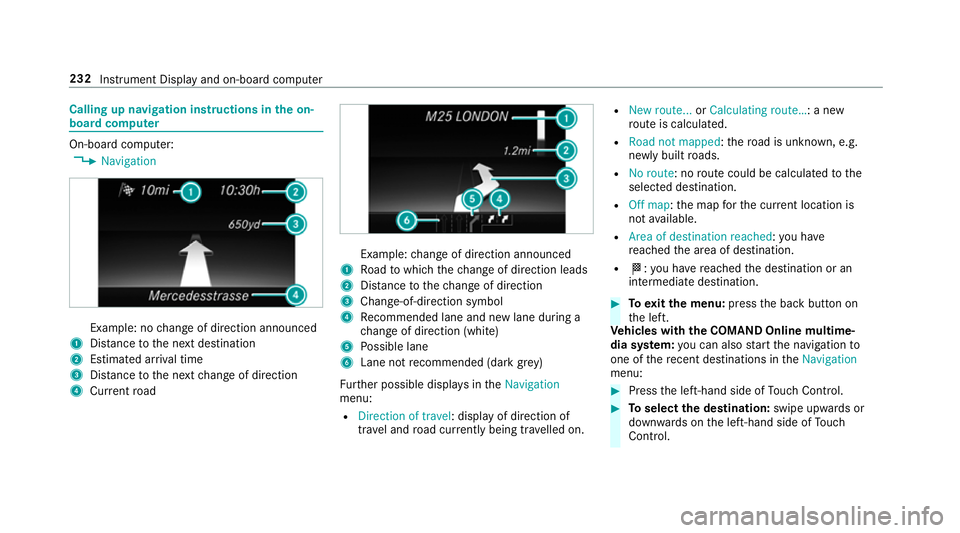
Calling up navigation instructions in
the on-
board compu terOn-board computer:
, Navigation Example: no
change of direction announced
1 Distance tothe next destination
2 Estimated ar riva l time
3 Distance tothe next change of direction
4 Current road Example:
change of direction announced
1 Road towhich thech ange of direction leads
2 Distance tothech ange of direction
3 Chan ge-of-direction symbol
4 Recommended lane and new lane du ring a
ch ange of direction (white)
5 Possible lane
6 Lane not recommended (da rkgrey)
Fu rther possible displa ysintheNavigation
menu:
R Direction of travel: display of direction of
tra vel and road cur rently being tr avelled on. R
New route... orCalculating route… : a new
ro ute is calculated.
R Road not mapped :th ero ad is unknown, e.g.
newly built roads.
R No route: no route could be calculated tothe
selected destination.
R Off map: the map forth e cur rent location is
not available.
R Area of destination reached :yo u ha ve
re ached the area of destination.
R O: you ha vereached the destination or an
intermediate destination. #
Toexitth e menu: pressthe back button on
th e left.
Ve hicles with the COMAND Online multime‐
dia sy stem: you can also start the navigation to
one of there cent destinations in theNavigation
menu: #
Press the left-hand side of Touch Control. #
Toselect the destination: swipe upwards or
down wards on the left-hand side of Touch
Control. 232
Instru ment Display and on-board computer
Page 236 of 521
#
Press the left-hand side of Touch Control.
Ro ute guidance is star ted.
If ro ute guidance has already been activated,
a re qu est will appear asking whe ther you
wish toend the cur rent route guidance. #
Select Yes. #
Press the left-hand side of Touch Control.
Ro ute guidance is star ted. Selecting
radio stations using the on-boa rd
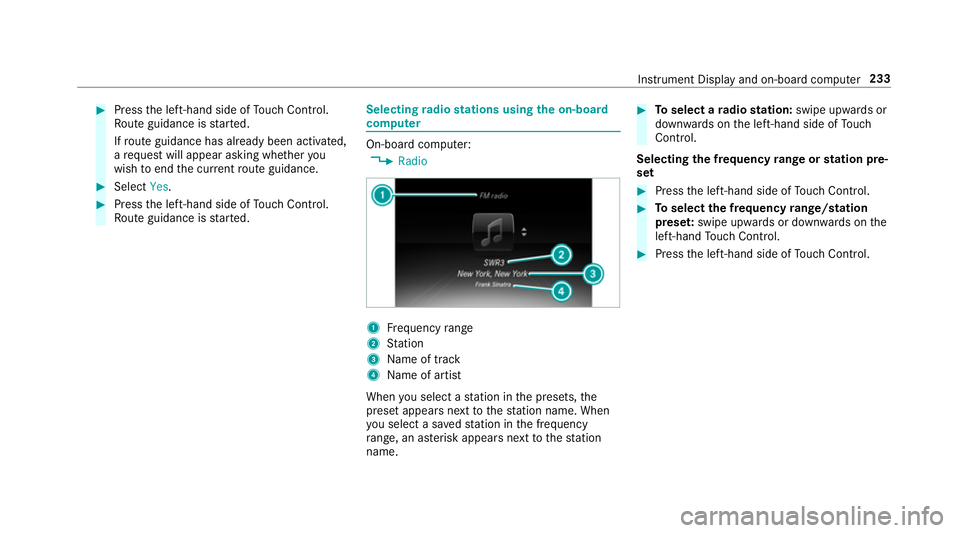
compu ter On-board computer:
, Radio 1
Frequency range
2 Station
3 Name of track
4 Name of artist
When you select a station in the presets, the
preset appears next tothest ation name. When
yo u select a sa vedstation in the frequency
ra nge, an as terisk appears nexttothest ation
name. #
Toselect a radio station: swipe upwards or
down wards on the left-hand side of Touch
Control.
Selecting the frequency range or station pre‐
set #
Press the left-hand side of Touch Control. #
Toselect the frequency range/station
prese t:swipe upwards or down wards on the
left-hand Touch Control. #
Press the left-hand side of Touch Control. In
stru ment Display and on-board computer 233
Page 237 of 521
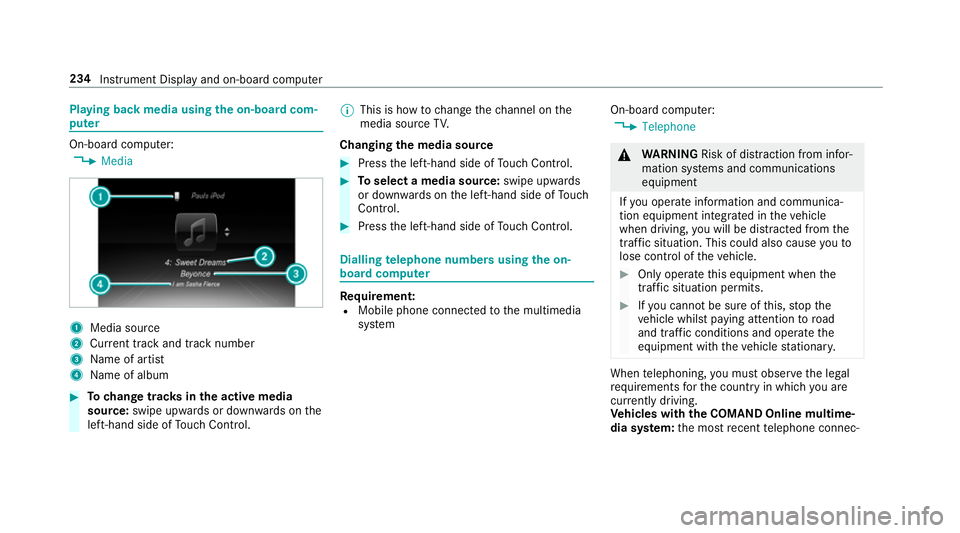
Playing back media using
the on-boa rdcom‐
pu ter On-board computer:
, Media 1
Media source
2 Current track and track number
3 Name of artist
4 Name of album #
Tochange trac ksinthe active media
source: swipe upwards or down wards on the
left-hand side of Touch Control. %
This is how tochange thech annel on the
media source TV.
Changing the media source #
Press the left-hand side of Touch Control. #
Toselect a media source: swipe upwards
or down wards on the left-hand side of Touch
Control. #
Press the left-hand side of Touch Control. Dialling
telephone numbers using the on-
board compu ter Re
quirement:
R Mobile phone connec tedto the multimedia
sy stem On-board computer:
, Telephone &
WARNING Risk of di stra ction from infor‐
mation sy stems and communications
equipment
If yo u operate information and communica‐
tion equipment integrated in theve hicle
when driving, you will be distracted from the
traf fic situation. This could also cause youto
lose control of theve hicle. #
Only operate this equipment when the
traf fic situation permits. #
Ifyo u cannot be sure of this, stop the
ve hicle whilst paying attention toroad
and traf fic conditions and ope rate the
equipment with theve hicle stationar y. When
telephoning, you must obse rveth e legal
re qu irements forth e count ryin which you are
cur rently driving.
Ve hicles with the COMAND Online multime‐
dia sy stem: the most recent telephone connec‐ 234
Instrument Display and on-board computer
Page 238 of 521
tions (dialled,
recei ved and missed calls) are dis‐
pla yed in theTelephone menu. #
Toselect thete lephone number: swipe
upwards or down wards on the left-hand side
of Touch Control. #
Press the left-hand side of Touch Control.
If th ere is only one telephone number
sa ve dto an entr y:thete lephone number is
selec ted. #
Ifth ere are multiple telephone numbers
sa ve dto an entr y:swipe upwards or down‐
wa rds on the left-hand side of Touch Control
to select the desired telephone numbe r. #
Press the left-hand side of Touch Control.
The telephone number is dialled.
The following displa ysmay appear ins tead of the
te lephone numbers dialled:
R Please wait... :th e application is starting.
When a Blue tooth®
connection tothe mobile
phone is not es tablished, the menu for
authorising and connecting a mobile phone is
displa yed in the multimedia sy stem
(→ page 290). R
Updating data...: the call list is being upda‐
te d.
R Importing contacts... :th e conta cts from the
mobile phone or from a storage medium are
being impor ted.
Ac cepting/rejecting a call
When youre cei vea call, a message appears in
th e Head-up-Display Incoming call. #
Swipe upwards or down wards on the left-
hand side of Touch Control and select 6
(Accept) or ~(Reject). #
Press the left-hand side of Touch Control.
The call may be accep ted/rejec ted using the
6 or~ buttons on thesteering wheel. Setting display content
On-board computer:
, Content
The following display content can be selec‐
te d in the ClassicandSport designs:
R Revs: rev counter R
Power meter: po wer me ter
R Navigation
R ECO display
R Consumption #
Toselect display content: swipe upwards
or down wards on the left-hand side of Touch
Control. #
Press the left-hand side of Touch Control.
The selected displ aycontent appea rson the
ri ght-hand side of the Instrument Displa y.
% This function is only available forve hicles
with a Widescreen Cockpit.
The following display content can be selec‐
te d in the Progressive design:
R Right display : selects content forth eright-
hand display content
R Assist. graphic
R Power meter: po wer me ter
R Date
R Navigation
R ECO display Instrument Displ
ayand on-board computer 235
Page 239 of 521
R
Consumption #
Toselect display content: swipe upwards
or down wards on the left-hand side of Touch
Control. #
Press the left-hand side of Touch Control.
The selected displ aycontent appea rson the
left-hand side of the Instrument Displa y.#
Toselect theright-hand display content:
select Right display and pressthe left-hand
side of Touch Control. #
Swipe upwards or down wards on the left-
hand side of Touch Control toselect display
content. #
Press the left-hand side of Touch Control.
The selected displ aycontent appea rson the
ri ght-hand side of the Instrument Displa y.
% This function is only available forve hicles
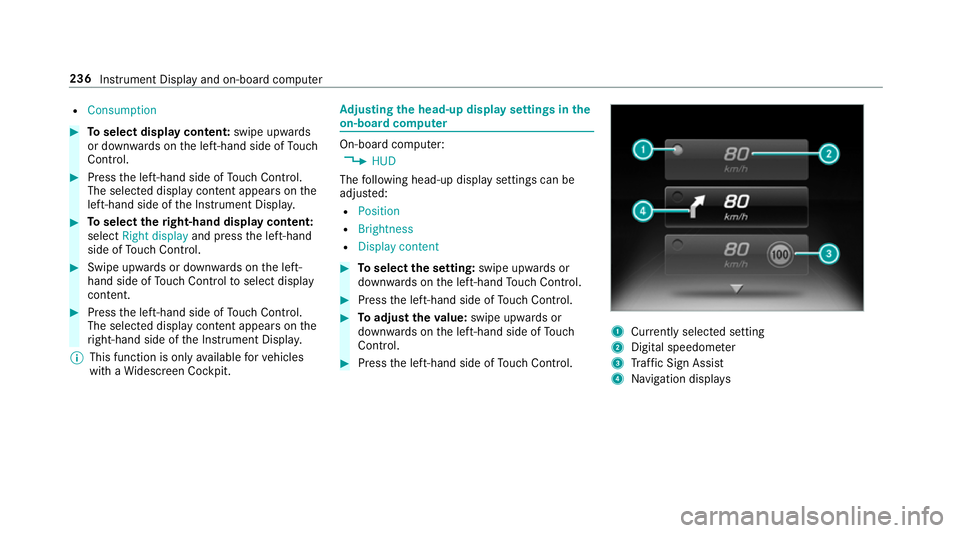
with a Widescreen Cockpit. Ad
justing the head-up display settings in the
on-board co mputer On-board computer:
, HUD
The following head-up display settings can be
adjus ted:
R Position
R Brightness
R Display content #
Toselect the setting: swipe upwards or
down wards on the left-hand Touch Control. #
Press the left-hand side of Touch Control. #
Toadjust theva lue: swipe upwards or
down wards on the left-hand side of Touch
Control. #
Press the left-hand side of Touch Control. 1
Currently selected setting
2 Digital speedome ter
3 Traf fic Sign Assi st
4 Navigation displa ys236
Instrument Display and on-board computer
Page 240 of 521
Setting
the design On-board computer
, Design
% This function is only available forve hicles
with a widescreen cockpit.
The following designs can be selec ted:
R Sport
R Classic
R Progressive #
Toselect a design: swipe upwards or down‐
wa rds on the left-hand Touch Control. #
Press the left-hand Touch Control.
The instrument displ ayis shown in the selec‐
te d design. Head-up Display
Fu
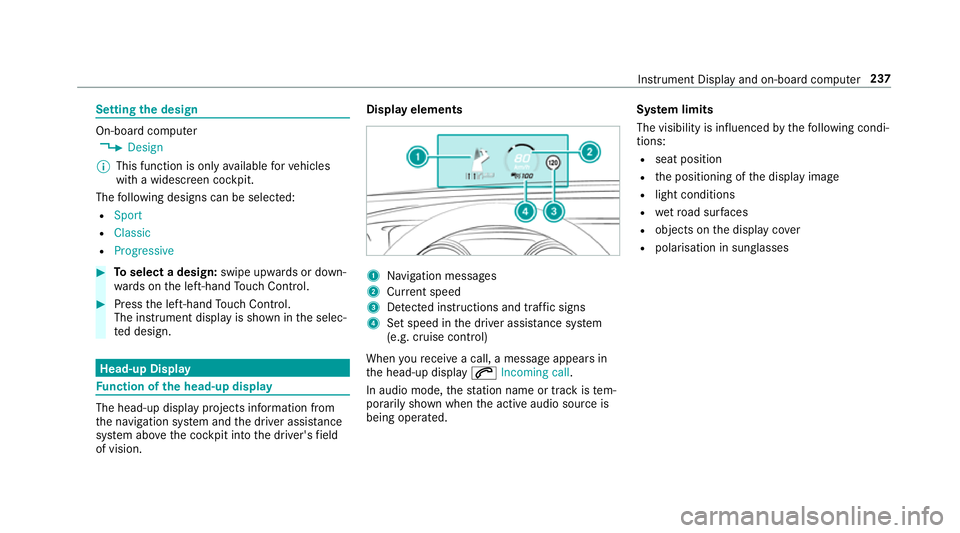
nction of the head-up display The head-up display projects information from
th e navigation sy stem and the driver assis tance
sy stem abo vethe cockpit into the driver's field
of vision. Display elements
1
Navigation messa ges
2 Current speed
3 Detected instructions and traf fic signs
4 Set speed in the driver assis tance sy stem
(e.g. cruise control)
When youre cei vea call, a message appears in
th e head-up display 6Incoming call.
In audio mode, thest ation name or track is tem‐
porarily shown when the active audio source is
being operated. Sy
stem limits
The visibility is influenced bythefo llowing condi‐
tions:
R seat position
R the positioning of the display image
R light conditions
R wetro ad sur faces
R objects on the display co ver
R polarisation in sunglasses Instrument Display and on-board computer
237