MERCEDES-BENZ E-CLASS SALOON 2015 Owners Manual
Manufacturer: MERCEDES-BENZ, Model Year: 2015, Model line: E-CLASS SALOON, Model: MERCEDES-BENZ E-CLASS SALOON 2015Pages: 497, PDF Size: 16.23 MB
Page 291 of 497
Activating/deactivating Steering
Assis tand Stop&Go Pilot X
Press the =or; buttononthesteer-
ing whee ltos elect the Assist.
Assist. menu.
X Using 9or:,s electDTR+:
DTR+: steer.
steer.
asst.
asst.
X Press the abutton.
The curren tselection is displayed.
X To activate/deactivate: press thea
butto nagain.
When Steering Assis tand Stop&Go Pilot
are activated, th emultifunction display
shows the DTR+: steering assistant
DTR+: steering assistant
On
On message.
Further information about DISTRONI CPLUS
wit hS teering Assis tand Stop&Go Pilot
(Y page 226).
Activating/deactivating ATTENTION
ASSIST X
Press the =or; buttononthesteer-
ing whee ltos elect the Assist.
Assist. menu.
X Press the 9or: buttontos elect
Attention Assist
Attention Assist .
X Press the abutton.
The curren tselection is displayed.
X Press ato confirm.
X Press the :or9 buttontos etOff Off ,
Standard
Standard orSensitive
Sensitive .
X Press the abuttontos avet he setting.
When ATTENTION ASSIST is deactivated,
the é symbol appear sinthemultifunc-
tion display in th eassistanc egraphic dis-
play.
Fo rfurther information about ATTENTION
ASSIST ,see (Y page 253).
Activating/deactivating Blind Spot
Assist X
Press the =or; buttononthesteer-
ing whee ltos elect the Assist.
Assist. menu.
X Press the 9or: buttontos elect
Blind Spo tAssist
Blind Spo tAssist . X
Press the abutton.
The curren tselection appears.
X To activate/deactivate: press thea
butto nagain.
Further information about Blind Spot Assist
(Y page 257).
Further information about Active Blind Spot
Assis t(Y page 261).
Activating/deactivating Lan eKeeping
Assist X
Press the =or; buttononthesteer-
ing whee ltos elect the Assist. Assist.menu.
X Press the 9or: buttontos elect
Lan eK eep. Assist
Lan eK eep. Assist .
X Press the abutton.
The curren tselection appears.
X Press ato confirm.
X Press the :or9 buttontos etOff
Off ,
Standard
Standard orAdaptive
Adaptive.
X Press the abuttontos avet he setting.
When Lan eKeepin gAssistorA ctiveLane
Keepin gAssistisa ctivated, th emultifunc-
tion display shows th elan em arking sas
bright lines in th eassistanc egraphic.
Further information about Lan eKeeping
Assis t(Ypage 259).
Further information about Active Lan eKeep-
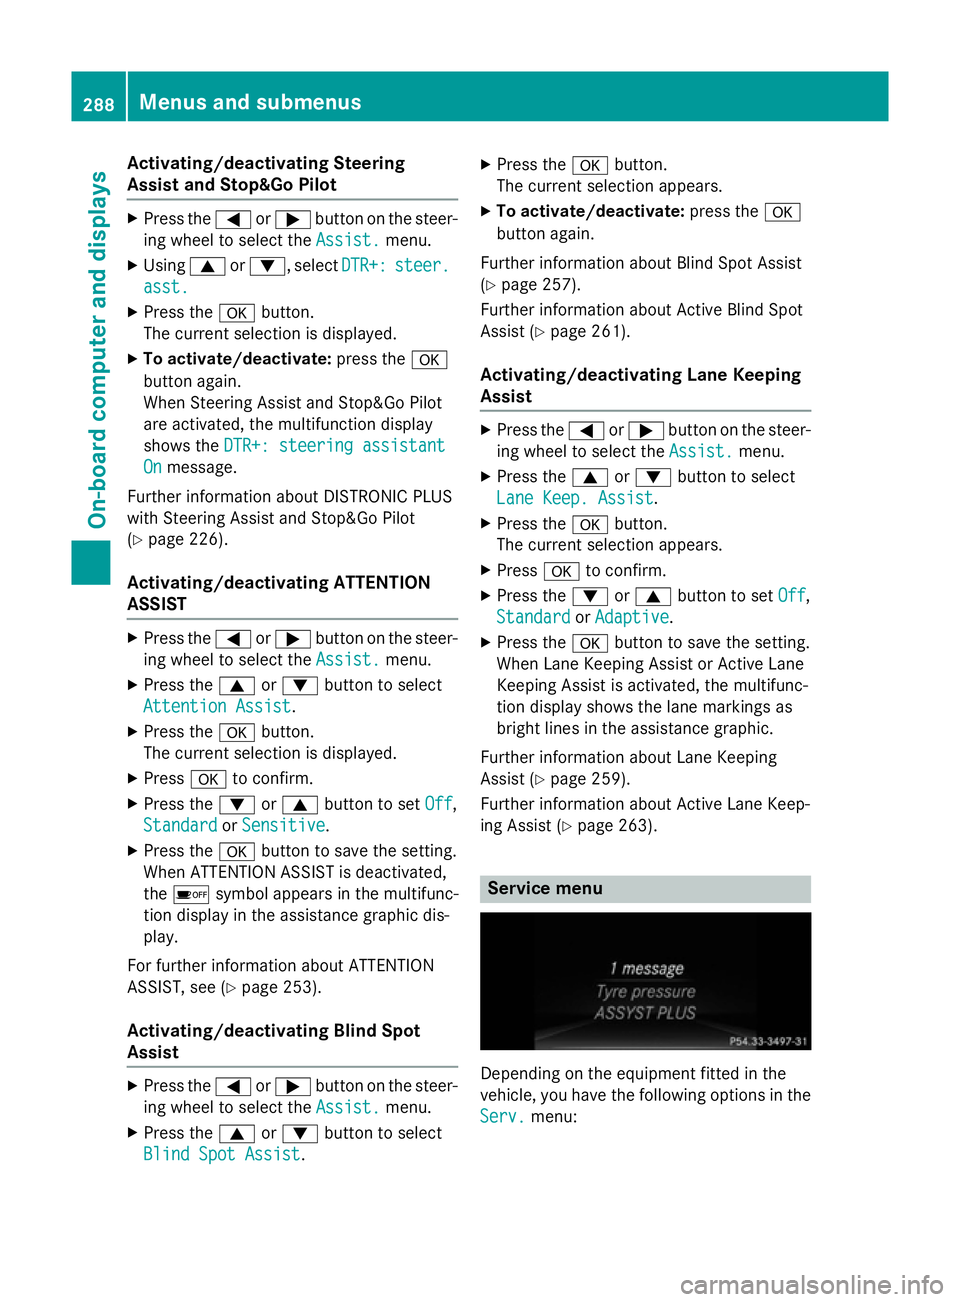
ing Assis t(Y page 263). Service menu
Dependin
gontheequipmen tfitte dint he
vehicle, you hav ethe followin goption sinthe
Serv.
Serv. menu: 288
Menu
sand sub menusOn-boardcomputer an ddisplays
Page 292 of 497
R
Callin gupd isplay message sinthemes-
sage memory (Y page 299)
R Restarting th etyrep ressur eloss warning
system (Y page 422)
R Checkin gthe tyrep ressur eelectronically
(Y page 423)
R Callin gupt heservic edue date
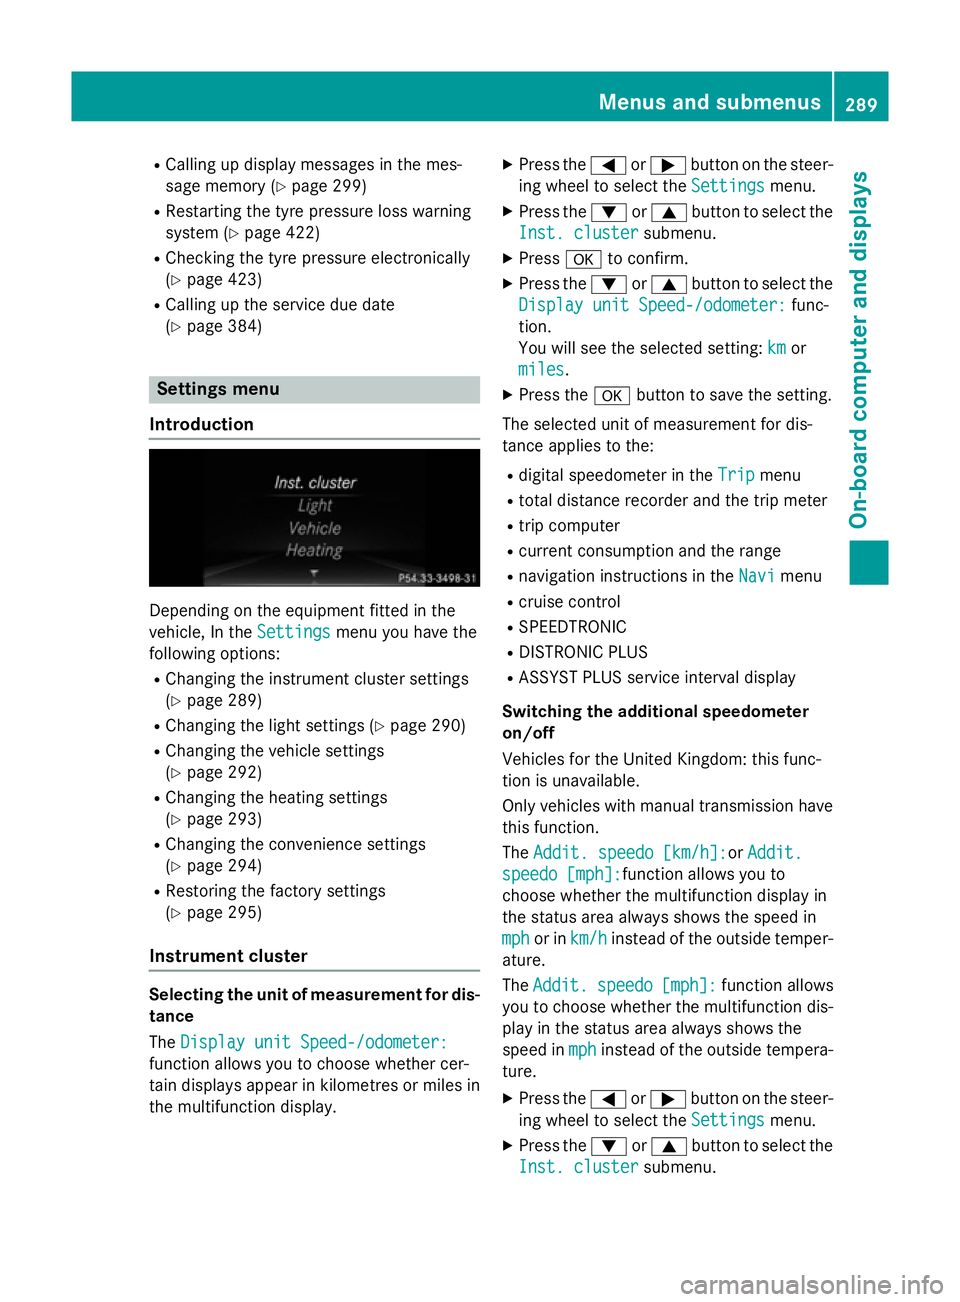
(Y page 384) Settings menu
Introduction Dependin
gontheequipmen tfitte dint he
vehicle ,Int he Settings
Settings menuyou have the
followin goptions:
R Changin gthe instrumen tcluste rsettings
(Y page 289)
R Changin gthe light settings (Y page 290)
R Changin gthe vehicle settings
(Y page 292)
R Changin gthe heating settings
(Y page 293)
R Changin gthe convenience settings
(Y page 294)
R Restoring th efactory settings
(Y page 295)
Instrumen tcluster Selecting th
eunitofm easurement for dis-
tance
The Displa yunitS peed-/odometer:
Displa yunitS peed-/odometer:
function allows you to choos ewhether cer-
tai nd isplays appear in kilometres or mile sin
th em ultifunction display. X
Press the =or; buttononthesteer-
ing wheel to select the Settings Settingsmenu.
X Press the :or9 buttontoselect the
Inst. cluster Inst. cluster submenu.
X Press ato confirm.
X Press the :or9 buttontoselect the
Displa yunitS peed-/odometer:
Displa yunitS peed-/odometer: func-
tion.
You will see th eselected setting: km kmor
miles
miles.
X Press the abuttontos ave th esetting.
The selected unit of measuremen tfor dis-
tance applie stothe:
R digital speedometer in the Trip
Trip menu
R total distanc erecorder and th etripm eter
R trip computer
R curren tconsum ption and th erange
R navigation instruction sintheNavi
Navi menu
R cruise control
R SPEEDTRONIC
R DISTRONI CPLUS
R ASSYS TPLUSs ervic einterval display
Switchin gthe additiona lspe edometer
on/off
Vehicle sfor th eUnite dKingdom :thisf unc-
tion is unavailable.
Only vehicle swithm anual transmission have
this function.
The Addit. speedo [km/h]: Addit. speedo [km/h]:or Addit.
Addit.
speedo [mph]:
speedo [mph]: function allows you to
choos ewhether th emultifunction display in
th es tatus area always shows th espee din
mph
mph or in km/h
km/h instead of th eoutside temper-
ature.
The Addit. Addit. speedo
speedo[mph]:
[mph]:function allows
you to choos ewhether th emultifunction dis-
play in th estatus area always shows the
spee dinmph
mph instead of th eoutside tempera-
ture.
X Press the =or; buttononthesteer-
ing wheel to select the Settings
Settingsmenu.
X Press the :or9 buttontoselect the
Inst. cluster
Inst. cluster submenu. Menu
sand submenus
289On-boardcomputer and displays Z
Page 293 of 497
![MERCEDES-BENZ E-CLASS SALOON 2015 Owners Manual X
Press ato confirm.
X Press the :or9 button to select the
Addit. speedo [mph]:
Addit. speedo [mph]: orAddit.
Addit.
speedo [km/h]:
speedo [km/h]: function.
Press the :or9 button to select the
Addit. MERCEDES-BENZ E-CLASS SALOON 2015 Owners Manual X
Press ato confirm.
X Press the :or9 button to select the
Addit. speedo [mph]:
Addit. speedo [mph]: orAddit.
Addit.
speedo [km/h]:
speedo [km/h]: function.
Press the :or9 button to select the
Addit.](/img/4/55517/w960_55517-292.png)
X
Press ato confirm.
X Press the :or9 button to select the
Addit. speedo [mph]:
Addit. speedo [mph]: orAddit.
Addit.
speedo [km/h]:
speedo [km/h]: function.
Press the :or9 button to select the
Addit. speedo [mph]:
Addit. speedo [mph]: function.
You will see the selected setting: on
onoroff
off.
X Press the abutton to save the setting.
Selecting the permanent display function
Vehicles for the United Kingdom: this func-
tion is unavailable.
You can determin ewhether the multifunction
display permanently shows your speed or the
outside temperature.
X Press the =or; button on the steer-
ing wheel to select the Settings Settingsmenu.
X Press the :or9 button to select the
Inst. cluster
Inst. cluster submenu.
X Press ato confirm.
X Press the :or9 button to select the
Permanent display
Permanent display function.
You will see the selected setting: outside
outside
temperature
temperature orAddit.
Addit. speedo
speedo[km/h]
[km/h]/
Addit. speedo [mph]
Addit. speedo [mph].
X Press the abutton to save the setting.
i The speed is highlighted in km/ho
rin
mph inverse to your speedometer.
Lights Setting the brightness for the instrument
cluster lighting and switches
The lighting in the instrument cluster, in the
displays and the controls in the vehicle inte-
rior can be adjusted with the Brightness Brightness
Display/switches:
Display/switches: function.
X Press the =or; button on the steer-
ing wheel to select the Settings
Settingsmenu.
X Press the :or9 button to select the
Lights
Lights submenu.
X Press ato confirm. X
Press the :or9 button to select the
Brightnes sDisplay/switches:
Brightnes sDisplay/switches: func-
tion.
You will see the selected setting.
X Press ato confirm.
X Press the :or9 button to adjust the
brightness to any level from Level 1 Level 1to
Level 5
Level 5 (bright).
X Press the aor% button to save the
setting.
If the light switch is set to Ã,Tor
L,t he brightness is dependent upon
the brightness of the ambient light.
i The light sensor in the instrument cluster
automatically controls the brightness of
the multifunction display.
In daylight, the displays in the instrument
cluster are not illuminated.
Switching the daytime driving lights
on/off
The Day lights Day lights function can only be
switched on with the engine turned off.
X Press the =or; button on the steer-
ing wheel to select the Settings
Settingsmenu.
X Press the :or9 button to select the
Light
Light submenu.
X Press ato confirm.
X Press the :or9 button to select the
Day lights
Day lights function.
If the Day lights
Day lights function has been
switched on, the cone of light and the W
symbol in the multifunction display are
shown in orange.
X Press the abutton to save the setting.
Further information on daytime driving lights
(Y page 143).
Switching the Intelligent Light System
on/off
X Press the =or; button on the steer-
ing wheel to select the Settings Settingsmenu.
X Press the :or9 button to select the
Light
Light submenu.
X Press ato confirm. 290
Menus and submenusOn-board computer and displays
Page 294 of 497
X
Press the :or9 button to select the
Intell. Light Sys.
Intell. Light Sys. function.
If the Intell. Light Sys.
Intell. Light Sys. function has
been switched on, the cone of light and the L symbol in the multifunction display
are shown in orange.
X Press the abutton to save the setting.
When you switch the Intell. Light Sys.
Intell. Light Sys.
function on, you activat ethe following func-
tions:
R Motorway mode
R Active light function
R Cornerin glight function
R Extended range foglamps
If you set the dipped-beam headlamps for
driving on the right/left, the multifunction
display shows the Intell.
Intell. Light LightSystem:
System:
System inoperative Inactive for
System inoperative Inactive for
left-side traffic left-side traffic orIntell. Light
Intell. Light
System:
System: System
Systeminoperative
inoperative Inactive
Inactive
for right-sid etraffic
for right-sid etraffic display message
instead of the Intell.
Intell. Light
LightSys.
Sys.function
in the Light
Light submenu (Y page 291). This
display message will only appear if the setting for driving on the left/right is set opposite to
your vehicle's country version.
Observe the additional information on the
Intelligent Light System (Y page 145).
Setting the dipped-beam headlamps for
driving on the left/right
This function is only availabl eonvehicles with
the Intelligent Light System.
You can use this function to switch between
symmetrical and asymmetrical dipped beam
(Y page 142).
X Press the =or; button on the steer-
ing wheel to select the Settings
Settings menu.
X Press the :or9 button to select the
Light
Light submenu.
X Press ato confirm. X
Press the :or9 button to select the
Dipped beams Setting for: Dipped beams Setting for: function.
You will see the selected setting: Right-
Right-
side traffic
side traffic orLeft-side traffic
Left-side traffic.
X Press the abutton to save the setting.
If you change the setting, conversion does
not take place until the next time the vehi-
cle is stationary.
If you set the dipped-beam headlamps for
driving on the right/left, then motorway
mode and the extended range foglamps are
unavailable. These are only deactivated if the
setting for driving on the left/right is set
opposite to your vehicle's country version.
Aq ualified specialist workshop can set the
dipped-beam headlamps for driving on the
left/right.
Setting the brightness of the ambient
lighting
X Press the =or; button on the steer-
ing wheel to select the Settings
Settings menu.
X Press the :or9 button to select the
Lights Lights submenu.
X Press ato confirm.
X Press the :or9 button to select the
Amb. light +/-
Amb. light +/- function.
You will see the selected setting.
X Press ato confirm.
X Press the :or9 button to adjust the
brightness to any level from Off
OfftoLevel 5
Level 5
(bright).
X Press the aor% button to save the
setting.
Setting the ambient lighting colour X Press the =or; button on the steer-
ing wheel to select the Settings
Settingsmenu.
X Press the :or9 button to select the
Lights
Lights submenu.
X Press ato confirm.
X Press the :or9 button to select the
Amb. light col.
Amb. light col. function.
X Press ato confirm. Menus and submenus
291On-board computer and displays Z
Page 295 of 497
X
Press the :or9 button to set the
colour to SOLAR SOLAR,NEUTRAL NEUTRAL orPOLAR
POLAR.
X Press the aor% button to save the
setting.
Activating/deactivating the surround
lighting and exterior lighting delayed
switch-off
X Press the =or; button on the steer-
ing wheel to select the Settings
Settings menu.
X Press the :or9 button to select the
Light Light submenu.
X Press ato confirm.
X Press the :or9 button to select the
Surround lighting
Surround lighting function.
If the Surround
Surround lighting
lightingfunction is acti-
vated, the light cone and the area around
the vehicle are displayed in orange in the
multifunction display.
X Press the abutton to save the setting.
Deactivating delayed switch-off of the exte-
rior lighting temporarily:
X Before leaving the vehicle, turn the key to
position 0in the ignition lock.
X Turn the key to position 2in the ignition
lock.
The exterior lighting delayed switch-off is
deactivated.
Delayed switch-off of the exterior lighting is
reactivated the next time you start the
engine.
If you have activated the Surround light‐
Surround light‐
ing
ing function and the light switch is set to
Ã,t he following functions are activated
when it is dark:
R surround lighting: the exterior lighting
remains lit for 40 seconds after unlocking
with the key. If you start the engine, the
surround lighting is switched off and auto-
matic headlamp mode is activated
(Y page 143).
R exterior lighting delayed switch-off: the
exterior lighting remains lit for 60 seconds
after the engine is switched off. If you close all the doors and the boot lid/tailgate, the
exterior lighting goes off after 15 seconds.
i Dependin
gonyour vehicle's equipment,
when the surround lighting and delayed
switch-off exterior lighting are on, the fol-
lowing light up:
R Side lamps
R Surround lighting in the exterior mirrors
Activating/deactivating the interior light-
ing delayed switch-off
If you activat ethe Light. delay Switch Light. delay Switch
off
off function, the interior lighting remains on
for 20 seconds after you remove the key from the ignition lock.
X Press the =or; button on the steer-
ing wheel to select the Settings
Settings menu.
X Press the :or9 button to select the
Light
Light submenu.
X Press ato confirm.
X Press the :or9 button to select the
Light. delay
Light. delay function.
If the Light. delay
Light. delay function has been
switched on, the vehicle interior is dis-
played in orange in the multifunction dis-
play.
X Press the abutton to save the setting.
Vehicle Setting permanent SPEEDTRONIC
X Press the =or; button on the steer-
ing wheel to select the Settings Settingsmenu.
X Press the :or9 button to select the
Vehicle
Vehicle submenu.
X Press ato confirm.
X Press :or9 to select the Limit
Limit
speed (winter tyres):
speed (winter tyres): function.
You will see the curren tsetting.
X Press ato confirm.
X Press the :or9 button to adjust
permanen tSPEEDTRONIC in increment sof
ten (240 km/h 240 km/h to160 km/h
160 km/h). The Off
Offset- 292
Menus and submenusOn-board computer and displays
Page 296 of 497
ting switches permanent SPEEDTRONIC
off.
X Press the abutton to store the entry.
Observe the additional information on per-
manent SPEEDTRONIC (Y page 217).
Activating/deactivating the automatic
lockin gfeature
X Press the =or; button on the steer-
ing whee ltoselect theSettings Settings menu.
X Press the :or9 button to select the
Vehicle
Vehicle submenu.
X Press ato confirm.
X Press the :or9 button to select the
Auto. doo rlocks
Auto. doo rlocks function.
When the Auto. doo rlocks
Auto. doo rlocks functio nis
switched on, the vehicl edoors ar edis-
played in orange in the multifunctio ndis-
play.
X Press the abutton to save the setting.
If yo uactivate the Auto. doorlocks
Auto. doo rlocks func-
tion, the vehicl eiscentrally locked above a
spee dofa round 15 km/h.
Furthe rinformation on the automatic locking
featur e(Ypage 102).
Activating/deactivating the acoustic
lockin gconfirmation
If yo uswitch on the Acoustic
Acoustic Lock Lockfunction,
an acoustic signa lsou nd sw heny ou lock the
vehicle.
X Press the =or; button on the steer-
ing whee ltoselect theSettings
Settings menu.
X Press the :or9 button to select the
Vehicle
Vehicle submenu.
X Press ato confirm.
X Press the :or9 button to select the
Acoustic Lock
Acoustic Lock function.
If the Acoustic
Acoustic Lock
Lockfunctio nisa ctivated,
the & symbo linthe multifunctio ndis-
play lights up orange.
X Press the abutton to save the setting. Heating Auxiliary heating departure time
G
DANGER
If the exhaust pipe is blocke dorsufficient
ventilation is not possible, toxi cexhaust
fumes can ente rthe vehicle, especiall ycar-
bo nm onoxide. This is the case, e.g .in
enclose dspaces, or if the vehicl eisstuck in
snow. There is ariskoff atal injuries.
Yo us houl dswitch off the auxiliary heating in
enclose dspacesw hich do not have an extrac-
tio ns ystem, e.g .agarage. If the vehicl eis
stuck in sno wand yo umustleave the auxiliary
heating running ,kee pt he exhaust pipe and
the area around the vehicl eclear of snow. To
guarante easufficient supply of fresh air, open
aw indo wont he side of the vehicl eawayfrom
the wind. G
WARNING
When the auxiliary heating is switched on,
parts of the vehicl ecan becom everyh ot.
Flammabl ematerial ssuchasl eaves, grass or
twigs ma yign ite if the ycom einto contact
with:
R ho tp arts of the exhaust system
R the exhaust ga sitself
There is ariskoff ire.
When the auxiliary heating is switched on,
make sure that:
R no flammabl ematerial scom einto contact
with ho tvehicl ecomponents
R the exhaust ga scan escap efromt he
exhaust pipe unhindered
R the exhaust ga sdoesn ot com einto contact
with flammabl ematerials.
! Operating the auxiliary heating/ventila-
tio nd raws on the vehicl ebattery .After you
have heate dorventilated the vehicl ea
maximum of two times ,drive for alon ger
distance.
Onl yvehicles with auxiliary heating have this
function. Menus and submenus
293On-board computer and displays Z
Page 297 of 497
In the
Heating
Heating submenu, you can select a
stored departure time or change adeparture
time.
The auxiliary heating timer function calcu-
lates the switch-on time according to the out-
side temperature so that the vehicle is pre-
heated by the departure time. When the
departure time is reached ,the auxiliary heat-
ing continues to heat for afurther five
minutes and then switches off. The auxiliary
heating adopts the THERMATIC or
THERMOTRONIC temperature setting.
You can switch off the auxiliary heating by
using the remote control or the auxiliary heat- ing button on the centre console.
i Switch the auxiliary heating on regularly
once amonth for aboutt en minutes.
Further information on auxiliary heating
(Y page 168).
Selecting the departur etime or deactivat-
ing aselected departur etime
X Press the =or; button on the steer-
ing wheeltos elect theSettings
Settings menu.
X Press the :or9 button to select the
Heating
Heating submenu.
X Press ato confirm.
You wills ee the selected setting.
X Press ato confirm.
X Press the :or9 button to select
one of the three departure times or Timer Timer
off
off (no timer active).
X Press ato confirm.
If ad eparture time is selected, the yellow
indicator lamp lights up on the auxiliary
heating button.
Changing the departur etime
X Press the =or; button on the steer-
ing wheeltos elect theSettings Settings menu.
X Press the :or9 button to select the
Heating
Heating submenu.
X Press ato confirm.
You wills ee the selected setting. X
Press the :or9 button to select A A,B B
or Change C
Change C.
X Press ato confirm.
You can now change the departure time.
X Press the =or; button to select the
display to be changed: hours, minutes.
X Press the :or9 button to set the
selected display.
X Press the abutton to store the entry.
The yellow indicator lamp on the auxiliary
heating button lights up.
Comfort Activating/deactivating the EASY-
ENTRY/EXIT feature
G
WARNING
When the EASY-ENTRY/EXIT feature adjusts
the steering wheel, you and other vehicle
occupants –particularly childre n–could
become trapped .There is arisk of injury.
Whilet he EASY-ENTRY/EXIT feature is mak-
ing adjustments, make sure that no one has
any body parts in the sweep of the steering
wheel.
If someone is trapped:
R press one of the memory function position
buttons, or
R move the switch for steering wheela djust-
ment in the opposite direction to that in
which the steering wheelism oving.
The adjustment process is stopped.
X Press the =or; button on the steer-
ing wheeltos elect theSettings Settings menu.
X Press the :or9 button to select the
Convenience
Convenience submenu.
X Press ato confirm.
X Press the :or9 button to select the
Easy Entry/Exit:
Easy Entry/Exit: function.
If the Easy Entry/Exit
Easy Entry/Exit function is activa-
ted, the vehicle steering wheelisd isplayed
in orange in the multifunction display.
X Press the abutton to save the setting. 294
Menus and submenusOn-board computer and displays
Page 298 of 497
Further information on the EASY-ENTRY/EXIT
feature (Y page 135).
Switchin gbelta djustmen ton/off
X Pres sthe = or; button on the steer-
ing wheel to select the Settings
Settingsmenu.
X Pres sthe : or9 button to select the
Convenience
Convenience submenu.
X Press ato confirm.
X Pres sthe : or9 button to select the
Belt adjustment
Belt adjustment function.
If the Belt adjustment
Belt adjustment function is activa-
ted, the vehicle sea tbeltiss hown in orange
in the multifunction display.
X Pres sthe a button to sav ethe setting.
For further information on bel tadjustment,
see (Y page 49).
Switchin gthe fold-in mirrors whe nlock-
ing functio non/off
Thi sfunction is only available whe nthe vehi-
cle is equipped with the electrica lfold-in func-
tion.
Whe nyou switch on the Auto.fold in
Auto .fold in
function, the exterior mirrors are folded in
whe nthe vehicle is locked. If yo uunlock the
vehicle and then ope nthe driver' sorfront-
passenger door, the exterior mirrors fol dout
again.
X Pres sthe = or; button on the steer-
ing wheel to select the Settings Settingsmenu.
X Pres sthe : or9 button to select the
Convenience
Convenience submenu.
X Press ato confirm.
X Pres sthe : or9 button to select the
Auto .fold in
Auto .fold in function.
If the Auto.
Auto. fold
foldin
infunction is switched
on, the multifunction display shows the
vehicle' sexterior mirror in orange.
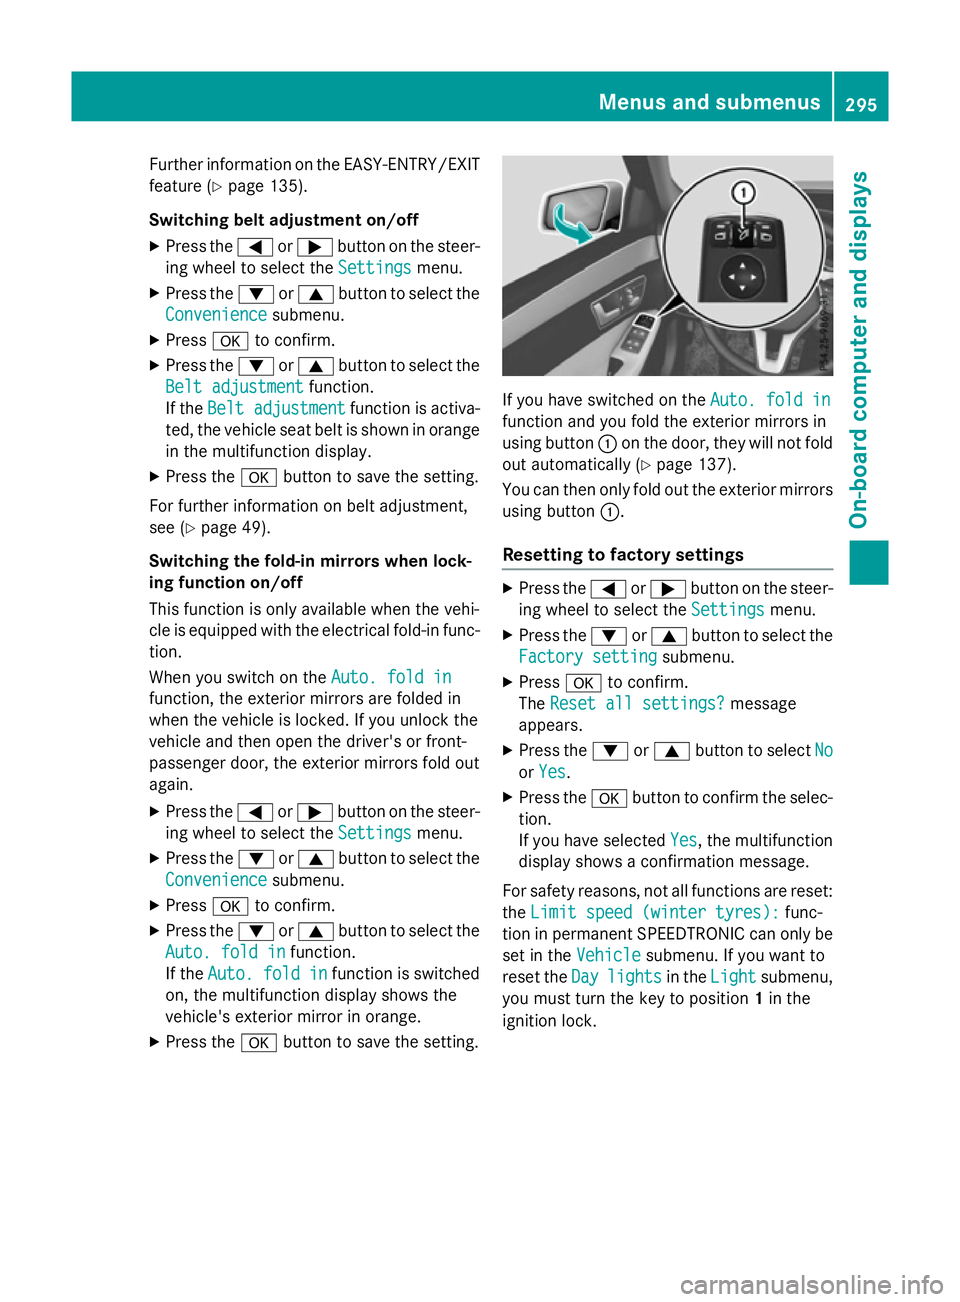
X Pres sthe a button to sav ethe setting. If yo
uhaves witched on the Auto.fold in
Auto .fold in
function and yo ufoldt he exterior mirrors in
using button :on the door, they will not fold
ou ta utomaticall y(Ypage 137).
You can then only fol doutthe exterior mirrors
using button :.
Resettin gtofactory settings X
Pres sthe = or; button on the steer-
ing wheel to select the Settings Settingsmenu.
X Pres sthe : or9 button to select the
Factory setting
Factory setting submenu.
X Press ato confirm.
The Rese tall settings?
Rese tall settings? message
appears.
X Pres sthe : or9 button to select No
No
or Yes
Yes.
X Pres sthe a button to confir mthe selec-
tion.
If yo uhaves elected Yes Yes,the multifunction
display shows aconfirmation message.
For safety reasons, not al lfunctions are reset:
the Limi tspee d(winter tyres):
Limi tspee d(winter tyres): func-
tion in permanent SPEEDTRONIC can only be
set in the Vehicle
Vehiclesubmenu. If yo uwantto
rese tthe Day
Day lights
lights in theLight
Light submenu,
yo um ustturn the key to position 1in the
ignition lock. Menus and submenus
295On-board computer and displays Z
Page 299 of 497
AMG men
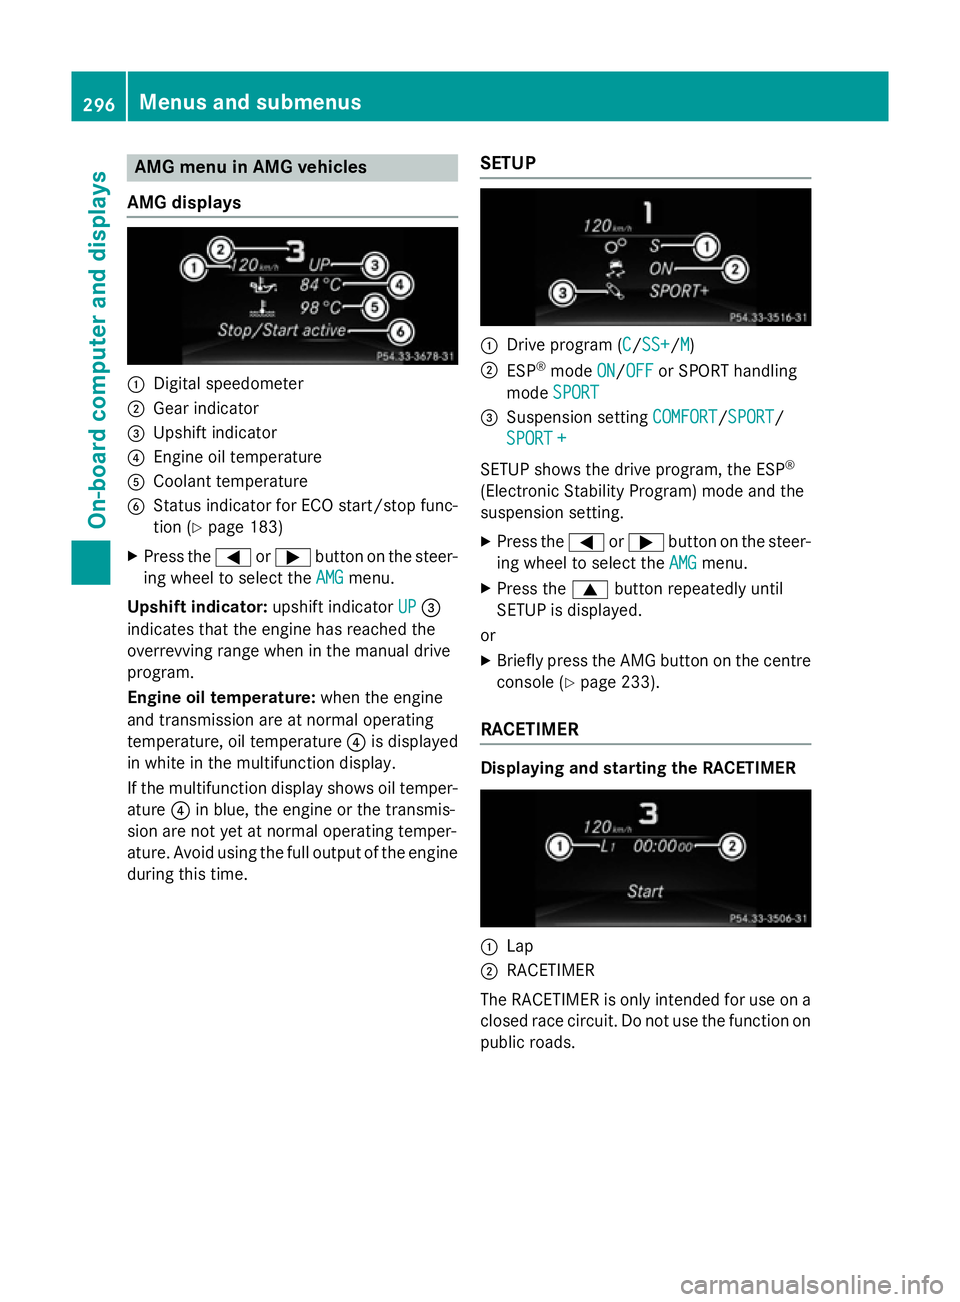
uinAMG vehicles
AMG displays :
Digital speedometer
; Gear indicator
= Upshif tindicator
? Engin eoil temperature
A Coolan ttem perature
B Status indicator for ECO start/sto pfunc-
tion (Y page 183)
X Press the =or; buttononthesteer-
ing whee ltos elect the AMG
AMG menu.
Upshift indicator: upshift indicatorUP
UP=
indicates that th eengineh as reached the
overrevving range when in th emanual drive
program.
Engin eoil temperature: when theengine
and transmission are at normal operating
temperature, oil temperature ?is displayed
in whit einthemultifunction display.
If th emultifunction display shows oil temper-
ature ?in blue, th eengineort hetransmis-
sion are no tyet at normal operating temper-
ature. Avoid usin gthe full output of th eengine
during this time. SETUP :
Drive program (C C/SS+ SS+ /MM)
; ESP ®
mode ON
ON/OFF
OFF or SPORT handling
mode SPORT
SPORT
= Suspension setting COMFORT
COMFORT/SPORT
SPORT/
SPORT +
SPORT +
SETUP shows th edrivep rogram ,the ESP ®
(Electronic Stabilit yProgram )modea nd the
suspension setting.
X Press the =or; buttononthesteer-
ing whee ltos elect the AMG
AMG menu.
X Press the 9buttonrepeatedly until
SETUP is displayed.
or
X Briefly press th eAMG butto nont hecentre
console (Y page 233).
RACETIMER Displaying and starting th
eRACETIMER :
Lap
; RACETIMER
The RACETIMER is only intended for use on a closed rac ecircuit .Don otuse th efunction on
public roads. 296
Menu
sand sub menusOn-boardcomputer an ddisplays
Page 300 of 497
You can star
tthe RACETIME Rwhen the
engin eisrunning or if the key is in position 2
in the ignition lock.
X Press the =or; button on the steer-
ing wheel to selec tthe AMG
AMG menu.
X Press the 9button repeatedly until the
RACETIME Risshown.
X To start: press the abutton to star tthe
RACETIMER.
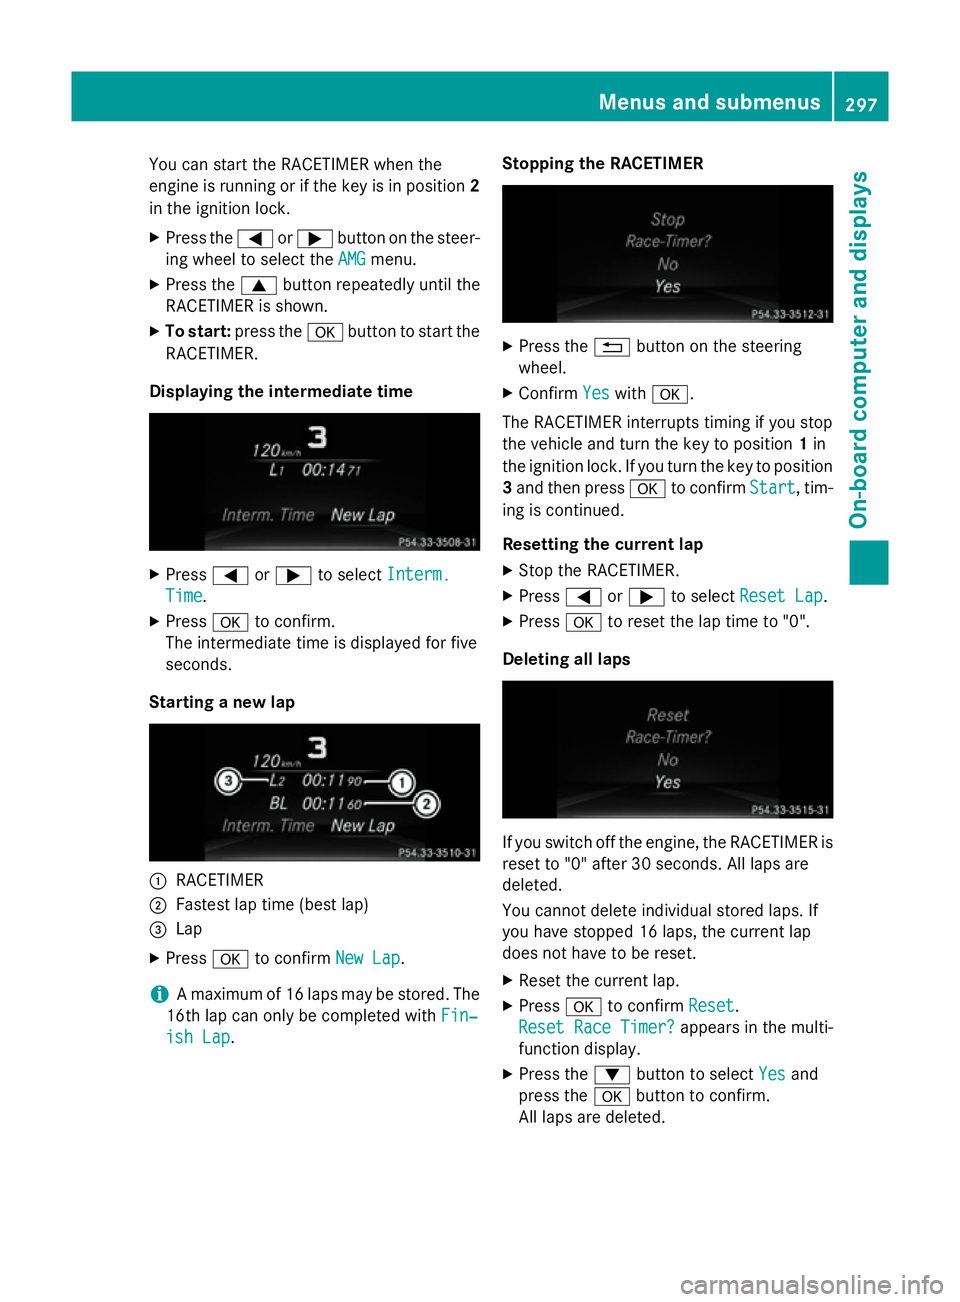
Displaying th eintermediat etime X
Press =or; to select Interm.
Interm.
Time
Time .
X Press ato confirm.
The intermediate tim eisdisplayed for five
seconds.
Starting anew lap :
RACETIMER
; Fastest lap tim e(best lap)
= Lap
X Press ato confirm New Lap
New Lap.
i Am
aximum of 16 laps may be stored. The
16t hlap can only be complete dwithFin‐
Fin‐
ish Lap
ish Lap. Stopping th
eRACETIMER X
Press the %button on the steering
wheel.
X Confirm Yes
Yeswith a.
The RACETIME Rinterrupt stiming if you stop
the vehicle and turn the key to position 1in
the ignition lock .Ifyou turn the key to position
3 and the npress a to confirm Start
Start,tim-
ing is continued.
Resetting th ecurrent lap
X Stop the RACETIMER.
X Press =or; to select ResetLap
Rese tLap.
X Press ato reset the lap tim eto"0".
Deleting all laps If you switc
hoff the engine, the RACETIME Ris
reset to "0" after 30 seconds .All laps are
deleted.
You cannot delet eindividual stored laps. If
you have stopped 16 laps, the current lap
does not have to be reset.
X Reset the current lap.
X Press ato confirm Reset
Reset.
Rese tRace Timer?
Rese tRace Timer? appears in the multi-
function display.
X Press the :button to select Yes Yesand
press the abutton to confirm.
All laps are deleted. Menus and submenus
297On-board computer and displays Z