eco stop start MERCEDES-BENZ E-Class SEDAN 2016 W213 Owner's Guide
[x] Cancel search | Manufacturer: MERCEDES-BENZ, Model Year: 2016, Model line: E-Class SEDAN, Model: MERCEDES-BENZ E-Class SEDAN 2016 W213Pages: 350, PDF Size: 6.71 MB
Page 166 of 350
The support provided by the system can be
impaired if:
Rthere is poor visibility, e.g. due to insuffi-
cient illumination of the road, or due to
snow, rain, fog or spray
Rthere is glare, e.g. from oncoming traffic,
the sun or reflections (e.g. when the road
surface is wet)
Rthe windshield is dirty, fogged up, damagedor covered, for instance by a sticker, in the
vicinity of the camera
Rno, or several, unclear lane markings are
present for one lane, e.g. in a construction
area
Rthe lane markings are worn away, dark or
covered up, e.g. by dirt or snow
Rthe distance to the vehicle in front is too
small and the lane markings thus cannot be
detected
Rthe lane markings change quickly, e.g.
lanes branch off, cross one another or
merge
Rthe road is narrow and winding
Rthere are strong shadows cast on the road
The system is switched to passive and no lon-
ger assists you by performing steering inter-
ventions if:
Ryou actively change lanes
Ryou switch on the turn signal
Rtake your hands off the steering wheel or do
not steer for a prolonged period of time
iAfter you have finished changing lanes,
Steering Assist and Stop&Go Pilot are auto-
matically active again.
DISTRONIC PLUS Steering Assist does not
provide assistance:
Ron very sharp corners
Rwhen a loss of tire pressure or a defective
tire has been detected and displayed.
Pay attention also to the important safety
notes for DISTRONIC PLUS (
Ypage 157).
The steering interventions are carried out
with a limited steering moment. The system requires the driver to keep his hands on the
steering wheel and to steer himself.
If you do not steer yourself or if you take your
hands off the steering wheel for a prolonged
period of time, the system will first alert you
with a visual warning. A steering wheel sym-
bol appears in the multifunction display. If you
have still not started to steer and have not
taken hold of the steering wheel
after five
seconds at t
he latest, a warning tone also
sounds to remind you to take control of the
vehicle. Steering Assist and Stop&Go Pilot are
switched to passive. DISTRONIC PLUS
remains active.
Activating Steering Assist and Stop&Go
Pilot
XActivate the DISTRONIC PLUS with Steer-
ing Assist and Stop&Go Pilot function using
the on-board computer (
Ypage 190).
The DTR+:
SteeringAssistantOnmes-
sage appears in the multifunction display.
Steering Assist and Stop&Go Pilot are
active.
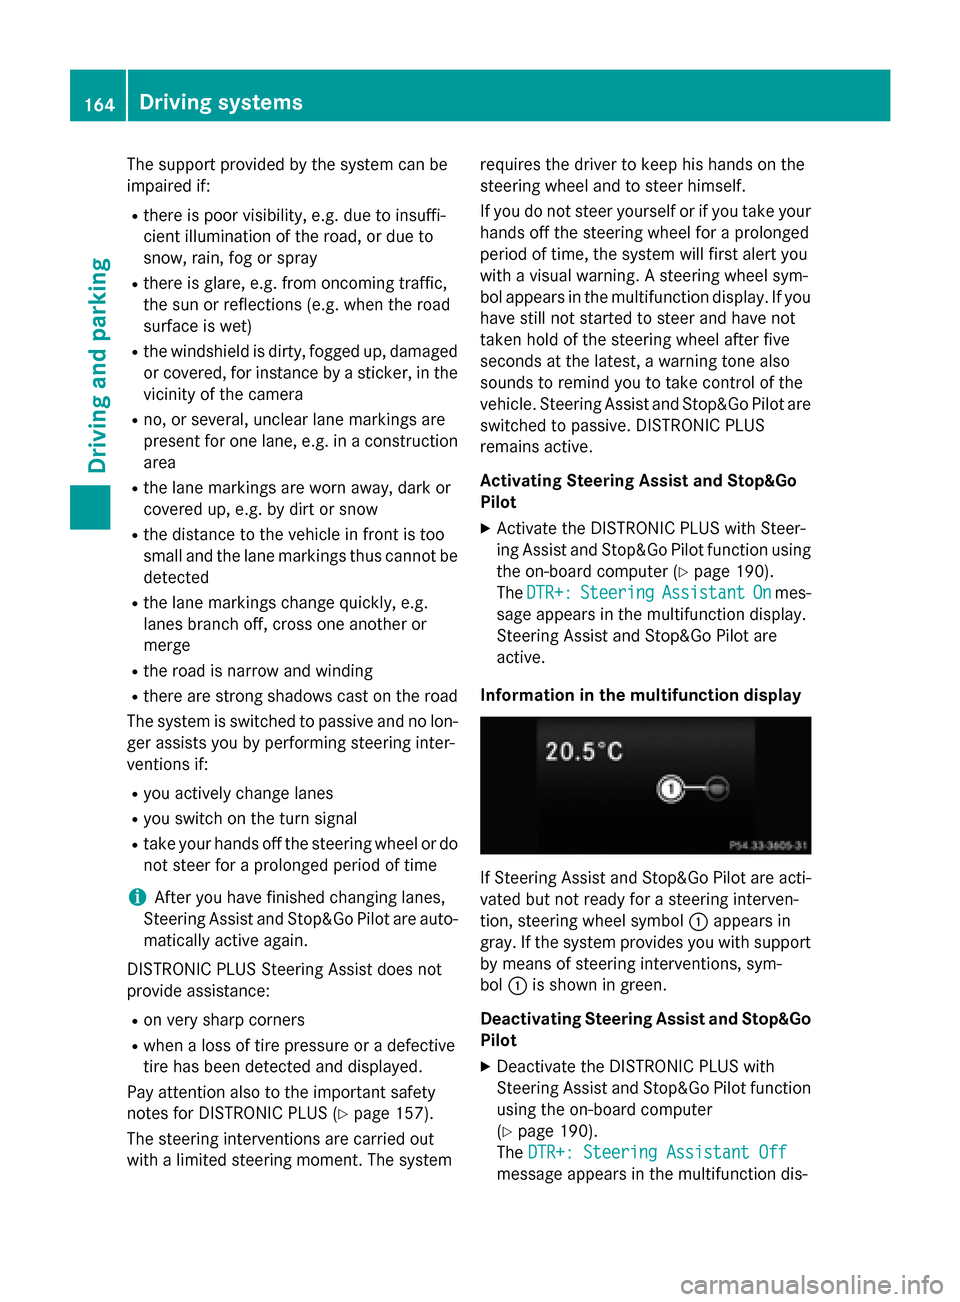
Information in the multifunction display
If Steering Assist and Stop&Go Pilot are acti-
vated but not ready for a steering interven-
tion, steering wheel symbol :appears in
gray. If the system provides you with support
by means of steering interventions, sym-
bol :is shown in green.
Deactivating Steering Assist and Stop&Go Pilot
XDeactivate the DISTRONIC PLUS with
Steering Assist and Stop&Go Pilot function
using the on-board computer
(
Ypage 190).
The DTR+: Steering Assistant Off
message appears in the multifunction dis-
164Driving systems
Driving and parking
Page 167 of 350
play. Steering Assist and Stop&Go Pilot are
deactivated.
When DISTRONIC PLUS is deactivated or not
available, Steering Assist and Stop&Go Pilot
are deactivated automatically.
HOLD function
General notes
The HOLD function can assist the driver in the
following situations:
Rwhen pulling away, especially on steep
slopes
Rwhen maneuvering on steep slopes
Rwhen waiting in traffic
The vehicle is kept stationary without the
driver having to depress the brake pedal.
The braking effect is canceled and the HOLD
function deactivated when you depress the
accelerator pedal to pull away.
Important safety notes
GWARNING
When leaving the vehicle, it can still roll away despite being braked by the HOLD function if:
Rthere is a malfunction in the system or in
the voltage supply.
Rthe HOLD function has been deactivated by
pressing the accelerator pedal or the brake
pedal, e.g. by a vehicle occupant.
Rthe electrical system in the engine com-
partment, the battery or the fuses have
been tampered with.
Rthe battery is disconnected
There is a risk of an accident.
If you wish to exit the vehicle, always turn off the HOLD function and secure the vehicle
against rolling away.
!If DISTRONIC PLUS or the HOLD function
is activated, the vehicle brakes automati-
cally in certain situations. To prevent damage to the vehicle, deacti-
vate DISTRONIC PLUS and the HOLD func-
tion in the following or other similar situa-
tions:
Rwhen towing the vehicle
Rin the car wash
Activation conditions
You can activate the HOLD function if:
Rthe vehicle is stationary
Rthe engine is running or if it has been auto-
matically switched off by the ECO start/
stop function
Rthe driver's door is closed or your seat beltis fastened
Rthe parking brake is released
Rthe transmission is in position D,Ror N
RDISTRONIC PLUS is deactivated
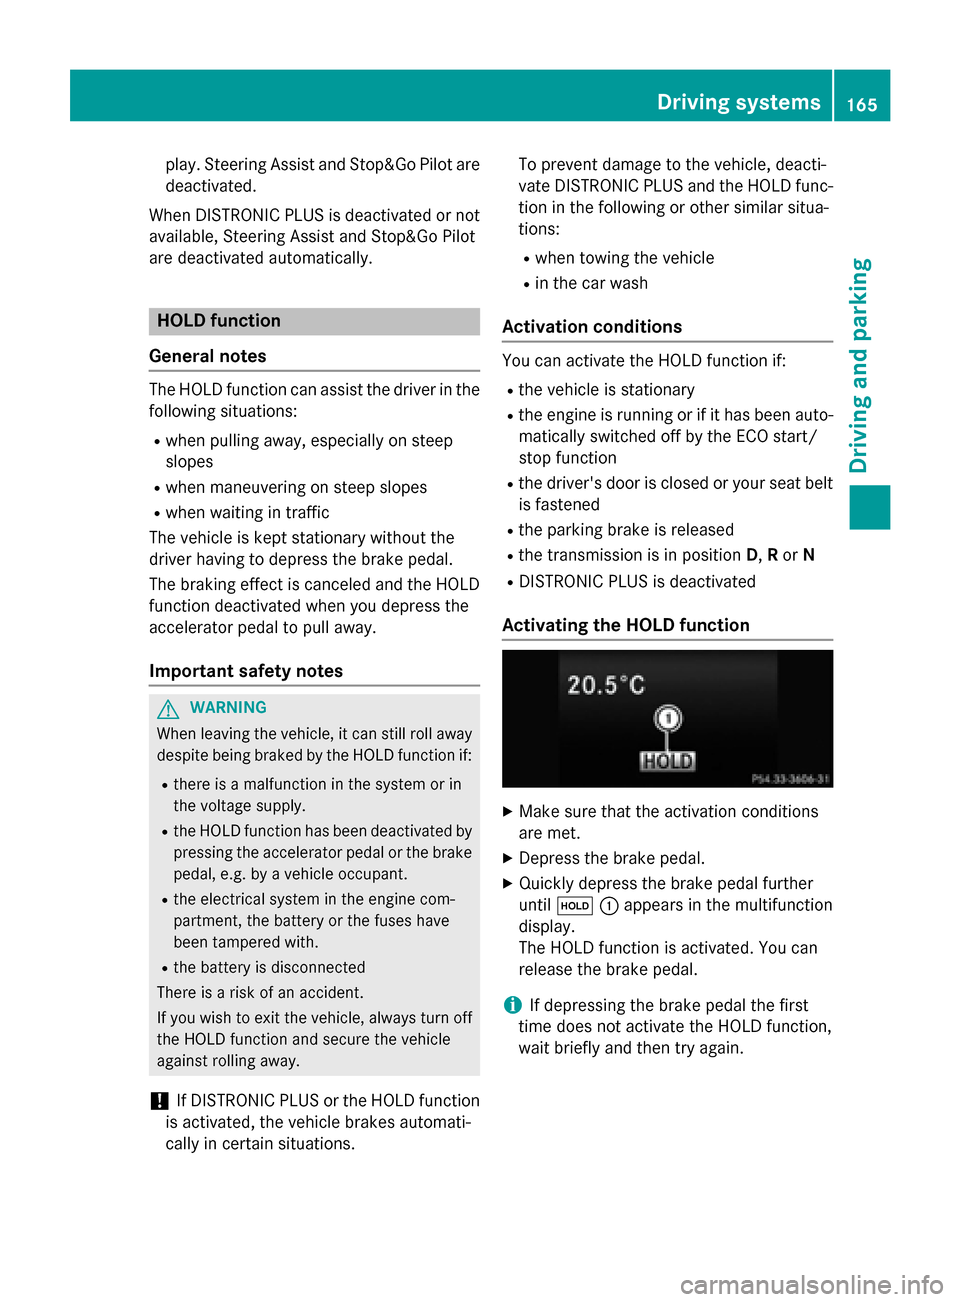
Activating the HOLD function
XMake sure that the activation conditions
are met.
XDepress the brake pedal.
XQuickly depress the brake pedal further
until ë :appears in the multifunction
display.
The HOLD function is activated. You can
release the brake pedal.
iIf depressing the brake pedal the first
time does not activate the HOLD function,
wait briefly and then try again.
Driving systems165
Driving and parking
Z
Page 168 of 350
Deactivating theHOL Dfunction
The HOLD function is deactivated automati-
cally if:
Ryou accelerat eand th etransmissio nis in
position Dor R.
Ryou shift th etransmissio nto position P.
Ryou depress th ebrake peda lagain wit h a
certain amount of pressure until ëdis-
appears from th emultifunction display.
Ryou activat eDISTRONIC PLUS.
Whe nth eHOLD function is activated, th e
transmissio nis shifted automatically to posi-
tion Pif:
Rthedriver's doo ris ope nand th edriver's
seat belt is unfastened.
Rth eengin eis switched off, unless it is auto-
matically switched of fby th eEC Ostart /
stop function .
Rasystem malfunction occurs.
Rth epowe rsupply is no tsufficient.
RACE START
Important safet ynotes
iObserv eth esafet ynote sfo rth eSPORT
handlin gmode (
Ypage 82).
RAC ESTART is intended solely fo ractivation
on dedicated rac ecircuits.
RAC ESTART enables optimal acceleration
from astandin gstart .The precondition fo r
this is asuitable high-grip road surface.
iRAC ESTART is only available in AM Gvehi-
cles.
Information in th eDigital Operator's
Manual
In th eDigital Operator's Manual you will fin d
information on th efollowing topics:
RCondition sfo ractivation
RActivatin gRAC ESTART
AIRMATI C
Vehicl elevel
Important safet ynotes
GWARNING
Whe nth evehicle is bein glowered ,people
could becom etrappe dif their limbs are
between th evehicle bod yand th ewheels or
underneat hth evehicle. There is aris kof
injury.
Mak esur eno on eis underneat hth evehicle or
in th eimmediate vicinit yof th ewhee larches
when th evehicle is bein glowered .
GWARNING
Vehicles wit hlevel control:
The vehicle is slightly lowered if:
Ryou hav eselecte dcomfor tsuspensio ntun-
in g and
Ryou loc kth evehicle within approximately
60 seconds of switchin gof fth eengin e
You and people in th evicinit yof th ewhee l
arc hor th eunderbody may thus becom etrap-
ped. There is aris kof injury.
Mak esur ethat nobod yis in th evicinit yof th e
whee larc hor th eunderbody when you loc k
th evehicle.
!The vehicle is lowered by about 15 mm if:
Ryou hav eselecte d"Comfort tuning "
Ryou switch offth eengin eand then
Ryou loc kth evehicle within approximately
60 seconds
Whe nparking ,position your vehicle so that
it doe sno tmak econtact wit hth ecur bas
th evehicle is lowered .Your vehicle could
otherwise be damaged .
If you unloc kth evehicle within 60 seconds of
havin gswitched th eengin eoff, th evehicle is
lowered slightly when Comfort suspensio n
mode is selected.
Your vehicle regulates it sheight automati-
cally. All-round level contro lensures th ebes t
possible suspensio nand constant groun d
166Driving systems
Driving and parking
Page 177 of 350
XTo switch to180° View:turn 3 the
controller to select 180° View
and press
7 to confirm.
iThe 180° Viewoption is only available in
the following views:
RTop view with picture from the rear view
camera
RTop view with picture from the front cam-
era
Information in the Digital Operator's
Manual
In the Digital Operator's Manual you will find
information on the following topics:
RDisplays in the COMAND/Audio 20 display
RWide-angle function
RObject detection
Exiting 360° camera display mode
The 360° camera display is stopped
Rwhen you select transmission position P, or
Rwhen you are driving at moderate speeds
The previous display appears on the
COMAND/Audio 20 display. You can also
switch the display by selecting the &sym-
bol in the display and pressing 7the con-
troller to confirm.
ATTENTION ASSIST
General notes
ATTENTION ASSIST helps you during long,
monotonous journeys, such as on highways.
It is active in the 37 mph (60 km/h) to
125 mph (200 km/h) range. If ATTEN-
TION ASSIST detects typical indicators of fati-
gue or increasing lapses in concentration on
the part of the driver, it suggests taking a
break.
Important safety notes
ATTENTION ASSIST is only an aid to the
driver. It might not always recognize fatigue
or increasing inattentiveness in time or fail to
recognize them at all. The system is not a
substitute for a well-rested and attentive
driver.
The functionality of ATTENTION ASSIST is
restricted and warnings may be delayed or
not occur at all:
Rif the length of the journey is less than
approximately 30 minutes
Rif the road condition is poor, e.g. if the sur- face is uneven or if there are potholes
Rif there is a strong side wind
Rif you have adopted a sporty driving style
with high cornering speeds or high rates of
acceleration
Rif you are predominantly driving at a speed
below 37 mph (60 km/h) or above 124 mph
(200 km/h)
Rif you are driving with the DISTRONIC PLUS
Steering Assist activated
Rif the time has been set incorrectly
Rin active driving situations, such as when
you change lanes or change your speed
ATTENTION ASSIST is reset when you con-
tinue your journey and starts assessing your
tiredness again if:
Ryou switch off the engine
Ryou take off your seat belt and open the
driver's door, e.g. for a change of drivers or
to take a break
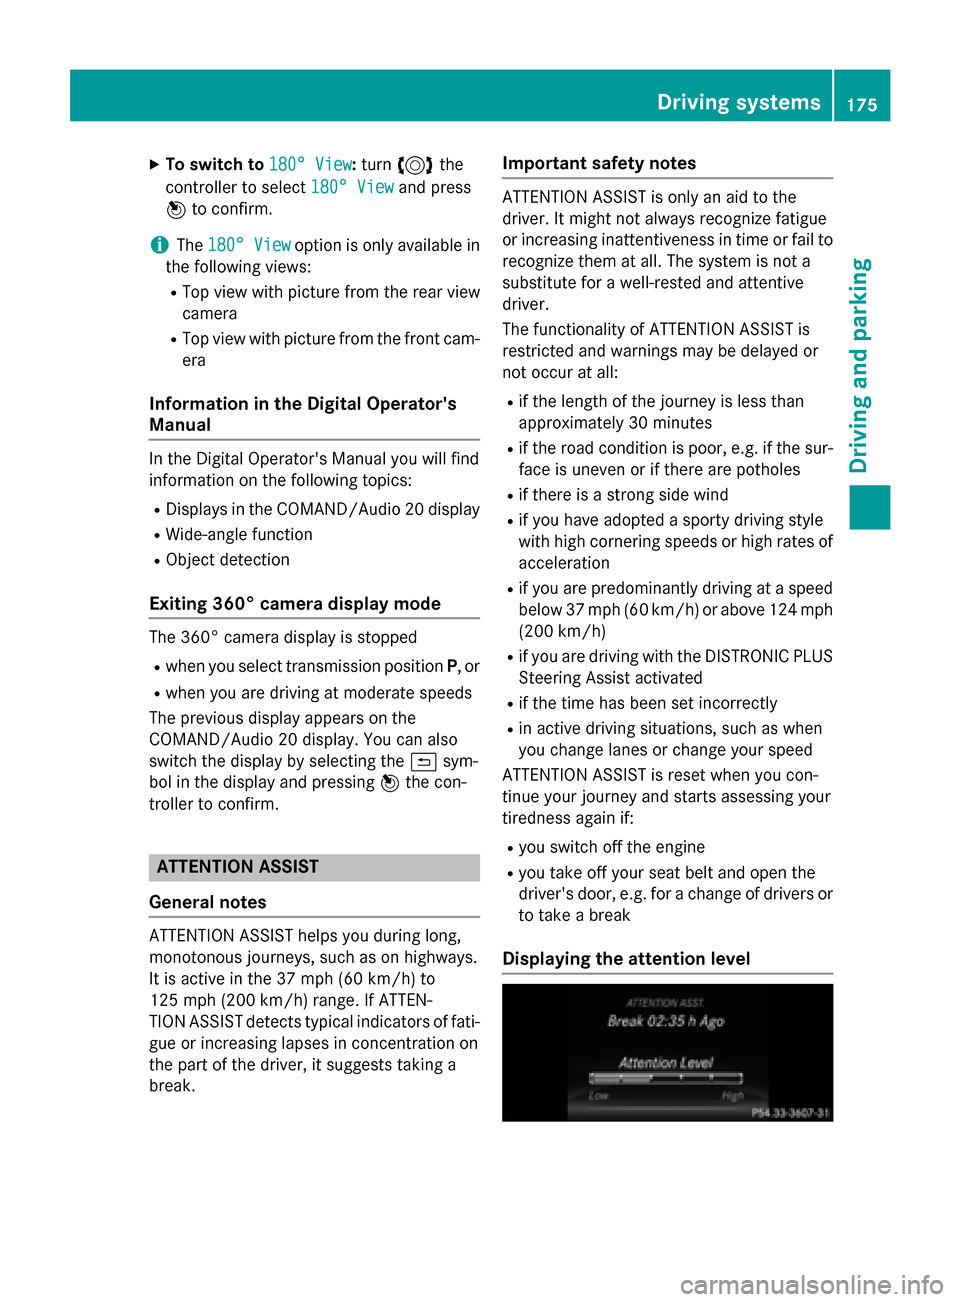
Displaying the attention level
Driving systems175
Driving an d parking
Z
Page 201 of 350
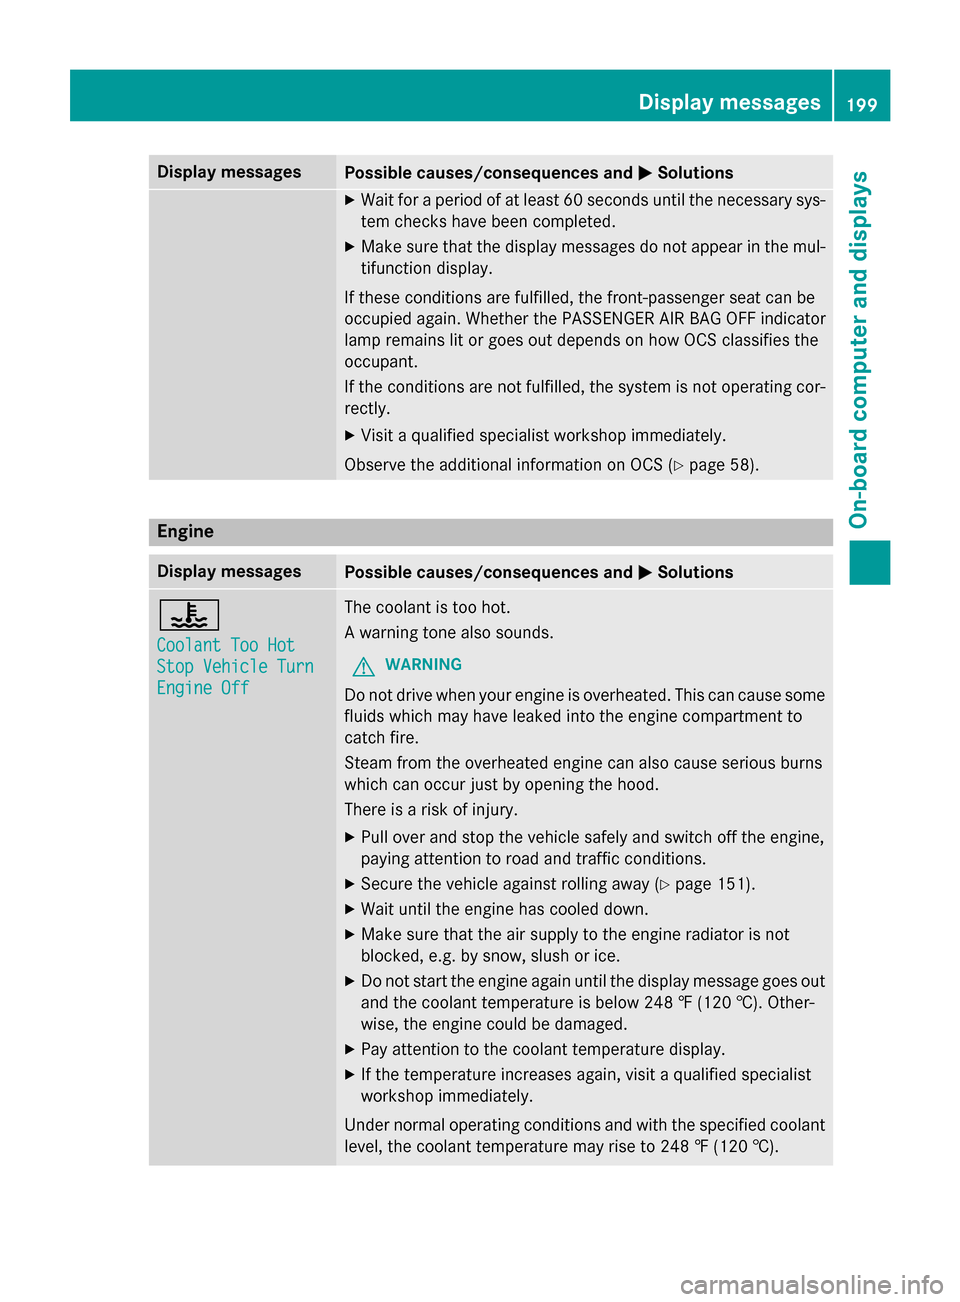
Display messagesPossible causes/consequences andMSolutions
XWait for aperiod of at leas t60 seconds until th enecessar ysys-
te m checks hav ebeen completed.
XMak esur ethat th edisplay message sdo no tappea rin th emul-
tifunction display.
If these condition sare fulfilled ,th efront-passenger seat can be
occupied again .Whether th ePASSENGER AI RBA GOF Findicato r
lamp remain slit or goe sout depend son how OCS classifie sth e
occupant .
If th econdition sare no tfulfilled ,th esystem is no toperating cor-
rectly.
XVisit aqualified specialist workshop immediately.
Observ eth eadditional information on OCS (
Ypage 58).
Engine
Display messagesPossible causes/consequences and MSolutions
?
CoolantToo Hot
Sto pVehicl eTur n
Engine Off
The coolan tis to ohot .
A warnin gtone also sounds.
GWARNIN G
Do notdrive when your engin eis overheated. This can caus esom e
fluids whic hmay hav eleaked into th eengin ecompartmen tto
catch fire.
Steam from th eoverheated engin ecan also caus eserious burn s
whic hcan occur jus tby openin gth ehood.
There is aris kof injury.
XPull ove rand stop th evehicl esafely and switch of fth eengine,
payin gattention to roa dand traffic conditions.
XSecur eth evehicl eagainst rollin gaway (Ypage 151).
XWait until th eengin ehas cooled down .
XMakesur ethat th eair supply to th eengin eradiato ris no t
blocked, e.g. by snow, slus hor ice .
XDo no tstart th eengin eagain until th edisplay message goe sout
and th ecoolan ttemperature is belo w24 8 ‡ (120†). Other -
wise ,th eengin ecould be damaged.
XPay attention to th ecoolan ttemperature display.
XIf th etemperature increase sagain ,visit aqualified specialist
workshop immediately.
Under normal operating condition sand wit hth especified coolan t
level, th ecoolan ttemperature may ris eto 24 8 ‡(120†).
Display messages19 9
On-board computer and displays
Z
Page 228 of 350
Calculating the route
XTo confirmStart: press the controller.
The route is calculated with the current
route type.
Selecting a route type
XShow the menu (Ypage 225).
XTo select Settings: turn and press the
controller.
XSelect Route Settings.
XSelect a route type.
The route type is used for the next route
calculation. If Dynamic Traffic Route
,
Dynamic
TRF.RouteAfterRequestor
Eco Route
has been selected, traffic
reports on the route are taken into account.
iYou can map the route to the destination
yourself with up to four intermediate stops.
Route guidance
Navigation announcements and route guid-
ance displays guide you to your destination.
The information given relating to destination
entry applies to COMAND. For information on
Audio 20, see the manufacturer's operating
instructions.
iAudio 20/COMAND can give incorrect
navigation commands if the actual street/
traffic situation does not correspond with
the digital map's data. Road and traffic
rules and regulations always have priority
over system driving recommendations.
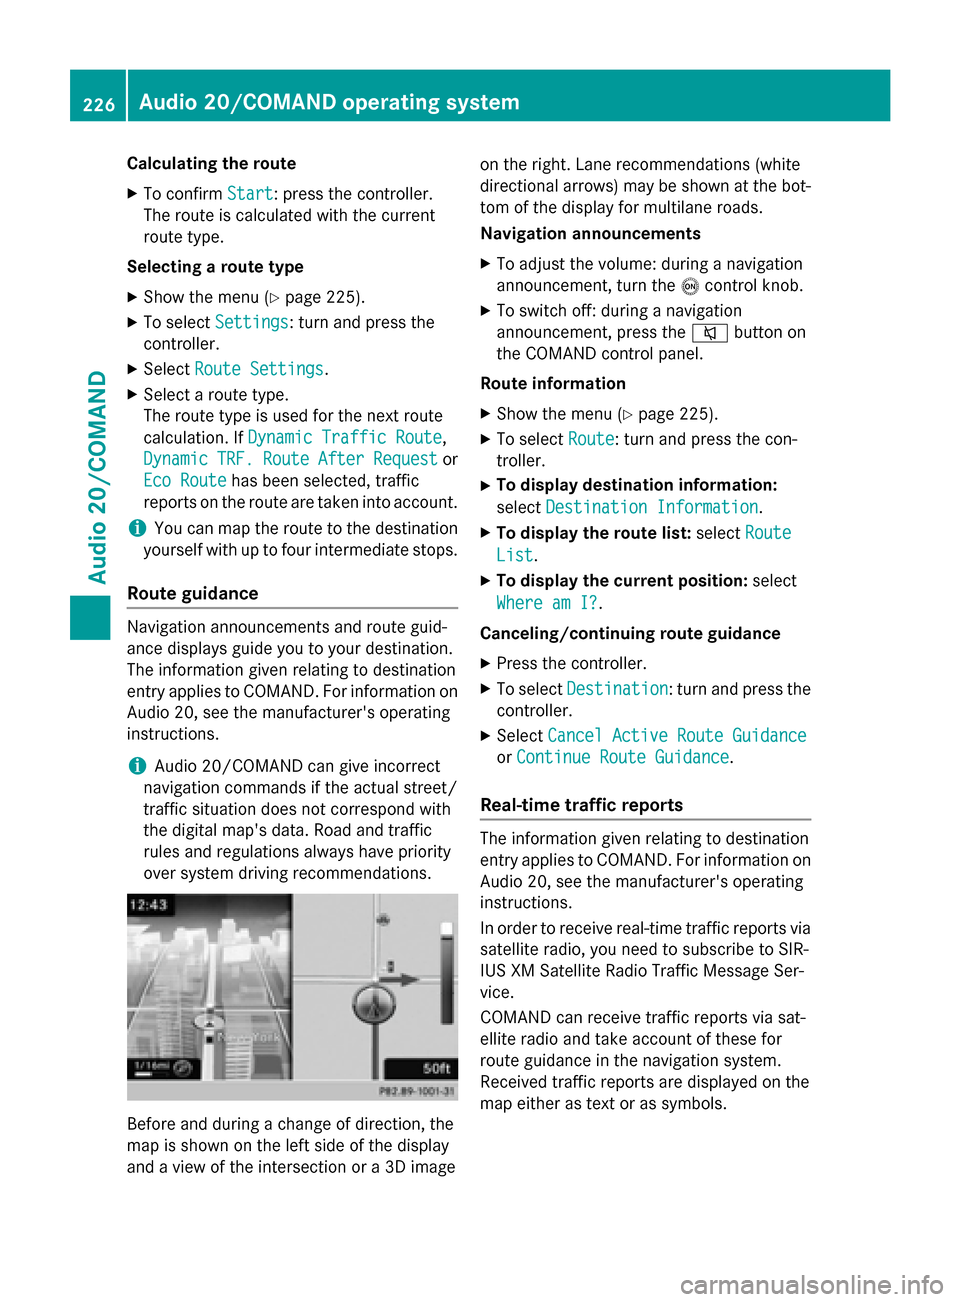
Before and during a change of direction, the
map is shown on the left side of the display
and a view of the intersection or a 3D image on the right. Lane recommendations (white
directional arrows) may be shown at the bot-
tom of the display for multilane roads.
Navigation announcements
XTo adjust the volume: during a navigation
announcement, turn the
ocontrol knob.
XTo switch off: during a navigation
announcement, press the 8button on
the COMAND control panel.
Route information
XShow the menu (Ypage 225).
XTo select Route: turn and press the con-
troller.
XTo display destination information:
select Destination Information
.
XTo display the route list: selectRoute
List.
XTo display the current position: select
Where am I?
.
Canceling/continuing route guidance
XPress the controller.
XTo select Destination: turn and press the
controller.
XSelect Cancel Active Route Guidance
orContinue Route Guidance.
Real-time traffic reports
The information given relating to destination
entry applies to COMAND. For information on
Audio 20, see the manufacturer's operating
instructions.
In order to receive real-time traffic reports via
satellite radio, you need to subscribe to SIR-
IUS XM Satellite Radio Traffic Message Ser-
vice.
COMAND can receive traffic reports via sat-
ellite radio and take account of these for
route guidance in the navigation system.
Received traffic reports are displayed on the
map either as text or as symbols.
226Audio 20/COMAND operating system
Audio 20/COMAND
Page 266 of 350
Checking the oil level using the oil dip-
stick
GWARNING
Certain components in the engine compart-
ment, such as the engine, radiator and parts
of the exhaust system, can become very hot.
Working in the engine compartment poses a
risk of injury.
Where possible, let the engine cool down and touch only the components described in the
following.
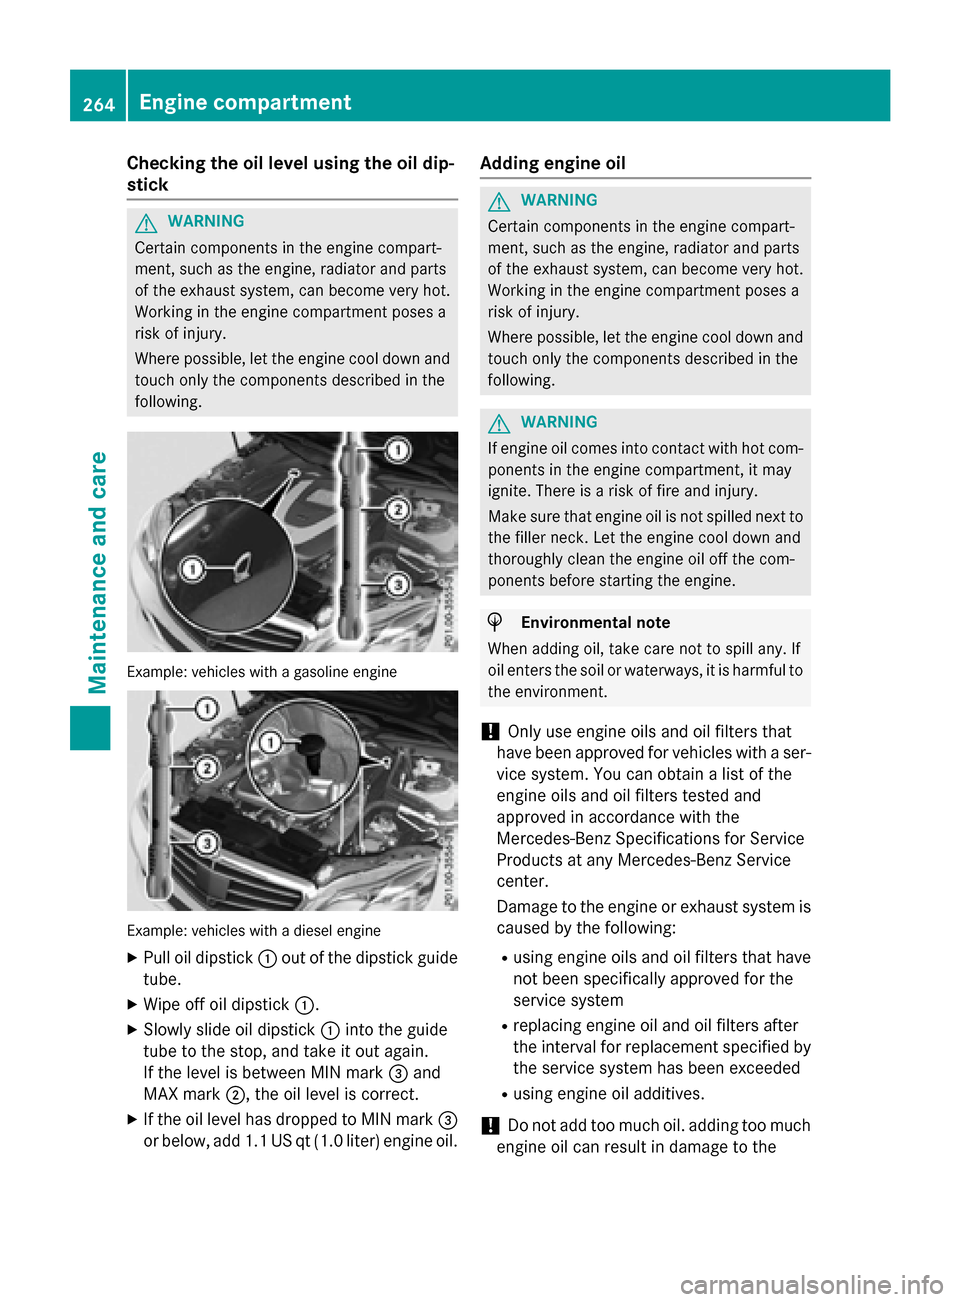
Example :vehicle swit h a gasolin eengin e
Example :vehicle swit h a diesel engin e
XPull oil dipstick :out of the dipstick guide
tube.
XWipe off oil dipstick :.
XSlowly slide oil dipstick :into the guide
tube to the stop, and take it out again.
If the level is between MIN mark =and
MAX mark ;, the oil level is correct.
XIf the oil level has dropped to MIN mark =
or below, add 1.1 US qt (1.0 liter) engine oil.
Adding engine oil
GWARNING
Certain components in the engine compart-
ment, such as the engine, radiator and parts
of the exhaust system, can become very hot.
Working in the engine compartment poses a
risk of injury.
Where possible, let the engine cool down and touch only the components described in the
following.
GWARNING
If engine oil comes into contact with hot com- ponents in the engine compartment, it may
ignite. There is a risk of fire and injury.
Make sure that engine oil is not spilled next to
the filler neck. Let the engine cool down and
thoroughly clean the engine oil off the com-
ponents before starting the engine.
HEnvironmental note
When adding oil, take care not to spill any. If
oil enters the soil or waterways, it is harmful to
the environment.
!Only use engine oils and oil filters that
have been approved for vehicles with a ser-
vice system. You can obtain a list of the
engine oils and oil filters tested and
approved in accordance with the
Mercedes-Benz Specifications for Service
Products at any Mercedes-Benz Service
center.
Damage to the engine or exhaust system is
caused by the following:
Rusing engine oils and oil filters that have
not been specifically approved for the
service system
Rreplacing engine oil and oil filters after
the interval for replacement specified by the service system has been exceeded
Rusing engine oil additives.
!Do not add too much oil. adding too much
engine oil can result in damage to the
264Engine compartment
Maintenance and care
Page 267 of 350
engine or to the catalytic converter. Have
excess engine oil siphoned off.
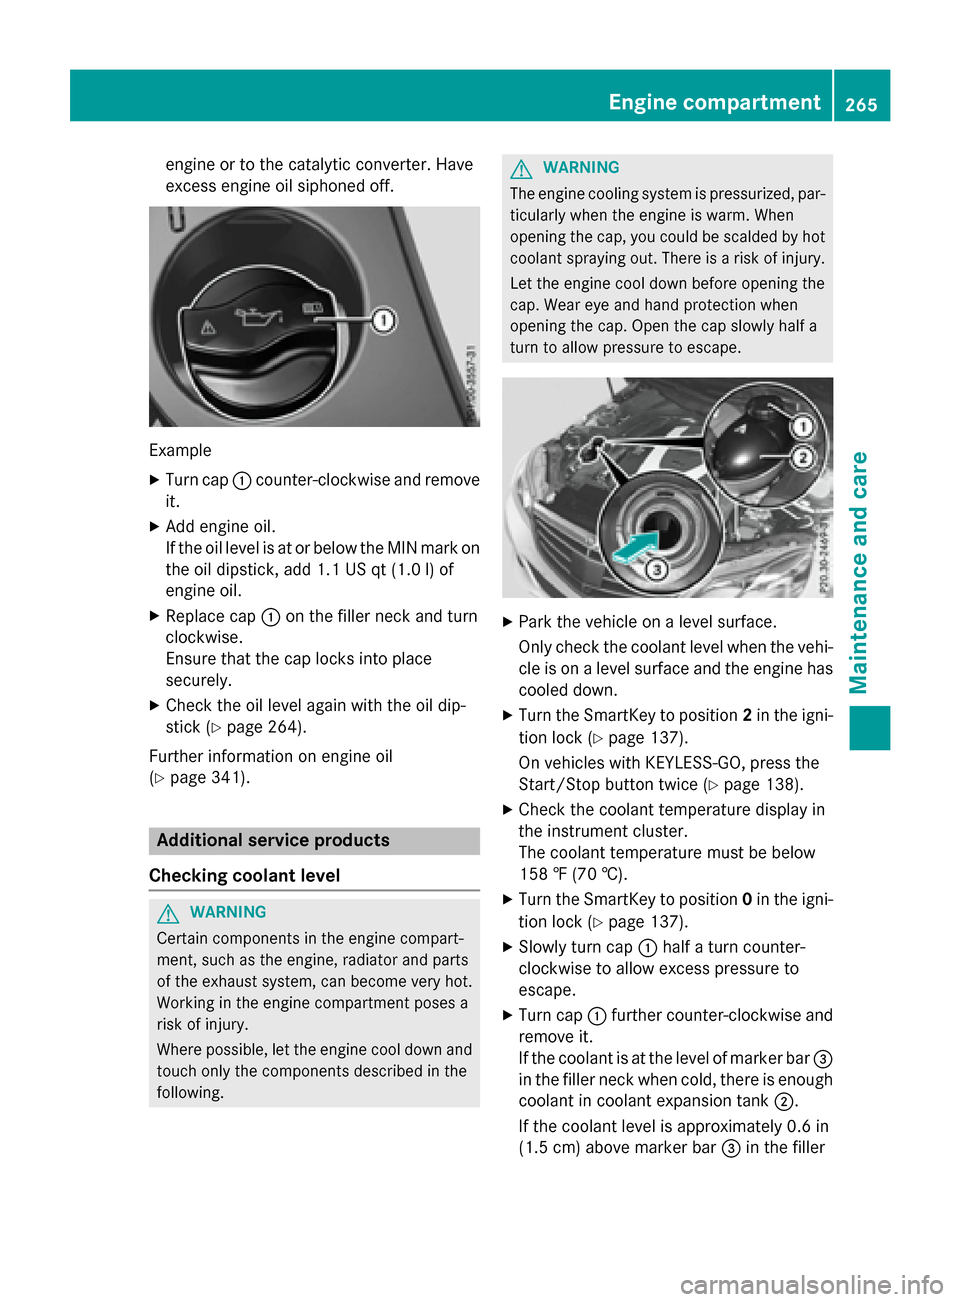
Example
XTurn cap:counter-clockwise and remove
it.
XAdd engine oil.
If the oil level is at or below the MIN mark on
the oil dipstick, add 1.1 US qt (1.0 l)of
engine oil.
XReplace cap :on the filler neck and turn
clockwise.
Ensure that the cap locks into place
securely.
XCheck the oil level again with the oil dip-
stick (
Ypage 264).
Further information on engine oil
(
Ypage 341).
Additional service products
Checking coolant level
GWARNING
Certain components in the engine compart-
ment, such as the engine, radiator and parts
of the exhaust system, can become very hot.
Working in the engine compartment poses a
risk of injury.
Where possible, let the engine cool down and touch only the components described in the
following.
GWARNING
The engine cooling system is pressurized, par-
ticularly when the engine is warm. When
opening the cap, you could be scalded by hot
coolant spraying out. There is a risk of injury.
Let the engine cool down before opening the
cap. Wear eye and hand protection when
opening the cap. Open the cap slowly half a
turn to allow pressure to escape.
XPark the vehicle on a level surface.
Only check the coolant level when the vehi-
cle is on a level surface and the engine has
cooled down.
XTurn the SmartKey to position 2in the igni-
tion lock (
Ypage 137).
On vehicles with KEYLESS-GO, press the
Start/Stop button twice (
Ypage 138).
XCheck the coolant temperature display in
the instrument cluster.
The coolant temperature must be below
158 ‡ (70 †).
XTurn the SmartKey to position 0in the igni-
tion lock (
Ypage 137).
XSlowly turn cap :half a turn counter-
clockwise to allow excess pressure to
escape.
XTurn cap :further counter-clockwise and
remove it.
If the coolant is at the level of marker bar =
in the filler neck when cold, there is enough
coolant in coolant expansion tank ;.
If the coolant level is approximately 0.6 in
(1.5 cm) above marker bar =in the filler
Engine compartment265
Maintenance and care
Z
Page 269 of 350
Regular careof your vehicl eis acondition for
retainin gth equalit yin th elon gterm .
Use car eproducts and cleaning agents rec -
ommended and approve dby Mercedes-Benz.
Exterior car e
Automatic car wash
GWARNIN G
Braking efficiency is reduce dafter washin g
th evehicle. There is aris kof an accident.
Afte rth evehicl ehas been washed, brak e
carefully while payin gattention to th etraffic
condition suntil full brakin gpowe ris restored .
!If DISTRONI CPLU Sor th eHOLD function
is activated, th evehicl ebrakes automati-
call yin certain situations.
To preven tdamag eto th evehicle, deacti -
vat eDISTRONI CPLU Sand th eHOLD func-
tion in th efollowin gor other similar situa-
tions:
Rwhen towin gth evehicl e
Rin thecar wash
!Never clean your vehicl ein aTouchles s
Automati cCar Wash as these use special
cleaning agents .These cleaning agents can
damag eth epaintwork or plastic parts.
!Mak esur ethat:
Rth eside windows and th eslidin gsunroo f
are fully closed .
Rtheventilation/heatin gis switched off
(the OF Fbutto nhas been pressed).
Rth ewindshield wiper switch is in position
0 .
Otherwise ,th evehicl emight be damaged.
!In car washes wit h atowin gmechanism ,
mak esur ethat th eautomatic transmission
is in transmission position N,otherwise th e
vehicl ecould be damaged.
RVehicles wit h aSmartKey:
Do no tremove th eSmartKey fr om the
i
gnition lock. Do no topen th edriver's doo
ror front-passenger door when th e
engin eis switched off .Otherwise ,th e
automatic transmission select spark
position Pautomatically and locks th e
wheels. You can preven tthis by shiftin g
th eautomatic transmission to Nbefore -
hand.
RVehicles wit hKEYLESS-GO :
Do no topen th edriver's doo ror front-
passenger doo rwhen th eengin eis
switched off .Otherwise ,th eautomatic
transmission select spark position P
automatically and locks th ewheels.
!If th eke yis within th erear detection
range of KEYLESS-GO ,situation ssuc has
th efollowin gcould lead to th euninten -
tional openin gof th etrunk lid/tailgate:
Rusin g acar wash
Rusin g apowe rwasher
Mak esur ethat th eSmartKey is at least
10 ft (3 m) away from th evehicle.
Observ eth efollowin gto mak esur ethat th e
automatic transmission stays in position N:
XMak esur eth evehicl eis stationary and th e
ignition is switched off .
XTurn theSmartKey to position 2in th eigni-
tion loc k (
Ypage 137).
Use th eSmartKey instead of th eStart /
Stop butto non vehicles wit hKEYLESS-GO .
XDepress and hold th ebrak epedal .
XShift theautomatic transmission to posi-
tion N.
XReleas eth ebrak epedal .
XReleas eth eparkin gbrake.
XSwitc hoff th eignition and leav eth eSmart -
Key in th eignition lock.
You can wash th evehicl ein an automatic car
wash from th ever ystart .
If th evehicl eis ver ydirty, pre-wash it before
cleaning it in an automatic car wash .
Afte rusin gan automatic car wash ,wipe off
wax from th ewindshield and th ewiper
blades. This will preven tsmears and reduce
Care267
Maintenance and care
Z
Page 273 of 350
RAlignment bolt
ROne pair of gloves
RLug wrench
RTowing eye
Vehicles with a collapsible spare wheel
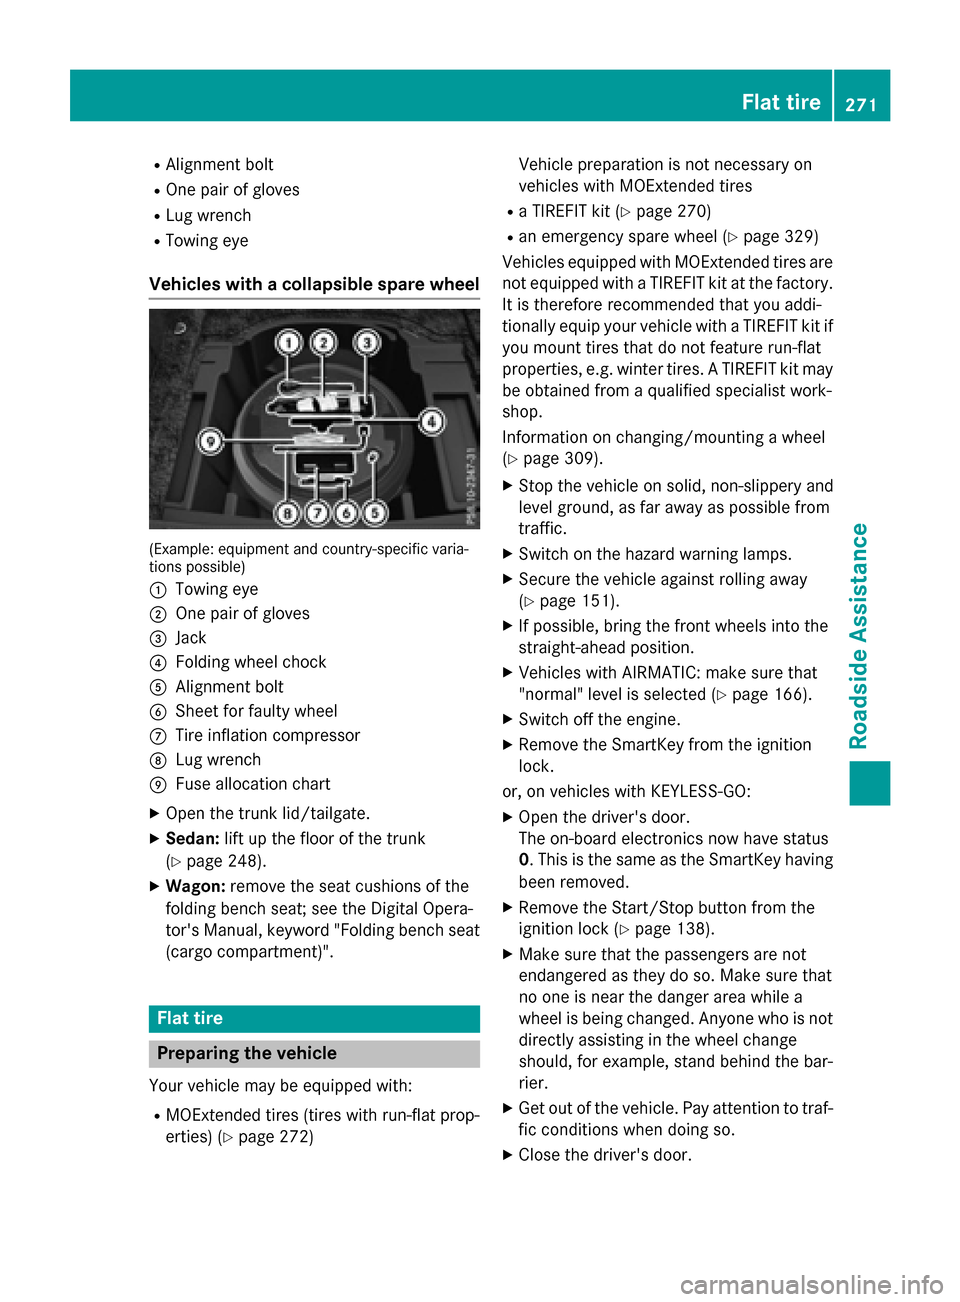
(Example: equipment and country-specific varia-
tions possible)
:
Towing eye
;One pair of gloves
=Jack
?Folding wheel chock
AAlignment bolt
BSheet for faulty wheel
CTire inflation compressor
DLug wrench
EFuse allocation chart
XOpen the trunk lid/tailgate.
XSedan:lift up the floor of the trunk
(
Ypage 248).
XWagon: remove the seat cushions of the
folding bench seat; see the Digital Opera-
tor's Manual, keyword "Folding bench seat
(cargo compartment)".
Flat tire
Preparing the vehicle
Your vehicle may be equipped with:
RMOExtended tires (tires with run-flat prop-
erties) (
Ypage 272) Vehicle preparation is not necessary on
vehicles with MOExtended tires
Ra TIREFIT kit (Ypage 270)
Ran emergency spare wheel (Ypage 329)
Vehicles equipped with MOExtended tires are
not equipped with a TIREFIT kit at the factory. It is therefore recommended that you addi-
tionally equip your vehicle with a TIREFIT kit if
you mount tires that do not feature run-flat
properties, e.g. winter tires. A TIREFIT kit may
be obtained from a qualified specialist work-
shop.
Information on changing/mounting a wheel
(
Ypage 309).
XStop the vehicle on solid, non-slippery and
level ground, as far away as possible from
traffic.
XSwitch on the hazard warning lamps.
XSecure the vehicle against rolling away
(
Ypage 151).
XIf possible, bring the front wheels into the
straight-ahead position.
XVehicles with AIRMATIC: make sure that
"normal" level is selected (
Ypage 166).
XSwitch off the engine.
XRemove the SmartKey from the ignition
lock.
or, on vehicles with KEYLESS ‑GO:
XOpen the driver's door.
The on-board electronics now have status
0 . This is the same as the SmartKey having
been removed.
XRemove the Start/Stop button from the
ignition lock (
Ypage 138).
XMake sure that the passengers are not
endangered as they do so. Make sure that
no one is near the danger area while a
wheel is being changed. Anyone who is not
directly assisting in the wheel change
should, for example, stand behind the bar-
rier.
XGet out of the vehicle. Pay attention to traf-
fic conditions when doing so.
XClose the driver's door.
Flat tire271
Roadside Assistance