key MERCEDES-BENZ E-Class WAGON 2016 W213 Repair Manual
[x] Cancel search | Manufacturer: MERCEDES-BENZ, Model Year: 2016, Model line: E-Class WAGON, Model: MERCEDES-BENZ E-Class WAGON 2016 W213Pages: 350, PDF Size: 6.71 MB
Page 174 of 350
Under the following circumstances, the rear
view camera will not function, or will function
in a limited manner:
Rif the trunk lid or tailgate is open
Rin heavy rain, snow or fog
Rat night or in very dark places
Rif the camera is exposed to very bright light
Rif the area is lit by fluorescent bulbs or LED
lighting (the display may flicker)
Rif there is a sudden change in temperature,
e.g. when driving into a heated garage in
winter
Rif the camera lens is dirty or obstructed.
Observe the notes on cleaning
(
Ypage 268)
Rif the rear of your vehicle is damaged. In this
event, have the camera position and setting
checked at a qualified specialist workshop
The field of vision and other functions of the
rear view camera may be restricted due to
additional accessories on the rear of the vehi-
cle (e.g. license plate holder, bicycle rack).
On vehicles with height-adjustable chassis,
leaving the standard height can result in inac-
curacies in the guide lines, depending on
technical conditions.
iThe rear view camera is protected from
raindrops and dust by means of a flap.
When the rear view camera is activated,
this flap opens.
The flap closes again when:
Ryou have finished the maneuvering proc-
ess
Ryou switch off the engine
Ryou open the trunk
Observe the notes on cleaning
(
Ypage 268).
For technical reasons, the flap may remain
open briefly after the rear view camera has
been deactivated.
!Objects not at ground level may appear to
be further away than they actually are, e.g.:
Rthe bumper of a parked vehicle
Rthe drawbar of a trailer
Rthe ball coupling of a trailer tow hitch
Rthe rear section of an HGV
Ra slanted post
Use the guidelines only for orientation.
Approach objects no further than the bot-
tom-most guideline.
The rear view camera may show a distorted
view of obstacles, show them incorrectly or
not at all. The rear view camera does not show
objects in the following positions:
Rvery close to the rear bumper
Runder the rear bumper
Rin the area immediately above the tailgate
handle
Activating/deactivating the rear view
camera
XTo activate: make sure that the SmartKey
is in position 2in the ignition lock.
XMake sure that the Activation by R
gearfunction is selected in Audio 20 or
COMAND, see the Digital Operator's Man-
ual.
XEngage reverse gear.
The rear view camera flap opens. The area
behind the vehicle is shown with guide lines
in the Audio 20 or COMAND display.
The image from the rear view camera is
available throughout the maneuvering
process.
To deactivate: the rear view camera deacti-
vates if you shift the transmission to Por after
driving forwards a short distance.
172Driving systems
Driving and parking
Page 176 of 350
Rif the trunk lid/tailgate is open
Rin heavy rain, snow or fog
Rat night or in very dark places
Rif the cameras are exposed to very bright
light
Rif the area is lit by fluorescent bulbs or LED
lighting (the display may flicker)
Rif there is a sudden change in temperature,
e.g. when driving into a heated garage in
winter
Rif the camera lenses are dirty or covered
Rif the vehicle components in which the
cameras are installed are damaged. In this
event, have the camera position and setting
checked at a qualified specialist workshop.
Do not use the 360° camera in this case. You
can otherwise injure others or cause damage to objects or the vehicle.
Guide lines are always shown at road level.
On vehicles with height-adjustable chassis,
depending on technical conditions, leaving
the standard height can result in:
Rinaccuracies in the guide lines
Rinaccuracies in the display of generated
images (top view)
Activation conditions
The 360° camera image can be displayed if:
Ryour vehicle is equipped with a 360° cam-
era
Rthe SmartKey is in position 2in the ignition
lock
RCOMAND/Audio 20 is switched on
Rthe 360° Camerafunction is switched on
Switching on the 360° camera
XPress the Øbutton in the center con-
sole for longer than two seconds.
Depending on whether position Dor Ris
engaged, the following is shown:
Ra split screen with top view and the
image from the front camera or
Ra split screen with top view and the
image from the rear view camera
or
XPress the Øbutton in the center con-
sole.
The vehicle menu is displayed.
XSelect 360° Cameraand press 7to con-
firm.
Depending on whether position Dor Ris
engaged, the following is shown:
Ra split screen with top view and the
image from the front camera or
Ra split screen with top view and the
image from the rear view camera
Activating the 360° camera using
reverse gear
The 360° camera images can be automati-
cally displayed by engaging reverse gear.
XMake sure that the SmartKey is in position
2 in the ignition lock.
XMake sure that the Activation by R
gearfunction is selected in COMAND/
Audio 20 (see the separate COMAND/
Audio 20 operating instructions).
XTo show the 360° camera image: engage
reverse gear.
The area behind the vehicle is shown in the
COMAND/Audio 20 display in split-screen
mode. You see the top view of the vehicle
and the image from the rear view camera.
Selecting the split-screen and full
screen displays
Switching between split screen views
XTo switch to the line with the vehicle icons:
slide 5the controller.
XTo select one of the vehicle icons: turn
3 the controller.
174Driving systems
Driving and parking
Page 191 of 350
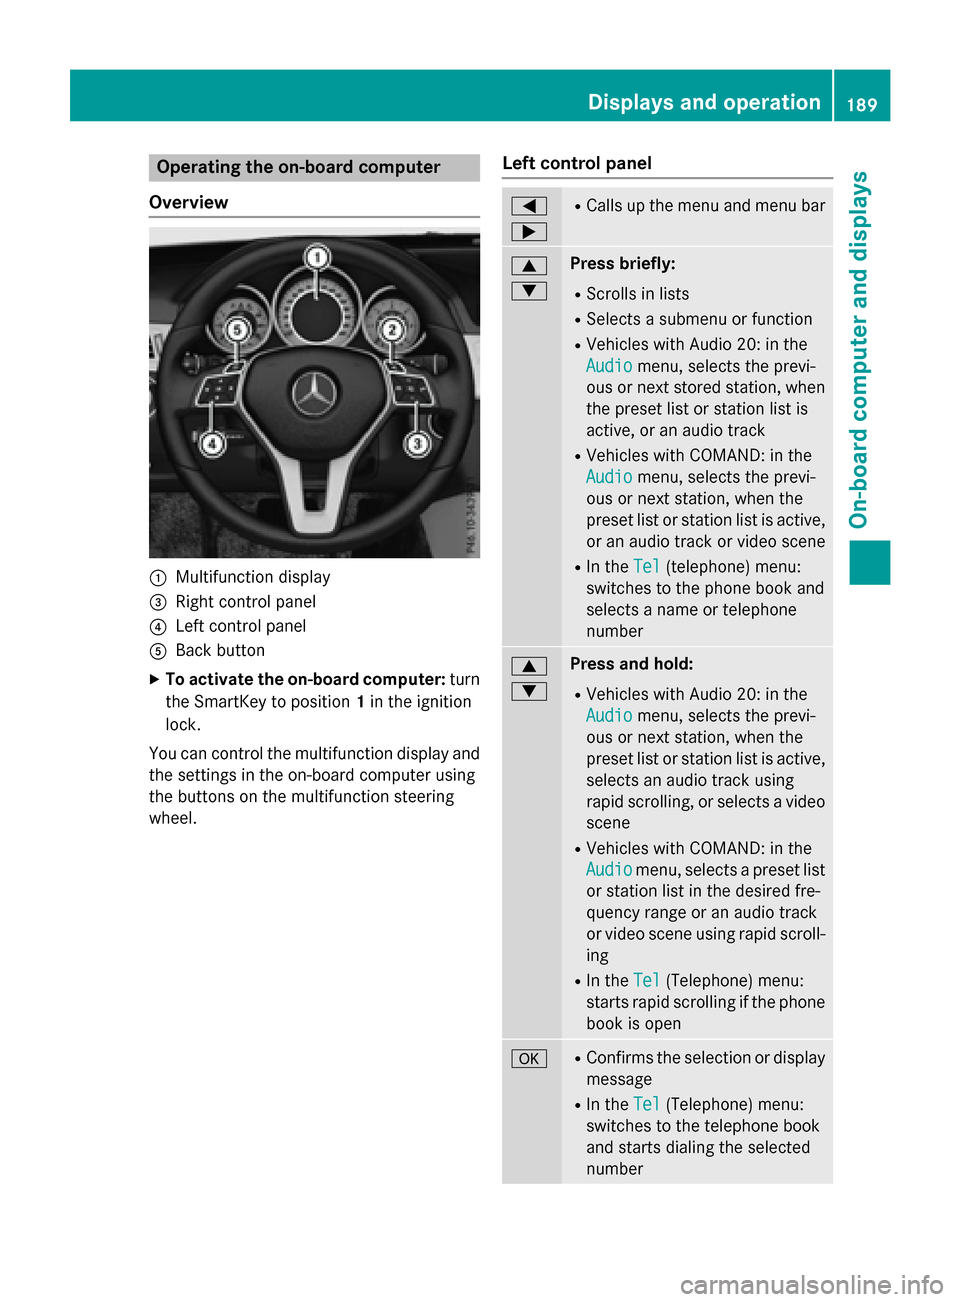
Operating the on-board computer
Overview
:Multifunction display
=Right control panel
?Left control panel
ABack button
XTo activate the on-board computer: turn
the SmartKey to position 1in the ignition
lock.
You can control the multifunction display and
the settings in the on-board computer using
the buttons on the multifunction steering
wheel.
Left control panel
=
;RCalls up the menu and menu bar
9
:Press briefly:
RScrolls in lists
RSelects a submenu or function
RVehicles with Audio 20: in the
Audio
menu, selects the previ-
ous or next stored station, when
the preset list or station list is
active, or an audio track
RVehicles with COMAND: in the
Audio
menu, selects the previ-
ous or next station, when the
preset list or station list is active,
or an audio track or video scene
RIn the Tel(telephone) menu:
switches to the phone book and
selects a name or telephone
number
9
:Press and hold:
RVehicles with Audio 20: in the
Audio
menu, selects the previ-
ous or next station, when the
preset list or station list is active,
selects an audio track using
rapid scrolling, or selects a video
scene
RVehicles with COMAND: in the
Audio
menu, selects a preset list
or station list in the desired fre-
quency range or an audio track
or video scene using rapid scroll-
ing
RIn the Tel(Telephone) menu:
starts rapid scrolling if the phone
book is open
aRConfirms the selection or display
message
RIn the Tel(Telephone) menu:
switches to the telephone book
and starts dialing the selected
number
Displays and operation189
On-board computer and displays
Z
Page 219 of 350
You can select from the following sound
systems:
-harman/kardon®Logic7®surround
sound system
-Bang & Olufsen BeoSound AMG sound
system (COMAND)
RNavigation system
-Navigation via the hard drive (COMAND)
-Navigation via an SD card (if available for Audio 20)
-Destination entry, e.g. using keyword
search (COMAND)
-Realistic 3D map with textured city mod-
els
-Personal POIs and routes using SD mem-
ory card (COMAND)
-Navigation functions, e.g. compass dis-
play (COMAND)
-Dynamic route guidance with traffic
reports via SIRIUS satellite radio
(COMAND)
RCommunication
-Messaging functions: text messages, e-
mail (COMAND)
-Address book (COMAND)
-Internet browser (COMAND)
-Mercedes-Benz Apps with Google™,
Local Search, Destination/Route down-
load, Facebook, Google Street View™,
stock prices, news and much more
-Mercedes-Benz mobile website
-WiFi interface for the connection of a
smartphone to COMAND
-WiFi hotspot functionality to connect a
tablet PC or notebook in order to enable
access to the Internet using the custom-
er's mobile phone (COMAND)
RSIRIUS Weather (COMAND)
-Weather data as an information chart
(current forecast, 5-day preview,
detailed information)
-Weather data on the weather map, e.g.
rain radar data, storm characteristics and the track of tropical cyclones (hurri-
canes, tornadoes)
RVehicle functions
-Vehicle settings, e.g. fuel consumption
-360° camera
-Rear view camera
-Seat functions
RFavorites button (if available)
Fast access to favorites functions using the
favorites button on the controller
Display
General notes
!Do not use the space in front of the dis-
play for storage. Objects placed here could damage the display or impair its function.
Avoid any direct contact with the display
surface. Pressure on the display surface
may result in impairments to the display,
which could be irreversible.
Wearing polarized sunglasses may impair
your ability to read the display.
The display has an automatic temperature-
controlled switch-off feature. The brightness
is automatically reduced if the temperature is
too high. The display may then temporarily
switch off completely.
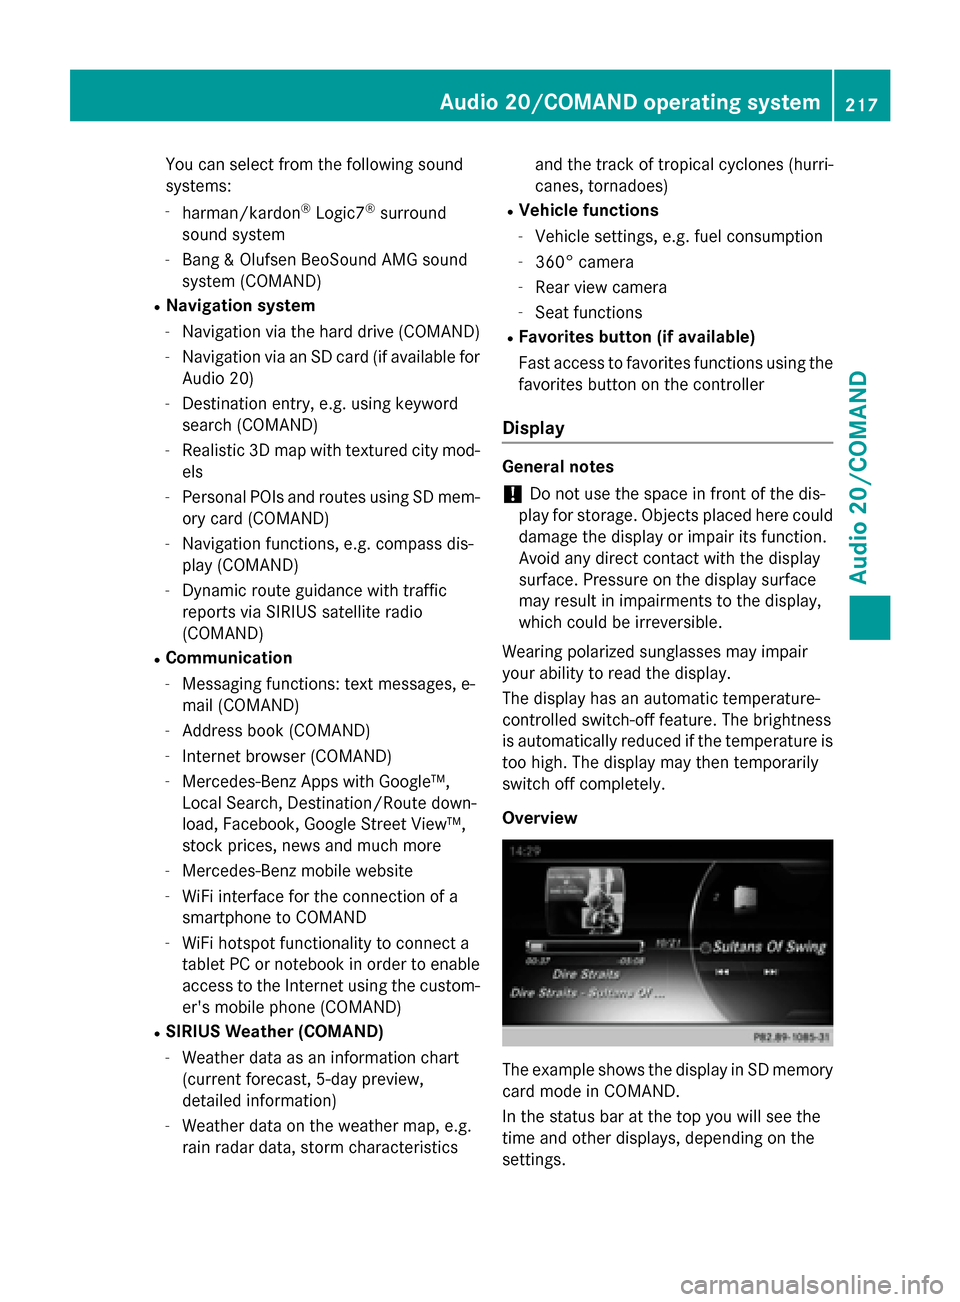
Overview
The example shows the display in SD memory
card mode in COMAND.
In the status bar at the top you will see the
time and other displays, depending on the
settings.
Audio 20/COMAND operating system217
Audio 20/COMAND
Z
Page 227 of 350
Only operate the equipment when the traffic
situation permits. If you are not sure that thisis possible, park the vehicle paying attention
to traffic conditions and operate the equip-
ment when the vehicle is stationary.
You must observe the legal requirements for
the country in which you are currently driving
when operating the navigation system.
General notes
Audio 20 is equipped with MARGIN
®MAP
PILOT (see the manufacturer's operating
instructions).
Further information on navigation using
COMAND can be found in the Digital Opera-
tor's Manual.
Among other things, correct functioning of
the navigation system depends on GPS recep-
tion. In certain situations, GPS reception may
be impaired, there may be interference or
there may be no reception at all, e.g. in tun-
nels or parking garages.
At vehicle speeds of above 5 km/h, data
entries are restricted.
iThe functionality of a roof antenna (tele-
phone, GPS) may be impaired if roof carri-
ers are used.
Switching to navigation mode
XPress the ßbutton.
The map shows the vehicle's current posi-
tion.
Showing/hiding the menu
XTo show: slide6the controller when the
map appears.
XTo hide: press the %button.
Destination entry
General notes
The information given relating to destination
entry applies to COMAND. For information on
Audio 20, see the manufacturer's operating
instructions. Destination entry options
Destination entry may be blocked while driv-
ing, depending on the country specifications.
Address input
Keyword search using fragments of words
From the list of last destinations (up to 50
destinations)
Selecting a contact from the address book
(contact with navigation data
L)
Selecting a POI (e.g. gas station, restau-
rant) for different positions
On the map
Entering intermediate destinations
From Mercedes-Benz Apps
Requirement (USA): mbrace is activated for
the Mercedes-Benz Apps.
Requirement (Canada): a mobile phone is
connected via Bluetooth
®or USB with
COMAND.
Entering geo-coordinates
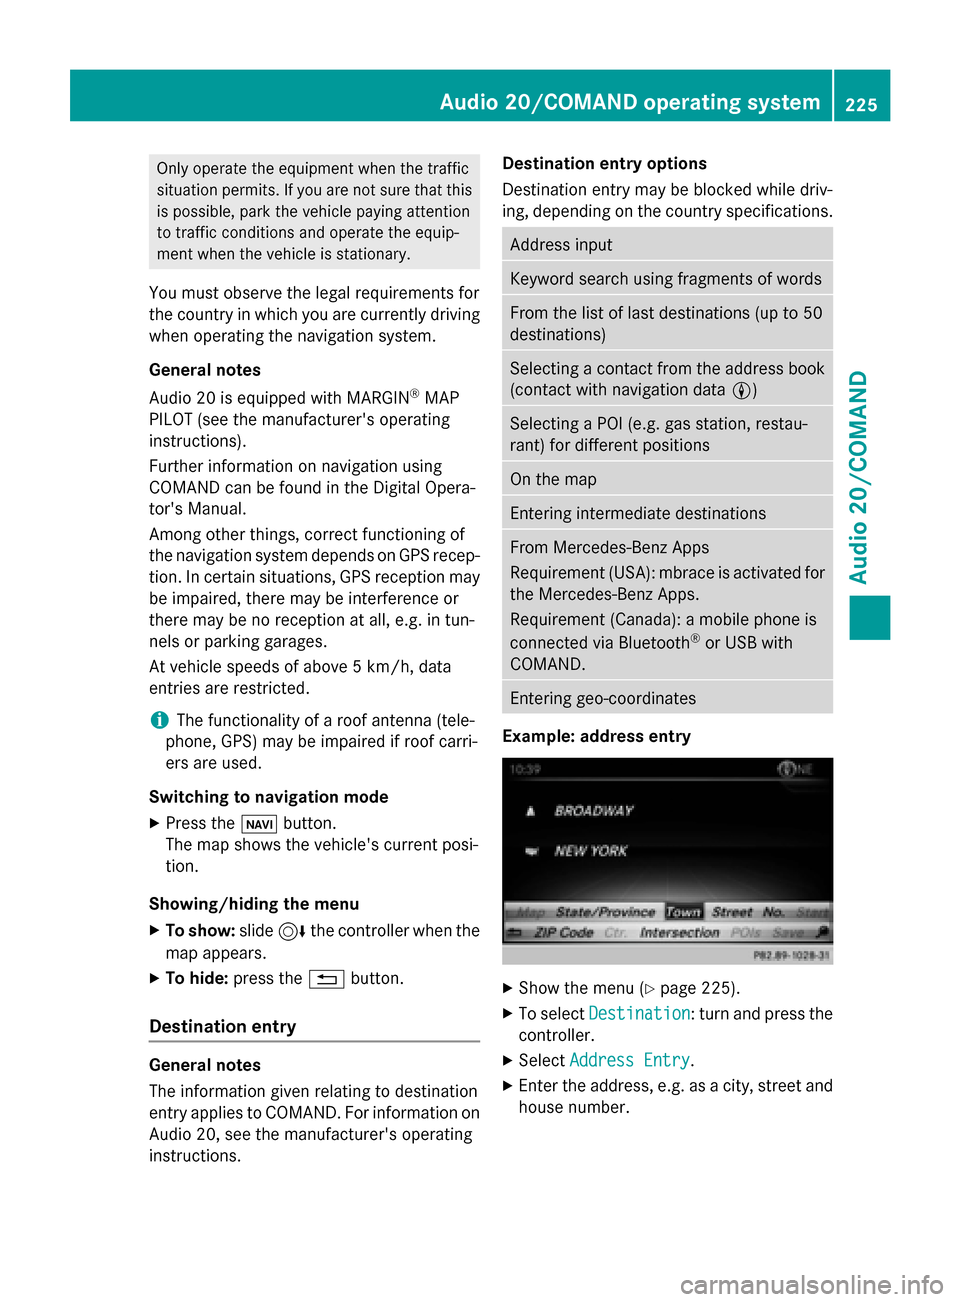
Example: address entry
XShow the menu (Ypage 225).
XTo select Destination: turn and press the
controller.
XSelect Address Entry.
XEnter the address, e.g. as a city, street and
house number.
Audio 20/COMAND operating system225
Audio 20/COMAND
Z
Page 230 of 350
On the mobile phone
XSwitch on the mobile phone and enter the
PIN when prompted to do so (see the man-
ufacturer's operating instructions).
XActivate Bluetooth®and, if necessary,
Bluetooth®visibility for other devices (see
the manufacturer's operating instructions).
This visibility is for restricted periods of
time on some mobile phones (see the man-
ufacturer's operating instructions).
XSet the Bluetooth®device name for the
mobile phone if necessary.
The Bluetooth
®device names for all of one
manufacturer's products might be identical.
To make it possible to clearly identify your
mobile phone, change the device name (see
the manufacturer's operating instructions).
The name can be freely selected.
If the mobile phone supports the PBAP
(Phone BookAccess Profile) and MAP
(Message AccessProfile) Bluetooth
®pro-
files, the following information will be trans-
mitted after you connect:
RPhone book
RCall lists
RMessages
The battery of the mobile phone should
always be kept sufficiently charged in order to
prevent malfunctions.
iNot all mobile phones available on the
market are equally suitable. You can obtain
more detailed information about suitable
mobile phones and about the connection
between the mobile phone and Audio 20/
COMAND on the Internet at
http://www.mbusa-mobile.com .
You can also obtain more information by
calling.
In the USA, you can get in touch with the
Mercedes-Benz Customer Assistance Cen-
ter on 1-800-FOR-MERCedes
(1-800-367-6372). In Canada, you can get in touch with the
Customer Relations Center on
1-800-387-0100.
iSome displays (e.g. the signal strength)
depend on the supported version of the
Hands-Free Profile.
Procedure and general information
Searching for and authorizing (connect-
ing) a mobile phone
Before using your mobile phone with Audio
20/COMAND for the first time, you will need
to search (
Ypage 229) for the phone and
then authorize it (
Ypage 229). Depending on
the mobile phone, authorization either takes
place by means of Secure Simple Pairing or by
entering a passkey. Audio 20/COMAND
automatically makes the system suitable for
your mobile phone available. You can recog-
nize Secure Simple Pairing by a code which is displayed in Audio 20/COMAND and on the
mobile phone. You can recognize the passkey
system by the fact that you have to enter a
code on the mobile phone and in Audio 20/
COMAND. The mobile phone is always con-
nected automatically after authorization.
If Audio 20/COMAND does not detect your
mobile phone, this may be due to particular
security settings on your mobile phone. You
can also start the search procedure and
authorization on the mobile phone
(
Ypage 230).
Device-specific information on authorizing
and connecting Bluetooth
®-capable mobile
phones can be found on the Internet at
http://www.mercedes-benz.com/
connect.
You can authorize up to 15 mobile phones.
Only one mobile phone can be connected to
Audio 20/COMAND at any one time.
De-authorizing (disconnecting) a mobile
phone
The connection is terminated automatically if
you leave the receiver range of Audio 20/
228Audio 20/COMAND operating system
Audio 20/COMAND
Page 232 of 350
The code is different
XAudio 20/COMAND:selectNo.
The process is canceled. Repeat the
authorization.
Authorization via passkey entry (access
code)
Once Audio 20/COMAND has found your
mobile phone, you can authorize (connect) it.
XTo select the Bluetooth®name of the
desired mobile phone in the device list: turn
and press the controller.
The input menu for the passkey is dis-
played.
The passkey is a one- to sixteen-digit num-
ber combination which you can choose
yourself.
XAudio 20/COMAND: enter the passkey
using the character bar.
XSelect ¬once all the numbers have
been entered.
XMobile phone: enter the same passkey
and confirm your entry. Depending on the
mobile phone used, you may have to con-
firm the connection to Audio 20/COMAND as well as confirm for the PBAP and MAP
Bluetooth
®profiles. The prompt to confirm
may take up to two minutes to be dis-
played. You may also save the confirmation
on the mobile phone (see the manufactur-
er's operating instructions).
The mobile phone is now authorized and
connected to Audio 20/COMAND. You can now speak using the hands-free system.
Further information on setting the transmis-
sion and reception volume of the mobile
phone can be found in the Digital Operator's
Manual.
If the
Authorization Failed
message
appears, you may have entered a different
passkey or exceeded the prescribed time
limit. Repeat the procedure.
iSome mobile phones require a passkey
with four or more digits.
iIf you wish to re-authorize the mobile
phone after de-authorizing it, you can
choose another passkey for it.
Establishing the connection from the
mobile phone
The Bluetooth®device name of Audio 20/
COMAND is "MB Bluetooth".
XAudio 20/COMAND: call up the telephone
menu.
XTo switch to the menu bar: slide 6the
controller.
XTo select Connect Device: turn the con-
troller and press to confirm.
The device list is displayed.
XTo select Connect via Phone: turn and
press the controller.
A message is displayed, stating that you
can start the search on your mobile phone.
XMobile phone: start the search for a Blue-
tooth®device (see manufacturer's operat-
ing instructions).
Audio 20/COMAND is displayed with the
name "MB Bluetooth" in the mobile phone's
device list.
XSelect "MB Bluetooth".
A prompt appears in the Audio 20/
COMAND display asking whether the
mobile phone should be authorized.
XAudio 20/COMAND: selectYes.
If No
is selected, the procedure is canceled.
If your mobile phone supports Secure Sim-
ple Pairing, a code is now displayed on both
devices.
The code is the same
XAudio 20/COMAND: selectYes.
XMobile phone: confirm the code. Depend-
ing on the mobile phone used, you may
have to confirm the connection to Audio
20/COMAND as well as confirm for the
PBAP and MAP Bluetooth
®profiles. The
prompt to confirm may take up to two
minutes to be displayed. You may also save
230Audio 20/COMAND operating system
Audio 20/COMAND
Page 259 of 350
USA: FCC ID: CB2HMIHL4
Canada: IC: 279B-HMIHL4
Important safety notes
GWARNING
When you operate or program the garage door
with the integrated garage door opener, per-
sons in the range of movement of the garage
door can become trapped or struck by the
garage door. There is a risk of injury.
When using the integrated garage door
opener, always make sure that nobody is
within the range of movement of the garage
door.
GWARNING
Combustion engines emit poisonous exhaust
gases such as carbon monoxide. Inhaling
these exhaust gases leads to poisoning. There
is a risk of fatal injury. Therefore never leave
the engine running in enclosed spaces with-
out sufficient ventilation.
Programming
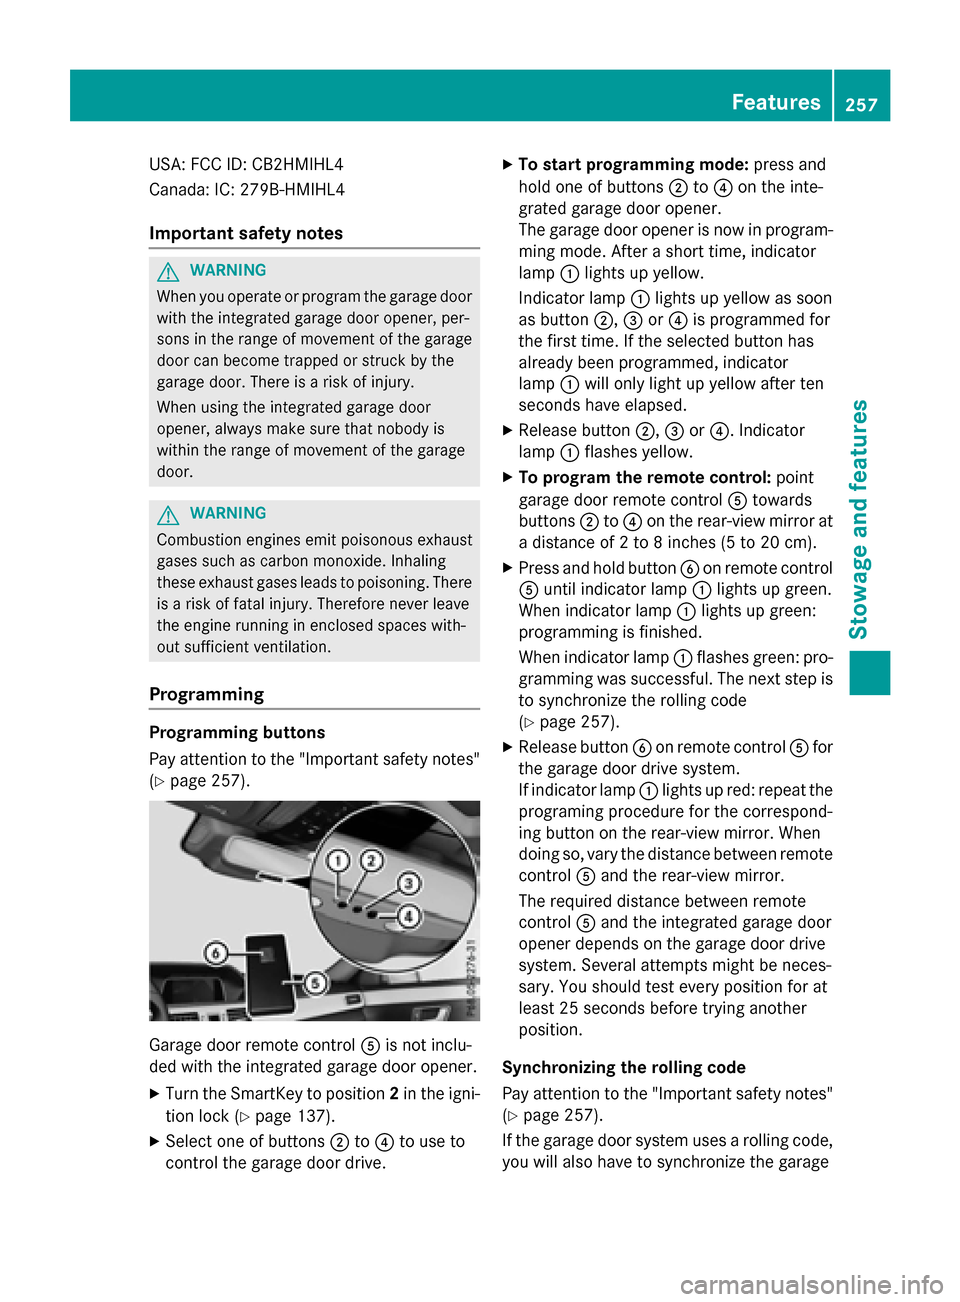
Programming buttons
Pay attention to the "Important safety notes"
(
Ypage 257).
Garage door remote control Ais not inclu-
ded with the integrated garage door opener.
XTurn the SmartKey to position 2in the igni-
tion lock (
Ypage 137).
XSelect one of buttons ;to? to use to
control the garage door drive.
XTo start programming mode: press and
hold one of buttons ;to? on the inte-
grated garage door opener.
The garage door opener is now in program-
ming mode. After a short time, indicator
lamp :lights up yellow.
Indicator lamp :lights up yellow as soon
as button ;,=or? is programmed for
the first time. If the selected button has
already been programmed, indicator
lamp :will only light up yellow after ten
seconds have elapsed.
XRelease button ;,=or?. Indicator
lamp :flashes yellow.
XTo program the remote control: point
garage door remote control Atowards
buttons ;to? on the rear-view mirror at
a distance of 2 to 8 inches (5 to 20 cm).
XPress and hold button Bon remote control
A until indicator lamp :lights up green.
When indicator lamp :lights up green:
programming is finished.
When indicator lamp :flashes green: pro-
gramming was successful. The next step is
to synchronize the rolling code
(
Ypage 257).
XRelease button Bon remote control Afor
the garage door drive system.
If indicator lamp :lights up red: repeat the
programing procedure for the correspond-
ing button on the rear-view mirror. When
doing so, vary the distance between remote
control Aand the rear-view mirror.
The required distance between remote
control Aand the integrated garage door
opener depends on the garage door drive
system. Several attempts might be neces-
sary. You should test every position for at
least 25 seconds before trying another
position.
Synchronizing the rolling code
Pay attention to the "Important safety notes"
(
Ypage 257).
If the garage door system uses a rolling code,
you will also have to synchronize the garage
Features257
Stowage and features
Z
Page 260 of 350
door system with the integrated garage door
opener in the rear-view mirror. To do this you
will need to use the programming button on
the door drive control panel. The program-
ming button may be positioned in different
places depending on the manufacturer. It is
usually located on the door drive unit on the
garage ceiling.
Familiarize yourself with the garage door
drive operating instructions, e.g. under "Pro-
gramming of additional remote controls",
before carrying out the following steps.
Your vehicle must be within reach of the
garage door or gate opener drive. Make sure
that neither your vehicle nor any persons/
objects are present within the sweep of the
door or gate.
XTurn the SmartKey to position2in the igni-
tion lock (
Ypage 137).
XGet out of the vehicle.
XPress the programming button on the door drive unit.
Usually, you now have 30 seconds to ini-
tiate the next step.
XGet into the vehicle.
XPress previously programmed button ;,
= or? on the integrated garage door
opener until the door closes.
The rolling code synchronization is then
complete.
Notes on programming the remote con-
trol
Canadian radio frequency laws require a
"break" (or interruption) of the transmission
signals after broadcasting for a few seconds. Therefore, these signals may not last long
enough for the integrated garage door
opener. The signal is not recognized during
programming. Comparable with Canadian
law, some U.S. garage door openers also fea-
ture a "break". Proceed as follows:
Rif you live in Canada
Rif you have difficulties programming the
garage door opener (regardless of where
you live) when using the programming
steps.
XPress and hold one of buttons
;to? on
the integrated garage door opener.
After a short time, indicator lamp :lights
up yellow.
XRelease the button.
Indicator lamp :flashes yellow.
XPress button Bof garage door remote
control Afor two seconds, then release it
for t
wo seconds.
XPress button Bagain for two seconds.
XRepeat this sequence on button Bof
remote control Auntil indicator lamp :
lights up green.
When indicator lamp :lights up green:
programming is finished.
When indicator lamp :flashes green: pro-
gramming was successful. The next step is
to synchronize the rolling code.
XRelease button Bof remote control Aof
the garage door drive.
If indicator lamp :lights up red: repeat the
programming process for the correspond-
ing button on the rear-view mirror. When
doing so, vary the distance between remote
control Aand the rear-view mirror.
The required distance between remote
control Aand the integrated garage door
opener depends on the garage door drive
system. Several attempts might be neces-
sary. You should test every position for at
least 25 seconds before trying another
position.
258Features
Stowage and features
Page 261 of 350
Problems when programming
If you are experiencing problems programing
the integrated garage door opener on the
rear-view mirror, take note of the following
instructions:
RCheck the transmitter frequency used by
garage door drive remote controlAand
whether it is supported. The transmitter
frequency can usually be found on the back
of the garage door drive remote control.
The integrated garage door opener is com-
patible with devices that have units which
operate in the frequency range of 280 to
433 MHz.
RReplace the batteries in garage door
remote control A. This increases the like-
lihood that garage door remote control A
will transmit a strong and precise signal to
the integrated garage door opener.
RWhen programming, hold remote control
A at varying distances and angles from the
button which you are programming. Try var-
ious angles at a distance between 2and
12 inches (5to 30 cm) or at the same angle
but at varying distances.
RIf another remote control is available for the
same garage door drive, repeat the same
programming steps with this remote con-
trol. Before performing these steps, make
sure that new batteries have been installed
in garage door drive remote control A.
RNote that some remote controls only trans-
mit for a limited amount of time (the indi-
cator lamp on the remote control goes out).
Press buttonBon remote control Aagain
before transmission ends.
RAlign the antenna cable of the garage door
opener unit. This can improve signal recep-
tion/transmission.
Opening/closing the garage door
After it has been programmed, the integrated
garage door opener performs the function of
the garage door system remote control. Please also read the operating instructions
for the garage door system.
XTurn the SmartKey to position
2in the igni-
tion lock (
Ypage 137).
XPress button ;,=or? which you have
programmed to operate the garage door.
Garage door system with a fixed code: indi-
cator lamp :lights up green.
Garage door system with a rolling code:
indicator lamp :flashes green.
The transmitter will transmit a signal as
long as the button is pressed. The trans-
mission is halted after a maximum of ten
seconds and indicator lamp :lights up
yellow.
XPress button ;,=or? again if neces-
sary.
Clearing the memory
Make sure that you clear the memory of the
integrated garage door opener before selling
the vehicle.
XTurn the SmartKey to position 2in the igni-
tion lock (
Ypage 137).
XPress and hold buttons ;and ?.
The indicator lamp initially lights up yellow
and then green.
XRelease buttons ;and ?.
The memory of the integrated garage door
opener in the rear-view mirror is cleared.
Floormats
GWARNING
Objects in the driver's footwell can restrict the pedal travel or obstruct a depressed pedal.
The operating and road safety of the vehicle is
jeopardized. There is a risk of an accident.
Make sure that all objects in the vehicle are
stowed correctly, and that they cannot enter
the driver's footwell. Install the floormats
securely and as specified in order to ensure
sufficient clearance for the pedals. Do not use
Features259
Stowage and features
Z