display MERCEDES-BENZ S-Class SEDAN 2016 W222 Comand Manual
[x] Cancel search | Manufacturer: MERCEDES-BENZ, Model Year: 2016, Model line: S-Class SEDAN, Model: MERCEDES-BENZ S-Class SEDAN 2016 W222Pages: 298, PDF Size: 9.16 MB
Page 128 of 298
Selecting text information on the map
At the bottom of the display, you can specify whether to display geo-coordinates or not to
display text information for the street you are currently on.
XTo switch to navigation mode:press theßbutton.
XTo show the menu: slide6the controller.
XTo select Options: turn and press the controller.
XSelectMap Content.
XSelectText Information On Map.
The #dot indicates the current setting.
XTurn and press the controller.
Current Street
shows the current street at the bottom of the display.
Geo-coordinates
shows the longitude and latitude, elevation and number of satellites
received. The elevation shown may deviate from the actual elevation.
XTurn and press the controller.
Switching highway information on/off
While driving on the highway, gas stations, rest stops, rest areas and highway exits are dis-
played along with their immediate distances from the current vehicle position (
Ypage 110).
XTo switch to navigation mode: press theßbutton.
XTo show the menu: slide6the controller.
XTo select Options: turn and press the controller.
XSelectMap Content.
XSelectHighway Information.
Switch the display in the map on Oor off ª.
Further information (
Ypage 110).
Displaying the next crossroads
If route guidance is not active, the next cross-
roads can be displayed at the upper edge of
the display.
XTo switch to navigation mode: press the
ß button.
XTo show the menu: slide6the control-
ler.
XTo select Options: turn and press the con-
troller.
XSelect Map Content.
XSelectNext Intersecting Street.
Switch the display in the map on Oor off
ª.
Showing the map version
The current map version number is shown.
Information about new versions of the digital
map can be obtained from an authorized
Mercedes-Benz Center.
XTo switch to navigation mode: press the
ß button.
XTo show the menu: press the controller.
XTo selectOptions: turn and press the con-
troller.
XSelect Map Content.
XSelectMap Version.
126Map functions
Navigation
Page 129 of 298
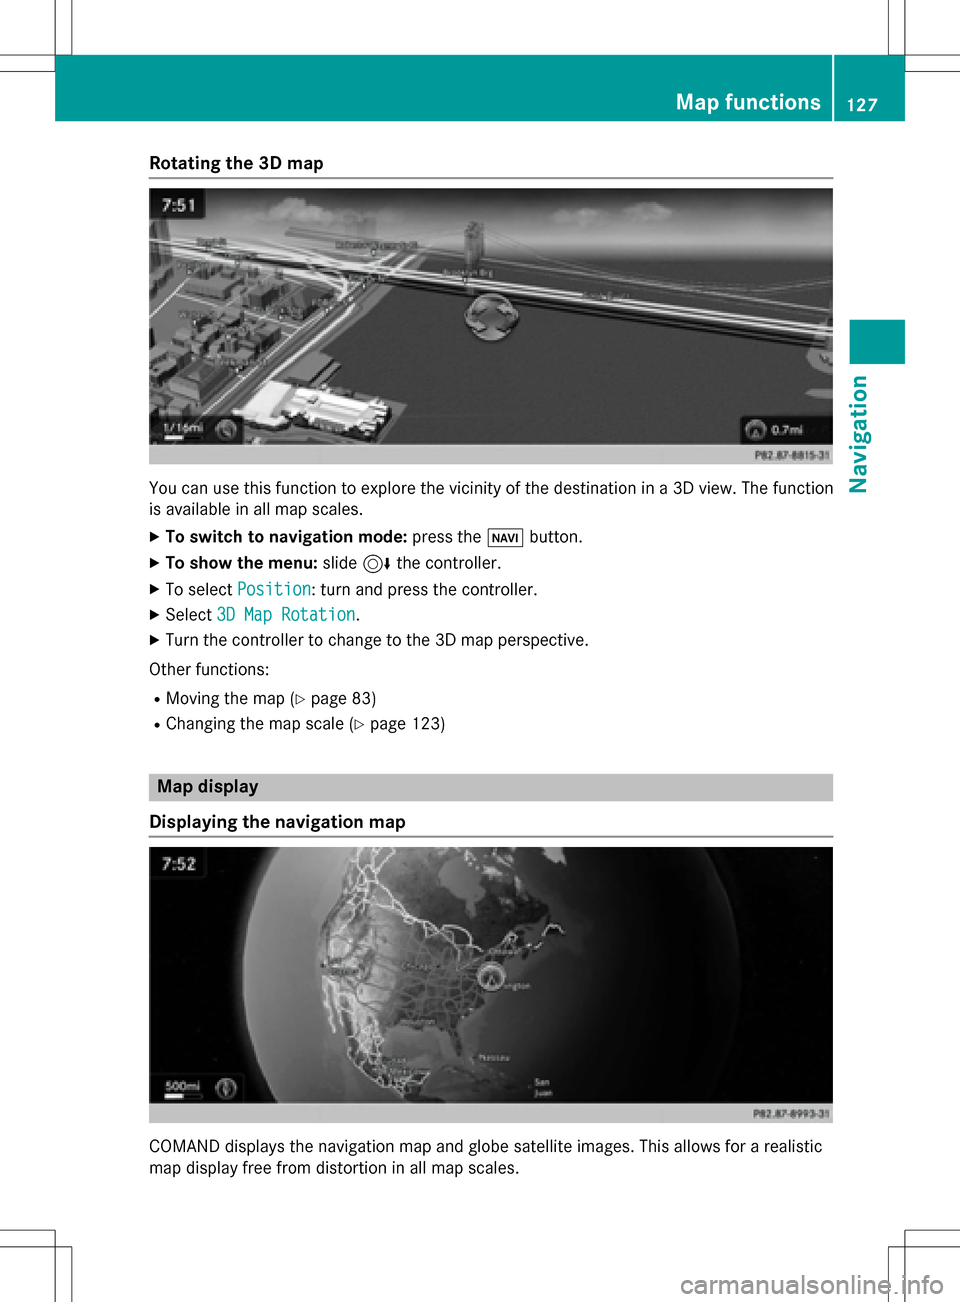
Rotating the 3D map
You can use this function to explore the vicinity of the destination in a 3D view. The function
is available in all map scales.
XTo switch to navigation mode:press theØbutton.
XTo show the menu: slide6the controller.
XTo select Position: turn and press the controller.
XSelect3D Map Rotation.
XTurn the controller to change to the 3D map perspective.
Other functions:
RMoving the map (Ypage 83)
RChanging the map scale (Ypage 123)
Map display
Displaying the navigation map
COMAND displays the navigation map and globe satellite images. This allows for a realistic
map display free from distortion in all map scales.
Map functions127
Navigation
Z
Page 133 of 298
XTo select an area:when the map with crosshair appears, press the controller.
A red square appears on the map, symbolizing the area to be blocked.
XTo change the size of the area, turn the controller.
The map scale is shown at the bottom of the display. The needle is on the map scale currently
selected.
XWhen the desired size is set, press the controller.
The area is entered into the list.
Turning Area on/off and displaying/changing the area
XTo switch to navigation mode: press theßbutton.
XTo show the menu: slide6the controller.
XTo select Options: turn and press the controller.
XSelectRoute Settings.
XSelectAvoid Options.
XSelectAvoid Area.
A list appears.
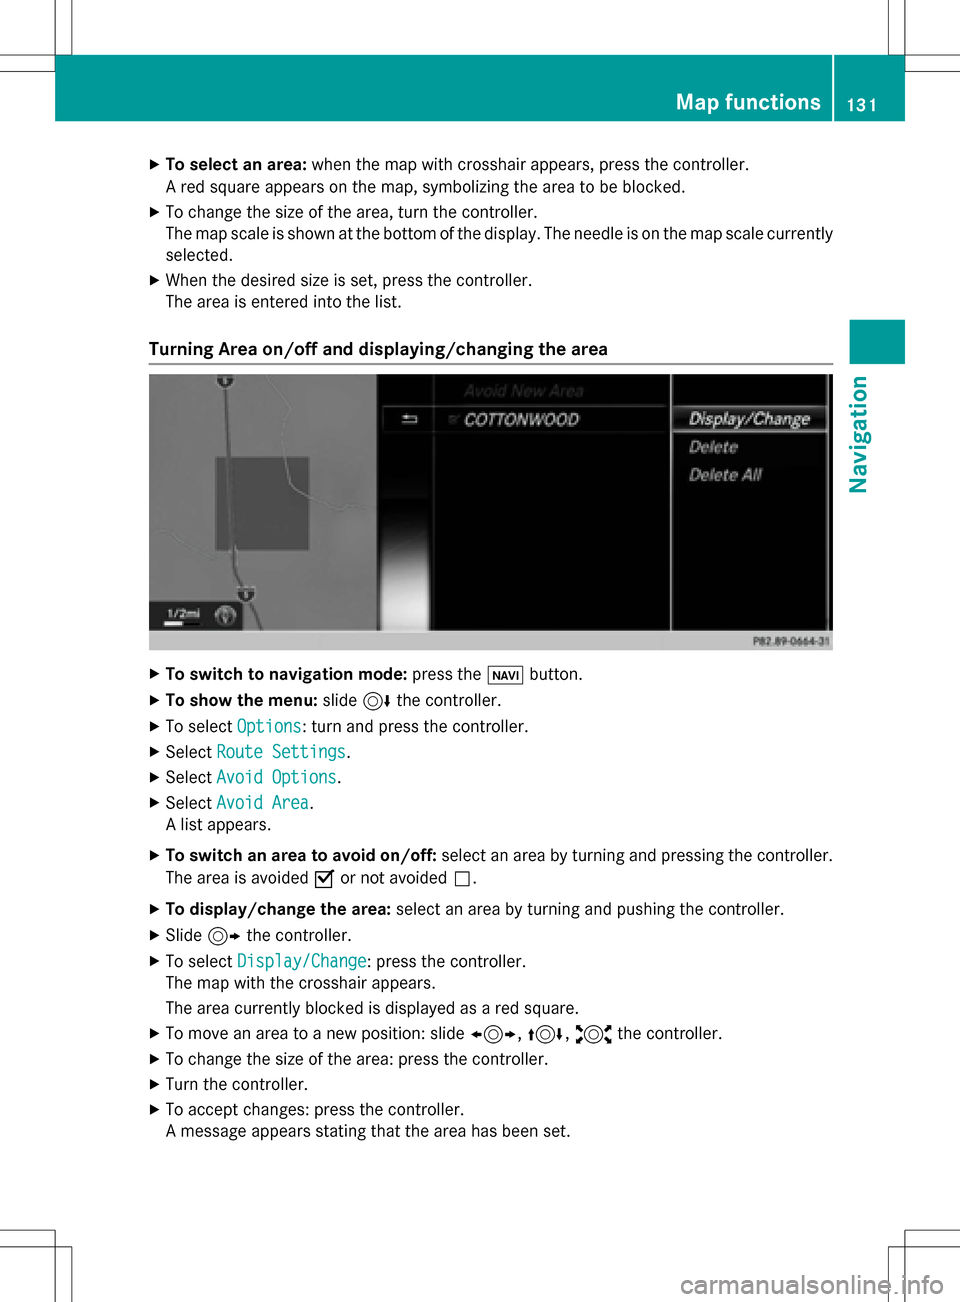
XTo switch an area to avoid on/off: select an area by turning and pressing the controller.
The area is avoided Oor not avoided ª.
XTo display/change the area: select an area by turning and pushing the controller.
XSlide9the controller.
XTo select Display/Change: press the controller.
The map with the crosshair appears.
The area currently blocked is displayed as a red square.
XTo move an area to a new position: slide 1,4,2the controller.
XTo change the size of the area: press the controller.
XTurn the controller.
XTo accept changes: press the controller.
A message appears stating that the area has been set.
Map functions131
Navigation
Z
Page 134 of 298
Deleting one/all areas:
XTo switch to navigation mode: press theß button.
XTo show th emenu :slid e6 thecontroller .
XTo selectOption s:turn and press th econtroller .
XSelectRoute Settings.
XSelec tAvoid Option s.
XSelectAvoid Are a.
A list appears .
XTo deletean area: markan are aby turnin gth econtroller .
XSlide9thecontroller .
XSelectDelete.
A prompt appears askin gwhether you wish to delete th earea.
XSelec tYesor No.
Afte rselecting Yes
,th eare ais deleted.
XTo delet eall areas :slid e9 thecontroller when th elist is displayed .
XSelectDelete All.
A prompt appears askin gwhether you wish to delete all areas.
XSelec tYesor No.
Afte rselecting Yes
,all areas are deleted.
SIRIUS XM service
Displaying SIRIUS XM service informa -
tion
You can display th eSIRIU SXM servic einfor-
mation .
XTo switch to navigation mode: press the
Ø button.
XTo show th emenu :press th econtroller .
XTo selectTraffi c:turn and press th econ-
troller.
XSelec tSIRIUS Servic e.
The window on th eright half of th edisplay
shows th etelephon enumber of th epro -
vider (SIRIUS XM) and th eserial number of
your servic emodule.
Registering for th eSIRIUS XM traffic
repor tservice
XCall th eprovider telephon enumber shown
on th eCOMAN Ddisplay.
iYou can also hav eth esatellit eservic e
activated online. To do so, visit th eSIRIU S
XM Radio websit eat
http://www.sirius.com (USA).
Once th econnection has been established :
XFollow theservic eemployee's instructions.
The activation process may take up to te n
minutes.
If registration is no tincluded when purchas-
in gth esystem, your credit car ddetails will be
require dto activat eyour account.
132Map functions
Navigation
Page 135 of 298
Updating the digital map
Introduction
The digital maps generated by the map soft-
ware become outdated in the same way as
conventional road maps. Optimal route guid-
ance can only be provided by the navigation
system in conjunction with the most up-to-
date map software.
Information about new versions of the digital
map can be obtained from an authorized
Mercedes-Benz Center. You can have the dig-
ital map updated there using a data medium,
or you can update it yourself.
Navigation functions
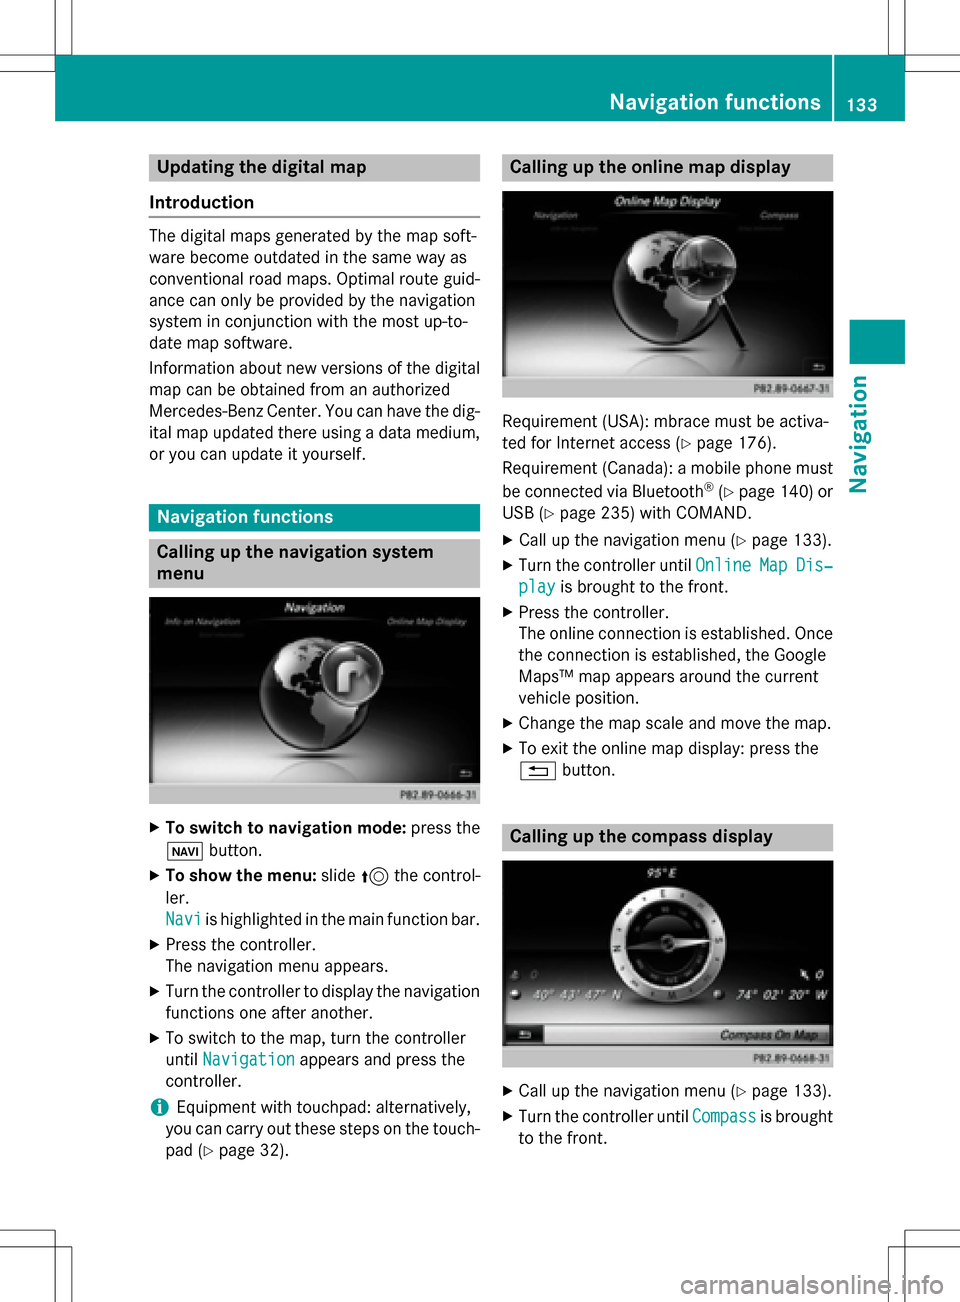
Calling up the navigation system
menu
XTo switch to navigation mode: press the
ß button.
XTo show the menu: slide5the control-
ler.
Navi
is highlighted in the main function bar.
XPress the controller.
The navigation menu appears.
XTurn the controller to display the navigation
functions one after another.
XTo switch to the map, turn the controller
until Navigation
appears and press the
controller.
iEquipment with touchpad: alternatively,
you can carry out these steps on the touch-
pad (
Ypage 32).
Calling up the online map display
Requirement (USA): mbrace must be activa-
ted for Internet access (
Ypage 176).
Requirement (Canada): a mobile phone must be connected via Bluetooth
®(Ypage 140) or
USB (
Ypage 235) with COMAND.
XCall up the navigation menu (Ypage 133).
XTurn the controller until OnlineMapDis‐
playis brought to the front.
XPress the controller.
The online connection is established. Once
the connection is established, the Google
Maps™ map appears around the current
vehicle position.
XChange the map scale and move the map.
XTo exit the online map display: press the
%button.
Calling up the compass display
XCall up the navigation menu (Ypage 133).
XTurn the controller until Compassis brought
to the front.
Navigation functions133
Navigation
Z
Page 136 of 298
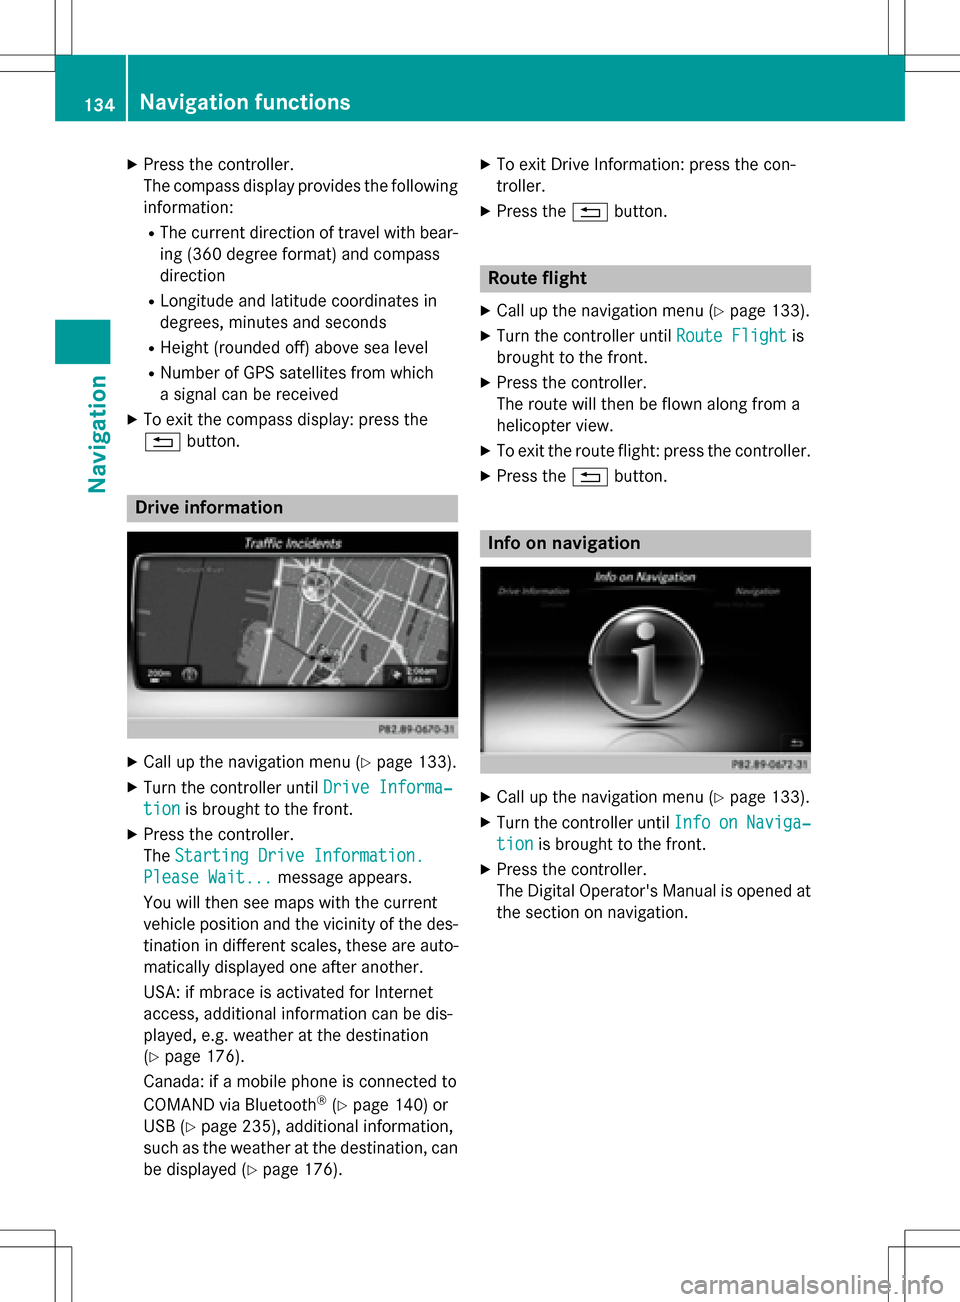
XPress the controller.
The compass display provides the followinginformation:
RThe current direction of travel with bear-
ing (360 degree format) and compass
direction
RLongitude and latitude coordinates in
degrees, minutes and seconds
RHeight (rounded off) above sea level
RNumber of GPS satellites from which
a signal can be received
XTo exit the compass display: press the
% button.
Drive information
XCall up the navigation menu (Ypage 133).
XTurn the controller until Drive Informa‐
tionis brought to the front.
XPress the controller.
TheStarting Drive Information.
Please Wait...message appears.
You will then see maps with the current
vehicle position and the vicinity of the des-
tination in different scales, these are auto-
matically displayed one after another.
USA: if mbrace is activated for Internet
access, additional information can be dis-
played, e.g. weather at the destination
(
Ypage 176).
Canada: if a mobile phone is connected to
COMAND via Bluetooth
®(Ypage 140) or
USB (
Ypage 235), additional information,
such as the weather at the destination, can
be displayed (
Ypage 176).
XTo exit Drive Information: press the con-
troller.
XPress the %button.
Route flight
XCall up the navigation menu (Ypage 133).
XTurn the controller until Route Flightis
brought to the front.
XPress the controller.
The route will then be flown along from a
helicopter view.
XTo exit the route flight: press the controller.
XPress the %button.
Info on navigation
XCall up the navigation menu (Ypage 133).
XTurn the controller until InfoonNaviga‐
tionis brought to the front.
XPress the controller.
The Digital Operator's Manual is opened at
the section on navigation.
134Navigation functions
Navigation
Page 137 of 298
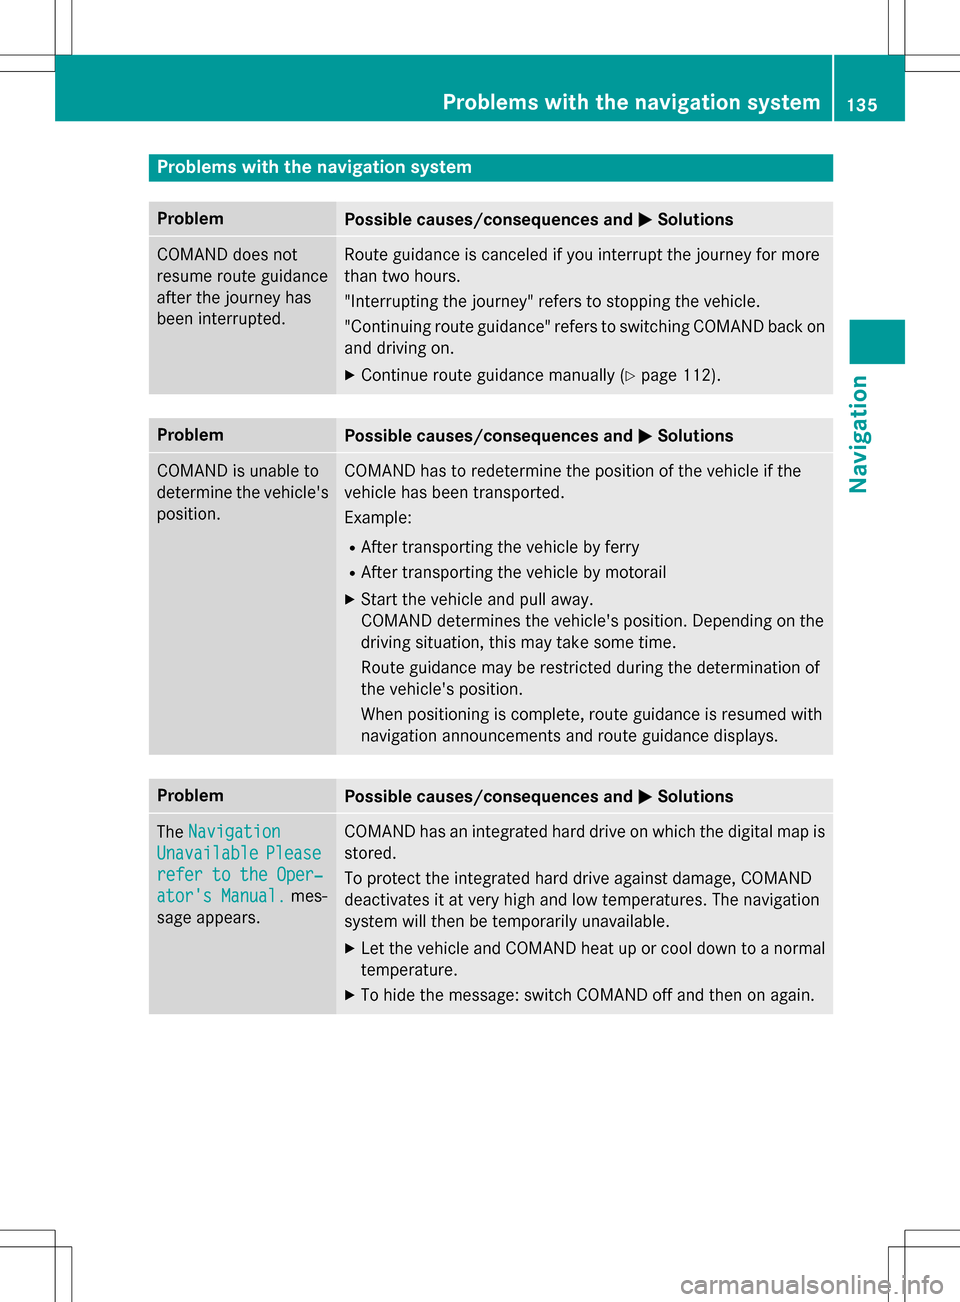
Problems with the navigation system
ProblemPossible causes/consequences andMSolutions
COMAND does not
resume route guidance
after the journey has
been interrupted.Route guidance is canceled if you interrupt the journey for more
than two hours.
"Interrupting the journey" refers to stopping the vehicle.
"Continuing route guidance" refers to switching COMAND back on
and driving on.
XContinue route guidance manually (Ypage 112).
ProblemPossible causes/consequences andMSolutions
COMAND is unable to
determine the vehicle's
position.COMAND has to redetermine the position of the vehicle if the
vehicle has been transported.
Example:
RAfter transporting the vehicle by ferry
RAfter transporting the vehicle by motorail
XStart the vehicle and pull away.
COMAND determines the vehicle's position. Depending on the
driving situation, this may take some time.
Route guidance may be restricted during the determination of
the vehicle's position.
When positioning is complete, route guidance is resumed with
navigation announcements and route guidance displays.
ProblemPossible causes/consequences andMSolutions
TheNavigation
UnavailablePlease
refer to the Oper‐
ator's Manual.mes-
sage appears.
COMAND has an integrated hard drive on which the digital map is
stored.
To protect the integrated hard drive against damage, COMAND
deactivates it at very high and low temperatures. The navigation
system will then be temporarily unavailable.
XLet the vehicle and COMAND heat up or cool down to a normal
temperature.
XTo hide the message: switch COMAND off and then on again.
Problems with the navigation system135
Navigation
Z
Page 140 of 298
Your COMANDequipment
i
These operatin ginstruction sdescribe all
th estandar dan doptional equipmen tof
your COMAN Dsystem, as available at th e
time of going to print .Country-specifi cdif -
ference sare possible. Bear in min dthat
your vehicle may no tfeature all function s
described here. Thi salso applies to safety-
relevant systems an dfunctions.
iRead th einformation on qualified special-
ist workshop sin th evehicle Operator's
Manual.
Important safet ynotes
GWARNING
If you operat emobile communication equip-
men twhil edriving, you will be distracted from
traffic conditions. You could also los econtro l
of th evehicle. There is aris kof an accident.
Only operat ethis equipment when th evehicle
is stationary.
If you mak e acallon your mobile phone whil e
driving, always use hands-free mode. Only
use th emobile phone when road, weather
an dtraffic condition spermit .Some jurisdic -
tion sprohibi tth edriver from usin g amobile
phone whil edrivin g avehicle.
Bear in min dthat at aspeed of 30 mph
(approximately 50 km/h), th evehicle cover s
a distanc eof 44 feet (approximately 14 m)
per second.
Excessive levels of electromagnetic radiation
may cause damage to your health an dth e
health of others.
There is scientific discussio nsurroundin gth e
possible health risks posed by electromag-
neti cfields .You can reduce this ris kby usin g
an exterio rantenna.
Therefore, connec tyour mobile communica-
tion sequipmen tto th evehicle' sexterio r
antenn awhereve rpossible.
General notes
Bluetoot h®interface
ABluetoot h®interface is available fo rteleph -
ony.
If your mobile phone supports th eBluetoot h
®
profilePBAP (Phone Book Access Profile) ,th e
contact sare automatically displaye din
COMAND. If your mobile phone doe sno tsup-
por tth eBluetoot h
®profilePBAP ,COMAN D
will attempt to display th econtact susin g
alternative methods.
You can use th emessag efunction if your
mobile phone supports th eMA PBluetoot h
®
profile (Messag eAccess Profile).
Wit h a suitable mobile phone ,you can use th e
hands-free syste man dreceiv evCards via th e
Bluetoot h
®interface .
You can obtain more information about suit -
able mobile phone son th eInternet at
www.mercedes-benz-mobile.com .
You can also obtain more information by call-
ing.
In th eUSA, you can get in touch wit hth e
Mercedes-Ben zCustomer Assistanc eCente r
on 1-800-FOR-MERCede s(1-800-367-6372).
In Canada, you can get in touch with the Cus- tomer Relations Center on 1-800-387-0100.
HD Voice®
COMAND supports telephone calls in HD
Voice®. The voice quality can be improved
with this procedure.
Requirements for HD Voice
®:
RYour mobile phone and mobile phone net-
work provider support HD Voice®.
RThe mobile phone and mobile phone net-
work provider of the person you are calling
support HD Voice
®.
Depending on the quality of the connection,
the voice quality may fluctuate.
138General notes
Telephone
Page 142 of 298
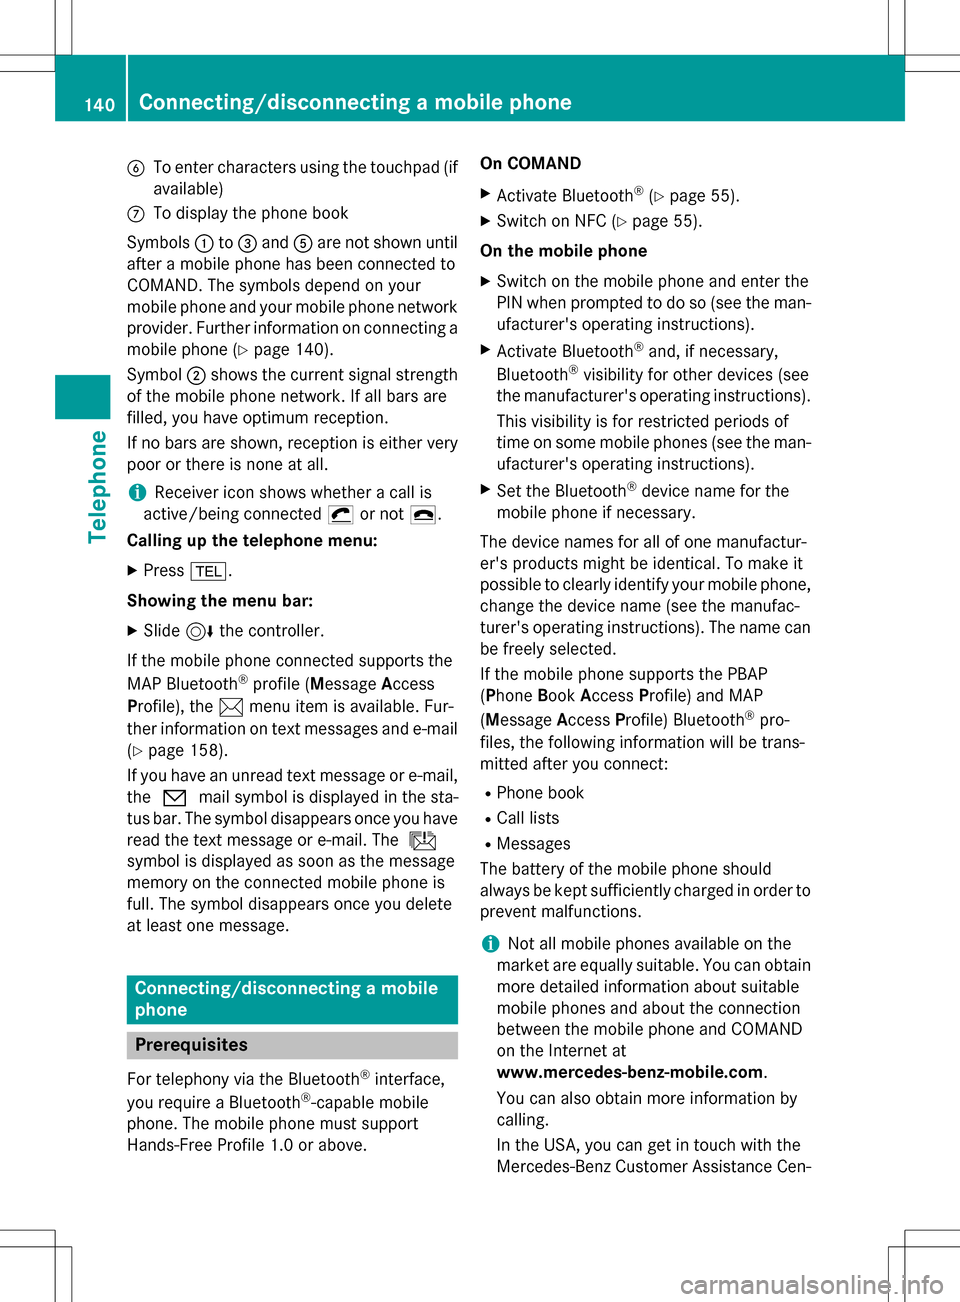
BTo enter characters using the touchpad (if
available)
CTo display the phone book
Symbols :to= and Aare not shown until
after a mobile phone has been connected to
COMAND. The symbols depend on your
mobile phone and your mobile phone network
provider. Further information on connecting a
mobile phone (
Ypage 140).
Symbol ;shows the current signal strength
of the mobile phone network. If all bars are
filled, you have optimum reception.
If no bars are shown, reception is either very
poor or there is none at all.
iReceiver icon shows whether a call is
active/being connected ¡or not ¢.
Calling up the telephone menu:
XPress %.
Showing the menu bar:
XSlide 6the controller.
If the mobile phone connected supports the
MAP Bluetooth
®profile (M essageAccess
Profile), the 1menu item is available. Fur-
ther information on text messages and e-mail
(
Ypage 158).
If you have an unread text message or e-mail,
the 0 mail symbol is displayed in the sta-
tus bar. The symbol disappears once you have
read the text message or e-mail. The ú
symbol is displayed as soon as the message
memory on the connected mobile phone is
full. The symbol disappears once you delete
at least one message.
Connecting/disconnecting a mobile
phone
Prerequisites
For telephony via the Bluetooth®interface,
you require a Bluetooth®-capable mobile
phone. The mobile phone must support
Hands-Free Profile 1.0 or above. On COMAND
XActivate Bluetooth®(Ypage 55).
XSwitch on NFC (Ypage 55).
On the mobile phone
XSwitch on the mobile phone and enter the
PIN when prompted to do so (see the man-
ufacturer's operating instructions).
XActivate Bluetooth®and, if necessary,
Bluetooth®visibility for other devices (see
the manufacturer's operating instructions).
This visibility is for restricted periods of
time on some mobile phones (see the man-
ufacturer's operating instructions).
XSet the Bluetooth®device name for the
mobile phone if necessary.
The device names for all of one manufactur-
er's products might be identical. To make it
possible to clearly identify your mobile phone, change the device name (see the manufac-
turer's operating instructions). The name can
be freely selected.
If the mobile phone supports the PBAP
(Phone BookAccess Profile) and MAP
(Message AccessProfile) Bluetooth
®pro-
files, the following information will be trans-
mitted after you connect:
RPhone book
RCall lists
RMessages
The battery of the mobile phone should
always be kept sufficiently charged in order to
prevent malfunctions.
iNot all mobile phones available on the
market are equally suitable. You can obtain
more detailed information about suitable
mobile phones and about the connection
between the mobile phone and COMAND
on the Internet at
www.mercedes-benz-mobile.com .
You can also obtain more information by
calling.
In the USA, you can get in touch with the
Mercedes-Benz Customer Assistance Cen-
140Connecting/disconnecting a mobile phone
Telephone
Page 143 of 298
ter on 1-800-FOR-MERCedes
(1-800-367-6372).
In Canada, you can get in touch with the
Customer Relations Center on
1-800-387-0100.
iSome displays (e.g. the signal strength)
depend on the supported version of the
Hands-Free Profile.
Procedure and general information
Authorizing a mobile phone (connecting)
If you connect your mobile phone using NFC
( Near Field Communication) the NFC area of
your mobile phone has to touch the NFC logo
on the DVD changer/single DVD drive. The
authorization then starts automatically. The
NFC range varies depending on the mobile
phone and can be identified by the logo. Fur-
ther information; see the manufacturer's
operating instructions.
If you use your mobile phone with COMAND
without NFC, you must search for it
(
Ypage 142) and then authorize it
(
Ypage 142). Depending on the mobile
phone, authorization either takes place by
means of Secure Simple Pairing or by enter-
ing a passkey. COMAND automatically ena-
bles the procedure suited to your mobile
phone. You can recognize Secure Simple Pair-
ing by a code which is displayed in COMAND
and on the mobile phone. You can recognize
the passkey system by the fact that you have to enter a code on the mobile phone and in
COMAND. The mobile phone is always con-
nected automatically after authorization.
If COMAND does not detect your mobile
phone , th
is may be due to particular security
settings on your mobile phone. You can also
start the search procedure and authorization
on the mobile phone (
Ypage 143).
Device-specific information on authorizing
and connecting Bluetooth
®-capable mobile
phones can be obtained from your authorized Mercedes-Benz Center or via the Internet at http://www.mercedes-benz.com/
connect
.
You can authorize up to 15 mobile phones.
Only one mobile phone can be connected to
COMAND at any one time.
De-authorizing (disconnecting) a mobile
phone
The connection is terminated automatically if
you leave the receiver range of COMAND or
deactivate Bluetooth
®on your mobile phone.
If you no longer want the Bluetooth
®connec-
tion to be established automatically, the
mobile phone must be de-authorized (discon-
nected) (
Ypage 145).
Establishing a connection via NFC
(Near Field Communication)
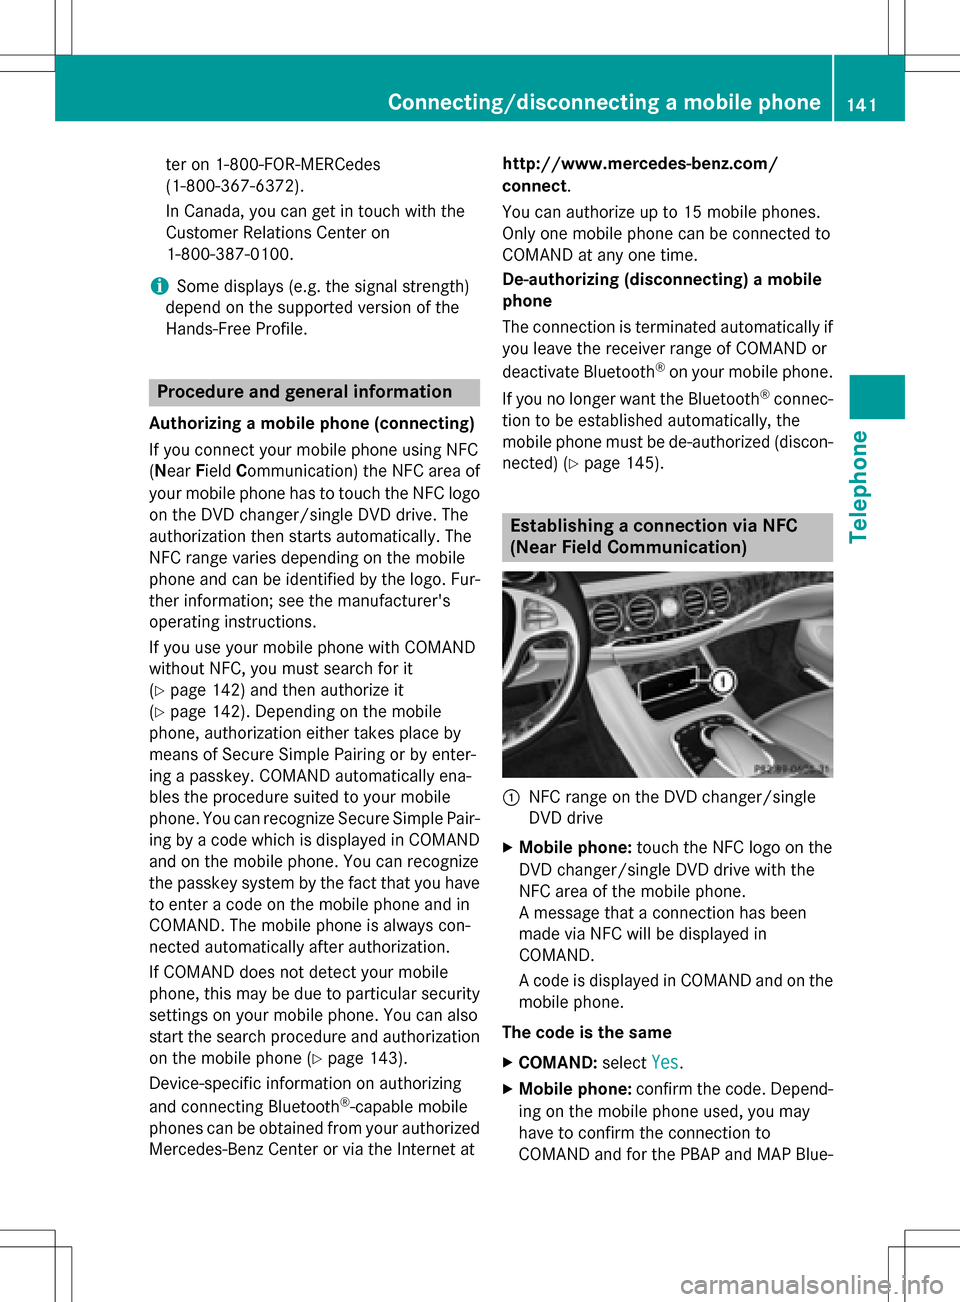
:NFC range on the DVD changer/single
DVD drive
XMobile phone: touch the NFC logo on the
DVD changer/single DVD drive with the
NFC area of the mobile phone.
A message that a connection has been
made via NFC will be displayed in
COMAND.
A code is displayed in COMAND and on the
mobile phone.
The code is the same
XCOMAND: selectYes.
XMobile phone: confirm the code. Depend-
ing on the mobile phone used, you may
have to confirm the connection to
COMAND and for the PBAP and MAP Blue-
Connecting/disconnecting a mobile phone141
Telephone
Z