navigation MERCEDES-BENZ SL-Class 2013 R131 Owner's Manual
[x] Cancel search | Manufacturer: MERCEDES-BENZ, Model Year: 2013, Model line: SL-Class, Model: MERCEDES-BENZ SL-Class 2013 R131Pages: 590, PDF Size: 9.73 MB
Page 472 of 590
X
DVD changer: insert a video DVD.
X Press 0009.
or
X Press the 001Fback button.
COMAND loads the medium inserted and
starts to play it.
Switching modes using the function
button
X Press the 0009function button on eor more
times.
COMAND switches to the previous disc
operating mode.
By pressing the function button repeatedly,
you can change the operating mode in the
following order:
R audio CD/DVD / video DVD/MP3 in the
DVD changer or DVD single drive (disc
mode)
audio CD/DVD, video DVD or MP3 disc in
the DVD changer
R memory card mode
R MUSIC REGISTER
R USB storage device
R Media Interface or audio AUX mode
R Bluetooth ®
audio mode
X DVD changer: selectMedia or
Changer by
sliding 0012000Aand turning 003E0012003Fthe COMAND
controller and press 0039to confirm.
Single DVD drive: selectMedia by sliding
0012000A and turning 003E0012003Fthe COMAND
controller and press 0039to confirm.
X Select a ývideo DVD from the media list
(Y page 472).
Switching on with the video menu
X Select Video in the main function bar by
sliding 00380012and turning 003E0012003Fthe COMAND
controller and press 0039to confirm.
Video DVD mode is switched on. Hiding/showing the navigation menu X
To show: in DVD video mode, slide 00380012000A
the COMAND controller.
X To hide: slide00380012000A the COMAND
controller.
or
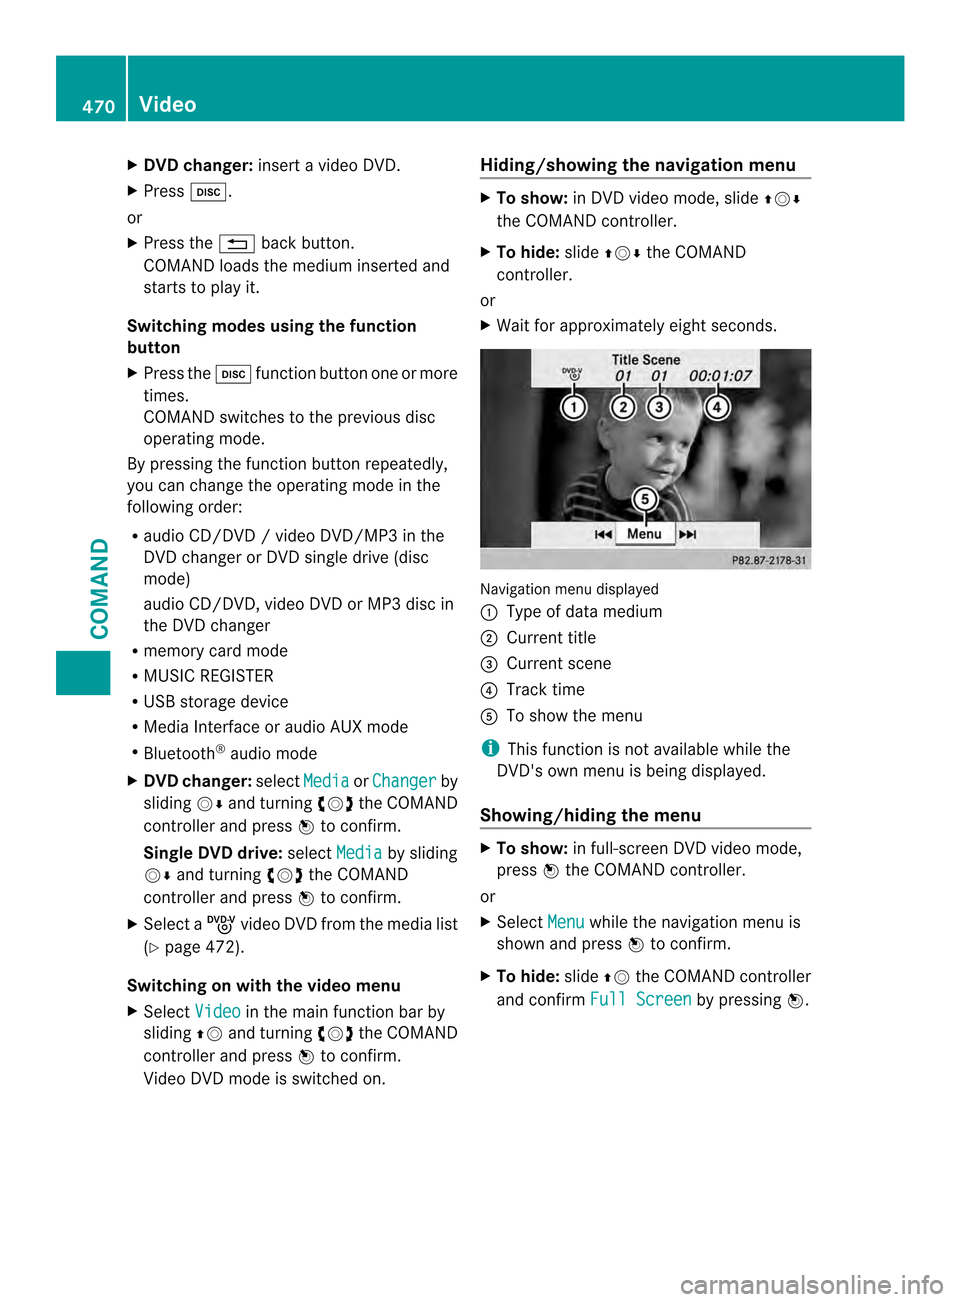
X Waitf or approximately eight seconds. Navigation menu displayed
0002
Type of data medium
0003 Current title
0027 Current scene
0026 Track time
0024 To show the menu
i This function is not available while the
DVD's own menu is being displayed.
Showing/hiding the menu X
To show: in full-screen DVD video mode,
press 0039the COMAND controller.
or
X Select Menu while the navigation menu is
shown and press 0039to confirm.
X To hide: slide00380012the COMAND controller
and confirm Full Screen by pressing
0039.470
VideoCOMAND
Page 473 of 590
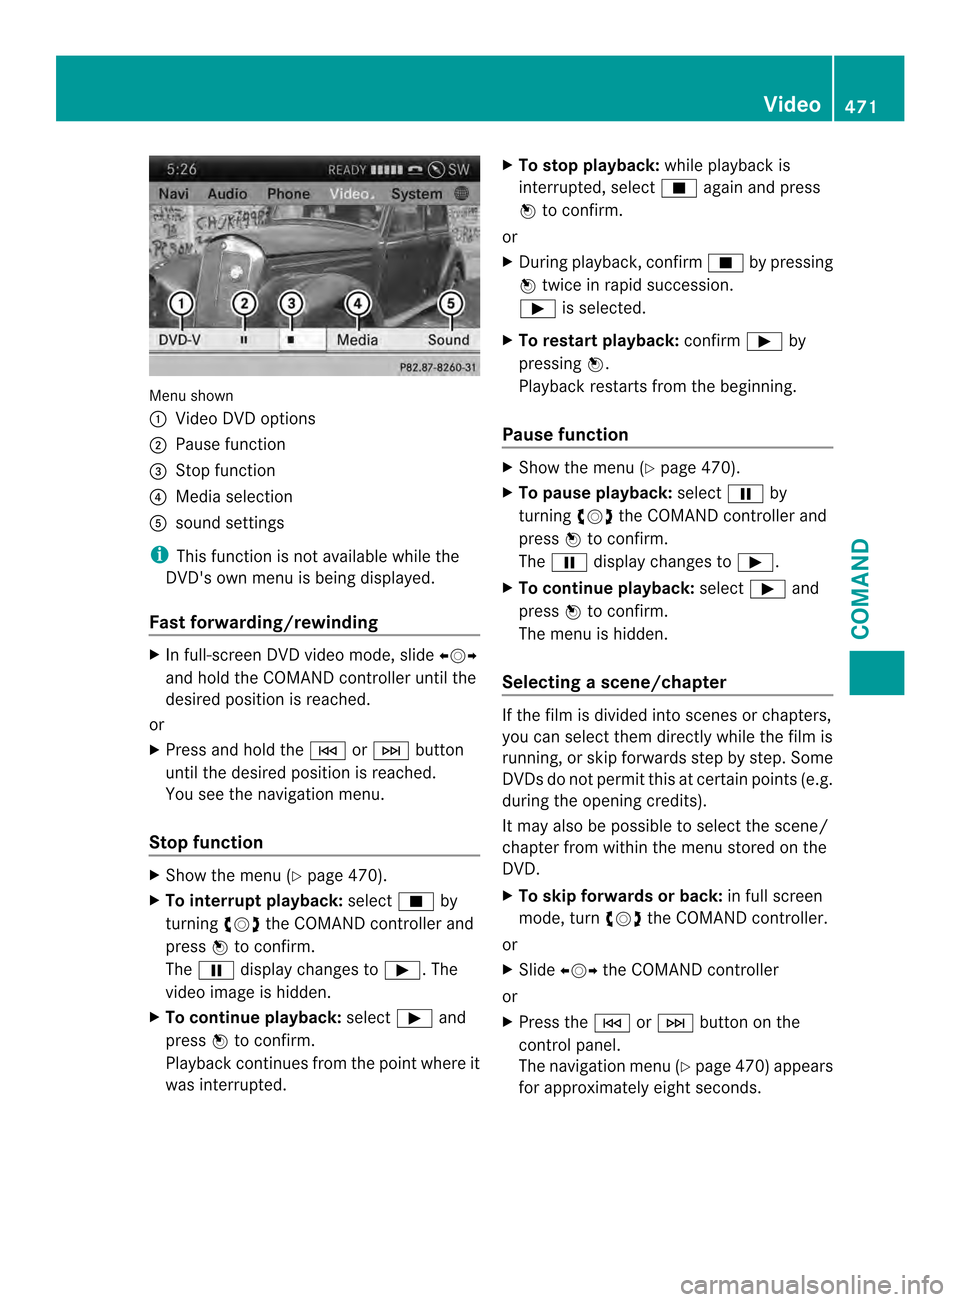
Menu shown
0002
Video DVD options
0003 Pause function
0027 Stop function
0026 Media selection
0024 sound settings
i This function is not available while the
DVD's own menu is being displayed.
Fast forwarding/rewinding X
In full-screen DVD video mode, slide 003600120037
and hold the COMAND controller until the
desired position is reached.
or
X Press and hold the 0001or0002 button
until the desired position is reached.
You see the navigation menu.
Stop function X
Show the menu (Y page 470).
X To interrupt playback: select0014by
turning 003E0012003Fthe COMAND controller and
press 0039to confirm.
The 0009 display changes to 0004.The
video image is hidden.
X To continue playback: select0004and
press 0039to confirm.
Playback continues from the point where it
was interrupted. X
To stop playback: while playback is
interrupted, select 0014again and press
0039 to confirm.
or
X During playback, confirm 0014by pressing
0039 twice in rapid succession.
0004 is selected.
X To restart playback: confirm0004by
pressing 0039.
Playback restarts from the beginning.
Pause function X
Show the menu (Y page 470).
X To pause playback: select0009by
turning 003E0012003Fthe COMAND controller and
press 0039to confirm.
The 0009 display changes to 0004.
X To continue playback: select0004and
press 0039to confirm.
The menu is hidden.
Selecting ascene/chapter If the film is divided into scenes or chapters,
you can select them directly while the film is
running, or skip forwards step by step. Some
DVDs do no
tpermit this at certain points (e.g.
during the opening credits).
It may also be possible to select the scene/
chapter from within the menu stored on the
DVD.
X To skip forwards or back: in full screen
mode, turn 003E0012003Fthe COMAND controller.
or
X Slide 003600120037 the COMAND controller
or
X Press the 0001or0002 button on the
control panel.
The navigation menu (Y page 470)appears
for approximately eight seconds. Video
471COMAND Z
Page 476 of 590
X
Select Subtitles or
Camera Angle and
press 0039to confirm.
In both cases, a menu appears .The 0021dot
in front of an entry indicates the current
setting.
X Select a setting by turning 003E0012003Fthe
COMAND controller and press 0039to
confirm.
Interactive content DVDs can contain interactive content (e.g. a
video game). In a video game, for example,
you may be able to influence events by
selecting and triggering actions. The type and
number of actions depend on the DVD.
X
Select an action by sliding 00380012000Aor003600120037 the
COMAND controller and press 0039to
execute it.
A menu appears and the first entry,
Select , is highlighted.
X Press 0039the COMAND controller. AUX video mode
Connecting external video sources G
WARNING
External video sources may have different
volumes, which can mean that system
messages such as traffic announcements and
navigation system announcements are much
louder. If necessary, please deactivate the
system messages or adjust their volume
manually.
If your vehicle is equipped with Media
Interface, you can connect an external video
source (AUX video) (Y page 460).
The 1/8 inch audio/video jacks are in the
center console stowage compartment.
i In vehicles with a rear view camera, the
AUX video jack cannot be used for external
video sources. Switching to AUX video mode
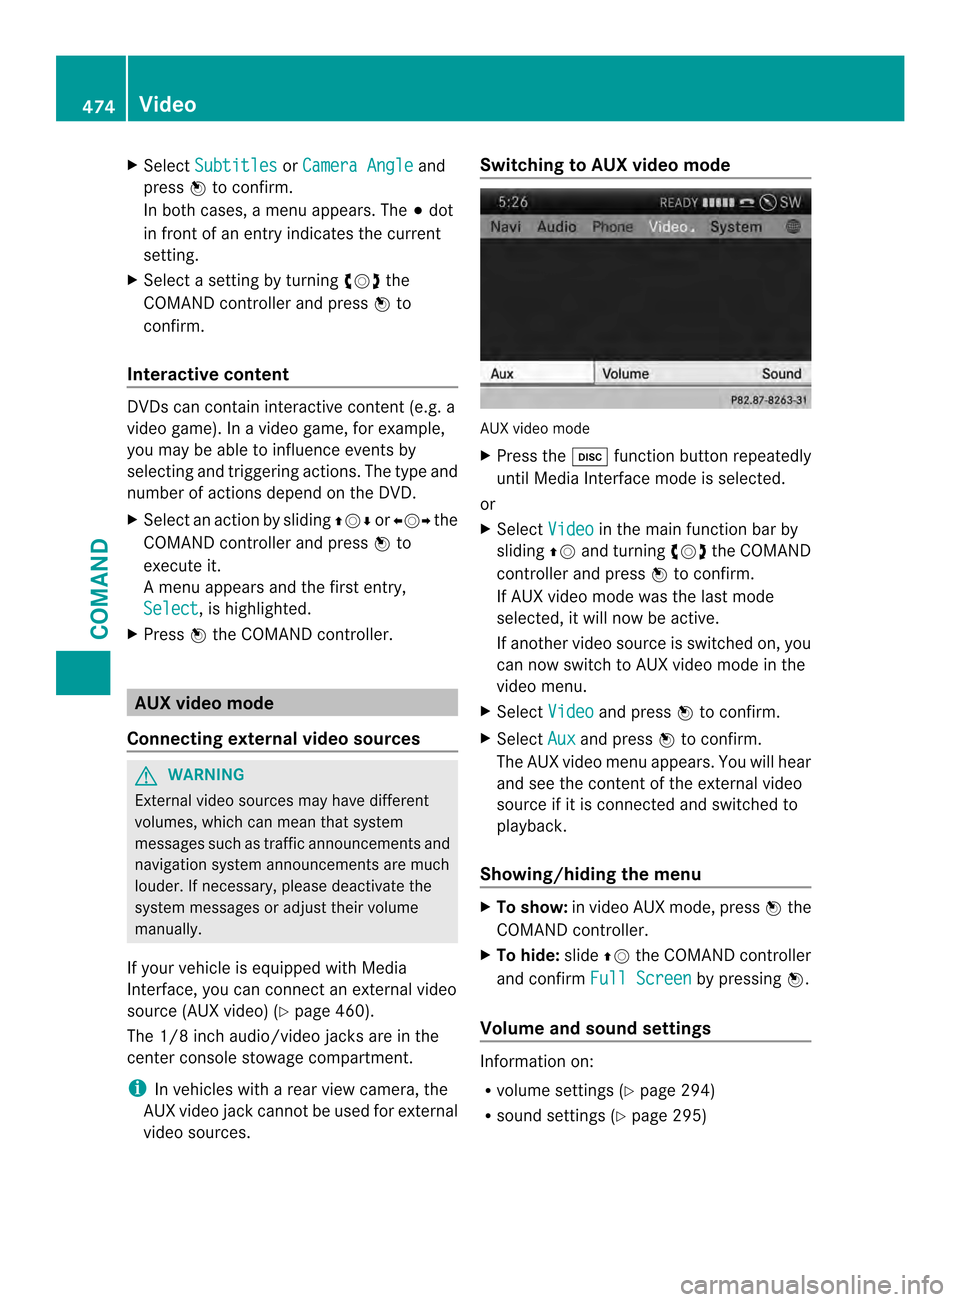
AUX video mode
X Press the 0009function button repeatedly
until Media Interface mode is selected.
or
X Select Video in the main function bar by
sliding 00380012and turning 003E0012003Fthe COMAND
controller and press 0039to confirm.
If AUX video mode was the last mode
selected, it will now be active.
If another video source is switched on, you
can now switch to AUX video mode in the
video menu.
X Select Video and press
0039to confirm.
X Select Aux and press
0039to confirm.
The AUX video menu appears. You will hear
and see the content of the external video
source if it is connected and switched to
playback.
Showing/hiding the menu X
To show: in video AUX mode, press 0039the
COMAND controller.
X To hide: slide00380012the COMAND controller
and confirm Full Screen by pressing
0039.
Volume and sound settings Information on:
R
volume settings (Y page 294)
R sound settings (Y page 295)474
VideoCOMAND
Page 477 of 590
G
WARNING
External video sources may have different
volumes, which can mean that system
messages such as traffic announcements and
navigation system announcements are much
louder. If necessary, please deactivate the
system messages or adjust their volume
manually.
i Adevice which is connected as an
external video source may seem quieter or
louder in the vehicle, or the usual maximum
volume cannot be achieved. On some
devices, it is possible to adjust the volume
separately. In this case, start at a medium
volume and increase it gradually. This
enables you to determine whether the
system is able to play the sound at high
volume without distorting it.
Increasing the volume on COMAND X
Show the video AUX menu (Y page 474).
X Select Volume by turning
003E0012003Fthe
COMAND controller and press 0039to
confirm.
Am enu appears. The 0021dot indicates the
current setting.
X Select Standard or
Boost and press
0039to
confirm.
Standard :t
he volume of the external video
source is adjusted to a standard value.
Boost : the volume of the external video
source is raised by approximately 10 dB. Picture viewer
Introduction If there are pictures on the active data
medium, you can look at them. You can
display pictures with a resolution of up to 20
megapixels. Data medium Supported picture
formats
CD/DVD with
picture files jpeg, jpg
USB devices (sticks,
hard drives)
SD memory card jpeg, jpg
Calling up
acategory list X
Select a data medium with pictures (e.g. a
memory card):
R
In the Audio menu (Y page 426)
R In the media lis t(Ypage 441)
X Select Search in the basic display by
sliding 0012000Aand turning 003E0012003Fthe COMAND
controller and press 0039to confirm.
The category list appears ( Ypage 448).
Displaying pictures X
Select (Y page 448)Photos in the category
list by turning 003E0012003Fthe COMAND controller
and press 0039to confirm.
Af older directory appears.
X Select a folder with photos and press 0039to
confirm.
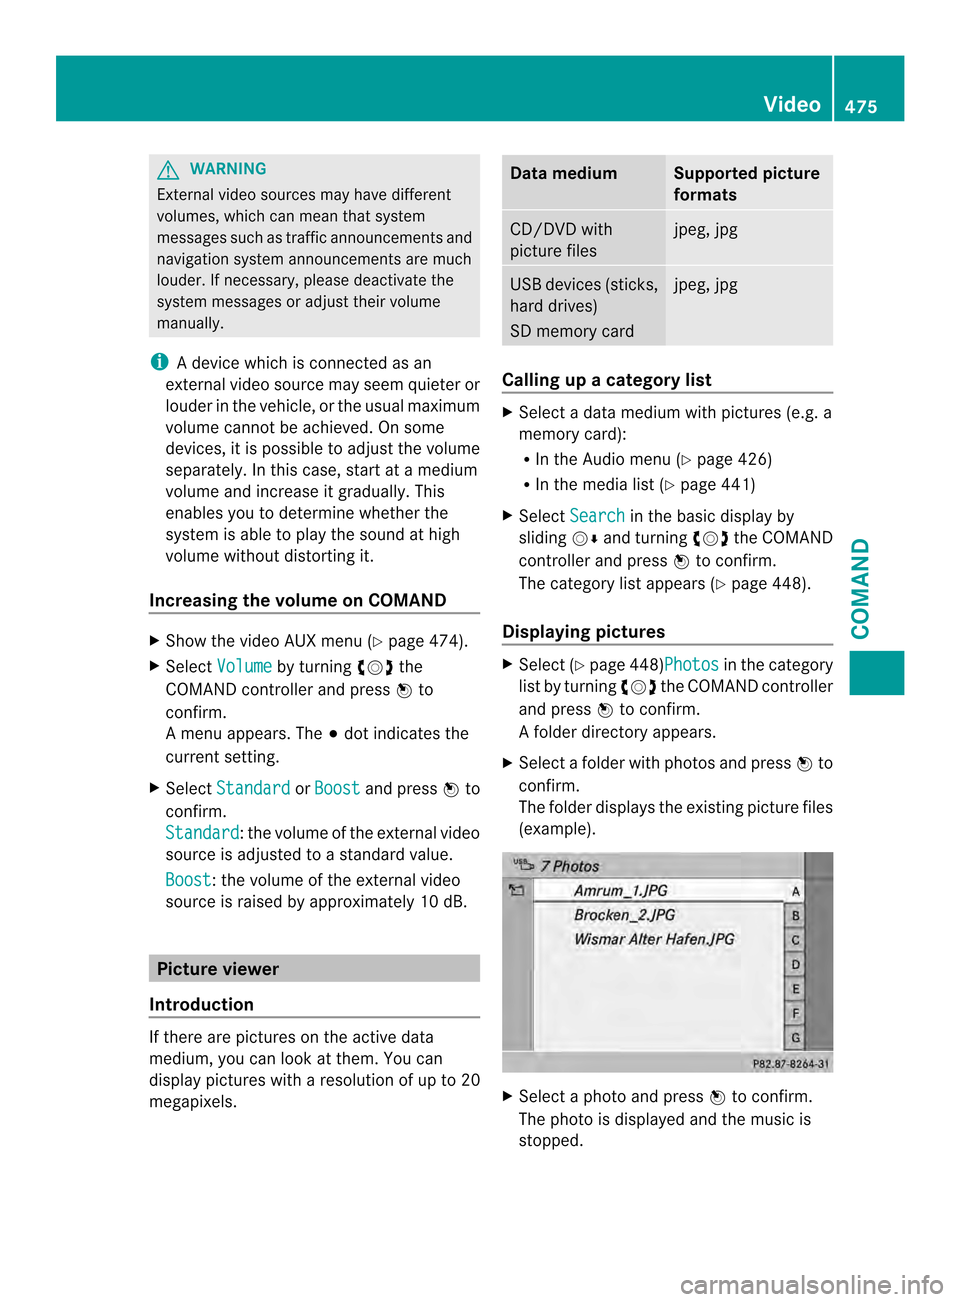
The folder displays the existing picture files
(example). X
Select a photo and press 0039to confirm.
The photo is displayed and the music is
stopped. Video
475COMAND Z
Page 502 of 590
immediately after pressing the SOS button,
you do not know if mbrace has successfully
made the emergency call. In this situation,
seek additional assistance by other means.
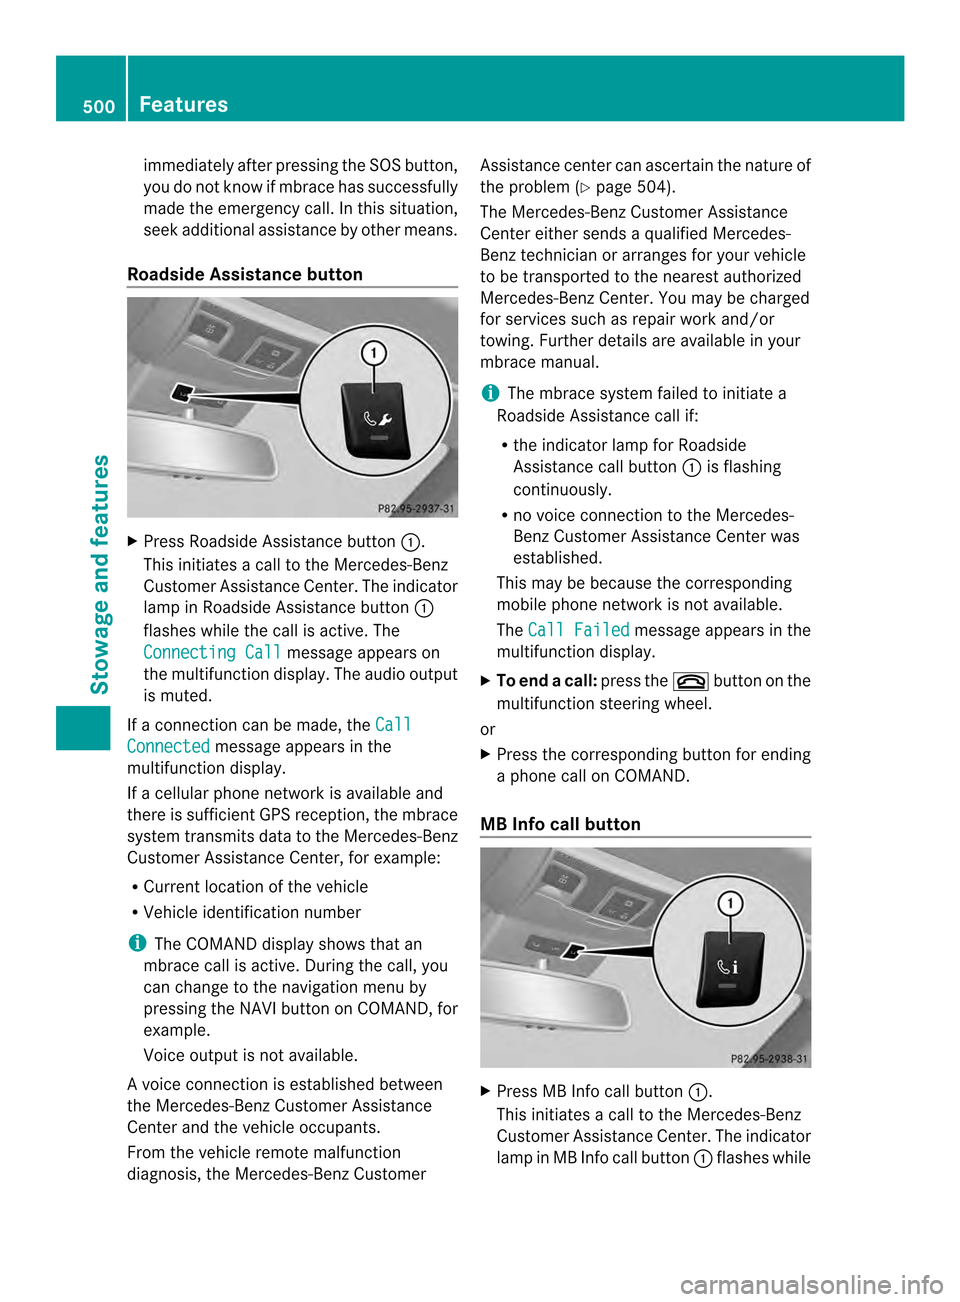
Roadside Assistance button X
Press Roadside Assistance button 0002.
This initiates a call to the Mercedes-Benz
Customer Assistance Center. The indicator
lamp in Roadside Assistance button 0002
flashes while the call is active. The
Connecting Call message appears on
the multifunction display. The audio output
is muted.
If a connection can be made, the CallConnected message appears in the
multifunction display.
If a cellular phone network is available and
there is sufficien tGPS reception, the mbrace
system transmits data to the Mercedes-Benz
Customer Assistance Center, for example:
R Current location of the vehicle
R Vehicle identification number
i The COMAND display shows that an
mbrace call is active. During the call, you
can change to the navigation menu by
pressing the NAVI button on COMAND, for
example.
Voice output is not available.
Av oice connection is established between
the Mercedes-Benz Customer Assistance
Center and the vehicle occupants.
From the vehicle remote malfunction
diagnosis, the Mercedes-Benz Customer Assistance center can ascertain the nature of
the problem (Y
page 504).
The Mercedes-Benz Customer Assistance
Center either sends a qualified Mercedes-
Benz technician or arranges for your vehicle
to be transported to the nearest authorized
Mercedes-Benz Center. You may be charged
for services such as repair work and/or
towing. Further details are available in your
mbrace manual.
i The mbrace system failed to initiate a
Roadside Assistance call if:
R the indicator lamp for Roadside
Assistance call button 0002is flashing
continuously.
R no voice connection to the Mercedes-
Benz Customer Assistance Center was
established.
This may be because the corresponding
mobile phone network is not available.
The Call Failed message appears in the
multifunction display.
X To end acall: press the 003Cbutton on the
multifunctio nsteering wheel.
or
X Press the corresponding button for ending
a phone call on COMAND.
MB Info call button X
Press MB Info call button 0002.
This initiates a call to the Mercedes-Benz
Customer Assistance Center. The indicator
lamp in MB Info call button 0002flashes while 500
FeaturesSto
wage an d features
Page 503 of 590
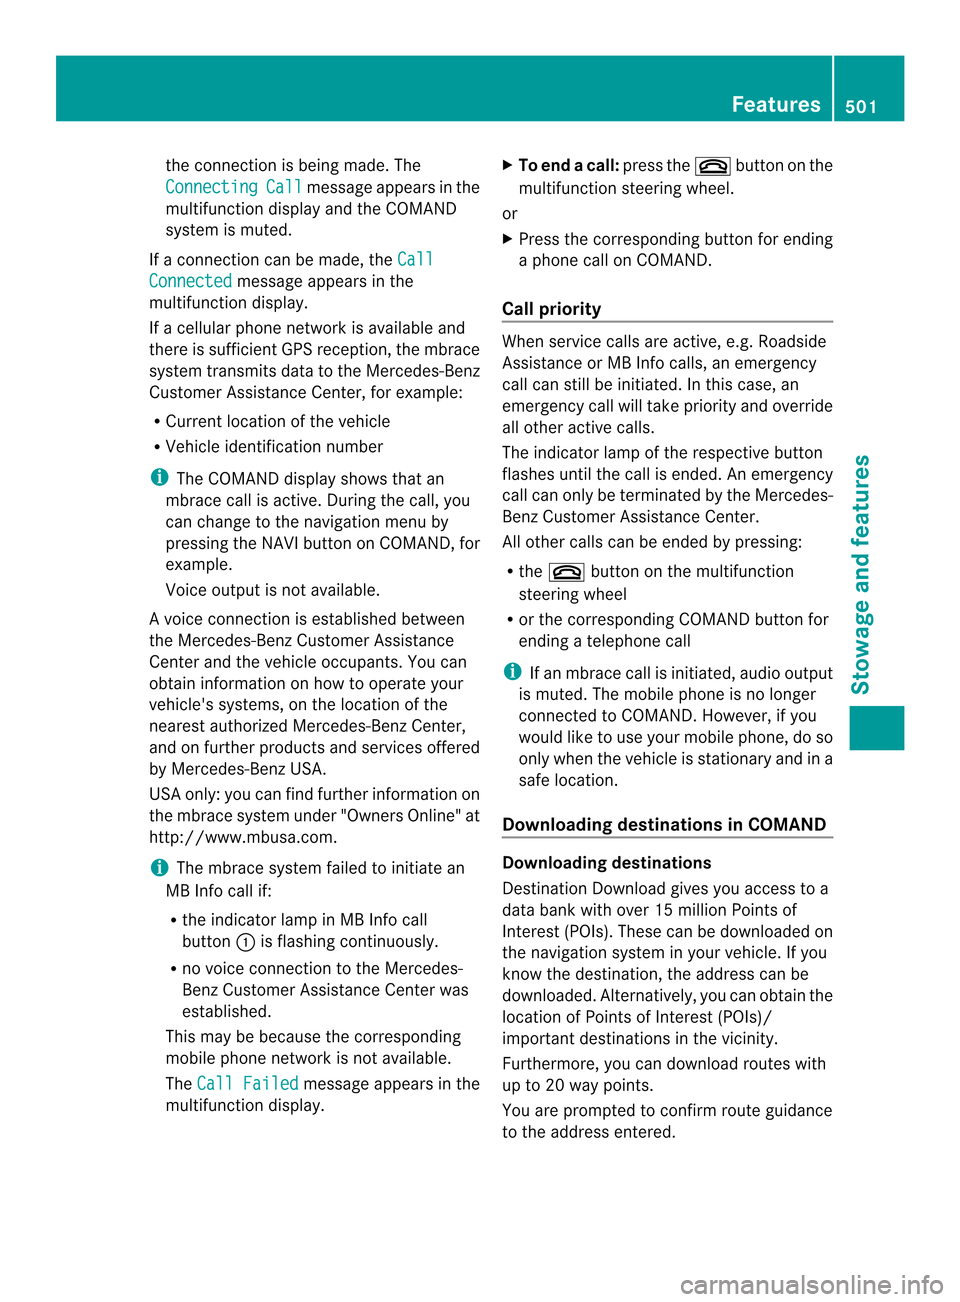
the connectio
nis being made. The
Connecting Call message appears in the
multifunction display and the COMAND
system is muted.
If a connection can be made, the CallConnected message appears in the
multifunction display.
If a cellular phone network is available and
there is sufficient GPS reception, the mbrace
system transmits data to the Mercedes-Benz
Customer Assistance Center, for example:
R Current location of the vehicle
R Vehicle identification number
i The COMAND display shows that an
mbrace call is active. During the call, you
can change to the navigation menu by
pressing the NAVI button on COMAND, for
example.
Voice output is not available.
Av oice connection is established between
the Mercedes-Benz Customer Assistance
Center and the vehicle occupants. You can
obtain information on how to operate your
vehicle's systems, on the location of the
nearest authorized Mercedes-Benz Center,
and on further products and services offered
by Mercedes-Benz USA.
USA only: you can find further information on
the mbrace system under "Owners Online" at
http://www.mbusa.com.
i The mbrace system failed to initiate an
MB Info call if:
R the indicator lamp in MB Info call
button 0002is flashing continuously.
R no voice connection to the Mercedes-
Benz Customer Assistance Center was
established.
This may be because the corresponding
mobile phone network is not available.
The Call Failed message appears in the
multifunction display. X
To end acall: press the 003Cbutton on the
multifunctio nsteering wheel.
or
X Press the corresponding button for ending
a phone call on COMAND.
Call priority When service calls are active, e.g
.Roadside
Assistance or MB Info calls, an emergency
call can still be initiated. In this case, an
emergency call will take priority and override
all other active calls.
The indicator lamp of the respective button
flashes until the call is ended. An emergency
call can only be terminated by the Mercedes-
Benz Customer Assistance Center.
All other calls can be ended by pressing:
R the 003C button on the multifunction
steering wheel
R or the corresponding COMAND button for
ending a telephone call
i If an mbrace call is initiated, audio output
is muted. The mobile phone is no longer
connected to COMAND. However, if you
would like to use your mobile phone, do so
only when the vehicle is stationary and in a
safe location.
Downloading destinations in COMAND Downloading destinations
Destination Download gives you access to a
data bank with over 15 million Points of
Interest (POIs). These can be downloaded on
the navigation system in your vehicle. If you
know the destination, the address can be
downloaded. Alternatively, you can obtain the
location of Points of Interest (POIs)/
important destinations in the vicinity.
Furthermore, you can download routes with
up to 20 way points.
You are prompted to confirm route guidance
to the address entered. Features
501Stowage and features Z
Page 504 of 590
The system calculates the route and
subsequently starts the route guidance with
the address entered.
i If you select No , the address can be stored
in the address book.
i The Destination Download function is
available if the corresponding mobile
phone network is available and data
transfer is possible.
i You can only use the Destination
Download function if the vehicle is
equipped with a navigation system.
Route Assistance
This service is part of the mbrace PLUS
Package and cannot be purchased
separately.
i You can also use the Route Assistance
function if your vehicle is not equipped with
a navigation system.
Within the framework of this service, you
receive a professional and reliable form of
navigation support without having to leave
your vehicle.
The customer service representative finds a
suitable route depending on your vehicle's
curren tposition and the desired destination.
You will then be guided live through the
current route section.
Search and send General notes
i
To use "Search &Send", your vehicle
must be equipped with mbrace and a
navigation system. You must also have an
mbrace service subscription.
"Search & Send" is a destination entry
service. Adestination address which is found
on Google Maps ®
can be transferred via
mbrace directly to your vehicle's navigation
system. Specifying and sending the destination
address
X
Go to the website http://
www.maps.google.com and enter a
destination address into the entry field.
X To send the destination address to the
e-mail address of your mbrace
account: click on the corresponding
button.
i Example:
If you select 'Send to vehicle' and then
'Mercedes-Benz', the destination address
will be sent to your vehicle.
X When the "Send" dialog window appears:
In the relevant field, enter the e-mail
address which you specified when
activating your mbrace account.
X Click "Send".
i Information on specific commands such
as "Address entry" or "Sending" can be
found on the website.
Calling up destination addresses
X Switch on the ignition.
The destination address is loaded into the
vehicle's navigation system.
Ad isplay message appears, asking
whether navigation should be started.
X Select Yes by sliding
003600120037and turning
003E0012003F the COMAND controller and press
0039 to confirm.
The system calculates the route and
subsequently starts the rout eguidance
with the address entered.
i If you select No , the address can be stored
in the address book.
i If you have sent more than one
destination address, each individual
destination must be confirmed separately.
i Destination addresses are loaded in the
same order as the order in which they were
sent. If you have multiple Mercedes-Benz 502
FeaturesStowage and featu
res
Page 507 of 590
about various special offers at your
workshop.
R monthly status informatio nE-Mail on oil
level, ai rpressure, maintenance, brakes,
etc. If applicable, you will receive
information on special offers in the E-Mail.
USA only: this information can also be
called up under "Owners Online" at http://
www.mbusa.com.
Information on the data stored in the vehicle
(Y page 39).
Information on roadside assistance
(Y page 36).
Downloading routes Downloading routes allows you to transfer
and save predefined routes in the navigation
system. To do this, an SD memory card must
be inserted into the COMAND system. If no
SD memory card is inserted, you must insert
the card into the card slot on the COMAND
system before saving.
Ar oute can be prepared and sent either by a
customer service representative or via the
mbrace portal on the Internet. Each route can
include up to 20 way points. When a route has
been received by the navigation system, the
'Route name' has been saved to memory card. Do you want to start
route guidance? message appears on the
COMAND display .The route is saved to the
SD memory card.
X To start route guidance: selectYes .
An overview of the route is shown in the
display.
i If you select No , the saved route can be
called up later in the navigation menu.
X Select Start .
Route guidance is started.
i Downloaded and saved data can be called
up again in COMAND.
Further information can be found in the
"COMAND", "Online and Internet functions" and "Download destination/
route" sections.
Speed alert You can define the upper speed limit, which
must not be exceeded by the vehicle. If this
selected speed is exceeded by the vehicle, a
message will be sent to the Customer
Assistance center. The Customer Assistance
center then forwards this information to you.
You can select the way in which you receive
this information beforehand. Possible options
include SMS, E-Mail or an automated call.
The data which is sent to the Customer
Assistance center contains the following
information:
R
the location where the speed limit was
exceeded
R the time at which the speed limit was
exceeded
R the selected speed limit which was
exceeded
Geo fencing Geo fencing allows you to select areas which
the vehicle should not enter or leave. You will
be informed if the vehicle crosses the
boundaries of the selected areas. You can
select the way in which you receive this
information beforehand. Possible options
include SMS, E-Mail or an automated call.
The area can be determined as either a circle
or a polygon with a maximum of ten corners.
You can specify up to ten areas
simultaneously
.Differen tsettings are
possible for each area.
USA only: these settings can be called up
under "Owners Online" at http://
www.mbusa.com.
Alternatively, you can trigger an MB Info call
and inform the customer service
representative that you wish to activate geo
fencing.
Currently inactive areas can be activated by
SMS. Features
505Stowage and features Z