ECO mode Mercury Milan 2006 Owner's Manuals
[x] Cancel search | Manufacturer: MERCURY, Model Year: 2006, Model line: Milan, Model: Mercury Milan 2006Pages: 256, PDF Size: 2.45 MB
Page 10 of 256
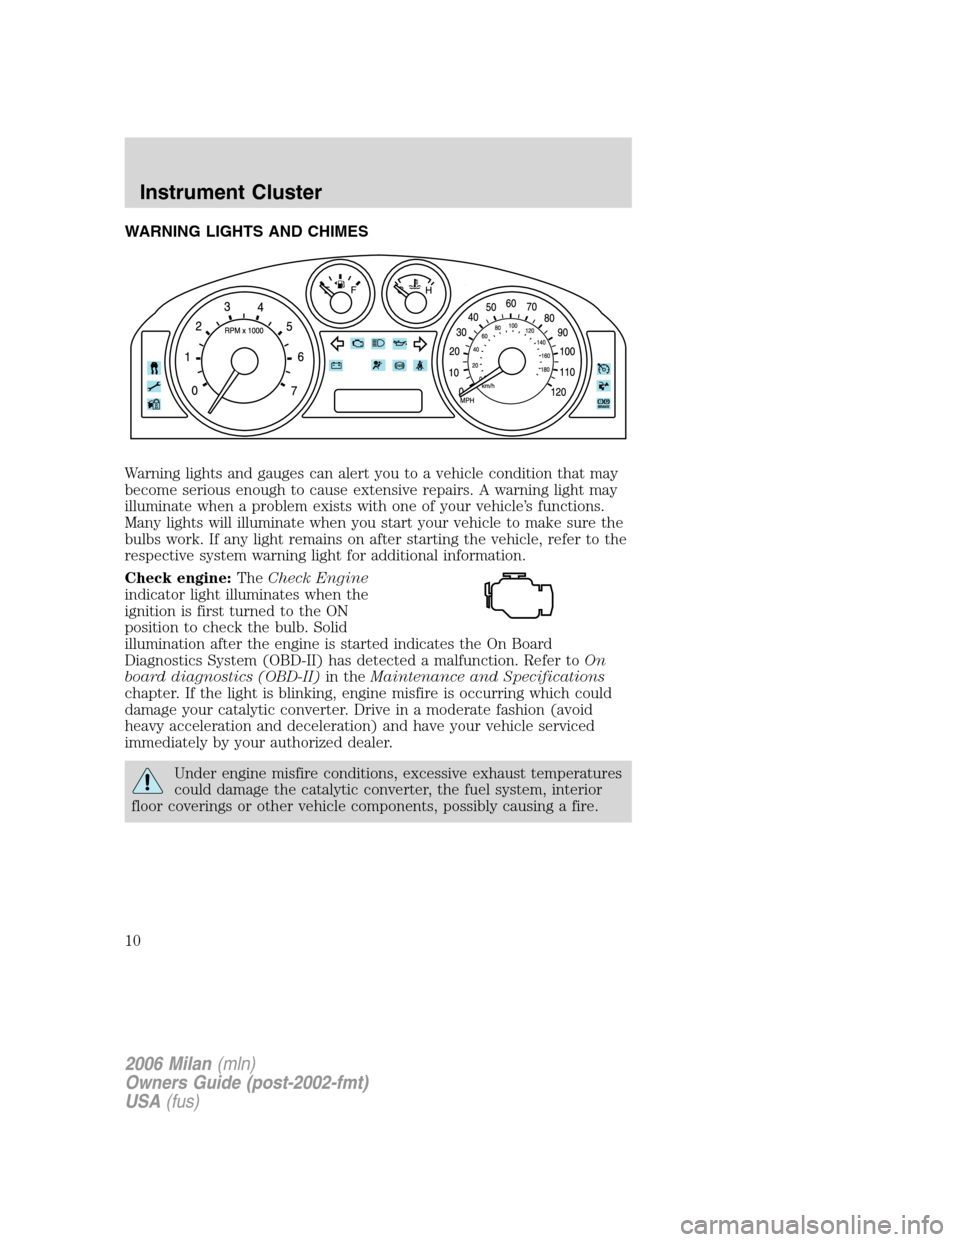
WARNING LIGHTS AND CHIMES
Warning lights and gauges can alert you to a vehicle condition that may
become serious enough to cause extensive repairs. A warning light may
illuminate when a problem exists with one of your vehicle’s functions.
Many lights will illuminate when you start your vehicle to make sure the
bulbs work. If any light remains on after starting the vehicle, refer to the
respective system warning light for additional information.
Check engine:TheCheck Engine
indicator light illuminates when the
ignition is first turned to the ON
position to check the bulb. Solid
illumination after the engine is started indicates the On Board
Diagnostics System (OBD-II) has detected a malfunction. Refer toOn
board diagnostics (OBD-II)in theMaintenance and Specifications
chapter. If the light is blinking, engine misfire is occurring which could
damage your catalytic converter. Drive in a moderate fashion (avoid
heavy acceleration and deceleration) and have your vehicle serviced
immediately by your authorized dealer.
Under engine misfire conditions, excessive exhaust temperatures
could damage the catalytic converter, the fuel system, interior
floor coverings or other vehicle components, possibly causing a fire.
2006 Milan(mln)
Owners Guide (post-2002-fmt)
USA(fus)
Instrument Cluster
10
Page 15 of 256
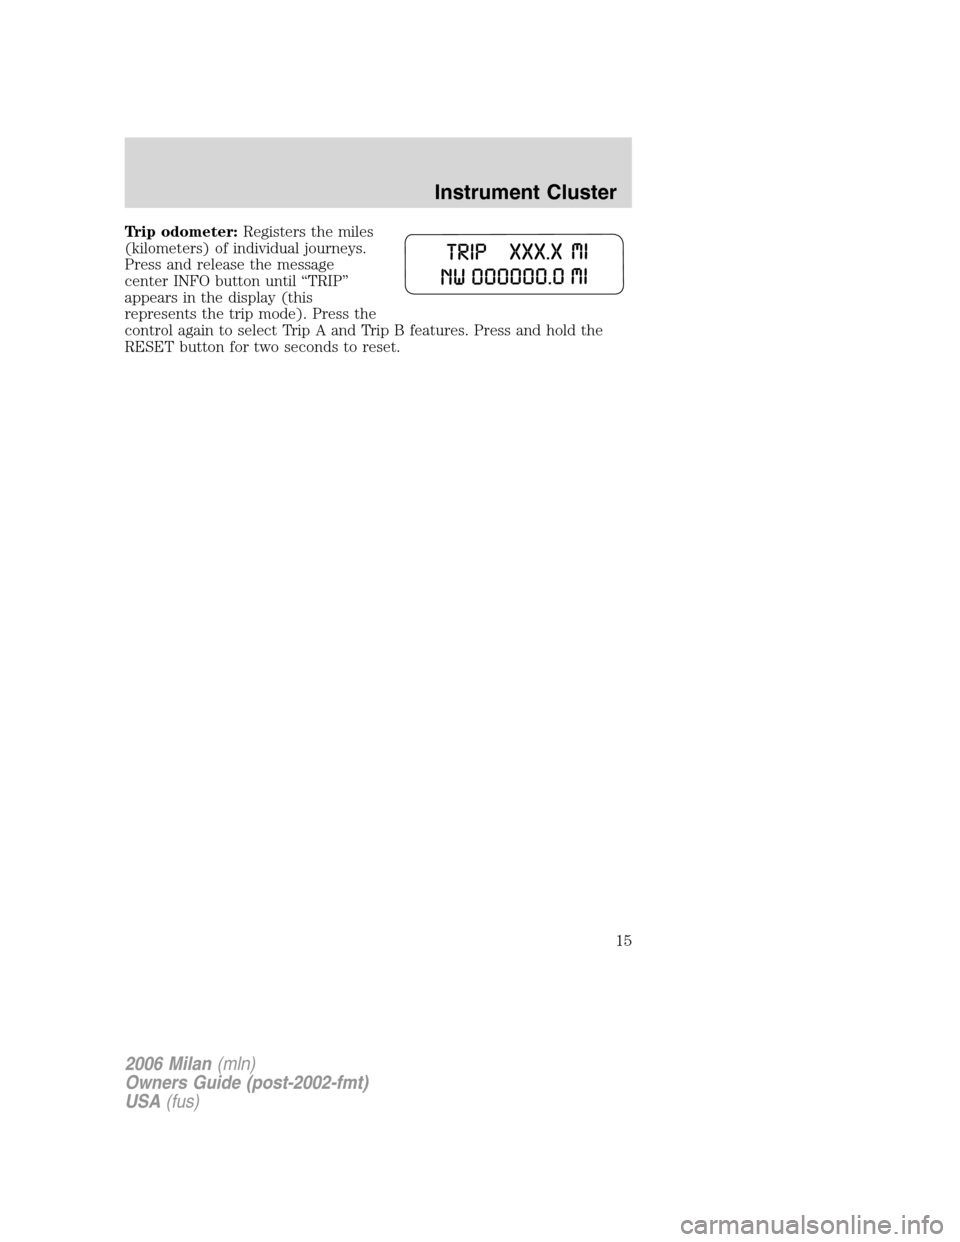
Trip odometer:Registers the miles
(kilometers) of individual journeys.
Press and release the message
center INFO button until “TRIP”
appears in the display (this
represents the trip mode). Press the
control again to select Trip A and Trip B features. Press and hold the
RESET button for two seconds to reset.
2006 Milan(mln)
Owners Guide (post-2002-fmt)
USA(fus)
Instrument Cluster
15
Page 17 of 256
Autoset:Allows you to set the strongest local radio stations without
losing your original manually set preset stations for AM/FM1/FM2 . Press
MENU to access. Use
/to set.
When the six strongest stations are filled, the station stored in preset 1
will begin playing. If there are less than six strong stations, the system
will store the last one in the remaining presets.
Bass:Press
/to adjust the bass setting.
Treble:Press
/to adjust the treble setting.
Balance:Press
/to adjust the audio between the left and right
speakers.
Fade:Press
/to adjust the audio between the front and rear
speakers.
Speed sensitive volume:Radio volume automatically changes slightly
with vehicle speed to compensate for road and wind noise. Press MENU
to access and use
/to adjust. The recommended level is 1–3.
Level 0 (SPEED OFF) turns the feature off and level 7 is the maximum
setting.
Track/folder mode:Available only on MP3 discs in CD mode.
Press
/to toggle between Track and Folder modes when in Menu
mode.
In Track mode, press
SEEKto scroll through all tracks on the
disc.
In Folder mode, press
SEEKto scroll through tracks within the
selected folder.
Compression:Brings soft and loud CD passages together for a more
consistent listening level when in CD mode. Press MENU until
compression status is displayed. Press
/to turn the feature on/off.
4.AUX:This control is not
operational.
5.SEEK
: Press to access the
next strong station or track.
2006 Milan(mln)
Owners Guide (post-2002-fmt)
USA(fus)
Entertainment Systems
17
Page 19 of 256
16.ON/OFF/Volume:Press to turn
ON/OFF. Turn to increase/decrease
volume.
If the volume is set above a certain
level and the ignition is turned off,
the volume will come back on at a
“nominal” listening level when the ignition switch is turned back on.
17.CD:Press to enter CD mode. If
a CD is already loaded into the
system, CD play will begin where it
ended last. If no CD is loaded, NO DISC will appear in the display.
CD units are designed to play commercially pressed 4.75 in (12
cm) audio compact discs only. Due to technical incompatibility,
certain recordable and re-recordable compact discs may not
function correctly when used in Ford CD players. Dirty, warped
or damaged CDs, irregular shaped CDs, CDs with a scratch
protection film attached, and CDs with homemade paper
(adhesive) labels should not be inserted into the CD player. The
label may peel and cause the CD to become jammed. It is
recommended that homemade CDs be identified with permanent
felt tip marker rather than adhesive labels. Ballpoint pens may
damage CDs. Please contact your authorized dealer for further
information.
18.CD eject:Press to eject a CD. If
there is no CD present, the display
will read NO DISC.
19.CD slot:Insert a CD label side
up.
2006 Milan(mln)
Owners Guide (post-2002-fmt)
USA(fus)
Entertainment Systems
19
Page 21 of 256
3.MENU:Press to toggle through
the following modes:
Setting the clock:Your vehicle is equipped with an in-dash clock. Refer
toClockin theDriver Controlschapter for instructions on how to set
the time.
RBDS ON/OFF:Press
/to turn RBDS ON or OFF.
Program Type:If RBDS is ON, press
/to find the desired
program type, then use
SEEKor SCAN to search for FM radio
stations broadcasting the desired program type.
SHOW RBDS Info:If RBDS is ON, this allows you to display the name
of the FM radio station or program type. Press
/to show program
type, station name or none.
RBDS(Radio Broadcast Data Signal): Allows you to search
RBDS-equipped stations for the following music formats: Classical,
Country, Jazz, Oldies, R&B, Religious, Rock, Soft, Top 40 and Information
(Inform). RBDS is only available in FM mode.
Autoset:Allows you to set the strongest local radio stations without
losing your original manually set preset stations for AM/FM1/FM2 .
Use
/to turn on/off.
When the six strongest stations are filled, the station stored in preset 1
will begin playing. If there are less than six strong stations, the system
will store the last one in the remaining presets.
Bass:Press
/to adjust the bass setting.
Treble:Press
/to adjust the treble setting.
Balance:Press
/to adjust the audio between the left and right
speakers.
Fade:Press
/to adjust the audio between the front and rear
speakers.
Speed sensitive volume:Radio volume automatically changes slightly
with vehicle speed to compensate for road and wind noise. Use
/
to adjust. Recommended level is 1–3. Level 0 (SPEED OFF) turns the
feature off and level 7 is the maximum setting.
2006 Milan(mln)
Owners Guide (post-2002-fmt)
USA(fus)
Entertainment Systems
21
Page 23 of 256
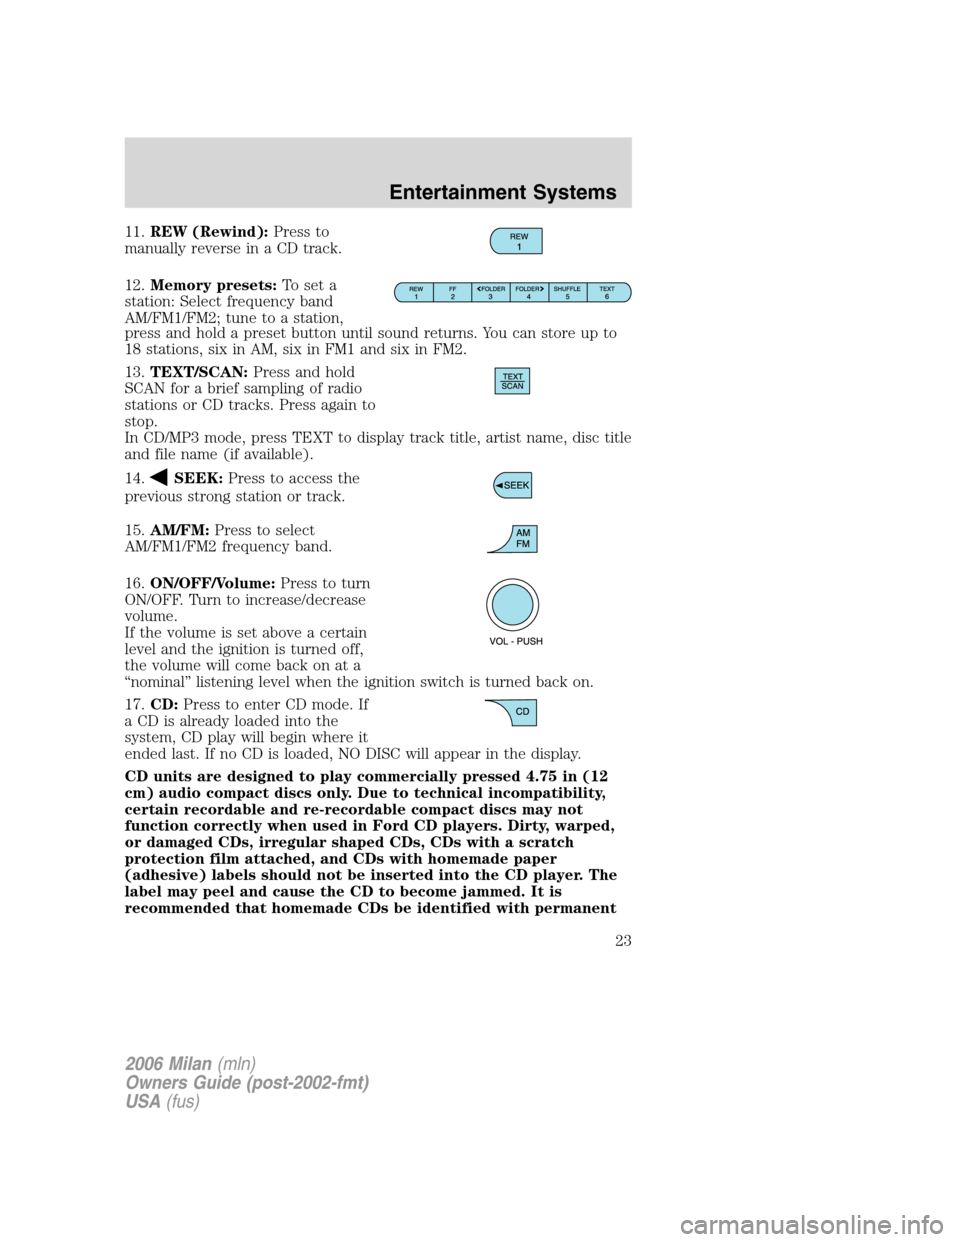
11.REW (Rewind):Press to
manually reverse in a CD track.
12.Memory presets:To set a
station: Select frequency band
AM/FM1/FM2; tune to a station,
press and hold a preset button until sound returns. You can store up to
18 stations, six in AM, six in FM1 and six in FM2.
13.TEXT/SCAN:Press and hold
SCAN for a brief sampling of radio
stations or CD tracks. Press again to
stop.
In CD/MP3 mode, press TEXT to display track title, artist name, disc title
and file name (if available).
14.
SEEK:Press to access the
previous strong station or track.
15.AM/FM:Press to select
AM/FM1/FM2 frequency band.
16.ON/OFF/Volume:Press to turn
ON/OFF. Turn to increase/decrease
volume.
If the volume is set above a certain
level and the ignition is turned off,
the volume will come back on at a
“nominal” listening level when the ignition switch is turned back on.
17.CD:Press to enter CD mode. If
a CD is already loaded into the
system, CD play will begin where it
ended last. If no CD is loaded, NO DISC will appear in the display.
CD units are designed to play commercially pressed 4.75 in (12
cm) audio compact discs only. Due to technical incompatibility,
certain recordable and re-recordable compact discs may not
function correctly when used in Ford CD players. Dirty, warped,
or damaged CDs, irregular shaped CDs, CDs with a scratch
protection film attached, and CDs with homemade paper
(adhesive) labels should not be inserted into the CD player. The
label may peel and cause the CD to become jammed. It is
recommended that homemade CDs be identified with permanent
2006 Milan(mln)
Owners Guide (post-2002-fmt)
USA(fus)
Entertainment Systems
23
Page 26 of 256
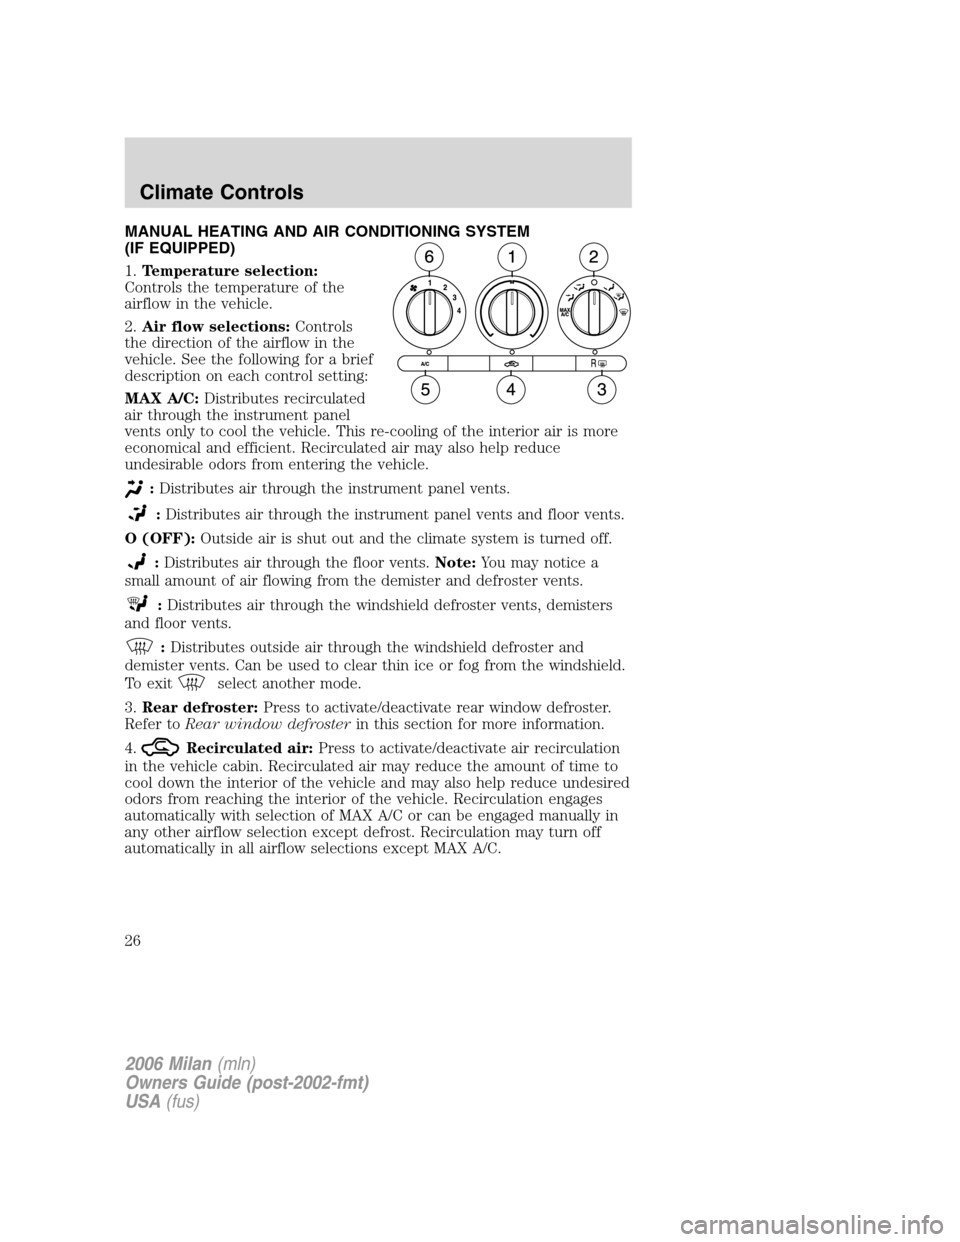
MANUAL HEATING AND AIR CONDITIONING SYSTEM
(IF EQUIPPED)
1.Temperature selection:
Controls the temperature of the
airflow in the vehicle.
2.Air flow selections:Controls
the direction of the airflow in the
vehicle. See the following for a brief
description on each control setting:
MAX A/C:Distributes recirculated
air through the instrument panel
vents only to cool the vehicle. This re-cooling of the interior air is more
economical and efficient. Recirculated air may also help reduce
undesirable odors from entering the vehicle.
:Distributes air through the instrument panel vents.
:Distributes air through the instrument panel vents and floor vents.
O (OFF):Outside air is shut out and the climate system is turned off.
:Distributes air through the floor vents.Note:You may notice a
small amount of air flowing from the demister and defroster vents.
:Distributes air through the windshield defroster vents, demisters
and floor vents.
:Distributes outside air through the windshield defroster and
demister vents. Can be used to clear thin ice or fog from the windshield.
To exit
select another mode.
3.Rear defroster:Press to activate/deactivate rear window defroster.
Refer toRear window defrosterin this section for more information.
4.
Recirculated air:Press to activate/deactivate air recirculation
in the vehicle cabin. Recirculated air may reduce the amount of time to
cool down the interior of the vehicle and may also help reduce undesired
odors from reaching the interior of the vehicle. Recirculation engages
automatically with selection of MAX A/C or can be engaged manually in
any other airflow selection except defrost. Recirculation may turn off
automatically in all airflow selections except MAX A/C.
2006 Milan(mln)
Owners Guide (post-2002-fmt)
USA(fus)
Climate Controls
26
Page 28 of 256
4. Set the fan speed to the highest setting.
5. Direct the outer instrument panel vents towards the side windows.
Do not place objects on top of the instrument panel as these
objects may become projectiles in a collision or sudden stop.
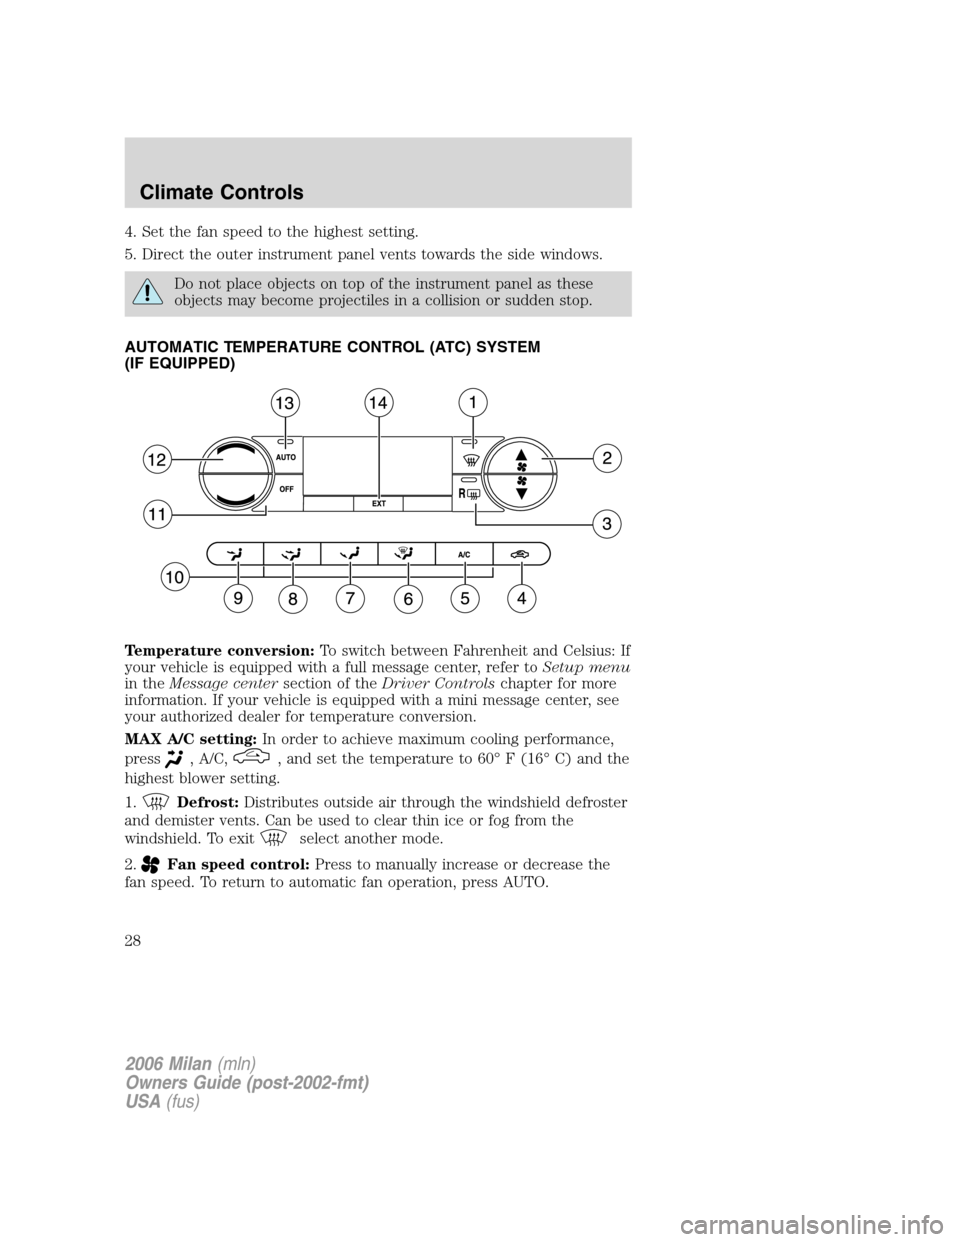
AUTOMATIC TEMPERATURE CONTROL (ATC) SYSTEM
(IF EQUIPPED)
Temperature conversion:To switch between Fahrenheit and Celsius: If
your vehicle is equipped with a full message center, refer toSetup menu
in theMessage centersection of theDriver Controlschapter for more
information. If your vehicle is equipped with a mini message center, see
your authorized dealer for temperature conversion.
MAX A/C setting:In order to achieve maximum cooling performance,
press
, A/C,, and set the temperature to 60° F (16° C) and the
highest blower setting.
1.
Defrost:Distributes outside air through the windshield defroster
and demister vents. Can be used to clear thin ice or fog from the
windshield. To exit
select another mode.
2.
Fan speed control:Press to manually increase or decrease the
fan speed. To return to automatic fan operation, press AUTO.
2006 Milan(mln)
Owners Guide (post-2002-fmt)
USA(fus)
Climate Controls
28
Page 72 of 256
Power door lock/unlock inhibit feature
As a theft deterrent, the power door lock controls and the interior trunk
release control can be disabled 20 seconds after the ignition has been
turned to the 1 (LOCK) position and the vehicle is locked using any of
the following:
•Remote entry transmitter portion of your Integrated Keyhead
Transmitter, or
•Driver power door lock control (Note:The driver’s door must be
open, then closed).
The door lock controls are reenabled when any of the following occurs:
•Unlock using the remote entry transmitter portion of your IKT,
•Opening any door from the interior of the vehicle, or
•Turning the key in the ignition to the 3 (RUN) position.
Note:This feature is configured off by default. This feature can be
turned on or off using the following procedure:
Before starting, ensure the ignition is in the 1 (LOCK) position and all
vehicle doors are closed. You must complete Steps 1–5 within 30 seconds
or the procedure will have to be repeated. If the procedure needs to be
repeated, wait a minimum of 30 seconds before beginning again.
1. Place the key in the ignition and turn the ignition to the 3 (RUN)
position.
2. Press the power door unlock control on the door panel three times.
3. Turn the ignition from the 3 (RUN) position to the 1 (LOCK) position.
4. Press the power door unlock control on the door panel three times.
5. Turn the ignition back to the 3 (RUN) position. The horn will chirp
one time to confirm programming mode has been entered and is active.
6. Press the power door lock control on the door panel two times within
five seconds. The horn will chirp one time to confirm the feature is off;
the horn will chirp one time and honk one time to confirm the feature is
on.
7. Turn the ignition from the 3 (RUN) position to the 1 (LOCK) position.
The horn will chirp one time to confirm the programming mode has been
exited.
Repeat the procedure to turn the feature on or off.
2006 Milan(mln)
Owners Guide (post-2002-fmt)
USA(fus)
Locks and Security
72
Page 80 of 256
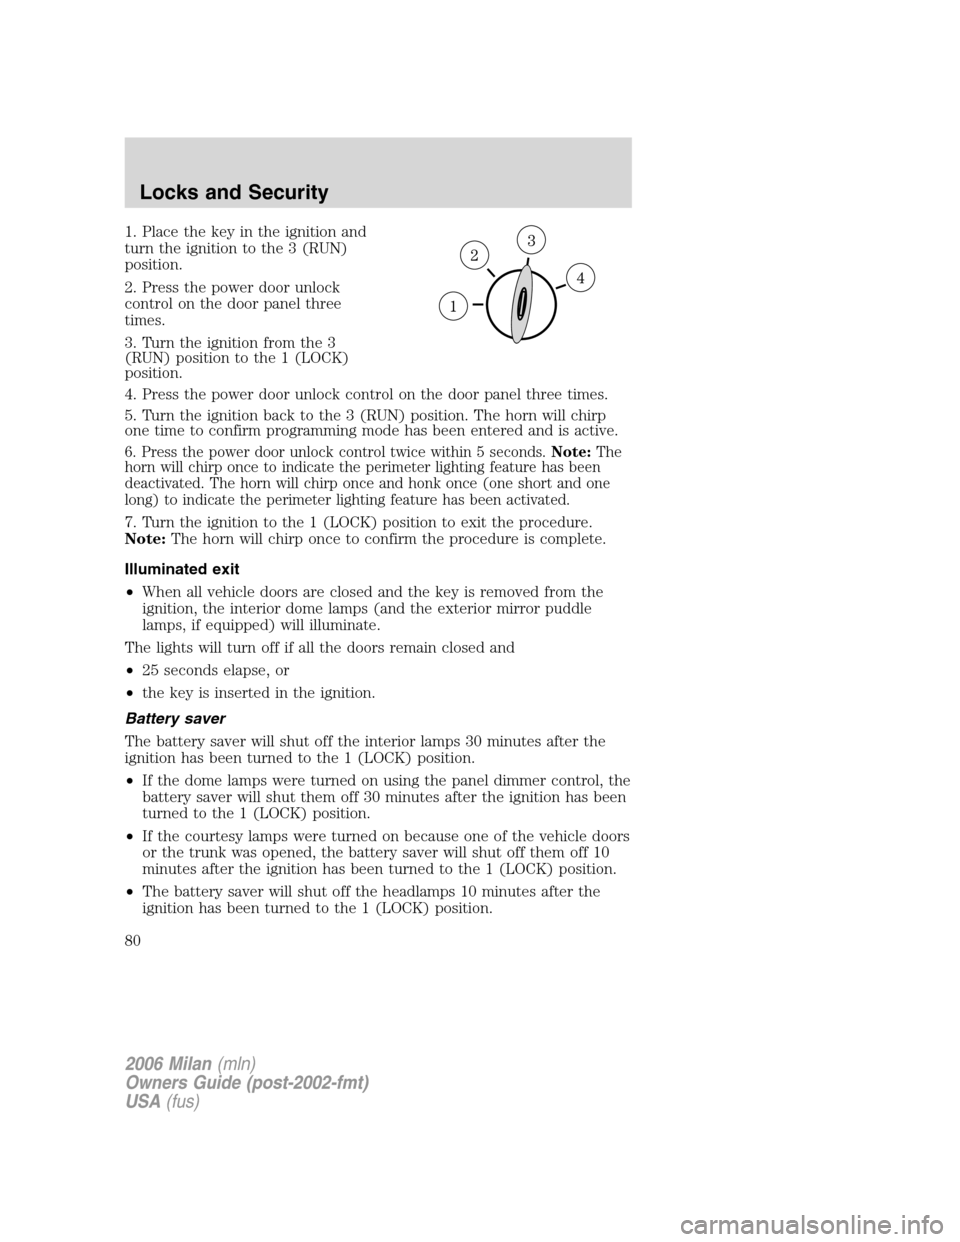
1. Place the key in the ignition and
turn the ignition to the 3 (RUN)
position.
2. Press the power door unlock
control on the door panel three
times.
3. Turn the ignition from the 3
(RUN) position to the 1 (LOCK)
position.
4. Press the power door unlock control on the door panel three times.
5. Turn the ignition back to the 3 (RUN) position. The horn will chirp
one time to confirm programming mode has been entered and is active.
6. Press the power door unlock control twice within 5 seconds.Note:The
horn will chirp once to indicate the perimeter lighting feature has been
deactivated. The horn will chirp once and honk once (one short and one
long) to indicate the perimeter lighting feature has been activated.
7. Turn the ignition to the 1 (LOCK) position to exit the procedure.
Note:The horn will chirp once to confirm the procedure is complete.
Illuminated exit
•When all vehicle doors are closed and the key is removed from the
ignition, the interior dome lamps (and the exterior mirror puddle
lamps, if equipped) will illuminate.
The lights will turn off if all the doors remain closed and
•25 seconds elapse, or
•the key is inserted in the ignition.
Battery saver
The battery saver will shut off the interior lamps 30 minutes after the
ignition has been turned to the 1 (LOCK) position.
•If the dome lamps were turned on using the panel dimmer control, the
battery saver will shut them off 30 minutes after the ignition has been
turned to the 1 (LOCK) position.
•If the courtesy lamps were turned on because one of the vehicle doors
or the trunk was opened, the battery saver will shut off them off 10
minutes after the ignition has been turned to the 1 (LOCK) position.
•The battery saver will shut off the headlamps 10 minutes after the
ignition has been turned to the 1 (LOCK) position.
2006 Milan(mln)
Owners Guide (post-2002-fmt)
USA(fus)
Locks and Security
80