display MINI COOPER 2014 User Guide
[x] Cancel search | Manufacturer: MINI, Model Year: 2014, Model line: COOPER, Model: MINI COOPER 2014Pages: 230, PDF Size: 11.58 MB
Page 25 of 230

Switching between cases, letters and
numbers
Depending on the menu, you can switch be‐
tween entering upper and lower case, letters
and numbers:SymbolFunction Enter the letters. Enter the numbers. or Move the controller up.
Without navigation system
Select the symbol.
Entry comparison Entry of names and addresses: the selection is
narrowed down every time a letter is entered
and letters may be added automatically.
The entries are continuously compared to the
data stored in the vehicle.
▷Only those letters are offered during the
entry for which data is available.▷Destination search: town/city names can be
entered using the spelling of language
available on the Control Display.Seite 25Onboard monitorAT A GLANCE25
Online Edition for Part no. 01 40 2 927 905 - II/14
Page 26 of 230
Voice activation systemVehicle equipment
All standard, country-specific and optional
equipment that is offered in the model series is
described in this chapter. Therefore, equipment
is also described that is not available in a vehi‐
cle, e. g., because of the selected optional
equipment or country variant. This also applies
for safety-related functions and systems.
The concept▷Most functions that are displayed on the
Control Display can be operated by spoken
commands via the voice activation system.
The system prompts you to make your en‐
tries.▷Functions that can only be used when the
vehicle is stationary cannot be operated us‐
ing the voice activation system.▷The system uses a special microphone on
the driver's side.▷›...‹ Verbal instructions in the Owner's
Manual to use with the voice activation sys‐
tem.
Requirements
Via the Control Display, set a language that is
also supported by the voice activation system
so that the spoken commands can be identi‐
fied.
Set the language, refer to page 82.
Using voice activation
Activating the voice activation system1. Press the button on the steering
wheel.2.Wait for the signal.3.Say the command.
The command is displayed in the instru‐
ment cluster.
This symbol in the instrument cluster indi‐
cates that the voice activation system is active.
If no other commands are available, operate
the function in this case via the onboard moni‐
tor.
Terminating the voice activation
system
Briefly press the button on the steering
wheel or ›End‹.
Possible commands
Most menu items on the Control Display can be
voiced as commands.
The available commands depend on which
menu is currently displayed on the Control Dis‐
play.
Short commands exist for many functions.
Some list entries, e.g., Phone book entries, can
also be selected via the voice activation system.
Speak these list entries exactly as they are dis‐
played in the respective list.
Having possible commands read aloud
You can have the available commands read out
loud for you: ›commands‹
Seite 26AT A GLANCEVoice activation system26
Online Edition for Part no. 01 40 2 927 905 - II/14
Page 27 of 230
For example, if the "Settings" menu is dis‐
played, the commands for the settings are read
out loud.
Executing functions using short
commands
Functions on the main menu can be performed
directly by means of short commands, nearly ir‐
respective of which menu item is currently se‐
lected, e.g., ›Vehicle status‹.
Help dialog for the voice activation
system
Calling up help dialog: ›Help‹
Additional commands for the help dialog:▷›Help with examples‹: information about the current operating options and the most
important commands for them are an‐
nounced.▷›Help voice activation‹: information about
the principle of operation for the voice acti‐
vation system is announced.
One example: open the
tone settings
Via the main menu
The commands of the menu items are spoken
just as they are selected via the controller.
1.Switch on the Entertainment sound output
if necessary.2. Press the button on the steering
wheel.3.›Radio menu‹4.›Audio settings‹Via short command
The desired radio station can also be started via
a short command.1.Switch on the Entertainment sound output
if necessary.2. Press the button on the steering
wheel.3.›Audio settings‹
Setting the voice dialog
You can set whether the system should use the
standard dialog or a shorter version.
In the shorter variant of the voice dialog, the
announcements from the system are issued in
an abbreviated form.
On the Control Display:
1."Settings"2."Language/Units"3."Speech type:"4.Select the setting.
Setting the voice dialog
language
You can set the language in which the voice ac‐
tivation and system announcements are to be
made.
On the Control Display:
1."Settings"2."Language/Units"3."Speech type:"4.Select the desired language.Seite 27Voice activation systemAT A GLANCE27
Online Edition for Part no. 01 40 2 927 905 - II/14
Page 29 of 230
Integrated Owner's Manual in the
vehicleVehicle equipment All standard, country-specific and optional
equipment that is offered in the model series is
described in this chapter. Therefore, equipment
is also described that is not available in a vehi‐
cle, e. g., because of the selected optional
equipment or country variant. This also applies
for safety-related functions and systems.
Integrated Owner's
Manual in the vehicle
The Integrated Owner's Manual can be dis‐
played on the Control Display. The equipment
and functions that are in the vehicle are descri‐
bed therein.
Components of the Integrated Owner's
Manual
The Integrated Owner's Manual consists of
three parts, which offer various levels of infor‐
mation or access possibilities.
Quick Reference Guide Located in the Quick Reference is important in‐
formation for the operation of the vehicle, the
operation of basic vehicle functions or for what
to do in the event of a flat tire. This information
can also be displayed during driving.
Search by pictures
Information and descriptions based on illustra‐
tions can be searched via search by pictures.
This is helpful, for example, if the description of
an outfitting package that cannot be named is
needed.Owner's Manual
Information and descriptions can be searched
by direct entry of a search term via the index.
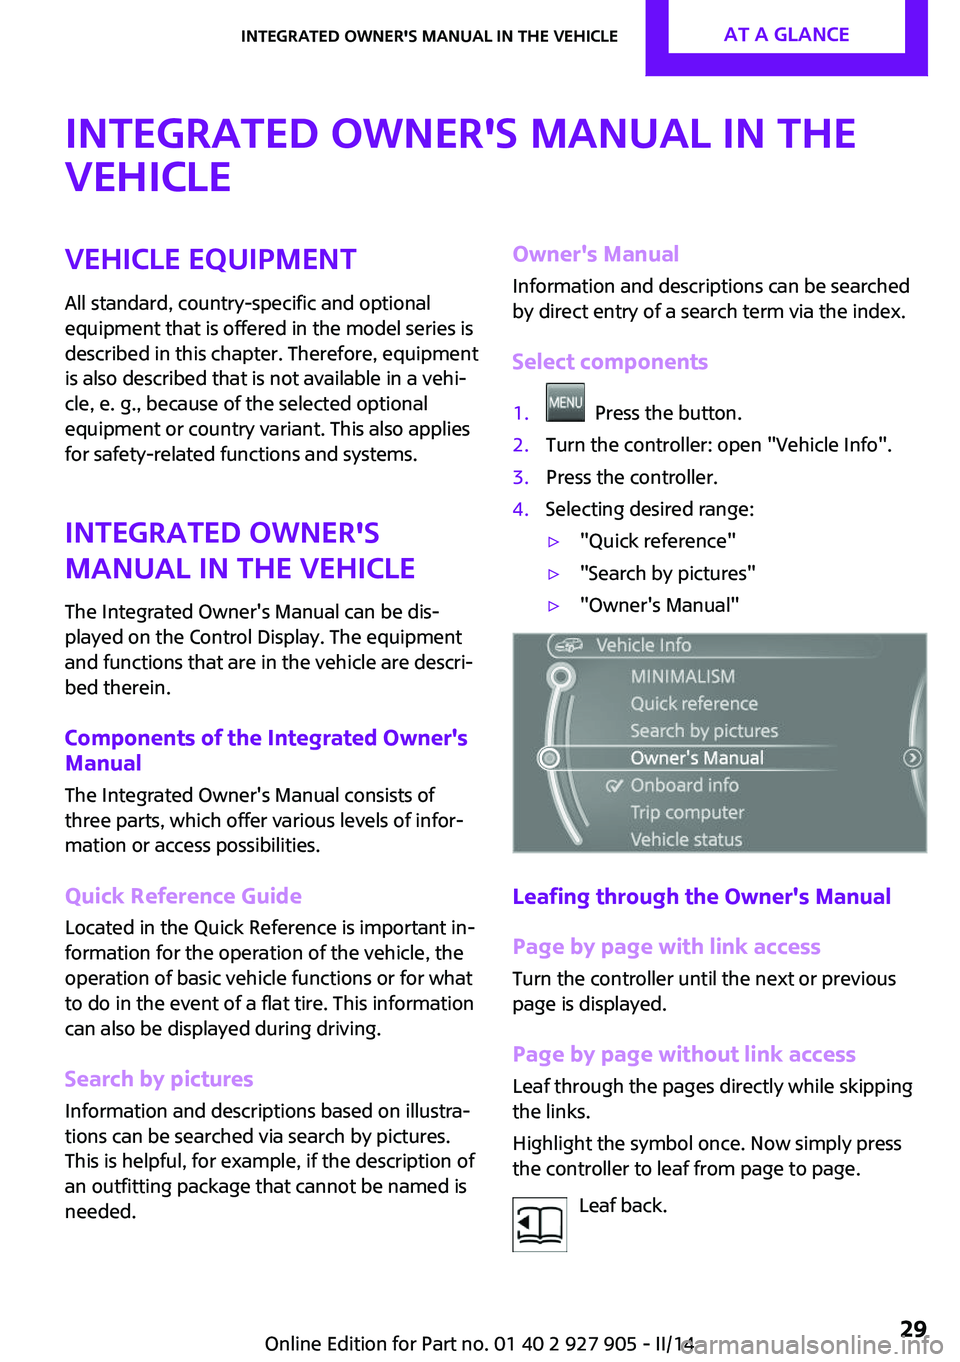
Select components1. Press the button.2.Turn the controller: open "Vehicle Info".3.Press the controller.4.Selecting desired range:▷"Quick reference"▷"Search by pictures"▷"Owner's Manual"
Leafing through the Owner's Manual Page by page with link access
Turn the controller until the next or previous
page is displayed.
Page by page without link access Leaf through the pages directly while skipping
the links.
Highlight the symbol once. Now simply press
the controller to leaf from page to page.
Leaf back.
Seite 29Integrated Owner's Manual in the vehicleAT A GLANCE29
Online Edition for Part no. 01 40 2 927 905 - II/14
Page 30 of 230
Leaf forward.
Context help - Owner's Manual to the
temporarily selected function
The relevant information can be opened di‐
rectly.
Opening via the onboard monitor To move directly from the application on the
Control Display to the options menu:1. Press the button or move the control‐
ler to the right repeatedly until the
"Options" menu is displayed.2."Display Owner's Manual"
Opening when a Check Control
message is displayed
Directly from the Check Control message on the
Control Display:
"Display Owner's Manual"
Changing between a function and the
Owner's Manual
To change from a function, e.g., radio, to the
Owner's Manual on the Control Display and to
switch between the two displays:
1. Press the button or move the control‐
ler to the right repeatedly until the
"Options" menu is displayed.2."Display Owner's Manual"3.Select the desired page in the Owner's
Manual.4. Press the button again to return to
the function displayed last.5. Press the button to return to the page
of the Owner's Manual displayed last.To switch back and forth repeatedly between
the function displayed last and the page of the
Owner's Manual displayed last, repeat steps 4
and 5. This opens a new panel every time.
Programmable memory buttons
General information
The Owner's Manual can be stored on the pro‐
grammable memory buttons and called up di‐
rectly.
Storing1."Owner's Manual" Select via the iDrive.2. Press the desired button for more
than 2 seconds.
Executing
Press the button.
The Owner's Manual is displayed im‐
mediately.
Seite 30AT A GLANCEIntegrated Owner's Manual in the vehicle30
Online Edition for Part no. 01 40 2 927 905 - II/14
Page 35 of 230
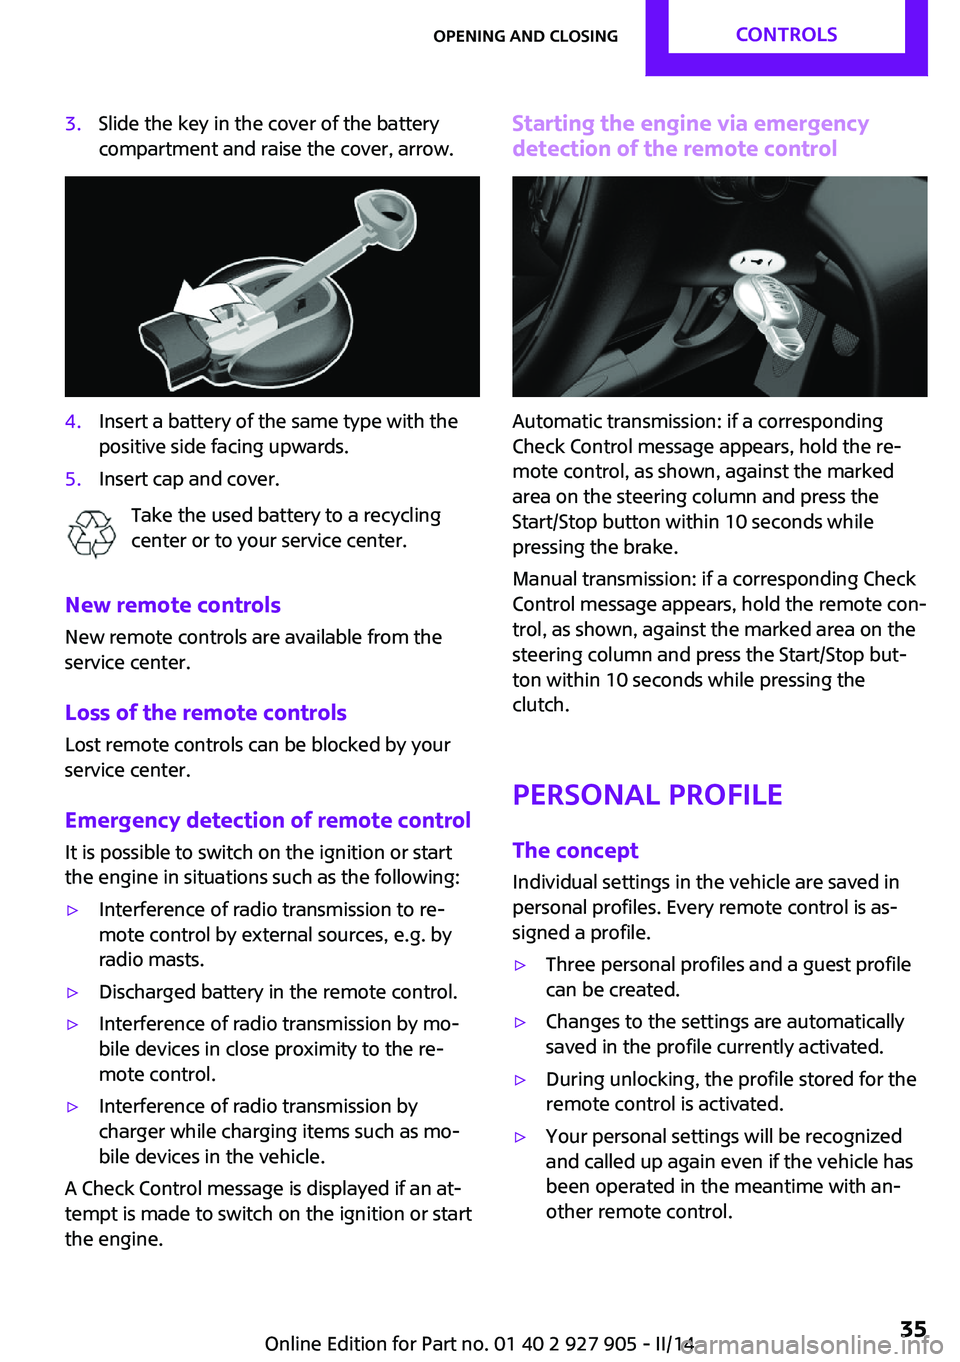
3.Slide the key in the cover of the battery
compartment and raise the cover, arrow.4.Insert a battery of the same type with the
positive side facing upwards.5.Insert cap and cover.
Take the used battery to a recycling
center or to your service center.
New remote controls
New remote controls are available from the
service center.
Loss of the remote controls Lost remote controls can be blocked by your
service center.
Emergency detection of remote control
It is possible to switch on the ignition or start
the engine in situations such as the following:
▷Interference of radio transmission to re‐
mote control by external sources, e.g. by
radio masts.▷Discharged battery in the remote control.▷Interference of radio transmission by mo‐
bile devices in close proximity to the re‐
mote control.▷Interference of radio transmission by
charger while charging items such as mo‐
bile devices in the vehicle.
A Check Control message is displayed if an at‐
tempt is made to switch on the ignition or start
the engine.
Starting the engine via emergency detection of the remote control
Automatic transmission: if a corresponding
Check Control message appears, hold the re‐
mote control, as shown, against the marked
area on the steering column and press the
Start/Stop button within 10 seconds while
pressing the brake.
Manual transmission: if a corresponding Check
Control message appears, hold the remote con‐
trol, as shown, against the marked area on the
steering column and press the Start/Stop but‐
ton within 10 seconds while pressing the
clutch.
Personal Profile The concept
Individual settings in the vehicle are saved in
personal profiles. Every remote control is as‐
signed a profile.
▷Three personal profiles and a guest profile
can be created.▷Changes to the settings are automatically
saved in the profile currently activated.▷During unlocking, the profile stored for the
remote control is activated.▷Your personal settings will be recognized
and called up again even if the vehicle has
been operated in the meantime with an‐
other remote control.Seite 35Opening and closingCONTROLS35
Online Edition for Part no. 01 40 2 927 905 - II/14
Page 36 of 230

Adjusting
The following settings are stored in a profile.▷Radio: stored stations, station listened to
last.▷Assignment of the programmable memory
buttons.▷Tone settings.▷Audio source listened to last.▷Unlocking the vehicle: driver door or entire
vehicle.▷Locking the vehicle: if no door is open or af‐
ter starting off.▷Welcome lamps: on/off.▷Triple turn signal activation: on/off.▷Headlamp courtesy delay feature: time set‐
ting.▷Language on the Control Display.▷Daytime running lights: on/off.▷Air conditioner/Automatic climate control:
settings.▷Navigation: map views, route criteria, voice
output on/off.▷Park Distance Control PDC: signal tone vol‐
ume.▷Rearview camera: selection of functions
and type of display.▷Head-up Display: selection, brightness, po‐
sition and rotation of the display.▷Driving Dynamics Control: configuration.
Profile management
Opening the profiles A different profile can be called up than the one
associated with the remote control currently in
use.
1. "Settings"2."Profiles"3.Select a profile.Called up profile is assigned to the remote con‐
trol being used at the time.
Renaming profiles1. "Settings"2."Profiles"
The current profile is selected.3.Open "Options".4."Rename current profile"
Resetting profiles The settings of the active profile are reset to
their default values.
1. "Settings"2."Profiles"
The current profile is selected.3.Open "Options".4."Reset current profile"
Importing profiles
Profiles stored on a USB device can be im‐
ported via the USB interface.
Existing settings and contacts are overwritten
with the imported profile.
1. "Settings"2."Profiles"3."Import profile"4."USB device"
Exporting profiles
Most settings of the active profile and the
saved contacts can be exported.
This can be helpful for securing and retrieving
personal settings, before delivering the vehicle
to a workshop for example. The saved profiles
can be taken with you to another vehicle
equipped with the Personal Profile function.
1. "Settings"2."Profiles"Seite 36CONTROLSOpening and closing36
Online Edition for Part no. 01 40 2 927 905 - II/14
Page 37 of 230
3."Export profile"4."USB device"
Using the guest profile
The guest profile can be used to make individ‐
ual settings that are saved in none of the three
personal profiles.
This can be useful for drivers who are using the
vehicle temporarily and do not have their own
profile.
1. "Settings"2."Profiles"3.Open "Guest".4.Adjust the settings.
The guest profile cannot be renamed. It is not
assigned to the current remote control.
Display profile list during start The profile list can be displayed during each
start for selecting the desired profile.
1. "Settings"2."Profiles"3.Open "Options".4."Display user list at startup"
Opening and closing
Using the remote control
Note Take the remote control with you
People or animals left unattended in a
parked vehicle can lock the doors from the in‐
side. Always take the remote control with you
when leaving the vehicle so that the vehicle
can then be opened from the outside. ◀
Unlocking
Press the button on the remote con‐
trol.
The vehicle is unlocked.
Welcome lamps, interior lamp and courtesy
lamps are switched on.
Press the button on the remote control
twice.
When the door is opened, the window is low‐
ered to make it easier to enter the vehicle.
Depending on the equipment version and
country variant, you can set how the vehicle is
to be unlocked. Settings, refer to page 42.
The alarm system, refer to page 42, is dis‐
armed.
Convenient opening
The remote control can be used to open the
windows and the glass sunroof after unlocking.
Press and hold the button on the re‐
mote control.
Releasing the button stops the motion.
Locking Press the button on the remote con‐
trol.
Locking from the outside
Do not lock the vehicle from the outside if
there are people in it, as the vehicle cannot be
unlocked from inside without special knowl‐
edge. ◀
The alarm system, refer to page 42, is armed.
Switching on interior lamps and
courtesy lamps
Press the button on the remote control
with the vehicle locked.Seite 37Opening and closingCONTROLS37
Online Edition for Part no. 01 40 2 927 905 - II/14
Page 60 of 230
Radio ready state
Activate radio ready state:▷When the engine is running: press the Start/
Stop button.
Some electronic systems/power consumers re‐
main ready for operation.
Radio ready state switches off automatically:
▷After approx. 8 minutes.▷When the vehicle is locked using the central
locking system.▷Shortly before the battery is discharged
completely, so that the engine can still be
started.
Starting the engine
General information Enclosed areas
Do not let the engine run in enclosed
areas, since breathing in exhaust fumes may
lead to loss of consciousness and death. The
exhaust gases contain carbon monoxide, an
odorless and colorless, but highly toxic gas. ◀
Unattended vehicle
Do not leave the vehicle unattended with
the engine running; doing so poses a risk of
danger.
Before leaving the vehicle with the engine run‐
ning, set the parking brake and place the trans‐
mission in selector lever position P or neutral to
prevent the vehicle from moving. ◀
Repeated starting in quick succession
Avoid repeated unsuccessful attempts to
start the vehicle or starting the vehicle several
times in quick succession. Otherwise, the fuel is
not burned or is inadequately burned, posing a
risk of overheating and damage to the catalytic
converter. ◀
Do not wait for the engine to warm-up while
the vehicle remains stationary. Start driving at
moderate engine speeds.
Diesel engine If the engine is cold and temperatures are be‐
low approx. 32 ℉/0 ℃, the start process may
be delayed somewhat due to automatic pre‐
heating.
A Check Control message is displayed.
Automatic transmission
Starting the engine1.Depress the brake pedal.2.Engage selector lever position P or N.3.Press the Start/Stop button.
The ignition is activated automatically for a cer‐
tain time and is stopped as soon as the engine
starts.
Manual transmission
Starting the engine
1.Depress the brake pedal.2.Press on the clutch pedal and shift to neu‐
tral.3.Press the Start/Stop button.
The ignition is activated automatically for a cer‐
tain time and is stopped as soon as the engine
starts.
Engine stop
General information Take the remote control with you
Take the remote control with you when
leaving the vehicle so that children, for exam‐
ple, cannot start the engine. ◀
Seite 60CONTROLSDriving60
Online Edition for Part no. 01 40 2 927 905 - II/14
Page 61 of 230
Set the parking brake and further secure
the vehicle as required
Set the parking brake firmly when parking; oth‐
erwise, the vehicle could roll. On steep upward
and downward inclines, further secure the ve‐
hicle, for example, by turning the steering
wheel in the direction of the curb. ◀
Before driving into a car wash In order for the vehicle to be able to roll into a
car wash, pay attention to the information re‐
garding Washing in automatic car washes, refer
to page 207.
Automatic transmission
Switching off the engine1.Engage selector lever position P with the
vehicle stopped.2.Press the Start/Stop button.
The engine is switched off.
The radio ready state is switched on.3.Set the parking brake.
Manual transmission
Switching off the engine
1.With the vehicle at a standstill, press the
Start/Stop button.
The engine is switched off.
The radio ready state is switched on.2.Shift into first gear or reverse.3.Set the parking brake.
Auto Start/Stop function
The concept
The Auto Start/Stop function helps save fuel.
The system switches off the engine during a
stop, e.g., in traffic congestion or at traffic
lights. The ignition remains switched on. The
engine starts again automatically for driving off.
Automatic operation
After every start of the engine using the Start/
Stop button, the Auto Start/Stop function is in
the last selected state, refer to page 63. When
the Auto Start/Stop function is active, it is avail‐
able when the vehicle is traveling faster than
about 3 mph, approx. 5 km/h.
Engine stop
The engine is switched off automatically during
a stop under the following conditions:
Manual transmission:▷Neutral is engaged and the clutch pedal is
not pressed.▷The driver's safety belt is buckled or the
driver's door is closed.
Automatic transmission:
▷The selector lever is in selector lever posi‐
tion D.▷Brake pedal remains depressed while the
vehicle is stopped.▷The driver's safety belt is buckled or the
driver's door is closed.
In order to be able to release the brake pedal,
engage selector lever position P. The engine re‐
mains off.
To continue driving depress the brake pedal.
When a gear is engaged, the engine starts au‐
tomatically.
The air flow of the air conditioner is reduced
when the engine is switched off.
Displays in the instrument cluster The display indicates that the
Auto Start/Stop function is ready
for an Automatic engine start.
Seite 61DrivingCONTROLS61
Online Edition for Part no. 01 40 2 927 905 - II/14