manual radio set MINI Hardtop 2 Door 2015 User Guide
[x] Cancel search | Manufacturer: MINI, Model Year: 2015, Model line: Hardtop 2 Door, Model: MINI Hardtop 2 Door 2015Pages: 251, PDF Size: 11.4 MB
Page 79 of 251

Set via radio.1. Press button.2. "Settings"3."Lighting"4."Daytime running lamps"
Settings are stored for the profile currently in
use.
Cornering lamp
Position of switch
: going around corners,
the cornering lamp also lights the interior area
of the curve. Below a speed of approx.
25 mph/40 km/h when the flasher is switched
on and the steering angle is detected, there is
automatic activation.
Malfunction
A Check Control message is displayed.
Cornering light is disrupted or failed. Have the
system checked as soon as possible.
High-beam Assistant The concept
When the low beams are activated, this system
automatically switches the high beams on and
off. The procedure is controlled by a camera on
the front of the interior rearview mirror. The as‐
sistant ensures that the high beams are acti‐
vated whenever the traffic situation allows. The
driver can intervene at any time and switch the
high beams on and off as usual.
Note Personal responsibility
The High-beam Assistant cannot serve as
a substitute for the driver's personal judgment
of when to use the high beams. Therefore,
manually reel off the high beams in situations
where required to avoid a safety risk. ◀
Activating
The High-beam Assistant can be activated
when the low beams are activated.
1.Depending on the equipment, turn the light
switch into position
or .
2.Press button on the turn signal lever, arrow.
The indicator lamp in the instrument
cluster lights up.
When the low beams are on, the lights are au‐
tomatically brightened or dimmed.
The system responds to light from oncoming
traffic and traffic driving ahead of you, and to
adequate illumination, e.g., in towns and cities.
The blue indicator lamp in the instru‐
ment cluster lights up when the system
switches on the high beams.
Switching the high beams on and off
manually
▷High beams on, arrow 1.Seite 75LightsCONTROLS75
Online Edition for Part no. 01 40 2 961 140 - II/15
Page 81 of 251

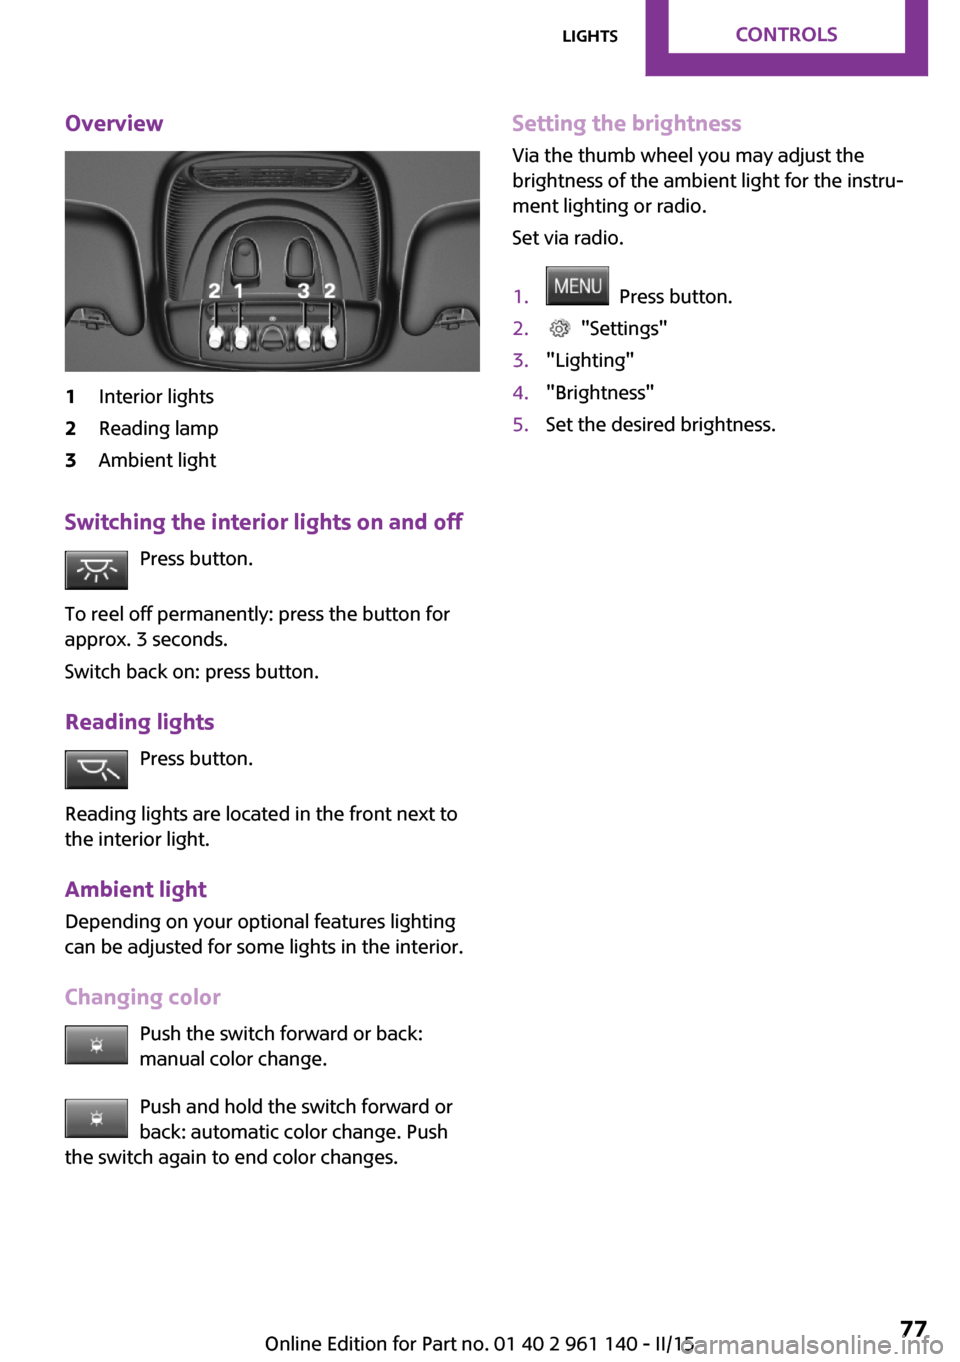
Overview1Interior lights2Reading lamp3Ambient light
Switching the interior lights on and offPress button.
To reel off permanently: press the button for
approx. 3 seconds.
Switch back on: press button.
Reading lights Press button.
Reading lights are located in the front next to
the interior light.
Ambient light
Depending on your optional features lighting
can be adjusted for some lights in the interior.
Changing color Push the switch forward or back:
manual color change.
Push and hold the switch forward or
back: automatic color change. Push
the switch again to end color changes.
Setting the brightness
Via the thumb wheel you may adjust the
brightness of the ambient light for the instru‐
ment lighting or radio.
Set via radio.1. Press button.2. "Settings"3."Lighting"4."Brightness"5.Set the desired brightness.Seite 77LightsCONTROLS77
Online Edition for Part no. 01 40 2 961 140 - II/15
Page 93 of 251

▷LED lights up orange or goes out respective
to their individual settings.
Adjust as needed. Individual settings are stored
for the profile currently in use.
Press button again:
▷All Intelligent Safety systems are
activated.▷The LED lights up green.
Hold down button:
▷All Intelligent Safety systems are
turned off.▷The LED goes out.
Setting the warning time
The warning time can be set on the radio.
1.Intelligent Safety button
The intelligent safety menu is displayed for
a brief time on the radio display.2."Front. Coll. Warn."3."Warning time"4.Setting the desired warning time
The selected warning time is stored for the pro‐
file currently in use.
Warning with braking function
Display
If a collision with a vehicle detected in this way
is imminent, a warning symbol appears on the
instrument cluster.
SymbolMeasureThe vehicle lights up red: prewarning.
Brake and increase distance.The vehicle flashes red and an acous‐
tic signal sounds: acute warning.
You are requested to intervene by
braking or make an evasive maneu‐
ver.Prewarning
This warning is issued, e.g., when there is the
impending danger of a collision or the distance
to the vehicle ahead is too small.
The driver must intervene actively when there
is a prewarning.
Acute warning with braking function
Warning of the imminent danger of a collision
when the vehicle approaches another object at
a relatively high differential speed.
The driver must intervene actively when there
is an acute warning. If necessary, the driver is
assisted by a minor automatic braking inter‐
vention in a possible risk of collision.
Acute warnings can also be triggered without
previous prewarning.
Braking intervention
The warning prompts the driver himself/herself
to react. During a warning, the maximum brak‐
ing force is used. Premise for the brake booster
is sufficiently quick and sufficiently hard step‐
ping on the brake pedal. The system can assist
with some braking intervention if there is risk of
a collision. At low speeds vehicles may thus come to a complete stop.
Manual transmission: During a braking inter‐
vention up to a complete stop, the engine may
be shut down.
The braking intervention is executed only if DSC Dynamic Stability Control is switched on.
The braking intervention can be interrupted by
stepping on the accelerator pedal or by actively
moving the steering wheel.
Object detection can be restricted. Limitations
of the detection range and functional restric‐
tions are to be considered.
System limits
Detection range The system's detection potential is limited.Seite 89SafetyCONTROLS89
Online Edition for Part no. 01 40 2 961 140 - II/15
Page 111 of 251

Switching on/off manuallyPress button.▷On: the LED lights up.▷Off: the LED goes out.
Display
Signal tones
When approaching an object, an intermittent
sound indicates the position of the object. E. g.
if an object is detected to the left rear of the ve‐
hicle, a signal tone sounds from the left rear
speaker.
The shorter the distance to the object, the
shorter the intervals.
If the distance to a detected object is less than
approx. 10 in/25 cm, a continuous tone is
sounded.
If objects are located both in front of and to the
rear of the vehicle, an alternating continuous
signal is sounded.
The signal tone is switched off, when selector
lever position P is engaged on vehicles with
Steptronic transmission.
Volume
The volume of the PDC signal tone can be ad‐
justed similar to the sound and volume settings
of the radio.
Settings are stored for the profile currently in
use.
System limits
Limits of ultrasonic measurement
Ultrasonic measuring might not function under
the following circumstances:
▷For small children and animals.▷For persons with certain clothing, e.g.
coats.▷With external interference of the ultra‐
sound, e.g. from passing vehicles or loud
machines.▷When sensors are dirty, iced over, damaged
or out of position.▷Under certain weather conditions such as
high relative humidity, rain, snowfall, ex‐
treme heat or strong wind.▷With tow bars and trailer couplings of other
vehicles.▷With thin or wedge-shaped objects.▷With moving objects.▷With elevated, protruding objects such as
ledges or cargo.▷With objects with corners and sharp edges.▷With objects with a fine surface structure
such as fences.▷For objects with porous surfaces.
Low objects already displayed, e.g., curbs, can
move into the blind area of the sensors before
or after a continuous tone sounds.
False warnings
PDC may issue a warning under the following
conditions even though there is no obstacle
within the detection range:
▷In heavy rain.▷When sensors are very dirty or covered with
ice.▷When sensors are covered in snow.▷On rough road surfaces.▷On uneven surfaces, such as speed bumps.▷In large buildings with right angles and
smooth walls, e.g., in underground garages.▷In automatic car washes.▷Through heavy pollution.▷Due to other ultrasound sources, e.g.,
sweeping machines, high pressure steam
cleaners or neon lights.Seite 107Driving comfortCONTROLS107
Online Edition for Part no. 01 40 2 961 140 - II/15
Page 149 of 251

The function is available in a certain speed
range.
A proactively driving style helps the driver to
use the function as often as possible and sup‐
ports the fuel-conserving effect of coasting.
Safety mode
The function is not available under one of the
following conditions.▷DSC OFF or TRACTION activated.▷Driving in the dynamic limit range and on
steep uphill or downhill grades.▷Battery charge status temporarily too low
or vehicle electrical system drawing exces‐
sive current.▷Cruise control activated.
Functional requirements
In GREEN mode, this function is available in a
speed range from approximately 30 mph, ap‐
prox. 50 km/h to 100 mph, approx. 160 km/h,
if the following conditions are met:
▷Accelerator pedal and brake pedal are not
operated.▷The selector lever is in selector lever posi‐
tion D.▷Engine and transmission are at operating
temperature.
Display
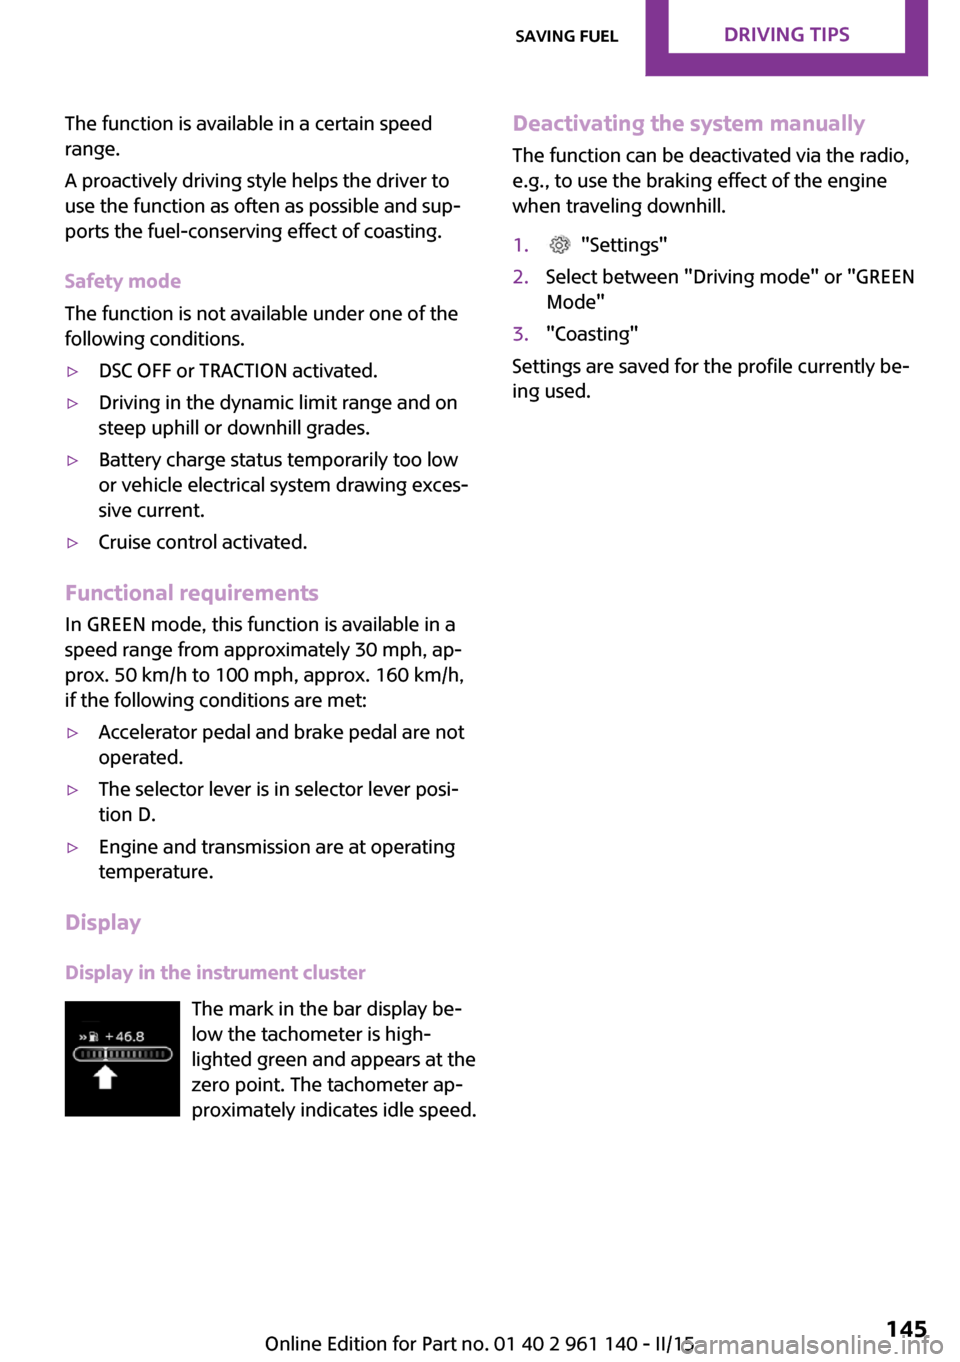
Display in the instrument cluster The mark in the bar display be‐
low the tachometer is high‐
lighted green and appears at the
zero point. The tachometer ap‐
proximately indicates idle speed.
Deactivating the system manually
The function can be deactivated via the radio,
e.g., to use the braking effect of the engine
when traveling downhill.1. "Settings"2.Select between "Driving mode" or "GREEN
Mode"3."Coasting"
Settings are saved for the profile currently be‐
ing used.
Seite 145Saving fuelDRIVING TIPS145
Online Edition for Part no. 01 40 2 961 140 - II/15
Page 154 of 251

Selecting a station1. "Radio"2."FM" or "AM"3.Select a station.
Selecting a station manually
1. "Radio"2."FM" or "AM"3."Manual search ( )"4.Turn the right-hand knob until the desired
frequency is displayed.
Changing the station
About the radio:
Press button.
Via the buttons on the steering wheel: Press button.
The next station with reception or stored sta‐
tion is played. If traffic bulletins are activated,
the next traffic information station is played.
About the radio:
Press and hold this button.
Via the buttons on the steering wheel: Press and hold this button.
The waveband is traversed. After the button is
released, the next station with reception is
played.
Storing a station
1. "Radio"2."FM" or "AM"3.Select a station.4.Press the right button.5.Select the memory location.
The stations can also be stored on the Favorites
buttons, refer to page 152.
Renaming a station When storing a station with RDS signal, the RDS
information transferred during storing is ac‐
cepted as the station name. This name can be
changed.
1.Select the station that is to be renamed.2. Press button.3."Rename to:"
If necessary, wait until the desired name
appears.4.Press the right-hand knob to store this
name.
Displaying additional information
If a radio station broadcasts radio text or radio
text plus, this information can be displayed,
e.g., the track or the performer of the music.
Availability, content and sequence are set by
the radio station.
1. "Radio"2."FM" or "AM"3. Press button.4."Station info"
RDS Radio Data System
The concept
RDS broadcasts additional information, such as
the station name, in the FM wave band.
When playing a station with multiple frequen‐
cies, the system automatically switches to the
frequency with the best reception, if needed.
Seite 150ENTERTAINMENTRadio150
Online Edition for Part no. 01 40 2 961 140 - II/15
Page 248 of 251

Roadside parking lights 73
RON recommended fuel grade 174
Roofliner 17
Roof load capacity 223
Roof-mounted luggage rack 138
Rope for tow-starting/ towing 214
RSC Run Flat System Compo‐ nent, refer to Run-flat
tires 184
Rubber components, care 218
Run-flat tires 184
S
Safe braking 135
Safety belt reminder for driv‐ er's seat and front passenger
seat 38
Safety belts 37
Safety belts, care 218
Safety reel, windows 32
Safety systems, airbags 78
Satellite radio 152
Saving fuel 141
Screwdriver 199
Screw thread for tow fit‐ ting 215
Sealant 185
Seat belts, refer to Safety belts 37
Seat heating, front 37
Seating position for chil‐ dren 43
Seats 35
Select a station 150
Selecting a station man‐ ually 150
Selection list in instrument cluster 67
Selector lever, Steptronic transmission 56
Sensors, care 219 Service and warranty 8
Service requirements, Condi‐ tion Based Service CBS 197
Service requirements, dis‐ play 65
Settings and information 69
Settings, locking/unlocking 29
Settings, mirrors 40
Shift paddles on the steering wheel 57
Side airbags 78
Signaling, horn 14
Signals when unlocking 29
Sitting safely 35
Size 222
Slide/tilt glass roof 32
Snow chains 188
Socket 123
Socket, OBD Onboard Diag‐ nostics 198
Sound settings 148, 149
Spare fuse 210
Spare tire, refer to Emergency wheel 207
Specified engine oil types 194
Speed, average 68
Speed limit detection, com‐ puter 69
Speed limiter, display 66
Speed Limit Information 66
Speed warning 69
Sport instruments, cockpit 70
SPORT program, Dynamic Driving Control 96
Sport program, transmis‐ sion 56
Stability control systems 94
Start/stop, automatic func‐ tion 49
Start/Stop button 47
Start function during malfunc‐ tion 23
Starting the engine 48
Station, storing 150
Status of Owner's Manual 6
Steering wheel, adjusting 42 Steptronic Sport transmission,
see Steptronic transmis‐
sion 55
Steptronic transmission 55
Stopping the engine 48
Storage compartments 127
Storage, tires 184
Storing the vehicle 219
Suitable engine oils 194
Summer tires, tread 182
Sun visor 123
Supplementary text mes‐ sages 63
Switch for Dynamic Driving 96
Switch, refer to Cockpit 14
Symbols 6
T Tachometer 64
Tailgate 27
Tailgate via remote control 25
Tail lights 203
Technical changes, refer to Safety 7
Technical data 222
Temperature, air condi‐ tioner 113
Temperature, automatic cli‐ mate control 115
Temperature display for exter‐ nal temperature 64
Temperature display, setting units 69
Temperature, engine 68
Tempomat, see Camera- based cruise control 98
Terminal, starting aid 212
Text messages, supplemen‐ tary 63
Theft alarm system, refer to Alarm system 30
Thigh support 36
Tilt alarm sensor 30
Time, radio, setting time on the radio 69 Seite 244REFERENCEEverything from A to Z244
Online Edition for Part no. 01 40 2 961 140 - II/15